rexourcez
wanderer
"Let’s live while we do things we like."
920 posts
Don't wanna be here? Send us removal request.
Last Seen Blogs
silent-stories
Do you wanna start a cult with me?
rainymeadows-art
Rainy Meadows' Art Blog
nextraordinaire
so stupid it loops back around

raejae33-blog
WTF Is Wrong With People
queensandkingsofattolia
Attolia Irene Shatters My Heart...
Photo

Requested by anonymous » Jill Valentine icons (RE3 remake)
80+ 300px x 300 px icons
Free to use but do not claim as your own; credit appreciated!
The icons, among other video game icons, can be found here
55 notes
·
View notes
Photo
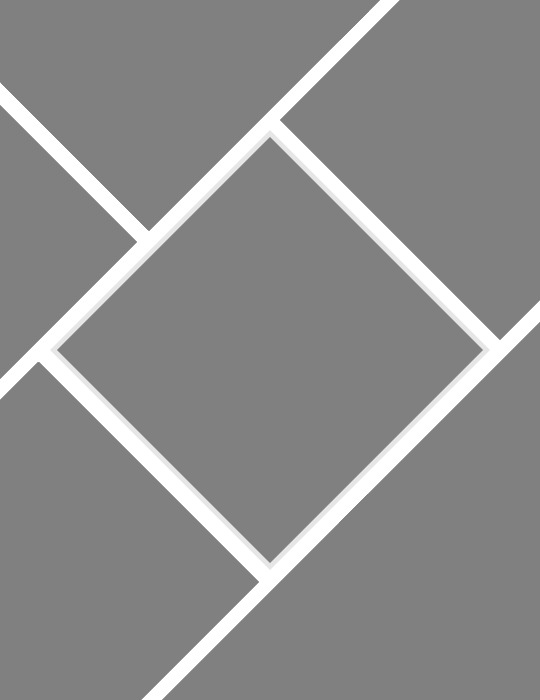
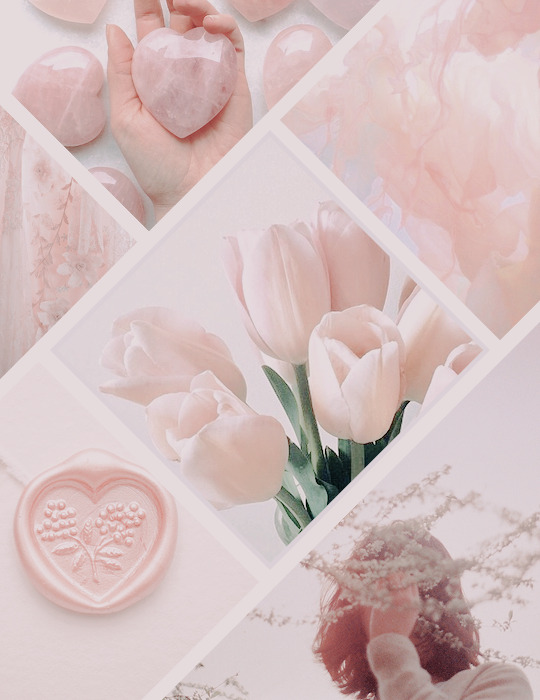
。・ template psd fourteen by templatepsds ゜+.*
-`. info .’-
+ since I got a request for a moodboard template, I decided to post this one I’ve had saved for a couple weeks.
+ it’s only one template, the examples just show what it looks like with and without the border.
+ adjust as much as you want to suit your liking.
+ please like or reblog if you download
+ mssg if you have any questions/difficulties!
-`. dl .’-
1K notes
·
View notes
Text
Please like or reblog if you use
Do not repost
Download
124 notes
·
View notes
Text
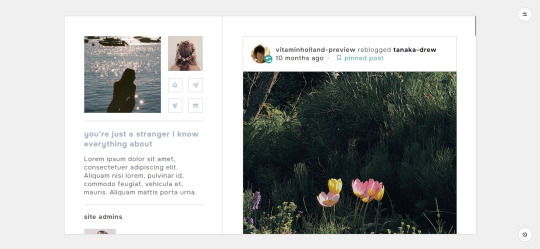


Theme — Stranger by tanaka-drew
Preview/Download
Features:
194x194px sidebar image
88x88px icon image
80x80px members images
60x60px affiliates images
two 100x100px small about images
310x454px large about image
custom blog title
members section**
affiliates section**
social media section**
tasks section**
about section**
five custom links
about section with 70x70px about image
540px blog posts
option for multiple font families for heading and body
option for 1/0.9*/0.8rem body font size
option for 0.9/0.8*rem uppercase font size
option for hide tags*
option for show tags
back to top* (except for contained version)
Notes:
* denotes default features.
** denotes default features that you have to edit directly into the code.
Sidebar is on position “sticky”. This means that it will stick to top and the succeeding elements are cut if you go beyond your screen but will scroll up when you reach the bottom.
This theme is NPF posts friendly. :D
Neither ask or submit links would show if you don’t allow people to ask you questions or allow people to submit things to you.
I don’t claim any of the fonts, scripts and/or tutorials I used unless stated otherwise. See full credits here.
Support me on Ko-Fi.
234 notes
·
View notes
Text

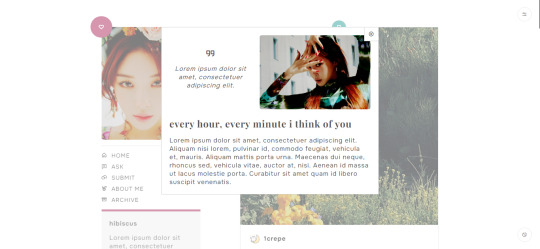
Theme — Hibiscus by tanaka-drew
Preview/Download
Features:
250 x auto height px sidebar image
310 x auto height px panel image
40x40px icon image
280 x auto height about image
custom blog title
search bar
updates section**
quote section**
about section**
six custom links
about section with 70x70px about image
option for 450/500*/540px blog posts
option for multiple font families for heading and body
option for 1/0.9*/0.8rem body font size
option for 0.9/0.8*rem uppercase font size
option for hide tags*
option for show tags
back to top* (except for contained version)
Notes:
* denotes default features.
** denotes default features that you have to edit directly into the code.
Sidebar is on position "sticky". This means that it will stick to top and the succeeding elements are cut if you go beyond your screen but will scroll up when you reach the bottom.
This theme is NPF posts friendly. :D
Neither ask or submit links would show if you don’t allow people to ask you questions or allow people to submit things to you.
I don’t claim any of the fonts, scripts and/or tutorials I used unless stated otherwise. See full credits here.
Support me on Ko-Fi.
151 notes
·
View notes
Note
you always have THE cleanest, crispest, clearest gifsets!! I'm genuinely in awe every single time they appear on my dash, I always reblog them, even if its not a fandom I'm in. Is there a way you achieve this? Is it all in the settings or is it the quality of the downloads? <3
First of all, thank you so much, anon 🥺💙
Second of all, let's start by saying that your gifs will always look worse on mobile than they do on the web (tbh that's why I started using the website more), sometimes they can look blurry or more pixelated. There's almost nothing we can do about mobile, but we can try to improve it overall.
1) Quality of downloads
Use the highest quality that you can find, or at least always use 1080p, 4k or 2k can work if you have a nice pc and nice internet connection (which I don't have so I'm always using 1080p). Sometimes you can get away with 720p, but I recommend you don't do it (all my eskam gifs are 720p and sometimes they suffer horribly because of it). Also, I prefer to download raw episodes or just full episodes in general, I don't use scene packs, which can be found even on youtube, at all. I tried a couple of times and it completely ruined the quality.
2) Use correct post widths
Here's the post with the right dimensions. It will improve the quality on both web and mobile. Here are some examples and dimensions that I usually use:
3) Smart Sharpening
That's what makes your gif nice and crispy, that's the flavor, anon :D
Smart Sharpen is located in Filter > Sharpen > Smart Sharpen.
I'm going to show you some examples of before/after sharpening and give you the settings that I usually use (i made the gif brighter so you could see the difference):
Before using Smart Sharpen:
After using Smart Sharpen:

As you can see it became more detailed and less blurry. I'm always applying the Smart Sharpen filter twice, but with different settings.
That's for the first time (I know some people are using 0,2 and 0,4 for radius; 0,3 usually works fine for me but sometimes I lower it if my gif is too pixelated):
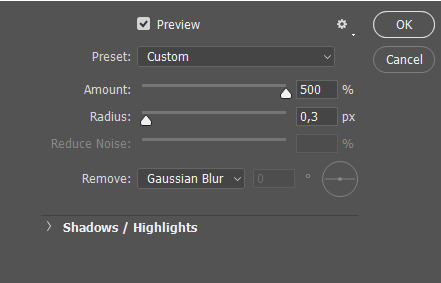
And after that, I apply the filter again but with these settings:

That's the way to make your gifs look fresh out of the oven.
4) Export Settings
That's the last step, and let me tell you, there isn't going to be one correct answer. You just have to experiment with settings and see which are making your gif look the best.
That's basically it, anon. I hope it'll help you :D If you have more questions - feel free to ask them, I'm always happy to help. You can also dm me here or on discord (if you have my dc of course).
287 notes
·
View notes
Photo


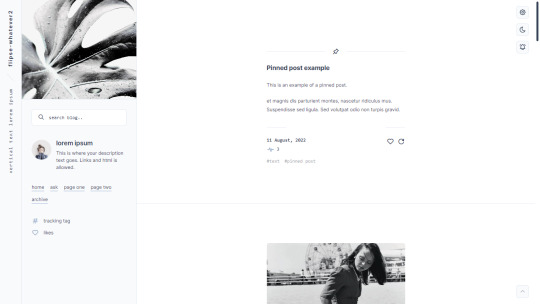
Leaf — a responsive, single-column theme
Static previews: Header, left sidebar
Download code: GitHub
This is a single-column Tumblr theme with an option between a header or left sidebar, with Google fonts of your choosing. Optional dark mode and update tab is included. Supports NPF posts. Features and notes below the cut.
Keep reading
2K notes
·
View notes
Text
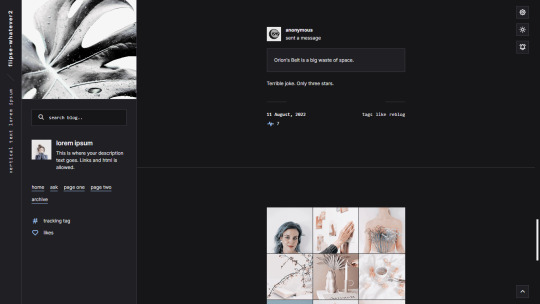
Suburban— a responsive, single-column theme with a full-length sidebar
Static previews:
- Preview (1)
- Preview (2)
Download code: GitHub
This is a single-column Tumblr theme with a full-length left sidebar and two Google fonts of your choosing. Full support of npf posts. Optional dark/light mode toggle and update tab available.
Read features and notes below the cut
Customize colours for dark and light mode
Customizable post margin
Custom vertical text
Custom title
Custom description
Custom statistics (in sidebar)
Select font-size
Select Post-width (350-540px)
Select photoset gutter (1-4px)
Select post info displayed as text or icons
Toggle to hide Tumblr controls behind icon
Toggle between sharp or rounded corners on content
Toggle between sharp or rounded corners on photo(sets)
Toggle optional update tab
Navigation: An unlimited display of native Tumblr pages.. Learn how they work in my helpdesk here. Custom home + ask + archive link labels.
Search bar: The search bar will automatically be hidden if you have the option to discourage searching your blog from search results enabled. Go to your blog’s settings to do so.
Sidebar header image: 290x250px. This header image is also optional. Separate image for light and dark mode, but If you want the same photo, simply upload it twice.
Sidebar Image icon: 50x50px. Choose a shape between shapes square, rounded, circle or blob. Separate icons for light and dark mode! But If you want the same icon, simply upload it twice.
Dark Mode: If you decide to offer dark mode, it detects if the visitor’s operating system is on dark mode, and displays that choice at the first visit - of course with the option to toggle the other mode on/off.
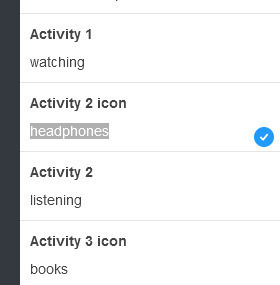
Icon change for update tab and sidebar statistics: To change the icons, go to https://tabler.io/icons and simply copy the name of the icon like so:

Into the corresponding field:
Notes:
Via/source links are on permalink pages
to hide the archive link, simply delete the text in the field.
Submit-link and ask-link only shows if toggled on in your blog's settings.
Credits
667 notes
·
View notes
Note
📝 first, congrats on the 15k you deserve all the love and appreciation. Second, idk if you’re still taking these but a tutorial on those lovely double exposure gifs, I’m obsessed with them 💜
thank you so much! i’ve been meaning to a double exposure/blending tutorial for a while so i’m going to try my best at explaining, let’s get this party started.
i use photoshop cs5 for this and you need a general understanding of the basic tools. i’m going to be walking you through a set i’m currently working on to ultimately create a double exposure gif such as this:

step one: create your base gif
as always before you can start any gifset, you need to pick what scenes you want. i often pick several different moments and experiment with what works best, some scenes will just perfectly meld together while others will be trickier.
you want to firstly select a ‘base gif’, this is the gif that you’re going to layer your other scenes onto. it’s helpful to have a gif where you can identify a darker area where scenes might be able to be blended onto. silhouettes, side-profiles and shots where you can see a portion of the body are an ideal place to start, but you can use any scene where there is a darker area in contrast to the rest.
for example, i picked this shot as my ‘base’:

in this shot, there are darker areas which standout, her body particularly below the shoulders but also in her hair. this provides a great ‘base’ for holding other scenes.
i’m going to colour my base gif in the way i usually would (i'm not going to go into details here, but if you want to know how i colour my gifs i have a tutorial here) but making an effort to ensure the blacks are thoroughly darkened (you can do this by adding a selective colours > black layer) and i’m done with my base gif:

step two: create your overlaying gif
next, you want to create your overlaying gif. personally i try to avoid using very light scenes as these can take a lot more work to blend in. if this is your first time blending i’d definitely recommend using a scene with a neutral backdrop, or even more ideally a dark backdrop, as this will just more seamlessly work with your base gif.
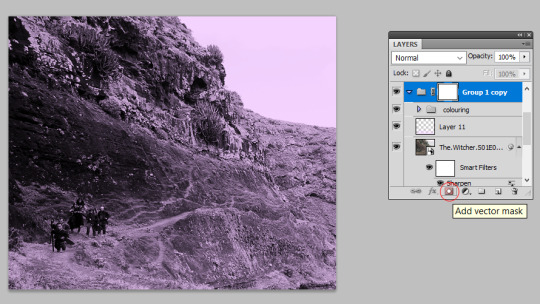
so, i’ve picked my first overlay scene as the mountain pathway, this will add a bit of texture to my gif and is fairly ‘neutral’ so should blend in well. i’m going to size and colour this as a separate gif with the same purple tones, then create a new folder (see red circle in screenshot) and drag my entire gif into it:

then i’m going to add a vector mask, to do this make sure you’ve selected the group and press this button highlighted in the screenshot:
step three: blending your gifs
now you’re ready to blend! from here, you want to just drag and drop your overlaying gif folder on top of the base gif, then set your overlaying gif folder to ‘screen’ or ‘lighten’ (i usually use screen, but sometimes lighten depending on the scenes - see what looks best!). it now looks like this:

the obvious issue here is that the overlay has taken over her face. so, we’re going to select that vector mask we added to the ‘overlaying gif’ folder, grab a black paint brush, and just brush over her face. this will remove the overlay from that area.
i use quite a large soft brush for this (around 200px), the larger you use the ‘smoother’ the transition you’ll get. the smaller the brush the harsher your transition will be. this is the part that takes practice, but the beauty of using a vector mask is that you can grab the eraser tool and erase any of the paint strokes you’ve just done to bring the overlay back. by the end my canvas and layer mask look like this:

from this we can see i’ve blocked out the overlay from the ‘top’ of the gif and concentrated it so it just spreads over her shoulders. this captures the overlay in the space i outlined on the base gif as my ‘blending space’ earlier. i’ve also blacked out the overlay on the right hand side as i want to put another gif in this space. at this point the gif is looking like this:

i think my ‘top tip’ with blending is to leave little details to make the transition between the two gifs more natural. for example, you can see there are still patches of the mountain moving up her neck. i could black these out so the mountain scene is just confined to her body, but in leaving it there is creates more of a transition. these little background details of the scene you’re overlaying can really add to the overall texture of your base gif, and for that reason don’t get too hung up on the ‘details’ of making sure your gif is limited to an exact space.
optional step four: adding more overlay gifs
for this gif i also added the dragon on the right hand side. you don’t have to be limited to overlaying two scenes and in fact, sometimes a nice idea is to use a more ‘landscape’ shot to add texture to your blended gif. to add more, i repeated step two to colour the shot i wanted, dragged this in its own folder on top of all my other blended gifs and set it to screen again:

i repeated the same steps in step three to black out the background, particularly concentrating in removing the line that we can see where the shot finishes. because in this shot the dragon’s head is actually partially cut off by the top, i was very careful with positioning this overlay and used a smaller black brush above the head. this positioning allowed it to look as if the overlay was giving way to yennefer’s face, rather than the shot cutting it off:
and that’s it, i’m done with my gif! this was a nice straightforward blend, but some scenes may not work as easily, which is where we turn to...
step five: using a black paint layer to create overlay space
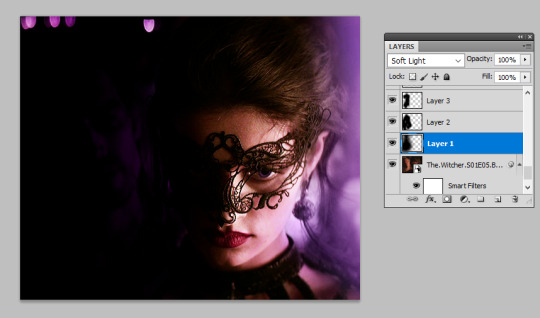
sometimes your gif doesn’t have an easily blend-able space. maybe the character is wearing something patterned, or the area just isn’t dark enough. for example in this gif, i’ve done all the above sets but the overlay scene doesn’t stand out very well because the armour pattern gets in the way:
but we can fix this quite simply with our black paintbrush. i go back to my ‘base’ gif and under all the colouring create a new layer and with a large soft paintbrush, paint over the armour. i then set this layer to ‘soft light’. then i create another new layer and using a more medium-sized paintbrush, paint exactly behind where the figures are moving. this layer adds black behind the figures so they stand out more clearly, while the soft light layer aids the transition as it darkens the whole area. now we have this:

this has made the overlay a lot more visible. you can use this technique to pretty much darken any layer. i always try and darken the section i want using ‘soft light’ layers as this creates a smoother transition than you’d achieve by just jumping in with your normal black paintbrush layer, but remember you can use multiple layers to reach the effect you want.
this can be taken to the next step to literally blacken out one side of a gif (and it may be useful if you want to do more side-by-side blending scenes), starting with your normal base gif coloured (admittedly mess-ily):

to completely darkening the right-hand side of it using a few black paintbrushed soft light layers:

and overlaying another gif into this darkened patch:

i’ve even used this technique for light scenes with success, it just might take a bit more practice and you’re better off starting with scenes that naturally have a darker background if you are a blending beginner.
the end!
and that’s a wrap. i hope this made sense, as always i’m very aware that just because i know what i’m talking about doesn’t mean anyone else does, so please if you have further questions do ask. happy blending! :)
1K notes
·
View notes
Text


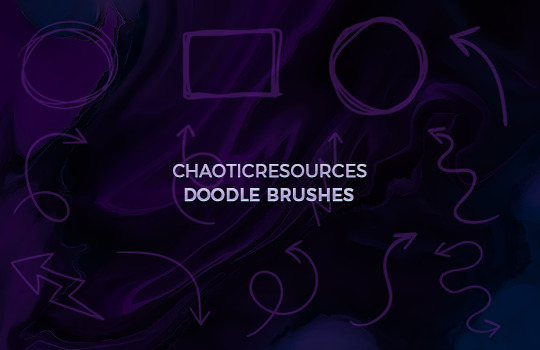
WNJUNHUI'S SHARPENING ACTION PACK
i thought that some people might benefit from these actions so i'm sharing them here. these are pretty generic sharpening settings, but i hope you find them useful.
action 01 | regular sharpening: works well with most gifs, pretty much the default sharpening settings
action 02 | noise sharpening: i use it mostly for kpop music videos, it gives the gifs a nice style, while helping the quality look better.
action 03 | smooth sharpening: if you want to go for a dreamy feeling, this is a great way to do it. i also find it useful when the quality of the footage is not great.
download here
431 notes
·
View notes
Text
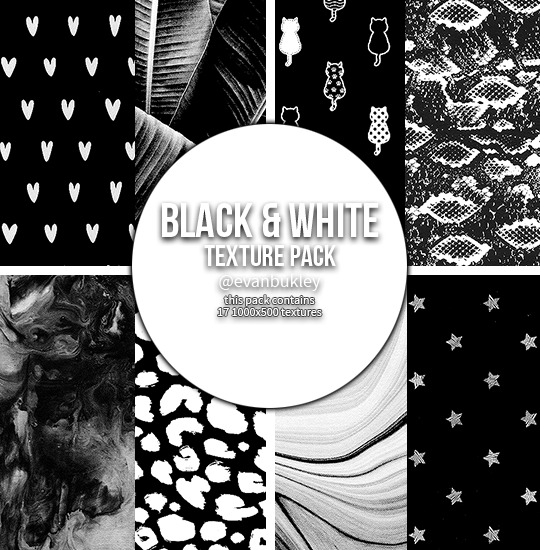
black & white textures
17 large textures // 1000x500
textures in the preview are all from the pack
please do not edit or claim as your own
credit is appreciated, but not required
download // deviant
if you download them please reblog/like!
hope you like them (⊃。•́‿•̀。)⊃
159 notes
·
View notes
Text
TILE TRANSITION TUTORIAL

a couple of people have asked me for a tutorial on how I did the penultimate gif in this set, so here goes! this is my first tutorial, so please feel free to reach out with further questions if anything's unclear.
note: this tutorial assumes you know the basics of gifmaking, can create the base gifs, and are familiar with timeline mode.
STEP ONE: create the base gifs! I'd recommend staying between 25-40 frames for each gif, since the transitions we'll use later tend to increase gif sizes. these are the ones I'll be using for this tutorial:


STEP TWO: create the guide layouts for both base gifs. for this panel, I chose a 4x4 grid — I would recommend keeping the number of "tiles" low because it can get tedious, but have a minimum of 9 (3x3 grid).


now your canvas should look like this:

STEP THREE: create the tiles. this is where the going gets rough; there might be easier ways to do this that I couldn't think of 😭 if there are any please send me an ask!
essentially, in this step we'll cut up the base gifs into smaller squares so that each tile can be manipulated separately when we put both gifs together. to do this, first create a square using the rectangle tool and the guides. then duplicate the base gif, move it above the square, apply a clipping mask, and then convert the clipped gif and square (selected in the image below) into one smart object.


ALTERNATELY: you could duplicate the original base gif and use layer masks to isolate tiles. create a layer mask for the duplicated gif layer and, with the layer mask selected, drag your mouse over a square (using the guide layout) and press delete. then press ctrl/cmd + i to invert the layer mask so that the gif only shows in the square of your choosing.
now repeat until you've got the entire gif in tiles, and do the same for the other gif!
since the transition effect is achieved by staggering the crossfades for each tile of the final gif, you can cheat by having multiple tiles "flip" at a time, ideally no more than four. this means you need to cut the base gif up into fewer pieces. to do this, simply draw multiple squares instead of one and then merge the shapes, before duplicating and clipping the gif onto them.


if you do this, it's essential to remember that you have to divide both gifs up in the exact same way. each piece of the b/w gif has to correspond to a piece of the purple gif!
this is what the layers look like for each gif once I'm done:


I have them lettered so that it'll be easier to match them up in the next step.
STEP FOUR: this is the complicated bit that took me two days to figure out. I'll do my best to explain but don't hesitate to reach out if something isn't clear!
to begin, open up a new psd and import both base gifs into it. (remember to click "create video timeline" and ensure that your gifs are all in order before proceeding.)
now, the trickiest part about this transition is ensuring that all the little tiles sync up so that the larger gif is coherent. so first we'll create some markers (just empty layers) to ensure that everything lines up as it should.
— marker 1: at about halfway through the first gif (b/w in this case)
— marker 2: at about a quarter of the gif length
— marker 3: close to the end of the gifs

at this point we're ready to start bringing in the tiles. I'm going to delete the base gifs from this new psd just to keep things cleaner!
first thing to do is import my b/w tile. move the timeline slider over to marker 1 and split the first gif. (if it helps, rename the split gifs and add (start) and (end) to the two halves.) then, move the (end) half to the beginning of the timeline, and the (start) half to line up with marker 3.
the purple tile is easier to manage. simply import it into the psd and line it up with marker 2.
your timeline should now look like this:

notice the overlap between the gifs at their beginnings and ends — this is where you'll be able to cascade the tiles flipping, so it helps to have a significant amount of overlap.
crop the three gifs for this tile as you see fit! since this is the first tile I want to flip from b/w to purple, I'll crop gif 1a (end) all the way to the current position of the timeline slider (red line with blue tip) and leave the beginning of gif 2a uncropped. for the flip from purple to b/w, I'll crop both gifs a bit.
once that's done, drag all three gifs onto the same level in timeline so they form a video group. your timeline should look something like this:

now you just repeat the process for all the other tiles! as long as you made sure that all the tiles in one gif correspond with tiles in the other gif in step three, this should be a fairly painless process. make sure to crop the starts/ends of the gifs separately so that they don't all flip together.
this is what my layers look once I've done all the tiles:

and the gif!

STEP FIVE: transitions! click on the half-white square (top right of the left column in the timeline, beside the scissors) and select the crossfade transition, then drag it between two gifs in a video group. it should create a two-triangle symbol and shorten the overall length of the video group.


apply the transition to all the tile flips, ensuring that the duration of all transitions is constant. this can sometimes be tricky because ps likes to change the duration of each transition, so right click on the transition symbol and manually change all your transition durations to be the same.
your layers should now look something like this:

STEP SIX: draw the grid. bring back the guide layout from step two and using the line tool (I like 2px thickness), trace the grid. adjust opacity as you see fit (50-80% is usually a good idea), so that the canvas looks like this:

STEP SEVEN: export and celebrate! you're done!
I hope this tutorial made sense and was easy to follow, and happy giffing! my inbox is always open for any questions <3
619 notes
·
View notes
Text
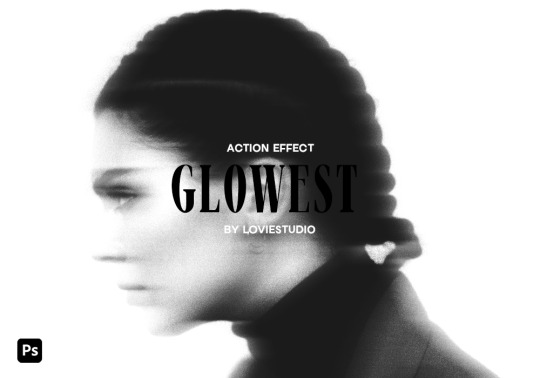
GLOWEST ACTION EFFECT by @loviestudio
This action was made in Photoshop CC, and it will work better on it!
CONTENT
1 Photoshop action file (ATN) with four options of the effect: black and white + coloured - horizontal and vertical.
TERMS
Before/after preview here!
Like and/or reblog to help a creator.
Don’t repost, re-upload or put it on packs and/or google drive. Don’t claim my resources as your own.
Don’t use my resources as a base or copy them.
Credits are not mandatory, although I’d love to see your edits!
My resources are free for personal/non-commercial use only. For commercial use, you must pay for the download. If you paid for the download, you are authorized to use it commercially. Reach out to me for more info or if you have questions about my resources license.
Follow me for more resources! ♡
This is a free resource, but you can buy it with points on DeviantArt to help out a creator or download it for free on Ko-Fi. Thank you!
229 notes
·
View notes
Text
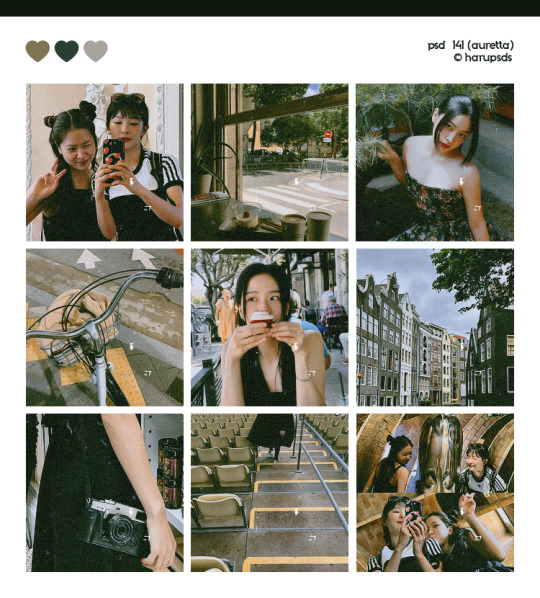
(141. auretta).psd coloring made by harupsds ©
This effect was made by me in photoshop cc and it works better on it. Before downloading read all the rules and follow them, be honest. Don't forget to leave your feedback or suggestion.
Like or reblog if you download and follow me for more content.
Don’t repost, reupload or put on pack/google drive.
Don’t claim as your own.
Don’t recreate, use as base or steal layers.
Adjust the layers or add new ones if needed.
Give me credit if you use it.
Before/After.
▸ Download
Thank you @miniepsds for amazing template. || This is our work done with effort and time spent. Please do not copy do not violate, and do not sell it as if it were yours. The Preview was made by me, being my own. Please, if your photo is here, talk to me. It is not my intention to violate the copyright rules.
115 notes
·
View notes
Text
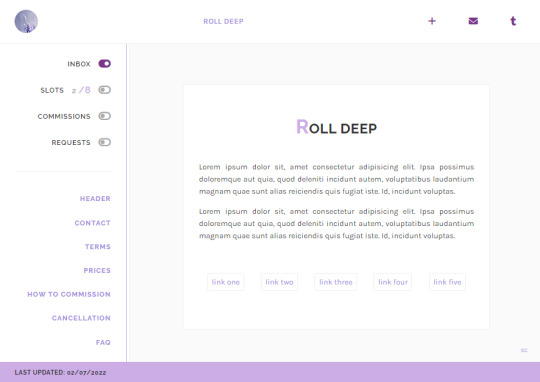

roll deep | preview , code
simple commissions page with anchor links for easy navigation
responsive design
sidebar with open/closed toggles, anchor links to every section
topbar with image, title page, links for follow, askbox and tumblr dashboard
header with title, text and quick links
contact section with icons for social media, dm link and email
terms section with text, numbered list, bullet point list, do/donts
prices section with optional type, price, image, text
how to commission/cancellation section with text, subtitles, numbered list and bullet point list
faq section with text, styled question and answer, tumblr askbox iframe
footer with last updated date
is something wong? need help? let me know!
if you’d like, you can support me on paypal or ko-fi
403 notes
·
View notes
Text
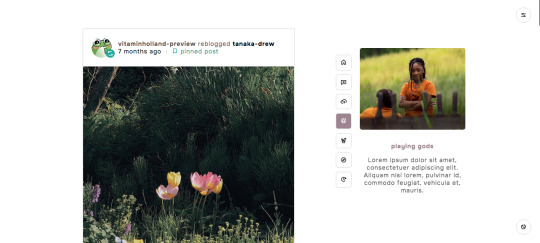
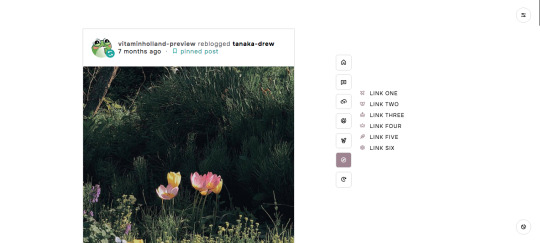
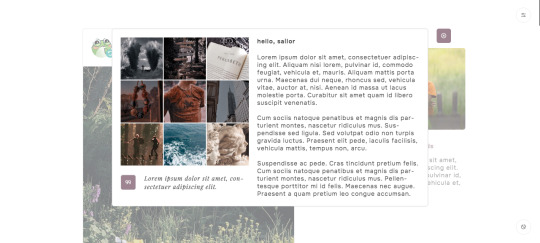
Theme — Playing Gods by tanaka-drew
Preview/Download
Features:
250px x auto height sidebar image
custom blog title
six custom links
about section with six 100x100px images + quote section + bio section
option for 450/500*/540px blog posts
option for multiple font families for heading and body
option for 1/0.9*/0.8rem body font size
option for 0.9/0.8*rem uppercase font size
option for hide tags*
option for show tags
back to top*
Notes:
* denotes default features.
This theme is NPF posts friendly. :D
Neither ask or submit links would show if you don’t allow people to ask you questions or allow people to submit things to you.
I don’t claim any of the fonts, scripts and/or tutorials I used unless stated otherwise. See full credits here.
Support me on Ko-Fi.
482 notes
·
View notes
Text
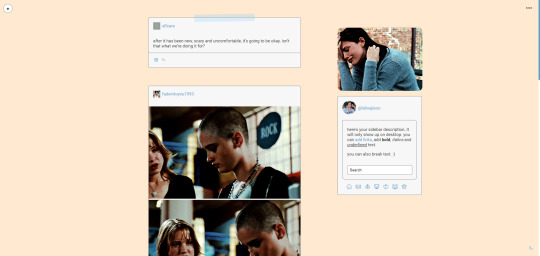
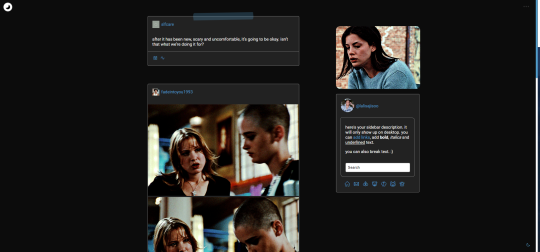

theme thirty-two ♡ by userbru
live preview | code | support me on ko-fi?
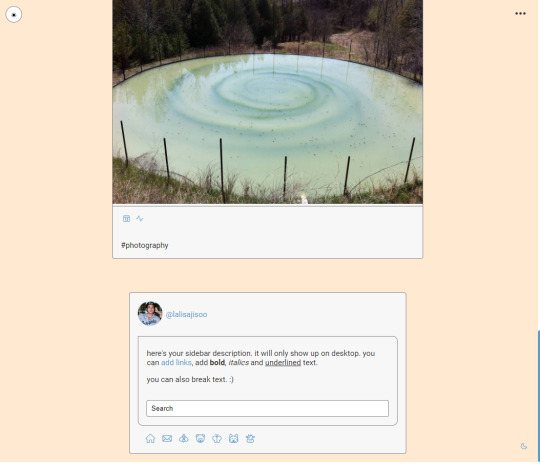
minimal responsive theme with night mode (bottom two screenshots show the layout on smaller screens)
540px posts
300px sidebar
7 sidebar links
custom desktop description
very few color customizations needed
base code made using @eggdesign's buildatheme :)
+ credits on code
if you want to change the sidebar links icons, head to cappuccicons.com, find the icon you want, and on the HTML (under ), ctrl+f, find the icon you want to replace, and on the line of code replace the name of the icon with the new one you want (keep the hyphens).
recommend doing a theme reset before installing this theme!
I am accepting theme commissions. for more information, DM me here or on my main (@fadeintoyou1993)
here is a master list of all my themes with the npf fix.
325 notes
·
View notes