
nikkasimms
NikkaSimms
A small space to share my Sims2 recolours and stuff.
128 posts
Don't wanna be here? Send us removal request.
Last Seen Blogs

nerd-inc
JAWBREAKER


ringer2424
The Unconscious
nicowithoutniners-blog
Jules

alrodbenedict96
Tmj Disorder
Text
Ooooh this is lovely!
Soho Livingroom

Download
68 notes
·
View notes
Note
hiiiii! I’m really enjoying your poses - they are so fun! i also wished my sim could simply take a selfie, and I found this set of selfie poses. would you be interested? if not that’s okay as well! https://www.tumblr. com/circusjuney/748052178811404288/simple-selfie-pose-pack
Hey! I believe there are some sims 2 selfie poseboxes out there! :)
Try these:
1.
https://boutiqueimaginary.blogspot.com/2014/06/selfie-posebox-by-illary.html#more
2. https://imaginaryboutique.tumblr.com/post/656433581468549121/selfie-2-posebox-by-illary
3.
https://posebox-guide.tumblr.com/search/selfie
Hope that helps :)
2 notes
·
View notes
Text

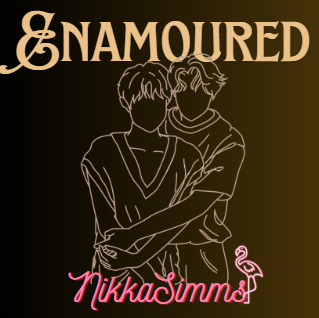


Enamoured Posebox for Sims 2!
Some cozy poses for your sleepy, cozy sims!
Round Chairs can be found at MTS:
https://modthesims.info/d/494578/js-round-chair-and-bonnie-s-loveseat.html
Make sure to check the ReadMe file!
These poses were inspired by @Simmireen
Download HERE (sfs)
40 notes
·
View notes
Text
Loooooove these!!!
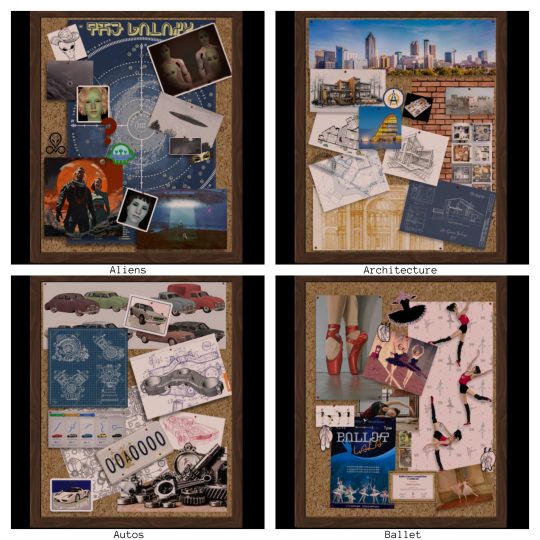

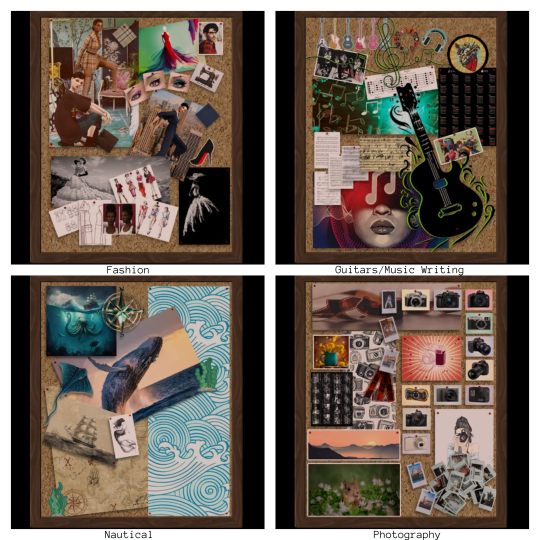
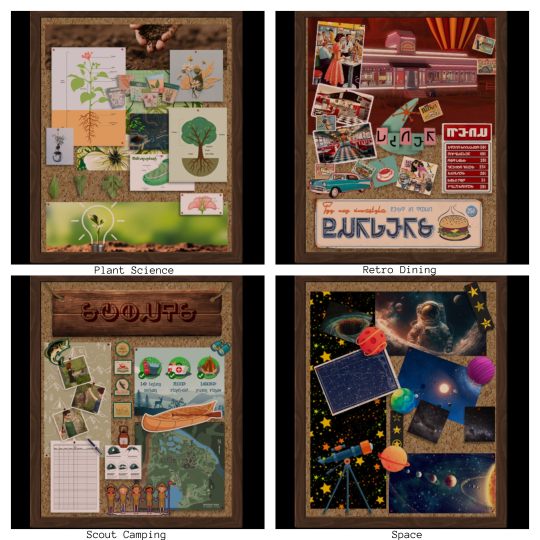
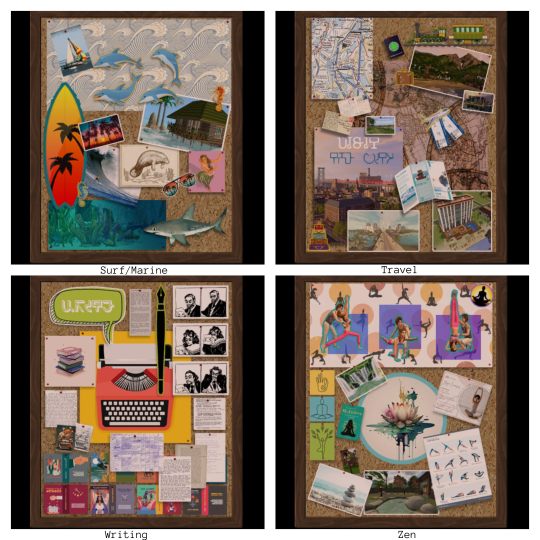
MORE PINBOARDS!
With !NEW! Hobby Enthusiasm Gaining Mesh!
Hello! I did a series of hobby-themed pinboard designs a few years ago on the 3t2 large pinboard converted by amovitam.
Today I bring you 20 new designs for more specific sub-hobbies, and a new mesh made by @picknmixsims that allows one to set a hobby to gain enthusiasm in when viewed! Very bespoke!
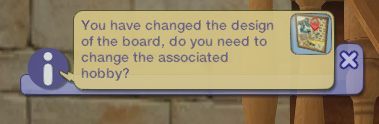
What's more is that if you re-design the board to another theme, there is a pop up that reminds you to re-set the hobby to match.
The boards can be used on community lots as well and set for hobby enthusiasm gain without resetting once your sim leaves! How cool is that?
If you don't want the modded mesh you can grab the deco-only mesh from my other download. If you want the updated mesh please replace the old one if you already have it. They are the same GUID so you should only have one.
New Mesh and 20 Recolors - DOWNLOAD
111 notes
·
View notes
Text
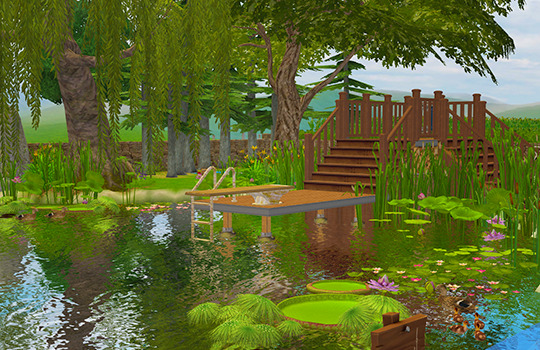
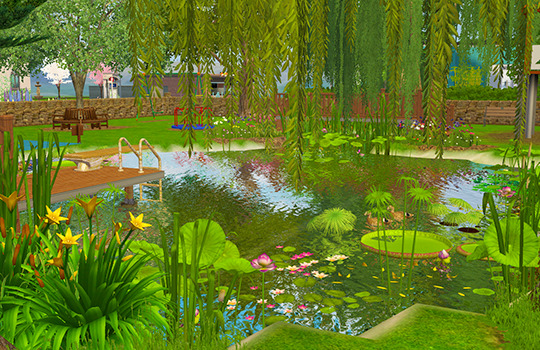
A new community lot for Angler's Bay. I build this using @kashmiresims Simple Swimming Pond as base 🏊🏻
172 notes
·
View notes
Text
Ufo Set for The Sims 2

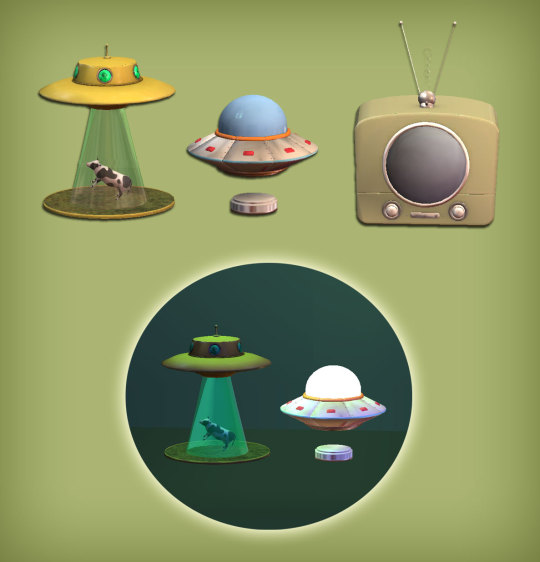
These are a bunch of alien themed items for The Sims 2.
Ufo Lamp, Signs and Ufo tv are 4to2 conversion from Sims41ife. Cow Lamp is from Pixelvibes. Ufo Neon is from Mechtasims.
I managed to reduce the polygons for all the items.
Cow Lamp will be green when turned on. The Ufo Lamp must be turned off at first use (or it will appear too bright) and can also rotate. Tv is functional.

DOWNLOAD HERE
-----------------------------------
If you want to support my creations, you can send me a donation with Paypal or Ko-fi ☕ If you want to ask for a Paid Commission, HERE you can find more details. Thank you <3
572 notes
·
View notes
Text
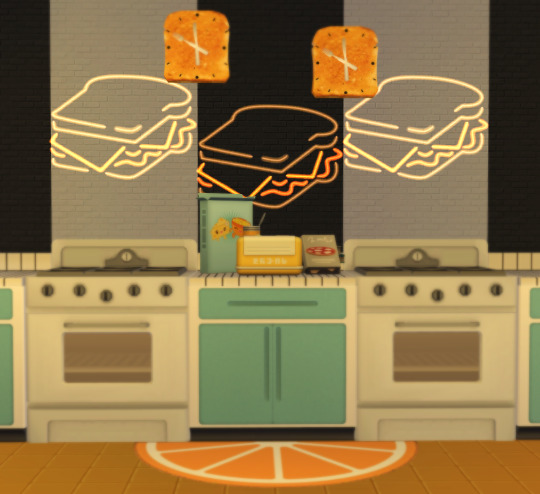
@grilledcheese-aspiration You were right! We absolutely need neon grilled cheese.
I hope these will help dull the craving - it's just just a very slapdash edit of a sign I found online and put on the DOT Neon mesh (which is included) (like everyone doesn't have it already).
I think they came out pretty cute!
Download@SFS
Download@Dropbox
257 notes
·
View notes
Text

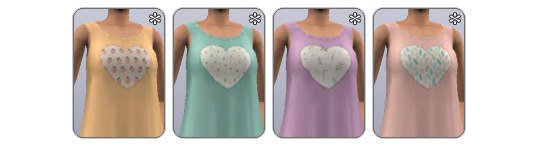
🌸@moyokeansimblr's conversion of Anubis' Bright Heart top, converted for TF and retextured. Because I needed more cutesy tops for my teens.
4 colors, appropriate morphs, set as everyday. polycount is 1452, texture size is 1024x1024.
📥 Download [sfs]
credits: anubis-under-the-sun, moyokean, anna for the colors, rawpixel for the patterns.
375 notes
·
View notes
Text
Green Dino, Pink Cloud and Sky Blue Cloud Birthday Cakes for The Sims 2
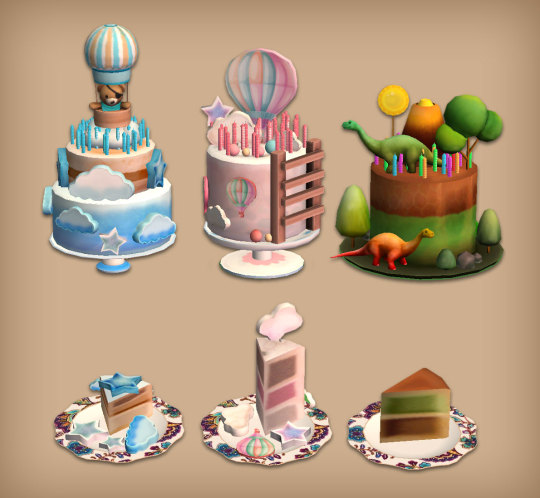
These are 4to2 conversions from Icemunmun, medium poly. They are functional birthday cakes with their own slices. Found in Party Section of Buy Mode.
DOWNLOAD HERE
----------------------------------
If you want to support my creations, you can send me a donation with Paypal or Ko-fi ☕ If you want to ask for a Paid Commission, HERE you can find more details. Thank you <3
419 notes
·
View notes
Text

4t2 Hearing Aid (a collab with @episims ❤)
For everyone! They're from toddlers to elders, both genders. The left and right sides are separated. They come in the original 15 colors, the left ones are repo'd to the right ones. They have custom icons! (courtesy to Epi - I have no clue how to make them lol) We decided to only put them in the glasses section to avoid it triggering the jewelry turn on/off.
They're morphing so they fit the ears better, but the downside of this is that with weirder ear shapes (like pointy ears), they get quite distorted. Something for something. 🤷♀️
Last, but not least, many thanks to @tvickiesims for extracting the files for us ❤
Download - Alternate
366 notes
·
View notes
Text
4T2 Industrial Loft Kit

Sul Sul!
Today I have the industrial loft kit from TS4 for Sims 2! Converted in its entirety! Thank you to @hugelunatic who helped me making the 4 tile actually work!! Thank you again!
Sims 4 shadow file is required, you only need one!
Features;
Functional 4 tile door - I could not bring myself to do a diagonal version, it would be a waste of GUIDs is my excuse!
Functional 4 tile arch
The bed from @platinumaspiration's every bed project is included,
@tvickiesims provided an assist with the rug and one of the plants! Thank you!
Sofa and arm chair have morphs!
Collection file included,
More slot options for surfaces!
Dresser has an interior and is fully animated!
Bar stool / dining chair versions of the chair included!
Enjoy!
DOWNLOAD ALT
@sims4t2bb - thanks!!
322 notes
·
View notes
Text

guess who learned how to convert objects from ts4? this girl!
i’ve felt that gym cc in ts2 has been somewhat lacking, and this set by severinka always taunted me on pinterest lmao. i wanted it in my game but it was like many things on pinterest, ts4cc. and you know like they say: if you want it, learn how to do it. or something like that idk i’m making it up lol. i didn’t do all of the objects, the shelf i still don’t know how to convert correctly as a shelf and not deco (though if you’d like a deco version lmk) same with the hoop. basically, i just did want i wanted/could! big thanks to @crystalvu’s tutorial on the subject, you’re the best mira!
collection file included, files are compressed.
categorized under deco -> sculpture (sorry)
download: [sfs] | [box]
UPDATE 3/23/24: objects now recolorable. red recolors included for barbell and bumper plates from the original set by severinka. barbell is now 2 tile instead of one. redownload and allow all files to override.
credits: severinka, crystalvu.
poly count under the cut.
Keep reading
763 notes
·
View notes
Text
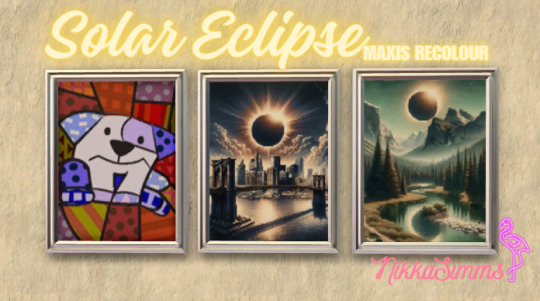
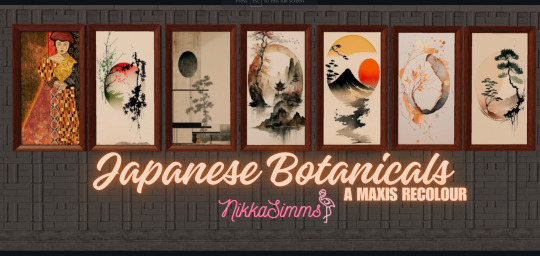
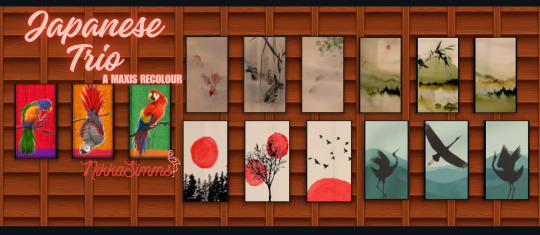
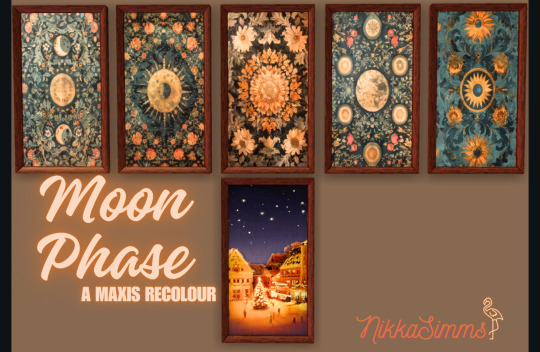
Recolour Blitz!!
Made some recolours for my game as I reno Takemizu! Plus with the upcoming solar eclipse - I figured my sims might appreciate some solar/lunar art!
Solar Eclipse DOWNLOAD (sfs)
Japanese Botanicals DOWNLOAD (sfs)
Japanese Trio DOWNLOAD (sfs)
Moon Phase DOWNLOAD (sfs)
44 notes
·
View notes
Text
4T2 Little Campers Kit
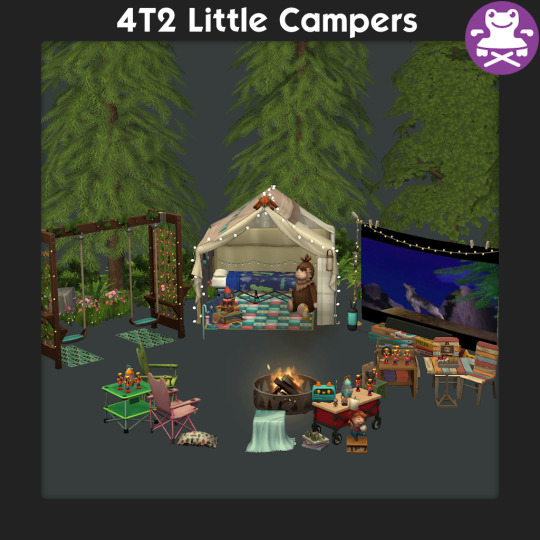
Sul Sul!
Today brings you a new conversion, the entirety of the Little Campers Kit!
Things to note;
@tvickiesims had some conversions done already, thank you for doing the projector and Gnome and allowing me to include!
She also gave me an option for the book piles to be a functional bookshelf, that is included too!
@platinumaspiration also did the doll house! Thanks again for letting me group it together!
Numerous surfaces have slots,
The activity table has been edited slightly (the chair rotated) and turned into an end table!
There is a deco item and a toy version of the Little Camping Buddy, the toy may be tidied away when sims clear up the toys so you might loose the money! Makes sense though, kids always loose stuff!
Collection file included!
Enjoy!
DOWNLOAD

@sims4t2bb whenever you get a moment!
317 notes
·
View notes
Text
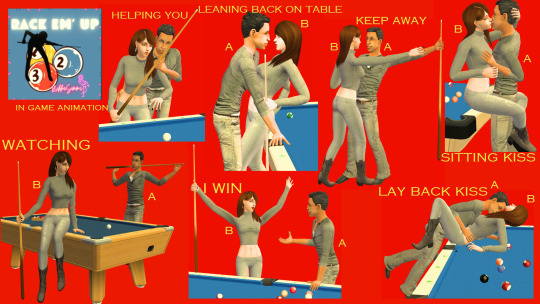
Rack em Up Posebox (Sims2)
These poses were inspired by Simireen's Sims4 Valentines poses! Make sure to check the ReadMe file for info on the first pose!
Download HERE (sfs)
32 notes
·
View notes
Text

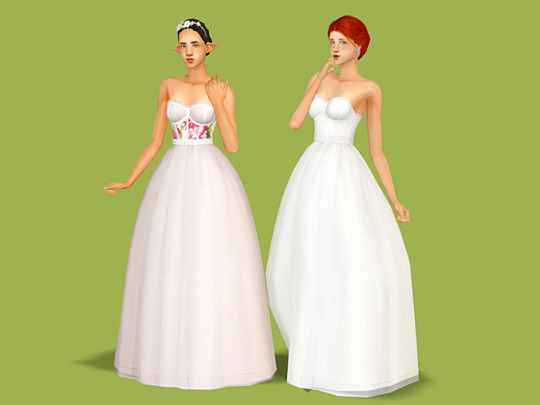
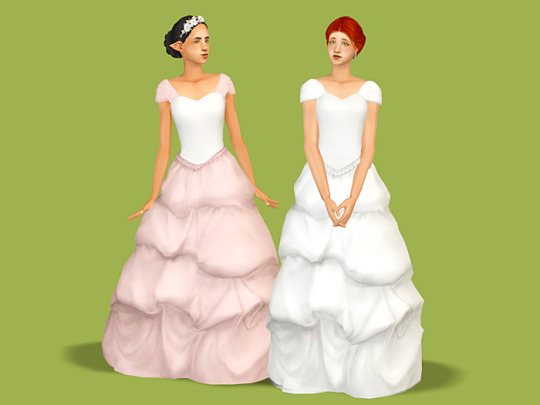


The second part is a wedding-themed cas set! 💍
Renaissance Gown
There's nothing renaissance about this anymore, but well. It's a mashup of Mistysensation's 4t2 Miiko Renaissance Dress and Skells Flower Girl skirt. AF only, has all morphs. I made 8 recolors, but here's the PSD for recolorists. Some patterns are from Freepik and Deviantart.
Download - Alternate
Petal Gown
A mashup from the sims 3 Petal Dress and the TSM Corset Puffy Dress. AF only, has all morphs. I made 6 recolors, but here's the PSD. Some clipping might occur at the shoulder area, but I tried my best.
Download - Alternate
3t2 The Tux
Found a suit that wasn't converted yet! For AM, TM, EM, and CU, they have the appropriate morphs. There are 6 recolors, but here's the PSD. You can choose if you want the other ages repo'd to the AM files, or not. Shoes are by MDP.
Download The Tux Repo'd - Alternate
Download The Tux Standalone - Alternate
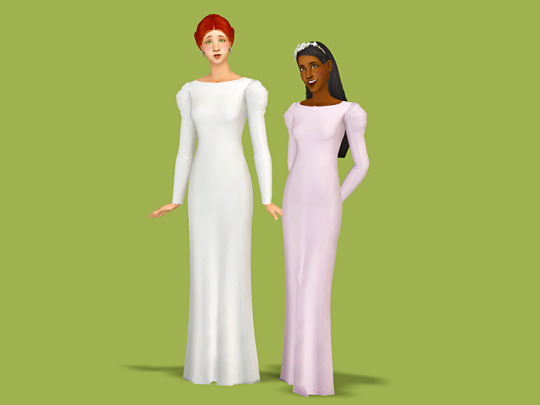
Ruched Sleeve Gown
And another gown XD. It's a mashup of Pudding's 3t2 Pointy Collar, MDP's 4t2 Cropped Bow, and Off Shoulder Evening Gown. They're for teens, adults, and elders, they have the appropriate morphs. They come in 6 colors, but here's the PSD. You can choose if you want the other ages repo'd to the AF files, or not.
Download Ruched Sleeve Gown Repo'd - Alternate
Download Ruched Sleeve Gown Standalone - Alternate
3t2 Lil Sophisticate With Bow
Something for the flower girls! CF only, has all morphs. There are 6 recolors, but here's the PSD. Shoes are from the... Celebrations SP?
Download - Alternate
Rented-Space's 4t2 EP01 Suspenders Bow
It's rare to find formalwear for tots, so here it is! For PU, they come in the original 8 colors. Shoes are 3t2 ones by Yuxi, converted to toddlers by IDEU.
Download - Alternate
4t2 EP11 Laurel Earrings Edit
I didn't like the og version of this, so I made an edit that makes more sense to me XD From TF to EF, they come in the original 10 colors. You can choose if you want them as glasses or as BV jewelry.
Download EP11 Laurel Earrings Edit as glasses - Alternate
Download EP11 Laurel Earrings Edit as jewelry - Alternate
Understated Flower Headband
I chopped it off from a sims 3 hair, then I continued suffering with it XD It doesn't fit many hairs, but I think it looks cute anyway. From CF to EF, I made 4 recolors, but here's the PSD. You can choose if you want them as glasses or as BV jewelry.
Download Understated Flower Headband as glasses - Alternate
Download Understated Flower Headband as jewelry - Alternate
Phew, that was a lot of text XD On to the last part!
604 notes
·
View notes
Text
Updating... The Tattooer (ver. 3.4)!

Finally! Took me a while, huh. This is the updated version of the Tattooer project. It skips some steps, making the workflow much, much faster! Huge thanks to @applewatersugar for his
suggestion on how to bake textures while preserving the transparency. This is kind of a repost of the original Tattooer post, but it actually has some new stuff and a few changes here and there, so please take a look if you want to learn how to use this new version.
This is a series of Blender template files already set up to quickly bake textures from The Sims 4 to The Sims 2. The different Blender files will allow you to:
-Bake body textures from TS4 to TS2 (Female)
-Bake body textures from TS4 to TS2 (Male)
-Bake body textures from TS4 (Female) to TS2 (Male)
-Bake body textures from TS2 (Female) to TS2 (Male) [Bonus!]
-New! Bake face textures from TS4 to TS2 (Unisex) [Bonus!]
-Bake head textures from TS4 to TS2 (Face + Scalp) (Unisex) [Still experimental]
Check the file names to see which one is which, and the resolution of the baked texture it will give.
Everything you see in the render above was 100% converted using those Blender files.
Download here! SFS / GD
Updated! Version 3.4.1 (27/08/2023) Fixed some issues on the shoulders for the AF-body-4t2-1024 and AF-body-4t2-2048 templates. Now the top straps on most converted underwear/swimwear should look right.
These templates were made mainly to bake and convert tattoos, but there’s more you can do with them if you get creative. I have to say, these are NOT perfect. Results may vary depending on what you are trying to convert, so! With that in mind, this is all the stuff you will be able to convert almost seamlessly from TS4 to TS2:
-Tattoos.
-Other body details such as body hair, scars, freckles, supernatural/occult details…
-Body painted underwear and swimwear, as well as some other clothing that’s mostly painted on the body.
-Socks, stockings and maybe leggings.
-Even skintones! In some areas they will look weird, so I recommend editing and blending them with other existing TS2 skins.
-Makeup, eyebrows and beards. In the old version this was just a proof of concept, but now I’ve added a new Face file template which gives some pretty decent results!
-Hair scalps. Very useful when converting some hairs! Although keep in mind part of that texture might also need to be baked on the face mesh, you know, that hairline makeup stuff.
Got your attention? Nice! Editing some of the textures from TS4 to match the UV mapping in TS2 using a 2D editing program can be incredibly hard. That’s where texture baking in Blender comes to the rescue!
You will need to download Blender, at least version 3.4, but you could always use a newer version. It is only incompatible with versions older than 3.4.
-You can download Blender for free here.
-You will also need Sims 4 Studio to extract the original Sims 4 CC textures you want.
In the first version of these Blender files, there was a necessary step using Photoshop, but that’s no longer needed. However, there’s still a tiny extra step which requires resizing the newly baked texture on some of the high resolution templates, so you might need a 2D editing program like Photoshop. More on that later.
So, before we begin, let’s clear out some questions you might have. What the heck is this texture baking thing and what does it do? Well, let’s imagine you have a video projector and point an image into a blank wall. Then you pick up some brushes and start painting and copying that projected image in that wall. Texture baking is kinda like that when it comes to 3D models. You align two models and match them as closely as you can in shape and form, and once you adjust some parameters and values, Blender does the rest for you: it will give you a new texture for a new model with a different UV map. These files I’m sharing have everything already set up, so it’s a matter of plopping in that Sims 4 texture and you will get that new texture for TS2 in just a few clicks.
This tutorial assumes you know literally nothing about how to use Blender, so if you feel uncomfortable with it, worry no more! This will guide you with pictures showing where you need to click and explaining what is happening. For Sims 4 Studio and Photoshop the process might be a bit less detailed, but still this should be pretty beginner friendly. For this tutorial, I will use some tattoos as an example (properly credited at the end of the post). Alright, enough with the rambling. Let’s get started!
·EXTRACTING TEXTURES IN SIMS 4 STUDIO:
First things first, you will need to extract as pngs all the textures you want to convert from TS4 using Sims 4 Studio. It should be pretty straightforward. Just open the packages and export the Diffuse textures. Keep them organized in a folder for easy access.
·BAKING THE TEXTURES IN BLENDER:
PRELIMINARY STEP 1: CONFIGURING BLENDER’S GRAPHICS SETTINGS:
Open your preferred Blender file depending on what you’re going to bake and the desired resolution (in this example I’m going to use the AF-body-4t2-1024 file). Before we start messing around in Blender, there’s one thing you should set up. It is a onetime step, and once it’s done, you won’t need to do it again. So, does your computer have a dedicated graphics card? If you don’t know or you’re not sure, just skip to the next step. Configuring Blender so it uses your graphics card instead of your CPU will make the baking render much faster, so it is recommended you set it up correctly.
If your computer has a dedicated graphics card, click File (1) > Preferences (2) > and on the window that pops up click System (3) > and select CUDA and make sure your graphics card is there and tick it (4). I have an Nvidia Graphics card but your case may vary. Once you’re done, click on the tiny button on the bottom left corner and Save Preferences (5).

PRELIMINARY STEP 2: CHOOSING THE RENDERING DEVICE:
Click on the tiny camera button on the right, called Render Properties (1), and on Device (2) select GPU Compute if it’s not already selected. If you’re not sure if you have a graphics card or not, just select CPU. Then select the Material Properties tab (3) and Save your changes, either by pressing Ctrl + S, or clicking File (4) > Save (5). You might need to do this second step with the other Blender files, but once you have it done and saved, you won’t need to do this again. Okay, time to get into the good stuff!

·STEP 1: LOADING YOUR TS4 BASE TEXTURE:
In the Material Properties tab, click the folder icon that says Open (1) and on the window that pops up, navigate through your folders and select your first texture. To navigate easily, the 3 buttons on the top right (2) are for the display mode. They will show your files in list mode, vertical and horizontal, and the one on the right will display the file thumbnails, pretty useful if you want to easily preview your textures here. The icons on the left side (3) will let you go one folder back and forward, go to the parent directory, and refresh the folder in case you just dropped something new in there. Double click on the image you need and that will load the texture into the Sims 4 body model, named “ts4 body”.

·STEP 2: SETTING UP YOUR SELECTION AND BAKING THE TEXTURE:
On the top right of the screen, you will see the names of the 2 models in the scene. Hold the Ctrl key in your keyboard and left click on the “ts2 body” model (1). If you did it correctly, you should see “ts2 body” in a yellowish orange color, and right down below, “ts4 body” should look more like a red orange. If not, try again by clicking first on ts4 body, and then while holding Ctrl click again on ts2 body. Then switch to the Render Properties tab by clicking the tiny camera icon (2) and click Bake (3). Depending on your screen resolution, you might need to scroll down a bit with your mouse to see the Bake button. Wait a few seconds for it to finish. You will see the progress percentage down on the bottom of your screen. Don’t panic if you notice your computer fans start ramping up, that’s completely normal! As I said in the beginning, using your GPU will bake the textures much faster than the CPU.

·STEP 3: SAVING YOUR NEW TS2 TEXTURE:
Once it’s finished, switch to the UV Editing Mode by clicking “UV Editing” on the top of your screen. And there it is: your new texture! You might have to scroll up your mouse wheel a bit to zoom in and see it in all its glory on the left side of the screen. We’re still not done yet though. You need to save it to yet another new folder (always try to keep your stuff organized!).

You can save it by pressing Shift + Alt + S, or clicking on Image* (1) and then Save As… (2). That will pop a window where you’ll need to navigate again and save it somewhere. Give it a proper name (3) and hit Enter to save it… well, Enter doesn’t always work for me for some reason, so if that happens just click Save As Image (4). And that’s it! You’ve successfully converted your baked texture. Congrats!

·STEP 4: GOING BACK TO STEP 1:
Alright! If you’re done with your textures, you can close Blender without saving and call it a day. But let’s say you want to keep baking other swatches. In order to go back to step 1 and start the process once again, click Layout (1), go back to the Material Properties tab (2), select “ts4 body” (3) and click on the folder icon (4) to open and load your next swatch.

Then it’s just a matter of repeating the process from step 2. When you’re ready to move on, close Blender without saving. If you see a small check telling you it will save some images, make sure you uncheck it, so you will be able to use it again in the future from the starting point with no issues. I don’t think it really matters if you accidentally save your progress in these files, but I like to keep it clean and fresh so I can do the process where I left it from the beginning next time I open it. And in case you mess up and save somewhere, you can always just delete the .blend file and download the template files again.
In case you’d like a video tutorial on how to use these files, the amazing @platinumaspiration recorded this fantastic video showcasing the process! You can watch it here.
One final note: some of the baking .blend files save the textures with a resolution of 2048x2048 pixels, as clearly stated at the end of their file name. That’s way too overkill, because TS2 only properly supports up to 1024x1024 for most of its textures and you should always resize your final product to that max resolution (or lower if needed). I just made those 2048 versions because there might be some really tiny and slim details on some tattoos that might look a little too blurry when baked into a 1024 resolution texture, so for those cases use that if you want and then resize them using your 2D editing software of choice.
In Photoshop, in the Resample mode of the Image Size menu, there are a few options to choose. For the fine details, I like the Nearest Neighbor (hard edges) option, which, even if it looks a bit pixelated, it still preserves most of the texture and quality.

For anything else, I would just directly bake them using the 1024 versions in Blender (512 for the face and scalp).
And for the folks who feel comfortable playing around in Blender, this is just the beginning! Texture baking opens a LOT of possibilities, so feel free to move stuff around and edit the models to your liking! If you notice the baked textures look warped or stretched somewhere, or don’t like where some textures are placed in the S2 body, poke around that area moving stuff and then give it another try. The main objective of the baking process is keeping both overlapping models as close in shape as possible. You may also edit and save new copies of the templates, or make new ones from scratch using mine as a reference (keep a close look on those Baking settings and values, I think they work pretty well) and share them if you want to. Go ham, do whatever you want with them! I still have plans on making templates to convert body textures from Sims 3 to Sims 2, but for now it’s not on my priorities, so we’ll see when that happens.
Whew! Hope none of this was too confusing. Need help or have any issues with these? Please ask/message me here and I’ll be glad to help when I’m able to!
Credits for the CC used in the render demonstration:
-Skin by Sims3Melancholic.
-Eyes by Northern Siberia Winds.
-Eyebrows by PeachyFaerie.
-Tattoos by xtc.
-Top by SerenityCC.
And the Tattoo I used for the tutorial can be found here, by ValhallanSim.
Last but not least, a huge thanks to all the people who somehow contributed to make this project and update possible, either by doing initial testing, finding issues to fix, or teaching me new Blender tricks to make the workflow way faster and easier. So thanks again to @elvisgrace @moyokeansimblr and @applewatersugar on Tumblr! <3
And thank you for reading! Hope you have fun playing with this (not so) new toy hehe.
290 notes
·
View notes