meliorn
so long and goodnight 🖤🥀🕯
alice. 27. bi + queer. she/her. big fan of colorful gifs. tracking: #usermeliorn.
34973 posts
Don't wanna be here? Send us removal request.
Last Seen Blogs
inzsanewrites
Inzsane Writes

arhidj
Без названия
goldenguardtheorist
I theorise the owl house(mostly Hunter)

skepsies
one-note wonder

crime-difficult
Untitled
Text


I’m the worst cop in Britain, isn’t that right? Yeah. I’ll give you a t-shirt with it on.
#broadchurch#broadchurchedit#tvedit#dailyflicks#userbbelcher#chewieblog#tvandfilm#dtennantedit#oliviacolmanedit#usertelevision#*gifs#*colors#~
333 notes
·
View notes
Note
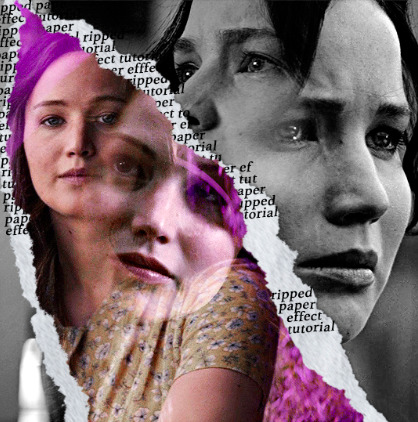
hi, your latest edit for thgweek24 is absulutely stunning and i thought if i can ask if you can make a tutorial about the ripped gifs/paper effect? if not, that's okay! have a nice day <3
RIPPED PAPER EFFECT TUTORIAL
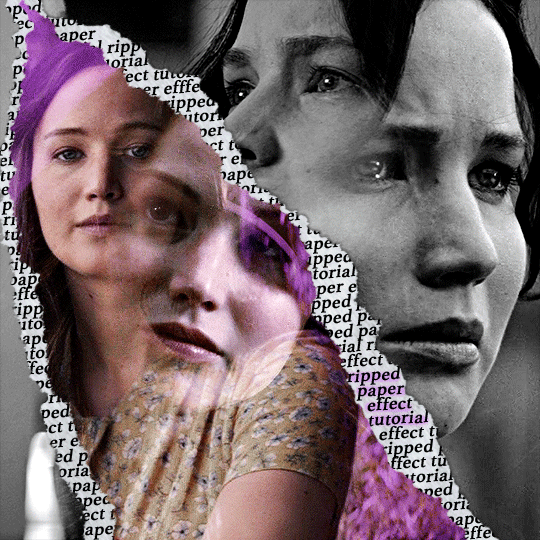
hi! thank u :D (thgweek set referenced)
below the cut are the steps that i took to create this effect. this tutorial is very screenshot heavy and assumes some basic knowledge of photoshop and giffing.
i do my best to try and explain my process so hopefully this is helpful! if you have any questions, please don't hesitate to ask.
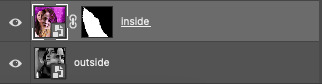
STEP 1: Choose and arrange your two gifs
with this specific use of the ripped paper effect, there's one gif on the "outside" of the rip and one on the "inside." in this example, the outside is the b&w and the inside gif is the colored:
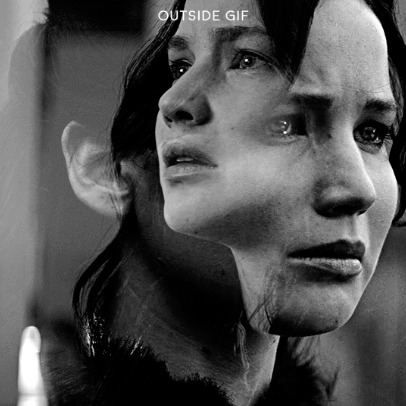
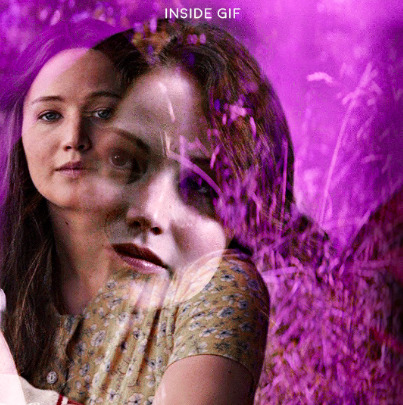
for me, the outside gif determined the positioning of the inside gif and the position/direction of the rip. as can be seen, outside gif has a lot of space on the left. therefore, i knew i was going to position the subject of the inside gif more on the right so i could create the rip without hiding too much of the b&w gif.
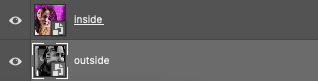
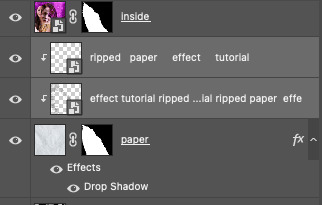
next, you want to arrange the inside gif on TOP of the outside gif. your layers panel should look like this:
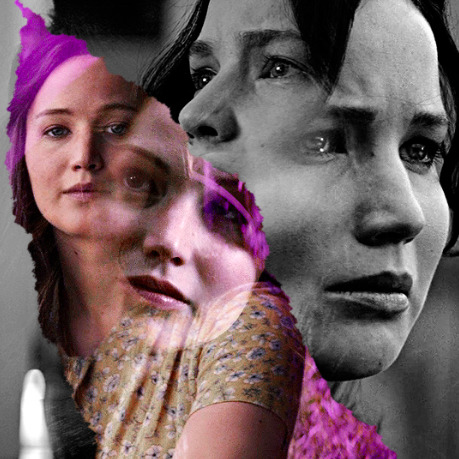
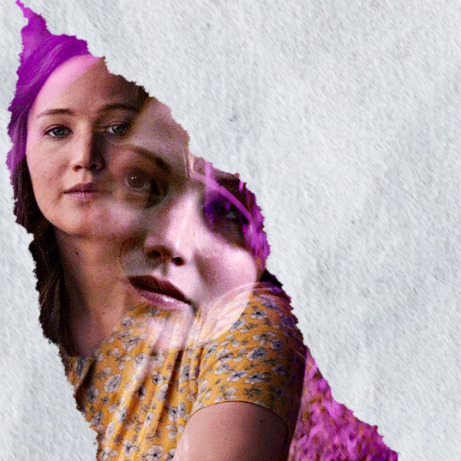
STEP 2: Creating the ripped effect
here comes the fun part! in order to create this effect, you're going to need torn paper brushes. here and here are some packs you can download (w credit to owner).
next, create a layer mask on your inside gif. you're going to use the brush of your choosing as an ERASER. then, you can play around with the size and angle of the eraser to create the look you want. this is what the gif and the layers panel now look like:
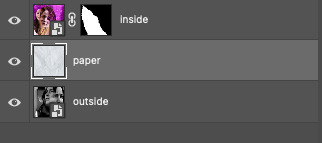
STEP 3: Adding the paper
in order to add the paper around the edges of the inside gif (where the text goes), you now need to download a paper texture. i found mine on google by searching "paper texture png."
place the paper png IN BETWEEN your outside and your inside gif. this is what everything should look like:
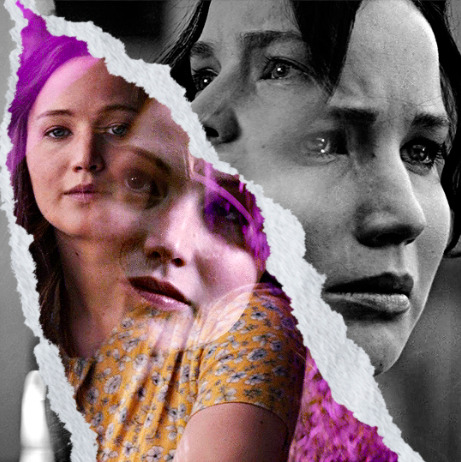
now, similarly to what you did in the previous step with the inside gif, you are going to create a layer mask on the paper layer. using an torn paper brush as an eraser, you will erase the paper, creating the shape you want.
be sure to leave enough room for whatever text you want to be on the paper. also, i suggest making the rips of the paper different from the rips of the inside gif so it looks more organic.
here is what my gif looks like after erasing the paper:
optional: add a drop shadow on the paper layer (right click -> blending options... -> drop shadow)
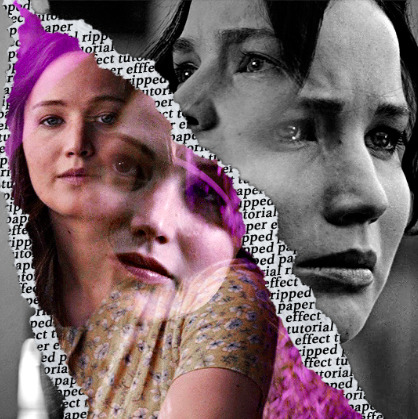
STEP 4: Adding the text
first, you want to identify the space where you will have room to place your full quote within the paper. if there are no spaces, you can always use your brush/eraser to modify the layer masks.

next, add a layer on top of the paper layer (and below the inside gif). select the text tool and start typing your repeated text!
because you can see which text is hidden by the inside gif and what is on top of the paper, a shortcut i use is the "tab" button and only type words that will be seen.
type the repeated words around the quote you want highlighted:
now, in order to contain the text within the paper, convert the text layers into smart objects. then, create a clipping mask on both layers (right click –> create clipping mask). this is what your layer panels should look like:
with that, your gif should now look something like this, with the text contained inside the paper:
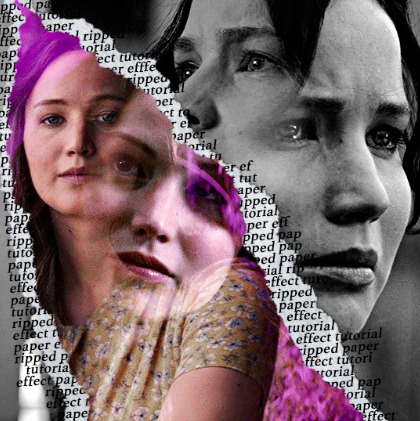
STEP 5: Highlighting the quote
as you can see, it just looked like a bunch of words. so, in order to highlight the quote you carved out in the previous step, add a new layer below the layer of the quote you want highlighted:
now, use a round brush (softness around 10-15% and opacity at 70-80%) with the color of your choice to highlight the words you want.
and there you have it!
i hope that this made sense and was helpful! if you have any questions or clarifications, please don't hesitate to ask :)
144 notes
·
View notes
Text


erika's 3k celebration 💌 for @buckleymaddie ― happy birthday!
409 notes
·
View notes
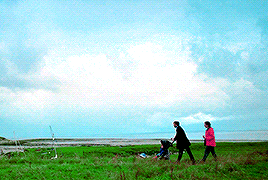
Photo

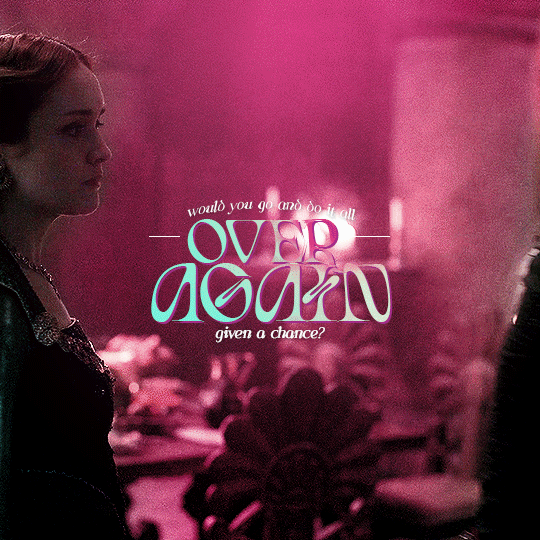
Do you think I’d give up
That this might’ve shook the love from me
Or that I was on the brink?
How could you think, darling, I’d scare so easily?
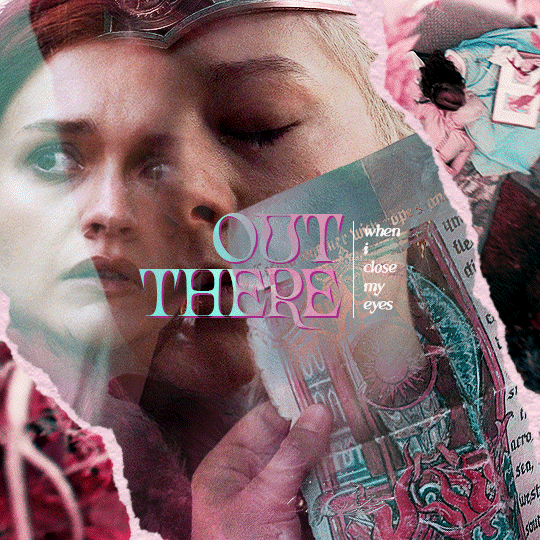
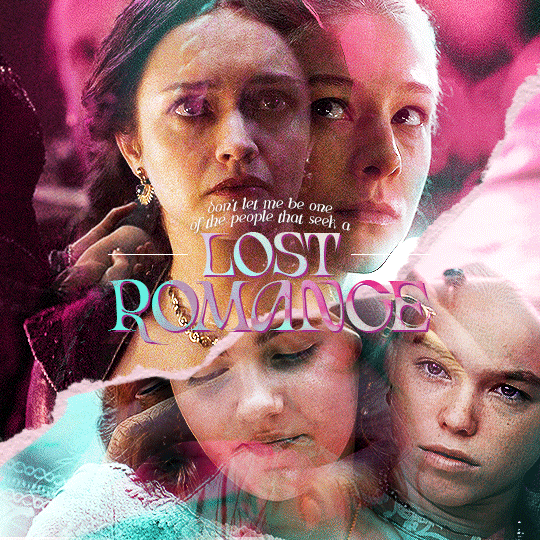
@usergif | NEWYEAR, NEW FONTS
DAY 01 | layer styles [fonts]
453 notes
·
View notes
Text
#0😍#i have been reading tho but just not finishing shit#writing a thesis rly doesn’t make you want to read for fun at the end of the day
4K notes
·
View notes
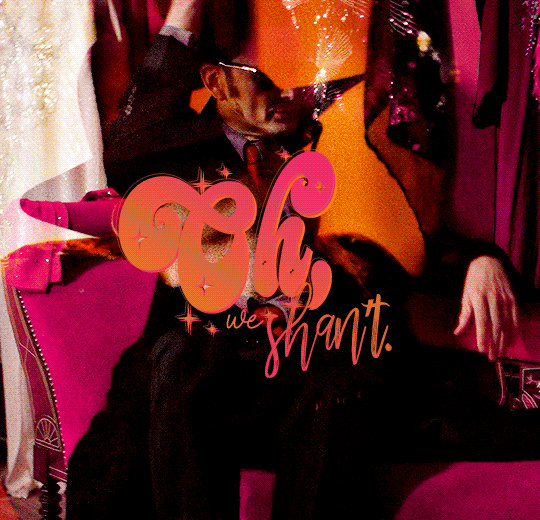
Text
helena - my chemical romance
(insp.)
#good omens#goodomensedit#dailygoodomens#dtennantedit#usergif#tvedit#dailyflicks#filmtvdaily#cinemapix#filmtv#*gifs#~
257 notes
·
View notes
Text


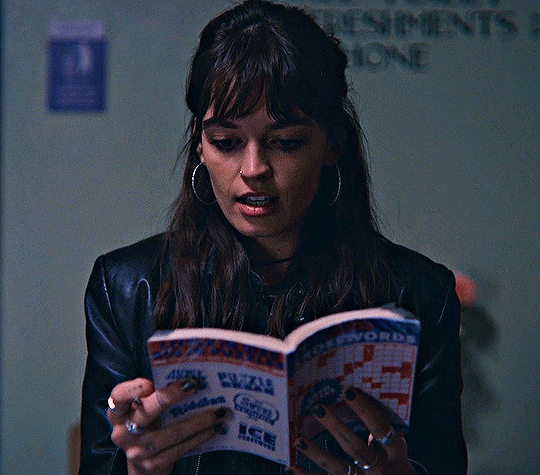
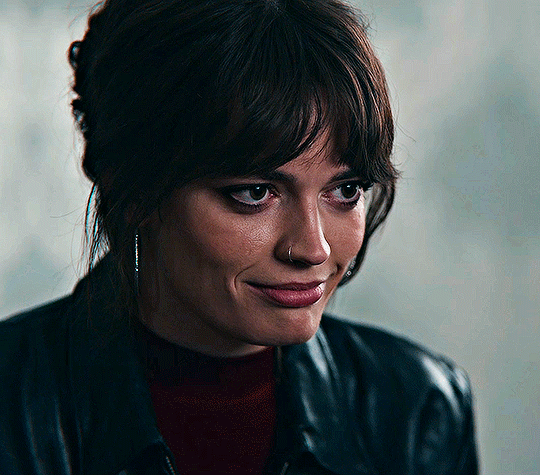


EMMA MACKEY as MAEVE WILEY
Sex Education (2019-2023)
881 notes
·
View notes
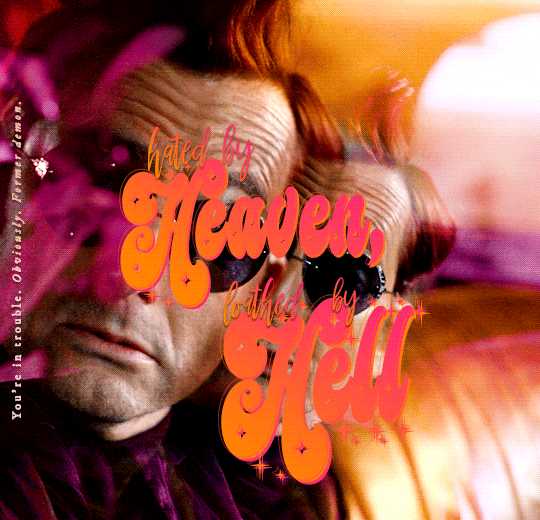
Text
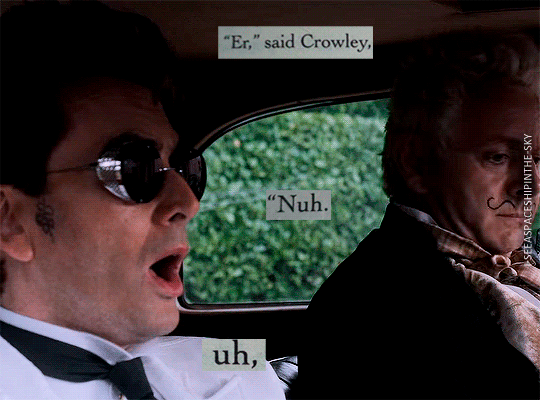
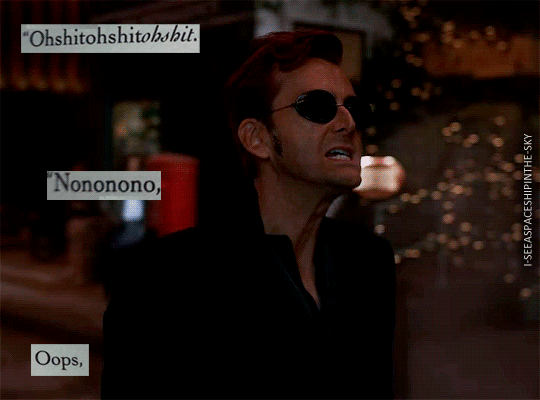
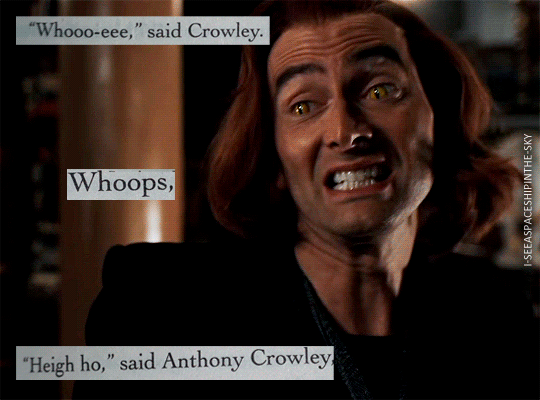

"The point is," said Crowley, "the point is. The point is." He tried to focus on Aziraphale. "The point is," he said, and tried to think of a point.
[insp.]
10K notes
·
View notes
Text


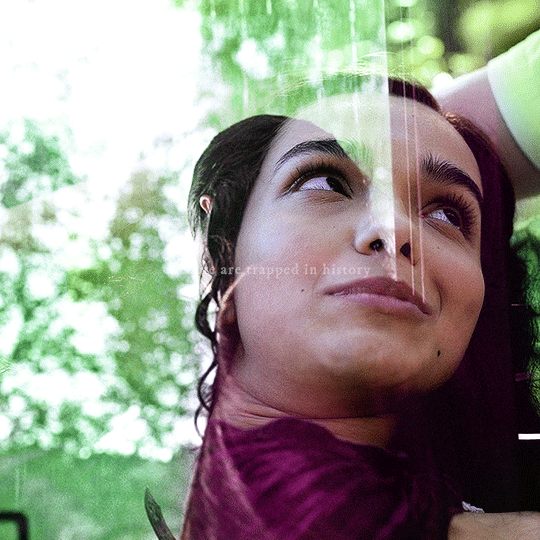

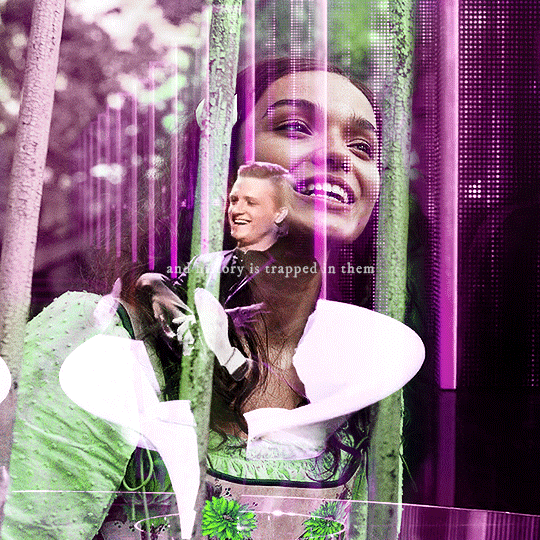
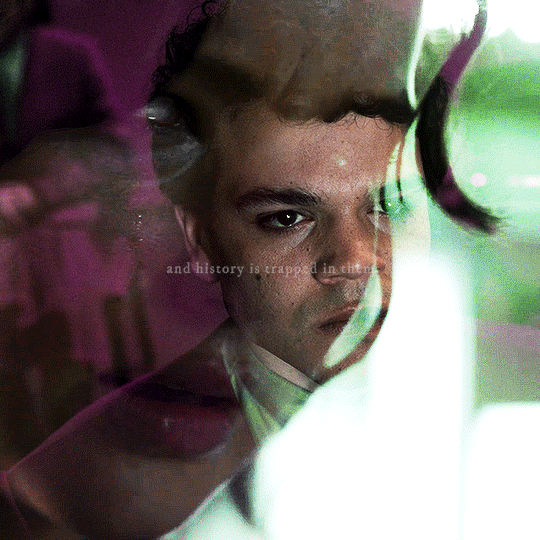
"People are trapped in history and history is trapped in them." ― James Baldwin
2K notes
·
View notes
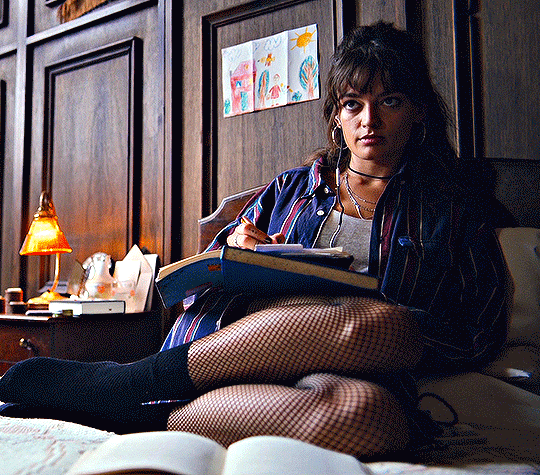
Text
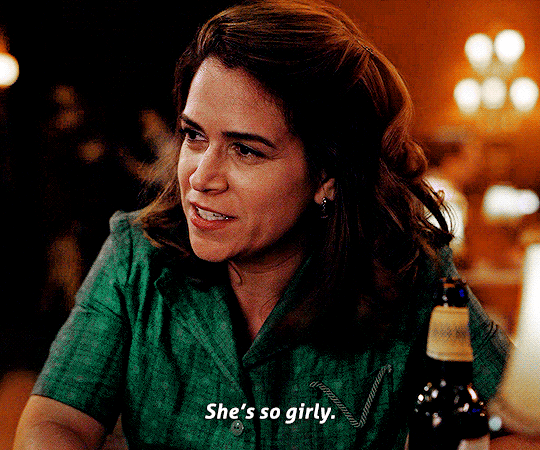
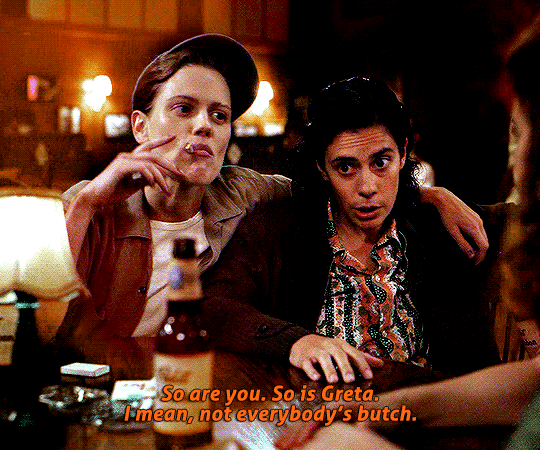

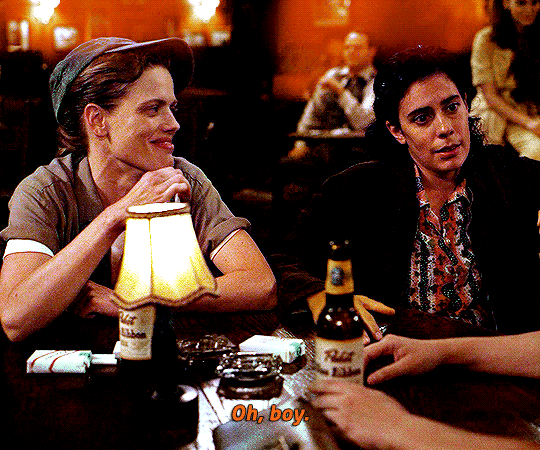
a league of their own ✧ S01E06
#a league of their own#alotoedit#dailylgbtq#wlwsource#alotosource#dailytvwomen#femalecharacters#dailyflicks#userbbelcher#*gifs#obsessed with this scene#also deeply in love with lupe and jess
3K notes
·
View notes
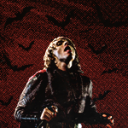
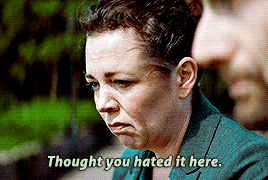
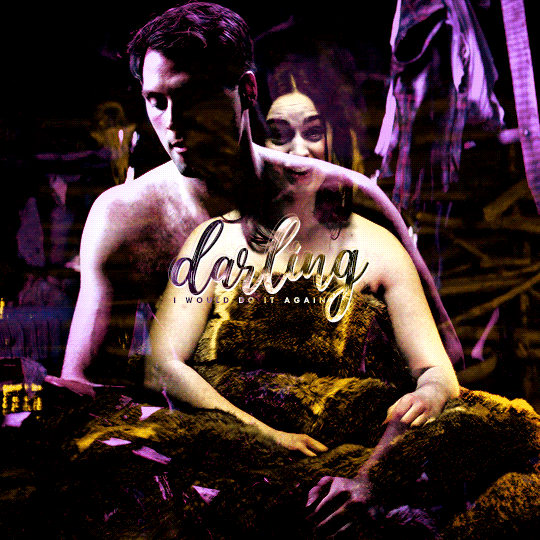
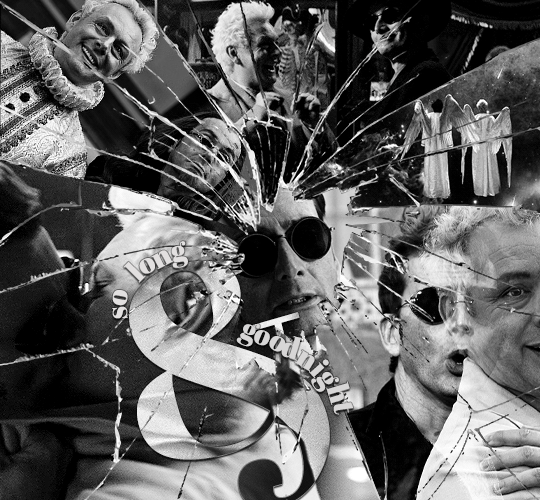
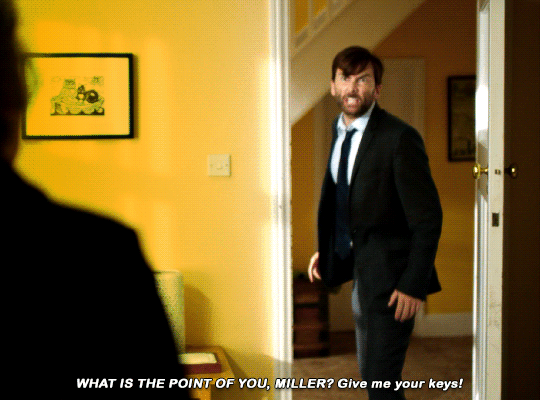
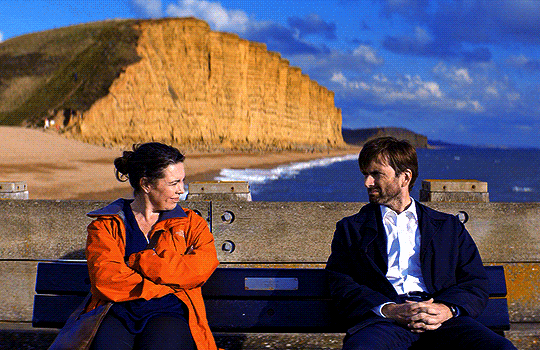
Text

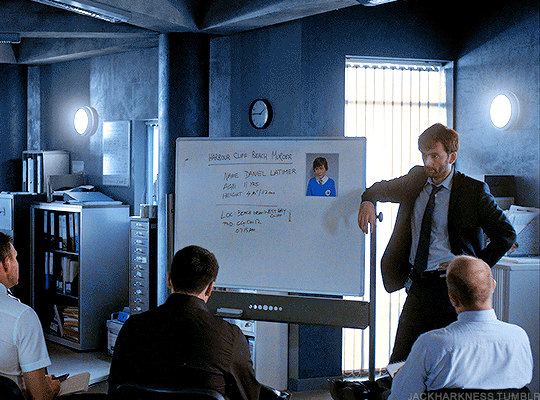


BROADCHURCH (2013-2017) 1.01
431 notes
·
View notes
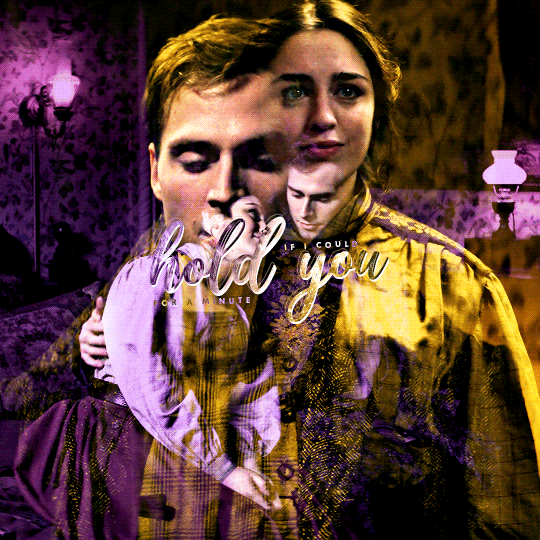
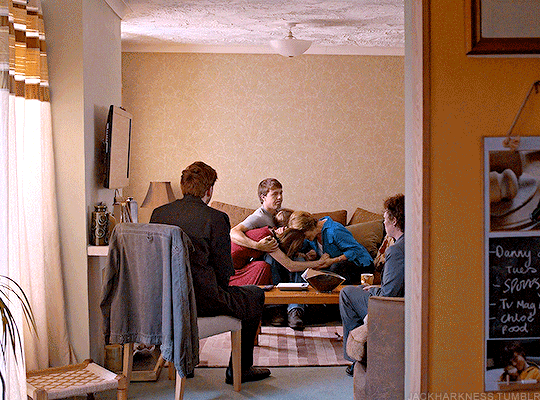
Text


I'm right here. I'm right here. I'm gonna keep you warm.
514 notes
·
View notes
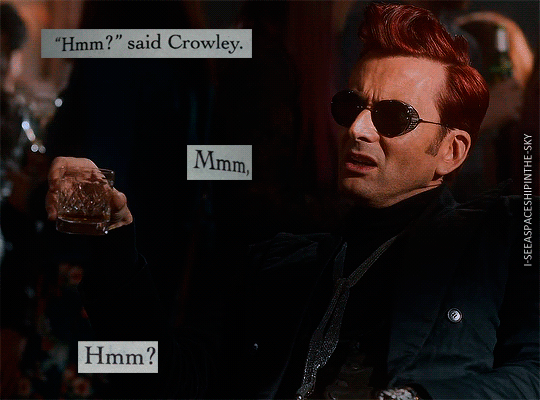
Text
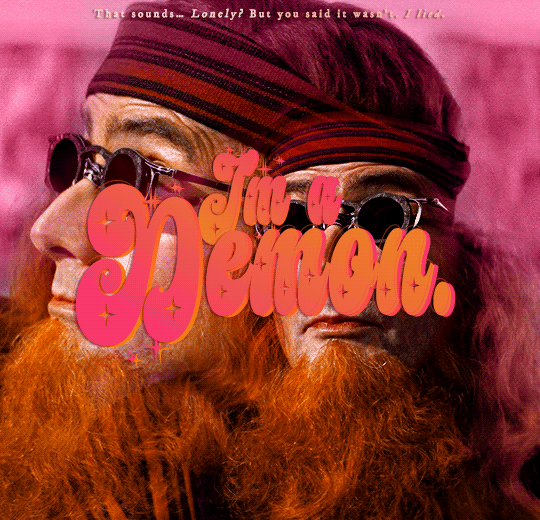

What does your exactly mean, exactly? I feel like your exactly and my exactly are different exactlys.
Crowley in Good Omens (2019–)
320 notes
·
View notes
Text
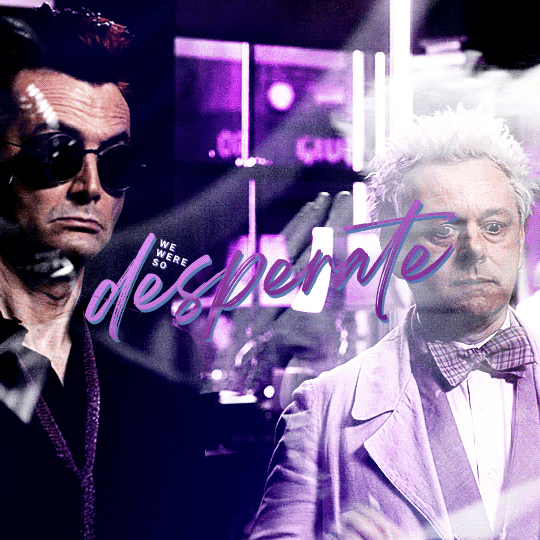


we were so desperate not to let go of each other that we left bruises
- The Binding, Bridget Collins
760 notes
·
View notes
Text

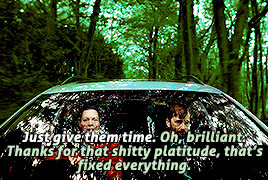
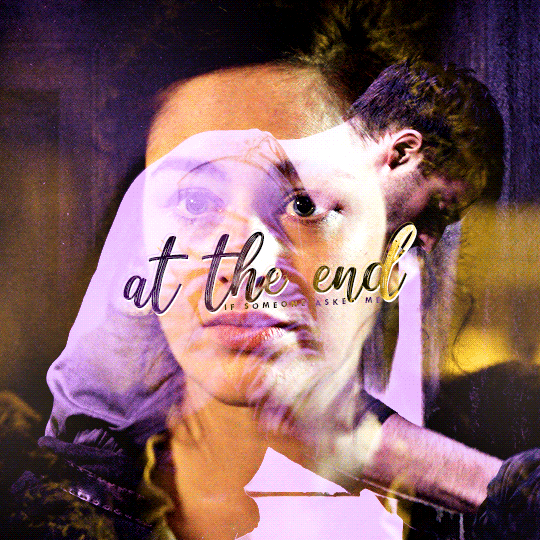
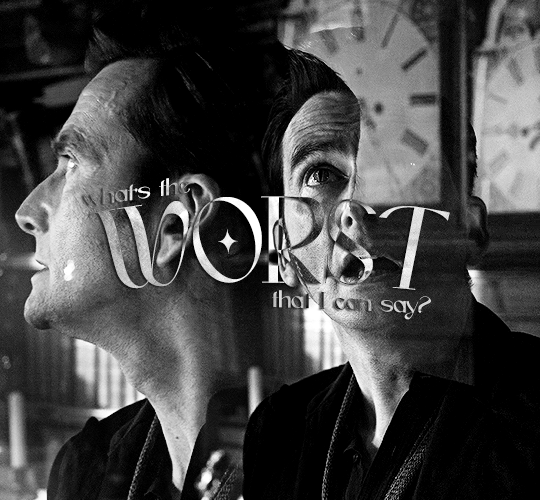
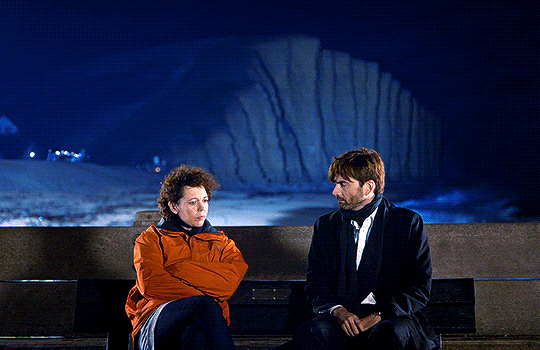
BROADCHURCH
2.01 | 2.03
824 notes
·
View notes
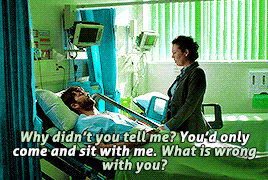
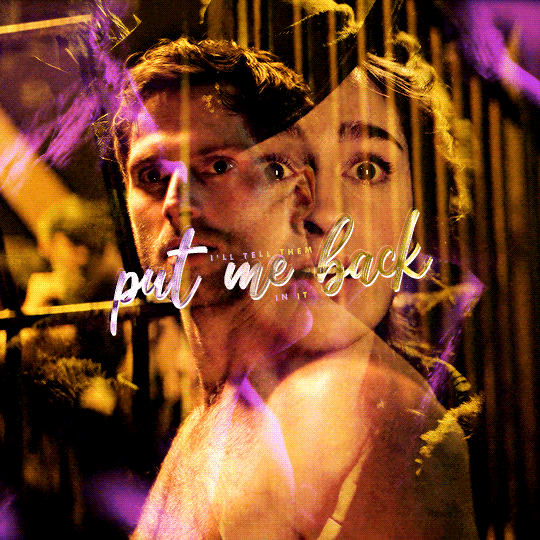
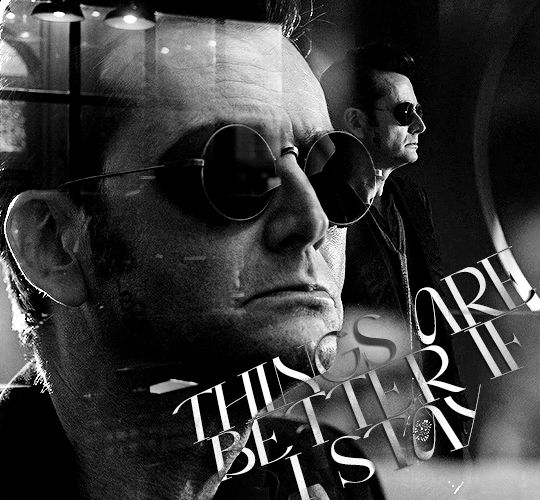
Text
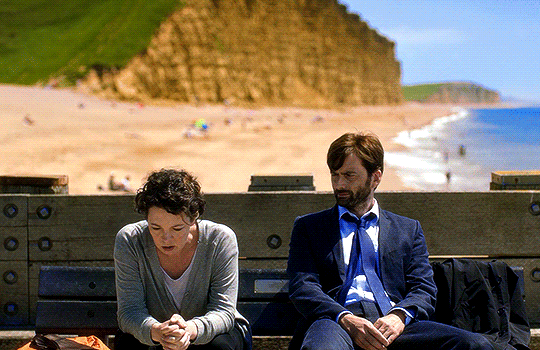
BROADCHURCH
1.08 | 2.02 | 3.08
3K notes
·
View notes
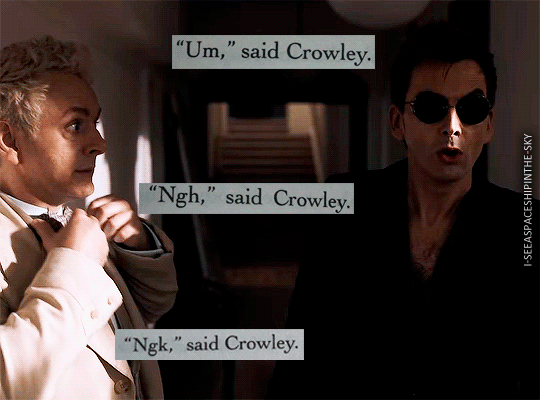
Text
What does your exactly mean, exactly? I feel like your exactly and my exactly are different exactlys.
Crowley in Good Omens (2019–)
#good omens#goodomensedit#dailygoodomens#crowley#crowleyedit#dtennantedit#dailyflicks#userbbelcher#tvfilmdaily#*gifs#*colors#~
320 notes
·
View notes