
homebrewtalk
Homebrew Talk
HomebrewTalk.com is the leading online homebrewing magazine and community.
211 posts
Don't wanna be here? Send us removal request.
Last Seen Blogs


Text
Harvesting Wild Yeast
Generally it’s nice to brew with predictable ingredients in controlled conditions. You purchase your ingredients, follow your process, pitch your yeast, and leave your beer in a temperature stable environment. After some time the yeast consumes all the sugars and leaves behind its own flavor characters and some alcohol.
I decided that I’d carry out a little experiment to mix the process up a little. I wanted to catch some wild yeast. Yeast grows on a number of plants and also drifts through the air. In the old days people fermented things without even knowing what was causing it. Later brewer’s yeast was isolated and then carefully selected and bred to the different strains we use today. There is however no reason we cannot make use of wild yeast in our beers and see what we end up with at the end. Wild yeast tends to have a particular character and doesn’t ferment as clean as some commercial yeasts. Some beers rely on this unique character to create their particular flavor profile. In this post I describe a yeast capture I did recently. I will not describe isolating the yeast as this does require more specialized equipment, but what we’ll end up with will allow us to brew beer.
Equipment needed
You won’t need much to capture some yeast. There are two ways you can capture yeast: from the air, or from some fruit, flowers, or other piece of plant. I will cover the first one here, but generally it’ll be the same process for the latter.
So before we get started here’s what you’ll need:
One or two small jars with lids
Some muslin cloth
Dry malt extract
Small amount of hops (optional)
Rubber bands
A larger jar with an airlock in the lid
Process
First off we’re going to need to get our small jars clean and sanitized. For this I boiled them in some water for about 15 minutes with their lids and the muslin cloth.
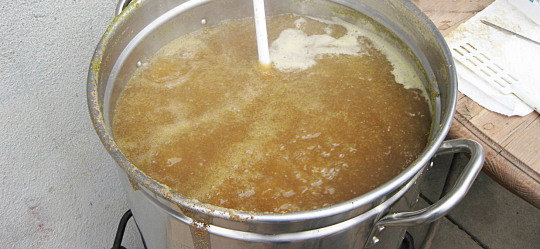
At the same time I prepared some wort with the DME aiming for a gravity of around 1.030. I used enough water to fill the two jars which was around 250ml, requiring about 20g of DME.
In this case I decided to add a small amount of hops (10 IBUs) which for this batch size is around 0.75g of 8%AA hop pellets. The hops add a little bittering and also help prevent the growth of some unwanted bacteria. I figured there would be no harm in adding that much, and if it prevents bacteria growing, all the better.
Once the jars were boiled I took them out (carefully) and left them to dry. Once dry I added some of the wort to each jar, placed the muslin on top and secured it with a rubber band and placed the lids back on until they completely cooled.
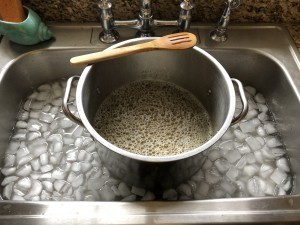
I decided to carry out my capture overnight in the winter, so I wasn’t too worried about the jars being a little warm, they cooled down pretty quick outside. I took the jars into my garden and placed them in two different places and removed the lids.
In the morning I replaced the lids and brought them inside. I poured both jars into a larger jar fitted with an airlock and left it at room temperature.
Now it’s a matter of waiting to see if you caught something and if it’s any good. It’s highly advisable to leave the jar for at least two weeks. The reason for this is that bacteria growth will start shortly after inoculation and peak soon after. Then yeast will start to grow and displace the nasties. After a few days you should start seeing the tell tale signs of fermentation in your jar. Bubbles, some foam, but don’t expect anything like high krausen.
Once it’s fermented out (2-3) weeks it will be safe to taste. DO NOT test or taste it before this time however. The presence of mold doesn’t mean your wild yeast starter is ruined, it’s just a common part of the process. If you have a pH meter handy, you can check the pH and see if it’s dropped significantly. That would also indicate the yeast has been working as the lactic acid concentration will increase after around weeks 4-5.
When testing, use smell first. If it smells OK you should use a sanitized pipette to pull a sample from below the surface and give it a taste. If it tastes good then you’ve got yourself your own awesome pet yeast. Otherwise bin it and try again.
Alternative method
As mentioned earlier it is possible to harvest yeast from flowers, fruit, and other pieces of plants. For this follow the above process but instead of leaving the jars outside simply place some fruit, leaves, bark, or whatever takes your fancy, into the wort. After a few days you should see some fermentation signs and a sediment will start to settle. No need to crush the fruit for this. If you notice the fruit going off remove it with a sterilized implement. Ideally leave the fruit 2-4 days and remove. Then leave the wort for a further 30 days.
I’ve not tried this method yet, but it is a similar method to capture yeast as above. You will find that different fruit, vegetables, and such will offer you different yeast types, so it’s a little more controlled than capturing yeast from the air.
Results!
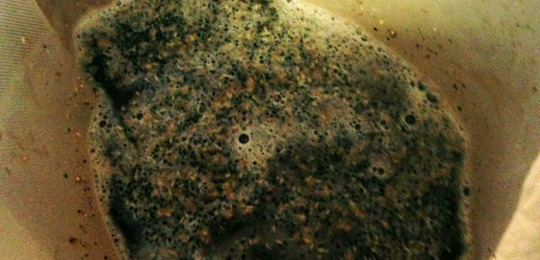
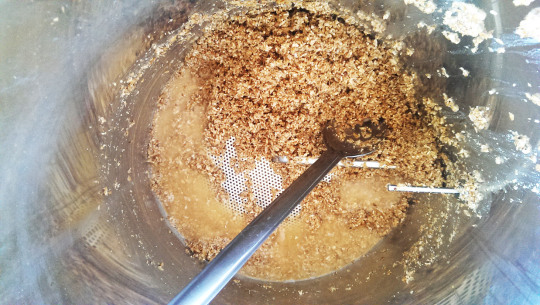
You should end up with a layer of yeast at the bottom of your jar that won’t look too dissimilar to what you’d see at the bottom of a starter. Here’s what mine looked like after 3 weeks, with a good yeasty layer at the bottom of the jar.
It had a very distinct flavor. A little sour and a bit earthy, but not bad, and I didn’t suffer any ill effects from sampling it. Unfortunately I ended up ditching this batch because I left it too long to brew with. But I plan on doing another capture now when spring arrives and more plants are in bloom.
Cultivating and isolating
If you are happy with the taste of your small beer then you can proceed to propagate the yeast. You can do this with step up starters, increasing the volume of the wort by a factor of 10 each time. So start with a 200ml starter with a gravity of 1.030-1.040 and leave that to grow ideally on a stir plate. Then pitch that into a 1.5l starter wort of the same gravity. At this stage you should have enough cells for a brew with an OG < 1.060.
Unfortunately this involves some guess work as unless you have the required tools to count how many cells your capture has, we’re just estimating the cell count. But hey, it’s free yeast, so just try again.
You can isolate the yeast cells in your capture, but that is outside of the scope of the article. For this process you will require a few more items like petri dishes, wire loops, alcohol burners, agar etc. There are a few resources online about wrangling yeast like this though if you wish to take this route.
Summary
Using wild yeast can lead to some interesting and very different flavors in your beers. If you end up capturing a good strain, you can always keep a small starter batch in the fridge and propagate from this for brews in the future. The strain will evolve over time, as it adapts to your brewing conditions and intermingles with other strains in the air, but that goes for pretty much all yeast strains.
So go hunting and have fun. Hope you catch something great.
by Sven Steinbauer
I live in the English countryside with my wife, two kids, and dachshund, having moved here from Germany many years ago. I work as a software engineer and enjoy figuring out how things work and learning how to do new things. I savor learning about and exploring the processes, different techniques, and ingredients that go into creating beer. With so many variables, adjustments, and ingredients, there’s a virtually endless combination of things to try out and learn about, plus you get to drink beer at the end of it. Although I enjoy a large variety of different beer styles, I still favor German beers most of the time.
Harvesting Wild Yeast was originally published on HomeBrewTalk.com
1 note
·
View note
Text
How to Brew beer in an hour (or less)
Let’s face it, most of us have jobs and other obligations that can sometimes make it hard to find the time to brew. So, brewing usually happens on the weekends. But what happens when life gets in the way, weekends fill up, but you still want to brew beer?
Here’s a method to simplify the brewing process to allow the homebrewer to brew a batch of beer in one hour.
This method was inspired by brewing Kombucha, which is a fermented tea. Props also need to go James Spencer of Basic Brewing Radio, who helped popularize the idea of the 15-minute boil.
In order to successfully brew a batch of beer in one hour, a few traditional homebrewing “rules” have to be broken. It should go without saying that the process uses extract with steeped grains. Secondly, the process uses 2-gallon batches – this lessens the time it takes to heat and cool the liquid. Third, it uses a 15-minute boil, and with such a short boil, you have to throw out the rules on hop additions. Once you accept these departures from traditional brewing techniques, you’ll find that it’s incredibly easy to brew beer in an hour.
Here’s the Cliff Notes version: Add specialty grains to one gallon of water and heat to 170 F. Remove grains and bring to a boil. Add DME and bring to a boil. Set timer for 15 minutes and add Bittering hops. Add Flavor hops at 5 minutes and Aroma hops at flameout. Add another gallon of refrigerated water and cool in an ice bath. Pitch yeast, ferment and bottle.
The One-Hour Brew Day Process
Start by heating one gallon of water and adding any specialty grains. When the water reaches 170 degrees F. remove the grain bag and bring to a boil add the DME and your first hop addition. The total boil time is 15 minutes, which is long enough to sterilize the wort. Add the next hops at 5 minutes and the last at Flameout.

The next step requires a bit of preparation. Grab a gallon of water from the store and place it in the fridge the night before you brew.
To cool your wort, make an ice bath and add the refrigerated water to the hot Wort and place the kettle into the ice bath. Every few minutes, give the Wort a swirl with a sanitized spoon. With this approach, you should be able to get the temperature to pitching temp very quickly.
Once at pitching temp, the process is the same as any other batch.
When you formulate a recipe using this method, you’ll need to experiment with the amount of hops. Hop isomerization, which is what provides the bitterness in beer, occurs when the hops are boiled. Alpha acids are isomerized (one molecule is transformed into another molecule that has exactly the same atoms, but the atoms are rearranged, according to Wikipedia) to form iso-alpha acids, which produce the bitterness. Since a 15-minute boil is shorter than a 60-minute boil, the result is less isomerization of alpha acids and therefore less bitterness. With a 15-minute boil, it’s common practice to double the Bittering hops, which will result in bitterness close to the 60-minute boil. If you’re adapting a 5-gallon recipe, keep the Bittering hops at the same amount, but reduce the flavor and aroma hops.
Aroma and Flavoring hops added after the 15-minute mark are close enough to the standard hop schedule to provide similar aroma and bitterness as in a 60-minute boil. If you have a complicated Hop Schedule, you can divide the time by 4, so a normal 15-minute addition becomes a 4-minute addition.
Here are two recipes using this method, a saison and a cream ale.
Saison
Grain Bill:
4 oz Crystal 40
2 lbs Light Dried Malt Extract
.5 lb Brown Sugar
Hop Schedule:
1 oz US Goldings @ 15 minutes
.5 oz US Goldings @ 5 minutes
.5 oz US Goldings @ Flame Out
Yeast:
WLP566 – Saison II 0r
Danstar Belle Saison
The Process:
Heat 1 gallon of water and add the Crystal 40 in a grain bag. Remove the grain bag when the temperature reaches 170° F. When the water starts to boil, add the brown sugar and Dried Malt Extract and 1 oz. US Goldings Hops. Boil for 15 minutes. 10 minutes into the boil, add .5 oz US Goldings Hops. When 15 minutes is up, add another .5 oz US Goldings Hops and remove from heat.
Move the stock pot to a sink or other container filled with ice and water and then add one gallon of cold water. When the temperature falls below 80° F, transfer the Wort to the fermenter and add the yeast.
When you think it’s done fermenting, take a gravity reading, then wait a day and take another reading. If the reading is the same, it’s time to bottle. If the reading changed, wait till the reading stays the same, then bottle.
Cream Ale
Despite its name, Cream Ale, doesn’t have any dairy products in it. The style originated in mid-1800s America as a response to the light German lagers. Traditionally corn has been added to the mash to help lighten the beer. In this case, we’re using corn sugar for that purpose. Cream Ale isn’t hoppy, or malty, but it is perfect for hot summer days.
Grain Bill:
2 lbs Light Dried Malt Extract
5 ounces Corn Sugar
1 teaspoon Irish Moss
Hop Schedule:
1 oz Cascade @ 15 minutes
Yeast:
Safale US 05
The Process:
Heat 1 gallon of water to boiling. When the water starts to boil, add the Irish Moss, Dried Malt Extract, Corn Sugar and 1 oz. Cascade Hops. Set your timer for 15 minutes.
When 15 minutes is up, move the stock pot to a sink or other container filled with ice and water and then add one gallon of cold water. When the temperature falls below 80° F, transfer the Wort to the fermenter and add the yeast.
Bottle after fermentation has stopped.
The Numbers:
1.048 OG
1.011 FG
4.9% ABV
Justinian has been home brewing since he got a home brew kit for Christmas a month before his 21st birthday. He brews up websites almost as often as beer and his currently playing around with www.onehourbrewday.com. He lives in Colorado with his wife, daughter and two dogs.

How to Brew beer in an hour (or less) was originally published on HomeBrewTalk.com
0 notes
Text
Malt Experiment for a Black IPA — Blackprinz vs Midnight Wheat
Being a fan of hoppy beers, I’ve tasted a lot of different expressions of IPA, IIPA, Session IPA, and in it sboom, the specialty IPA’s like White IPA, Red IPA, Rye IPA and, one of my favorites of that list, Black IPA
or Cascadian Dark Ale.
This style, according to the BJCP Guidelines, was popularized in the early-mid 2000s. It was a style that boomed (like now the NEIPA) and every brewery was creating some batches of those and selling them like hot bread. Suddenly, the style started to go down in the national numbers, until it was just turned into a seasonal beer with a very well planned volume, so it wouldn’t go to waste.
In Mexico City, you cannot find a very good example of the style, because the style never was popularized like in the USA. If you could find a bottle coming from there, it wasn’t fresh because of all importation logistics and the hops were a little subdued. Being a style that wasn’t available, I tried to brew one just for me with a lot of hoppiness in there, resulting in a very enjoyable brew. I’m not such a fan of stouts, porters or very roasty beers. Nevertheless, Black IPA was delicious because the toastiness was restrained and it was just a faint touch of it, with a smooth, not astringent, nor bitter finish (this is part of the BJCP Guidelines).
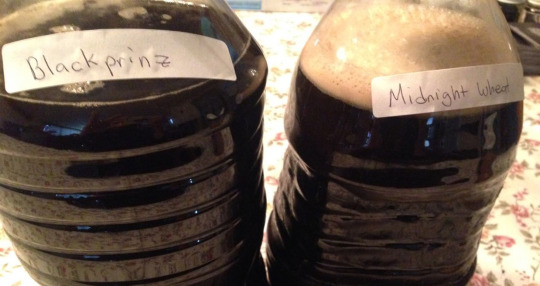
I recently found that a supplier brought some Briess Specialty Malts and in hiding in between different bags, there were some Blackprinz (a hulless black malt) and Midnight Wheat (black wheat). I was wondering about the main difference between them, aside from one being wheat and other barley, and ended visiting the Briess website and made some research. Both malts have a quite similar description of lending a smooth, not dry, not bitter, not astringent flavor; and both are recommended for Black IPA. It was after reading the specifications that I decided it was time to test both malts in this nice and rarely
found beer style.
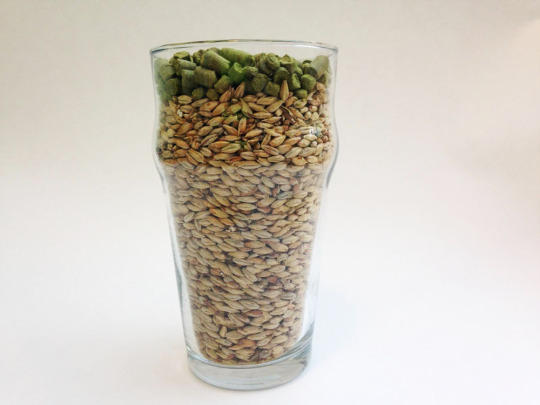
Grains Hop Schedule Yeast 83% – Pilsen Malt 50 IBUs Chinook @ 60min Nottingham Ale Yeast 6.7% – Crystal 40 Malt 17 IBUs First Gold @ 5 min 6.7% – BlackPrinz / Midnight Wheat 1oz First Gold @ 0 min 3.6% – Victory Malt 2oz / 2.5 Gallon First Gold – 3 Days
Notes: OG: 1.062 | 6.2% ABV
IBUs: 67
Mash Temp 149F – 90 Min.
Water Profile: Ca: 66 | Mg: 12 | Na:23 | SO4: 119 | Cl: 52
Black IPA Malt Comparison Process
On brew day, I decided to brew 2 little batches of 5 liters, just for sake of experimentation (and depending on the result, brew a bigger one for the kegerator sake!), with 30 minutes apart between batches for a stress-free day. I milled the grains, each batch with the respectively dark malt. Then, did a BIAB (Brewing in a Bag) with a classic approach:
Mashing for 90 minutes at 149 °F for a nice starch conversion and a lot of simple sugars. I added some Gypsum, Calcium Chloride, Epsom Salts and Phosphoric acid to achieve a nice 5.5 pH.
Boiling for 60 minutes with the respective hop additions.
Chilling with a copper immersion chiller.
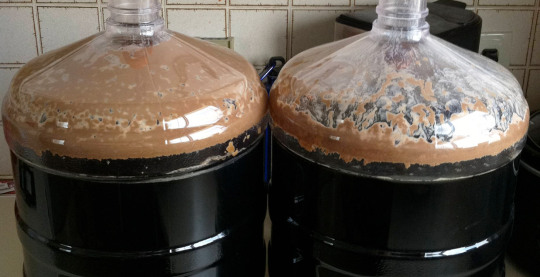
With the 2 different worts, I took density measurements and reached the same gravity. Transferred them to 2 little PET carboys, rehydrated the yeast, pitched and put on some airlocks. Fermentation kicked up 8 hours, first in the Midnight wheat and just a little later in the Blackprinz sample, both with a lot of activity and a delicious aroma. After primary fermentation was over and gravity was steady, I added the hops in some mesh bags and waited for 3 days.
After dry hopping, it was time to bottle them, with some priming (sucrose) and waited for 10 days for the beer to be fully carbed. Finally, it was time to taste them and compare them! The approach was like the pro’s so an Appearance, Aroma and Flavor test was held with each beer:
Blackprinz :
Aroma: A lot of hops with a fruity profile, citrus with a slight hint of roasty character just behind the hops.
Appearance: jet black, opaque, with a head that slowly disappeared.
Flavor: hop forward, high bitterness, citrusy with a note of dark chocolate. Like eating a chocolate of 90% cacao.
Midnight Wheat:
Aroma: A lot of hops with a fruity profile, citrus with a lesser hint of roasty character than Blackprinz malt, just behind the hops.
Appearance: jet black, opaque, with a head that slowly disappeared.
Flavor: hop forward, high bitterness, citrusy with a note of dark chocolate but less apparent than with Blackprinz malt. Not sweet, dry, a little harsher than Blackprinz malt.
Conclusions and Discussion

When tasting them blindly, I couldn’t find a strong difference. Just after knowing each one and really paying attention to every detail in the aftertaste I could find a little more flavor in the Blackprinz pint.
It was definitely an IPA with an accentuated bitterness, but with an interesting back note of what I could say is roasted cacao. It really gives extra depth and complexity to the beer without being overpowering and cloying. I think Blackprinz and Midnight wheat can be substituted but IMHO, to accomplish a similar flavor profile (like that note of dark chocolate), Midnight wheat should be added in more quantities.
Midnight wheat is definitely a great choice to add color without almost any flavor, in that case, someone searching for just a black coloring while keeping the same flavor as a pale IPA can find a good ally in that malt. In the other hand, Blackprinz is also a good option to fix color but expect just a little more flavor.

by Hideki Arao
Hi everyone! I started brewing in 2013 as a hombrewer and then, after winning a medal at one of the greatest beer contests in Mexico, I started learning and studying more and more about beer. Right now I am the owner and brewer of a micro-brewery in the heart of Mexico City, pursuing the dream of being one of the best and innovative breweries of the region (you can check out our site http://beerproject.mx). Brewing, drinking, sharing and dreaming about beer,that’s the summary of my life!
Want to Read More About Experimenting? Check Out This Article »

Kits are a staple of the homebrewing scene. Put together by your local homebrew shop or the big online retailers, they are all-in-one boxes that give you everything you need to create beers that are time-tested and brewer-approved. Sometimes they are clones of popular craft brews, other times they are retailer exclusives that recreate classic styles, but either way they take the guesswork out of making a great beer. For both newbie homebrewers and veterans alike, that can be a very welcome thing indeed. But sometimes you want to throw a little twist into an old favorite. Sometimes you want to get creative but don’t know where to start. Sometimes you have a beer idea in mind, but don’t want to spend ages tinkering with a base recipe before you start introducing more unusual elements. That’s when you start kitbashing…
Malt Experiment for a Black IPA — Blackprinz vs Midnight Wheat was originally published on HomeBrewTalk.com
0 notes
Text
How to Brew A Crowd Pleaser
We have all been there. There is an event coming up that you want, or have been asked, to brew a beer for, and you want to brew up something that sets itself apart from the light lagers that so many are fond of while remaining accessible to those same light lager drinkers. It is a delicate balance, but with some forethought, you can brew an ale that delights the palate of everyone at that next big event, regardless of what they normally drink.
What Makes an Ale a Crowd Pleaser?
Now, when we say a crowd pleaser, we know what we really mean; a beer that our macro-lager drinking friends and family will enjoy, while packing in character that craft beer drinkers will appreciate, striking a nice balance between the two. Aside from style, which we will get to in the next section, there are four main characteristics that make for a beer that will be loved by all.
Light – This is perhaps the most critical factor because one of the chief complaints about craft beer that I hear from BMC drinkers is that its mouthfeel is too heavy. You do not need your beer to be bone dry, but you should aim for your beer to be medium-bodied or lighter.
Refreshing – Imagine a beer that you would want to drink after mowing the lawn on a hot summer day, and that is how refreshing your beer should be. And nothing makes a beer more refreshing than being effervescent from higher than average levels of carbonation. 2.7 – 3.2 volumes of CO2 should be sufficient without over-carbonating your beer.
Low Hops – Your beer does not need to be devoid of hops, but to make the beer as accessible as possible to as many drinkers as possible, you should use a light hand when administering your hops. A light bittering charge followed by an equally light flavor charge. The way I think about hopping a beer like this is that the casual drinker should be able to taste the hops without being able to identify the flavor as coming from hops.
Low Alcohol – This is not a strict requirement, but if we are being honest, part of the draw of BMC is its session-able nature, and you can use that to your advantage in designing a crowd pleaser of an ale. Between that and the fact that session beers are becoming more and more popular among craft beer drinkers, it is hard to go wrong in keeping your beer in the neighborhood of 5% ABV or less.
Crowd Pleasing Beer Styles
We all know there are a multitude of styles to choose from, and many of them — too many to write about in this article — could theoretically be made into a crowd pleasing ale. However, there a few styles that lend themselves particularly well to pleasing crowds, and that is because of their inherent conformance to the above-mentioned characteristics. Here are some styles that work well as crowd pleasing ales:
Blonde – Just about anyone who likes beer will drink a blonde ale. A great style to choose when you want to maximize your chances of success, while having a bit of latitude to add some character.
Kölsch – This choice is a bit bolder, but still very doable. I brewed a Kölsch for my brother’s wedding, and it was a resounding success despite the extra punch of flavor Kölsch yeast imparts to the beer.
Cream Ale – Another solid choice that is hard to go wrong with. This style is about the closest you are going to get to BMC without dipping down into lager territory. While you are, of course, not bound by the style guidelines in home brewing, if you are going to stay true to style, this one has the least amount of wiggle room in terms of adding character.
American Wheat – I like doing this style as a crowd pleaser because you get a beer that is akin to a German hefeweizen, just without all the banana and clove yeast character that is likely to scare off non-craft beer drinkers.
As I said, this list is far from exhaustive, but for your first foray into brewing for the widest audience possible, these are the styles that I feel you are most likely to have success with.
Technical Considerations
Now, for the fun part! How do we actually design our recipes to achieve the characteristics listed above? There are several technical considerations that go into designing a recipe for a crowd pleasing ale, and while they are all fairly straightforward taken individually, getting them to play well together in a way that will tickle anyone’s taste buds is the true art of brewing a crowd pleasing ale.
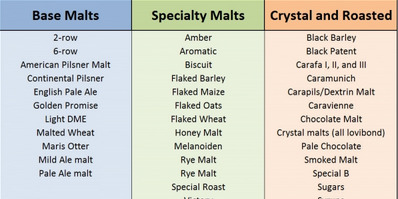
Grain Selection – Depending on the crowd you are trying to please, bold flavors may be appropriate, but for the purposes of this article, we are trying to brew for the widest audience possible, so that means light grains are the theme of the day. Feel free to experiment, of course, but in my own brewing, I have found that the lighter in color the beer, the more likely the non-craft drinking public are to enjoy your beer. That is why I generally stick to the lightest grains, and add character by adjusting other parts of the recipe. Here are some staple grains that I use when brewing a beer that anyone can drink:
Pilsner
Pale Ale
American 2-row
Marris Otter
Golden Promise
Amount of Grain – In keeping with the goal of staying under 5% ABV in your beer, you are not going to be using a whole lot of grain. It is going to vary, of course, based on the efficiency of your system, and the exact grains you use, but generally you will not be using any more than 10 pounds of grain for a five gallon batch at 75% brew house efficiency, which is how my system performs.
Mash Temperature – To achieve the light to medium body that we are looking for, we need to keep our mash temperature low, but not so low that it results in a bone dry beer. Without getting into the science behind mash temperature (to which I could devote an entire article), the basic principle is that lower mash temperatures result in a wort with more fermentable sugar than the same mash at a higher temperature. Thus, a higher mash temperature will result in a beer with more body, which we are not looking for here. The ideal mash temperature range to achieve the body we are after, in my experience, is 149 – 153 F (65 – 67.2 C).
Hopping Schedule – We are keeping our hop character low for these beers. Remember, to the casual drinker, the hops should be detectable, but not identifiable as hops. You are going to want a small bittering charge to balance the low malt sweetness, and then a small flavor charge to add a bit of hop character without being overpowering. You generally want to choose hops on the lower end of the alpha acid scale so that if you accidentally use too much, it won’t affect the beer as much as a higher alpha acid hop variety. Which hop varieties you use is up to you, but in in general, the safer option is to avoid the fruitier hops. However, given the sheer number of hop varieties, and their associated characteristics, experimentation will often lead to some amazing beers that still please a wide variety of palates.
Yeast – This part of the recipe is easy, but worth mentioning for completeness’s sake. Any clean fermenting, medium to high attenuating yeast strain will do very well, such as California Ale, American Ale, US-05, or Kölsch (if you decide to brew a Kölsch). Again, feel free to experiment because you can turn a run-of-the-mill beer into a great, yet still crowd pleasing, beer just by changing the yeast to one that throws some esters and adds a little extra depth.
Example Recipes Sure to Be a Crowd Pleaser

Here are two recipes of my own that saw great success and high praise from even the most staunchly anti-craft beer drinkers I know. The first one is a blonde ale recipe that I designed for the brewery that I am co-founding, which got rave reviews at our first tasting event open to the general public. The second one is the Kölsch that I brewed for my brother’s wedding some years ago that even my Bud Light-for-life aunt enjoyed. I would love to hear from anyone who brews these, or any other recipe based off of the information in this article, and whether they were successful in pleasing your particular crowd. Cheers!
Scuttlebutt Blonde Ale (5-gallon, 75% Efficiency)
Mash Temperature – 152 F (66.7 C)
Grains Hop Schedule Yeast 10 Lbs – American 2 Row 0.75oz Cascade @ 60min Safale S-05 1oz Cascade @ 10 min
Notes:Ferment at 68F, carbonate to 2.7 volumes.
Goldilocks Kölsch (5-gallon, 75% efficiency)
Mash Temperature – 152 F (66.7 C)
Grains Hop Schedule Yeast 9 Lbs – German Pale Ale Malt 1oz Czech Saaz @ 60min WYeast 2565 – Kolsch Yeast 1oz Czech Saaz @ 20 min
Notes:Ferment at 65F, carbonate to 3 volumes.


by Aaron Lott
Aaron started brewing while he was in the U.S. Navy, and has been home brewing for more than nine years. He is currently in the process of turning his passion for brewing into a career by starting his own brewery near Houston, TX. He lives in Houston where he goes to law school at Thurgood Marshall School of Law.
Want to Read More About Recipe Formulation? Check Out This Article »
After most of us have a few brew days behind us, and possibly a few beers in our belly, we get the bright idea that we can make a stellar recipe…on our first try. As I like to say, “Even a blind squirrel finds a nut once in awhile.” However, chances are that squirrel is not you!I remember my first recipe – a southern English brown ale. I looked at the BJCP guidelines for 11B and saw there was a large emphasis on the “sweetness” in this style. I proceed to throw over 2-lbs of crystal 60L malt in that five gallon recipe and used very little hops which contributed to a low bitterness. A few weeks later my taste buds received a thorough lesson on the definition of a cloyingly sweet beer…
How to Brew A Crowd Pleaser was originally published on HomeBrewTalk.com
0 notes
Text
Finally! New Brewing System That Can Brew A Single Pint of Homebrew
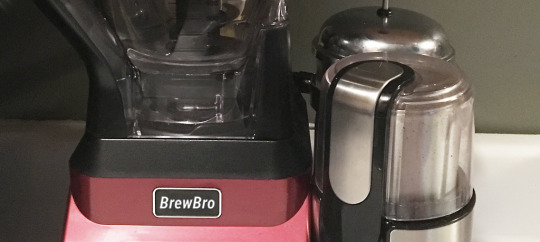
The world of automated brewing systems has exploded since the launch of the Pico Brew in 2013, automated brewing systems have been popping up like fruit flies in a house made out of bananas. Some big name examples like the BeerDroid / BeerFlo, the MiniBrew, IGulu, the Brewie and all the variations of the Pico line. However, there was one system that really caught my attention for a few reasons. It’s called the BrewBro and it brews a single pint of beer at a time.
What makes this brewing system unique, unlike the others previously listed, is that it brews a single pint of beer at a time. Founder, Ted Bronson, gave us a first-hand look at the BrewBro.
Ted Bronson on the BrewBro Brewing System
The BrewBro is a revolutionary brewing system that we’re launching in April of 2018. What makes this system so groundbreaking is 3 factors. First, it has three phase fermentation. This means that you have your standard fermentation, a secondary fermentation, and an optional third phase; cold lagering. Second, a revolutionary process we call active oxygenation. We know how important it is that your beer gets lots of oxygen throughout the entire brewing process. Our system infuses oxygen into the fermenting beer all the way from the yeast pitch to bottling. Lastly, it brews a single pint of beer.
Sometimes, you don’t want 1, or 3 or 5 gallons. Sometimes you just want a single beer, you know? So that’s why we made this system. So I can hone my craft to brewing the perfect pint… literally.
How the BrewBro Works
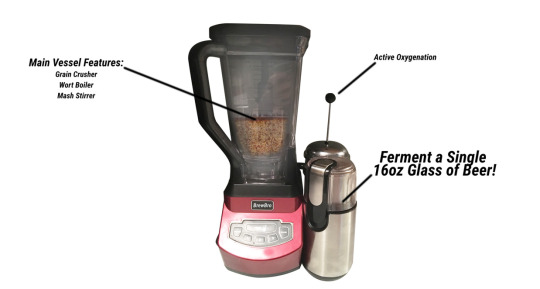
The main vessel is where the brewing magic happens. Add uncrushed grain to the top of the tower. The system handles the rest. First it crushes the grain with it’s NinjaBladeTM tech. It ensures that each kernel is split perfectly down the middle. This guarantees between 25-30% efficiency. The center of the tower is the heating element which boils the grains and wort to make sure you get the maximum flavor in your pint of beer. Next, the beer gets transferred through the oxygenator, and then into the fermenter cup. As fermentation begins, CO2 is forced out of a valve. The negative pressure sucks air through a hepa filter, creating the ongoing oxygenation of your beer.
How Can I Get a BrewBro Brewing System of My Own?
BrewBro is launching on April 1st, 2018 for the early-bird price if $3895.00. Pretty reasonable as the final price will be just shy of $5000. If you’re interested in spending just as much time brewing 1/50th of the beer in a standard batch, the BrewBro is for you.
” Sometimes you just want a single beer, you know? So that’s why we made this system. So I can hone my craft to brewing the perfect pint… literally.”
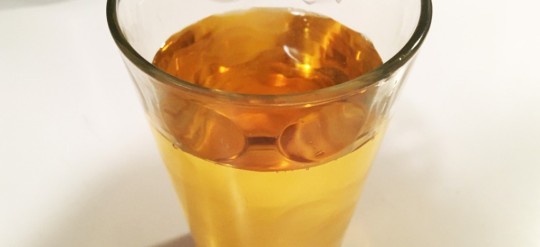
It may sound like a major investment, but when you see how the finished beer comes out, Myself and Ted agree that you’ll be brewing your own single pints of beer in no time! You can order your BrewBro brewing system at www.homebrewtalk.com/AprilFools.html

by David “Marshmallow Blue” Doucette
David is a full blown fermentation enthusiast who has dedicated much of his free time to learning and sharing the art of homebrewing. He’s spent several years documenting and writing homebrewing information on his blog Hive Mind Mead. He’s written over 60 articles between Homebrew Talk and Homebrew Supply. He also writes for his own homebrewing blog, Hivemind Mead
Trick Your Friends With These Other Great April Fools HBT Articles:
New Bill Could Allow Homebrewers ot Sell Homebrew on Cottage Licenses
Study Shows Isomerized Alpha Acids can Increase Your IQ
Brew Your Own Glow in the Dark Beer!
Finally! New Brewing System That Can Brew A Single Pint of Homebrew was originally published on HomeBrewTalk.com
0 notes
Text
Brewing Big Batches: Implications & Troubleshooting
When I started the hobby and made some research about recipes, equipment and raw materials, I found that almost everything was in some kind of codified volume : 5 gallons. The recipes I found were for 5 gallons of beer with their respective amount of grains, hop additions and yeast. The equipment was mysteriously listed for 5 gallons, like the carboys, the coolers for the mashing and the fermenters. I thought it was a holy number and always followed the instructions: everything for 5 gallons.
Then the time came where I could start buying new equipment and found a boil kettle that was 9 gallons. I thought it was weird, because everything I had was 5 gallons and those 4 extra gals were for more free space and to avoid boil overs (the addition of hops when the wort is boiling and you don’t have some space in the kettle is a headache). After that, I started tweaking around the recipe, the efficiency of the system and realized that I could tweak another variable: the final volume. I worked the recipe as a mathematical equation: if you have X of 2 row malt, then 1.84x (scaling from 5 to 9 gallons for 8 gals of beer) must do the trick. I made the same with the water, hops and yeast. Hell, I was wrong…
On brew day, everything went wrong: the tun was so full of water and grains that I had to drain some water liquid, there was a stuck mash, and the Original Gravity (OG) of the wort was too low, and the bitterness higher than expected. That was the time I realized that brewing larger batches wasn’t just as straightforward as I thought. When brewing more than 5 gallons, there are some variables, which are correlated, that must be taken in account:
1. Capacity of the equipment (Mash Tun, Boiling Kettle and fermenter).
2. Efficiency that can be achieved with the system.
3. Expected OG.
Understanding these variables will guide the brewer to know how many malt and hops must use be used to achieve X Original Gravity with a Y efficiency. Let’s go deeper into each one of the points:
Capacity of the Equipment for Big Batches
It’s important to know how much volume the tuns can hold. It’s easy to lose track of the fact that water and grains can impact the total volume of the mashing. If the mash tun capacity is of 7 gals, the brewer can’t expect to be capable of mash 7 gals of water mixed with grains. The grains will occupy space and, if not taken in account, there will be a flood at the moment of the dough in. There are mathematics ways to calculate these volume of water + grains, but, thanks to the technology, we have brewing software , which can help you the brewer out to know how much capacity the brewer tuns must have in order to brew X volume of beer.
The Boiling Kettle capacity is important too. If it fits the exact volume of wort, there will be some spilled liquid by the vigorous boil and a 100% guarantee that there will be a boil over when adding the hops or boiling off the hot break (there is a reaction when adding hop pellets that a lot of foam is created and everything starts to flood. This can be countered by a water sprayer to “destroy” the foam, but it is a headache the that most brewers want to avoid.)
Finally, the fermenter. If the fermenter is the exact volume of the wort coming in, there will be a 100% assurance that there will be a mess when the fermentation starts. Yeast will start to devour the sugar and a Krausen will form (a foam of proteins, hops and yeast). If the brewer is not armed with a blow off tube, the airlock can be clogged by the Krausen resulting in pressure building up. If it’s not handled, the fermenter can just launch the airlock out. Beer and yeast will be in all over the place. Changing the airlock is a headache because it has to be done several times until fermentation is less vigorous and the contamination hazard is very high when doing this. The correct way to counter attack this is to build a blow off tube that let the Krausen flow from the fermenter to a bucket/bottle with some sanitizing solution; or have a fermenter with more capacity (20% is recommended).
Big Batches & Efficiency
When brewing a high volume of beer, the brewer must take in account that the efficiency that he/she is used to while brewing 5 gals of beer is going to change. This is often related to a more compact mash (less water to grain ratio) that gives less space for the malts to interact with the water and covert the whole starch (enzymatic activity), or even related to the difficulties to mix the mash with all the extra grains (easier to mix 10 pounds of grain than 30 pounds). This variable is not as easy to predict as the other ones, like having some extra space in the mash tun or boiling kettle just in case. The only way to discover the new efficiency is by brewing. This uncertainty is awful at the beginning, but it’s the only way to understand it. Here’s an example:
The brewer is used to have a 70% efficiency when brewing 5 gals, and expect a wort of 1.05 points of gravity. The brewer uses the same malts and just scales the recipe x3 (moving from 5 gals to 15 gals). At the end of the brew of 15 gals, the brewer achieves a wort of 1.045. This means that there is a drop of 7% in efficiency. An adjustment must be done in order to counter this by:
1.- Adding more malt or extract (Dried/Liquid Malt Extract).
2.- Incorporating extra steps in the brew, like a fly sparge or mixing the mash more often. Or…
3.- Choosing a different method of mashing, like changing from BIAB (brewing in a bag) to a false bottom mash tun to be able to do a sparging/lautering.
There’s another option but it is not recommended. This is milling the grains with less space between the rollers, giving a finer grist. This actually elevates the efficiency, but at the cost of a latent danger of a stuck mash because of all the flour created. This can be avoided if you’re using the brew in a bag method.
Another thing to consider is the heat retention of your mash and strike water. The larger the volume of your mash, the slower it will lose temperature. This also means that 170F strike water in a 5 gallon mash may be too hot for a 10 gallon mash, resulting in a correction being needed or a high mash temperature.
With Big Batches, and Standard Size Batches, Everything is Connected
In brewing everything is connected and we can have a “butterfly effect”. A lower gravity from the lower efficiency in the mash, can cause the wort after the boiling to be more bitter (utilization of hops is higher with less sugars dissolved), ending in the worst case in a beer quite different than expected. Even stuff like the gas/electricity that is going to be used to bring the wort to boil and the time extension to chill it has an impact that is important to take in account while scaling.
Knowing the efficiency and implications of the new system can be challenging and time consuming but it will give the brewer the freedom to brew larger batches of beer with certainty in the numbers, which can be translated into certainty of the resulting beer.
by Hideki Arao
Hi everyone! I started brewing in 2013 as a hombrewer and then, after winning a medal at one of the greatest beer contests in Mexico, I started learning and studying more and more about beer. Right now I am the owner and brewer of a micro-brewery in the heart of Mexico City, pursuing the dream of being one of the best and innovative breweries of the region (you can check out our site http://beerproject.mx). Brewing, drinking, sharing and dreaming about beer,that’s the summary of my life!
Want to Read More About Big Batches? Check Out This Article »
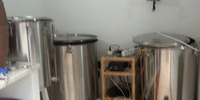
A brew size of around 200 liters therefore seemed about right to start with and could be fitted into a small-purpose built (3.5m x 4.0m) brewhouse in my garden. Getting the structure built was relatively easy using our regular Portuguese builder who is talented at making new features, additions, and extensions in a way that captures our traditional property architecture. For the kit, I wanted to replicate large-scale breweries as much as possible, rather than settle on home brew adapted buckets and pots. This meant going for purpose-built, stainless-steel vessels throughout. BrewBuilder in the UK supplied me with a 200-litre hot liquor tank (HLT), mash tun, and boiler, together with two 100-litre …
Brewing Big Batches: Implications & Troubleshooting was originally published on HomeBrewTalk.com
0 notes
Text
Three Areas of Consideration When Expanding Your Home Brewery.
Are you totally obsessed with brewing? Are you ready to expand your homebrew operation past the beginner stages? In that case, you’ll want to seriously consider three areas of your procedure: milling, fermenting and bottling.
Expanding Your Home Brewery: Milling
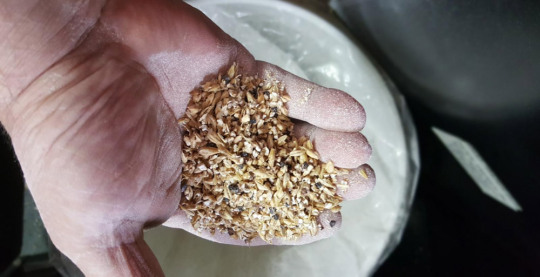
A grain mill is one piece of equipment that could last us the rest of our brewing careers, so it’s useful to purchase the best possible product to suit our needs. Let’s start by discussing the fact that we cannot mill grain perfectly without the proper piece of machinery. We can attempt to crush the kernels by blending, smacking them with a wine bottle, crushing with a rolling pin or pounding them in a mortar and pestle, but the result will be disappointing. If the kernels are too thoroughly smashed, there could be a large amount of powder in our grain bed, which can lead to a stuck sparge. If the kernels aren’t crushed enough, our efficiency will fall dramatically.
There are two main decisions when selecting a grain mill. You can purchase a mill that crushes the grain with rollers, or a mill that crushes the grain with grinding pads. The roller method is the most precise method for milling barley as it squeezes the kernel in between two rods before dropping the kernel into a container below. One important thing to look for in a grain mill with rollers is the adjustability of the crushing gap. The more adjustable the rollers, the more useful the grain mill will be in the long run. Remember that you’re buying a product to last you as many years as possible, so consider the fact that you might want to brew with specialty grains in the future that require a different grind to barley so that the adjustability will come in handy.
Roller grain mills will come with two or three rollers. The two roller models are perfectly fine, but the third roller ensures you get a more thorough crush the first time through. Most three-roller models will press the grain initially and then push the kernel to a second station for a more comprehensive crush. This means that you could achieve a similar outcome by crushing grain twice in a two-roller model, but it takes twice as long. The decision is yours.
Grain mills that grind grains between two pads are less reliable and not necessarily as precise, but they have one huge benefit; they’re cheap. The motion of moving the grains between two rough pads is naturally more haphazard than pressing the kernels between rollers, but both methods work. Do yourself a favour and read through some online discussions on grain mills. You’ll find that most people are very happy with the model they have, simply because it is particularly effective or because it gets a rough job done for a low cost.
Of course, you’ll want to make sure you read a thousand reviews of the specific model you’re planning on purchasing to make sure that the product is reliable. Also, consider speaking to the people at your local homebrew store to get some trustworthy advice.
Fermentation
When considering fermenting vessels you have three main options: A plastic bucket with an airlock, a plastic fermenter or a glass carboy. A plastic bucket with an airlock is basically a less expensive plastic fermenter. Both of these fermenters are almost always opaque, so you can’t see the progress of your brew, and both are easy to clean since the lid is very wide. Make sure any plastic you buy is food grade and remember that the surface may be easily scratched. Scratches will allow microorganisms to hide in the vessel after an improper clean, so be gentle. Since the plastic buckets require you to be particularly vigilant with sanitation, it’s probably a bad idea to put beer into a used container. The tub in which you mix your pool chlorine or take fishing is probably unsuitable for brewing, even if you’ve never caught a bream.
The plastic fermenter can be more useful if it has a spigot on the bottom, which can be fitted with a bottle filler (bottling rod) to make the final stages of fermentation easier. The purpose built plastic fermenter will also be easier to transport if it has handles since the people who designed it are expecting the vessel to carry over 5 gallons.
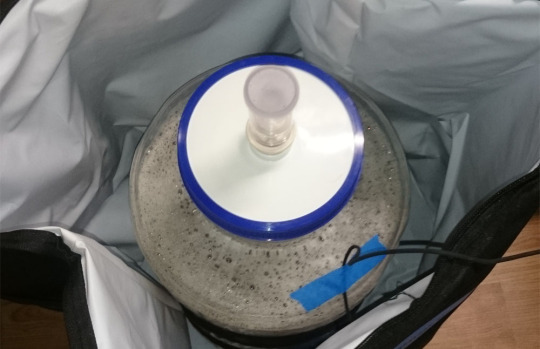
Finally, the glass carboy is the best for storing beer long term. If you’re lagering or souring a brew, or trying to infuse some additional flavor with a secondary fermentation stage, then the glass carboy is the most appropriate piece of equipment.
Be aware though, the top of a glass carboy will be very narrow, so sanitation will only be possible by flushing the vessel out and soaking or rinsing with sanitize. Glass is also less malleable, so you won’t be able to install a tap at the bottom; you’ll need a siphon to transfer the liquid properly. Oh, and DON’T DROP IT!
With all of these benefits and complications to individual products, the answer is simple; get them all. Purchase one of each of these fermenters and you’ll be able to keep multiple beers in separate stages of the brewing process. As you’re expanding your home brewing operation, an opportunity to triple the amount of beer you can brew is a prospect that shouldn’t be ignored.
Another factor of improvement in fermentation is to make sure you have some form of temperature control. This can be a converted fridge, or something like the BrewJacket Immersion. Controlling your fermentation temperature is huge as many yeast strains don’t really like being at 68F and prefer the lower to mid 60s. Temp control also opens up the ability to brew lagers, which allows you to brew dozens of new styles.
Bottling
Now we’re on to bottling. Guess what: just like milling and fermenting equipment, you’ll get what you pay for with bottling gear. You could buy a hand capper for a few bucks and expect to simply refill the empty bottles your mates left at your house last weekend, but when those three fermenters we just spoke about are ready for bottling and you need to get 15 gallons into two hundred little glass vessels, you’ll wish you were more prepared.
We won’t discus kegging in this article because it’s probably a little too much for us at this stage. If we’re considering milling gear and fermenters, lets focus on that for now and deal with ball lock systems and aluminium cylinders and in a few months.
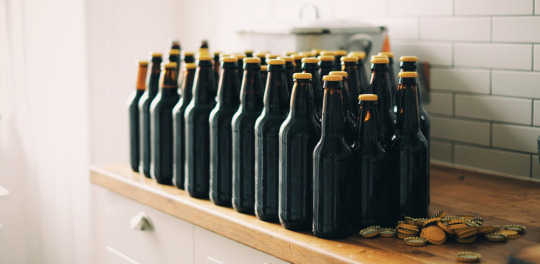
We can select glass bottles or plastic bottles. Glass bottles need to be capped, plastic bottles use screw on lids. Glass is better for aging beer, plastic is better if you plan on drinking as much of this brew as you can fit in your belly as soon as possible and there’s a moderate chance that you could drop a beer at some point in the evening. Of course, glass can be salvaged for free from your recycling bin.
Again we’re at a stage where each option comes with its benefits. Can you guess where we’re headed now? That’s right, lets plan to use glass and plastic. Since you need to purchase plastic PET bottles (if you don’t already have some), but they’re simple and practical to clean, prepare and re-use, consider keeping thirty or forty on hand. This way, you can quickly transfer a standard beer into bottles to be drunk soon, then cleaned and re-filled for the next time you want a quick brew. But, glass is much better for aging beers, so store your big beers and the darker stuff you’d like to leave in the bottle for a couple of months in glass.
Another consideration for the social home brewer is that glass makes for a better gift. If you bottle a six pack for a friend, you can give them glass without having to mention, “Can I please get those bottles back when you’re done, mate?” Now you’ll need a capper and, just like the grain mill, you get what you pay for. Luckily, even the best cappers aren’t particularly expensive, so you can purchase something that will attach to a workbench and last you for a long, long time for a very reasonable price.
Having enough bottles handy when you need them might also require a little planning, so consider hoarding all the bottles from a celebration. Maybe Christmas is just around the corner, or there’s a particularly rowdy barbeque coming up soon; either way, put a bin or a plastic bucket off to the side and tell everyone to throw the empties into it. You can soak the whole haul in sanitiser and figure out which bottles have the most forgiving packaging. You’ll find that some labels simply fall off and some need to be scraped away. With this in mind, avoid bottles with foil stickers. These things flake off and the metal shavings can get inside your other bottles.
So now you have a mill, three fermenters and a couple of bottling options for your separate needs, what’s next? What a stupid question, we all know what’s next; it’s time to make some beer.
by Daniel Norrish
Daniel is an Australian homebrewer, living on the west coast of the country. When he’s not boiling wort or waiting for brews to lager, he writes novels and watches rugby. Dan prefers strong, dark beers, but he’ll drink anything and he enjoys adding strange and peculiar flavors to beer.
Learn more about controlling »
Up until now you’ve been fermenting your beer in the basement, or in that hall closet that stays nice and cool. What if you want to brew a saison that calls for higher fermentation temperature, want to try your hand at lagering, or even dial in your standard ale fermentations more precisely? You need a way to control the fermentation temperature. Temperature control isn’t just for beers that ferment higher or lower than average. All of your batches can benefit from being at the right temperature at the right time…
Three Areas of Consideration When Expanding Your Home Brewery. was originally published on HomeBrewTalk.com
0 notes
Text
Gelatin Fining - Cold Versus Warm
In my last article about gelatin, I explained how it works (physically and chemically) and proved that a short boil does no harm to it, busting a common brewing myth. After multiple positive responses, I decided to do an experiment to bring more light into another commonly discussed, gelatin related topic: “Do you have to cold crash before gelatin fining?” While with the last topic, opinions were quite polarized, some people saying boiling gelatin is a disaster, others being on my side, with this one, most people agree cold crashing is recommended. Let’s look how much of a difference it really makes!
What Exactly is a Chill Haze?
Every homebrewer knows that sometimes, after putting a warm bottle of apparently clear beer into a refrigerator, the beer becomes hazy as it cools. Generally, some proteins are insoluble in beer, while others are soluble up to a certain concentration if certain conditions are met. The insoluble ones are not a problem, as most of them settle during whirlpool or during fermentation, however, temperature is the limiting condition for the soluble ones. Years ago, at school, we did an experiment, comparing salt solubility in cold vs hot water. I learned, that in hot water, the solubility of table salt is slightly higher than in cold water, but also that when I cool the hot sample, the extra salt “jumps” out of solution, which is called precipitation. The same happens to proteins in beer, forming the well-known chill haze. That is why lagers don’t get hazy. They are cleared (usually by filtering) at near freezing temperatures, so by cooling a bottle of lager to a serving temperature, you are still not reaching the chill haze point.
Hypotheses
Before making an experiment, I formulated a few hypotheses based on my limited knowledge of the problem.
The gelatin “waits” diluted in the warm beer and during chilling, the chill haze forms, gelatin “grabs” on it and clears the beer in the next 48 hours as usual.
The gelatin settles to the bottom of the warm bottle (taking the haze that is already present) and then, after chilling, the chill haze forms, but does not settle.
The gelatin somehow clears all the proteins even at the warm temperature, so no chill haze forms during chilling.
The Gelatin Experiment First Day:
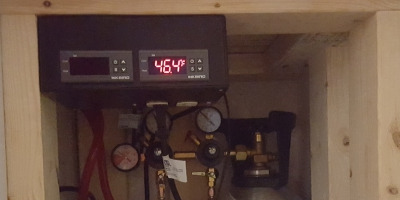
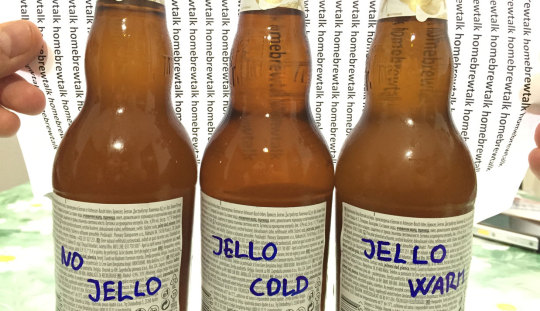
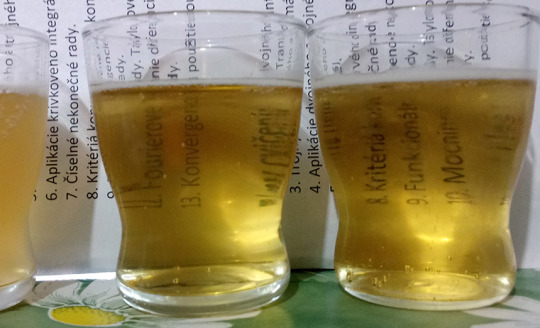
The three samples of the same beer have been stored upright for 12 hours, one of them in the fridge, the other two warm. I took a photo to show you the chill haze, the warm ones were almost clear, despite being witbiers. I then injected one cold and one warm sample with the same amount of (boiled) gelatin, capped them and shook all three samples well. I returned the cold sample into my kegerator and the warm ones into my closet.
80 hours later: I took all three samples out for documentation. The difference was quite dramatic. The chilled sample, which was the haziest before, was almost clear, only showing a slight haze in the lower part of the bottle (the photo is not accurate here, probably due to artificial light). The untouched warm sample was now the haziest one. The warm sample with gelatin was interesting, because while it appears to be clear in the photos, with my bare eye I could see tiny but visible solid particles floating inside, equally distributed top to bottom, maybe 2mm apart. I have no hypothesis for this. It was, nevertheless, the clearest of the three with the best readability. After this documentation, all three samples were put into the kegerator.
20 hours later: Another quick check, just to see how the warm samples react to chilling. The untouched one was no surprise, but the (previously) warm one with gelatin was the same, impossible to even recognize anything behind the bottle.
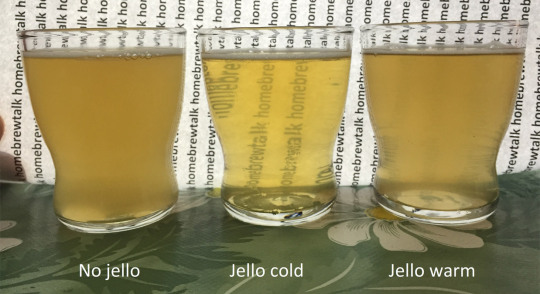
48 hours later, The Judgement Day:
So here it is, the final results. You may argue that the cooled sample had more time to settle in the cold, and I agree the schedule I have chosen was probably not ideal, but it was hard to decide which one to choose. However, I adjusted to this by only making 0,75ml samples, so only the upper ¼ of the bottle ends up in the glass. From my experience with gelatin I know that beer drops crystal clear in 3-5 days in a half meter tall keg, sucking from the very bottom. Anyway, the results are obvious, the cold fined sample was crystal clear, the untouched one opaque and the warm fined one only slightly clearer, although I cannot comment on the floating particles as the beer was too hazy to see them. Taste-wise, the clear one was a bit crisper and somewhat juicier, while both of the hazy ones were a tad more velvety with fuller body, which I preferred with this particular beer style.
Conclusion
Unfortunately, it appears there is no way around it. Adding gelatin to warm beer might help with clarity very slightly, but I would not recommend it if you are planning to keg-fine anyway. If you are bottling directly after a warm primary or secondary, you might get a slight advantage at a cost of one extra fermentor opening (possibility of oxidation, infection). Decision is up to you.

by Robert Solarik
My name is Robert (but I like to call myself Robko). I was born, and I also live in Slovakia, a small country south of Poland. Ever since I was born, I have been curious how things work, which led to basically all my toys being disassembled at some point of their short lifespan. During high school times, however, I discovered the charm of homebrewing and after graduating, I was not really decided what university to proceed to. I don’t like doing things if I am not sure they make sense, so I got a job as a head-brewer in a small brewery, because that was my biggest passion at the time. After two successful years I finally decided for studies of mechatronics at a technical university in my hometown, and I am enjoying every bit of it. I am still brewing actively at home. It has been five years since I started.
Want to Read More About Cereal Adjuncts? Check Out This Article »
Many all-grain brewers seem to be put off when anything beyond a single infusion comes up in a recipe. Terms like “triple decoction” conjure up images of steampunk laboratories, mad scientists, and hump-backed henchman. Cereal mashing seems to get the same response, which is understandable as just about every article on the subject is filled with diastatic calculations, gelatinization temps, etc. which no one having a beer on brew day wants to remotely contend with…
Gelatin Fining – Cold Versus Warm was originally published on HomeBrewTalk.com
0 notes
Text
Hefeweizen Yeast Selection Experiment
One of the beers that made me enter the hobby of brewing was a nice and fluffy Paulaner hefe-eeissbier. It was the first hefeweizen I tasted and I fell in love instantly with the style: phenolic, estery, wheaty, refreshing, bubbly… simply delicious.
Since then I tried to brew some examples of the style, using the materials I had at hand; good wheat and barley malts, good German hops and some dried yeast (WB-06). It didn’t go well. The beer was crystal clear (an accidental kristallweizen?) and the classic banana and clove were very, very subtle. Not my favorite brew. Then I tried another yeast, Lallemand’s Munich. Same results. I live in Mexico City so liquid strains were hard to find. I was really frustrated because I was brewing nice blondes, American wheats, IPA, stouts and so on, but couldn’t brew my favorite style… Until I found a guy that could bring me a good vial of White Labs bavarian weisse Yeast (WLP 380).
I was so excited that the next day after I had in my hands the vial, I brew 5 gals of weissebier. Pitched the yeast (made an overbuild to save yeast for later, just in case it was a good yeast) and waited anxiously. On bottling day, I tasted it and I was in heaven, but it is quite different to a fully carbed beer. After 8 days, I open the first bottle and I had some tears in my eyes. Nice and delicious phenols and esters in the air, with a nice haze and persistent head… I finally brewed a decent hefe!
Then I found that my supplier was selling a new yeast from Lallemand: Munich Classic. I was like “hey wait… why is there a Munich and also a Munich Classic?”. I did some research on the Lallemand’s website and found that the description was changed for Munich Yeast, and Munich Classic had what seems to be a real hefeweizen description. So, I decided it was time to do an experiment with 4 different yeasts that are meant for the style and really compare them:
Hefeweizen Yeast Experiment Recipe
Grains Hop Schedule Yeast
2.8 lbs Pilsen Malt
6 lbs Wheat malt
1 lb Melanoiden malt
.5oz Perle @60
WB-06 Fermentis Yeast
Munich Lallemand Yeast
Munich Classic Lallemand Yeast
WLP 380 WhiteLabs Yeast
Notes: Ferment at 72F.
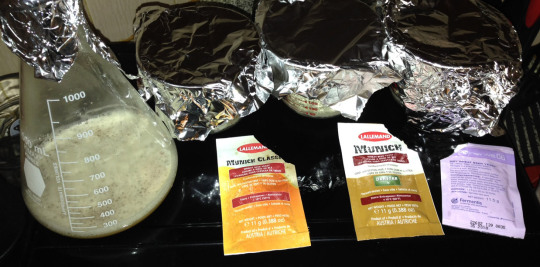
Process
2 days before, I prepared a starter for the WLP 380 yeast (3rd generation), so it was healthy and awake for the pitch. Then on brew day, I did a BIAB (Brewing in a Bag) with very classic methods. I Mashed for 75 minutes at 153 Fahrenheit. Boiled for 60 minutes and Chilled with my copper coil immersion chiller.
I separated the wort in 4 little carboys. I pitched the yeast but taking into account that for a “good hefe” one must stress the yeast.
No oxygen (for the dried yeast is not that critical).
10% less yeast than recommended for the pitch rate.
I did it for all the samples by weighing the dried yeast (and rehydrating them) and by checking the volume of the slurry for the liquid one. I also like to create something like an “open fermentor” so I just put a foil over the mouth of each sample, no airlocks this time. All where fermenting 12 hours after the pitch, except the one with the Classic Munich; but it caught up the other ones 4 hours later.
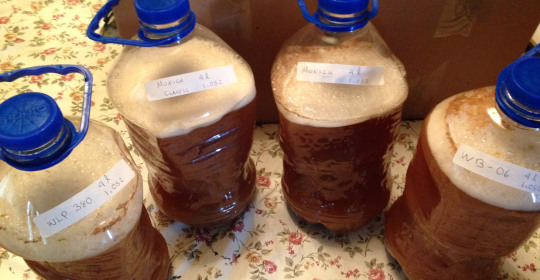
I waited 2 weeks for them to be fully attenuated and checked that the fermentation was over. They stayed in a room where the temperature doesn’t come below 72 °F. The odors, during fermentation, were different:
WB-06: just a little spicy.
Munich: quite neutral, like using an American strain.
Munich Classic: sweet banana.
WLP 380: mostly clove and then a lot of sulfur.
Does the aroma indicate that in each of the samples I will find the banana, clove or sulfur respectively?
After fermentation was over and it was time to bottle them (3.0 vols of CO2)
WB-06 / Munich / Munich Classic /WLP 380 respectively
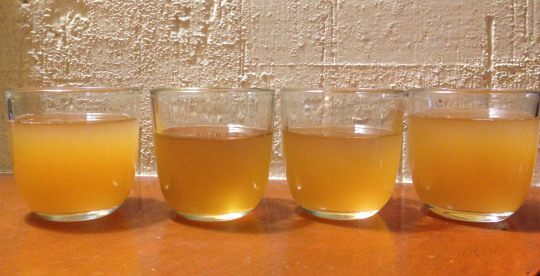
After 2 weeks in the bottle, it was time to do a nice comparison like the pros: Aroma, Appearance, and Flavor. These are the results:
WB-06 / Munich / Munich Classic /WLP 380 respectively
WB-06 Fermentis Yeast
Aroma: A little fruitiness but not resembling banana nor bubblegum. Almost no clove, with a lot of yeasty, bready aroma.
Appearance: Quite hazy with a nice pale orange color, a head that was big at the beginning but disappeared after a minute.
Flavor: tart, a little fruity but not feeling the banana nor the clove, which are critical for the style. Not bitter just enough to balance the malts. Bready and grainy flavor with a silky mouthfeel, effervescent and dry finish, not sweet.
Munich Lallemand Yeast
Aroma: Quite neutral, like using an American strain. Bready, and yeasty aroma.
Appearance: Quite hazy with a nice pale orange color, a head that was big at the beginning but disappeared after a minute. Very similar to the Fermentis sample.
Flavor: A little tart, but overall very neutral with a very bold yeast and bready flavor. Banana and clove are nonexistent. Dry finish, not sweet.
Munich Classic
Aroma: Somehow sweet, banana and a little clove. These aromas disguise more the bready touch of the beer.
Appearance: Same than the other samples, hazy and pale orange with more retention.
Flavor: A little tart, not bitter, with some banana and some clove in there (more banana than clove). Esters and phenols are present and melt nicely with the grain bill, but somehow muted. Dry finish, not sweet at all.
WLP 380
Aroma: A lot of cloves, some apricot and a little sulfury note that disappeared after some minutes. Phenols cover the majority of the maltiness.
Appearance: Same than Munich Classic, good head retention, hazy and pale orange.
Flavor: Not tart at all, not bitter, not sweet, a lot of cloves, banana is minimal. Apricot is another note that lingers. Dry finish, silky mouthfeel and effervescent.
Results and Discussion
This is quite shocking because the wort was exactly the same, treated the same way, and the beers were totally different. You can find the following text in the respective websites of the brands:
Fermentis WB-06: A specialty yeast selected for wheat beer fermentations. The yeast produces subtle estery and phenol flavor notes typical of wheat beers. The choice of wheat or weizenbier fans.
Lallemand Munich: Munich Wheat Beer yeast originated in Bavaria, German and is a neutral strain which can be used to produce a wide variety of wheat-based beer styles. With only slight esters and phenol production, Munich’s allows brewers to showcase other spice additions. Traditional styles brewed with this yeast include but are not limited to American wheat, Belgian white, berliner weiss, gose, hefeweizen, dunkelweis, and weizenbock.
Lallemand Munich Classic: Munich Classic is a Bavarian wheat beer strain that can easily express the spicy and estery aroma profile typical to German wheat beer styles. This strain is simple to use over a wide range of recipe variations and fermentation conditions, making it a great choice for a number of traditional styles of wheat beer. In classic open fermentation vessels, the yeast can be skimmed off the top in the traditional manner. Styles brewed with Munich Classic include but are not limited to weizen/weissbier, dunkelweizen, and weizenbock.
White Lab’s WLP 380: High phenolic clove aroma and flavor, with minimal banana. Also produces refreshing citrus and apricot notes for a crisp, drinkable hefeweizen. Less flocculant than WLP300 and sulfur production is higher.
After tasting the samples and reading the description, I can say they are true, but not so much for the styles they are saying are suitable for. A hefeweizen is a yeast forward style with a solid malt backbone. I think that the Fermentis and Lallemand’s yeast does not have enough character for this style and create a quaffable wheat beer, but not a hefeweizen. In contrast, White Labs yeast create a nice mélange of phenols and malt components that approach very well the hefeweizen characteristics. My favorite of the 4 is, without a doubt, the WLP 380. There are a lot of forums and chats talking about some very specific temperature control, ones ramping each day to achieve an estery and phenolic profile from the Fermentis and Lallemand’s yeast. It can be true that with a more temperature focused process one can suck off the banana and clove of that yeast, but for this practical case where the fermentor is just sitting at 72 °F all the time, the yeast creating a very nice Hefe is White Labs.

by Hideki Arao
Hi everyone! I started brewing in 2013 as a hombrewer and then, after winning a medal at one of the greatest beer contests in Mexico, I started learning and studying more and more about beer. Right now I am the owner and brewer of a micro-brewery in the heart of Mexico City, pursuing the dream of being one of the best and innovative breweries of the region (you can check out our site http://beerproject.mx). Brewing, drinking, sharing and dreaming about beer,that’s the summary of my life!
Want to Read More About Experiments? Check Out This Article »
One of the very common rumors is that you mustn’t boil your gelatin solution (that many of us use as a clearing agent), because you DENATURE the proteins present and it no longer does its job. However, as everybody knows, it is a good idea to sanitize everything that touches the beer in its cold stage, so being able to boil the gelatin would really be convenient. This is the reason for me publishing this article, to bring (what seems to be) true to the masses.
Hefeweizen Yeast Selection Experiment was originally published on HomeBrewTalk.com
0 notes
Text
Making Carrot Wine
We’re in the depths of winter and folks might erroneously assume that fresh wine making produce was incontrovertibly thin on the ground. You’re invited to think again.
So, with the wine cellar in likely need of substantive input, where does that leave us with several idle months ahead before the dandelions even begin to display their splendid heads?
How about a canned pineapple wine? Fair enough. Maybe a couple of gallons of skeeter pee takes your fancy. Bottled lemon juice happens to be in the shops at this time of year. Then again, maybe not!
The winter vegetables are a somewhat prosaic candidate for experimentation, yet these uninspired items can nonetheless produce a wholesome wine. For no good reason they appear to somehow consistently languish at the bottom of the lower division and often fall below the radar when compared with homemade country wines derived from fruit. That is a shame because a well balanced and aged parsnip or marrow wine is definitely a tipple to savor if one has the patience to wait for the wine. Perhaps it’s the other way round: Will the wine have patience enough for those who seek to enjoy the fruits of their labors? Who knows?
Here’s a modern take on carrot wine that in the dark days of next year’s bleaker months could find a prospective home in a glass by a warming fire, preferably somewhere near you.
We’re looking to be able to fill eighteen bottles with star bright wine in six to eight months time, so allowing for wastage and the odd tasting the plan is to make 15lts.
You will need:
Sugars Spices Yeast & Other Ingredients
13 Pounds – fresh carrots
3 pints (48 fl oz) – orange juice
1 gallon – apple juice
1.3 pounds – sultanas
1 Pound – malted wheat
3 – lemons
1.25 cups – fruit syrup (rose hip is decidedly good) or grape juice concentrate
2.2 pounds – soft brown or Demerara sugar
1 – navel orange or pink grapefruit
1 – tbs malt extract
1 – liter active yeast starter
6 oz – root ginger;
4.25 cups – strong English breakfast tea (6-8 bags);
2 tbs – of coriander seeds;
1 tbs – each of broken cinnamon sticks, fennel and caraway seeds;
0.2 oz – ground turmeric (haldi);
1-2 g – pectic enzyme;
15 g – bentonite;
1 liter – active yeast starter
Brewing Your Carrot Wine
As basic wines go, the method is quite simple. Carrot wine is made in three stages just like any other. There are however, one or two unfamiliar quirks or exceptions to this idea. As you will see, there’s nothing neither complicated nor difficult to fathom. The required explanations are set out below, and we’ll cover the nitty-gritty of the finer details in the main body of the article. Until then; in a nutshell:
Prepare the must and pinch the yeast.
Ferment and rack off of the gross lees.
Ferment out the young wine. Rack again and age in bulk.
Pre-Fermentation
It’s a recommendation worth following to get the starter culture prepared twelve hours in advance of making the must. Use 1 tbs of sugar, 1 pint of orange juice and the malt extract topped up with boiling water. Cool to blood temperature; then add the yeast (slurry or dehydrated), to make what brewers call a small wort. Cover and set aside till needed. In the meantime, knock up a thin paste with the bentonite and set aside also.
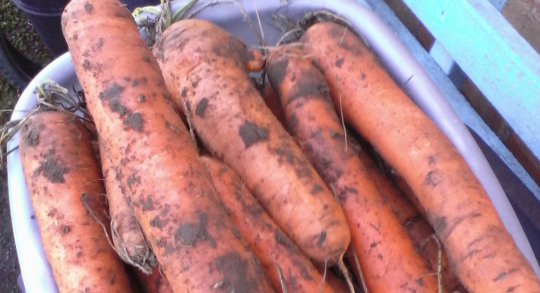
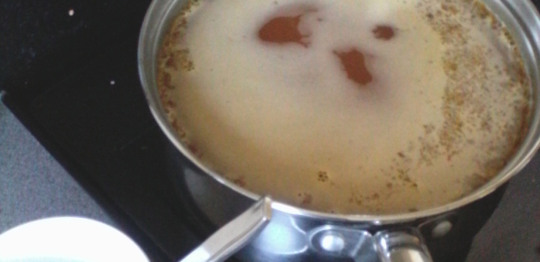
Preparing all of the carrots sounds like a chore: It is. They should be scrubbed clean but don’t require peeling, if that’s any consolation. After being thinly sliced, poach the veggies with the remaining orange juice and just enough hot water to cover. Simmering the carrots until soft might take 30-40 minutes after coming to the boil. They mustn’t be over-cooked. In fact, there’s no need to do this as we have further plans for the al-dente carrots.
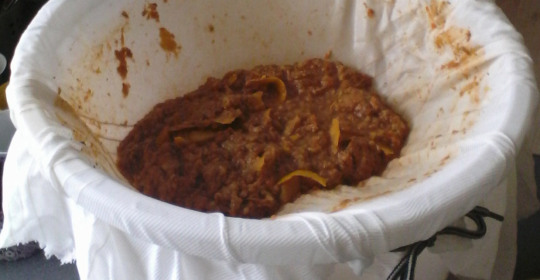
While the carrots gently simmer away par the zest from the lemons, grate the ginger, blitz in the magi-mixer or finely chop the sultanas, brew the tea in a liter of boiling apple juice and put all this into the sanitized primary fermentation vessel after adding the malted wheat. Add the syrup or fruit concentrate to the bucket and prepare to strain the carrots. Squeeze out the dregs from the teabags; rinse the bags in boiling water and pour into the fermenter.

Sooner or later, when ready, carefully strain the carrot water onto the other ingredients using a large colander. Best bet is to do this in batches. Transfer the cooked vegetables to a smaller bin and keep warm. Use a makeshift lid and towels to insulate the bucket.
Carrots contain little, if any, acid. This imbalance needs to be corrected. Juice the lemons and add to the must. Vigorously stir the must so as to fully aerate and combine everything together. The approximate ballpark figure for the initial specific gravity of the cooled must is 1060-1070º, or a potential alcohol content of 9.5% if fermented to dryness. When cool enough for the yeast, add the starter culture.
Carrot Wine Fermentation
Remember the pectic enzyme (pectinase) in the list of ingredients? This is where we part company with received wisdom because it doesn’t go into the must just yet.
On to a small point of clarification if readers will forgive the digressional pun. Pectinase destroys pectin: Any fruit that is known to contain sufficient levels of pectin so as to throw a stubborn haze in a finished wine needs the enzyme added in the early stages of fermentation. Be that the case, if incorporated, then a future problem has no future so to speak: nipped in the bud, as it were.
Whilst suspended solids are relatively easy to encouraged to drop (cold crashing at temperatures below 6ºC works well), a haze of colloidal pectin or starch in a near finished wine is a different order of difficulty to sort out when it comes to bottling time.
Pectinase is not a clearing agent in any sense of the term as most types of wine finings work in a fundamentally different way. Try adding the enzyme to a cloudy, pectin free wine. After a week or so the brew may have cleared somewhat, but that is simply due to the slowing down of active fermentation and settlement over time. You might incorrectly assume that the enzyme worked to clear the wine, but it had no affect what so ever.
Whether it’s purchase in a dropper bottle or as a dry powder, the enzyme works to degrade and destroy the hard glue-like inter-cellular substances found in fruit and vegetables that give rigidity and stiffness to the whole. The satisfyingly crisp firmness or ‘bite’ of an apple derives from the pectin.
Under the powerful liquefying action of the enzyme the sugary juices, fruit flavors and pleasing color compounds are released in a process called enzymic maceration.
Try the following technique rather than composting the cooked carrots.
Pour a liter or so of apple juice over the carrots and add the enzyme. Gently stir, cover the surface with cling film or similar to reduce oxidation and tidy the bucket away somewhere really warm (25-30ºC). After 24hrs strain the not insubstantial volume of juice off the solids using a grain bag. Squeeze gently to avoid an excess of pulp and from 6kg of carrots 4-5lts of juice can go into the primary fermenter alongside the rest of the now vigorously fermenting brew. Add the bentonite slurry. Stir well in. You should have 12lts or thereabouts of must by this point with a frothing fermentation on the go. Keep the fermentation on the cool side of 20ºC and stir the rising pulp back into the must twice a day for three to four days, at which point the gravity of the young wine requires adjustment.
In the presence of fermentable sugars and adequate nutrition, a thoroughly active yeast doesn’t mess about. Far from it. At an appropriate temperature, the yeast is perfectly happy to toil away while the going is good.
On day four, the must will show marked signs of separating into distinct layers as nutrition becomes depleted and fermentation stalls. The situation will begin to appear decidedly unfavorable for the yeast and it is now that an interventionist wine maker should step in and help the yeast to thrive in the face of deteriorating environmental conditions.
Now is the time to ‘sugar feed’ the young wine. Draw off 2lts of must into a large pan. Gently warm until the liquid can be heard, or as a foam rises. Add 500gm of the sugar and turn off the heat. Stir until the sugar is fully dissolved, add the turmeric, cover and allow to cool for thirty minutes. Rouse the whole brew and swirl in the feed. Each of these additions will raise the potential alcohol of 15 liters by 1.5%.
When the signs of a slow-down show themselves once again, repeat the procedure with the last of the sugar to leave a potential alcohol content of 14% or more.
If a sweeter finished wine is desirable then further sugar feeding will inevitably topple the yeast, depending on the environmental factors and the yeast strain being used, to leave a stable medium sweet wine of high alcohol content which conveniently suits the next stage of the recipe.
Stir in the final 2lts of apple juice. At this point lower the temperature to encourage sedimentation. When the wine is seen to deposit a heavy sediment and the SG. drops below 1010º it’s time to strain and press the solids into a secondary fermentation vessel or better still, an intermediate bucket for a twenty four hour rest period. After resting, rack off into three separate 5lt demijohns. From here-on in, proceedings should continue under an air lock.
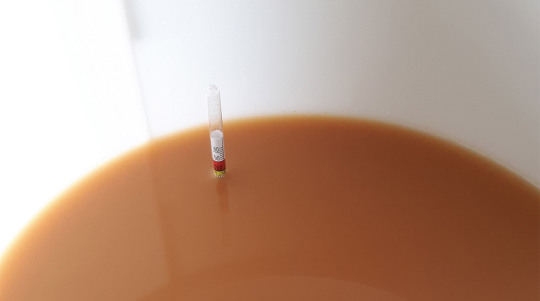
Flavoring Your Carrot Wine
Adding unfamiliar spice to food and especially drinks is always going to be a challenge. It’s so easy to underestimate the potency of fresh aromatics and the ability of alcohol to extract the essential oils, so the plan is to err on the side of caution by hedging our bets. Each of three #demijohns will receive a separate treatment.
We’re going to add a piquant flavor and aroma to the wine so as to pleasantly compliment the carrot and ginger in a similar way that bouquet garni is used to infuse a stock pot. As the spicing is to be tied up in a square of muslin we’ll call our little bundles ‘sachet garni’.
Zest the orange after washing to remove wax and chemical residues. With a dry pan on a low heat, gently warm through the seeds and shards of cinnamon and transfer to a mortar. Use the pestle to crack and crush the spice mixture but do not grind to a powder.
Make up two parcels. Place half the citrus zest in each. To one parcel add 1.5tbs of spice mix: to the second add 2.5-3tbs of mixture. Fold both sachets up small enough to fit through the neck of a demijohn and secure with a sterile rubber band.
#1. Remains un-spiced and is there for blending purposes if the spicing of either of the other two goes too far.
#2. Receives the low dose.
#3. Gets the higher dosage. Force the air out of each sachet garni and push it down into the wine with the handle of a wooden spoon.
This is where taste perception assumes a lead role. After forty eight hours both of the spiced wines can be sampled and a judgement made. The steeping should end when the wine tastes right in terms of personal preference. Please remember, wine changes character during storage and that mildly sharp or bitter flavours mellow over time.
If #3 hits the nose, and the taste is pleasingly spicy then remove the sachet and top up the demijohn with apple juice or a similar white wine. If your taste buds are unimpressed, leave to steep for a further twenty four hours and repeat. When all is well and good with #3, the focus moves down to #2 which is in effect a day behind the higher dosage rated wine.
Hopefully, by day five the two spiced batches can be recombined by racking into a 10lt carboy. Each wine maker should decide for themselves whether to blend #1 with the other two or to leave the un-spiced naked carrot wine as it is.
Maturation of any wine can be a protracted affair. With generous aging comes a smoothness and mellow refinement which young vegetable wines sadly lack. Folks should reckon on eight to twelve months of bulk storage as a starting point. If the recipe was finished medium sweet to sweet then one can double those figures.
Rack as necessary and rest the wine in darkness at a constant temperature around 12ºC. Keep an eye on the air lock/locks. Ensure they don’t dry out. Having said all that, once the wine is absolutely stable and perfectly clear there is no real reason why your carrot wine cannot be safely bottled. Bottle as you would any other wine and lay them down to sleep.
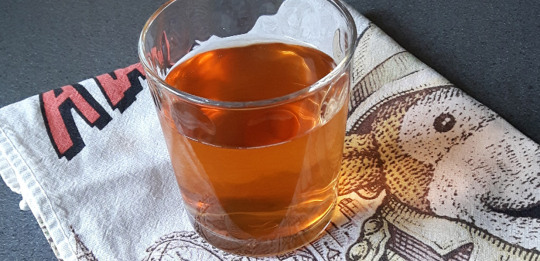
Cheers and good luck.
by Doornail
Doornail lives and writes out of rural North Yorkshire, Great Britain. He made the first batch of homebrewed alcoholic ginger beer with his sister aged thirteen. His mother anxiously voiced her disapproval, but left it at that. Nearly forty years later, his main winemaking concern is work widely foraging for the fruit, yeasts, seed and cuttings from cider apples and pear trees, rose hips and varieties of drupe ideally suited to the production of wine and traditional cyder. He’s fond of saying to a point bordering on repetition, “The more you think you know, the more you discover that you’ll never have enough time to know everything about fermentations, wild or otherwise.”
Want to Read More About Alternative Brews? Check Out This Article »
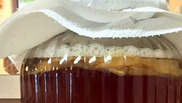
The only thing I make more of than beer is kombucha. It’s easy, it’s cheap, it’s delicious, it’s good for you, and best of all, I can drink it at work!… Patience. Don’t worry, we’re nearly there. Over the course of the 2-4 weeks, you will see a film develop over the top of the tea. That film with continue to get thicker and thicker until it forms a large, rubbery puck that floats on top.
Making Carrot Wine was originally published on HomeBrewTalk.com
0 notes
Text
Aspects of Brewing a Wheat Beer
With half of my family originating from Bavaria, I’ve been exposed to wheat beers from a young age, and would often proudly pour them for members of my family. I remember the unusual glasses, the lively bubbles, and the golden color of the cloudy liquid underneath a thick creamy head. It was a skill to pour a Hefeweizen correctly. Too quick and you end up with 80% foam, too slow and you end up with sad, headless drink. Wheat beers are a staple in many parts of Germany, with a variety of styles to choose from depending on region. Wheat beers also have some unique brewing aspects, which make them a great beer for homebrewers to experiment with, as they respond noticeably to a number of variables.
Wheat Beer Profile
Wheat beers, or Weizen (German for wheat) as they are known in Germany, are a very unique style of beer. There are hardly any hop aromas, no discernible hop bitterness, just a rich maltiness and the flavors the special yeast imparts on the beer. It is a very carbonated and fairly sweet drink, with dominant aromas of banana, clove, and some citrus scents like orange or lemon in some versions. Traditionally cloudy due to the low flocculating yeast and thus also called Hefeweizen (yeast wheat), but you can get a filtered version, or Kristallweizen, if you want to cut back on your yeast consumption. The high wheat content makes for a fluffy and lasting head atop of the beer that is a pleasure to sink your nose into during a hot day, or after a long day at work.
For another variation, replace some of the original malts with darker malts, and you got yourself a Dunkelweizen. A darker, richer beer, with hints of biscuit, bread, but still having that banana and clove character.
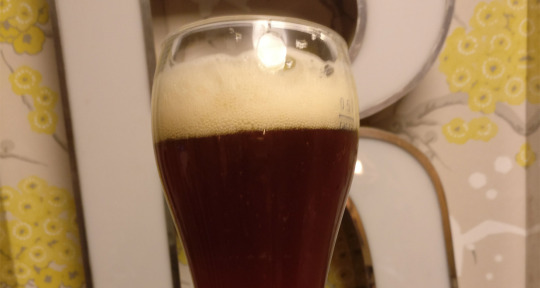
The process of making a decent Weizen will vary from brewer to brewer, so it’s best to experiment with different techniques. So let’s find out what these variables are and how they might affect your beer. I’ll be focusing on the German Hefeweizen, but be aware there are other wheat beers out there, like the Belgian Wit and the American Wheat, each with their own techniques, ingredients, and flavor profiles, but their specific production techniques are outside the scope of this article.
Ingredients
Wheat beers traditionally have a short and simple list of ingredients with most of the flavors and characters coming from the malt and yeast used.
Grain
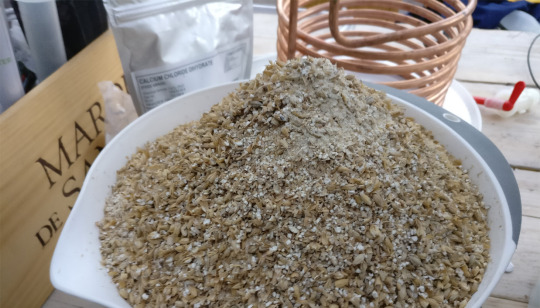
The grain bill is usually pretty straight forward 40%-60% malted wheat, 50%-30% pilsner or other light malt, and around 10% Munich or other darker malt for color. How much wheat people use seems to vary, but 40% is pretty common in homebrew. In Germany it is usually expected that wheat beers contain at least 50% wheat malt, and some breweries even use up to 70%.
Hops
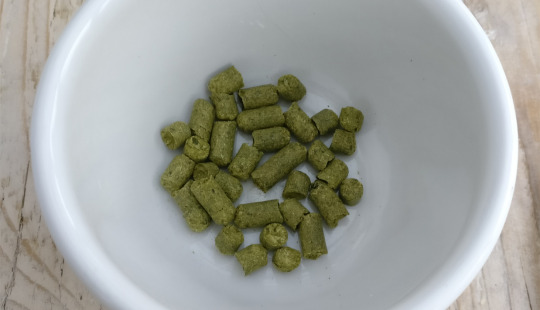
Hops are only used for bittering, and then still in small amounts. Wheat beers will have a range of 10-20 IBUs, usually somewhere in the middle. The traditional hops used are German noble hops with floral and citrus notes and low bitterness. Examples are Hallertau Hersbrucker, Tettnanger, Perle, or similar. These days there are people creating hoppy wheat beers, with some more aroma additions, so it’s worth experimenting. New breeds of German hops, like Huell Melon or Mandarina Bavaria offer new opportunities to experiment with new aroma profiles however.
Wheat Beer Water Profile
The water profile will want to be on the malty to very malty side. This means a high chloride to sulphate ratio, so keep some calcium chloride to hand. I would aim for something like this.
Ca+2 Mg+2 Na+ Cl- SO4-2 100 5 10 100 50
This should accentuate the maltiness and provide a nice rich mouthfeel. A mash pH of 5.2-5.6 is recommended to keep those enzymes happy and ensure full conversion.
Process
While it is possible to create decent beers with a single infusion mash, a multiple step mash, or decoction mash, is recommended. Due to the high wheat content, there are a number of benefits of the different mash stages. Some people only do a single decoction, whereas others do two.
Mash
A low mash-in temperature of 40°C (104°F)facilitates the initial breakdown of the wheat proteins. The mash temperature is then raised to 63°C (145°F) for a maltose rest. The yeast requires lots of maltose to generate phenols. The mash is kept at this temperature for around 30 minutes. A decoction is then pulled and heated to 70°C (158°F). After 15 minutes the decoction is heated to boiling and held there for 15 minutes before being added back to the main mash, raising its temperature to 63°C (145°F). Another rest is held for 20 minutes before another decoction is pulled and boiled for 20 minutes and returned to the main mash bringing it up to 75°C (167°F) for 10 to 15 minutes before lautering.
To work out the amounts, you can either use an online calculator, or estimate the volume with this formula:
Dvol = Mv * (Tt – St) / (Bt – St)
Dvol: decoction volume
Mv : total mash volume
Tt : target temp (either °C or °F)
St : start temp (either °C or °F)
Bt : boil temp (either °C or °F)
Add about 15% -20% to this figure. Add the decoction slowly whilst monitoring the temperature of the mash. When the target temp is reached, leave the decoction to cool to the target temperature and then add it back in. Note that the total mash volume is the volume of the water with the grains.
A typical non-decoction profile for the homebrewer might look like this:
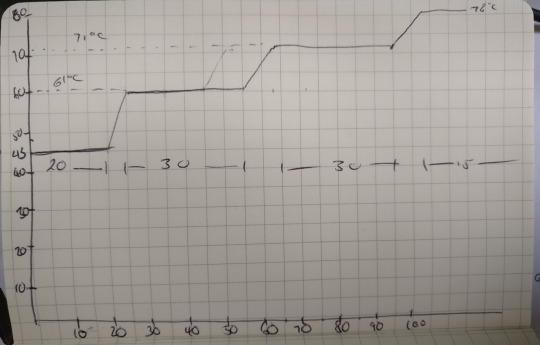
It is however also possible to do a stepped mash in a kettle without decoctions. Some will say that decoction mashing will add melanoidin flavors to the wort due to the boil of the partial mash, and others say they get the same results. This is something I am still experimenting with to see if there are any noticeable differences between the two methods. I also plan to compare the results of a single infusion mash with those from the aforementioned staged mashes.
Due to the high amounts of protein in Wheat, and the fact that its kernels lack a husk, stuck sparges are often a concern. To reduce the risk of a stuck sparge you can add about 500g (1lbs) of either rice or oat husks to a 10l (2 gal) mash. I generally soak these in some hot water for about 30 minutes to rinse off any dust, and also to reduce the amount of water they absorb during the mash. Then I drain them and mix them into the mash and proceed as normal. This is not always necessary, but advised if using more than 40%-50% wheat.
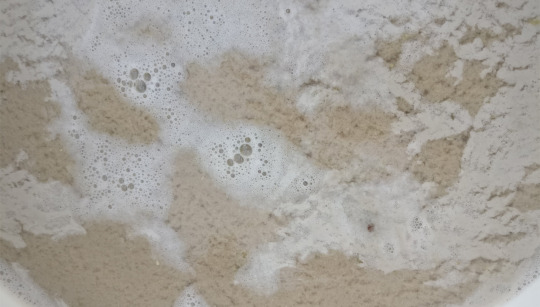
Fermentation/Yeast
Probably one of the most important parts, and one that will require some experimenting with pretty much every variable you can think of for fermenting: pitch rate, pitch temp, fermentation temp, open vs closed fermentation, removing Krausen, fermenter shape, etc
I’m only able to experiment with a number of variables, but read any thread or article about fermenting with Weizen yeast, and you will get a bunch of different information. Some will say that variable X affects the flavor, other say it doesn’t, and so on. I’m not going to dictate how to make it correctly, but go over some of the conceptions of the effects that different variables have on the outcome.
Yeast
You will want to use a wheat strain, as these are capable of producing that signature mix of phenols and phenols that wheat beer is famous for. I would advise using liquid yeast, as I’ve not had great flavor production from dried yeast, but your mileage may vary.
Pitching Rate
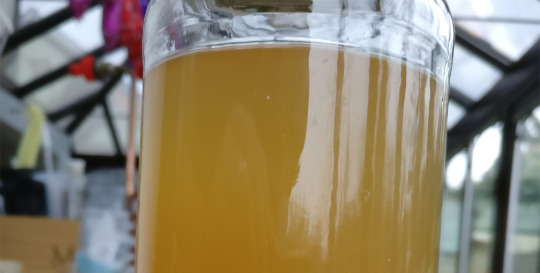
In the case of a wheat beer we want it to produce esters and we can make that happen by stressing the yeast. Under-pitching by varying amounts, allows you to control the amount of banana flavor your beer will have. I’ve seen people pitch from 0.75 to 0.25 million cells per ml per °P. The more stressed the yeast, the more banana you will get. Even though you are looking to under pitch, it is still recommended that you check yeast viability and cell count using a calculator to see if you require a starter or not. Above is a small starter I made from which I decanted half for the next beer. For my last 12 liter batch I aimed for around 83 billion cells.
Wheat Beer Oxygenation
Under oxygenating your wort will also stress the yeast, resulting in more banana flavors. You should still oxygenate your wort if you simply shake or splash your wort usually, as this will rarely get much oxygen into solution. I would suggest not using pure oxygen however if you want to get esters from your yeast.
Pitch temp
Wheat beer is pitched at around 2-3°C below fermentation temperature. This helps prevent the yeast from producing unwanted off flavors during the lag phase, and gives it a chance to acclimatize and multiply before starting main fermentation. Once main fermentation starts the wort temperature will rise.
Temperature
Temperature during fermentation has a great impact on beer flavor. To produce our nice flavors, we will need to keep our yeast around 20°C (68°F). Higher temps will promote banana flavors, whilst lower temps of around 15°C (59°F)will promote clove flavors. What temp you ferment at will depend on which of the two flavors you prefer. If you are using a temperature controlled with differential settings it’s advisable to keep them as close as possible. Generally setting the hot and cold differentials to 0.5 is a good idea, but make sure to not cycle the compressor too much.
I would however suggest being cautious with stressing the yeast on all fronts, as you might end up with either too much banana flavor, poor attenuation, or other issues. It’s worth experimenting with a few brews to see which variables produce your desired flavor profiles.
Fermentation profile
As stated above it’s good to pitch the yeast into a wort that’s around 2°C-3°C (35°F-37°F) below fermentation temp, and let it rise gradually until the target temp is reached. I usually plug in my Inkbird set to the fermentation temp and leave the heating element unplugged. Then the fridge will kick in once fermentation temp is reached.
Wheat yeast will form a lot of krausen, so make sure you have plenty of headspace, or use a blow off tube. After about a week, fermentation will have slowed and possibly hit final gravity. At this point it’s good to start ramping down the temp and keep it at around 4C (40°F) for another week to cold condition. As you are generally fermenting in the upper ranges (for the esters) a diacetyl rest is rarely needed, but it’s still a good idea to let the yeast clean up a bit at the end of the fermentation before dropping the temp.
Wheat Beer Carbonation
These are highly carbonated beers in general, and depending on who you ask you can get CO2 volumes of anywhere between 2.6 and 4.5. I would suggest somewhere in the range of 3.0-3.5 is a good place to start. A decent bottle will withstand around 4.0 volumes of CO2, so depending on your carbonation technique, this could be a limiting factor.

by Sven Steinbauer
I live in the English countryside with my wife, two kids, and dachshund, having moved here from Germany many years ago. I work as a software engineer and enjoy figuring out how things work and learning how to do new things. I savor learning about and exploring the processes, different techniques, and ingredients that go into creating beer. With so many variables, adjustments, and ingredients, there’s a virtually endless combination of things to try out and learn about, plus you get to drink beer at the end of it. Although I enjoy a large variety of different beer styles, I still favor German beers most of the time.
Want to Read More About Wheat Beers? Check Out This Article »
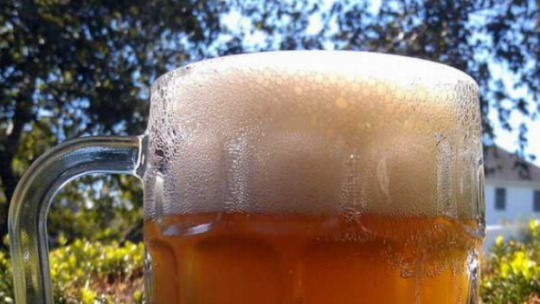
Sometimes you want to throw a little twist into an old favorite. Sometimes you want to get creative but don’t know where to start. Sometimes you have a beer idea in mind, but don’t want to spend ages tinkering with a base recipe before you start introducing more unusual elements. That’s when you start kitbashing….
Aspects of Brewing a Wheat Beer was originally published on HomeBrewTalk.com
0 notes
Text
Climbing Gravity-Taking a High Gravity Beer From Grain To Glass
When I first started Home Brewing my first thought was not to brew some sophisticated Belgian Ale using only imported ingredients from some monastery high in the Alps, but rather I centered my aim to something more American. My aim was to brew something that showcased the truly American ideal of bigger is better. I wanted to hit an Original Gravity(OG) of at least 1.100 and still end up with a beer that I could drink, albeit a bit slower.
Considerations When Brewing High Gravity Beers

Oops. Should have used a blowoff tube.
High gravity brewing brings a new set of challenges and opportunities that you may not normally encounter with a lower gravity beer. One thing to consider is that with the large quantities of grain in your recipe your hops will struggle to break through all that malt. You may want to increase your hop additions to achieve a more balanced beer. Even maly styles can still have 40-50 IBUs just to balance the extreme maltiness. Remember your final gravity will likely be somewhere around 1.020 or above, so don’t be afraid to up the IBUs a bit.
Also, you either need a larger mash tun to accommodate the grain or plan to supplement your recipe with some Dry Malt Extract(DME). Having some extract on hand can also be good for these brews, as a fuller mash tun may recquire a lower your water to grain ratio, or cause effecinecy issues. Having some DME on hand to hit your numbers regardless can put those worries at ease.
Another issue is that with a high OG the yeast may struggle to perform its magic to the fullest and eat through all the available sugars. You may need to pitch more yeast or choose a yeast that can handle the high gravity wort. A 2L starter should be good for a high gravity ale, but you might want to think about a 3L – 1 Gallon starter for a big lager. This of course will also affect your calculatinos in terms of the amount of wort you’re collecting (Brewing only 4 gallons at a gravity even higher than your target to account for the large starter). A challenge that I personally experienced was the increased fermentation activity. You may want to employ a blow off tube in your fermentation chamber or just be prepared to clean up a sticky mess.
High Gravity Chocolate Coconut Cream Stout.
Grains Hop Schedule Yeast
12 lbs 3.2 oz Maris Otter Malt (Muntons) (3.0 SRM)
2 lbs Caramel Malt – 80L 6-Row (Briess) (80.0 SRM)
1 lbs Chocolate Malt (350.0 SRM)
2 lbs Amber Dry Extract (12.5 SRM)
1 lbs Milk Sugar (Lactose) (0.0 SRM)
1oz Chinook @60
1oz Willamette @0
1 pkg Safebrew Abbey Ale
Notes: Add 4 oz Cacao Nibs and 2 pounds of toasted coconut to Secondary/Primary 10.0 days before bottling or kegging.
OG: 1.109 FG: 1.019 ABV: 11%
My recipes are normally adjusted for what my local home brew shop has on hand at the time. For instance, I used Maris Otter because they did not have enough Pale Malt available the day that I went shopping. I also used Shredded Sweetened Coconut off the shelf at the local grocery store and toasted it in the oven on a tray. Just be sure to watch it closely and turn the coconut over every few minutes until it is a nice golden brown.
I mashed in with 23 quarts of 164F water and held the temperature in the mash tun at 154F for 2 hours. I did a 2 hour mash because I was helping a friend brew his first beer and it took longer than expected to get back to mine. I mashed out with 22 quarts of 184F water for 35 minutes. I boiled for 60 minutes and added 1 oz of Chinook at 60 minutes and 1 oz of Williamette at flameout.
I chilled my wort with my counterflow chiller as it transferred to my fermenter. I pitched 1 packet of BE256 for its ability to handle the higher alcohol content and fermented for 7 days at 65F. I then added the Cacao Nibs and Coconut and let it sit for another 10 days at 65F. My OG came in at 1.100 and it finished off at 1.016. Transferred to the keg and force carbonated.
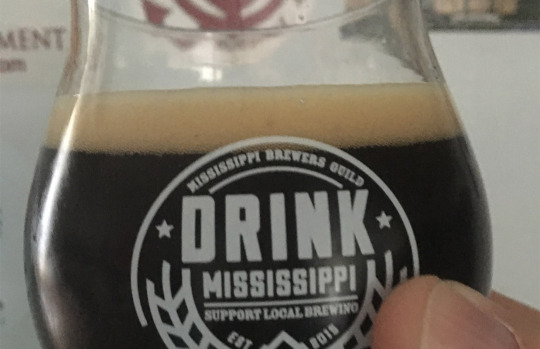
The result is a big, full, sweet stout that I enjoyed very much. The coconut faded over a few months but was just right when fresh. When I do this one again, I may increase the coconut to 3 lbs to help the coconut flavor and aroma linger a bit longer so I can let it age. The grain bill will probably stay the same as I experiment and try some other fruit or coffee to see how they affect the overall flavor profile.
In the end, brewing a big beer is a very rewarding experience, you just have reward yourself slowly.

by Troy “trojan” Stouffer
My wife, our 6 kids, and I live out in the country of south MS. When I am not brewing, writing, helping raise our kids, maintaining our property, building furniture, chasing chickens, stirring up political trouble on social media, or dating my wife, I am a Field Engineer repairing Diagnostic Medical Equipment.
Want to Read More About Special Ingredients? Check Out This Article »
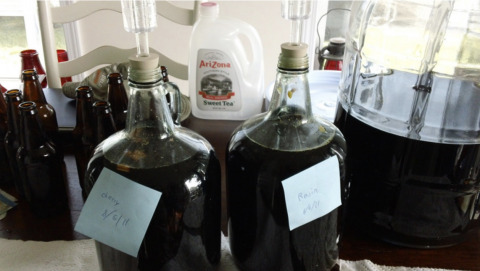
Sometimes you want to throw a little twist into an old favorite. Sometimes you want to get creative but don’t know where to start. Sometimes you have a beer idea in mind, but don’t want to spend ages tinkering with a base recipe before you start introducing more unusual elements. That’s when you start kitbashing….
Climbing Gravity-Taking a High Gravity Beer From Grain To Glass was originally published on HomeBrewTalk.com
0 notes
Text
Brewing A Braggot - Meads Combined with Malted Barley
Some of you, when you saw this article knew exactly what you were going to see. Others of you, probably saw the word braggot and wondered, “The heck’s a braggot?” I admit, less than a year ago, I fell squarely into the second camp. Before I started home brewing and reading books about the process, I had never heard of this wonderful hybrid of beer and mead. I simply have never seen a commercially produced one and, looking it up right now, I just am not seeing too many.
It’s lousy because there just isn’t much else like a nice braggot on the shelf. However, that’s the benefit of being a homebrewer, we get to make whatever we want. So if you like beer and mead, we’re going to be making a modern version of mankind’s oldest drinks.
The best way to think of the flavor is the maltiness of beer with the essence of honey, without the pure sweetness that comes with it. With this kind of base, the sky’s the limit as to potential flavor combinations you can do. Let’s start considering with considering the malt.
Braggot Grain Bill
Any beer could theoretically become a braggot, but not all of them are advisable. The goal of this entire adventure is to make sure that we blend the flavor of honey and malt together. Brown ales are the natural and most obvious match for this one. Scottish ales could pull it off well as well. Certain types of beer aren’t as advisable. IPA’s and stouts seem to come to mind as the bitterness of hops tends to overtake the flavor of the honey while the coffee or chocolate flavors don’t blend with it. However, it’s up to you! If you want to try it to see how it turns out, let me know!
Whatever style you decide to try, just keep the fact you’re adding honey to it in mind. The honey itself is going to impart an essentially honey flavor to the beer and add a lot of sugar.
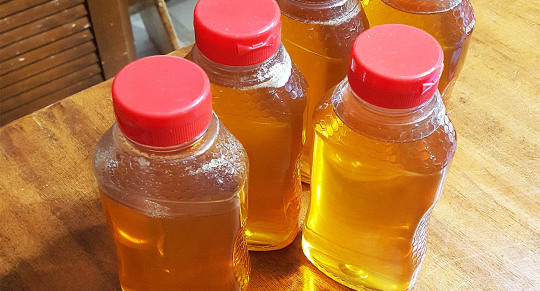
The Honey
When it comes to honey, for the best results, support the little guy. Get your honey from a local beekeeper. The hobby is becoming more popular and many communities have at least one person doing it. You can use the honey from the grocery store, but there is something special about making it with local honey that gives an even more complex flavor. Most stuff you get in the store is clover, where the local wildflower honeys will have other flavors that come from all the different plants the bees have found. Besides, I’m sure plenty of the beekeepers would gladly trade honey for beer, that’s how I get mine. If you can’t find some locally, the internet can be your best friend when it comes to finding high quality varietal honeys.
Depending on where you are, you may have access to honey that was made by bees on particular fruits and other plants. If you are lucky to have that around you, enjoy playing with all the flavors that can be in that honey.
Braggots and Hops
When it comes to hop selection for a braggot, there is a bit of flexibility, but here are some guidelines you’ll want to follow. Aim to keep your alpha acids lower as the bitter hops can easily overpower the batch. Since honey ferments completely, it will create a dryer finished product than a typical beer, increasing the perceived bitterness. Some of the hops that go well with this are floral and earthy hops that accent the honey you’re using. However, fruity hops can also be used with honeys like Orange Blossom.
Other Spices
Not every braggot recipe calls for hops. There are many recipes that focused on the spices used for the beer instead of throwing hops into it. When considering spices to add to a braggot, think of what is going to go well with the honey. Think cinnamon, clove, anise, ginger, or nutmeg. Let the creativity flow, just remember, a little goes a long way
Yeast
Again, whatever kind of beer you’re using to make your beer can decide your type of yeast to use. Just make sure you consider the fact this could be a high gravity because of the extra sugars. You’ll want to make a starter for this beer. Between the high gravity and the nutrient deficient nature of honey, you’ll want to give your yeast the best chance it has. A lot of modern yeasts can handle this, but it’s just best to give it a good head start. There are plenty of guides on how to do this on this website. Add about 5 tablespoons of the honey to the starter when you do it as well.
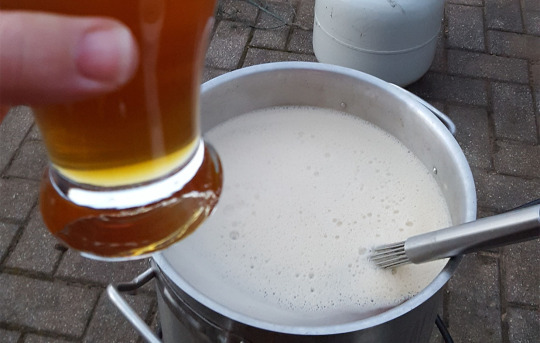
Extra Malty Braggot
Fermentables Hop Schedule Yeast
5 lbs Wildflower Honey
2.5 lbs Victory Malt
1.5 lbs Crystal 80 Malt
6 lbs Maris Otter Malt
1oz US Fuggle @60
1oz US Fuggle @10
1oz US Fuggle @0
High Tolerance English Yeast
Notes: Use hop bags so they can be removed prior to whirlpooling.
OG: 1.092 FG: 1.012 ABV: 10.5%
As far as brew day goes, outside of making sure you got the starter, most of the day is the same as usual. The biggest question that arises is, “When do I add the honey?” I’ve seen differing opinions on this one. I’ve seen some people state that one should add the honey prior to the boil to give time for everything to meld. Unfortunately, this ends up being the same process that boils some of the other flavor out of honey bought in stores. Talking to some seasoned brewers and beekeepers, the best time to do it is at flame out, or slightly afterward. This gives the chance for you to stir the honey in while warm, but you won’t boil all the aromas and other flavors out of the beer. Consider that undiluted honey has been in history as a topical antibiotic, the chances of any kind of infection are low, so you can add it as late as a few days into fermentation.
Afterward, cool the beer and ferment the beer as normal. Another thing to note if you decide to make a braggot, they age very well. I know my buddy who owns a brew supply shop commented that, “When you finish your last bottle of mead, that’s probably when you should have bottled it.” A similar idea can hold true to braggots. This gives time for all the flavors to continue to meld and the alcohol flavor to blend in with everything. Best way to find the age you like is to try some when it’s done and set some aside to age as well.
by Andrew “BrewinRev” D.
Andrew is a pastor, a father, a hunter, and now a home brewer. After years of wanting to try it but allowing myself to be intimidated away from it, my wife and I finally took the plunge last year and it’s one of the best things to do over the weekend (outside of drinking the beer) When I’m not serving my congregation, I’m either in the woods hunting, making animals into delicious sausages or smoked meats, playing with my toddler daughter (read: teaching her the ropes of brewing beer), or on my patio with a beer in hand, a friend with me, and brewing up a new batch. Been learning a lot on brewing over the last six months with more to learn in the coming years! Prost!
Want to Read More About Braggots? Check Out This Article »
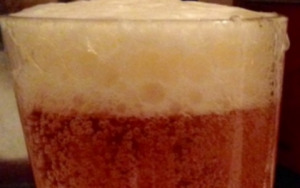
Crisp, malty, and maybe hoppy beer; combined with aromatic, bright floral honey. Add a bit of carbonation (or maybe not) and what do you get? A braggot. A braggot is a type of mead that also uses brewing ingredients like hops, malt, or both. They are typically carbonated similar to beer and finish dryer due to the fermentability of honey. When does a honey ale become a braggot? The Rule of thumb for most…
Brewing A Braggot – Meads Combined with Malted Barley was originally published on HomeBrewTalk.com
1 note
·
View note
Text
Do You Really Ruin Gelatin If You Boil It? Experiment Time.
I have been brewing for some 5 years, 2 of those also as a head-brewer at a local brewery. I don’t have any official education supporting my brewing skills, I gained all of them myself, reading forums, books and articles like this, but most importantly, by experimenting. The information you get from other homebrewers can be useful, but as you probably know, you must take it with a pinch of salt. So many times you read posts from people who are claiming something, but then, after some time, you find out they were completely wrong. Sometimes the wrong information just robs you of your time, sometimes it ruins a brew or two, or slows down your progress. Some of these rumors are so widely spread that the counter-information stands no chance. One of the very common rumors is that you mustn’t boil your gelatin solution (that many of us use as a clearing agent), because you DENATURE the proteins present and it no longer does its job. However, as everybody knows, it is a good idea to sanitize everything that touches the beer in its cold stage, so being able to boil the gelatin would really be convenient. This is the reason for me publishing this article, to bring (what seems to be) true to the masses. Just a little disclaimer, I try not to be a hypocrite, so I admit right now that all you read in this article are just my theorems and information I got from the internet, often simplified, as well as an experiment. There are, however, is some really nice evidence that supports some of them.
What is Gelatin?
It is a protein substance derived from collagen. Collagen is the main structural protein in bodies of animals. It is insoluble in water, but at certain conditions, it can be broken down by water molecules, an irreversible process called hydrolysis. And this is how gelatin is made. Gelatin is to collagen is what dextrins are to starch. The collagen is usually sourced from animal skin, bones, and hoof as these are the most collagen-rich parts. It has to be extracted first to get rid of fat, minerals and other substances, but the actual breakdown into gelatin is then done partial DENATURATION by BOILING it in water. It is then even sterilised by heating to 140°C (375°F) and dried to the solid form.
How and Why Gelatin Works?
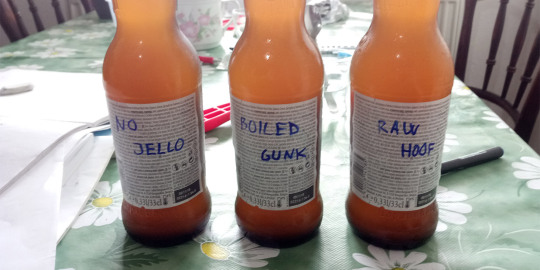
First, let’s talk terminal velocity of spherical objects in fluid (yes, it’s physics and yes, it’s beautiful). Now this will be very inaccurate due to million kinds of little simplifications here, but still sufficient to give you a point. Imagine two spherical objects (both the same material) of different sizes. In vacuum, they are going to fall at the exact same speed (accelerating, actually, but at the same rate). In fluids, things get much more complicated, as the drag comes into play. The bigger ball obviously has more drag, but it is also heavier, in fact, so much heavier that it counterbalances the drag difference and the bigger ball is falling faster than the small one. At some point (rather quickly) both balls reach their terminal velocity and they no longer accelerate, they fall at constant speed. This terminal velocity is given by this formula:
v=29ρp-ρfμgR2
In the equation, everything except R (which is the ball radius) is constant.
See the power of it? Ball 10 times the diameter is going to fall 100 times faster.
Now the balls are the tiny little particles that make your brew cloudy. Yeast is one kind of these particles and while it is by no means the tiniest, it is still so small that it’s terminal velocity only allows it to fall very slowly. It has, however, one very useful feature, the feature called flocculation. Some strains (Fuller’s for example) flocculate so well, that you can see chunks as big as 10mm in your starter. And as the formula higher up says, the bigger the particle, the higher the settling speed. This is why Belgian powdery strains take ages to settle. A bigger problem, however, comes with particles smaller than yeast (they are usually proteins). They are (and thus their settling velocity is) so incredibly small, that they seem not to settle at all. They don’t even flocculate. What’s more, some particles are even smaller, so small, actually, that they are affected by some really minor molecular forces to such an extent, that they really do not settle. These are called true colloids.
This is why you want to add gelatin. Gelatin has a strong positive charge in acidic solutions, which results in electrostatic attraction between gelatin macromolecule and our tiny little haze particles and voilà, the particles suddenly flocculate.
The Experiment
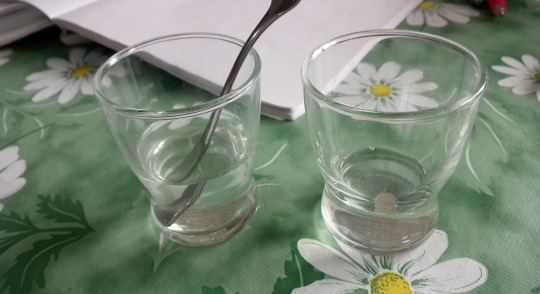
The experiment was rather straight-forward. I bought three bottles of the same cloudy wheat beer (Hoegaarden). I let them cool in my kegerator for 12 hours to a serving temperature of 4°C. I prepared two solutions of gelatin. I decided to try the two extremes, so I diluted the first portion of gelatin (0,5g) in 40ml of roughly 30°C (86°F) water (a full hour of stirring) and I boiled the second portion (0,5g) in 45ml of water (to make up for the boiloff) for one minute.
I then opened two of the bottles and injected 5ml of one of the solutions to each of them and capped them. I gave all three bottles a good shake, so they have the same starting point.
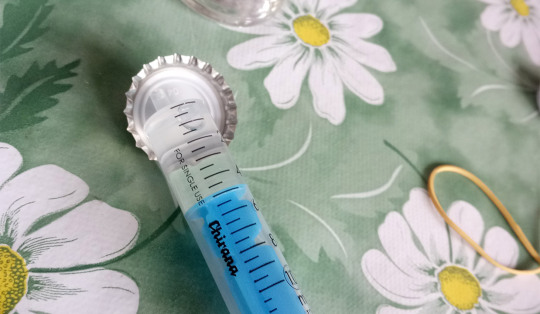
I put the bottles back to the fridge and decided to wait 48 hours for the magic to happen. After 24 hours I checked the progress. Both bottles with gelatin were visibly less cloudy than the untouched one, but not clear yet.
After the 48 hours, I took the bottles out for sampling.
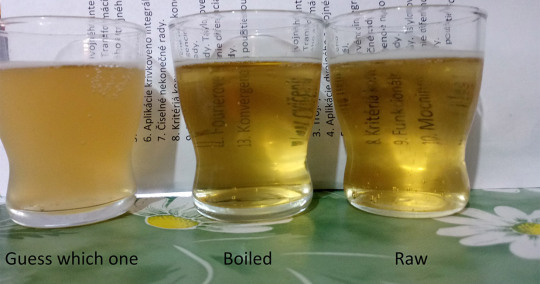
As you can see, the myth is busted. I tasted them, and I can tell the clear ones were definitely crisper and also seemed to have slightly lighter body and slightly more banana taste to them. The taste difference was similar to hefeweizen vs kristalweizen and I preferred the hazy one. It suited the witbier style better. I should also say that while the beer in the bottle was clear, the sediment was easy to agitate. This applied to both samples.
Conclusion
Boil your gelatin. It is safer, much quicker and makes little-to-no difference. And also, don’t believe everything people say and don’t spread it if you don’t have at least some clues that it is actually true.

by Robert Solarik
My name is Robert (but I like to call myself Robko). I was born, and I also live in Slovakia, a small country south of Poland. Ever since I was born, I have been curious how things work, which led to basically all my toys being disassembled at some point of their short lifespan. During high school times, however, I discovered the charm of homebrewing and after graduating, I was not really decided what university to proceed to. I don’t like doing things if I am not sure they make sense, so I got a job as a head-brewer in a small brewery, because that was my biggest passion at the time. After two successful years I finally decided for studies of mechatronics at a technical university in my hometown, and I am enjoying every bit of it. I am still brewing actively at home. It has been five years since I started.
Want to Read Part 2? Check Out This Article »

I decided to do an experiment to bring more light into another commonly discussed, gelatin related topic: “Do you have to cold crash before gelatin fining?” While with the last topic, opinions were quite polarized, some people saying boiling gelatin is a disaster, others being on my side, with this one, most people agree cold crashing is recommended. Let’s look how much of a difference it really makes!
What Exactly is a Chill Haze? Every homebrewer knows that sometimes, after putting a warm bottle of apparently clear beer into a refrigerator, the beer becomes hazy as it cools. Generally, some proteins are insoluble in beer, while others are soluble up to a certain concentration if certain…
Do You Really Ruin Gelatin If You Boil It? Experiment Time. was originally published on HomeBrewTalk.com
0 notes
Text
Getting Maple Syrup Flavor & Working with Bacon
Maple syrup is a fully fermentable sugar, so brewing with maple syrup will contribute to the alcohol content of your beer, but not necessarily the flavor. Whether you add the maple syrup to the mash, boil or bottle, brewing yeast will remove all of that natural taste. Luckily a few little tricks can bring the earthy-sweet taste of maple to your next brew.
Tips for Getting More Maple Flavor
Firstly, brew a style of beer that’s already quite sweet. Consider a mash profile with some cara-malt to lay a foundation of non-fermenting sugars. You’ll find dark beers work quite well, but you can also experiment with lighter ales if you want more of a session beer.
Next, consider adding a tiny touch of cinnamon, a clove or two and/or vanilla to a secondary fermenter. These spices can mimic some of the natural taste of maple syrup. When combined with the sweetness you’re already getting from the non-fermenting sugars, these additions can bring on the depth of flavor you’re looking for.
Now let’s get a little more serious. Try racking the beer onto some oak chips (or whatever brewing wood chips you prefer). This will impart some of the natural earthy flavors. If you’re feeling particularly adventurous, soak the oak chips in a little dark rum (or bourbon) for a day or so beforehand, but be careful; the rum can easily destroy the balance of flavor in the brew, so only use it to soak the wood chips. Do not add any extra rum to the brew unless that’s the taste you’re searching for. Also remember that maple syrup does not taste at all like rum, so this particular option won’t help you zero-in on the illusive maple flavor.
For this article, we experimented with a range of brews incorporating each of these methods to try and instill the best possible taste.
What About Maple Syrup During Packaging
We found that the maple flavor was more closely mimicked in the dark beer (a porter) and there was absolutely no difference in flavor due to the priming agent. Unfortunately, this means we can’t sneak in any extra maple when we bottle, but it also indicates that there’s no need to buy maple syrup instead of your favorite priming sugar.
The most obvious result of this test was that the simple beers are far better in the end. My personal favorite was the porter with only a little vanilla in the secondary and very few rum soaked wood chips (the chips in this experiment were actually from rum barrels). With just a hint of the pseudo-maple flavor and the toasted caramel sweetness of the malt, it gave the impression of a much more precise brew. As a point of comparison, the pilsner with cloves, cinnamon and a dash of extra rum was rubbish. Someone drank it, of course, but it was rubbish.
Working with Bacon
Finally, one more funky additive to consider is bacon. Obviously there is no meat flavor inherently nestled in the subtle aromas of maple syrup, but they make a great pair. Next time you fry up some of everyone’s favorite pork product, eat the bacon and throw a dash of a strong and mildly flavored spirit (perhaps vodka) into the dirty pan. Alcohol is a lovely solvent, so let the spirit sit there for a half an hour or so to soak up all the grease. You can even use a spatula to scrape up some of the crispy bits into the solution (don’t worry, you’ll be getting rid of them later. Then pour the foul looking liquid, chunks and all, into a small bottle or jar. Place a straw in the bottle or jar so that it travels through the surface of the liquid and leave the container at room temperature for a few days. Be warned, it will look absolutely disgusting, but you’re not going to drink the whole thing; you’re just drawing out some of the bacon flavor.
After a few days, put the container in the freezer. You’ll notice that a layer of fat has formed on the surface of the spirit and the straw is spearing through that layer. When it’s frozen, remove the straw and you’ll see a tiny hole in the rock-hard layer of fat. The alcohol will not have frozen and you can pour the bacon-flavored spirit into another container. You’ll also want to run this peculiar smelling stuff through a coffee filter to ensure it’s all spirit, and no fat particles or chunks get through. This concoction will add a meaty taste to your beer that may not be the most refreshing flavor, so consider adding a tiny dash to a small batch in case you decide later that the pork should have stayed in the pan.
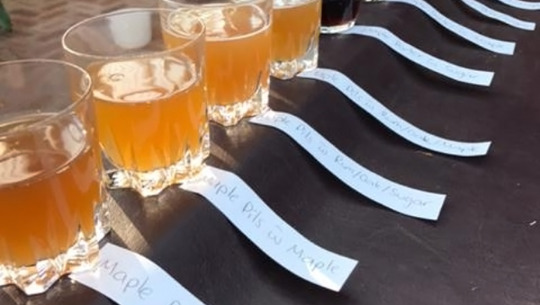
Now you can make maple-bacon beer BUT remember that simplicity will yield the best results.
by Daniel Norrish
Daniel is an Australian homebrewer, living on the west coast of the country. When he’s not boiling wort or waiting for brews to lager, he writes novels and watches rugby. Dan prefers strong, dark beers, but he’ll drink anything and he enjoys adding strange and peculiar flavors to beer.
Want to Read More About MapleS yrup? Check Out This Article »

Oh, and pure maple syrup, the lighter the grade, the better. I’ve told many a homebrewer about this technique, and it works just fine, giving good enough results to win numerous ribbons in homebrew competitions. It’s best to bottle from the keg before you’ve carbonated the beer, so right after you’ve transferred to the keg is the best time. You can bottle cold and carbonated beer, but beware as the addition of maple syrup will cause gushing before you get a chance to cap the bottle…
Getting Maple Syrup Flavor & Working with Bacon was originally published on HomeBrewTalk.com
0 notes
Text
Starting & Maintaining a Homebrew Club
Starting a homebrew club can be as casual and informal as a few friends getting together for a bottle share in a garage. Or, it can be a fully formed organization with a mission statement, membership guidelines and a board of members with specific roles. The great thing about starting a homebrew club is there are no rules! You can model your club after an existing club or you can completely make it up as you go. Whatever you decide, starting a homebrew club is a lot of fun and can come with many perks.
As a founding member and current Vice President of the SoCal Cerveceros, I can share how we got started and what we do to maintain and grow our homebrew club. Like so many first time homebrewers, I found myself searching online forums and visiting numerous sites trying to learn whatever I could. I bought a starter kit online and jumped right into brewing 1 gallon batches in my kitchen. With the exception of an ex-coworker from a decade earlier, I had never met another homebrewer. No one in my inner circle homebrewed and I had no one to turn to with questions. As I continued reading forums and checking out blogs, I realized there weren’t any Latino homebrew clubs around. In fact, there wasn’t a homebrew club in my area at all. Soon after, I became friends with a homebrewer named Agustin Ruelas, who is a member of the brewing collective, Brewjeria Company. Agustin shared the same observation and together we decided to start a homebrew club. Today, our club is in its third year and by default we are the biggest Latino based club in California, if not the United States. Full disclosure; we are not strictly a Latino homebrew club. We aim to promote diversity and acceptance of all interested brewers male and female. Our mission is to promote the art of homebrewing with a focus on local Latino communities.
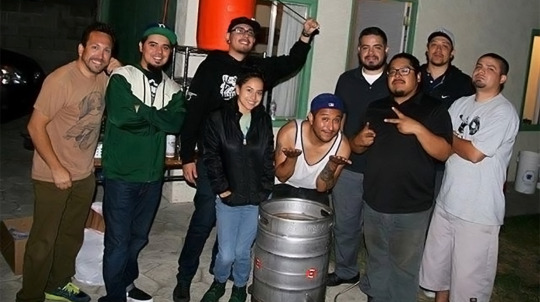
Getting Your Homebrew Club Started
First, determine why you want to start a club. This will help you going forward and you’ll know how involved you really want to be. If you’re looking just to hang out and share beers occasionally, then you can mention that when recruiting others. By having an idea of what kind of club you are interested in, it will help you to recruit like-minded brewers. Some people might be interested, but not want to commit to anything beyond sharing some beer. That’s great for a bottle share type of club. The SoCal Cerveceros was started to fill a void in the local homebrewing community and to act as a hub for brewers to develop and learn their craft. With that in mind, we had a clear idea of the kind of members we wanted to attract.
Once you’ve found a friend or two, who are interested in starting a club, begin recruiting. Start with those closest to you and go from there. The more people you ask the better your chances of finding recruits. When first starting SoCal Cerveceros, my one brewer friend and I took to Facebook and Twitter to get the word out. We posted a question asking if anyone was interested in joining a homebrew club or if any friends knew anyone who might be interested. It didn’t take long for us to find a few people. In our case, Facebook was most effective for our early recruitment. Word of mouth starts to spread once you have a few members. Visiting your local homebrew supply shop is a great resource as well. You can let the brewers who work there know you’re recruiting and you might be able to post a flyer promoting your soon to be club. If you don’t frequent any homebrew shops, you might try recruiting potential members at your favorite local pub, bar or craft beer hang out. If that is not an option for you, then social media will still work out fine.
Planning Your First Meeting
Once you have your first 2-3 people, set a date and time to hold your first meeting. Our first meeting was held in the garage of our future club president and had seven people attend. Most of the meeting was making introductions and getting to know each other a little better. We were lucky enough to have a member who had been in a club a few years prior. He shared some of the things that club did and it helped us shape some of our expectations and focus for the group. It’ll be helpful to go around and ask what each person is looking to get out of a homebrew club and what expectations anyone might have. Treat the first meeting like an ice breaker and try to get a sense of where everyone is at in their brewing skills and knowledge. This will give you a better idea of what kind of group you might have. The SoCal Cerveceros’ first meeting had a few seasoned brewers, a couple newbies (like myself) and a couple guys who didn’t brew, but who were craft beer aficionados.
A great piece of advice for meetings is to stay consistent. Select a day of the week and meet that same day every time. The SoCal Cerveceros hold meetings every third Friday of the month. During the first year we would each host a meeting and the host was responsible for finding the location. Most of the early meetings were held at people’s homes. We now hold meetings in public spaces like bars, restaurants and taprooms. On occasion we’ll meet up at someone’s home or a non-public space. You can do whatever works best for the club. Many clubs find a permanent home in a local tap room and always meet there. That’s great too!
Picking a Name

This took us longer to decide then we anticipated, but it will be helpful if you first determine what kind of homebrew club you are looking to establish. If it’s something casual like a few buddies having a bottle share once a month, then your name probably doesn’t have to be anything you spend too much time on. If your vision is to establish a club that’s more serious and involved, then you’re going to want take your time to come up with something unique. A few things to consider when naming your club; Is the name available on social media platforms (i.e., Facebook, Instagram, Twitter)? Is the domain name available to build a website? Can the name be easily used on marketing materials like stickers, coasters, t-shirts etc?
We decided on SoCal Cerveceros for a few obvious reasons. The name lets people know where we’re located and using the Spanish word for brewer speaks to the identity of our mostly bilingual members. Plus, the name was available across all main social media pages, including the domain name for our website. Think of it like naming one of your homebrews. Get everyone involved with suggestions and have fun picking out your new name. If you need a little inspiration for a name, you can visit the homebrew club directory under the “Community” page on the American Homebrewers Association website. That wraps up part one of Starting and Maintaining a Homebrew Club! Thanks for reading, and may your wort always ferment!
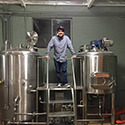
by Ray Ricky Rivera
Ray got his start homebrewing one gallon batches on his stove top, three and a half years ago. Shortly after, he co-founded the SoCal Cerveceros Homebrew club and currently serves as Vice President. SCC is the largest Latino based homebrew club in the state of California. Rivera is currently developing the Norwalk Brew House, a brewpub to be located in Norwalk,CA where he lives with his wife and three kids.
Check out this article on brewing competitions »
A little over a year ago I jumped into this awesome hobby of homebrewing. Now, twenty some batches in, I’ve moved from extract to all-grain, gotten a temperature controlled fermentation chamber, a handful of kegs, and all sorts of other fun gear. What I hadn’t done, was enter a competition. Sure, the local homebrew club had some monthly comps that I brought a bottle or two for, but I hadn’t gone ‘public’… yet. I was only 3 batches old last year when my Local Homebrew Store (LHBS) had their second annual people’s choice “brew off” that coincided…
Starting & Maintaining a Homebrew Club was originally published on HomeBrewTalk.com
0 notes
Text
Formulating Balanced Beer Recipes
I’ve spent a lot of time researching recipes for homebrewing, and everybody claims to have the best recipe that you need to try for yourself. I find this optimism refreshing since online reviews and comments are usually negative, but I also think homebrewers tend to be too optimistic about their creations simply because they made it. He who chops his own firewood gets twice the warmth right? A lot of times I’m looking for how much of a specific ingredient to use and it’s fun to see how different everybody’s threshold is for each ingredient. I know I’ve brewed beers that feature strawberries, rye, chocolate, honey, brown sugar, vanilla, or just an excessive amount of hops, and many times I don’t get enough out of that featured ingredient. On the other hand you have some beers that use too much of an ingredient and overpower your senses (I’m looking your way Christmas ales). Both scenarios can be frustrating, but there is a kind of beer that delivers on its promises without offending. We call those balanced beers.
What Makes a Balanced Beer?
First off, I don’t want you to think a balanced beer has to be void of all flavors to appease the masses. It can still have distinct flavors suitable to its style, but none of those flavors should be overpowering. For instance, you may still have some coffee notes in a balanced stout. Yet it doesn’t taste like a cold cup of Joe. A balanced IPA may still have an underlying bitterness. Yet it’s not like you’re biting a bar of soap. Both of these attributes are expected in their style and there’s nothing wrong with those flavors showing through in an appropriate amount.
If you compare most beer recipes, you’ll realize that they follow the same general formula for malts. To start out you use about 70-100% of a light base malt like 2 row, pale, or pilsner. Then you add in 0-30% of specialty malts like caramel, chocolate, or wheat to alter the color and flavor. This is a tried and true foundation for making a well-balanced beer. For example, there is no need to use pounds of chocolate malt in a stout to get the rich flavor or color you’re looking for. This can be backed up by several commercial breweries who have released homebrew sized recipes of their popular beers. Brooklyn Brewery shared the recipe for their popular Brooklyn Lager on their website’s blog. It calls for 9.6lbs of 2 row, 14oz of Munich, and 12oz of 60L caramel. Therefore, 86% of that beer is base malt, and 14% is specialty malts. Another 200+ commercial recipes can be seen in BrewDog’s DIY Dog. It’s a free document released by BrewDog that shows how to homebrew every beer they’ve created in the last decade. Looking at their flagship Punk IPA, it calls for 9.6lbs of extra pale malt and 0.55lbs of Caramalt. That makes their IPA 95% base malts and 5% specialty malts. MadTree also offers recipes for their beers on their website. Thundersnow, their popular Scottish ale, uses 10.25lbs of 2 row, 0.98lbs of caramel 90L, 0.73lbs of extra special, 0.73lbs of Victory, 0.34lbs of Melanoidin, 0.27lbs of chocolate rye, and 0.24lbs of dark chocolate. Despite making the most complicated grain bill known to man, they still ended up with 76% base malt and 24% specialty malts. Feel free to experiment with different amounts of malts, but don’t reinvent the wheel. The world’s most experienced brewers have already figured this out for us.
Using Hops to Create a Balanced Beer
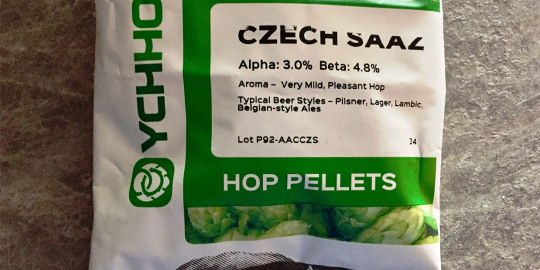
Hops can be more difficult to play with for several reasons. For starters every variety contains a unique blend of oils, flavors, and aromas. Then to further complicate things, annual crops can alter the levels of those oils making year to year batches inconsistent. If you do get a grasp on the potency of your hops, then you must figure out your utilization rate (how much of the oil you can get out of your hops) which depends on the gravity of your wort, how vigorous your boil is, how big your batch is, and many other variables. Furthermore, adding hops to your beer at different stages in the brewing process can yield more or less bitterness, flavor, and aroma. Understanding how each variable impacts your beer can be tedious, but luckily there are a few guidelines to help you achieve a balanced beer.
A basic schedule for hop additions would be as follows for a typical 60 minute boil. First, add bittering hops near the beginning of the boil (60 minutes). Even if you don’t like bitter beers, this is necessary to balance the sweetness from the malts in your finished beer. Since these hops will boil for a long time, you’ll end up destroying the more delicate compounds in the hops, and only be left with their bitterness. Next, add flavoring hops near the middle of the boil (30 minutes). Since these hops aren’t boiled as long, some of the delicate hop compounds remain in your finished beer and can add some depth and flavor. They also don’t contribute as much bitterness due to a shorter boil time. Finally, add your aroma hops near the end of the boil (5 minutes). Since these aren’t boiled for long, a lot of the delicate hop compounds remain in your finished beer to improve the hop aroma. The short boil time also means they add very little bitterness to your beer. You don’t need to follow this schedule strictly though and I recommend you experiment to learn more about timing’s impact. However, timing is the easy part. The more difficult part is figuring out how many hops to add at each stage.
As I mentioned before, every type of hop has a unique blend of oils in it. So certain hops can be better suited for bittering, while others may be better for adding flavor or aroma. This is based on the ratio of several different oils in each variety and means it’s not always easy to swap one type for another and achieve the same effect. Most hop websites like Yakima Valley, YCH, or 47 Hops have a chart or description for each hop to help guide you when creating a recipe. The most dominant oil in a hop is called its alpha acid. Packages usually display the alpha acid content to help you understand that hop’s bittering potential. A higher percentage means that hop is able to add more bitterness to your beer. In general, higher alpha acid hops (>10%) are better for bittering while lower alpha acid hops (<10%) are more mild and used for flavor and aroma. Another important factor for how much bitterness a hop will add to your beer is utilization. Utilization is how effective you are at boiling the oils out of your hops. The lower your boiling gravity is or the longer you boil your hops, the more oil you will be able to extract from them. The last piece of the puzzle is the final volume of your batch. Using all of these factors and a few simple equations, we can estimate the bitterness of a beer (expressed as International Bittering Units or IBU’s).
Let’s say we’re brewing a 5 gallon batch of amber ale and only adding 2oz of Fuggle hops for bittering. Our Fuggle hops contain 5% alpha acid. First we need to figure out how much bittering oil our hops will be adding to our wort. We can do this by calculating the AAU’s (alpha acid units) of our hop addition. This takes into account quality (alpha acid %) vs quantity (ounces of hops).
AAU = (ounces of hops) x (alpha acid %)
AAU = 2 x 5
AAU = 10
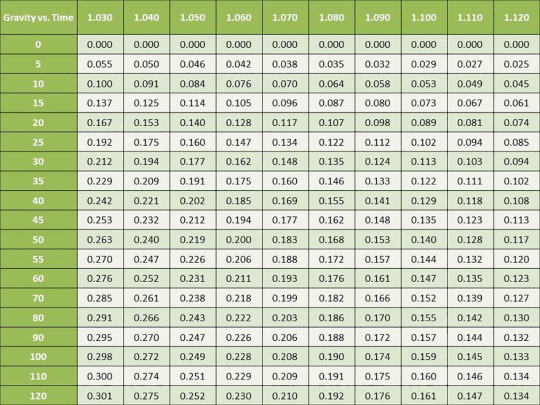
Next we need to figure out our utilization rate using the chart from John Palmer’s book “How To Brew”. Since we’re using these hops for bittering, we’ll boil them for 60 minutes. Let’s say we used 6lbs of amber DME to make our wort and are boiling 3 gallons in a small pot.
Boil Gravity = 1 + (pounds of DME x 0.04 gravity points per pound / gallons boiled)
Boil Gravity = 1 + (6 x 0.04 / 3)
Boil Gravity = 1 + (0.080)
Boil Gravity = 1.080
Now we can look at the table to see that a 60 minute boil for a 1.080 gravity wort gives us a utilization of 0.176. With that we have all the pieces we need to calculate IBU’s. So there’s no confusion, the “75” in the following equation is a conversion factor to allow us to use ounces and gallons in the equation. You didn’t overlook something in our earlier calculations.
IBU = AAU x Utilization x 75 / Finished Batch Volume
IBU = 10 x 0.176 x 75 / 5
IBU = 26.4
In this example our batch of amber ale would have about 26 IBU’s. If we wanted to do more hop additions for this recipe, then we’d need to do these calculations again for each addition, and add those IBU’s to the 26 IBU’s we already have. I use BeerTools Pro for creating my recipes, and the IBU calculator in that software is always very close to these calculations.
In my experience it’s more likely to not use enough hops and make a beer that’s too sweet. This has happened to me on styles that aren’t meant to be hoppy (so I intentionally go light on the hops) and high alcohol beers (which have poor hop utilization and more residual sugars from the large amount of malts) which both lead to a sweeter beer. The final beer ends up not having quite enough bitterness to counter balance the sweetness of the malt. It doesn’t necessarily make an awful beer, but it can leave the beer with a lot of room for improvement. I think it’s misunderstood by a lot of homebrewers on how many hops are appropriate for styles other than IPA’s. Where some people will simply say more is better.
Your Beer’s Water Profile Also Plays a Role
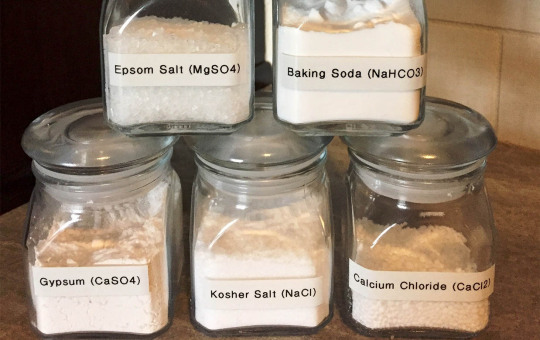
It’s undeniable that water plays a large role in brewing, yet the ingredient that makes up the majority of beer is often overlooked. Brewing water can be a very complicated topic when you dive into the details, but there are a few simple things you can do to improve your brews without majoring in chemistry. My first bit of advice is if your tap water tastes or smells odd don’t use it for brewing. I know tap water is cheap and easy to use, but starting with a bad ingredient will do you no favors in the end. It’s like making a cake with dirt instead of flour, and hoping that baking it and covering it with frosting will magically make it taste normal when it’s done. If you do insist on using tap water, it always helps to run it through a charcoal water filter first. That will help reduce contaminants and chlorine (if present) which is not beneficial in any amount. Even with that though, your tap water may still contain low or high levels of various minerals which can make it well-suited for some types of beer, but less so for others. It’ll vary depending on your local water supplier so there’s no single piece of advice that can cover all the different types of water in the world. I really don’t like guess work, so I prefer to buy distilled water from my local grocery store (~$0.90/gal) and “build up” my mineral profile. Distilled water has no minerals in it so you know you’re starting with a clean slate every time. From there I use the EZWaterCalculator (http://www.ezwatercalculator.com/) to figure out which minerals I need to add to my distilled water, to “build up” certain minerals. During the process, the calculator also helps you find a proper pH for your mash which is useful. To me this feels like a more precise method, and it’s a small amount of work and money to improve your beer.
Part of the fun for homebrewers is making whatever kind of beer you want. You can make it as alcoholic as you want, use whatever ingredients you want, and ultimately you decide what the beer tastes like. Some brewers are more daring when it comes to trying new ingredients, but no matter what you add, everybody’s goal is to make their beer taste good. Unfortunately, this is often easier said than done. The first homebrew that comes to my mind for being unbalanced is a grapefruit double IPA that I made a few years ago. I was trying to imitate the Grapefruit Sculpin brewed by Ballast Point. When I first tried the Ballast Point beer I was extremely impressed. It had a strong, clean taste of grapefruit and the backbone of a solid IPA. However, my version ended up less impressive. After some research I had chosen to add grapefruit peels to my secondary to get that signature flavor. So I peeled 6 giant grapefruits and threw the peels into my secondary for 10 days. At that point I didn’t realize how far 6 peels would take me for a 5 gallon batch. After kegging the beer and pulling my first pint, I left these exact notes in my binder for future Mike. “Sample is overwhelmingly grapefruity. Tastes and smells like the strong bitter oils from the peel. Good, but hoping that it mellows/blends in better. Too strong right now. Borderline taste of citrus hand sanitizer.” Unfortunately it didn’t get better. My hand sanitizer beer soon developed a soapy taste which left me pouring the batch down the drain. Ironically, this is where all Dawn eventually ends up anyways. I would like to note though, that I had pulled an 8oz sample when racking to secondary, and added a small piece of grapefruit peel to the plastic bottle to imitate my final beer. After I force carbonated the sample, a buddy and I drank it 8 hours later. At that time we were both very impressed with the beer. It had an authentic grapefruit flavor and an amazingly fresh aroma. I was on the right path but over did it. If I were to brew this beer again, I would try 1 grapefruit peel for the last 1 day in secondary. Maybe then I could recreate that delicious sample.
If you think of balance as a teeter totter, you can’t have one side that’s completely empty. The sweetness from the malts needs to be balanced by the bitterness from the hops. Water shouldn’t have absolutely no minerals or an extremely high amount of 1 mineral. Adding 1 grapefruit peel might not be enough, but 6 peels is definitely too many. In the end each brewer’s preference decides where to put the fulcrum to balance the teeter totter. Everybody still has the same goal though, which is to not leave one end sitting on the ground.

by Mike Camera
Mike is a Cleveland, OH native that has been homebrewing for about 5 years. He mainly focuses on making good beer, but has also made some bad ciders in the past. His other deep passion is for cars, which led him to get a degree in Mechanical Engineering at the University of Toledo. He now lives in Columbus, OH with his beautiful wife and 2 dachshunds. He works full time at Honda’s R&D facility, where he’s an on-site engineer for a supplier called L&L Products. In a sense he likes drinking and driving, but of course not in that order. Fast beers and great cars are good for the soul. Yes you read that correctly.
Learn more about balanced grain bills »

After most of us have a few brew days behind us, and possibly a few beers in our belly, we get the bright idea that we can make a stellar recipe…on our first try. As I like to say, “Even a blind squirrel finds a nut once in awhile.” However, chances are that squirrel is not you! I remember my first recipe – a southern English brown ale. I looked at the BJCP guidelines for 11B and saw there was a large emphasis on the “sweetness” in this style. I proceed to throw over 2-lbs of crystal 60L malt in that five gallon recipe and used very little hops which contributed to a low bitterness…
Formulating Balanced Beer Recipes was originally published on HomeBrewTalk.com
0 notes