
foondiworkshops
Foondi
An African industrial design company targeted at developing affordable, high-tech products for emerging markets. www.foondiworkshops.com
4 posts
Don't wanna be here? Send us removal request.
Last Seen Blogs

kookminrm
Kim Jong Kook & Jeon So Min

bellabooty9258
Untitled

mommypieck
in between satosugu

adraydoux
Adray Doux

annetpeas
Annet Peas
Text
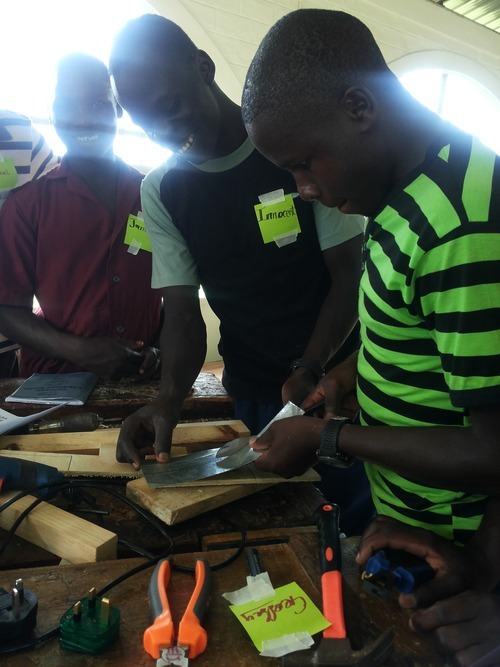
Wood block phone charger workshop in Uganda
On Saturday afternoon, Yvette and I headed to Mpigi in Uganda which is about an hour from the capital, Kampala. Watoto Church Vocation Training Institutein Mpigi is based at the heart of a village and is home to hundreds of students, most of whom are orphans and some of whom come from the nearby villages.
Many homes in the villages do not have access to electricity and use candles for lighting. While most people have phones, you need to pay 500 UGX ($0.20) to charge you phone in town. Like several places in Uganda, boda bodas (motorcycles) are used for everywhere transport. What if people could charge their phones using the battery from a boda boda that more easily accessible than a charging shop? What if boda boda drivers could build or buy these portable mobile chargers and earn some extra money? We ventured out to Watoto Church training institute to find out.
Watoto Church | Vocation Technical Institute
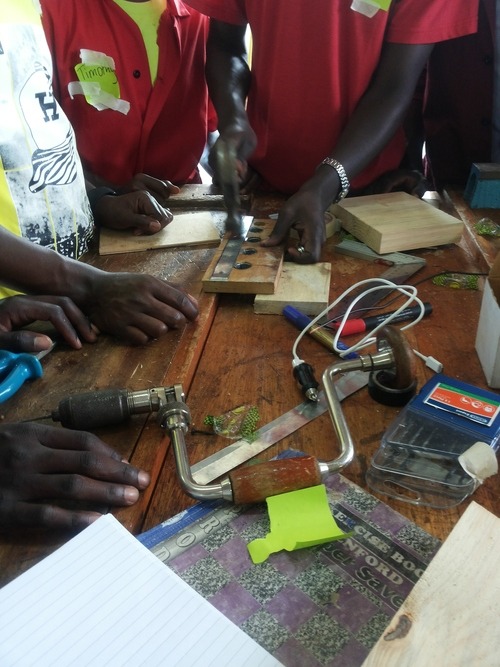
Livingston Sebyatika, one of the institute’s administrators, gathered together 15 students from the technical school. These students, in their late teens, are currently studying carpentry, electrical installation and metalwork at the centre’s technical institute. Asked what they plan on doing after leaving the institute? Most students want to become adept engineers and designers, something that come through strongly as we carried out the workshop.
Rolling up our sleeves and diving in
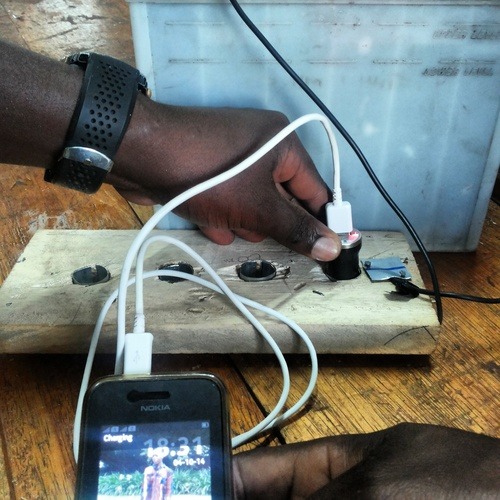
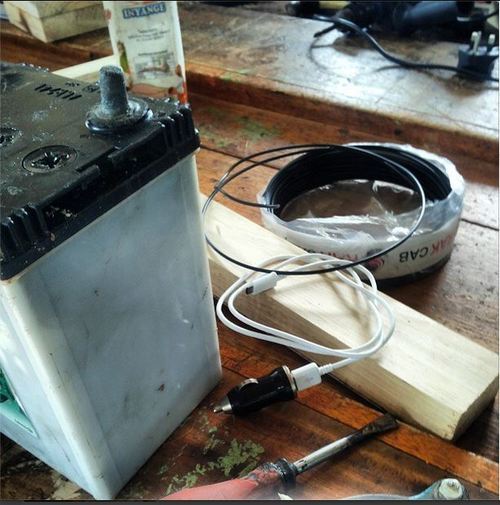
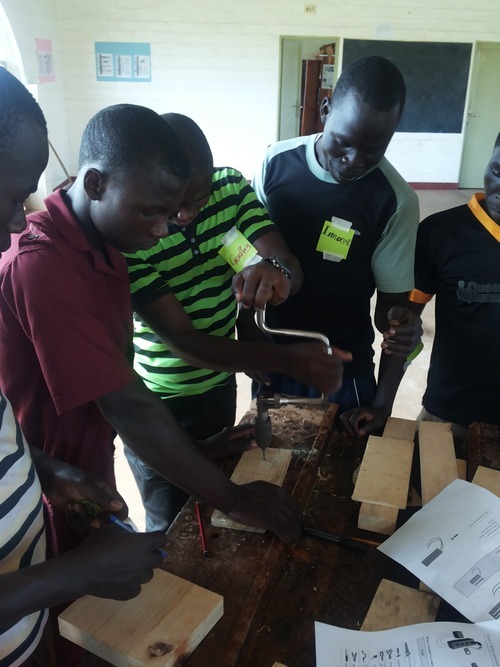
Our plan for the afternoon was to build a wooden phone block charger. How? Simply by using a 12v car/motorcycle battery, a car phone charger, wood, sheet metal, wires and a 13A fuse.
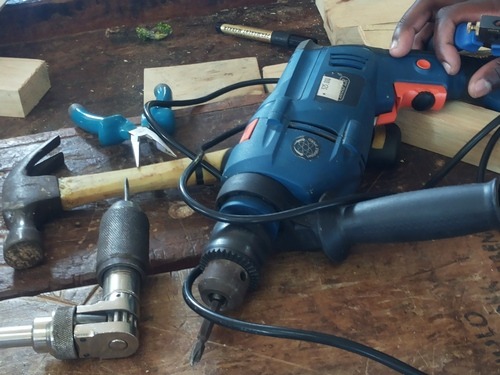
We put together the tools and materials, split the students into two team, rolled up our sleeves and dived right in to the build-it session. A build-it is a guided design activity aimed at systematically teaching an engineering concept. It also teaches the use of hand basic tools and fabrication processes.
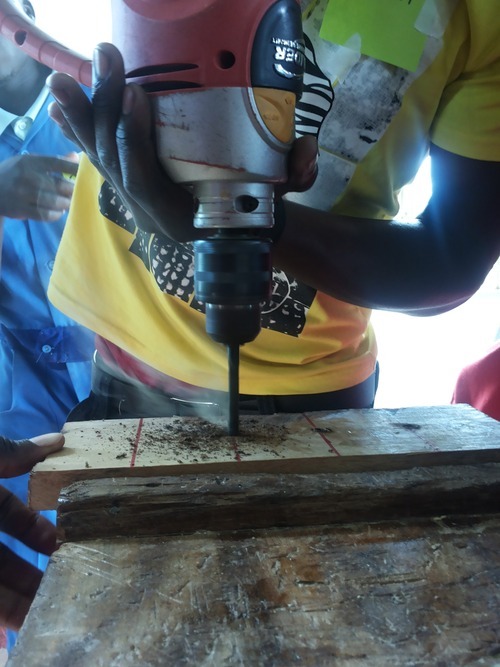
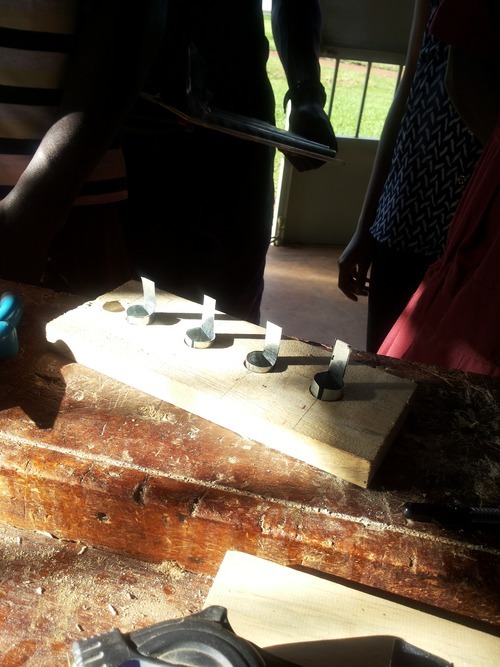
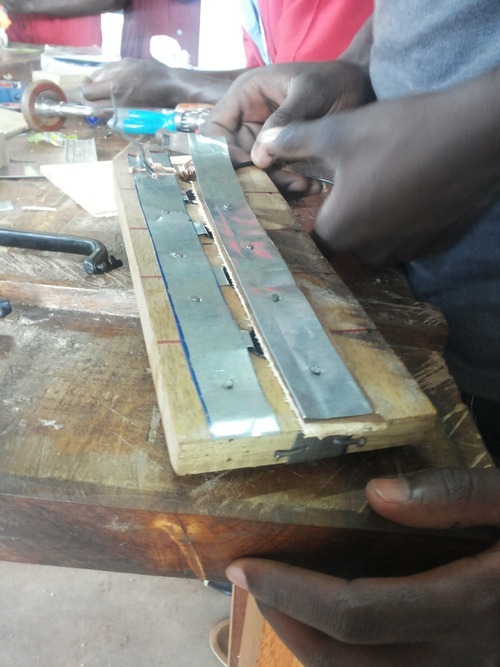
The first step was to prepare the wooden block. This is where the phone charger would be plugged into so we needed to make 4 charging ports using a 7/8” drill bit. Alternatively, you could use a brace and bits of the same size (which is what we did when at some point we encoutered a power interruption)
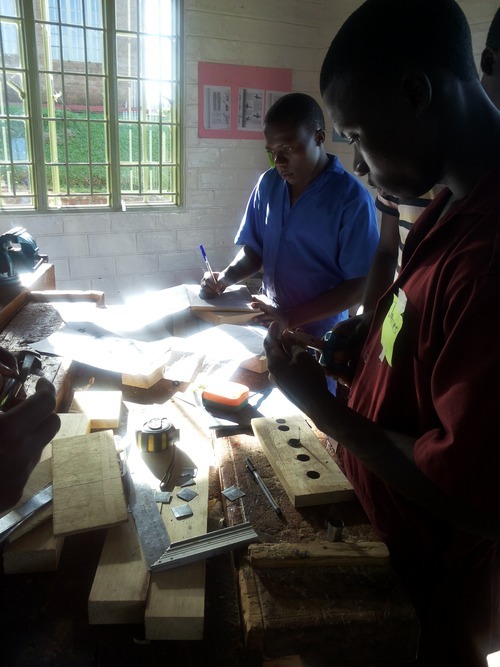
Now for conduction purposes, we cut and bent the sheet metal to form cylindrical inserts for the four holes that we had previously drilled. The tabs from these cylindrical inserts would stick out of the board and form the negative terminal of the circuit.
With the remaining sheet metal, we cut out the positive terminal for the circuit. This sheet was nailed over the holes. A second sheet was then nailed over the tabs for the negative terminal.

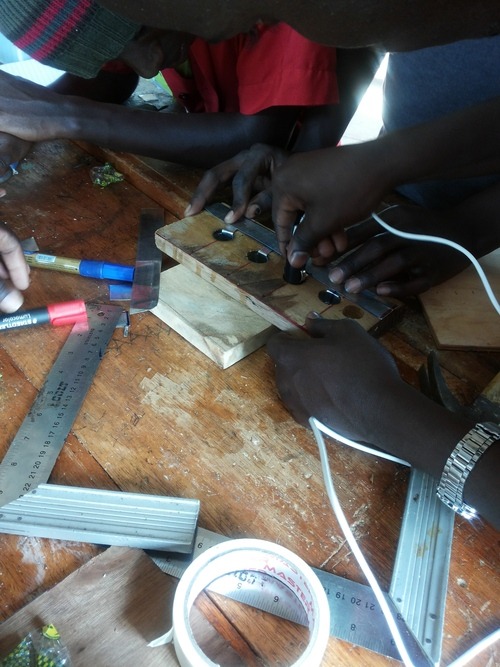
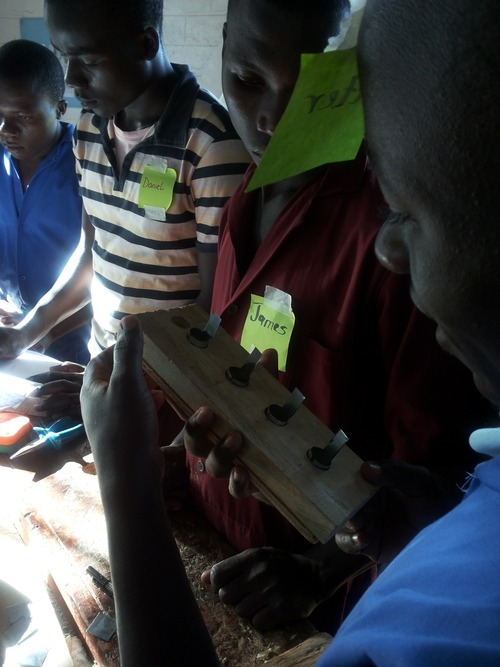
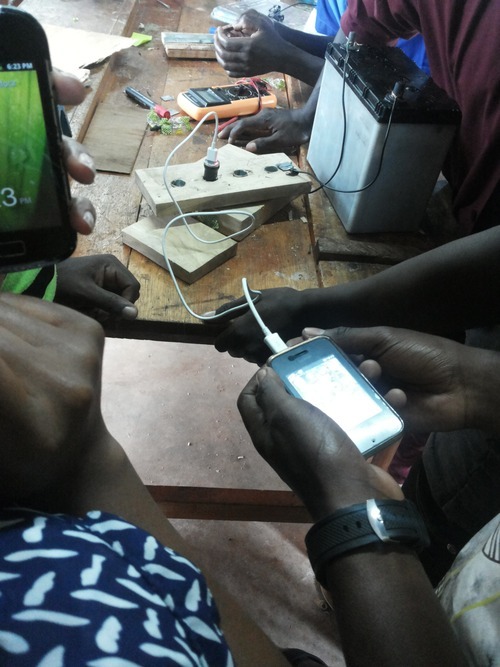
Lastly, we connected the positive terminal using a wire and 13A fuse to the battery. After ensuring we had a complete circuit and that there were no short circuits and went on to test and power up the phone. And it worked! The students were so excited that their first reaction was to build more phone chargers and start a business sell them in town. They could definitely see how these units would come in handy in the neighbouring town and village.
Reflections
Great tools make everything run more smoothly, and the outcome meets the design requiremets of the build-it activity. Our team is deeply grateful to the vocation institute which shared their tools with us for the workshop.
At some point, Timothy’s (one of the team leads) group’s wooden block broke in half as they were nailing the pieces, their first reaction was ,”That’s easy to fix. We’ll just hold it together with a metal piece and some nails.” And they did. And it worked perfectly.
Having a smart, energetic and driven team of participants made the workshop have more meaningful and have impact as they were eager to learn a new technology that could solve a local challenge. What also stood out greatly was their dexterity and attention to detail, at every point of the build-it activity. I’m excited to see what they will have done with the technology months from now.

Future plans
Foondi plans to continue working with these students by following up on this phone charger project as well as conducting more creative capacity building sessions with them.
We’re looking forward to holding more workshops with relevant projects to the communities we work with. We want to see more people to make use of their hands-on skills and design background to develop tangible appropriate technologies for their communities.
Our workshops will continue to provide a platform for problem setting, designing and prototyping entrepreneurial-based ventures.
~ Juliet Wanyiri (Founder- Foondi Workshops)
4 notes
·
View notes
Link
MSc Product Design Engineering. Project: A Low Cost Manufacturing Tool for Informal Sector Artisanry (‘Jua Kali’) in Kenya.
The Kitchen Exhaust Hoods that Maina’s Enterprise Produces
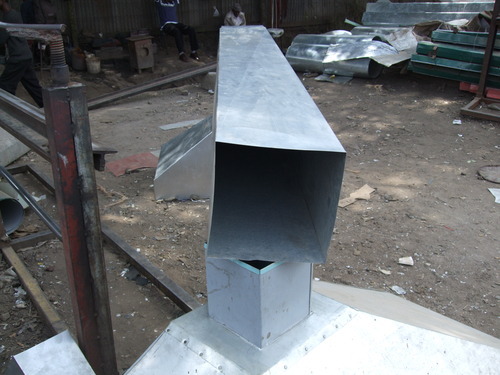
Maina works alongside his colleagues in Kamukunji, one of the constituencies in Nairobi with the greatest...
1 note
·
View note
Link
MSc Product Design Engineering. Project: A Low Cost Manufacturing Tool for Informal Sector Artisanry (‘Jua Kali’) in Kenya.
Emilio Beating a Stack of Recycled Aluminium Sheets by Use of a Mallet to Produce Cooking Pans
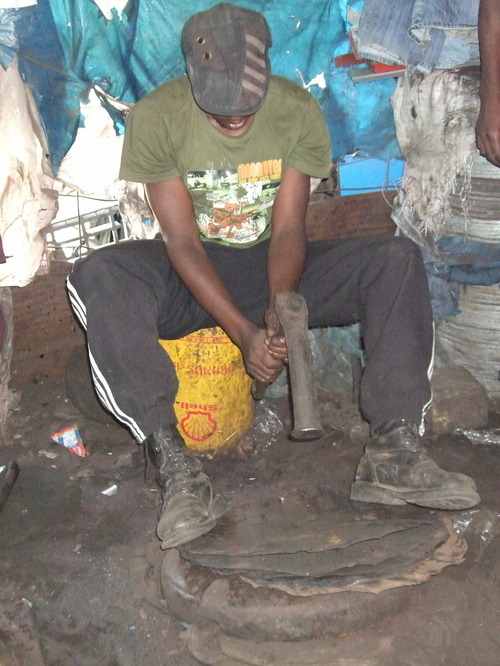
Emilio, like Maina (discussed in the previous blog-post) works in...
1 note
·
View note
Text
Building a Bici-Blender
The Kijani Engineering team began working on the green roof project about a month ago as part of their larger goal of connecting artists, designers and engineers to build amazing projects together. How did they do this? The team worked with two visual artists from Kuona Trust - Cyrus Kabiru and Tonney Mugo - who helped add gusto to the design of the green roof by incorporating glass work and metal work so that the roof was completely transformed from standard green roof design to one that incorporated functional art
A bit of history here on why green roofs and such a great idea for modern architecture in Africa. Green roofs, covered with vegetation (grasses and flowers), have been around for centuries in Northern Scandinavia.
Green roofs are great not only for the added aesthetics, they also last longer than conventional roofs as well as conserve energy and water.This climate-friendly technology has the added advantage of helping curb green house gases.

Picture of the green roof of the Sky Garden in Singapore
Architects are now incorporating green roofs in modern architecture, with the Coca Cola East Africa Headquarters being among the first in the region.
Lillian, Jessica and Juliet (that's me) developed four green roof prototypes - the first with metal propellers made by Cyrus and second prototype built by Tonney using glass bottles. The remaining two were standard wooden designs. What’s interesting is that the glass not only looked great when the sun shone through, it also helped retain the moisture in the soil so that you wouldn’t have to worry about watering the plants on your roof. Pretty neat, right? These are just two of the amazing ways one can customize their green roof so that if you wanted one with both glass and metal, you could easily have one designed and built for you.
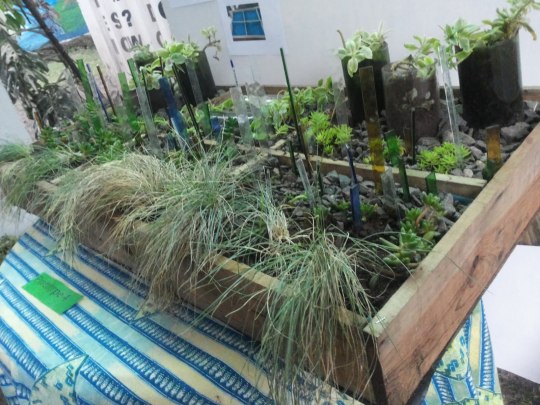
Picture of a green roof with glass work
What would you do if, hypothetically, you were in the middle of nowhere with a basket of fruits, a bicycle, a bike hub and some wood and screws? You’re probably wondering where I’m going with this. Bear with me, I’ll get there in a minute. But first, haven’t you ever been upcountry visit your grandparents or on a family reunion and there are all these delicious fruits from the shamba. Worse still, the sodas have run out and you really aren’t up for your Cucu’s (grandma’s) chai. At that moment, there isn’t much you wouldn’t give for an ice-cold glass of your favourite juice or smoothie!
With in this mind, Foondi Workshops held a bici-blender workshop to teach anyone interested on how to build and power a blender simply using a bike.
A bit of background on Foondi Workshops - Foondi was inspired by MIT D-Lab's annual International Development Design Summit (IDDS) that brings together diverse groups of people to develop solutions together with among the world's poorest communities. Juliet Wanyiri attended the 2012 summit in Brazil where she worked with a diverse team to develop a sustainable sanitation system for a community based in Sao Paulo’s rural area. Inspired by this experience, she set up Foondi as a way to share the knowledge she gained at IDDS as well as hold workshops that bring together the arts and the sciences to collaboratively design solutions for the African market.
How does this work? Participants from different backgrounds are taken through hands-on design sessions where they are gain experience on both identifying challenges and their solutions. Moreover, participants develop these solutions iteratively until the final product meets the users needs and solves the challenge faced. In order to create sustainable and appropriate technology, this design work is done while working closely with the affected community and local stakeholders.
Now, back to the bici-blender workshop. Foondi brought together a diverse group for a session on pedal powered technology. In Africa, where more people have access to a bike than to electricity, pedal powered technology offers an affordable, sustainable and scalable form of alternative energy.
Participants at the bici-blender workshop
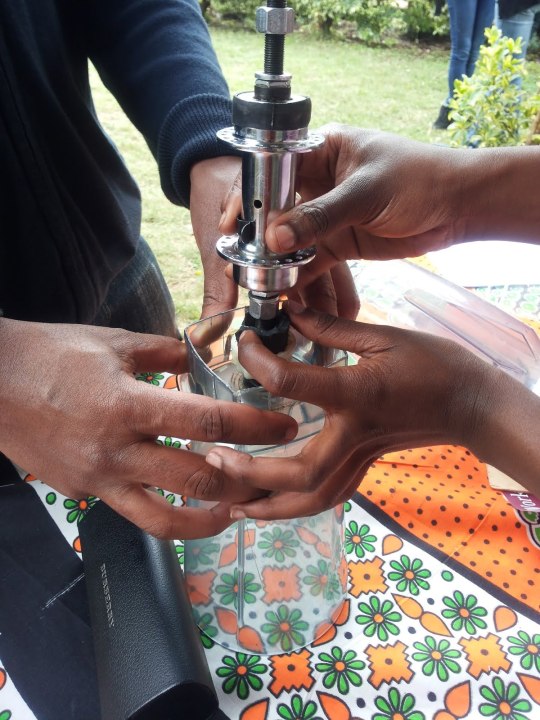
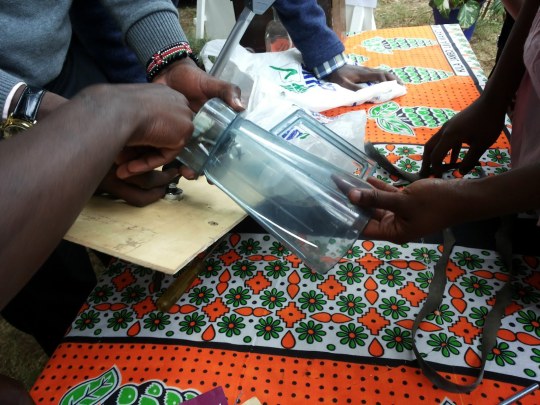
The design challenge was to build a pedal powered blender dubbed a “bici-blender”. This worked by using the rotation of the rear wheel to turn that inner blade of an old blender jug. In our case, we used a blender jug for convenience sake that was fitted with a old bicycle hub to the bottom of the jug so that it could make use of the rotation of the rear tyre.
Here’s the list of the materials and tools we used:
Materials:
1 - One litre plastic jug
1- Bicycle
1- Hub from a bicycle
2- Wood blocks
4- one inch screws and nuts
Soft rubber (for the bottom of the hub).
An old blender jug already fitted with a blade. Alternatively, a stainless steel blade can be fitted at the bottom of an ordinary jug
Tools:
Power drill & drill bits
Wood saw & hack saw
Screw driver
Tape measure
Hammer
Clamp
File
Participants at the Foondi workshop starting work on their bici-blender projects
After some pizza and soda, we had an introduction of pedal powered technology; what it’s about, it’s uses and project ideas. We then split the participants into two team and gave them the challenge on working together to build the bici-blender using the materials provided. They were free to veer off the instructions in the manual provided that the bici-blender maintained it’s intended functionality.
The Foondi team had an added challenge for each of the team. You see, ideally, the bici-blender works best when using a bike with a saddle at the back (blackie in Kenyan-speak). The reason being that you need to support the blender jug on the saddle so that the rider can freely peddle away as the blender is at work.
This worked out well as a great learning point for the participants on design constraints - adapting the initial design to suit the available materials, a lesson our team felt would be great for the participants to go home with. So the two teams formed each worked on building their “bici-blender” under the added constraint of having to prop up the rear wheel during the prototyping session as well as using rubber to secure the blender onto the hub. This added a competitive edge to the workshop, with each team working hard and thinking about the best way to raise the bike and ensuring its stability while pedaling.
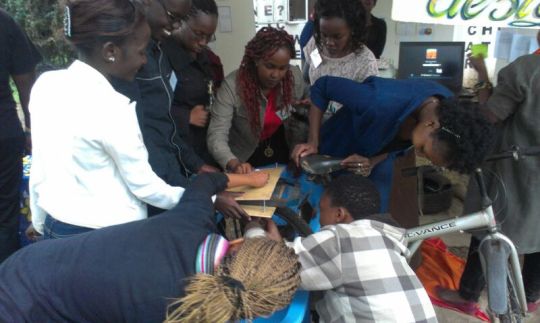
Teams finalising their bici-blender projects
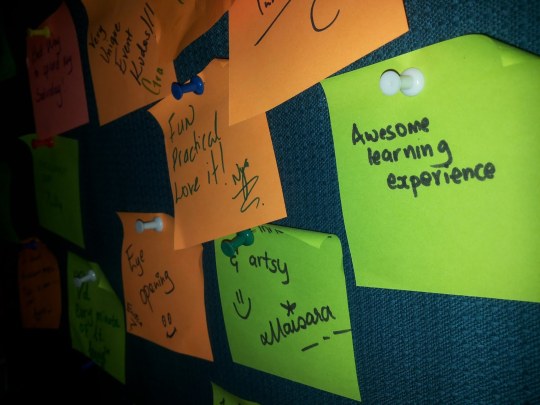
At the end of the day, we had two different bici-blender designs each with unique strengths in terms of stability and design properties. The overall experience was a fun, interactive design workshop where the participants got to interact on both an intellectual as well as social level, and think about their design challenges creativity.
With this, our vision of co-creation and capacity building was achieved. As a homegrown company, we strongly believe in the capacity in Kenya and believe in providing communities with the skills and tools to become innovators and develop new technologies rather than providing ready-made solutions.
Foondi will continue to hold design workshops that offers participants of our workshops a unique avenue to come up with and test viable technological innovations that have a lasting impact on the developing world. Our goal is to work more closely with the semi-skilled artisans working in carpentry, metalwork and wood work.
See you at our next workshop!
Do stay in touch!
foondi.strikingly.com
1 note
·
View note