
danrpaulsen
Delicious Art
The art of @danRpaulsen
/ 3D animator and game developer / These posts are my own
77 posts
Don't wanna be here? Send us removal request.
Last Seen Blogs

saladfly
Salad Fly

onlineprofessionals
Online Professionals

akihiro0917
Akihiro.I


soslua69
FUTURO HERÓI
Photo
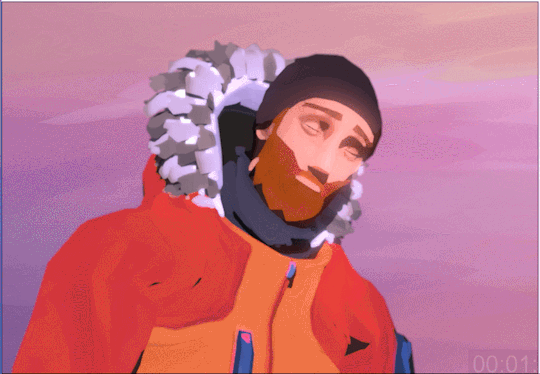
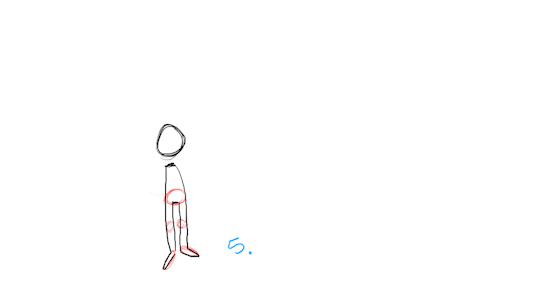
Small gif taken from the short-film “Arctic” I directed during the MA.
2 notes
·
View notes
Text
Solar System Script
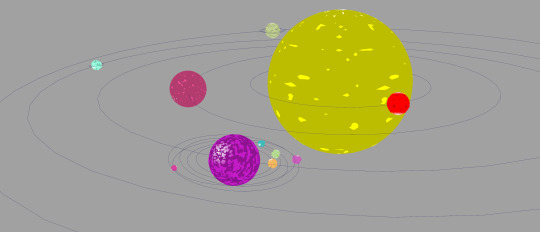
For the MA, I delivered a scripting assignment at the beginning of the year. It was a python script in Maya that allows the creation of an animated solar system.
You can find the script on GitHub
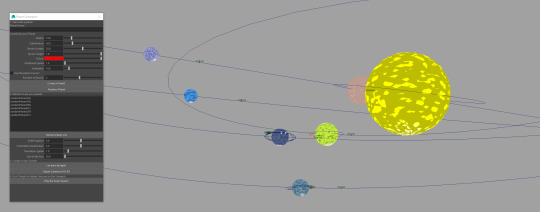
The latest version can be found on GitHub, and hopefully I’ll give it one or two more updates. As it has some issues I couldn’t resolve in time for delivery. Plus now I noticed that additional definitions (or even classes) could have done the trick.
The file has a ReadMe so that you can generate your own planets in Maya. The script generates a sphere, then applies a textureDeformer node. The deformer is connected to a noise node. Another sphere is generated without the deformations, to simulate water. A surface shader is assigned to each of them, with a defined color from the UI, the non-deformed sphere has a lower value. The spheres are then grouped and animated through an expression. And lastly stored in a global list.
The solar system creates a sun, then runs through all the items in the list and generates a curve to whom each planet is attached to. The motion path speed is defined by the size of the planet and the speed factor in the UI. Each orbit takes the size of the previous planet and adds a random value to the next one, in order to avoid any overlapping. Finally, the script adjusts the time slider, the far clip plane of the camera, frames the solar system and plays the animation.
Each planet can have its own moons, which are treated as mini-solar systems on their own, grouped and then parented to the motion path like any planet.
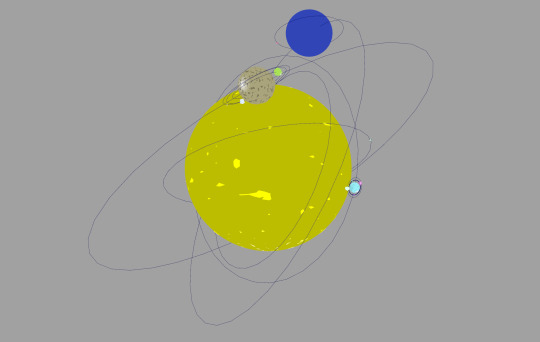
It was a fun script to do, and it took a couple of days to create, little less than a week. If you’re interested in expanding it don’t forget to share the results!
2 notes
·
View notes
Text
Obstacle Animation
Here’s a new animation made for the MA. This one had a preproduction of 1 week plus 3 weeks of production. This one started to give trouble when I jumped into Substance Painter to start texturing the environment instead of focusing more on polishing the animation, and when I realised the render queue over at the render farm was starting to get busy.
You can find more information about the production process and the rest of the assignment on my dedicated MA3D blog clicking here
youtube
3 notes
·
View notes
Video
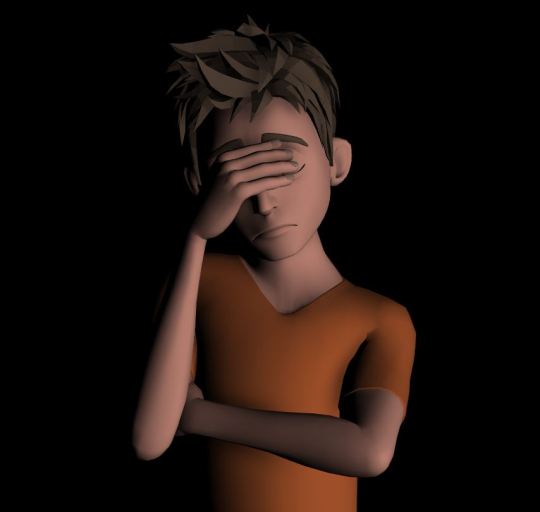
As part of my Master’s Degree, I produced this short animation of an emotional boncing ball. It started as a happy ball that was supposed to get angry, break the dish where the cupcake is and bounce away. But after playing with the timing and spacing, it looked pretty much the same, one fast ball bouncing everywhere and breaking a plate for no reason. Then, after talking with my classmates, I was able to produce a different approach: a happy ball that unfortunately throws a cupcake away and gets very sad.
Here is the animatic for the ball
youtube
1 note
·
View note
Text
Guildford Game Jam
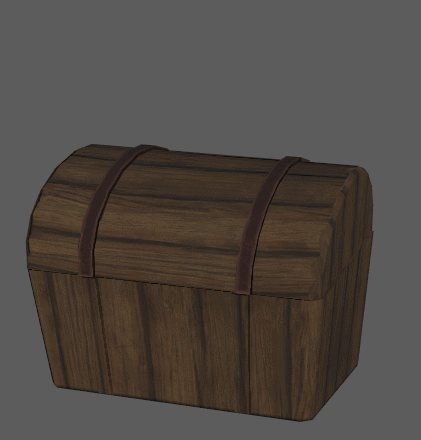
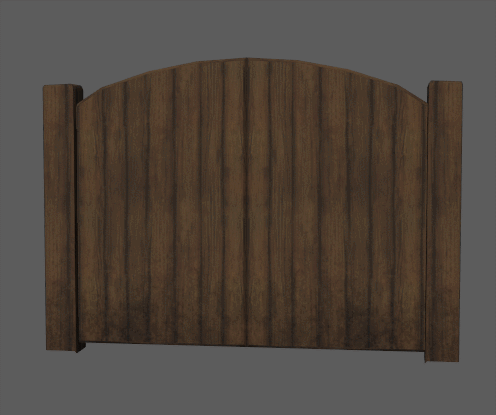
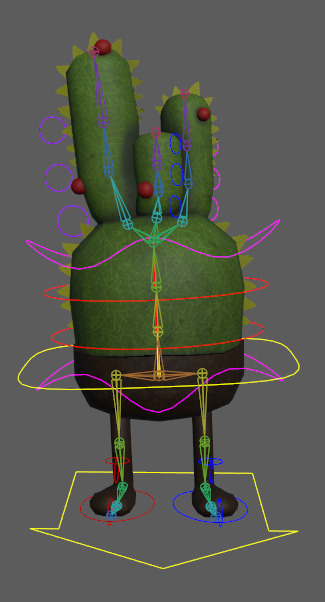
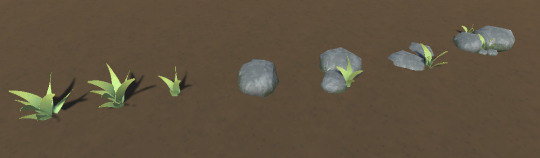
This weekend I attended the Guildford Game Jam organised by the guys at Rocketdesk. I was with the very talented team Dadagarjo with @GarethIW @joeeigel and @DannyT. We did a first person that through online voting other people could decide your next room to play at. With a bit of Dungeon Hero and murderous cacti we made it through the jam. All the folks that logged in at a website could vote to decide the next room on the quest. Between the two options available, one could have more murderous cacti, an appealing design or a treasure chest.
Beating cacti with a stick? Must be a gamejam! @DannyT @danRpaulsen @Joeeigel pic.twitter.com/b7Qw4eaemw
The first task at hand was to create a set of rooms for the player. With a little research -and looking around at other displays for inspiration- I came up with the idea of having a sort of hedge maze feel. That ended up looking more like cotton candy or clay.
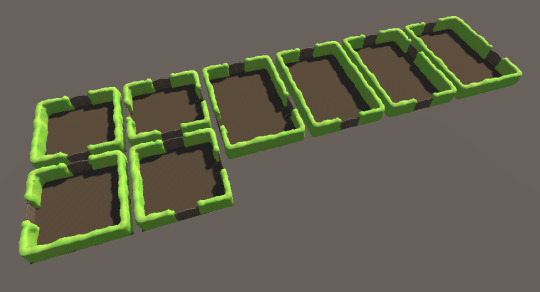
Then came the animated doors and chests. Just to start dressing up the rooms.
With the idea of the first person, it was time to create a hand with a weapon. Fortunately I had previously acquired a good 3d model to use the hand from and only had to model the branch.
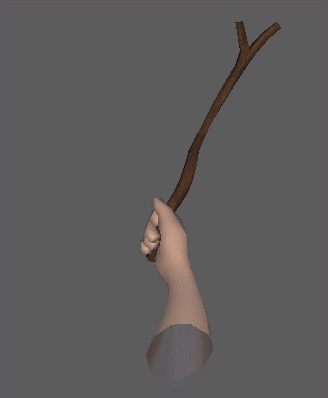
A very simple rig did the trick
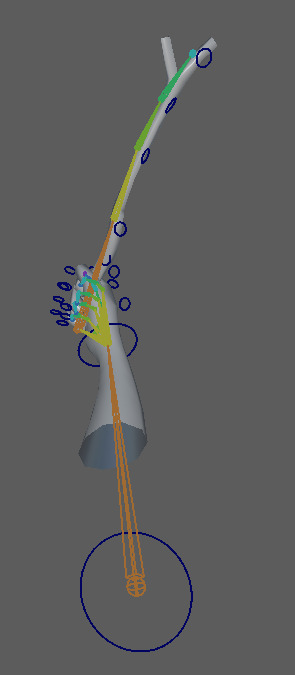
We needed an enemy, just to make things interesting. Since we're supposed to be on a garden, why not having murderous plants in it? A cactus was the most interesting approach for it, and with a little bit of cartoonish animations, just to have fun while animating. The rig took a couple of hours to do, before wrapping up the Saturday. And Sunday was just for animating a couple of cycles, walk, idle and a jump that couldn't be implemented. At the end I did some extra props for dressing up the rooms as well.
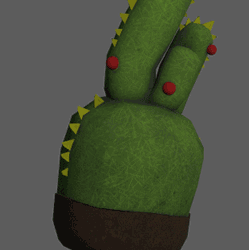
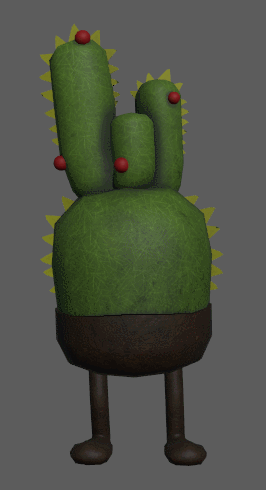
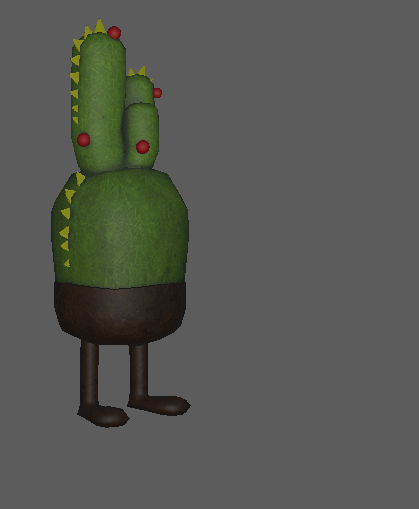
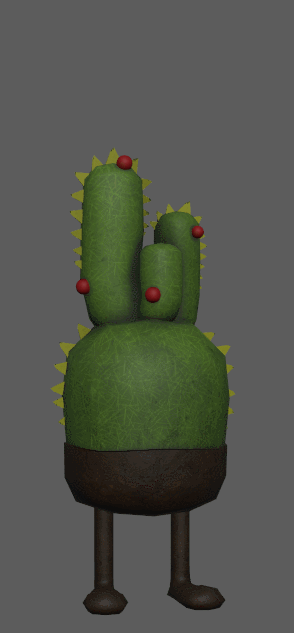
Watch out for the murderous cacti on your garden!
1 note
·
View note
Video
youtube
I gave a talk at the Unity Dev Day Mexico on June and the video is up! I hope your Spanish is sharp enough to get the whole talk.
0 notes
Text
Animation aide
For the past years I’ve been using one extremely useful tool to animate in Maya, the Razer Nostromo. It’s one geeky attachment to your keyboard that can hold macros and key combinations, and it’s easily customized. With the proper keybindings it can be the best tool to animate in Maya.
So why not, instead of doing yoga on top of your keyboard with the multiple combinations of letters + ctrl + alts + shifts, what a better way to move around the most used ones without damaging your wrist.
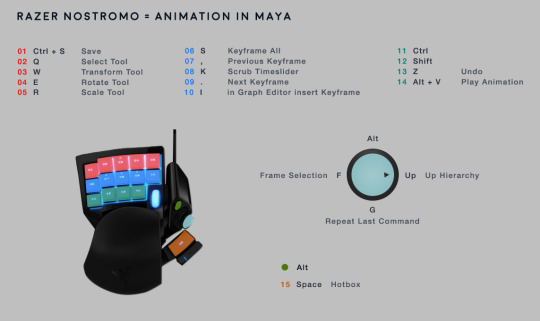
Link to image
The most important one is 01! And you guessed it, its the save command. It’s very helpful to just press that key and save the scene. You know... Maya doesn’t like to crash from time to time... and sometimes you need some extra comfort besides the auto save feature. The middle keys are my most used ones, previous keyframe, scrub timeline and next keyframe are great for key posing a character. With the addition of the Alt key, I can easily move to the next or previous frame, for moving holds or catching up with the motion. You may have noticed that alt is on the stick on the right and the little button next to it. That’s because I have used it enough times to have some trouble with it, and I’ve also found that the stick is easier to use. Upper and lower sections are straightforward, the transform tools, ctrl, shift and z. And the key 14 is set to play the animation.
I intend to upload a YouTube video, to share how I use this particular tool for animation, and how it has helped me to stop worrying about keys and keep thinking about animation. And in the meantime share some of the work I’ve been animating ;)
Do you have a better combination of keys?
0 notes
Photo
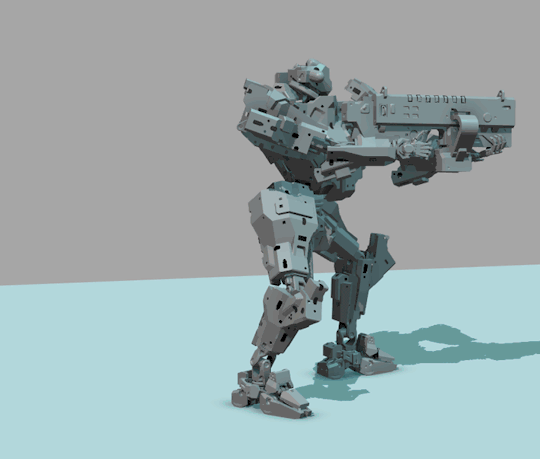
Keeping up with the Mech animations posts. How do I get to this first gif at the top of the post? First come the ideas, how about this options, what works and what doesn’t? After that comes the iteration process, and at the end something that could work on Unity.
Let’s have a look at the first ideas:
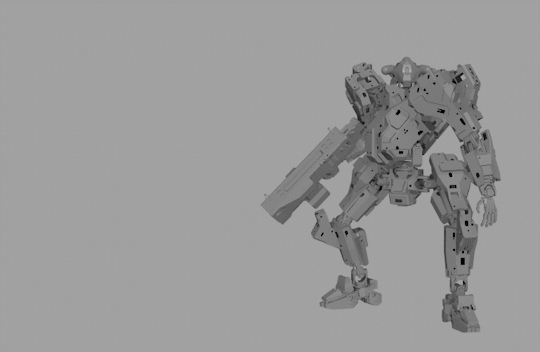
Not quite there right? Let’s move forward with the second idea on that previous gif.
Uhm it’s more like a shuffle, and not a dodge. If you were being hit by a bit missile, you’ll be dead by now.
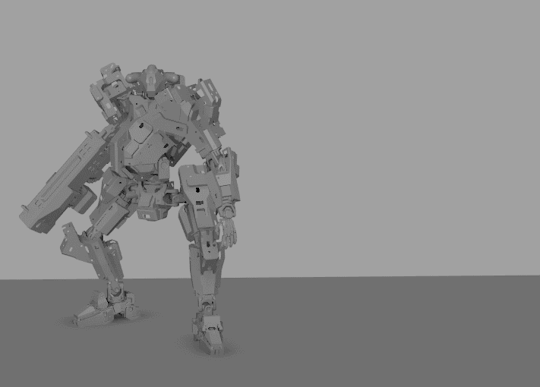
That’s more like it. After polishing a little:

Next step is to have a look in Unity. The only thing to consider from now on: will it work during gameplay?
1 note
·
View note
Text
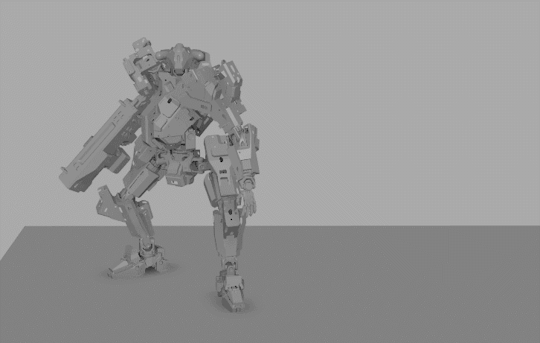
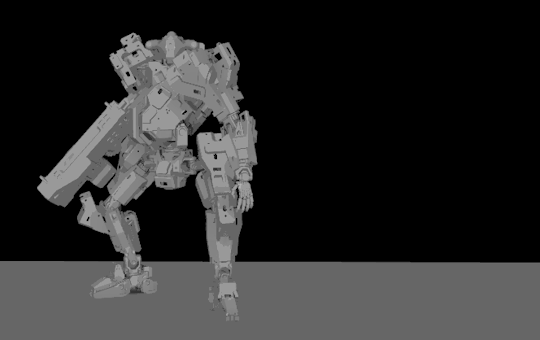
Animating Mechs
I started doing animations for the game Phantom Brigade. Almost a month now, figuring out how to correctly locate joints and their orientations to make them work with the really cool meshes by Bac9 and animating some initial loops for testing.
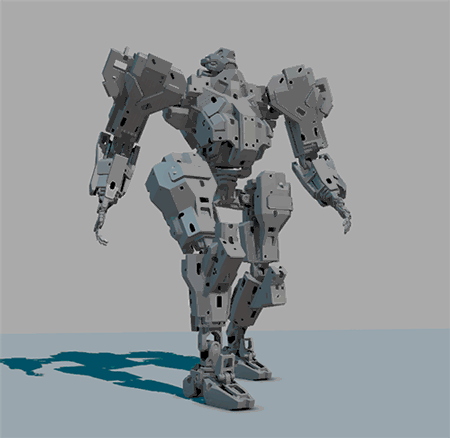
It has been challenging to move from animating cutesy little Kerbals to Mechs, and quite a lot of fun too!! They are big enough to show some weight, but at the same time agile and ready to dash and kick some ass.

Watch C7 showing some gameplay of Phantom Brigade here!
4 notes
·
View notes
Text
Suicide Tooth
Today I got a wisdom tooth removed. He’s a suicidal.
0 notes
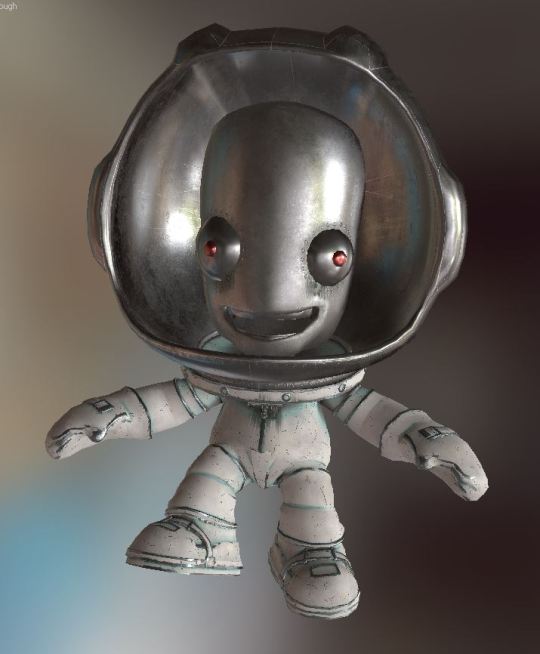
Photo
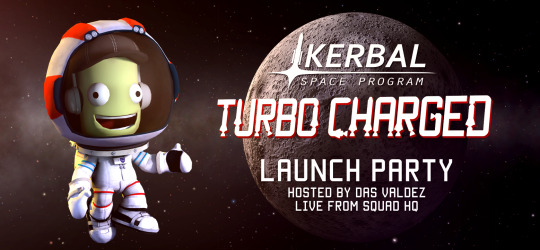
I did this ver quick Kerbal Space Program 1.1 image for the Das Valdez launch party a month ago. I had less than an hour to finish it!
0 notes
Photo
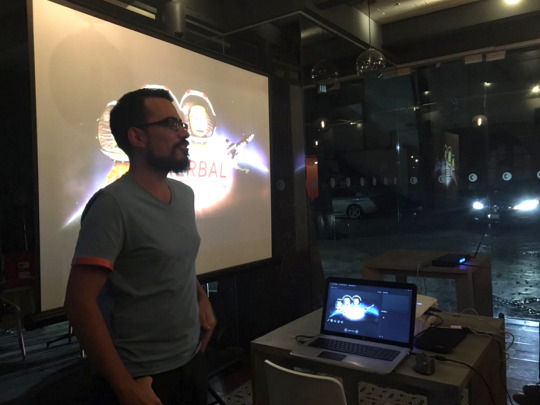
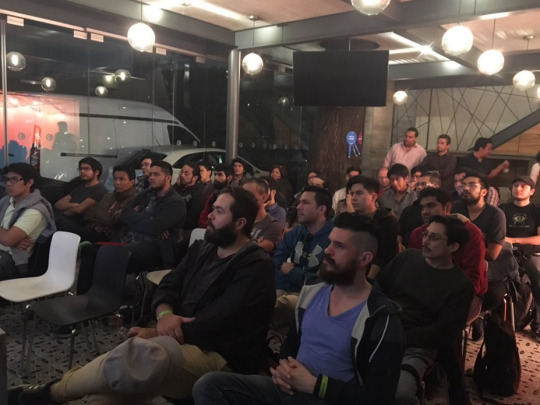
Last week I shared the love for Kerbal Space Program on a Unity User Group Mexico. I showed a bit of what I do, cinematics in Unity, animations, as well as the most recent rig for cinematic trailers.
The group asked a lot of questions and was very supportive!
2 notes
·
View notes
Photo
Having fun with the CGTarian rig Ray. It’s very comfortable to use, I’ll keep on posing it for getting used to the rig and see if something animated comes up!
You can find the rig at http://www.cgtarian.com/ray
1 note
·
View note
Photo
I did some gifs for the final test of my History and Fundamentals of Animation class. The purpose was to show my students the 12 principles of animation so that they could ennumerate them. They all did a great job applying them to their animations!
3 notes
·
View notes
Photo
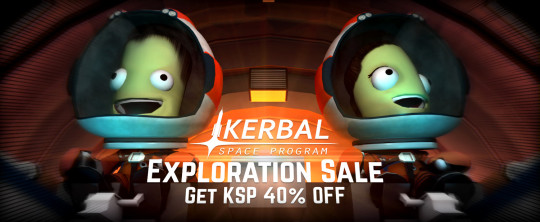
Time for another breakdown! Now it’s the turn of the Exploration Sale graphic. On my ArtStation page you can find the overall process I followed, from the render layers and layout to the final adjustments

6 notes
·
View notes
Photo
Last week I saw an illustration of Mech Jeb by the talented Yorshee, and couldn’t resist to open Substance Painter and throw in a bunch of materials and smart materials to the Valentina Kerman mesh.
I think MechVAL is going to hate that she won’t be able to move her limbs, or mouth. But she’ll be alright. There’s also a strong resemblance between VAL and HAL... Save yourselves brave Kerbonauts!!
13 notes
·
View notes
Photo
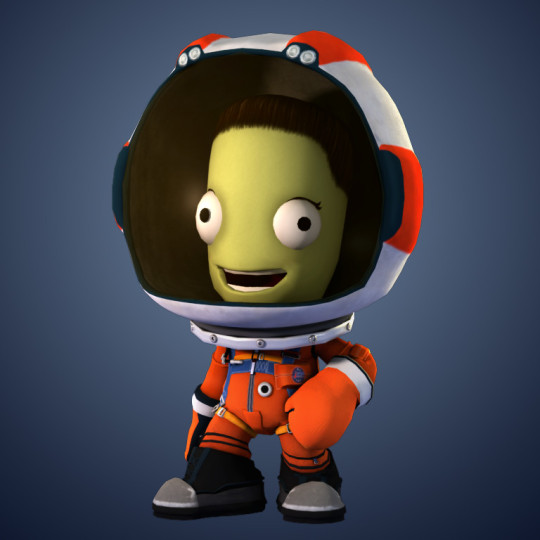
Another ArtStation post! This time it’s the Launch Suit for the lovely Kerbals. Iterated on a model by a colleague, and re-textured with Substance Painter.
https://www.artstation.com/artwork/1L5vo
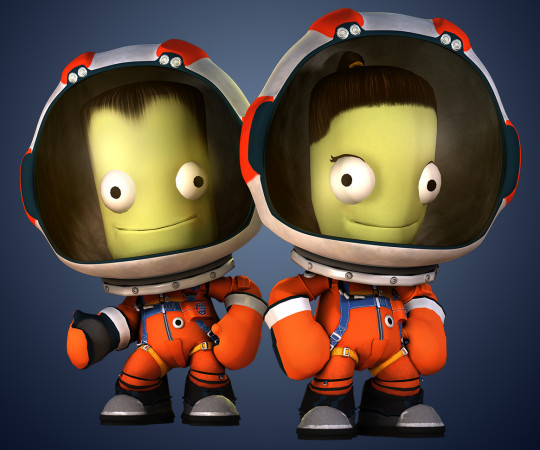
23 notes
·
View notes