
caruwa
an embroidery blog
www.instagram.com/caruwa/
222 posts
Don't wanna be here? Send us removal request.
Last Seen Blogs

learn-to-care
Every adventure requires a first step

mingtinys
" i love my desire "

taninwinter
Tan In Winter

gigirant-ing
ranting and crying

brandingexcel
Branding Excellence
Text
Rothschildia Lebeau (female), 25 cm // 10"
Caruwa 🌿
Follow me on instagram! @caruwa
#embroidery#handembroidery#needlecraft#needlework#bordadoamano#lepidoptera#saturniidae#mothart#bug art#moth#moths#natureart#natureembroidery
46 notes
·
View notes
Text

Atlas moth handembroidery, 36 cm (14")
#embroidery#handembroidery#needlecraft#needlework#bordadoamano#mothart#moths#bug art#cottagecore#cottagestyle#lepidoptera#saturniidae
7 notes
·
View notes
Text
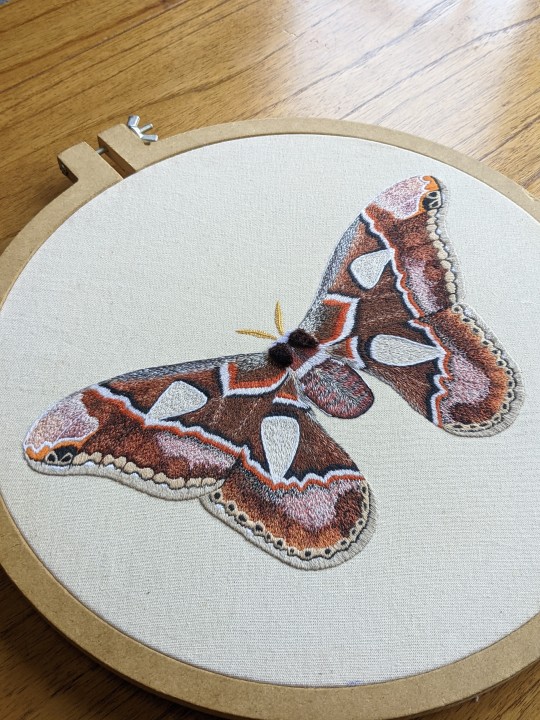
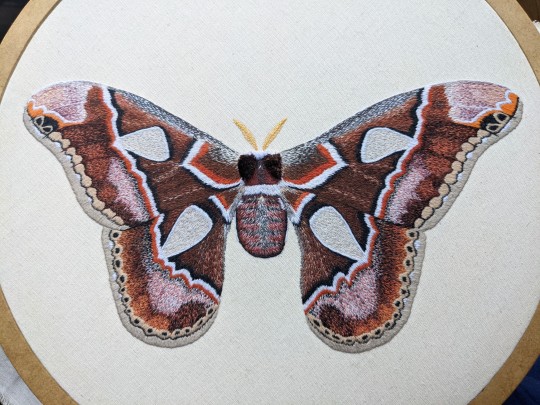
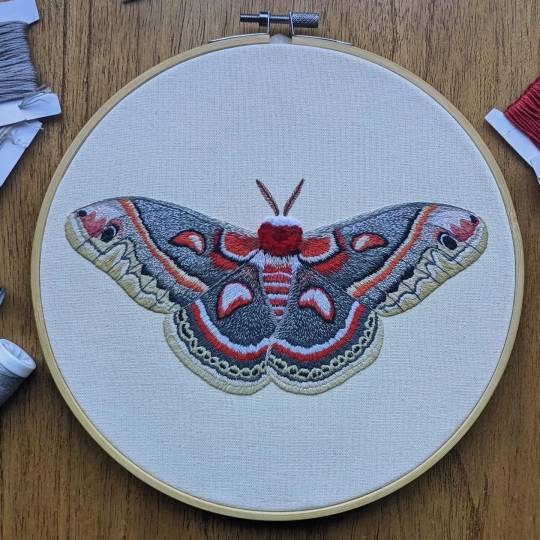
Despidiendo el otoño 🍁🌤️
#silkmoth #mothsofinstagram #mothsmatter #saturniidae #cecropiamoth #moths #natureartist #natureembroidery #mothembroidery #cottagestyle #needlecraft #needlepainting #bordadoamano #bugart #mothart #lepidoptera
instagram
#embroidery#handembroidery#needlecraft#bordadoamano#needlework#moths#cecropia moth#lepidoptera#saturniidae#cottagecore#cottagestyle#bugs#bug art#mothart#moth art#insectart#natureart#Instagram
0 notes
Text
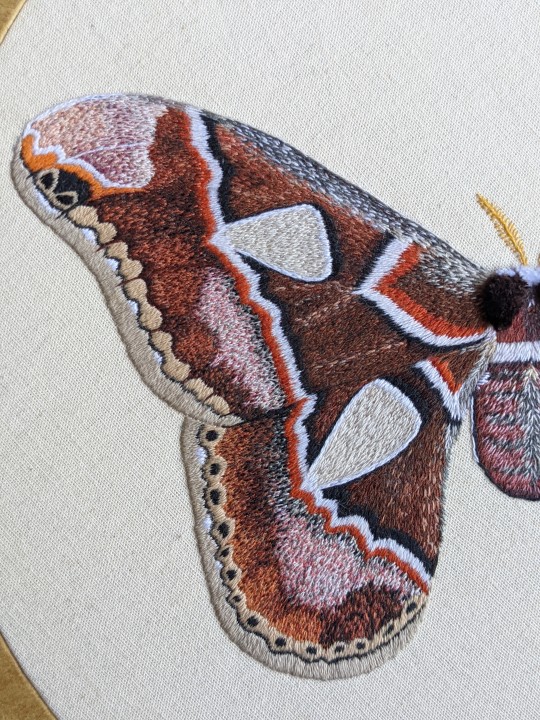
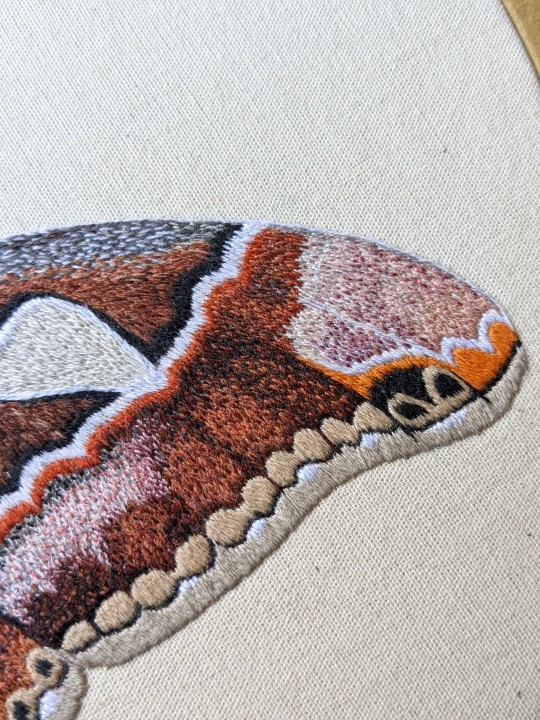
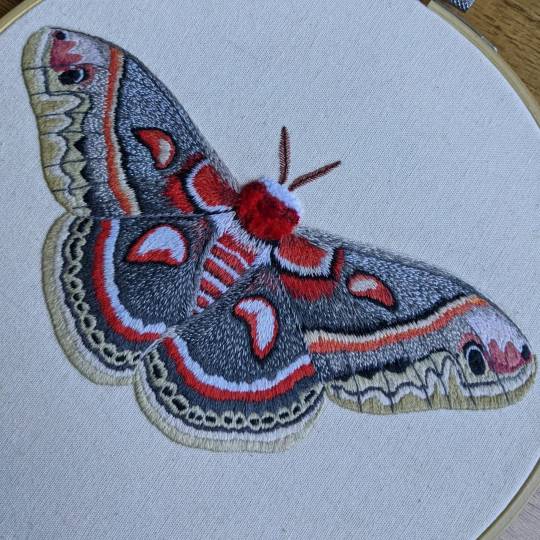
Hyalophora cecropia moth
8" handembroidery

#handembroidery#embroidery#mothart#moth art#insectart#bug art#cottagecore#crafts#needlework#needlecraft#bordadoamano#silk moth#cecropia moth#moths#moth tag
16 notes
·
View notes
Text
Antique illustration combo✒️
Thanks for sharing💖
💌available for purchase
https://www.instagram.com/caruwa


#embroidery#handembroidery#needlecraft#needlework#bordadoamano#embroideryart#handmade#handcrafted#handmadeembroidery#stitched#vintage#vintagedecor#antiqueillustration#antique#engraving
9 notes
·
View notes
Text
Part 2
Getting Started with Silk Shading or Needle Painting Hand Embroidery
Starting and finishing your threads:
Don’t use regular knots to cast on your thread. Stab stitches are by far the most secure way to anchor your threads and are invisible once stitched over. Regular knots will come undone over time and leave the back of the piece untidy. They also form bumps on the front and back of the fabric after the piece has been mounted. The best way to secure your thread is with the 3 little stab stitches used in a waste knot.
I personally use a pin stitch to secure my thread. But I always add 2 tiny anchoring (stab) stitches after for extra security.
But a waste knot is a similar way to anchor the thread. It’s just easier to do and explain. Here’s info:
Waste Knot:
Start by making a large knot at the end of your thread, of your threaded needle. Bring it down into the fabric from the FRONT side of the embroidery, somewhere inside the design or on a design line. This is very important. Place it close to where you’ll begin stitching. Then take 3 very small stab stitches (anchoring stitches). Because they’re placed inside the design or design line, they’ll be covered up by other stitches as you work. Once you’ve made all three stab stitches, pull up on your knot from its tail, lifting it up from the fabric, and cut it off as close to the fabric as possible. The stab stitches will hold the thread very securely. And once stitched over. They’re completely invisible.
You can even start your thread for each individual knots, like french knots, in this way. Just place the stab stitches where the knot would be placed. Work the stab stitches in a small triangle pattern. Then work your french knot in the middle of this triangle. The stab stitches will get completely covered by the knot stitch.
To end your thread do the same. Take 3 tiny stab stitches where they’ll be covered up by other stitches.
If you’re working stitches like long and short stitch or satin stitch and you’ve run out of room to place these anchoring stitches, you can actually put them between the previous stitches. Just carefully part the stitches and place your tiny stab stitches between them.
If you’re working like a line stitch or a stitch that can’t be parted, you can try to sneak the stab stitches under the line stitch.
If you absolutely can’t end your thread this way because you’ve run out of design space and absolutely can’t place the stab stitches anywhere, weave the thread behind previous stitches on the backside of your embroidery, then make one small knot securing your threads.
By using this method, you can work individually knot stitches, like a single french knot, so you don’t have to travel/carry your thread across the back of your fabric from knot to knot. In the case of single french knots, weave the thread behind the 3 stab stitches you started the thread with, form a loop, then pass the thread through it, making a small knot.
Besides being the technique taught at the Royal School of Needlework, casting on the thread with stab stitches is so secure, you can machine wash an embroidery as long as the rest of the stitches are secure, unlike pieces that use regular knots.
Part 3 Next….
7 notes
·
View notes
Text
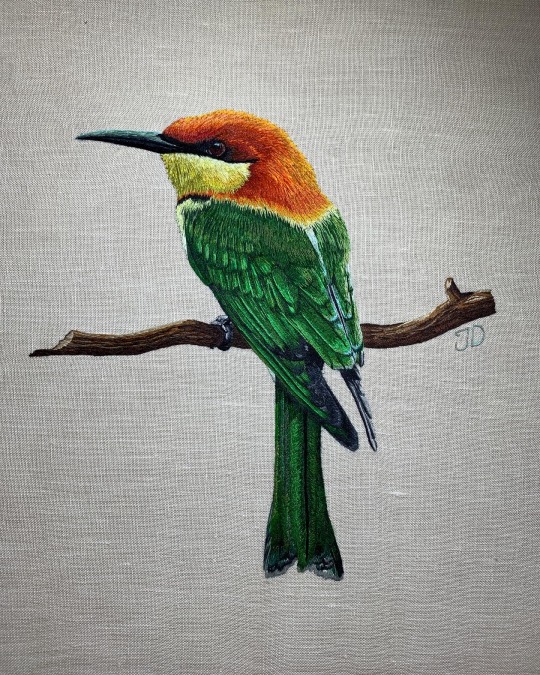
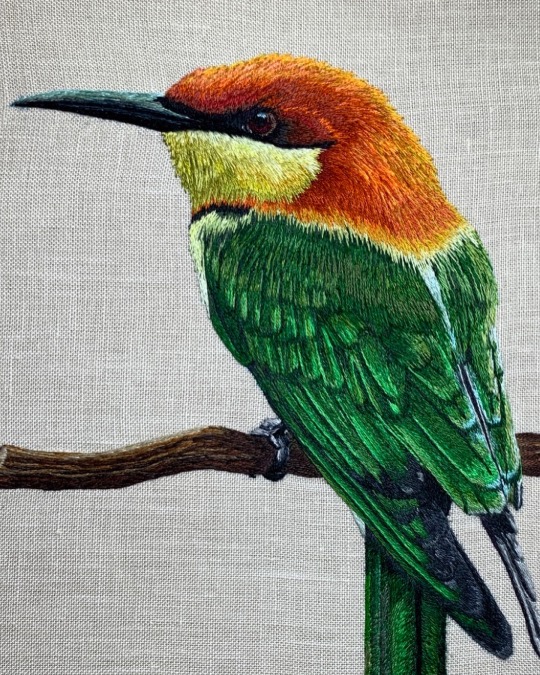
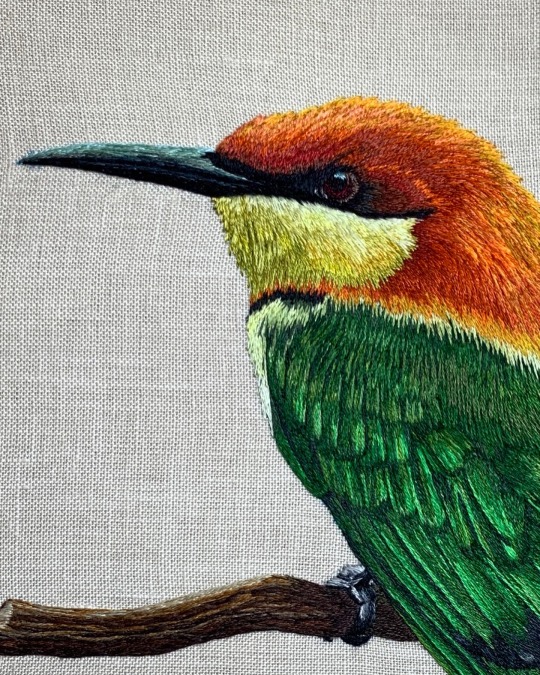
My hand embroidery, needle painting, of a Chestnut Headed BeeEater. Took over 60 hours to stitch, with over 50 colors used. Now I just have to lace and mount it. Then it ships to Germany. I’m a bit sad to see it go. I hope he brightens your day.
Based off photograph by @thomson_saburja, who so kindly allowed me the use of his amazing photo.
363 notes
·
View notes
Text
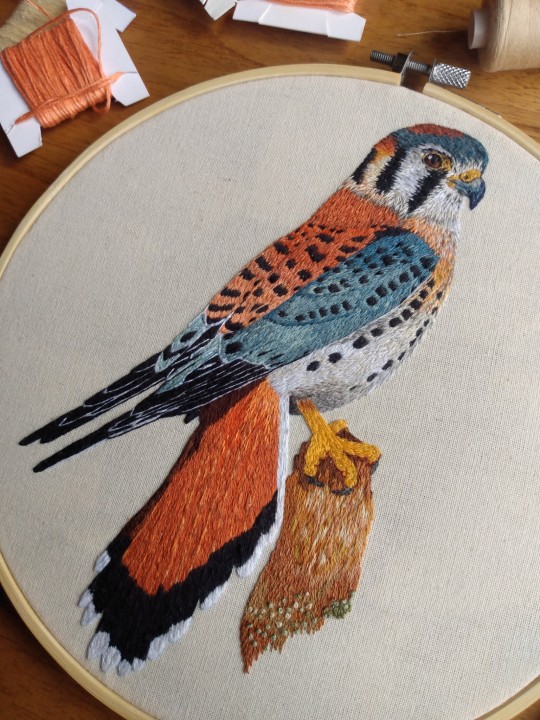
American kestrel
8" hoop (20 cm)
https://www.instagram.com/caruwa

#embroidery#handembroidery#kestrel#american kestrel#birdlovers#bird art#needlecraft#needlework#bordadoamano#embroideryart#handmade#handcrafted#handmadeembroidery#stitched#natureembroidery#natureart#cottagestyle#cottagecore#birds
43 notes
·
View notes
Text

🌿Hypercompe scribonia (giant leopard moth) 6"
🌿Abraxas grossulariata (magpie moth) 5"
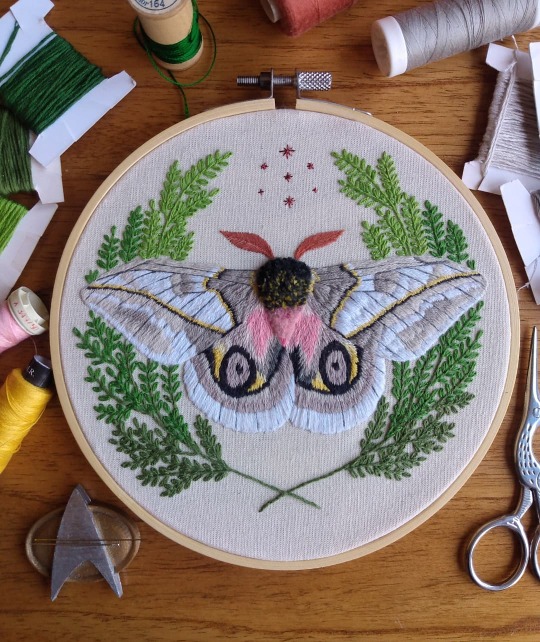
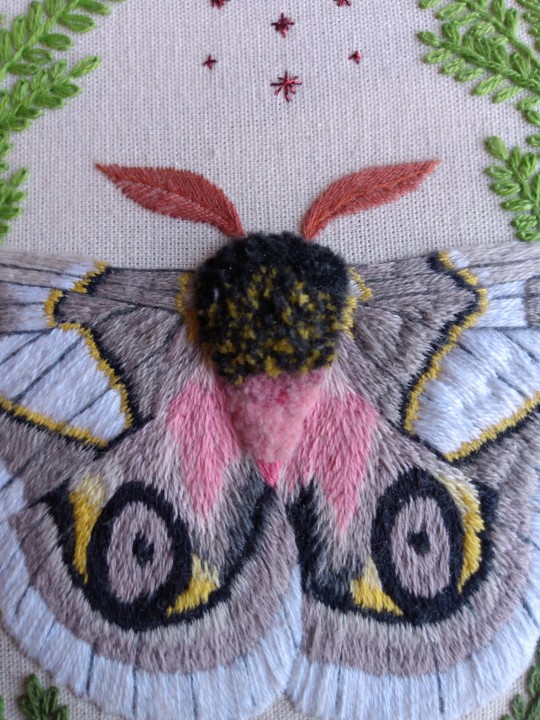
🌿Automeris Frankae 6"
(available for purchase💌🌎)
https://www.instagram.com/caruwa
#embroidery#handembroidery#needlecraft#needlework#bordadoamano#embroideryart#handmade#handcrafted#handmadeembroidery#stitched#mothart#moth art#moths#moth#bug art#insectart#needlepainting#cottagcore#cottagestyle
368 notes
·
View notes
Text
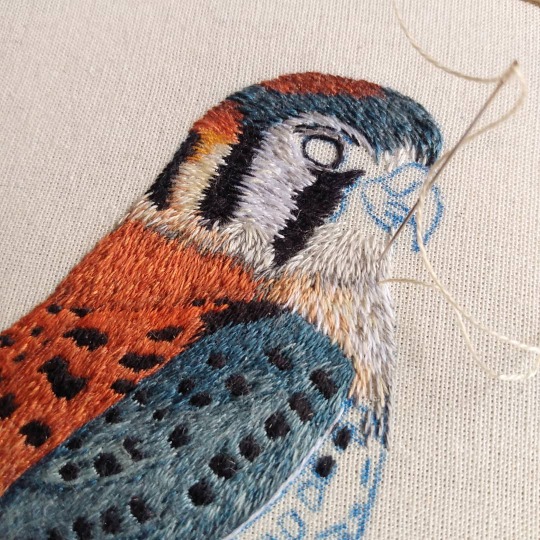
American Kestrel WIP
http://www.instagram.com/caruwa
#embroidery#handembroidery#needlecraft#needlework#kestrel#american kestrel#bordadoamano#embroideryart#natureembroidery#natureart#cottagcore#cottagecore
20 notes
·
View notes
Text
Spock🖖
https://www.instagram.com/caruwa

#embroidery#handembroidery#needlecraft#needlework#bordadoamano#embroideryart#handcrafted#handmade#spock prime#spock fanart#s'chn t'gai spock#mr spock#startrekcrafts#star trek#startrek
93 notes
·
View notes
Text
Automeris Frankae moth embroidery
https://www.instagram.com/caruwa

#embroidery#handembroidery#needlecraft#needlework#bordadoamano#embroideryart#handmade#handcrafted#cottagestyle#cottagcore#mothart#moths#insectart#bug art#stitchart#stitched#natureembroidery#natureart
21 notes
·
View notes
Text
🌿Automeris Frankae🌿 16cm
Check out my other moth pieces on my instagram account!
https://www.instagram.com/caruwa


#embroidery#handembroidery#needlecraft#needlework#mothart#moth art#moth#moths#embroideryart#bordadoamano#handmade#handcrafted#handmadeembroidery#stitched#bug art#cottagestyle#cottagecore#insectart#insects
10 notes
·
View notes
Text
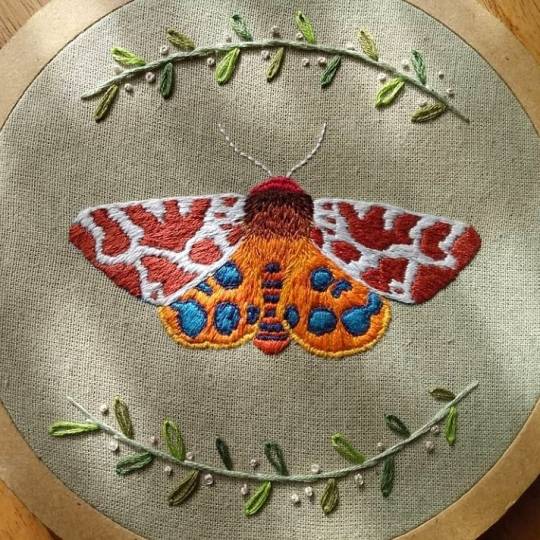
🌿Arctia Caja moth 🌿
http://www.instagram.com/caruwa
#embroidery#handembroidery#needlecraft#needlework#bordadoamano#embroideryart#handmade#handcrafted#handmadeembroidery#stitched#mothart#moths#bug art#moth#moth art#insectart
9 notes
·
View notes
Text
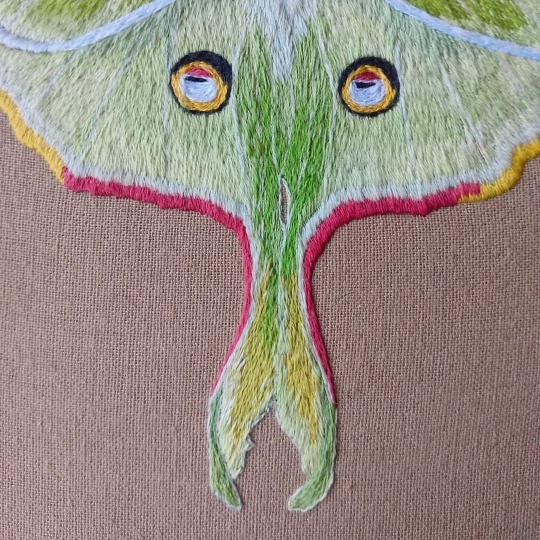
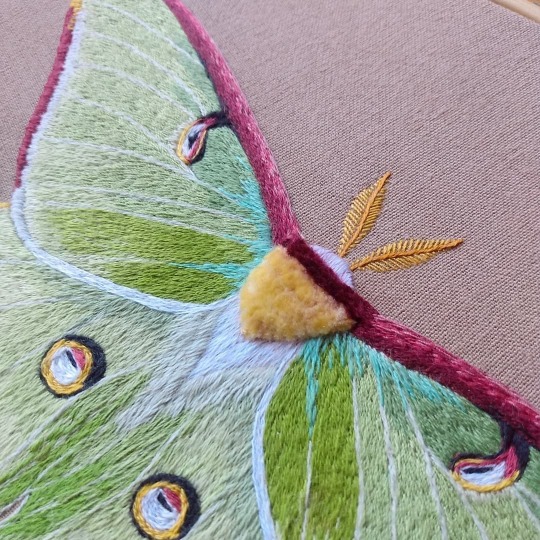
Luna moth🌿✨ 8" hand embroidery
Check out my other moth pieces on my instagram account!
http://www.instagram.com/caruwa


#embroidery#handembroidery#needlecraft#needlework#bordadoamano#embroideryart#handmade#handcrafted#handmadeembroidery#stitched#mothart#moth art#luna moth#lunamoth#bug art#cottagecore#cottagestyle#moths
370 notes
·
View notes
Text
Sparkly torch!
Follow me on instagram: http://instagram.com/caruwa


#embroiderydesign#embroidery#embroiderywork#embroideryart#embroiderylove#handembroidered#handmadeembroidery#handembroidery#handmade#needlework#needlecraft#handcrafted#stitchart#stitched#stitchwork#stitchery
5 notes
·
View notes