
Last Seen Blogs


Text
The Garden Kitchen – Everything You Need to Furnish Your Summer Garden House (Part 2)
Welcome to part 2 of a 2 part series on how to furnish your garden kitchen. Let's not waste any time and jump right back in!

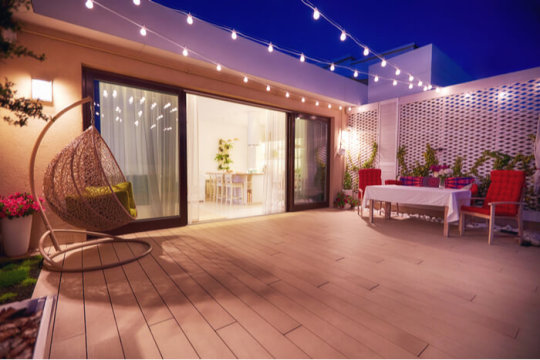
Tip #4: Lighting
Whether outdoor or indoor, lighting is a must. Once again, this is up to your unique, decorative style. However, you can use your lighting to define the zones and their purpose. In the actual kitchen, you will want plenty of light for early breakfasts and late dinners.
Try small, intimate lights in the dining room at night for romance. String lights can be purchased in a variety of shapes and sizes, and add a fun dimension to dinner. If you are on a budget, look for lighting that can use both indoor and outdoor. Illuminate a path to your summer kitchen at night to help guests find their way to and from their cars.
Tip #5: Storage
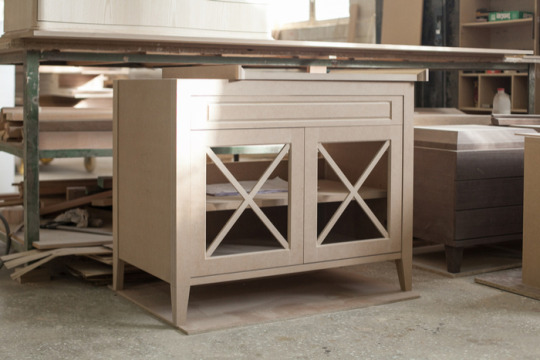
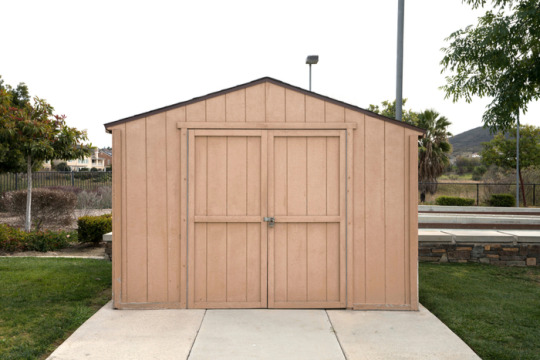
Your summer house garden kitchen will need plenty of storage. Whether this is a converted wooden shed or wooden garage, there are many ways to add storage. You can even purchase cabinets explicitly made for weathering the outdoors if your summer kitchen is on the smaller side. There are also portable cabinets for your convenience.
Tip #6: Counter Space
You will want to have enough counter space if you're going to be able to cook like the chef you are. If preparing multiple dishes or baking for multiple people, you will need the space. If there is limited space indoors, we suggest adding a counter to the outdoor space. If purchasing outdoor cabinets, you can buy the set together.

You can find discount tops fit for the outdoors at your local home improvement store. Or, with a little bit of elbow grease, you can make your own out of brick, concrete, and stone.
Tip #7: Bar (Optional)
A bar is not a necessity, but it is a fun addition! Creating an indoor/outdoor bar space in the garden kitchen is an option. Or, keep a portable bar to get your beverages where they need to go easily. An outdoor bar would also be an easy option to add to the charm of your summer garden house.
0 notes
Text
The Garden Kitchen – Everything You Need to Furnish Your Summer Garden House (Part 1)
Thank you for joining us for part 1 of the 2 part series on furnishing your garden kitchen. Summer garden houses are not only handy, but they are also a way to showcase your creativity and talent. To do so, here is everything you have ever needed to know.
Furnish Your Garden House Garden Kitchen
Tip #1: Not only for Good Weather
The good news is, what used to be called a summer kitchen is no longer just for nice days. At this point in history, you can install a heating unit and a cooling unit. This could be anything from a wood-burning stove to a fireplace, depending on the size of your summer house. Central air or window box air conditioners are both options as well.
This way, you can entertain in your summer garden house all year long.
Tip #2: Install a Cooking Unit
Cooking units can be powered by solar, gas, electric, or water. Just be sure you check how much power is needed and how much power you have before purchasing. If you are not off the grid, if power is running to your garden kitchen, you will be fine.

There are many different varieties of cooking units available. Imagination, garden house dimensions, and budget are the three biggest factors to making your choice! If you are planning on purchasing a coal, charcoal, or wood-powered stove, think about the smell and smoke. Some summer kitchens are built specifically for these types of cooking units.
Hint: Think about installing a pizza oven or other unique cookware to make the summer garden house garden kitchen stand out!
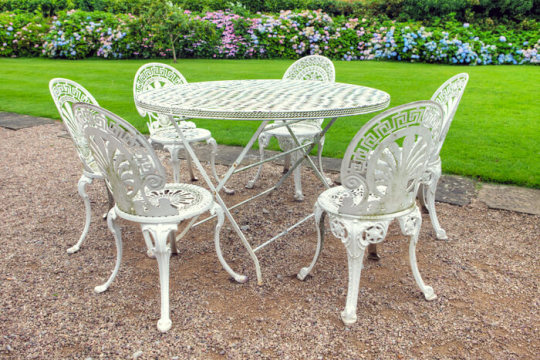
Tip #3: Dining
Where do you want to eat? This can be outdoors or indoors. Usually, this is determined by the size and setup of your building, type of cooking unit utilized, and weather. The best part of having a nook indoors, or a patio, is being able to feast no matter what the climate.
The furniture you purchase is really up to you. However, if you are operating on a budget, we suggest buying pieces that can be used indoors and out. That way, you can move them based upon you and your guest’s preferences.
The type of material could be any of the following:
- Wooden furniture (with an outdoor-approved stain)
- Wicker furniture (lightweight and easy for anyone to move)
- Wrought iron furniture
- Plastic table and chairs
- Bamboo furniture
- Aluminum and cork furniture (new and contemporary)
- Glass and metal
0 notes
Text
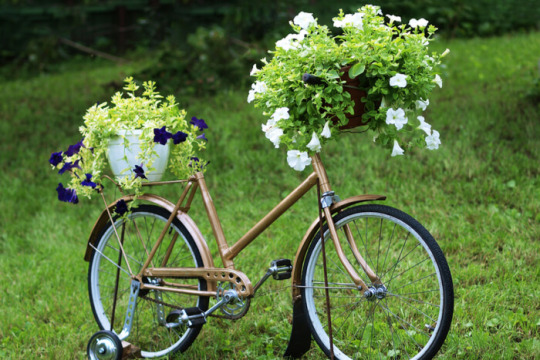
Tips On How To Make Various Garden Baskets (Part 2)
Have you come across big, beautiful garden baskets and wondered how you too could enjoy such beautiful presentations? Well, it all comes down to a few easy tips on how to make various garden baskets. Here’s what you need to know and follow:

Planting Time
The success of your plants and flowers will depend on your planting timing. Many people often ask when the best time to prepare their baskets is so that they can have delicate flowers decorating their spaces when the warm weather hits. The answer is spring. You need conditions where there is no frost, and the sun is peeping out of the sky. You can choose to have your plants in early May where you plan on having the plants in a shaded area. Or you could wait a few more weeks and start them.
Basket Choice
What basket works best for you? There are tons of options, and they all have their upsides. It all comes down to what kind of setup you have in mind. Let’s suppose you want the flowers peeking out from the sides and the top. In this case, you can get a wire basket through which you can cut to create more access to the outside. It results in trailing plants which give the effect of a large basket. If you use fuschias to execute this, your garden will be the envy of many.

Compost Selection
You need multipurpose compost that is free of peat as it will serve your plants for at least four weeks, enabling them to appear healthy and beautiful. With one basket, you will need about ten liters. The more you get, the more you can improve the flowers in the baskets, flower beds and other locations in your indoors and outdoors.
Fertilizer
Yes, the compost works great for your plants but if you want a healthy bunch of flowers that can withstand the elements with ease, add some fertilizer to the mix. Not only do you get a head start but you also get to enjoy the effects for longer. If you would rather keep away from chemicals, you can use organic fertilizer instead.

Plant Spacing
As long as you allow the root balls adequate space to expand, you can have a plant for every inch. Imagine how many you can place in one large basket and the effect of this setup!
With these tips coupled with adequate watering, weeding, and pruning where necessary, you should enjoy a healthy garden basket that will have your visitors in awe. Try them out today!
0 notes
Text
Tips On How To Make Various Garden Baskets (Part 1)
Do you want to make your garden stand out? How about having a hanging basket? This kind of flower presentation works for both indoors and outdoors, and with the right positioning, it should result in a vibrant space. Here are some tips on how to make various garden baskets, in this case, the hanging types:

Basket Selection
You will find that there are many baskets in the market, something which works in your favor as you don’t have to limit yourself to a few options. The selection should be as per the theme you have in mind so that you don’t end up with a clashing effect. Other than the hue, you should also look into the size of the basket regarding the plant you wish to have. Also, consider how large the plant will become over time and factor this in the selection.
Often, the materials available for this kind of basket are galvanized wire, solid plastic, ceramic and plastic mesh. Get what matches your décor, and you should be good to go.
Preparation
You need to line the basket as this helps in keeping the soil in place and thus reduces the need for frequent watering. Also, it helps the basket appear neat when complete. One of the best linings in this regard is sphagnum moss, which works best for wire-based baskets. Where you cannot get this lining, you can use polythene, as long as there are holes to allow the passage of water. You can also combine the two linings as this will help the soil retain water more efficiently.
Add some good potting soil in the basket and incorporate some fertilizer into the mix. Where you are unable to get a good quality potting mix, you can use compost in its stead.
Plant Selection
Not all plants can grow in a basket, and you thus need to choose those that can thrive under these conditions. The best option, in this case, is the use of well-established plants that are close to flowering or have already started. Start by planting the large ones before adding the small ones along the edge. You can use many varieties including lobelia, baby’s breath, geranium, fuschias, begonias, and pansies.

Hanging
The basket will be heavy upon completion. You can hang it using strong hooks or place it on a surface. Positioning will depend on the look you want to achieve so you can play about with this. All the best!
0 notes
Text
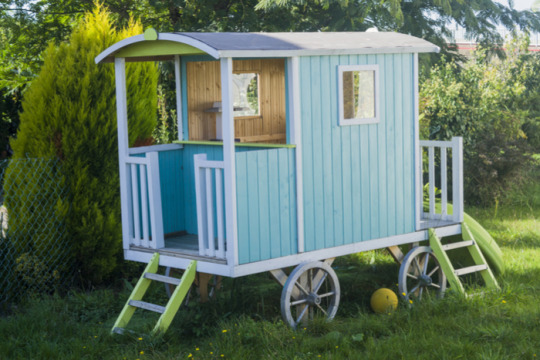
Child-Friendly Garden With Garden House And Playground Equipment Suitable For Children
Summertime is an excellent time for kids to be outdoors and what better way to get them interested in outdoor fun that by creating a child-friendly garden with garden house and playground equipment suitable for children? Here are some fantastic ideas in this regard:

Chalkboard Walls
Do your kids enjoy writing on any surface that they can find? Well, you can provide them with a designated space by installing a chalkboard wall on the fence. Here, they can write and draw as much as they want without getting in anyone’s way. It also saves you a lot of time and energy spent on cleaning up after them. Talk about a win-win situation!
A Zip-Line
Zip-lining is a sure way to get their adrenaline going. How fun would it be if they could enjoy this activity from the comfort of their backyard? Their popularity scores are also sure to rise as they make new friends. The good thing about a zip-line is that you can create it using a few materials. Ensure that it is safe as a lack of adequate securing could have disastrous results.
Backyard Camping
Do your kids love building forts? Well, you can create such an experience for them by having tents in the backyard. Here, they can explore the outdoors as they think of creative ways to use tents.
Hanging Chairs
As opposed to having the traditional swing, how about opting for hanging chairs instead? They can relax here once they have run around and used up all their energy. They can also nap here as they rock themselves to sleep. The beauty of these setups is that anyone can use them, including you when you have had a long day.

Music Fence
How much do your kids enjoy banging on things to see what sound they will produce? You can create a music fence where you attach objects to a fence panel. Get creative in the selection and use anything that creates sounds when hit, from pans to wooden spoons. Or you could let your kids choose what they would like in the panel as they explore music in their different ways.
Climbing Wall
The beauty in this setup is that the kids get to exercise as well as have fun. You should have a mattress underneath the wall in case someone falls.
In all the examples above, it is necessary to exercise caution to protect your kids from injury. Contact us today for options on garden houses, and we will walk you through suitable designs for you.
0 notes
Text
Child-friendly garden with garden house and playground equipment suitable for children
Kids need to spend time outdoors as it helps them to keep fit as they work on their life skills. With the many electronic devices to which they have access, it has become much harder to get them to play out in the sun as was the norm back in the day. However, this is something that you can manage with the use of a child-friendly garden with garden house and playground equipment suitable for children. Here are some ideas:
The garden house
The garden house is a great idea as you can use it as a playroom. While they are here, you don’t have to worry about tripping on toys in the main house. Also, it allows them to be free and to yell and scream as much as they want as they enjoy the fresh air outdoors. A good thing about this space is that it also works for storage of their items once they finish playing and you could have them take naps here during the afternoons.
The Tree House
Is a backyard ever complete without a tree house? It’s their safe place where they can be kids and enjoy each other’s company. Here, they can play lots of games as they battle it out as to who will rule the kingdom. They can also set up meetings with their friends here, and the good thing about it is that they don’t have to worry about spilling stuff in their wooden home (more information here) and they can enjoy the freedom. They can also learn some DIY tricks by working on this space now and then. If you don’t have one yet, you could turn it into a project where you could bond with your kids in the process.

Sandbox
No matter what age your kids are, the chances are high that they enjoy their time in the sand. If this is the case, then having a sandbox enables them to enjoy the feel of the sand as they play games which they would on the beach. You can add a small pool in the yard to complete the experience.
A Swing
Here, you have two options. You could go with the traditional chair, or you could get creative and use your old tires to make one. Either way, your kids will love it.

Whichever of these projects you undertake, be sure to consider the safety of your kids by ensuring that everything is secure. Monitoring their activities, especially where there are pools and swings involved is also mandatory. Talk to us today and let's take you through our garden house options.
0 notes
Text
How to Make Some Furniture for Your Log Cabin
This is part 2 of a 2 part series on how to make some furniture for your log cabin (more information here). The first five tips are invaluable. However, these next 4 tricks and tips will help you perfect your craft.
4 More Tips to Make Wooden Furniture for Your Log Cabin
Tip #1: Armchair Size
If your goal is to make an armchair, there is a standard size. Most are 2 feet wide by 4 feet long. Are you interested in creating a bench for your entryway? The larger sizes are 6 feet or more.
Tip #2: Rocking Chair Size
Many rugged log cabin owners dream of making their own wooden log rocking chair. If you do, cut your timber between 25 and 27 inches long. The area where you sit can now be 17 to 19 inches wide. If you are a log arm chair expert, you will know this is the average size.
Tip #3: Clear the Area
Before you begin doing anything to your logs, remove the clutter from the surrounding area. Not only does this help you concentrate, it is also for your own safety. This is true whether you are using hand tools or a chainsaw.

Tip #4: Use a Chainsaw
If you are new to cutting logs with a chainsaw, here are some of the basics to keep in mind as you make those first few cuts:
- Wear eye protection.
- Hold this tool with both hands. Never use a chainsaw with only one hand.
- Square your body and firm your footing. Face the log you plan to cut head on.
- Use a square of flat, instead of tip or rounded, bottom portion of the bar.
- Cut downward while applying pressure. Keep it steady.
- Use a rocking motion, back and forth, to make the cut through the timber.
- Do not let the chain or the bar come in contact with the ground below the log. This will ruin your chain, not to mention the potential for personal injury!
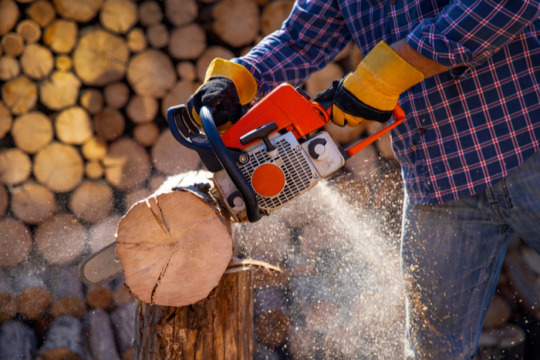
- Keep your focus. Do not get distracted. If you are not prepared to take this task seriously, do it at another time.
Hold the chainsaw away from your body. This will help you stay clear of saw dust or wood chips that try to fly into your face.
0 notes
Text
How to Make Some Furniture for Your Log Cabin
This is part 1 of a 2 part series on how to make furniture for your log cabin (more information here). Thank you for joining us on our journey to give you the best tips and tricks to help you realize this dream. Soon, you will be on your way to making your space your own.

5 Tips to Make Wooden Furniture for Your Log Cabin
Tip #1: Sand the Wood
When you are working with wood, it is important to always sand it. This creates that flawless finish you see in log cabin magazines. Even if you cut down or buy the logs yourself, it is still important to sand the natural timber. This will take care of any dents, dings, burrs, and knots.
Tip #2: Use Tenon Cutters
If you are new to making wooden furniture, you will have to get used to tenon cutters. These are used to make the ends of logs rounded so they can be connected into other logs. Kind of like the Lincoln Logs from your childhood. You can use these as an electric drill attachment, but you can also use them with your bare hands.
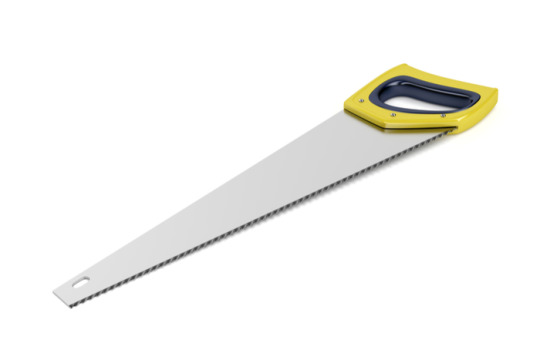
Tip #3: Use Hand Tools
Simple hand tools are useful to prep the timber to become furniture. Electric and automatic tools are fine, but if you want your furniture to look homemade or rustic, you have to put in the hard work. These allow you to peel the logs as much or as little as you want. They can also help you connect the logs with fine detail.
Tip #4: Glue the Furniture
Think about the type of wood you are using. This determines what type of adhesive you need. Back in the good old days, they used to use sap as glue. These days, we recommend white and wood glue on wood that’s porous. Harder wood requires a stronger adhesive.
Tip #5: Clean and Prep the Wood
Don’t just start on the wood in the state you receive it. First, take a lint-free towel and soak it in detergent. The oil-free, liquid kind is the best. Then, use water to wash off the timber. You can use a hose for this. Afterward, apply a conditioner and let it dry. Only then should you sand.
0 notes
Text
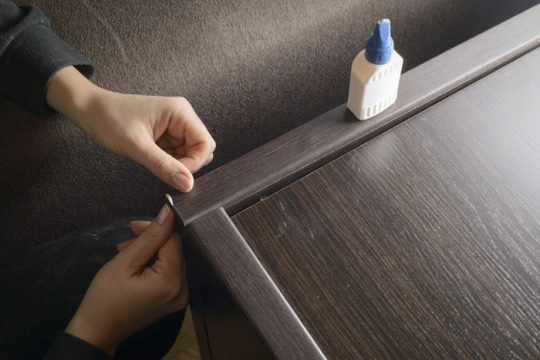
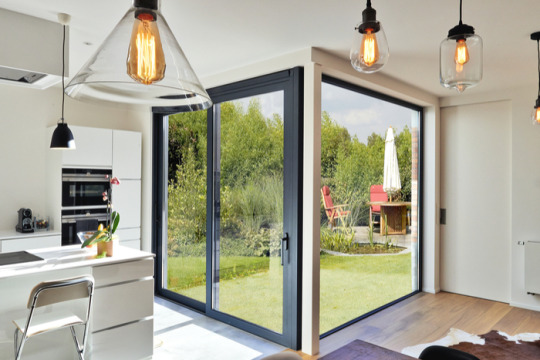
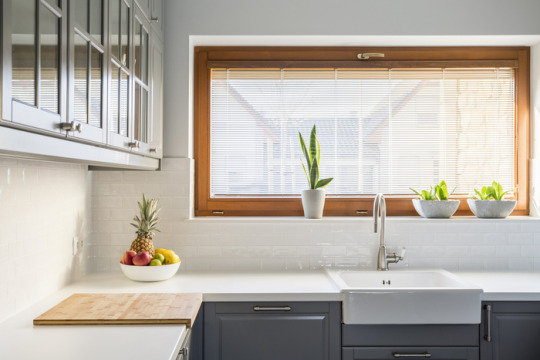
Modern Windows in the Garden House – What You Should Consider
If you have never thought of a window as modern before, you aren’t alone. However, technology has allowed us to make all sorts of different glass shapes. In this short article, we will cover all the basics to consider.
Modern Windows 101
What is Considered Modern?
Pretty much any window design or style out of the ordinary is considered modern. Floor to ceiling windows are modern. Walls completely made of glass are modern. There are many different sizes, shapes, and designs out there these days.
How to Choose?
The windows you choose for your garden house (more information here) are going to be there forever. Yes, you can replace them and the style, but it will require more money and hiring contractors. It can be difficult to decide whether to go classic or modern, but there are some ways to choose.
- Budget – If you are on a budget, this might decide for you. If you want large windows or a large number of windows it can get expensive. Luckily garden homes aren’t usually too big. However, certain modern windows such as floor to ceiling windows are much more expensive than others.
- Use of Building – A garden house is typically used for sitting, relaxing, and admiring the view. However, others may choose to use this space as an office, yoga studio, meditation room, wooden shed, or any number of other uses. Will your activity benefit from having more modern windows?

- Overall Look – What does the garden house look like overall? There are so many different types of designs, it can be difficult to discuss just one. How will these modern windows look with the whole architecture?
- Matching – What does your actual home look like? Will modern windows in your garden home look weird when viewed beside your home? If you want to keep a theme going, these are two important questions to ask. This isn’t important to everyone.

- Go With Your Dreams – What does your dream garden house look like? If it is in your budget, you should go with it. If you want to put modern windows on a classic building, we say go for it. You are the only person that needs to be happy with the outcome!
0 notes
Text
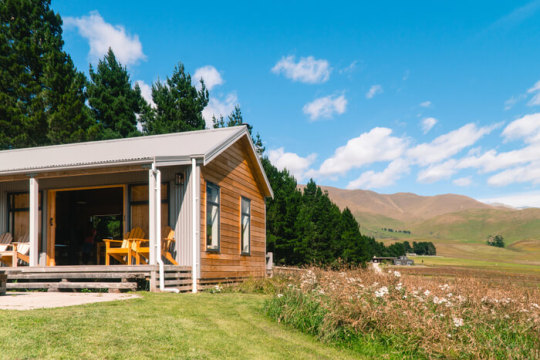
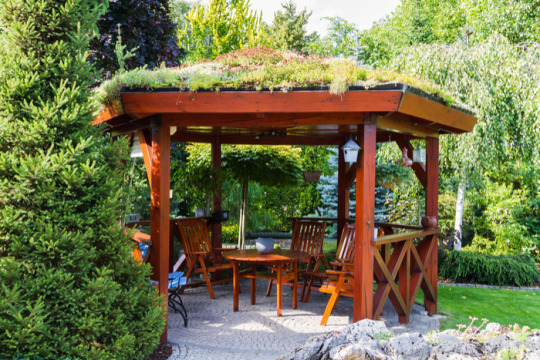
Wooden Garden Houses – What are the Advantages and Disadvantages?
Wooden garden homes are also known as summer homes. These buildings can be awesome, but they can also be a burden. The following are the advantages and disadvantages of buying or building one yourself.

Wooden Summer House Pros
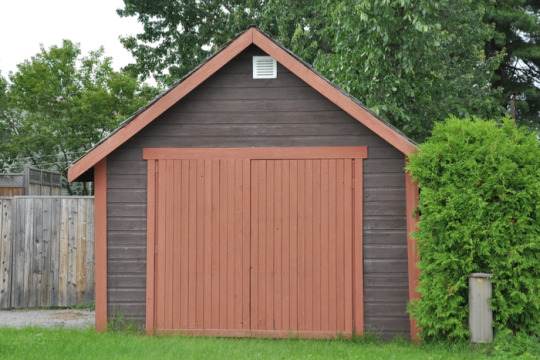
1. Increased Property Value – Summer houses are great for increases your property value. They can also be repurposed by the next buyers into a wooden shed or a she shed!
2. Aesthetics – Adding a wooden garden house will make your back or side yard look better. Just make sure you buy or build something worth looking at! You will be the one to see it everyday, so like the way it looks!
3. Entertaining Space – Wooden garden houses (more information here) are supposed to be a place where you can sit and enjoy your yard. This makes it a perfect location to entertain as well. It gives people a nice indoor/outdoor area to meander back and forth. You can even enjoy romantic meals for two while enjoying the site of the fruits of your gardening labor!
4. A Space to Call Your Own – Having a place where you can go to relax and unwind is priceless. Wooden garden houses are fantastic for allowing people to get the benefits of nature without having to leave their backyard!
Wooden Summer House Cons
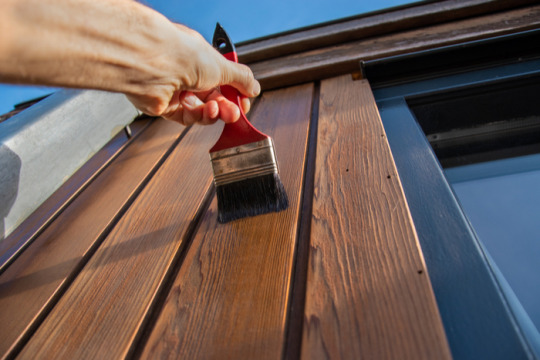
1. Maintenance – Anytime wood is involved, maintenance is involved. If you know you aren’t the type of person to take care of a building, do not build something made of wood. Be honest with yourself before buying a kit, materials, or hiring someone. There will be more work to come.
If you don’t take care of your wooden summer home, insects and water damage will occur. It’s just a matter of time.
2. Insects – There are a few insects that are wood’s mortal enemy. Termites, carpenter ants, wood-boring bees are all examples of pests that want to eat your summer home. They will eat it, too, if you don’t maintain it!

3. Weather – Weather is another issue when it comes to buildings made of timber. The rain and snowmelt will take their toll on your garden house over the years if it isn’t properly maintained. This means staining it, keeping moisture away from it, and checking for damage at least twice a year. If not, rot and mildew can set in.
0 notes
Text
What is Better Suited for Your Needs – Wooden Carport or Wooden Garage?
Welcome to part 2 of our article about what is better suited to your needs – wooden carport or wooden garage (more information here). In this portion, we will be discussing the pros and cons of wooden garages. Keep part 1 in mind as you read through this information. When taken together, you should have a better idea of which one is better for you!
Wooden Garage
Pros
· Fully enclosed – Unlike carports, garages are fully enclosed. That means whatever you have can be completely protected from the elements. Not to mention people.
· Storage space – A wooden garage is a great place to store a wide variety of items. Most people keep some expensive equipment in their garages. It’s also a great addition to help you de-clutter. You can’t store a lot of things in a carport. There is no room!
· Secure – Garages are fully enclosed and lock. They are very secure buildings, unlike carports. It takes a lot more effort to try and break into a garage than simply walking up to a car under a carport.
· Adds property value – This wooden structure adds property value. We’ve seen some estimates as large as $20,000 to $30,000 more! Just make sure it is in good shape and useable.

· Versatile – Wooden garages can double as an extra living space. We’ve met plenty of people that use this building as an extra living area. Some even insulate it and turn it into a spare bedroom. It can be a workshop, office, gym, yoga studio, etc.
Cons
· Permit approval takes longer – Unfortunately, both buildings require a permit. However, since garages are more complex, it takes a bit longer to get them approved. That just means you’ll have to plan carefully.
· Maintenance – Anything made of wood is going to require maintenance. However, the larger square footage of timber requires even more care. If you aren’t willing to put in this extra work, figure out another material to use for your garage.

· More expensive – Your property value may be increased, but it comes at a price. Garages cost more because they require more timber to build. Budget is an important part of building, but so is having your needs met.
0 notes
Text
What is Better Suited for Your Needs – Wooden Carport or Wooden Garage?
Welcome to part 1 of our 2 part series on how to decide between a carport and a garage. We have been in your shoes, and we know how difficult of a choice it can be. That’s why we’ve put together an article about how to figure out what is better suited to your needs – wooden carport or wooden garage. In part 1, we are covering the wooden carport.
Wooden Carport Pros and Cons
Pros
· Beauty - Who doesn’t want a carport made out of wood? They look much more classy than carports made from metal. If you have a log cabin, you should definitely think about putting in a wood structure over a metal one.
· Versatility – There are so many different wooden carport (more information here) designs it will be hard to choose. Pretty much anything you can imagine you can do. There are also many different kinds of wood you can use. Spruce, pine, cedar – you name it they got it!
· Easy to change up – If you get bored, you can always paint or stain the wood. However, I would not paint logs like log cabin logs. Only stain these. If you’d like, you can add some metal or stone down the road for a different look.
· Strong – Wood can withstand just about anything as long as you buy quality timber. In addition, you must keep up with the maintenance to continue reaping the benefits!

· Lower cost – Since wooden garages use more timber than carports, the cost of the carports are much lower. However, they are not as cheap as their metal counterparts.
· DIY doable – It is much simpler to put together a DIY carport than a DIY garage (if that’s even a thing). You can even purchase pre-fabricated kits.
Cons
· Maintenance – If you are the type of person that hates chores, I would rethink my decision to purchase a wooden anything. Maintenance is an important part of keeping your wooden structures up to par.
· Exposure – Carports offer little to no protection from elements that can blow in from the side. Your car can still get hail damage, rain damage, and ding from objects carried in the wind.
0 notes
Text
Tips on How to Make Your Own Flower Garden at Home: Part II
Welcome to part 2 of how to make your own flower garden at home. In this article, we will finish what we started in part 1. By the end, you will be able to plant your own flowers in your own garden!
How to Make Your Own Flower Garden Continued
Step 4: Choose Your Flowers
If you have already picked your flowers in step 1, you can skip this step. The way to choose flowers is to think about whether the area gets mostly shade or sunlight. Also, do you want your plants to come back every year? Choose perennials. Or are you up to plant more every season? Pick annuals. Remember, annuals get more colorful blooms.
Step 5: Start Your Seeds or Buy Your Flowers
Do you want to start seeds? If so, do them 3 weeks to a month before the last frost. Too early and they will outgrow their containers. Use a seed starting mixture, because there are no weed seeds in it. Also, it contains the right nutrients to help them sprout! Place them in a warm place with 6 hours of sunlight. The soil must be warm enough to promote growth.

Step 6: Dig the Holes
Plant the garden flowers only after the last frost. Too early and they will die. The first step is digging the hole. Make it only as deep as the flower’s roots need. Before putting the plants in their holes, put in some time-release fertilizer to give them a boost.
Remember to space them apart according to each individual flower’s need. Also, don’t forget to keep all plants at least 3 feet away from the exterior wood of log cabins (more information here).
Step 7: Plant the Flowers
Gently separate the roots and put the flower in the ground. Now, fill in the remaining holes with soil. Tamp it down and water thoroughly once you have it in place.
Step 8: Water When Needed
At first, you will need to water your plants every other day at least. Depending on the area you will need to water them every day. After the first week or so, you can water as needed. That depends where you live. Hot, dry climates will require more moisture than places that are humid and rainy.
0 notes
Text
Tips on How to Make Your Own Flower Garden at Home: Part I
In this article, we will give you our top tips on how to make your own flower garden at home. It’s not too difficult for beginners. In fact, we recommend everyone start their own floral garden. It’s a great way to improve your home’s value and reduce your stress. Welcome to part 1!

How to Make Your Own Flower Garden
Step 1: Choose a Location
The first thing you should do is choose a location in your yard. You will want to pick a spot where the light level and drainage are right for the flowers you want to plant. The best way to do this is to choose the plants first and match your location. If you have limited space, pick flowers that can live in the climate of your location.
Choose a place where you will see your flower garden. Don’t stick it in some forgotten corner because you may forget about it! You want to be able to see it everyday. A great place is right next to your wooden garage (more information here).
Step 2: Get the Ground Ready
Take the grass off of the area you want to plant. We recommend starting your flower garden small and increasing the area each year. Beginners can do it, but the smaller the plot the better. You don’t want to bite off more than you can chew or you may grow to hate gardening.
If you don’t want to dig up the grass, there is another method you can start about 5 months before planting. Lay down 5 or more layers of newspaper on top of the area. Cover them with compost, topsoil, and potting soil. This layer should be over 3 inches thick. Over the few months the grass will die naturally and the soil will be rich enough for flowers.
Step 3: Enrich the Soil
If you took the grass off of your yard, you will need to enrich the soil underneath. Break up the top 6 inches of soil and add aged manure, peat moss, compost, shredded leaves, or other organic materials. Mix it altogether and you are ready to plant.
Can’t or don’t want to dig into the soil? Start a few months before planting season and simply put the materials on top of the soil. Over time the soils will become one and you are ready to plant!
0 notes
Text
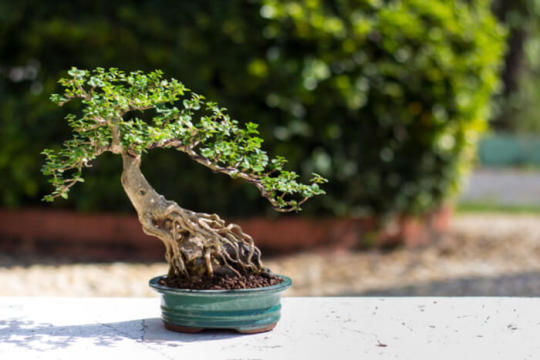
How to Plant a Bonsai Tree: Part II
Thanks for coming back for part 2 of how to plant a bonsai tree. Let’s not waste any time and dig back into the process!

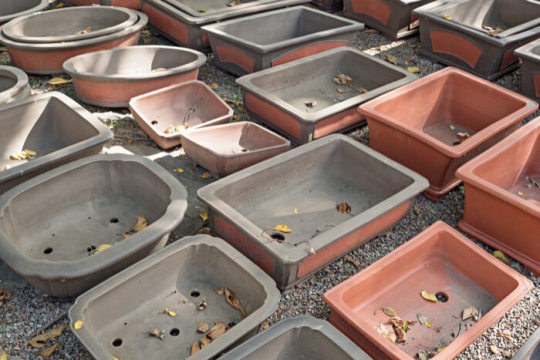
Step #5: Pick Your Pot
The key to a bonsai is choosing a smaller pot so the roots can’t grow any bigger. At the same time, you need a container where you can cover the roots with soil. Additionally, it should have some drainage holes at the bottom to prevent root rot. You can drill these yourself if you are completely sold on a pot without them.
Note: If the bonsai is unhealthy, you can grow it in a regular pot for a little while before transplanting it.
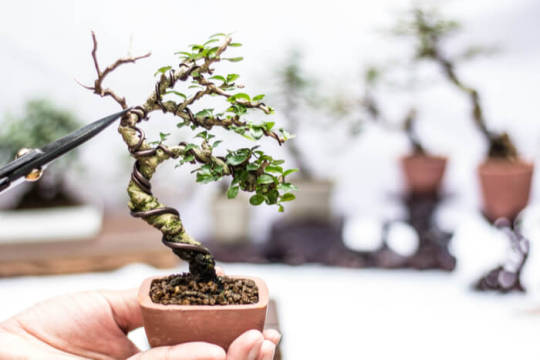
Step #6: Prepare the Plant
The tree itself should be pruned to your desired shape before transplanting. If you like, you can stop watering a few days prior to make the soil easier to work with. Additionally, the best time to transplant is the spring, as it is less taxing on the trees.
Step #7: Prepare the Roots
After taking the plant out of its current container, clean the roots. You want to be able to see everything clearly when you prune them. To prune, cut off any upward facing roots. Make sure any of the thicker roots are also cut. You want multiple thin strands of roots.
Step #8: Prepare the Pot
An important part of how to plant a bonsai tree is preparing the pot. For this, you will need coarse soil at the bottom. Followed by a layer of soil that drains well. Do not use regular soil or else the plant could drown. Be sure to leave a big enough space for the bonsai.
Step #9: Plant the Tree
Set the tree on the top layer of soil in the way you want it to look. Afterward, fill the remaining space with the well draining dirt. The most important thing to remember here is to cover the roots completely. At the very end, some people like to add moss or gravel to the pot. This serves 2 purposes: holding the bonsai in its place and looking beautiful!
Step #10: Care
Give the tree some time to breath. It has just been through a traumatic experience. That means you should keep it in an area with indirect partial sun. Do not set it outside yet, as it really needs a 2 week to 1 month period to establish its roots in the new pot.
0 notes
Text
How to Plant a Bonsai Tree: Part 1
If you aren’t familiar, bonsai trees are just mini trees. However, the art of growing them is quite ancient and originated out of China. In the first part of this series, we are going to explore the first few steps of how to plant a bonsai tree.

Planting a Bonsai
Step #1: Pick the Right Tree
Almost any tree or shrub that is a perennial can be made into a bonsai. That gives you a lot of choices, but almost too many! We recommend starting your first out of something easy such as a pine, juniper, cedar, spruce, magnolias, maples, oaks, and jade.
Step #2: Indoor or Outdoor
This will depend on what tree you choose. If you want to grow indoors, you want a tree that doesn’t need as much water or light. Outdoor environments are much better for temperate bonsai trees. Here are a few examples of both:
Indoor – Boxwood, Ficus, Gardenia, Hawaiian Umbrella

Outdoor – Elm, Juniper, Cypress, Cedar, Maple
Step #3: Decide on the Size
Your bonsai can grow to as small as inches or as large as feet. Think about the area you want to keep the plant in. How large can you go? What container will you be using? How much sunlight, water, and nutrients are available? How invested are you? Larger trees need more resources and will need to be pruned just as regularly as smaller ones.
Step #4: Seed vs. Store Bought vs. Cutting
Here’s where things can get confusing. If you decide to grow from a seed, it may take up to 5 years to get the bonsai of your dreams. However, you will be able to control the tree from the very beginning.
If you are new or just want to have fun shaping and pruning, go with a plant that has already been grown. Although you don’t have as much control, you can have the bonsai you want in a much shorter time.
Cuttings are somewhere in the middle. They offer you a moderate level of control and do not take nearly as long to grow as a seed will.
Stay tuned for part 2 of how to plant a bonsai tree!
0 notes
Text
How to Make a Kitchen Garden: Part II
Thank you for joining us for part 2 of how to make a kitchen garden. If you are new to the site, click here to read to part 1.

Kitchen Garden 101 Continued
Choose a Layout
There are a few different ways you can lay out your kitchen garden. If you have decided to do a container garden, you don’t have to worry about this step. If you are doing a raised bed, there are some decisions you will have to make.
You can decide between planting your crops in rows, a triangular formation, intensive, scattered, or climbing. There are actually endless options, but these are the more popular. When you are just starting out, rows may actually be the easiest for you. However, there are benefits and drawbacks to each type of planting.
Plan the Arrangements
If you decide to plant your vegetables in a big clump, it will help deter pests that like to feed on one kind of plant. That is why we recommend going with edibles and flowers. Insects and pests can be confused quite easily. Planning is necessary when deciding how to make a kitchen garden.
Remember, when you decide where to plant what you need to take into account the fully grown size of each item. If you crowd the seeds or seedlings, there won’t be enough room for them to develop into the delicious edibles they are!

If you decide to grow tall plants like corn, or plants that grow up trellises, be sure they aren’t blocking the sun from the smaller crops. Additionally, some people like to use non-edible plants to landscape their edging. If this is you, find perennials that won’t grow too tall, but will still make a statement on the kitchen garden boundary.
Time to Plant
With all of your plans drawn, you are ready to plant your kitchen garden! Congratulations! Now, this is where the real work begins! Seeds will take a while to grow, and if you haven’t started them already you may want to think about seedlings. However, there are quite a few seeds that propagate quickly, so do your research online or by reading the seed packets.
We recommend planting a new bed or container outside of your mobile home once every 2 weeks. This is called successive sowing, and it guarantees you will have delicious edibles throughout the whole growing season.

Trustworthy products, customer satisfaction, and steadfast manufacturing are the Pineca promise! You can find more information here.
0 notes