bayou0baby0
A Touch of Seoul
Life is a journey. Here's mine.
1097 posts
Don't wanna be here? Send us removal request.
Last Seen Blogs

feederreal23
Sin título

samayla
Da mi basia mille

fangirling-101
im having a proper full on gay crisis

hangmanssunnies
We'll All Be Here Forever

sarhosfalanmiyim
zeynos💗💅
Photo
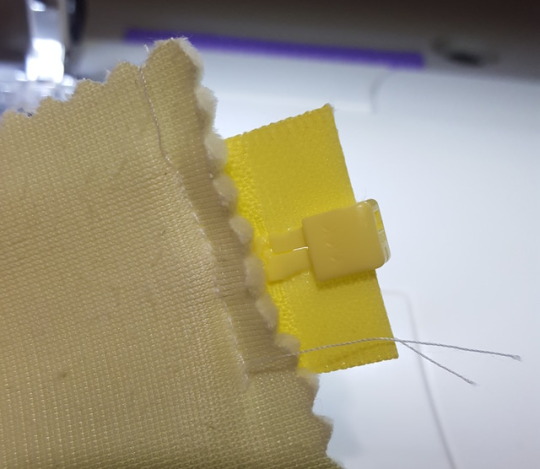
Ending a Zipper
There are a few different ways to end a zipper that you want to shorten or prevent from separating on the bottom. Here is my current favorite technique! In my previous guides I’ve used glue or webbing, but I have been doing this instead and I like the finish of this much better!
Above, using a sewing machine (hand stitching is also possible!) sew a scrap of fabric over the zipper teeth just above where the slider is supposed to separate or where you would like your zipper length to end. If you have a printed fabric or minky, like I am using, orient your fabric so it is “wrong” side against the zipper teeth.
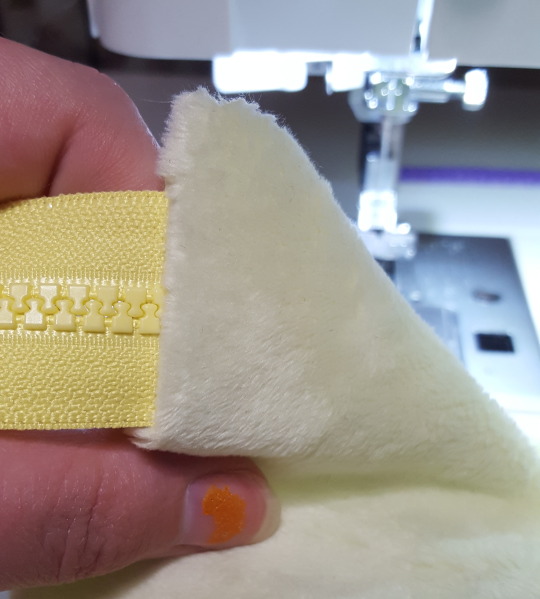
The fabric will be folded over the zipper like so.

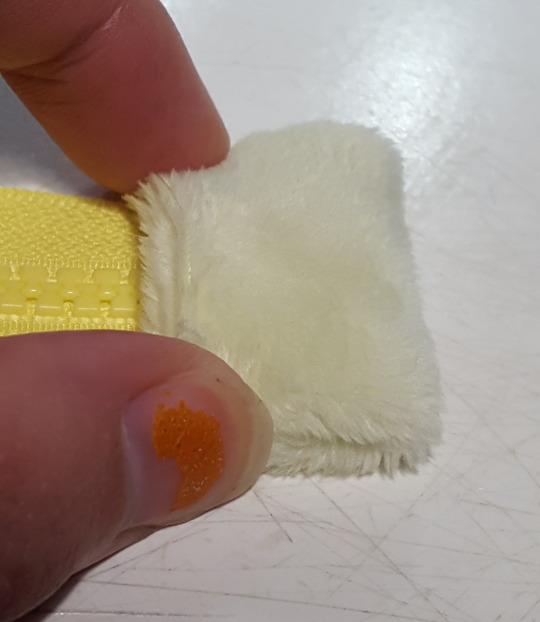
Here is how the opposite side looks after that first stitch. You can now trim your fabric piece smaller. To get a tidy look, folding in the end your fabric will achieve that.

You can also fold the sides in on your fabric too.
Here is both the ends and the sides folded in, ready to sew. If it helps, you can pin or clip your zipper end to keep it in place until you can sew it.
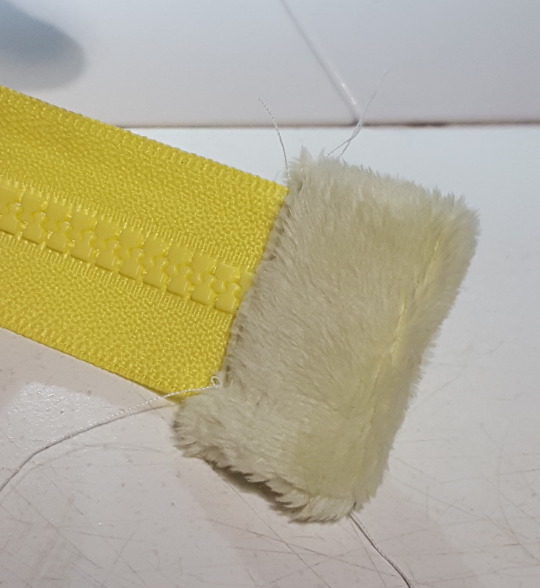
Do another line of stitching over the zipper teeth to sew the folded in end down.
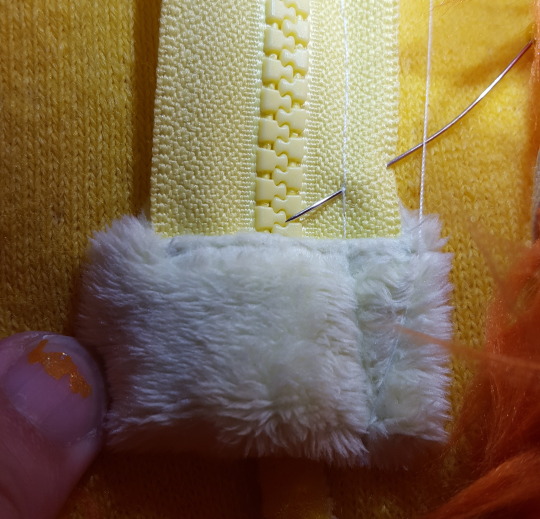
You can leave your sides un-stitched until you install your zipper into your project! Once you sew your zipper down to your project, you can sew over the ends and it closes them up very neatly.
I hope this zipper ending technique is useful for your projects! Enjoy!
734 notes
·
View notes
Text
Making A Resin Mask - Part 1
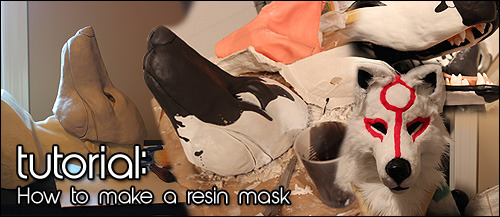
Since I’ve done it a few times now and I had to learn and research A LOT, I figured I’d make a tutorial for those wanting to get started! :D
Keep reading
962 notes
·
View notes
Note
Heya, so I was wondering how exactly do you finish off the edge of a mouth on a toony suit? I haven't seen a single tutorial or guide explaining it anywhere. Do you sew the fur over the top of a glued lining? Or the other way around? Or get an extra piece of mouth fabric and make a lip? Or sew the two pieces together, slip it on the head and somehow glue it down?
I have only recently mastered this after … gosh, however many years I have been making costumes. It has taken a lot of research and development to get myself to this point. So I appreciate credit, but also sincerely hope y’all have a chance to chip in to my Patreon if you get the chance, it will continue to encourage my innovation and show me you appreciate these sort of replies – in a financially supportive way!
I pattern my fursuit heads to have a liner that is non-balaclava based. That means I build my foam head shapes first, hollow them as much as I can, and then tailor a liner to fit the interior. This liner I sew from quilted broadcloth, and then I use either lycra ironed to interfacing or anti-pill fleece for the mouth lining/eye lining(sometimes I add in lining for ear vent holes and the neck as well). For someone making their own head, you can make a tape pattern of half of the interior, mirror it, and then tailor a liner based off that.
Tip: Save that primary liner pattern, it generally can be revised for each new head for a custom fit. As you make more heads you get a better sense of what needs revised about it. I save almost all my patterns and revise them for use on future masks and it saves me a lot of time so I don’t have to repeat tasks from scratch, and I can learn more from it each time.
When I get to the mouth – the part that was asked about! I carefully tape-pattern the desired mouth shape, it gets cut out with a very small margin since I hand-sew the fur to mouth (I will describe this a little later). Be sure to sew anything that needs sewn directly to the liner, including any other accessories – like teeth & tongue (they can also be marked out on the tape pattern)!

You can (sort of) see even the mouth corners are patterned in, too. Those are the triangular-looking extra pieces coming off the left and the right. This liner & teeth & velcro for the tongue is all machine-sewn up to this point.
The time I install the liner comes before I fur the mask. Its crucial! First I pin it in place as a “dry fit,” sometimes I do another revision step once I see it all together. Once finalized, then I start gluing down all the easy-to-glue loose edges (I use hot glue).
When I need to glue down an interior segment I cannot reach easily: I cut a small slice in the foamwork, fit the glue tip in to reach the liner, glue the liner through the slice and then squirt a bit more glue to close that slice in the foam right back up. When gluing down the mouth leave a margin of unglued area around the edges – those will be sewn.
Tape pattern the rest of your critter for your fur. Measure your pattern, order your fur, and when it arrives cut your pattern and sew it up however you wish. Leave the jaw separate from the face, it will be easier to attach to the liner.
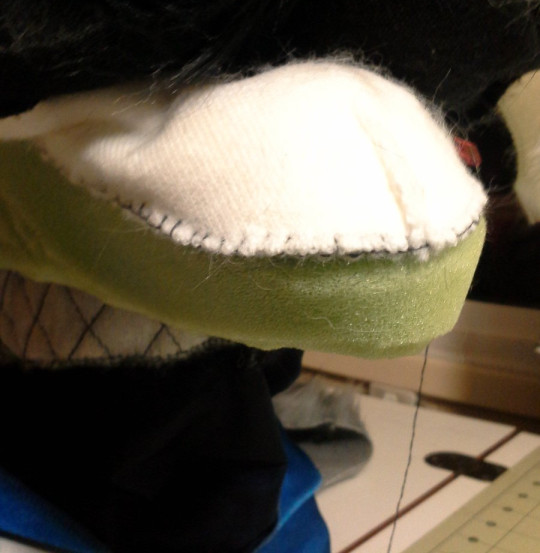
Use a blanket stitch or similar to sew your jaw fur on! Matching thread color to fabric is important, as it may show.
The end result is very clean once turned right side out.You can see on my upper mouth where I left the edge unglued to instead be sewn. The top jaw and mouth corners, too, were sewn in this way.
You can also use this technique to sew the inside liners of ears or other areas that need a smooth edge but may call for separate treatment from the rest of the head.
Happy crafting! For more costume tutorials, visit my website Matrices.net
709 notes
·
View notes
Photo

Ever curious about your puppy’s paws? This is a greyt diagram of the different pads!
2K notes
·
View notes


Photo

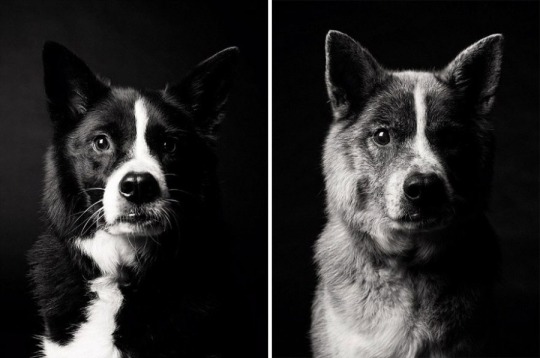


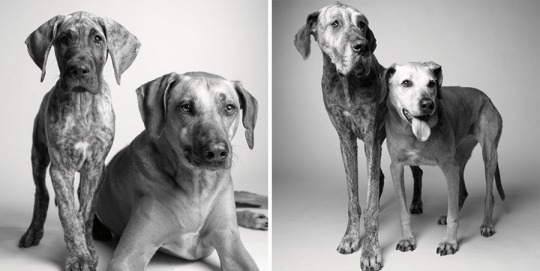

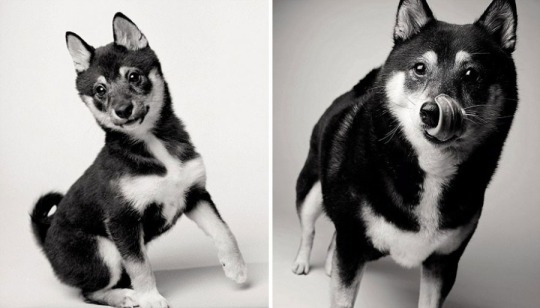
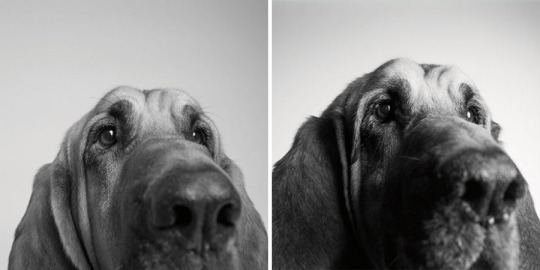


Amanda Jones has dedicated the past 20 years to an incredible photography project which aims to show just how fleeting the lives of our beloved pets are.
602K notes
·
View notes


Photo
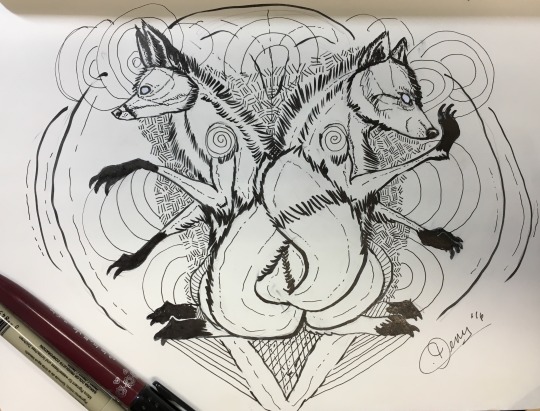
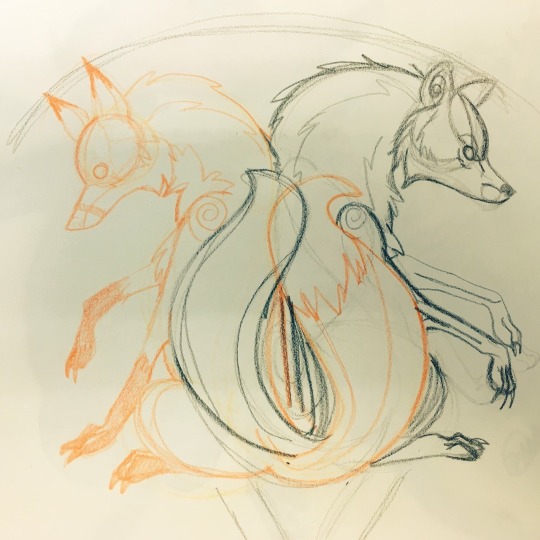
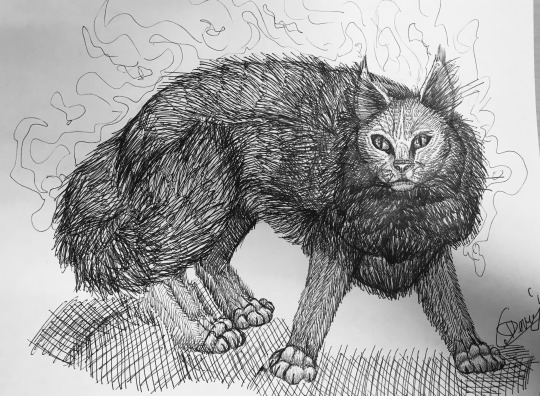
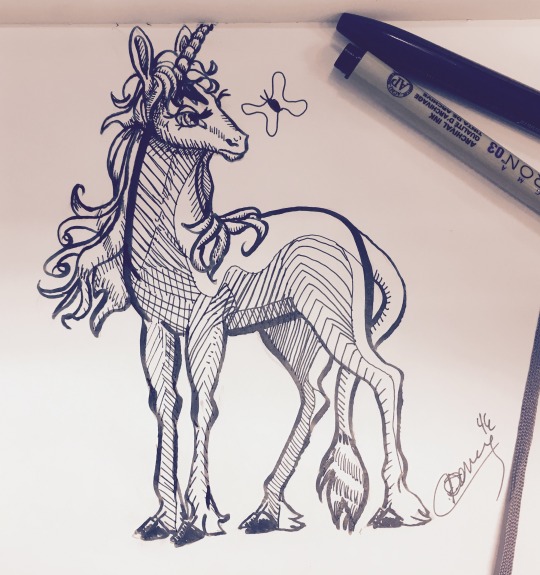
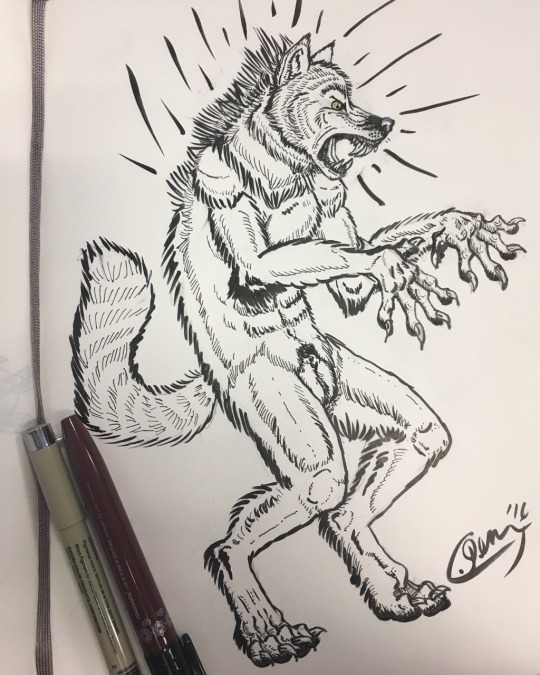
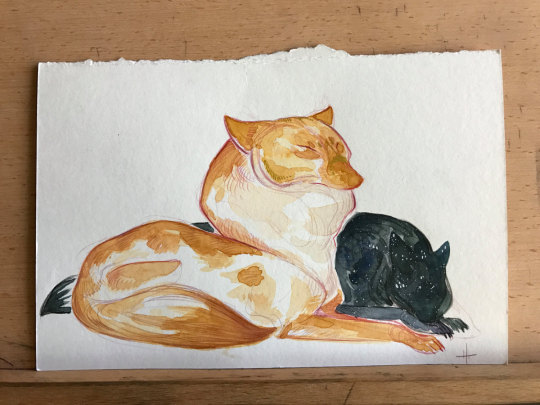
Tattoo idea reimagined for #Inktober2016. New on left and old and right.
2 notes
·
View notes