
Last Seen Blogs


Text
Another Cameron Button Up
Thrifted fabric, I think it's poly or a cotton poly blend (more poly than cotton). I only had 4 white buttons, so you get one surprise red button near the bottom hem.
I think I've done this collar/collar stand method enough times that i want to try and find a different approach. Surely there are methods that are a little less fiddly but get a similar result? To youtube!

I cut a piece from a colorful bandana for the collar stand. I wanted the blue/green to show but it's yellow - womp womp. Still fun! Learning moment, though. I was too focused on cutting with the correct grainline alignment that I didn't consider placement on the print and where the ends would be that will show up the most.

I am unsure if I'll add a pocket. The rest of the bandana is certainly big enough to use for a pocket, but it is LOUD and I'm not sure if I would wear it as often. But I can think about it as long as I want because I could add a pocket whenever!
10 notes
·
View notes
Text
Modifying a sweatshirt into a cardigan (swardigan?)
Time for another knit garment modification 100% winging it!
You ever buy something at the thrift store and wonder: why someone would want to part with this, it's great?! And then you wear it a few times and...understand. You should not have passed judgement.
This "teddy" faux sherpa sweatshirt was cute but 100% polyester and as a top, wow SO sweaty. I was not wearing it, so it seemed fair game to try and edit into an open front cardigan/sweater layer instead.
It has no fasteners as I wanted this to be quick (and it was!). But if you do this, you could probably work a little slower and incorporate some loop & toggles like this. It's been working out fine as an open front thing to throw on, and I'm not a sweaty monster in it. Yay!
I forgot to take a "before" photo, but this is close enough. All I've done is carefully cut it right down the center front:

I'm using what I had on hand; brown thread for the regular sewing machine, and I was not about to rethread my serger for an experiment, so you'll see later that the serged threads are black. It's fine!
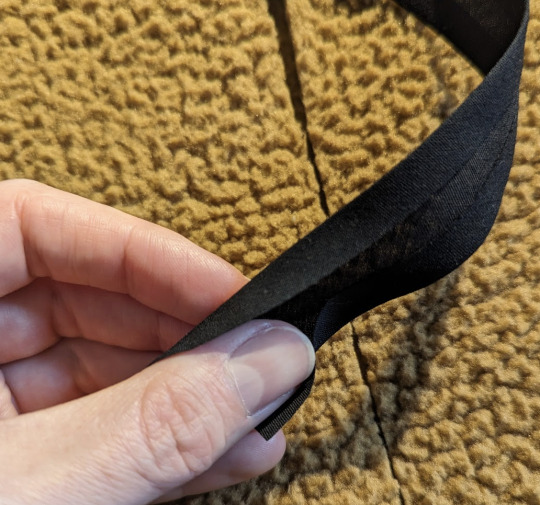
I had some cheap black single-fold bias tape. That did well enough to line the inside of the cut edges.

There was a little bit of Stuff Happening around the bottom hem, but it didn't feel TOO thick to sew over, and it wasn't a problem. Here are the guts at the bottom hem:

Le serged edge:

With right sides together, and the top of the bias tape folded down twice to enclose the raw edge, sew it on thusly. This is from two different angles, before sewing that line and then afterward. Sorry if that's confusing!!:

Then you neatly pull the bias tape over the edge and sew it down again. There are many videos out there that can explain this basic technique better than I can! This was even easier than that demo, because it's a straight line.

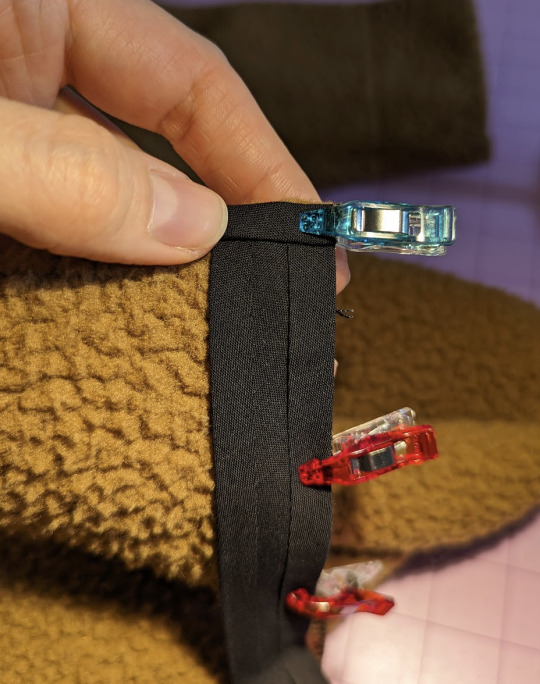
There it is, now flipped to the inside. I'm pointing at the edge where you sew one more line all the way down. The serged edge is captured inside where the clips are.

Bee-daa! Not fancy, but it does the job.

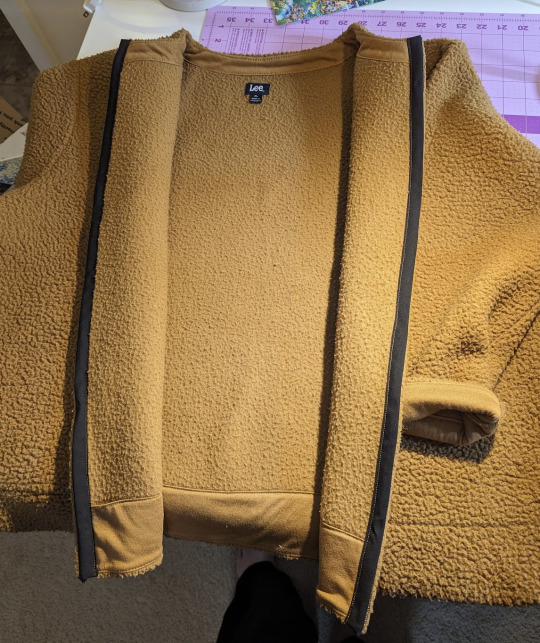

There, a sweaty-sweater-no-more!
10 notes
·
View notes
Text
Sizing up a hoodie or sweatshirt
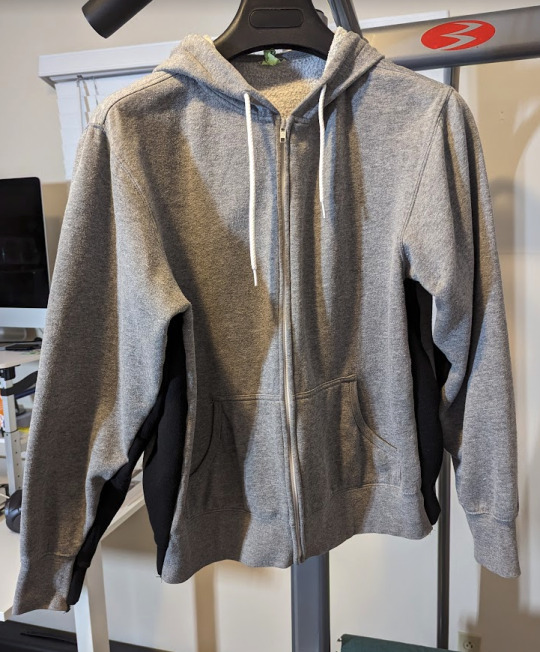
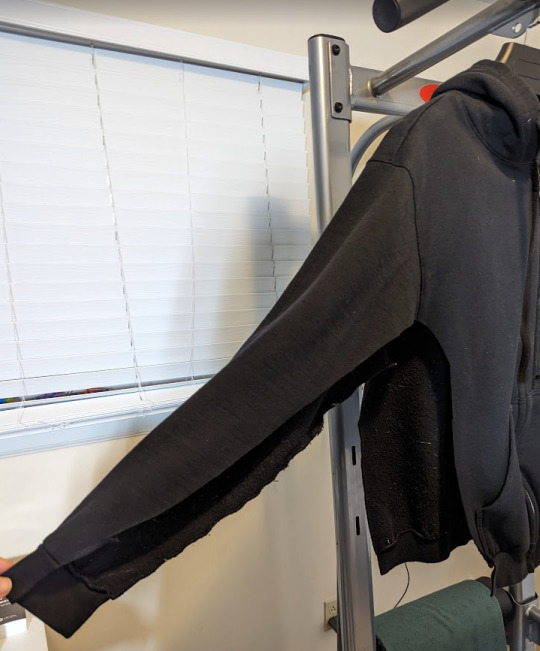
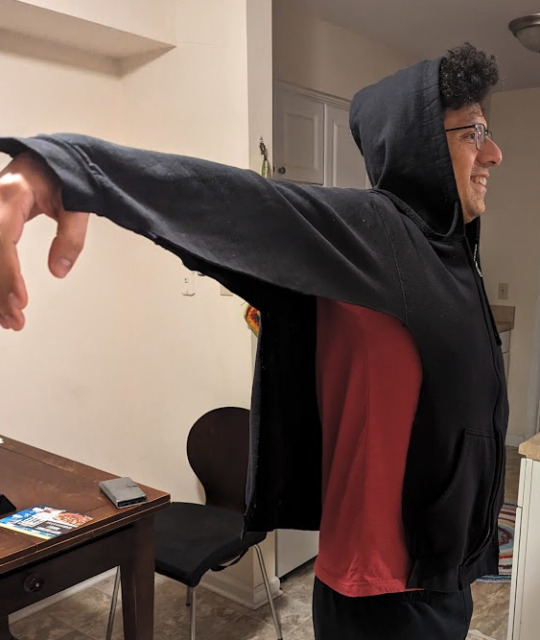
I had an old hoodie I wanted to wear more often, but it's always been a little snug (the price you pay when the merch table at a show has limited sizes remaining but you HAVE TO GET A SOUVENIR - and also support the band). I realized I had another hoodie I didn't wear very much, and decided to sacrifice it to size up the other!
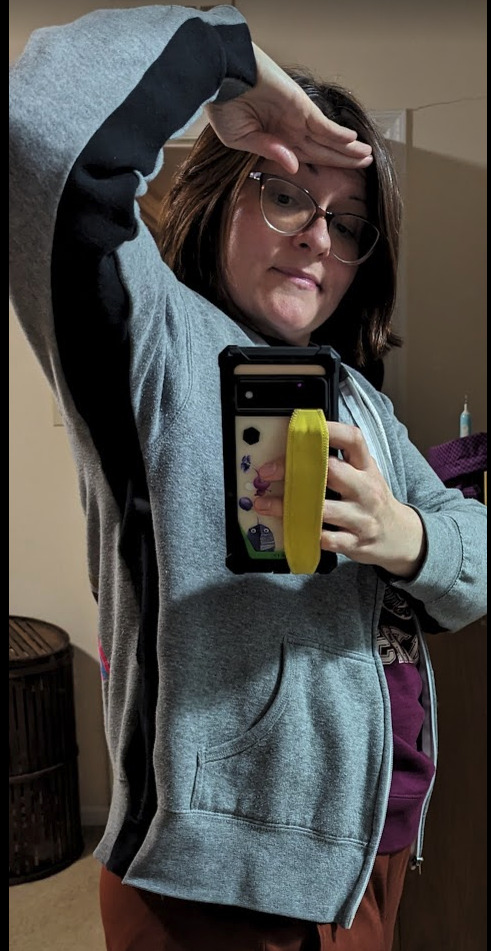
The black stripe is the sacrificial hoodie bit, which overall made the original hoodie about 6 in larger all around (3 in strip added under each arm). Keep in mind, this method makes the torso larger, but also the sleeve size. I bet that's helpful to most people, but if you wanted to not size up the sleeve so much, you could probably cut your strip so it's narrower as it goes down the sleeve. But not to a fine point! Just a little narrower on one end than the other. You still need to have room to use your serger on both seams.
I looked up tips for adding a gusset under the arm. It was not an ideal solution; I ran into a pet peeve in my searching. When folks yadda-yadda over the fiddliest bit of the process. No! Please tell me how exactly you pivot around a point with a stretch stitch and then serge the rest of a seam!! I was not about to try to figure that out with no clear tips.
So, I decided to approach it with the skills and tools I was most confident using (not confident in my ability to use the right kind of stretch stitch around a corner at an armpit seam. I knew it would fall apart!).
NOTE: I used a serger for the entire process. I opt to use an embroidery needle or similar to pull the tail back up into a few stitches rather than try to sew over the tail ends. It's not as quick but I know it works and I have more control. I'm not going to cut into something by accident either!
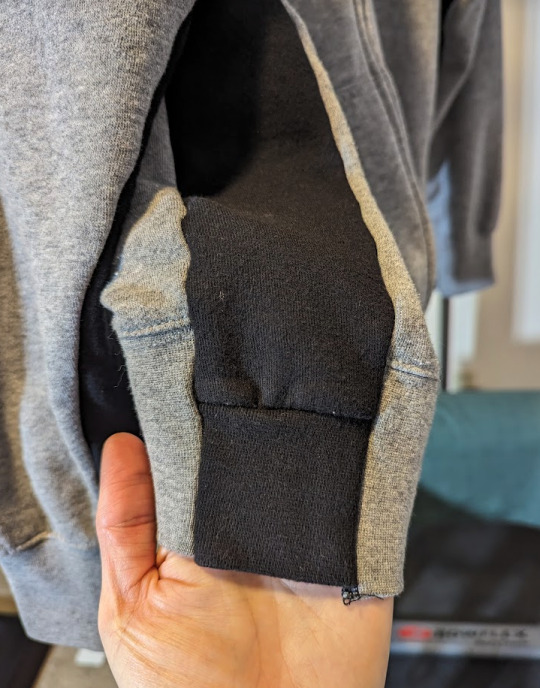
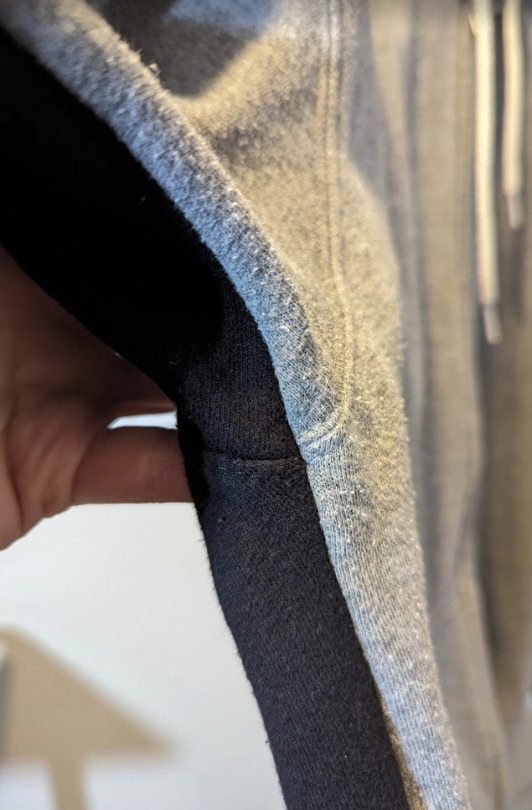
ANOTHER NOTE: You HAVE TO use 2 sweatshirts or hoodies that are the same length from the pit to the BOTTOM HEM. If the length from the pit to the arm cuff hem is somewhat off, that's okay. When you're done, you could always cut off the cuffs and serge on a new one. But you can't so easily do that on the bottom hem on a hoodie with a zipper.
See how the cuff is misaligned here. I could cut off the cuff just above the grey seam and serge on a new strip of ribbed knit if I wanted it to look cleaner. But this was close enough, and also who wants to chop off its character? Someone who's probably no fun at parties, but probably better than me at filing their taxes, that's who.
HOW I DID IT
I essentially added a strip from one hoodie into the under arm/side of the other. If you're wanting to be precise, you can measure how much extra room you want to add, divide by 2 and that's how much you'll harvest from your sacrificial hoodie. The serging will eat some from each seam; consider how much you are comfortable serging off and add that math in for yourself. This one was about 3" wide on each side, as I feel comfortable to serge with taking off just a whisper.
I used a marking tool and a ruler to mark a consistent 3" wide cutting line from hem to cuff on the black hoodie. You'll be cutting a straight strip so don't eyeball it! If you're making it a little smaller at one end than the other, an even better reason not to eyeball it!
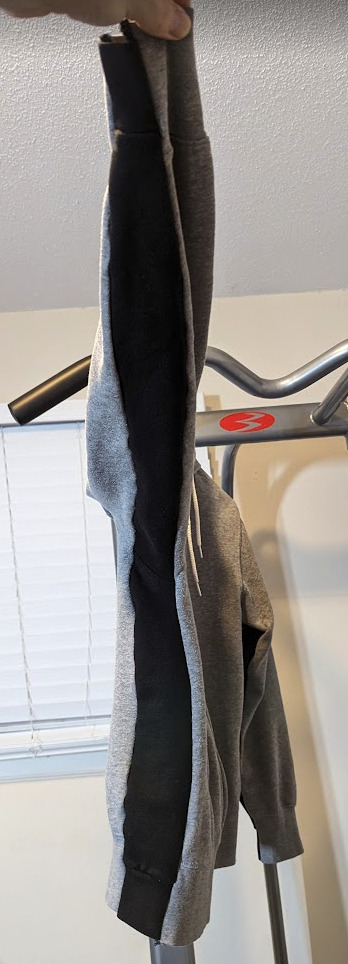
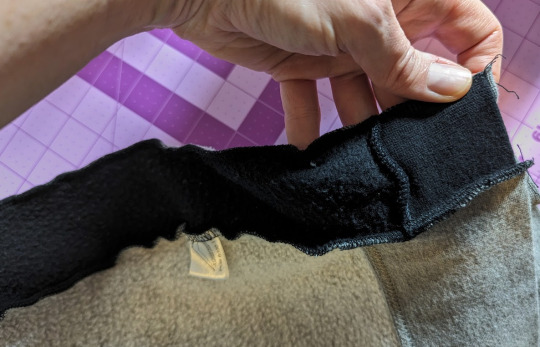
You can only remove up to where you come in contact with a pocket, zipper, or other component. Pick up a hoodie and look under the arms and you'll see what I mean! Here's as far as I cut due to the location of the pocket on the black hoodie:
Here's what that black hoodie looked like after I cut out the strips. Daniel was quite amused by it looking like a pelt and/or some kind of punk wizard's cape:

Mark which strip is meant for which side before you move on, so you don't get frustrated later! THIS IS IMPORTANT!
Next, you have to cut open the hoodie that will be gaining these strips. At first, I was carefully seam ripping the side seams but that is SILLY! Don't do that. Just cut it, your serger will be removing any old seam bits.
Right sides together, pin your strips in place. IMPORTANT! Make sure you're using the correct side of the old hoodie to the new one! R with R, L with L.
IMPORTANT ALSO!! Make sure the underarm pit seam intersection is aligned! Start pinning from there, and work your pinning out. AGAIN! the length from this pit junction to the bottom hem should be almost exactly the same or this will give you a headache.
(Pay attention to your pits, to avoid getting down in the dumps.)
Time to serge! You can squinch and fudge the seams a little as you serge to make them line up a little better. Just don't pull or yank on them much, or your knits will be forever wonky.
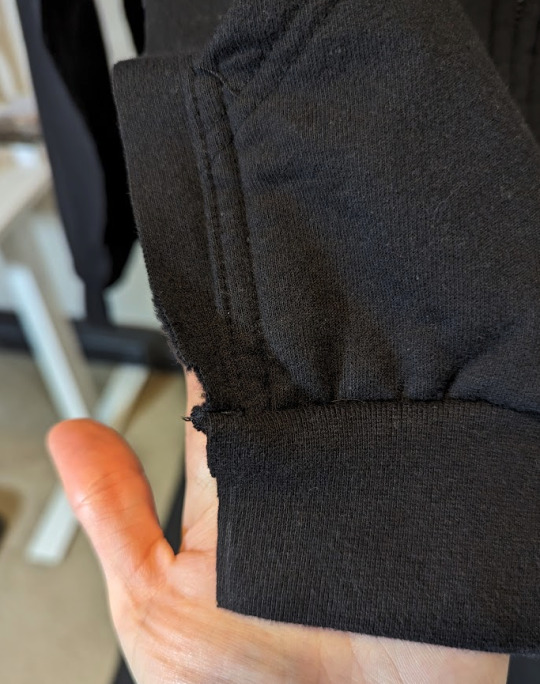
Here's what it looks like on the inside:
I hope this is helpful to others and you get more wears from things you love! If you need to find a hoodie or sweatshirt to sacrifice, hit up a thrift store. Just be sure to bring your hoodie with you as you shop, so you get one that is almost exactly the same length from hem to hem.
86 notes
·
View notes
Text
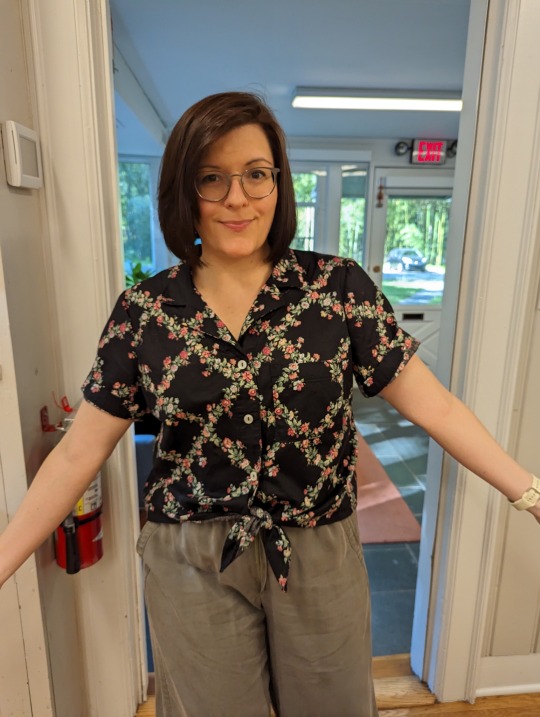
It’s Me Made May (I wish that had a better name but w/e!) - and I finished something. Yahoo!
The Gilbert Top from Helen’s Closet, in a lightish weight cotton woven I thrifted from a local reuse warehouse.
The pattern alignment was a total accident! I should try less hard more often.
12 notes
·
View notes
Text
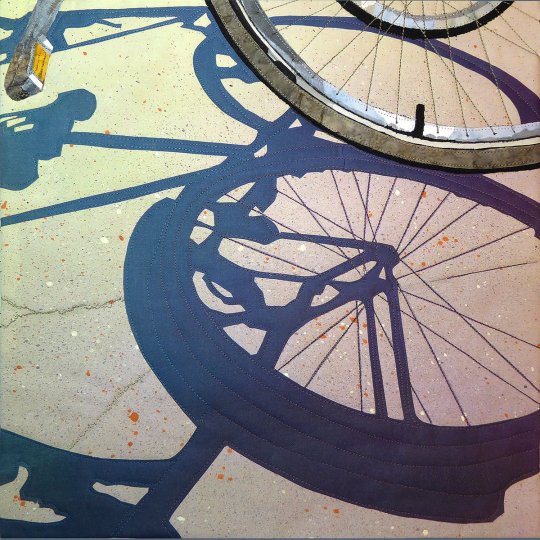
god damn this is a QUILT ('late day shadows' by nancy messier)
130K notes
·
View notes
Text
Cashmerette Stanway
I sewed my first knit garment using the Cashmerette Ahead of the Curve book - the Stanway T-shirt! It’s a raglan style and wow, what a simple way to sew a sleeve. Straight lines? Yes, please!
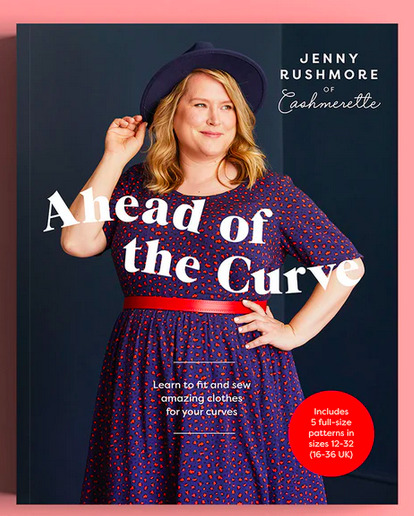
This was also my first Cashmerette pattern and I was SO impressed! I used the C cup size 16 and added just a bit around the hips. No other modifications. It FITS SO WELL! The book includes great directions on modifying patterns if you need it for a smaller/larger bust, shoulder, bicep, and more. And includes 5 patterns! I recommend it.

Making this top with 2 fantastic friends with different levels of experience in sewing made the process even more fulfilling. We ALL finished a Stanway AND they fit wonderfully! We made our own mini sewing retreat weekend and dang, but it was fun!
I almost finished a Gilbert top, but ran into some challenges. More on that in a future post!
0 notes
Text
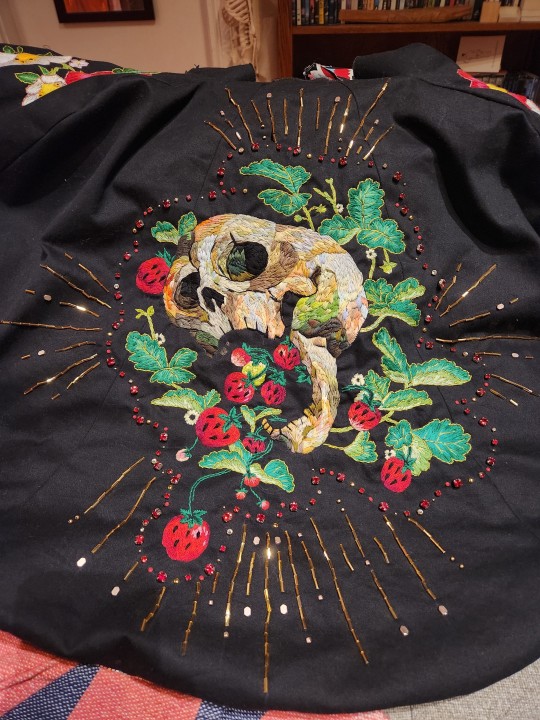
I'm now at 514 pieces of embellishment (rhinestones, studs, beads) on this baby, not counting the rhinestone trim. Moving on to the front!
24K notes
·
View notes
Text
New year, new hobonichi! Sewed a quick cover with some cardstock for stability.


1 note
·
View note
Text
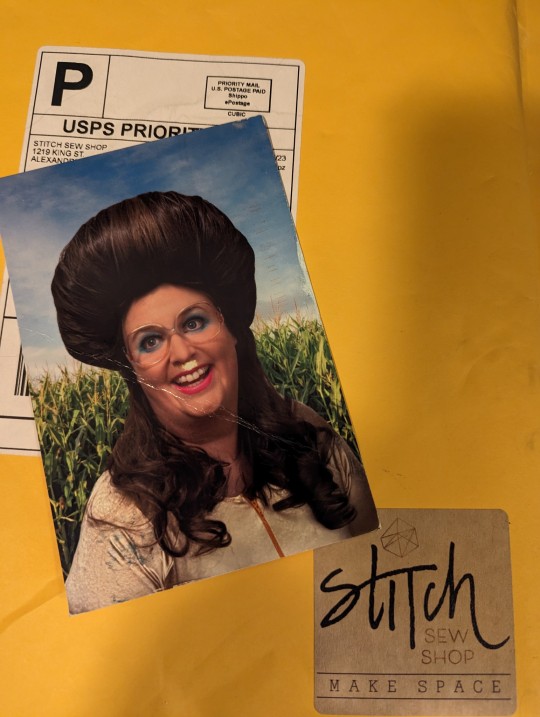
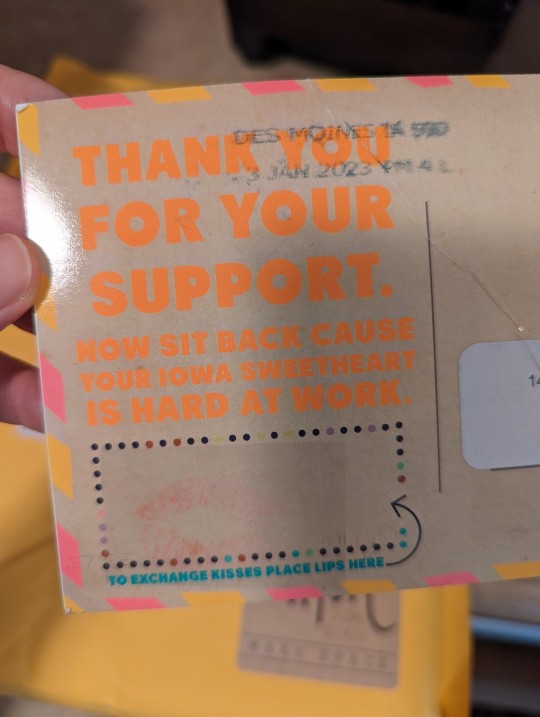
My latest sewing patterns arrived in the mail at the same time as my Patreon postcard from mother gem. Would you look at the petite mustache the postal sorter gave her.
4 notes
·
View notes
Link
I received a question recently about this hat knitting up a little bit big when they were starting the pattern. I made a little explainer video here. If you are finding that the hat seems too big or too stretchy, make sure you're using K1P1 in the round, not accidentally k1p2. And if it's still too big then cast on fewer stitches!
If you’re inclined to make a gift or two this time of year, my Chicken Hat pattern is available for $5! It’s a pretty quick knit, using chunky weight yarn for most of it, and only requires a few types of stitches. You do need to know some very basic crochet skills for the little beak and comb.
Since I’ve had so many requests for how to make the “nest” version that I used to sell as a finished hat, there’s a new pattern add-on for it too!
2 notes
·
View notes
Text
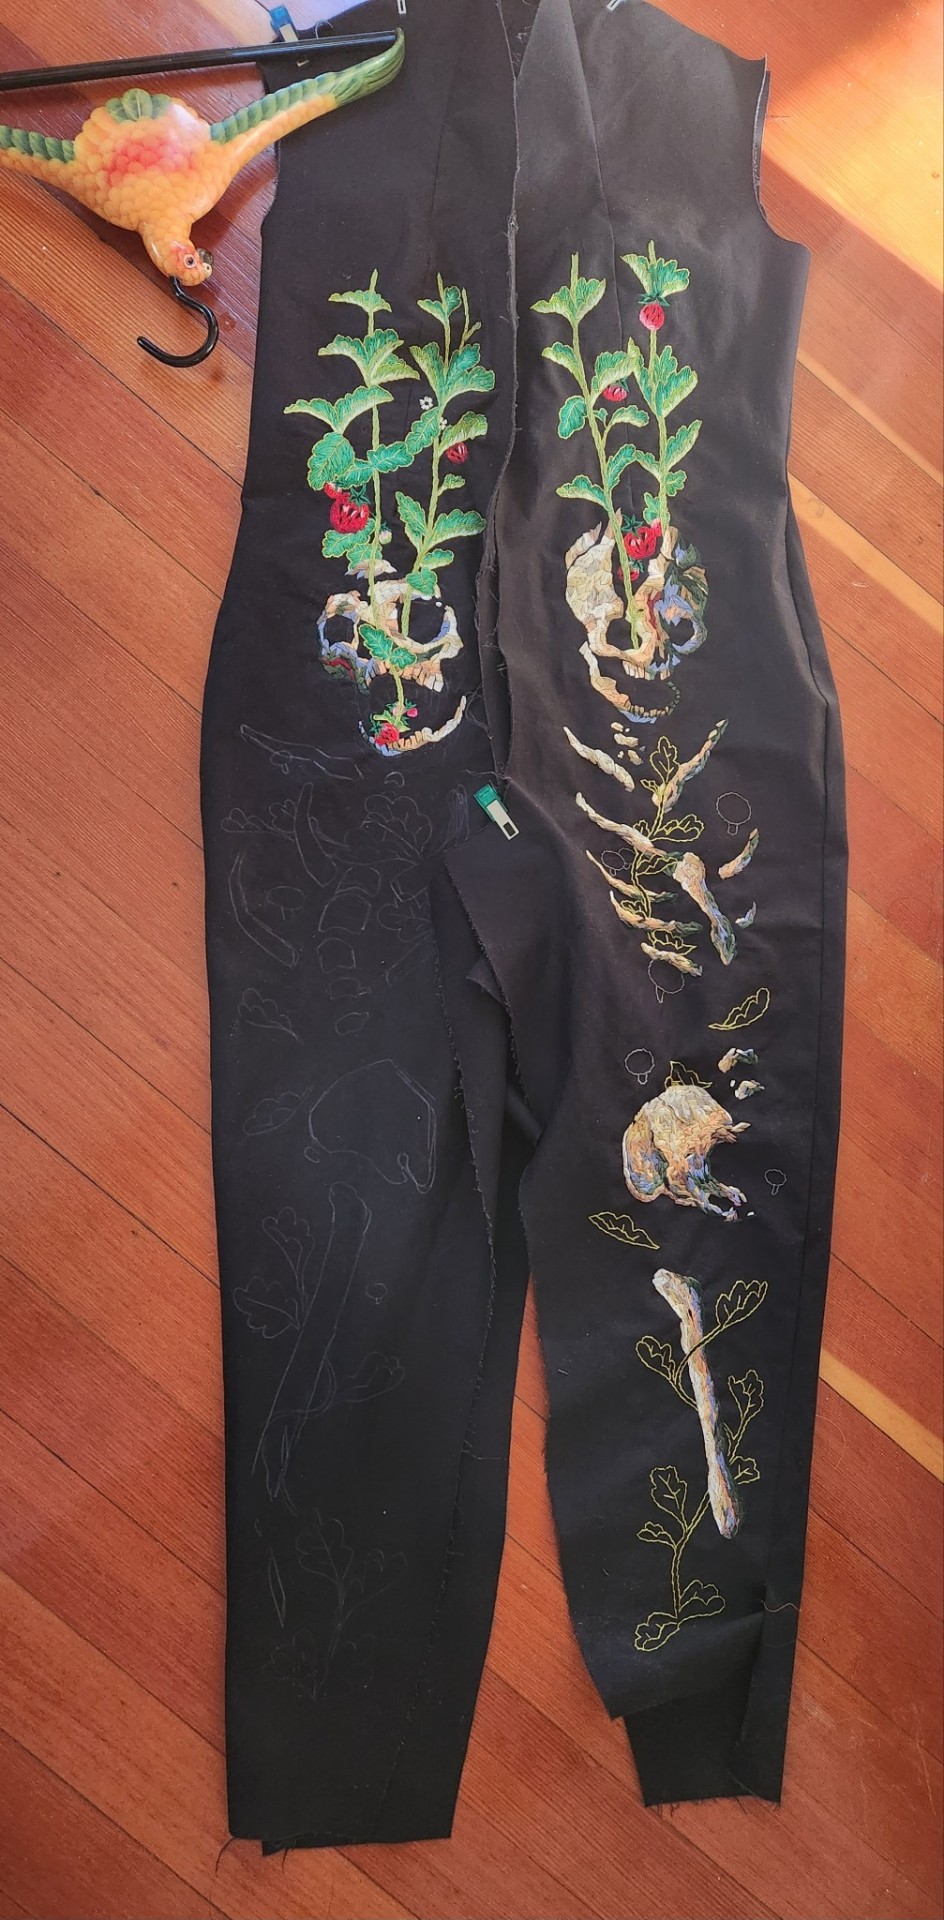
A progress report on the caped jumpsuit inspired by the work of Nudie Cohn I started in May. Behind the cape is a pile of 1k+ studs and rhinestines that will be incorporated.


101 notes
·
View notes
Text
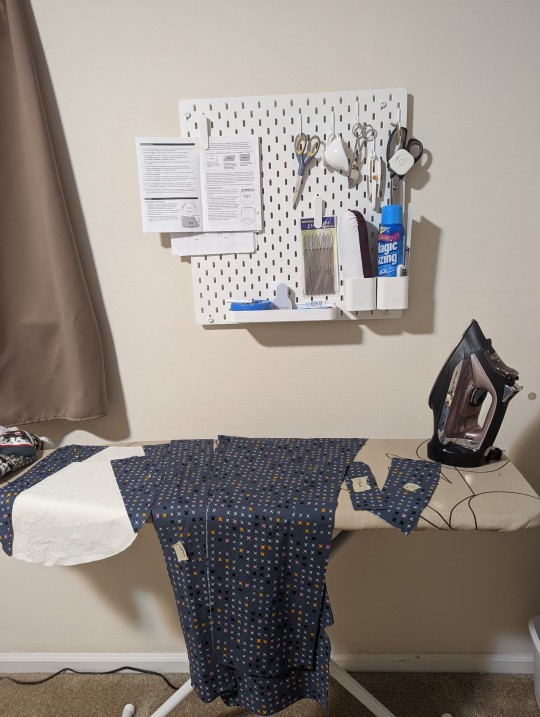
I'm very happy with the Ikea Skadis board to make my ironing & pinning corner tidier and more efficient!

2 notes
·
View notes
Link
If you’re inclined to make a gift or two this time of year, my Chicken Hat pattern is available for $5! It’s a pretty quick knit, using chunky weight yarn for most of it, and only requires a few types of stitches. You do need to know some very basic crochet skills for the little beak and comb.
Since I’ve had so many requests for how to make the “nest” version that I used to sell as a finished hat, there’s a new pattern add-on for it too!
2 notes
·
View notes
Text
Cameron Button up - pt 3
It’s finished! 🎉 I believe this is a washed black linen/cotton blend.
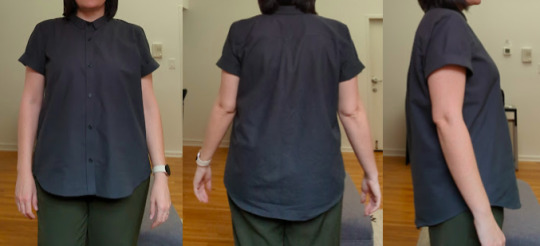
I hadn’t yet washed it in these photos, I suspect it’ll loosen up a little bit, especially at the collar.
Running through my changes and what I thought about them:
COLLAR - I’m glad I slimmed it down. I really don’t like sewing collar stands!!
SLEEVES - I kept the sleeve length as-is but cuffed it twice. Seems like it will stay cuffed on its own so I don’t plan to tack them down (I thought I might have to do that).
LENGTH - I’m happy with the little extra I added!
HIPS - It’s really nice to have a longer line button up that doesn’t pull across the hips & butt if I want to wear it buttoned all the way down.
SHOULDERS - I squared the shoulders .75″. I have pretty much no slope so I’m glad I did that. I forgot to try this method for making the sleeve easier to set in, if I make another one I’ll give it go. I’m not confident it would really help, but maybe?
1 note
·
View note
Link
This is sewing-adjacent for preserving your makes, and doing less laundry! Not any kind of paid promotion! I had a tough time finding something like this, so wanted to share with others who might also want a solution for preserving their garments from dreaded pit sweat.
I live in a place that gets incredibly swampy in the summer, and I bike to work. So my pits are also a swamp! One of my first makes last year was a jumpsuit, but it’s now permanently pit-stained because I didn’t have a good way to soak up the sweat 😭. (A new jumpsuit make on the horizon!) I also try to avoid laundering my work clothes too often, unless they’re really needing it. But if they’re stinky, ya gotta was it after every wear. Which wears out your nice clothes more quickly. Boo! I needed an undershirt solution that didn’t peek out from different neck lines, and was more absorbent in the pits than just a single layer of fabric (that’s not enough for these summers, y'all).
There are lots of throw-away, stick-on armpit sweat catcher things out there. They don’t really stay on, they make your pits look weird and wrinkled, and I really don’t want another disposable thing in my life. There are some old fashioned versions still on the market that are washable, and look kind of like a shoulder pad that you clip to your bra and sling under your arm. But that really only works for people who wear bras, AND wear skinny, strappy bras. Not I!
After some googling I tried the undershirts from Numi and I LOVE THEMMM. They have a pad of material sewn into the armpits. It’s very subtle visually, and doesn’t really feel like it’s there when you’re wearing it. But it does a great job of being a sweat sponge so your top doesn’t get funky!! They’re all tagfree, so you can reverse it too! This style can be a low neck or turned around for a higher neck/lower back.
The fabric doesn’t ride up on me, I was thinking I would need to be shimmying it down all the time under my clothes but it stays put! Same for the sleeve, amazing. I find them true to size, using their sizing tool on the site.
I hope this is helpful to another sweaty person out there. Save the jumpsuits!
2 notes
·
View notes