
vallygrin
I'm just really angry all the time
I am Valkyrie. I have tattoos and a bad addiction to Assassin's Creed.
4465 posts
Don't wanna be here? Send us removal request.
Last Seen Blogs

broneiponei
(:Unicorns And Rainbows :)

thenotebookscribbler
disha 🌊

boredstrom
Boredstrom
croissanthemums
zae
bitta74
BITTA BJØRNSDOTTER
Photo

Phone in my bra, idgaf. It’s 4:45 in the morning and I can’t sleep.
But, my eyebrows look good so ¯\_(ツ)_/¯
7 notes
·
View notes
Note
Hello, I am Cathleen, here we have some fashion clothes to promote and we find your tumblr is very fantastic, so we are eager to cooperate with you. Do you have interest? If yes, please let me know your email as soon as possible so we can send you more information.

1 note
·
View note


Text
mikey way in that joy division shirt reblog if you agree
434 notes
·
View notes
Photo

I love my hair so much, okay. Red was the only thing that covered my blue and still looked bad ass.
1 note
·
View note
Photo


northern downpour sends its love.
not my photos, just my edit!
1K notes
·
View notes


Text
Pro-tip: do your assigned readings when they’re assigned instead of two days before your exam
5 notes
·
View notes


Text
How to Take Notes: from a Textbook
(Be sure to change the post type from link to text post when you reblog, if that’s what you want to do)
This method is best suited for textbook or article notes, and is a version of revised notes. It is also well suited for books you plan on returning to the bookstore or books you have rented, as it does not involve writing directly in the book itself.
First, you’ll need to find a notebook, and the pens you like the best. My favorite notebooks to work with for note-taking, especially for my “revised” notes, are the Moleskine, hard or soft cover, in size extra large. For this specific class (Intro to Gender and Women’s Studies), I decided that lined pages would suit my needs better. For my math, engineering, and science classes, I usually opt for squared paper, as I draw in lots of diagrams and graphs.
My favorite pens ever are Staedtler Triplus Fineliners, so even though they show through the pages a little bit, I still choose to use them. I just love the way they write. I usually write out my notes themselves with a Pilot G2 05 with black ink, as it writes with a finer line and doesn’t bleed through quite as much.
I usually try to set up my notebooks about a week or so before class starts, that way it’s ready to go on my first day of class.

You’ll want to start off by setting up your notebook. On my first page, I put my course code for my university, as well as the course title.

Next, and this is perfectly optional (I just like the way it makes the book look, especially at the end of the semester), I include some sort of related quote to the course. For my engineering courses (which are related to my major), I put a different quote at the beginning of each section. But as this is a two-month long course during the summer, I opted for one quote by Mohadesa Najumi at the beginning of my book.

Next I set up my table of contents and include a page with basic course information. As this course is all online, my course information just included the start and end dates of the course, what time content is posted and on what day, and the name of my professor. For my usual courses, I will include the days of the week the class meets on and where, TA names and contact info, as well as posted office hours for my professors and TAs and tutoring hours either in the library or in the College of Engineering.

Next is one of the things I’m most proud of.
While I religiously use my Erin Condren planner to map out my days, weeks, and months, I have found throughout my college experience that including monthly views for the months my class ranges has been helpful. This way, there’s no sifting through the multiple colors I have in my planner, and everything related to that class is in the same notebook.
On this calendar I include start dates of the class, the end date, the dates of exams or quizzes, assignment deadlines, office hours, etc.
For this course, as I just started a few days ago, I don’t have a lot of dates or information, so my calendars are still very empty.


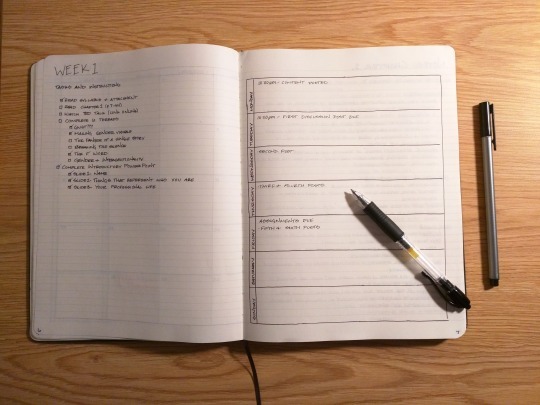
Next up I go to my weekly overview. At the beginning of each week, I set up a weekly layout, and I include a list of assignments, tests, quizzes, tasks, projects, etc that need my attention throughout the week, and I place the days I plan on doing them or the days they need turned in onto the weekly layout.
Now you’re finally ready to get into taking the notes.
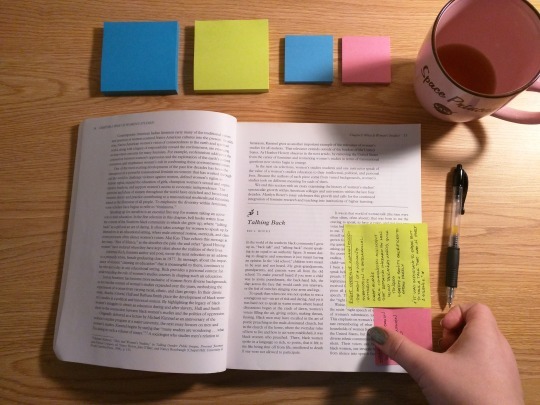
Gather your book, some sticky notes, and your favorite pen or pencil.
I color code my stickies so that the “revision” process later goes a bit smoother. In this case, I’m using blue to denote something interesting, intriguing, or thought provoking, greenish-yellow to represent the facts or important concepts, and pink for important vocabulary words and their definitions.
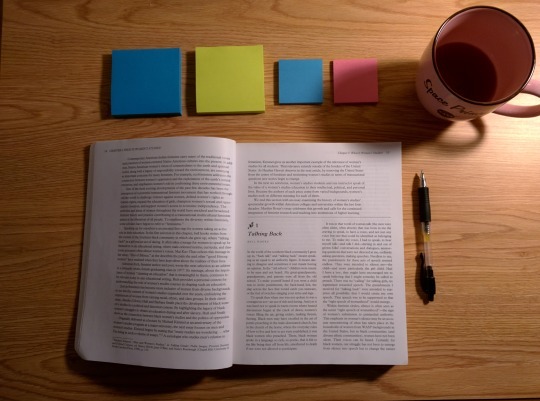
Read the selection once.
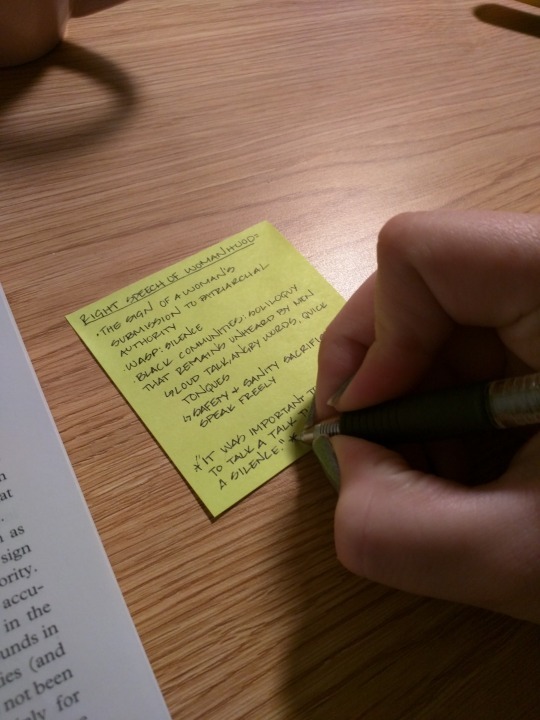
As you read along the second time, write notes on your stickies, and place them in a place of relevance directly on the page in the book. Just make sure you don’t cover up anything you need to keep reading.

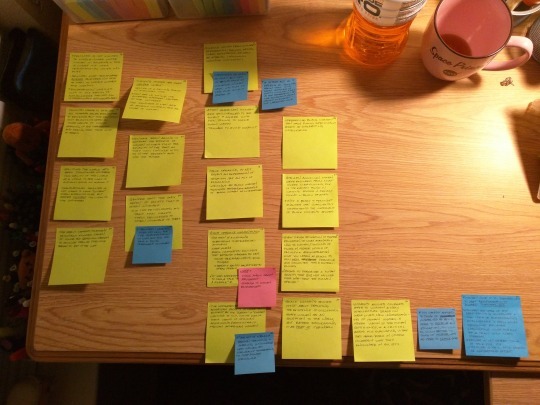
Now, once you’ve read all the material in questions (you can choose to break it up however you want, but since Chapter 1 was assigned for the week, I’ve elected to break it into chapters), carefully remove your stickies one by one and lay them out on a flat surface. This is when having a separate color for vocab can be helpful, as I sometimes put all of my vocab at the beginning or end of a section, especially if the section of reading was particularly large.
Organize your stickies in an order that makes sense to you, and use this order as your basis for transferring those notes into your notebook. The order you choose can just be lumping them under similar headings. Some classes even lend themselves to a nice chronological order. Whatever you choose, just make sure it’s something that will make sense to you when you come back to it in the end.

Okay so up there I wasn’t following my own advice, I just thought I would include the picture because my handwriting looks nice…

Now organize the stickies!
Now you just start writing everything from the stickies into your notebook. I like to take each category or subgroup and put them in the book on the facing page, then put them back in my textbook as I finish with each post it.

Moving on to the next category.
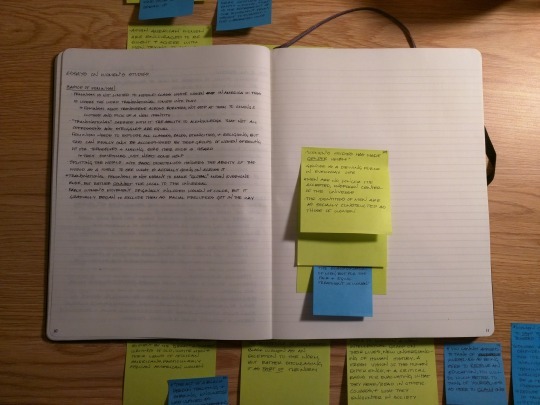

Before you know it, you’ve written all of your stickies into your notebooks.

Now you’re revved up and ready to go. You can either keep going and make a note summary page (which I’ll show you next week), or you can leave it. These will also be helpful when reviewing for tests and quizzes. You can highlight or underline, or use even more stickies (which is what I usually do) as you review.
Well, that’s all I have for you right now. Happy studying!
(To view this post on wordpress, click here)
170K notes
·
View notes