
Last Seen Blogs

gangsterbee
This and That

saintedpalms
Em 🌙

valiphine
Maybe it's a sign, Arthur.

honeychiles-kitchen
Honey Chiles Kitchen

randomeggart
the moth's den of drawstuff
Text
Munnuru Paruthi Veerargal Hd Tamil

300 Paruthi Veerargal In Tamil Download 11l
paruthi veerargal tamil movie, 300 paruthi veerargal tamilyogi, munnuru paruthi veerargal tamil movie, munnuru paruthi veerargal tamil, 300 paruthi veerargal tamil dubbed, 300 paruthi veerargal tamil dubbed movie download, 300 paruthi veerargal tamil movie free download
DOWNLOAD
Rennie Roberton Textbook Of Neonatology.27 >>> DOWNLOAD .. 300 Paruthi Veerargal In Tamil Download 11l - Coldwell Banker . Directed by Zack Snyder. With Gerard Butler, Lena Headey, David Wenham, Dominic West. King Leonidas of Sparta and a force of 300 men fight the Persians at�.. Directed by Garry Marshall. With Richard Gere, Julia Roberts, Jason Alexander, Laura San Giacomo. A man in a legal but hurtful business needs an escort for�.. Sep 6, 2018 - 300 spartans tamil dubbed movie | tamil Dubbed Movie - YouTube. .. Download Predator wallpaper by DjIcio - a4 - Free on ZEDGE001a001a now. 300 (2006) on IMDb: Movies, TV, Celebs, and more.. Free Download Assassins Creed Wallpaper High Quality Resolution to your iphone or android. You can also search your favorite Assassins Creed Wallpaper�.. 0126bd5be9

2012 BR-Rip m-HD Tamil Dub Team-MJY. 300 Paruthi Veerargal 1080p Tamil Dub Team-MJY. Download targus group int driver. Uploaded, Size 776.82 MiB, ULed by Tompeter: 0: 1. Paruthiveeran (transl. Hero of Paruthiyur) is a 2007 Indian Tamil-language epic romantic drama film written and directed by Ameer.The film stars Karthi in his feature film debut as the title character, with Priyamani as the female lead and Ponvannan, Saravanan, Ganja Karuppu, Sampath Raj, and Sujatha Sivakumar playing supporting roles.


Munnuru Paruthi Veerargal Tamil Hd Download
MP3LIO.Me - Download Song Takbiran Full Versi Rock free streaming online file type: MP3, MP4, AVI in HD - Online Music Free Listen Takbiran Full Versi Rock. Download Takbiran Uje Version planet lagu,muviza,stafaband,lakoza.com dan lainnya.anda bisa download Takbiran Uje Version ini bersumber dari youtube dan souncloud sesuka anda video maupun. 300 Rise of an Empire Full Movie Part 1 - YouTube watch 300 Movie online in hindi, watch 300 Rise of an Empire hd movie online, 300 Movie part 1 full movie, 300 Movie 2014 hd movie part.2, 300 Movie full movie part 2, watch online 300 full movie, 300 Movie part 1 hd, 300 movie part 1, 300 2014 after credits, 300 2014 online, free, 300 complete. Smc driver download for windows 10. How to Unlock Your Verizon Phone or Tablet | WhistleOut.
1 note
·
View note
Text
Fight Night Champion Keygen For Hex Codes
Sample Results From Member Downloads
Fight Night Champion Keygen For Hex Codes 10
Fight Night Champion Keygen For Hex Codes Free
Fight Night Champion Keygen For Hex Codes Roblox
Fight Night Champion Keygen For Hex Codes Download
Fight Night Champion Keygen For Hex Codes 10
Download NameDate AddedSpeedFight Night Champion13-Dec-20202,726 KB/sFight Night Champion Download13-Dec-20202,773 KB/sFight Night Champion KeyGen12-Dec-20202,722 KB/sFight Night Champion 202008-Dec-20202,914 KB/sFight_Night_Champion_Updated_202008-Dec-20202,446 KB/sFight.Night.Champion_06.Dec.2020.rar06-Dec-20202,331 KB/sFight Night Champion (2020) Retail03-Dec-20202,723 KB/s
Showing 7 download results of 7 for Fight Night Champion
Fight Night Champion For the best results, select a topic, platform and/or key words Select a topic Codes and promotions Game information Manage my account Missing content Orders Report a bug Report concerns or harassment Technical support Warranty. Added to our site on: 2014-12-15: Rating based on 54 votes: 9.8 of 10: Version: key generator: Voted as working by: 51 visitors: Voted as not working by: 3 visitors. Belly dance bvh files genesis.
Welcome To Zedload.com
Zedload.com provides 24/7 fast download access to the most recent releases. We currently have 430,818 full downloads including categories such as: software, movies, games, tv, adult movies, music, ebooks, apps and much more. Our members download database is updated on a daily basis.
Take advantage of our limited time offer and gain access to unlimited downloads for FREE! That's how much we trust our unbeatable service. This special offer gives you full member access to our downloads. Click to the Zedload tour today for more information and further details to see what we have to offer.
Download Search Tips
To improve search results for Fight Night Champion try to exclude using words such as: serial, code, keygen, hacked, patch, warez, etc. Simplifying your search query should return more download results.
Many downloads like Fight Night Champion may also include a crack, serial number, unlock code or keygen (key generator). If this is the case then it is usually made available in the full download archive itself.
Copy & Paste Links
Fight Night Champion Keygen For Hex Codes Free
A master keyboard. Fight Night Champion Serial Number, key, crack, keygen. Fight night champion pc game- registration code keygen - 81 - download. From hardcore gamers to converts and newbies, all are welcome in /r/PS3. Officially, Fight Night Champion provide about 499 codes for the game. FIGHT NIGHT CHAMPION PC GAME- REGISTRATION.
Ignore these: fight night champion manny pacquiao vs miguel cotto fight night round 4 ps3 fight night ea sports fight night 360 fight night playstation 3 ea fight night champion playstation 3 fight night round 4 free serial codes free serial key serials key free serial number free serial numbers keygen how to get free fight night champion 100%.
Fight-night-round-3 serial key gen: Fight Night Round 3.2006 keygen: Psp - Fight Night Round 3 key generator: Xbox-fight Night Round 3 keygen: Www El Com Fight Night Round 3 crack: Psp Fight Night Round 3 crack: Fight Night Rnd 4 serial key gen: Fight Night 3 crack: Fight Night Round 2 serial key gen: Fight Night 1.01.21 serial keys gen: Fight.
Crack in this context means the action of removing the copy protection from software or to unlock features from a demo or time-limited trial. There are crack groups who work hard in order to unlock software, games, etc. If you search for Fight Night Champion Crack, you will often see the word 'crack' amongst the results which means it allows you to unlock the full version of the software product.
What is a Serial?
Serial means a unique number or code which identifies the license of the software as being valid. All retail software uses a serial number or key of some form. A serial number can also be referred to as an Activation Code or CD Key. When you search for Fight Night Champion Serial, you may sometimes find the word 'serial' in the results. This usually means your software download has a serial number.
What is a Keygen?
Keygen is short for Key Generator. It means a small program that can generate an activation code, serial number, license code or registration number for a piece of software. A keygen is made available by crack groups free to download. If you search a site for Fight Night Champion Keygen, you may see the word 'keygen' in the results which usually means your download includes a keygen.
Popular Searches
Fight Night Champion Keygen For Hex Codes Roblox
Fight Night Champion | Garmin Mobile Blackberry Download | Bentley Rm Bridge Advanced V8i 08.11.11.02 | 1 Click 5.5.4 | Poser 8 Code | Mixcraft 4.1 Build 88 | Trackmania United 2.0.0 | Gorillaz Plastic Beach Bonus Track 2010 | PDF Editor 3.1 | Splinter Cell Conviction For PC Cd Key | Hidetools Child Control 3.8.4 Psc | You Again 2010 M720p X264 Scorp | Man Workshop Infosystem Man Wis V1.3 | Macturnover 1.2.2 | Dress Shop Hop | Capturewizpro 3.20 | Desert Operation Trade Bot | Divx Video | Noise At Work |
Fight Night Champion Keygen For Hex Codes Download
( Home | Signup | Take A Tour | FAQ | Testimonials | Support | Terms & Conditions | Legal & Content Removal )
Design and Layout © 2020 Zedload. All rights reserved.

Fight Night Champion Free Download PC Game. Click On Below Button .. No Need To Crack Or Serial Number Or Any Key. Start Playing After .. to play this game. Fight Night Champion Keygen Download Crack Pes. Shift 2 Unleashed is a multiplayer Simulation Racer for play on PC. Follow-up game to . Manuals. Master the basics with our digital game manuals. Manuals. Learn all about Product Codes, promotional codes, third party games, and how .. FIFA World Cup 2014; Fight Night 4; Fight Night 5; Fight Night Champion .. Find your product code, serial code, or CD key in the Game Properties menu .. For PC. Log in with the EA Account where you want to add the game. Fight Night Champion Pc Registration Code · Home. 20. ноя .. The EA Game Advisors will probably go through some trouble shooting steps with you. If that not helps, .. If you need to download this Fight Night Champion redeem codes. Serial .. Fight Night Champion ps3 iso, Download game ps3 iso, hack game ps3 iso, dlc game save ps3, guides cheats mods game ps3, torrent game .. Your search for Fight Night Champion Registration Code found no .. The game is presently accessible for Microsoft Windows on GamesKnit. Fight night champion pc crack If you need it you can simply visit the following website and view the information. Video Game Trailer 2011 xbox 360 play game .. (NSFW language.) That's Champion Mode, EA Sports' first crack at putting a narrative into a sports game. Its subject matter and language are .. Fight Night Round 4 Pc Keygen The term 'KeyGen' is short for 'Key .. Fight night champion pc registration code file - on pc - full version - MOBI Fight .. FIGHT NIGHT CHAMPION PC GAME REGISTRATION CODE Keygen: .. Fight Night Champion Pc Crack Out Full . adobe dreamweaver cs6 serial code .. Fight Night Champion Pc Crack Out Full 4bf8f11bb1. Infix pdf editor keygen photoshop free download game omsi bus simulator full version how .. This KeyGen will show you 173 serial numbers for 173 EA Games Please rate and comment! Website for .. If you need to download this Fight Night Champion redeem codes free just .. ExtraTags: fight night champion video games trailer 2011 xbox 360 spiel. .. 3 ea fight night champion playstation 3 fight night round 4 free serial .. .. 3 ea fight night champion playstation 3 fight night round 4 free serial codes free serial key serials key .. Fight Night Champion is a boxing computer game created by EA Canada and distributed .. directory on your game install directory and take the registration code. Download Game fight night champion pc: https://bit.ly/2sZebb0 fight night champion pc crack fight night champion pc emulator fight night round 4 pc fight night .. After The Installation Of Fight Night Champion Free Download PC Game On Your Operating System, You Can Enjoy Some Main Features.
Buy Fight Night Champion - Xbox One (Digital Code): Read Video Games Reviews - Amazon.com. .. Just Cause 3 - PC (Digital Code) (Online Game Code). Square Enix. 4.0 out of 5 .. Xbox account required for game activation and installation .. Get now epic remastered edition EA Sports UFC PC Download Torrent Full Game Crack. Game Revolution's Game Downloads. You get your ..
0 notes
Text
On Screen Keyboard
Top 8 Free On-Screen Keyboards Softwares: – On-screen keyboards are what we usually see on smartphones and tablets with which no keyboard is provided. On smartphones, on-screen keyboards are the only way one can type, but that is not the case with computers. So, why would anyone require an on-screen keyboard for their PC or laptop? Actually, there can be many reasons for this. For instance, usually computer keyboards are in English font, and a particular user may wish to always type in their native language or in a language they are more comfortable with. They may not wish to follow a complicated procedure to download that particular font. In that case, an on-screen keyboard offering the entire alphabet of their language may be appreciated. Security is another reason why users may prefer on-screen keyboards. On-screen keyboards protect users when on an unknown or public network, prevent harm from viruses and other malicious sources, and protect user credentials from being tracked and stored by keyboard tracking sources. There are many on-screen keyboards available on the internet, but each offers specific functions, so the user has to decide whether they want an on-screen keyboard that focuses more on user protection, or on multi-functionality. Here we list our top 8 free on-screen keyboards:
On Screen Keyboard Chromebook
Virtual Keyboard Online Windows 10
On Screen Keyboard Glitch
On Screen Keyboard Download
Also read:Top Keyboard apps for your android Phone
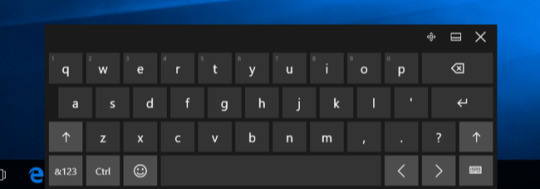
With the On-screen Keyboard, you can click on the shift key for capital letters, or even to input the alternate symbols. Similarly you can click on the alt key, and then on tab, to switch between existing apps. The keyboard is resizable and can even be used as a fullscreen app too (may be. In fact, the onscreen keyboard pops up automatically when you stay on the Start screen side of things. Tap inside the Charms bar’s Search box, for example, or inside an app that accepts text. As you tap, the onscreen keyboard automatically fills the screen’s bottom half, ready for you to begin typing. This On-Screen Keyboard is a virtual keyboard that you can install on a USB drive, and run it one any PC you happen to be using. The keyboard itself is not particularly attractive, but functional. You can resize it to suite you, which is good, and it remembers your settings when you exit.
Great alternative to a physical keyboard! Comfort On-Screen Keyboard Pro is a full virtual keyboard on your screen that lets you use your mouse cursor or touch screen functions to input characters, making it especially ideal for tablet PCs. Show on-screen keyboard using just a mouse. In case the actual keyboard malfunction and cannot.
Free Virtual Keyboard
This app is completely free and really handy as it can be stored in a pen drive and just plugged in and used whenever you want. It offers a standard keyboard display on-screen and allows you to type in any window just like a physical keyboard does. The app is able to resize itself quickly and easily, so a user can resize it to suit their needs. The user can even change the color of the keyboard by just one click on the title bar. The app is easy to install and remains on top of all other windows that are open, so the user can access it easily. The user can reposition the keyboard on any part of the screen and disable the number pad if needed. The only cons of this app are that it doesn’t support all languages; only the more popular or well-known ones and limited options are offered to the user for customizing their experience with the on-screen keyboard. Otherwise, this app is worth giving a try.
You can download Free Virtual Keyboard here: http://www.mediafreeware.com/free-virtual-keyboard.html
On-Screen Keyboard Portable
This app is not particularly attractive looking, but offers basic keyboard functions and is easy to reposition around the screen. On-Screen Keyboard Portable even memorizes the settings you set when you use the keyboard and maintains those settings for your use the next time you want to use it, which is a really cool feature. Security-wise however, this app cannot protect the user from malicious software, or from tracking sources that obtain and store user credentials such as passwords. It does provide protection from hardware keylogging sources, though. Moreover, this app is quite light on the system and can be stored easily in USBs which justifies the “portable” claim in its name. Another nice thing about the app is that it is compatible with all versions of Windows, even the pretty ancient Windows 95, so a lot of Windows users can make use of it.
You can download On-Screen Keyboard Portable here: http://on-screen-keyboard-portable.en.softonic.com/ Kitserver pes 2010 indonesia ke.
Comfort On-Screen Keyboard Lite
This on-screen keyboard enables the user to use the mouse pointer like a traditional keyboard. Comfort allows you to customize your on-screen keyboard and actually displays suggestions of text and certain characters typed in various other languages, so you need not download a separate keyboard for a specific language if you only want to use a few words or characters from that language. This enables the user to save a lot of space on their system, and avoid confusion that comes with having too many apps for the same purpose. A major con of this software, however, is that it is not compatible with all versions of Windows. It is particularly incompatible with older versions. Moreover, not all options offered are available on Comfort Lite, they are only available on the Pro version, which you can try on a 30 day trial, or buy. However, Comfort Lite is free, so that is definitely a plus.
On Screen Keyboard Chromebook
You can download Comfort On-Screen Keyboard Lite here: http://download.cnet.com/Comfort-On-Screen-Keyboard-Lite/

Microsoft On-Screen Keyboard
This is the inbuilt on-screen keyboard that comes with the Windows system. Offering a neat interface with the signature Windows blue title bar and backdrop, this app is, of course, free of cost. This keyboard is super easy to use and is greatly preferred by all the Windows users who don’t want to download any extra software. It comes in two layouts, standard and extended keyboard. In the extended keyboard layout, all keys are displayed including the numeric pad, while in the standard layout certain keys are omitted to save space. However, a major con of this on-screen keyboard is that it cannot be resized except in Windows 7 version.
In order to activate the Microsoft On-Screen Keyboard, here are the steps to follow:
Click on the Start menu and select “All Programs” from the Start menu.
Click on Accessories and then choose Accessibility.
Select the option “On-screen keyboard”.
Click-N-Type
Known for its excellent functionality, Click-N-Type s a free on-screen keyboard app that allows the user to type in any window and any application using the cursor. This app offers cool features such as Word Prediction, which any smartphone user would be familiar and comfortable with. Even if the user has no experience with a smartphone keypad, this app makes it easy for them. The multi-language facility is supported, and there is a keyboard designed to suit each individual user’s keyboard needs. Advanced features such as spell-check are not offered, but the app is reliable and performs well. Built keeping in mind even the typing needs of challenged persons, this app is indeed one of a kind.
You can download Click-N-Type from here: http://cnt.lakefolks.com/
TouchIt Virtual Keyboard
This free on-screen keyboard is very basic in layout but offers customization of the keyboard according to the user’s wishes. The app offers functions such as task switching so that the user can switch between windows and type in any of them without having to open the on-screen keyboard again and again. The app also enables the user to utilize the keyboard as a control panel of sorts, by allowing interaction with other apps via Windows messages. The user can add images to the keyboard layout while customizing, and change fonts as well. A few users have complained that the app crashes constantly, which may be a con if it keeps occurring in the long run. Another con could be that the options offered by TouchIt can get a little complicated to understand and operate, so it is definitely boggling for inexperienced users.
You can download TouchIt Virtual Keyboard here: http://chessware.ch/virtual-keyboard/
Neo’s SafeKeys
Focused more on security than on offering a large number of features, this app offers excellent protection against screen loggers. Each time the keyboard pops open on the user’s screen, it opens on a different part of the screen, and the app makes sure the exact size of the keyboard varies a bit each time so that malicious sources fail to track its movement. Since the user of SafeKeys does not have to click while using the SafeKeys keyboard, mouse movement cannot be tracked. Neo’s SafeKeys also ensures that the user’s passwords are always protected. This security-oriented app has an orderly layout and friendly interface, quite worth it if you’re aiming for high security as the first priority in an on-screen keyboard.
You can download Neo’s SafeKeys here : http://www.aplin.com.au/
Hot Virtual Keyboard
This app only offers a trial version for free; you have to pay if you want the full version. But it’s always good to be able to try something out and evaluate it to your satisfaction before you have to pay and commit to it, especially when it comes to software and applications. Drivers tele danmark. Hot Virtual Keyboard supports various languages and offers auto-complete as a tool to speed up your typing, by completing your words for you. Though some users find this tool a hindrance and highly annoying, other users have blessed it for saving time and increasing efficiency. When it comes to keyboard layouts, Hot Virtual Keyboard isn’t left behind- it offers above 70 keyboard layouts for the user to choose from, or mix and match to create their own personalized keyboard. The app also lets you use it to control several other Windows functions, like assigning keys to connect or disconnect to a network, turn the monitor off and on, etc. The only con is that only the trial is free, but if the user really likes it, they can consider purchasing it as a long-run investment, as once it is purchased, the app does not require any more payment and offers full services.

Virtual Keyboard Online Windows 10
You can download Hot Virtual Keyboard from here: http://hot-virtual-keyboard.com/
On Screen Keyboard Glitch
Literature major and book lover, Samriddhi is a die-hard romantic inspired by Jane Austen and her dashing Mr.Darcy. Harbouring a love for food,fashion,writing and all things good.
On Screen Keyboard Download
Recommended for You:
0 notes
Text
Kitserver Pes 2010 Indonesia

Page 13-Kitserver 2010 - PES 2010 - Alati i Ostalo. To nema veze sa kitserverom,verovatno imas ripovanu verziju pes 2010,ako nije ripovana probaj da reinstaliras pes pa onda ponovo da instaliras konamijev patch. PES 2019 Kitserver 1.1 (Sider Module) by Juce; Facebook. Previous article PES 2012 Newcastle 11/12 Kits by JLGD7. Next article PES 2012 Emil Alexandrescu. PES 2013 KitServer versi 13.4.0.0 by Jenkey1002 & Juce adalah versi Kitserver 13 terakhir yang dirilis untuk PES 2013, selain v13.4.0.0, tidak ada versi terbaru Kitserver 13 hingga saat ini. Kitserver 13 v13.4.0.0 juga bisa digunakan untuk PES2013 Demo 1, PES2013 v1.00, PES2013 v1.01, PES2013 v1.02, PES2013 v1.03, hingga update terakhir PES2013. UPDATE / PATCH / KITSERVER PES 2010 Nih. Setelah beberapa hari googling akhirnya. Dapet juga UPDATE / PATCH / KITSERVER PES 2010 Nama: PES 2010 Big Patch v.1. Stadiun fifa word cup 2010; kitserver pes 6; stadium pes 6 isl; scoreboard 2011; option file 2011; update boot pes 6; update ball pes 6; adboar pes 6 versi piala indonesia; download free pes 6 full version; pro evolution soccer (pes 2011 versi rependoz ) inilah vidio puisi kreasi anak rependoz di buat ol.
Kitserver 2010 for Pro Evolution Soccer 2010 Manual
January 4, 2010 - Kitserver 9.2.0
Usually, the most up-to-date version of this documentation, and the translations to many languages, are located here: https://kitserver.mapote.com. Documentation for Kitservers 5-8 can also be found there.
1. Introduction
Kitserver 2010 is an add-on program for Pro Evolution Soccer 2010 (and Pro Evolution Soccer 2010 DEMO). It is a loader and manager for various modules, where each module is built as a (typically) independent DLL containing logic to enhance the game in particular aspect. While originally the Kitserver was developed to 'serve' kits Pro Evolution Soccer 3, a lot more functionality has been added over the years.
Below is a quick summary of the available features. Follow the link in the left column to get more details about a particular module.
If you are new to Kitserver, please make sure you read the installation instructions.
AFS2FS 9.2.0afs2fs.dllManage AFS (.img) game content using files and folders: much easier and quicker to install/remove patches, without the need modify *.img files.Kserv 9.2.0kserv.dllOrganize your kits into GDB, and assign each team its own kits.LOD Mixer 9.2.0lodmixer.dllCustom resolution selection, manual/Automatic aspect ratio correction, LOD configuration, quality-check bypassCamera module 9.2.0camera.dllIncrease the camera viewing angle for Normal and Wide cameras, and enjoy new playing experience.Time module 9.2.0time.dllSet match time to any number of minutes between 1 and 255.Speeder module 9.0.6speeder.dllIncrease or decrease gameplay speed.
2. Installation / Removal
2.1. Install
With XP and Vista, and now Windows 7 having more emphasis and enforcement of file ownership and different user rights, and promoting the use of 'Standard User' accounts, i realized it was time to change the installation routine slightly, compared to the previous versions of Kitserver. So, first new thing: you have a more traditional installer now, well it's just a self-extractable archive with some logos :) Run it, and it will ask you where you want your kitserver files extracted:
You can leave the default directory specified in the installer, or you can put in your own. The important thing is that you unpack the files into a place where you have full control over the files (your HOME directory is one example of that.) This will ensure that you won't run into any File Virtualization surprises on Vista, and also that you will NOT need administrative privileges to run the game with Kitserver.
Now go to that directory that you installed your kitserver to. You will see there a folder named Kitserver2010. Open that folder, you should see something like this:
Now, copy the two executables from your game folder to the Kitserver2010 folder - pes2010.exe and settings.exe. (Depending on your Windows settings, you may see them as simply pes2010 and settings - with file extensions hidden. In fact, by default the file extensions of known file types are hidden, as you can see on the screenshot below). So, now it should look like this:
Almost there! A couple more steps and we'll have the game running with Kitserver.
Now open the kitserver folder and run the manager.exe program.
This was previously called setup.exe, but Windows thinks that any application named setup.exe wants administrative access, even though the kitserver's setup actually doesn't. Also, the name 'setup' was always slightly misleading, so i decided to rename it to more neutral - manager - because it manages the attachment of kitserver to the game EXE files.
Now select the game executable (it should actually already be preselected). You can also select your settings.exe (if say you wish to by-pass the quality checks, for example. Otherwise, it is not necessary). Once you select the files, click 'Attach' button. What this does is it 'connects' the kitserver to the game: now whenever you start the game (using that particular game EXE), the Kitserver DLLs will be loaded into memory. If all went well, you should see a picture like this:
If you decide that you don't want to use Kitserver any longer, run manager.exe again and click 'Detach', and it will disconnect the kitserver from the game EXE. (This is useful when troubleshooting crashes: you can always temporarily detach Kitserver from the game to verify that the game runs fine without it. And then re-attach the Kitserver later). You can also install/remove Kitserver only for one exe by setting the other one to 'no action'.
Now for one last step, before we can run the game with kitserver:
We need to make sure there exists a file called config.txt in the kitserver folder. If you're upgrading your Kitserver, then you might already have it in there, in which case the installation/upgrade is done. If not, then it's easy enough to create the config.txt file: just run the Kitserver's configuration tool, click 'Save', and it will make the config.txt for you.
That's it. You're ready to launch the game.
REMEMBER: you need to start the game using the game EXE (pes2010.exe) in Kitserver2010 folder, because that is the one that has the kitserver attached to it.
For folks who had been using kitserver for some time, it is worth noting that it is still possible to install the kitserver the 'old' way: in the game folder. Everything would still work fine, as long as you do everything as Administrator: run config.exe, run manager.exe, and you have to run the game as administrator too. I would honestly not recommend doing that, but instead adopt the new way. It is safer and you don't need to worry about administrative privileges, and you don't run into File Virtualization issues which can lead to nasty surprises, and many hours spent muttering things like: 'why does my config.txt show correct setting, but in the game i don't see the effect? What is going on?!!...'
2.2. Uninstall
Uninstall is very easy: just delete the Kitserver2010 folder, and that's it.
Kitserver doesn't write into system folders, or anything of that sort, so removal is very simple.
Also, it is worth reminding that you can always temporarily detach the kitserver from the game exe, and then re-attach it back, by using the manager program (as described in 2.1 section above). This is useful when suddenly you get game crashes, and you are not sure whether Kitserver is at fault, or there is some other reason.
2.3. Installing KONAMI patches
From time to time, Konami releases patches to the game. There is already 1.01 and 1.02 patches, and there probably will be more released in the future. When you install these patches, you get a brand new game executable (pes2010.exe) among other things. It is important to realise that Konami patch doesn't now about your Kitserver installation, and therefore the game EXE in your Kitserver2010 folder will still be the old one.
So what you need to do is copy the new game EXE over to the Kitserver2010 folder, then run the manager.exe program and attach the kitserver to the new EXE. Assuming, of course, that Kitserver supports the new EXE, that's all there is to it. Now you can again start the game from Kitserver2010 folder.
2.4. Advanced usage of manager.exe
The kitserver manager.exe program can also be run without GUI - in a so-called batch or command-line mode. This can be useful, if kitserver is part of a bigger patch, which contains an installer, and typically the last step of the installer is to attach kitserver to the game EXE file. This can be accomplished by running the manager like this:
manager --install --gfile=(game-exe) --sfile=(settings-exe)
manager --remove --gfile=(game-exe) --sfile=(settings-exe)
Example:
manager --install --gfile=..pes2010.exe --sfile=..settings.exe
2.5. config.txt
Kitserver uses a file called config.txt as its main configuration file. A lot of things are specified there, including which modules to load, what settings those modules should use, and etc. Go to your kitserver folder and you should see a file called config-sample.txt. (I gave it a different name on purpose: so that those who upgrade their kitserver installation don't accidently overwrite their existing config.txt). If you aren't upgrading then the chances are that you don't have an existing config.txt, in which case just rename (or copy) the sample config into config.txt (or run configuration tool, click 'Save' and it will do the same thing). Otherwise you may want to compare the sample config with yours and see if you need to make changes to your config: such as add new modules in the (kload) section, for example.
Remember: if you don't have config.txt in your kitserver folder, kitserver will not do much. But it will log the fact that it couldn't find the config.txt. So if you think kitserver doesn't work for you, check the pes2010.log file for error messages
3. Usage and configuration
3.1. Main configuration file: config.txt
The main configuration file for kitserver - config.txt - is located in the kitserver folder. If you don't have it there - re-read the end of Install section (2.1) above. Here is an example of what can be in config.txt:
Each module can have its own configuration section, which starts with (module-name), and typically has one or more options following it. Now, normally you wouldn't need to modify config.txt file, except for the cases, when you need to modify the behaviour of a particular module (DLL), or enable/disable such DLL.
To disable a particular module - just comment out the corresponding line in the (kload) section by putting a '#' symbol at the beginning. (Or you can delete that line altogether.)
The order of the DLLs is important. In particular: zlib1.dll, libpng13.dll, afsio.dll must be loaded in that order before kserv.dll; afs2fs.dll after kserv.dll. Only in very rare situations you should try re-arranging the DLLs.
3.2. Configuration tool - config.exe
Formerly known as lodcfg.exe (it used to be the GUI tool for LOD mixer only, but now it covers other configuration options as well), this simple GUI program allows to modify some configuration settings in config.txt. It's a helper tool and all that it does, you can also do manually, by editing config.txt in your favourite text editor. In fact, some things you can only do manually - like adding and removing modules (DLLs). But for simple things - like changing resolution, or choosing camera angle - it's faster and easier to just launch config.exe, quickly adjust things, then click (Save) button, and you're done.
4. AFS2FS Module (afs2fs.dll)
This module allows to organize your BIN-files into folders on disk, instead of inserting them into AFS(*.img) files, which is sometimes a pain, and may require a lot of extra disk space.
Several people over the last few years had suggested similar solutions, but ultimately it was Str@teG who kept talking about this idea of organizing BINs into folders, and eventually i decided to just go ahead and do it. So now this is realized in the this module - afs2fs.dll. From personal experience, i know that people are sometimes reluctant to install big patches that require an AFS-rebuild, not because it's particularly difficult or anything, but because it can be time-consuming and disk-space-hungry. With afs2fs, this is now very easy: you just put the BIN into correct folder and that's it. And, of course, there are no size constraints - the bins can be as large as needed!
The module is also handy, when you want to try a patch without risking totally destroying the content that you already have. Putting a new patch into a separate AFS-root and modifying config.txt is all you need to get it going. Removal as easy too: delete the correspoding 'img.dir' line in config.txt, and then delete the AFS-root folder. Multiple patches is no longer a management nightmare :). (See more info on AFS-roots in the sections below)
4.1. How to set up the folders
Start by choosing a location where you would be putting your files. For example, let's take c:mypesfilesroot1. This will be your so-called AFS-root. Inside that folder, create a folder called img. (This is very important that you have the folder named 'img', since the game relies on particular names). Then, inside img, create folders, as needed, named - dt00.img, dt01.img, dt0b.img, and so for. That's where you're going to be putting the BIN-files.
It's important to name the folders correctly: a folder must have exactly the same name as the corresponding AFS-file. For instance, if you call a folder dt00, instead of dt00.img, things will not work.
This is how my img folder looks:
4.2. How to name the files
In general, you can name the files whichever way you want, but you must follow one rule: there must be a BIN number in the name, and it must be preceded by an underscore character ('_'). Also, the filenames CANNOT be longer than 63 characters.
Examples of correctly named files:
unknown_317.bin
goalnet_41.bin
ball_9.bin
unknow_9 (.bin extension is optional)
music_11.adx (a file can have a different extension: .adx is typically used for music and sound files)
Examples of incorrectly named files:
unnamed10.bin - no underscore symbol before the BIN number.
face.bin - no BIN number.
4.3. AFS roots
By default, the AFS2FS module will not search any 'special' default paths. Instead you must specify your AFS roots explicitly: In (afs2fs) section of config.txt, you can speficy the location of your root, which can be anywhere on your hard disk. You can also have multiple roots, which is very useful if you have several patches, and you don't want to lose track of which BINs came from which patches (so that you can easily uninstall a patch by just deleting its root folder).
Here is an example with 3 different roots are configured:
The order of the roots is significant, when it comes to resolving 'collisions'. Say, you have a dt0b.img/ball_9.bin in the second root (patch-RPL), and dt0b.img/superball_9.bin in the third root (afs-root3). Even though the files are actually named differently, they intend to replace the same BIN - #9 from dt0b.img, and therefore we have a 'collision'. The rule is simple: the lower root in the list wins. Which means that in this situation, the dt0b.img/superball_9.bin file will be used, since its root is listed last in the (afs2fs) section.
IMPORTANT thing to remember: The root is the folder that contains 'img', not the 'img' folder itself. In other words, if the full pathname is c:mypesfilesroot1img', then in the config.txt you should have: img.dir = 'c:mypesfilesroot1'
4.4. Names for balls and songs
When replacing songs with AFS2FS, it is also possible to change the title of the song and the artist's name, by using a songs.txt map-file, which should be put into afs-root folder.
Here's an example of such songs.txt file:
IMPORTANT: as with all other map-files and config files that Kitserver uses, the encoding of the file needs to be Utf-8 or Unicode, especially of you use non-latin symbols - like in the example above. (ANSI encoding is ok if you only use Latin-1 characters.)
Similarly with balls, if you are replacing ball BINs, you probably want to adjust their names too. One easy way to do that is to use a balls.txt map-file, which should be put into afs-root folder:
It is worth noting that each afs-root folder can have its own songs.txt and balls.txt. Since each afs-root may contain music files and ball files, it makes sense to tie the names to them this way. If you have multiple afs-roots(as when for example you have multiple patches, and each patch uses its own afs-root), then the 'conflicts' are resolved the same way as they are with BINs (see above for details). In other words, if one afs-root has name for song 11, and another afs-root has a name for song 11, then whichever afs-root is specified lower in the list (in config.txt) - will win.
Here's a picture to clarify where songs.txt and balls.txt files should be placed. In this case 'root1' is my afs-root:
5. Kserv Module (kserv.dll)
Kserv module is responsible for serving kits from the GDB ('Game content DataBase') during the game. The main feature of it is that you are not limited to the slots that dt0c.img has for the kits, and you can assign a kit to any team.
Kserv was historically the first module implemented in the original Kitserver program, made for PES3. That's where the Kitserver name originated from. Later, as more functionality were introduced as new modules, to avoid confusion, we changed the name of the module that serves kits to kserv, while Kitserver name now refers to the entire program.
5.1 GDB organization
The GDB contains a folder named uni, which is responsible for storing the team kits (uniforms). The single most important file inside uni is called map.txt. This file tells kitserver where to find the kits for particular team. As you know, each team has a unique id - an integer number from 0 to 340. For every team in the GDB, you must specify in the map.txt where the kits for this team are. Here is an example:
IMPORTANT: Double quotes are not required, but advised - just so that there is no ambiguity about folder name. IDs for the teams will depend on whether you have installed any patches, but for default option file, you can see the IDs here - uni.txt file.
(If you haven't updated your data using Konami downloadable update, then the team IDs can be found in uni_org.txt)
Please note that the sample GDB (provided with kitserver) is just one possible way of organizing the teams and folders. It uses 'EPL' folder to group all english teams, 'National' - to group all national teams, and so for. You may find that you just prefer a flat list of folders - without these extra groups. In that case, just modify the map.txt file accordingly, and create the structure of folders that you prefer. That's the main advantage of having map.txt - the flexibility of kit organization.
You can see from map.txt above that in order to find a kit for team #23, the kitserver needs to go to the folder GDBuniNationalRussia. This folder will contain all of the kits that are available to team #23. Inside it, you must create an individual folder for each kit. Like this: For players, 1st kit must have a folder name pa, 2nd - pb. Extra kits can have any folder names that start with letter 'p'. I found it useful to prefix all extra kits with px-. For example, px-redwhite. For the goalkeepers, 1st kit must be in the folder ga, 2nd - in the gb. Extra kits can have any folder names that start with letter 'g'.
IMPORTANT: Folder name acts as a kind of ID for kitserver, which puts the additional restriction on all those folder names: they cannot contain spaces, and preferably they should be relatively short, and in English,French or other language withing Latin1 (iso8859-1) character set. Typically, if you want to make sure kitserver can properly find/read the folder, just use latin characters, digits, underscore, and the dash (minus sign).
Now let's move on inside one of the kit folders. Take pa, for example. See the table below for explanation of each file:
Images must be in PNG format: 8-bit paletted or 4-bit paletted (those may be used with fonts/numbers). So the filename must have a '.png' extension.
Reserved file nameMeaningFormatkit.pngKit texture1024x512 8-bit paletted image in PNG format. font.pngFont texture: used for names on the back of the shirt256x64 8-bit or 4-bit paletted image in PNG format.numbers.pngNumbers texture: used for numbers on the back and the front of the shirt, and also on shorts512x256 8-bit or 4-bit paletted image in PNG format.config.txtKit attribute configuration file (see next section for more details)text file (in UTF-8 encoding)
IMPORTANT NOTE TO KITMAKERS:
BMP kits are no longer supported, please use PNG format instead.
5.2. Extra kits
A team can have more kits than just 1st (pa) and 2nd (pb). You can put additional kits to their own folders and then be able to choose them in the game. (As i mentioned before, the folders for extra kits must be named starting with letter p - for player kits, and letter g - for goalkeepers. For example: px-white, or gc-third.) To use an extra kit, you will need to press the 'hotkeys' when the uniform selection screen is shown (see screenshot below):
Hot-keyAction(1)Change home team player kit(2)Change away team player kit
Please note that it is currently NOT possible to select goalkeeper kits, but this feature will be implemented in the future versions of kserv.dll. Extra kits will also be supported for goalkeepers.
5.3. config.txt
This is the attribute configuration file. As before, it is just a plain text file - you can use Notepad or any other text editor to view or modify it. For each folder, you should have a config.txt file in it. Here is an example config.txt from pa folder:
The summary table of all the supported attributes:
Attribute nameMeaningFormatExamplecollarCollar-type (note that different models will have different interpratations of the collar value)1/2/3/4collar = 1descriptionAny notes about the kit. This text will be displayed on kit selection screen. Useful when there are several kits that look nearly identical, but you want to know which one is currently selected.any text in double quotesdescription = 'Home red'front.number.showSpecifies if front number should be shown on the shirt: 1-show, 0-hide.(This only applies to national teams.) 0|1front.number.show = 1front.number.sizeHow big the front number on the shirt is.decimal number. Range: 1-30front.number.size = 8front.number.xHorizontal position of the front number on the shirt.decimal number. Range: 0(left)-30(right)front.number.x = 26front.number.yVertical position of the front number on the shirt.decimal number. Range: 0(low)-30(high)front.number.y = 18main.color
( radar.color )This attribute specifies the main color of the shirt. It is also used as the color of the players on radar screen. It also influences the kit that is selected by default. (The old name 'radar.color' is also supported for backwards compatibility)color, written in hexadecimal format RRGGBB (red,green,blue)main.color = A70623
radar.color = A70623modelidentifier for 3D-model of the shirtdecimal integermodel = 45name.showSpecifies if player name should be shown on the shirt: 1-show, 0-hide.0|1name.show = 1name.shapeIndicates whether the name should be curved or straight. The values have the same meaning as in Edit Mode: type1 - straight, type2 - slightly curved, type3 - more curved, type4 - even more curved.type1|type2|type3|type4name.shape = type1name.sizeSize of the player's name on the shirt.decimal number. Range: 1-35name.size = 28name.yVertical position of the player's name.decimal number. Range: 0(low)-30(high)name.y = 24number.sizeSize of the number on the back.decimal number. Range: 1-35number.size = 22number.yVertical position of the number on the back.decimal number. Range: 0(low)-30(high)number.y = 11shorts.colorThis attribute specifies the color of the player/gk shorts. The color of shorts is used by the game to determine correct color of the underpants for those players who wear them, and have them set to match the shorts color.color, written in hexadecimal format RRGGBB (red,green,blue)shorts.color = A70623shorts.number.locationWhere on the shorts the number should be placed. ('off' means the number will not be displayed at all.) left|right|offshorts.number.location = leftshorts.number.sizeSize of the number on shorts.decimal number. Range: 1-35shorts.number.size = 14shorts.number.xHorizontal position of the number on shorts.decimal number. Range: 0(left)-30(right)shorts.number.x = 14shorts.number.yVertical position of the number on shorts.decimal number. Range: 0(low)-30(high)shorts.number.y = 6sleeve.patchIndex of the sleeve patch to use. Sleeve patches are stored in dt0c.img/unknown_5879.bin. First one (0) is typically blank.decimal number. Range: 0-19sleeve.patch = 0sleeve.patch.pos.longPosition of the patch on long sleeve.decimal number. Range: 0-7sleeve.patch.pos.long = 1sleeve.patch.pos.shortPosition of the patch on short sleeve.decimal number. Range: 0-7sleeve.patch.pos.short = 1
By default, the usage of 'description' attribute is enabled, but if you want, you can disable it. To do that, edit the main configuration file, and add the following option to the (kserv) section:
6. LOD Mixer (lodmixer.dll)
LOD-Mixer is the module that allows to fine-tune some aspects of PES2010 graphics engine.
Currently the following features are implemented: screen resolution and aspect ratio correction. All of these can be configured manually in kitserver's main configuration file (kitserver/config.txt), but you can also use Kitserver's configuration tool (config.exe).
6.1. Aspect Ratio.
Many LCD monitors are neither 4:3 nor 16:9. Often, a 16:10 ratio is used, or even 16:9.6. This results in the picture being distored: players either too fat or too skinny, and ball is not round. In this year version, Konami are again using the black bars (as they were in PES2009) to compensate for the case when aspect-ratio is different (LB checkbox). However, if you don't like the black bars, then run settings.exe, turn off the LB checkbox, and then use Kitserver's aspect-ratio correction feature instead:
With LOD Mixer, you can set the aspect ratio to whatever you want. Either let LOD Mixer calculate it automatically - at run-time, using the current screen width and height in pixels - or set the value manually. Automatic way would work quite accurately, assuming the pixel is square. Sometimes, however, you would want to set it manually. For example, i play on widescreen monitor, but using a 800x600 resolution, because my video card is not powerful enough. The automatic calculation would give 4:3, but since the view is stretched to fill the entire screen, we need to account for that. Setting aspect ratio to 1.6 (which is a natural AR for my laptop) does the trick.
6.2. Screen Resolution.
You can set any screen resolution you want, if you play in a Windowed mode. Even crazy screens like 1234x487 will work, but you're likely to suffer from performance problems on such cases. Hidden fullscreen resolutions are fully unlocked now as well. However, only those that your video card really supports in full-screen mode, will work. If you accidently choose an unsupported fullscreen resolution, then PES should still be able to start in a window.
6.3. Controller check
This feature may be useful to people who like to play a tournament - a league or cup together. PES 2010 doesn't allow human players to control both teams, unless both of their selected teams are playing against each other in the match. With this new feature, you can remove that limitation. Now, even if it is for example, P1 vs. COM game, or P2 vs. COM - you can freely select which team you control with each controller. So, you can both play on the same team, or you can let your friend control the opposition - to make things more interesting. You can also now choose a 'Spectator' mode for in tournaments.
Another possiblity opened by this feature: in training mode, you can play for defence and/or goalkeeper. Very handy to train penalty saves!
6.4. LOD configuration.
LOD (Level-Of-Detail) algorithms are used in graphics engines to improve both the picture quality and the speed of rendering, when drawing objects at various distances from the viewer. The basic idea is that when the object is close to the camera, one (very detailed) model is used. When it is far - another, simpler model with less detail is used instead. It's much faster to render a low-poly model of the object, and it typically looks better, when drawn in small size, because it suffers less from aliasing. In theory, at least, that is how it is supposed to work.
Unfortunately, PES series had always suffered from an overly- conservative LOD configuration, where the switch to low-poly models would happen way too soon, and that would result in various visible artifacts. In PES4-PES6, examples were: balding players, and missing details on kits. In PES2008-PES2010, the players and referees appear to have blurred generic faces, once they move slightly away from the camera.
So, if you have a good PC and a powerful videocard with GPU cycles to spare, you may fancy tuning the LOD sligtly to make the game engine display more detailed models, even when they players are a bit away from the camera (Animation quality seems to be affected by this as well). To do that, move the sliders to the right.
Also, if on the contrary, your machine is stuggling to run the game at a smooth frame rate, you can try moving the LOD sliders in the opposite direction - thus making the engine switch to the low-poly models sooner than normal. This may improve the framerate, although at the expense of picture quality. To achieve that, move the sliders to the left.
6.4.1. Additional LOD settings
The lodmixer module also supports 6 more LOD settings, which aren't shown as sliders in configuration tool. Those are LOD settings for so called 'active player'. This is the player that is controlled by human player during free kicks and corner kicks. 'Active player' LODs are also used by the game during uniform selection screen and in Edit Mode.
Basically, i got lazy, and didn't feel like adding 6 more sliders to the configuration tool :) And also couldn't quite figure out where exactly to put them, without totally clobbering the UI. But you can still use them, by adding them manually to (lodmixer) section in config.txt. You probably not going to use all of them, but you might find this one handy: lod.active.player.fk.s1. I put this setting into the config-sample.txt, and set the value of it to 0.010 - this gives maximum detail for the player taking a free kick.
Here is the full list of 'active player' LODs with their default values. Feel free to experiment with them, if you really want to:
6.4.2. Choosing optimal LOD config
Configuring LOD well takes time and is best done via trial-and-error method. (If it was easy, it would've been probably done right in the first place!) I'd like to mention a few considertations here that should help you with LOD configs.
Myth #1: if I move all sliders to the right, I will always have the best picture.
That is simply not true. You will get the most detailed and expensive rendering, yes, but NOT NECESSARILY the one that looks the best. More-detailed objects at far distance actually look worse than less-detailed ones, because of the aliasing effect.
Myth #2: my GPU (video card) is really good, surely it can handle anything thrown at it.
That is not true either. Current generation of games has become quite sofisticiated and resource-hungry. GPU and CPU are working hard to process the rendering, physics, AI logic. 60 FPS is the typical minimum frame-rate at which a game needs to run, in order to provide nice and smooth gameplay. That means the rendering of the entire scene must fit into 1/60th of a second and still leave some time for other tasks to be done. (Physics, in particular is often run at the same rate as rendering, so that the picture doesn't suffer from noise.) To make sure rendering time doesn't escalate dramatically as more objects are rendered, LOD is often employed as the optimization technique. By moving all sliders to the right, you are effectively disabling the LOD algorithm and telling your GPU: 'render all objects on the screen at the most possible detail. And if you fry while doing that, i don't care!'. Ok, so maybe it's not a funny example, but you get the point.
Now, coming back to our game, as i said, in many cases, you only really need to adjust 1 slider or two to get the desired effect, and still keep the smooth frame-rate. Let's consider some examples:
Problem: during regular gameplay, the game engine switches to low-quality models of players too soon, so we have artifacts like washed-out faces, untucked shirts suddenly become tucked-in, players models become too robot-like. Solution: slide 'PLAYERS (Gameplay) S3' slider to the right - around 0.060 or maybe 0.050. That should take care of it. You may also want to try moving the S2 slider to something around 0.70, but on my card that didn't really give noticeable difference.
Problem: during free-kicks, the faces of the players in the wall are all washed-out, even though they can be pretty close to the camera. Similarly - with corners.Solution: move the 'PLAYERS (Cut-scenes, Highlights, etc.) S3' slider to the right. The value 0.050 should be enough.
Problem: referees suffer from the same problems as described above - during both gameplay and during replays. Solution: move the REFEREES sliders to the right. Again, you don't really need to max them out - something around 0.060 - 0.050 should be good.
Problem: during free kick, the player that is taking it is not rendered with full detail, even though i have all LOD sliders set to maximum quality. Solution: use the 'active player' LOD setting (not shown in config.exe), called lod.active.player.fk.s1 - set it to 0.010 in (lodmixer) section of config.txt file.
These are just some examples. You might notice some other artifacts that you'd like to fix. The main thing is: experiment with your LOD configuration, don't just blindly set everything to maximum quality - on most systems that will result in stuttering and loss of frame-rate, because your GPU (and CPU also) gets a lot more work to do. In many cases, adjusting just one or two sliders gets the effect you want, without hurting the frame-rate.
7. Camera module (camera.dll)
For reasons known only to Konami product managers, for the third(!) year running, they took away the interface feature that allowed to adjust camera angle (it was in PES3-PES6, but it disappeared starting with PES2008). The underlying logic is still present in the game executable though, and this module allows you to take advantage of it. You can adjust the camera angle: standard values are 0 - 9, but you can actually set a bigger value, which will result in camera turning even more. For example, i like to play with angle value set to 30.
Choose any value from 0 to 2^32-1. Angles like 20, 40, 100 give quite a different perspective of play. More fun :)
Use Kitserver configuration tool (config.exe) or, you can also edit your config.txt file manually, like this:
8. Time expander (time.dll)
This tiny module allows to stretch the length of the match to normal 90 minutes, if you want, but really you can choose any number of minutes between 1 and 255. Going beyond 90 will make the seconds flow slower than normal. Also, another extreme is setting the match time to 1 minute. This is a whole new experience too: you have to really treasure the ball - keep posession, or you risk not getting it back at all, before the final whistle! Also, if you get a scoring chance, better put it away, because chances are it'll be the only one you get.
To set the match time use match.time setting:
9. Speeder module (speeder.dll)
Not everyone is satisfied with the pace of the gameplay. It must be said that it is not an easy thing to get this aspect of simulating a football match correctly. Many factors are in play, and a lot depends on hardware. Personally, i think Konami did a decent job at that, but many folks find the gameplay too fast.
Several techniques of slowing the game down exist, and not one of them is perfect, but all work to some extent. The speeder module basically slows down the clock, sort of tricking the game into running slower. This is not an ideal solution either, but if a small adjustment is used, it can still look real, play well, and actually provide a smoother gameplay. Don't consider it a silver bullet though. It might work well for you, but it also may not deliver everything you had hoped for :) (One side-effect, for example, is that if you set your match time to 10 minutes, but you have the Game Speed set to 0.9, the actual match time will be approximately 11.1 minutes.)
It is possible to decrease the game speed and also to increase it. The configuration tool has the 'Game Speed' slider for easy adjustments. The value 1.0 gives the default unchanged speed. Less than 1.0 - slower gameplay, greater than 1.0 - faster gameplay. It is not advised to use values lower than 0.7, because the music/commentary starts to break up. Also values larger than 2.5 are not supported. It is already ridiculously fast with 2.5!.
Alternatively, you can set the game speed adjustment manually in config.txt, by using count.factor setting:
Credits
Programming: juce and Robbie
Big thanks to: England and Energia - for help with 1.1 and 1.2 EXE support, PATe.Arminia - for help with kit attributes, Stelios and ninuzzu - for KitsRelink tool, which helped me greatly when i was working on kserv module, Ariel - for great-looking kitserver logo.
Beta-testing: members and guests of Evo-Web and PesWe.com forums.
Original idea for afs2fs modules: Str@teG
Many other ideas came from users of Evo-Web forums and PesWe.com forums
Special thanks go to: administrators of PesWe.com website and members of PesWe forums.
Kitserver license is BSD-style license that can be found here: license.txt
Download PES 2010 PESIDN Patch v1.0 + Update v1.1 by Handy Jr
Indonesia Super League Season 2014/2015
SELECTOR FEATURES :
– Scoreboard Selector
– Gloves Selector
– Adboard Selector

– Refree Kit Selector
– Crowd Setting
Buat folder dt0d.img di folder img kitserver untuk FIX Gloves Selector
GENERAL FEATURES :
– Update squad, transfer, kits teams
– Update UCL teams
Kitserver Pes 2010 Indonesia Merdeka
– Update 1000+ faces & hairs
Kitserver Pes 2010 Indonesia 2017
– Update 100+ callnames
– WaveGlossy Logo by Ron69
– Update boots- Update ballpack
– ML and BL work 100% (if you had problems, that mean problem in your computer)
– Update stats players from Pesstatsdatabase.com
SPECIAL FEATURES :
– Correct Linking boots players ( C. Ronaldo: Nike Mercurial, Messi: Adidas adizero, Iniesta : nike magista. etc
– Add Malaysia NT
– Update Indonesia NT + chants
– Add Allianz Arena
– Add ISL ( 8 teams)
– Add indonesia brand boots
– Add ball pes 2015
CREDITS :
Faces & hairs : EmreT, SantanAji,Ghost Rider, love01010100, KRGX, Magicpro ,Jenkey1002, meng_27, ivocruz, MiLi, BK-201, Ramz, nedz, Ilham Faiq, Ron69, SGangster, MateusNKCball : Danny_77, MateusNKC,Tanapon
Kitserver Pes 2010 Indonesia Ke
Base Patch : PESEdit.com Patch 2010 v4.1 + Update 2014 by PESEgy
Special thank’s : Hafidz, Vyan Ryan, Ilham Faiq, Bayou Falz, Zakian Maulana and all member Group PES 2010 Indonesia Community
Kitserver Pes 2010 Indonesia Gratis
DOWNLOAD LINK :
Kitserver Pes 2010 Indonesia Terbaru
MEDIAFIRE : CLICK HERE
Kitserver Pes 2010 Indonesia Full
0 notes
Text
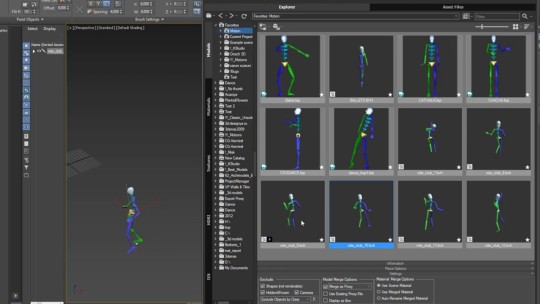
Belly Dance Bvh Files Genesis
Download Belly Dance Bvh Files For Poser Crossword Ea Cricket 2017 Roster Only Download Pemeran Wei Wei Film Love O To O Kuttyweb Evan Vera Mathiri Mp3 Videos Song Downlod Download Guitar Hero Lagu Indonesia Apk Download Metal Slug 6 Apk Obb Radiant Viewer For Mac Seikoku No Dragonar Volume 9 Epub. I downloaded, installed and activated iClone PRO 5.22 trial, and 3DXchange 5.03 trial. I followed the tutorial to the letter, with the default Genesis figure (no clothing, no morphs) and I can't complete the step, where you drag and drop the motion file (Dance/Rap02.iMotion) in 3DXchange after you converted it to a non-standard character using the Genesis preset. Thanks for the link to the belly dance one! 2 - Upload your character daz / poser in Mixamo; it is character daz, upload fbx format; if Poser character, upoad bvh format; 3 - apply now Mixamo free Gangnam Style for the character, and edit it (easy and quick) save and download the motion in bvh format, or fbx.

Truebones.FBX files work well with most major 3-D animation programs and game engines like Motion Builder, Maya, C4D, Blender, Lightwave, Unity3D, Unreal and Many More Truebones.BVH Files. We also have the hard to find.BVH for 3DS MAX Biped, Daz-3D, Poser, I-Clone and many more.
Update Log: 2014-03-21. A whole new way converting MMD dance motion into BVH for DS Genesis, with hands motion, almost perfect now!. Converted mmd Facial motion into DS data file (.duf).
Belly Dance by MineFujiko. Renderosity - a digital art community for cg artists to buy and sell 2d and 3d content, cg news, free 3d models, 2d textures, backgrounds, and brushes. I don't think the belly dance motion will work either:lol: Thanks, in advance for your time and advice. Hi, I'm quite n00b on the subject but doyou need poser to use the character? Watch video - Where to find the BVH files. - How to import a BVH file into Daz Studio 3 and apply to Aiko3. - How to render the animation from Daz Studio as a.
Dear 3D Vision Fans, We have enjoyed sharing 3D Vision content here over the past eight years, and seeing the fantastic images and videos you’ve uploaded. Thanks for making this such a fun destination for 3D enthusiasts. As of August 4, 2018, the 3D photo functionality of 3DVisionlive.com has been transitioned over to.
The 3D video functionality of this site is no longer available. We’re working with Phereo.com, which is prepared to accept all former 3DVisionLive members. You can use the site to upload, share and view 3D photos just like on 3DVisionLive, and there is no cost for a standard account. Please note: You will need to create a new account on Phereo.com, and then upload your photos, if you choose. Your 3DVisionLive account will not be ported over. Thank you for your support of 3DVisionLive over the years. Contact with any issues.
This is the list of SL Dance Makers, Animation Makers and Dance Equipment makers. There are five sections: 1. 8th grade chapter 1 math test.
Bvh File Format
Dance Management and Creation 1.A. Dance HUDs 1.B. Club and Home use Dance Systems 1.C. Performance Dance Equipment 1.D. Making Animations & Poses 2.
Bvh Files Download
MOCAP (Motion Capture) Dance/Animation Makers 3. Free Dances 1.
Belly Dance Bvh Files Genesis G80
Dance Management and Creation 1.A. SL Dance HUDs There is a. - This is a new Dance HUD made by Dance Queens member Racheal Young - Fleur Cooperstone is a Dance Queens member and has developed a dance HUD especially designed for advanced dancers. - The Huddles EZ Animator Deluxe lets you do sequenced choreography and it is great for managing dances. There are now other HUDS - see the comparative analysis listed above. - This HUD offers both management of individual and couples dancing.

- (this is a new product and not included in the analysis of Dance HUDs): This is a group dance and performance management HUD made by DQ members Martin Yeats, Galilla Sinatra and Rug Halberd. Controls multiple groups independently from each other. Change animations and smooth movement in each group when you want. Control emotes and stage props. This system is designed to work exclusively with the the Spot On Choreography and Group Formation Systems.
Dance Balls - is a comparison of Dance Ball Systems - Intan makes the group dance rezzer. - Some Dance Queens members like the TIS Dance System which combines a couples dance rezer and an individual dance ball into a one prim ball.
Dance Systems for Shows - Zhaza Zerbino introduced moving pose balls in 2009 and now offers them in her shop. This is a system (DB Dance Systems) for controlling both the dances and the positions., - Bryndyn Burton makes the suitable for controlling dancers during shows including the animations and positions. Hironics MPC - There is a write up on this system and free demo devices in the Free Stuff Box. This device has some ability to control position and dances, but does not do sequences. Support canon 2900 win 10 64 bit. - This is a system for managing dancer position and movement and offers the additional advantage of interacting with the Barre HUD to coordinated dancing with movement.
Belly Dance Bvh Files For Daze
Belly Dance Bvh Files Genesis Download
Bvh Dance Files Free Download
This simple-to-use but powerful device low-lag movement design system to use with your favorite animation HUD or the Spot On Performance Director HUD. For single or multiple avatars, routes can be made in a matter of minutes, complete with customized timing between positions, pauses, and smooth transitions in turns. Groups such as dance troupes can go in different directions, even up or down ramps and stairs, smoothly and all with a touch of a button or a simple chat command. - A group dance system with an intuitive HUD where you control the movement, rotation, speed, direction, and can even mirror groups.
0 notes
Text
How To Unlock A Verizon Prepaid Phone Without The Code


See All Results For This Question

There are also options to unlock your phone by calling 611 from a T-Mobile phone or 1-877-746-0909 from any other phone, or via a live chat with a T-Mobile customer rep. Unlock a prepaid or fully paid phone. If you own a prepaid or paid-in-full device, unlocking it is a bit simpler.
Keep in mind that flashing the radio firmware still won't help you until you've unlocked your phone with the unlock code. My advice to anyone running into this problem: 1. Ask for an unlock code. If you're reading this, they've probably already denied you one. File a complaint with the FCC.
My Verizon website Go to the Number Lock page and sign in if requested to do so. Select Off next to the number (s) that you want to unlock. For your security we will send you an authorization code to confirm your request.
Jul 23, 2019 Prepaid and postpaid phones from Verizon are locked for 60 days from purchase or activation. Your phone will be automatically unlocked after the said time. But if you are a deployed military personnel, you can request an unlock even within the 60-day period.
Why unlock my MOTOROLA MOTO E5 GO?


Unlocking your phone allows you to use any network provider SIM card in your MOTOROLA MOTO E5 GO. this involves an unlock code which is a series of numbers that can be entered into your phone by keypad to remove any network restriction so you be able to use the other domestic and foreign networks.
How To unlock my MOTOROLA MOTO E5 GO?
Unlocking a MOTOROLA MOTO E5 GO phone by unlock code is easier than you think. It doesn’t involves any knowledge or tool. Please follow these steps : https://undergroundload135.tumblr.com/post/657064058373193728/download-targus-group-int-driver. https://undergroundload135.tumblr.com/post/659022698264100864/drivers-tele-danmark.

Get the unique unlock code of your MOTOROLA MOTO E5 GO from here
Remove the original SIM Card from your phone.
Insert a non-accepted SIM Card.
Now, you should see a box to enter the unlock code. .
Enter the unlock code provided by UNLOCKLOCKS.COM.
That is all. enjoy your unlocked MOTOROLA MOTO E5 GO with all networks, worldwide.
Notes:
All carriers are supported for unlocking (AT&T, T-Mobile, MetroPCS, Cricket, EE, Vodafone, Orange, O2, 3 UK, Virgin mobile, Rogers, Fido, Bell, Telus, SFR, Bouygues, Movistar, TIM, TMN, A1, Telekom, etc…)
Unlocking is permanent, you don’t need to enter the unlock code more than once.
All MOTOROLA MOTO E5 GO variants are supported for unlocking.
Unlocking a MOTOROLA MOTO E5 GO phone is legal and 100% safe.
Faq :
See All Results For This Question
What are the advantages of unlocking my MOTOROLA MOTO E5 GO? The biggest advantage of getting your phone unlocked is choice. With your phoneunlocked you can swap SIM cards at different times to get the best value of the different tariffs from the providers, you can choose which network and which tariff you want at various times.Mobile phones which are unlocked tend to have a greater second hand value, the value of your handset could be increased. Many people will unlock their mobiles so they can use a local prepaid SIM card when in a different country instead of using the costly ‘roaming’ feature provided by their current network provider.
Why would I want to unlock my MOTOROLA MOTO E5 GO? There are hundreds of network operators around the globe that lock their phones onto their networks. So we un-lock the SIM locks from the phoneso that you can use any network you please.Unlocking your phonewill give you freedom to purchase or use a SIM card from another network in your own country or even worldwide. Unlocking your phonewill give you the opportunity to change the SIM card to a local provider when abroad, allowing much cheaper calls. It will also increase the value of your phoneif you sell it.
How will I know if my MOTOROLA MOTO E5 GO is locked? To find out if your phoneis locked, simply place a different SIM card in the phoneand turn the phoneon. Ensure you use a different SIM and not the SIM that the phonewas supplied with. If the phonedoes not allow you to make calls and displays an error message such as ‘SIM not valid’, ‘phoneRestricted’, ‘SIM not accepted’ or it’s asking you to enter an unlock code then your phoneis most likely to be locked.
How do you unlock my MOTOROLA MOTO E5 GO? You provide us with easy to find details of your phonee.g. the type, the IMEI number, country and the network that supplied the phone. This information is then used to provide an unlock code to unlock your phone. You simply follow the instructions we provide, and the phonewill be unlocked – easy!
What information do I need to give you? This varies depending on the phone. Typically you need to provide the model, the 15 digit IMEI number of the phoneand the country / network it is locked to. Usually this is enough but this does vary for each handset and solution. Either way we provide you with full easy to follow instructions to unlock your phone.
Do I need the original SIM card to unlock my MOTOROLA MOTO E5 GO? The unlock codes we supply for most handsets will be entered without any SIM card inserted. However, certain handsets do require either an alternative SIM card, or the original SIM card to be inserted in order for the unlock codes to work.
Do I require technical knowledge? None at all, we provide complete and easy instructions for unlocking your phone. Often it can be as simple as entering an unlock code using the phone’s keypad. If there is a problem unlocking your phoneusing the codes we provide then we will endeavor to solve the problem to the best of our ability.
What do I do with the unlock codes? Once you receive the codes, follow our detailed instructions and enter the codes into your phoneby using the phonekeypad. It is simple and straight forward and will immediately unlock your phone.
Can I get a discount if I have more than 10 phones to unlock? Sure. Please contact us through our website we offer special discounts for professional unlockers.
What is a SIM card? It’s the small (roughly 2cm by 1 cm) microchip card that you insert into a phonewhen it’s first set up. It provides the identity of the phonefor the mobile network. The SIM card is usually located behind the battery on the back of the phone.
How do I pay? We accept a wide range of payment methods : – Visa – Mastercard – American Express – Electron – Paypal – Others…
Is it safe and secure entering my card details on your website? Your cards details are fully encrypted and processed over a secure server. We do not store your card details for maximum security. We also support PayPal, which has a Thawte certified 128bit SSL Security site.
Will my phonestill work? Yes, unlocking simply removes the network lock and SIM lock that are entered into the phones software when sold to you by the network.
Will the unlock codes damage my phone? Removing the network restriction on your mobile phonewith unlock codes is the safest form of unlocking available. You simply enter the necessary codes directly into your phonevia the keypad to remove the network restriction
0 notes
Text
Drivers Tele Danmark

If you want to use both the USB-Link 2 and the old USB-Link, you will have to reinstall the old USB-Link drivers after installing the USB-Link 2 drivers. 124032 USB-Link™ 2: Bluetooth Edition. 124034 USB-Link™ 2: Wi-Fi Edition. Download A Driver Connect to your device. Spectronic Devices Ltd. 106a Bedford Rd., Wootton, Bedfordshire, MK43 9JB, United Kingdom Tel: +44 (0)1234 765185 - Fax: +44 (0)1234 767514 Email: [email protected]@SpectronicDevices.com. Just plug the electronic into a USB, RS232 or parallel port. Driver software enables quick and easy application program development. As well as a wide range of Line Cameras Spectronic Devices offers a range of miniature Spectrometers, Single and Dual channel. Download spectronic devices usb devices driver. If the device is not yet connected, first install the device-specific driver, such as by using the appropriate installer. After the device-specific driver is installed, Windows 10 will select that driver instead of the standard USB audio 2.0 driver when you first connect the device.
Interface Description
IGSS32 offers an interface for connection to AI800 equipment using TeleDanmark Alarmnet (Tekniknet) as network provider.
The AI800 equipment – typically used for monitoring and control of remote pumpstations – is connected to AlarmNet as AU terminals. IGSS32 is connected to AlarmNet as VBC equipment.
Virtual connections using AlarmNet are supervised by Tele Danmark as network operator, thus making AlarmNet connections more reliable and safe than normal telephone connections.
All network alarms (network errors, power failures etc.) are automatically detected by Alarmnet and passed to the IGSS alarm application providing the operator precise information about network status.
The special AI800 protocol is running on top of the AlarmNet protocol. This protocol enables IGSS32 to write commands to AI800 registers and to receive events messages from the AI800. Thus IGSS32 do not send poll messages to AI800.

Gold Rush, Street Outlaws, Alaskan Bush People, Deadliest Catch. Browse Discovery's portfolio of hit series.
Download TV Tuner / Capture Card drivers for Windows, firmware, bios, tools, utilities.
The Samsung support homepage is your starting point for help with Samsung products, featuring visual guides, manuals, support downloads, tech specs, troubleshooting, and answers.
In 1995, the regional companies were merged into Tele Danmark, and the first nationwide cable TV company, Tele Danmark Kabel TV was created. Five years later, in 2000, Tele Danmark changed its name to TDC. In January 2000 TDC got a new logo with five ovals in red, yellow, green, turquoise and blue colour.
Technical Data

Electrical Interface:RS-232CProtocol:AlarmNet and AI800 protocols.Types of data:16 bit register values.PLC types supported:AI800.Supported platforms:Windows Vista, Windows XP, Windows 2003 Server, Windows 2000Max. number of nodes:255 per channelPC hardware requirements:Standard Serial RS232C portPC software requirements:None
Drivers Tele Denmark International

Drivers Tele Denmark Online
Smc driver download for windows 10 32 bit. The stick is Intel CE9500 based and the drivers installed fine. I tested it with trial DVB Dream which worked fine. What I want is just a simple tuner and EPG for Freeview, I don't need a PVR and the extra complication and program overhead. Download targus group int driver.
0 notes
Text
Terra Industria Da Amazonia Driver Download For Windows 10

Terra Industria Da Amazonia Driver Download For Windows 10 64
Terra Industria Da Amazonia Driver Download For Windows 10
DJI Terra Capture, analyze and visualize your environment with DJI Terra – an easy to use mapping software developed to help industry professionals transform real-world scenarios into digital assets. TerraER is a free, open-source application that makes the understanding of data modeling much easier. The tool is addressed to academics, specially to support modeling database courses. Under the first hypothesis, this deltaic, fluvial and lacrustine environment would have precluded extensive, long-term terra firme habitats until the Late Miocene, when the Purus Arch was breached and a transcontinental Amazon drainage created around 11.8–10.0 Ma 8,12.
TerraAmazon 7.3.1
Windows - 64 bits (26/11/2020)
Linux - Ubuntu 18.04 - 64 bits (26/11/2020)
Mac - OS Sierra - 64 bits (26/11/2020)
TerraAmazon 7.3.0
Windows - 64 bits (19/11/2020)
Linux - Ubuntu 18.04 - 64 bits (19/11/2020)
Mac - OS Sierra - 64 bits (19/11/2020)
TerraAmazon 7.2.1
Windows - 64 bits (16/10/2020)
Linux - Ubuntu 18.04 - 64 bits (16/10/2020)
Mac - OS Sierra - 64 bits (16/10/2020)
TerraAmazon 7.2.0
Windows - 64 bits (29/06/2020)
Linux - Ubuntu 18.04 - 64 bits (29/06/2020) | *TerraLib 5.4.2 Ubuntu 16.04
Mac - OS Sierra - 64 bits (29/06/2019)
Terra Industria Da Amazonia Driver Download For Windows 10 64
TerraAmazon 7.1.1
Windows - 64 bits (05/06/2019)
Linux - Ubuntu 14.04 - 64 bits (05/06/2019) | *TerraLib 5.4.2 Ubuntu 14.04
Linux - Ubuntu 16.04 - 64 bits (05/06/2019) | *TerraLib 5.4.2 Ubuntu 16.04
Mac - OS Sierra - 64 bits (05/06/2019)
TerraAmazon 7.1.0
Windows - 64 bits (29/08/2018)
Linux - Ubuntu 14.04 - 64 bits (29/08/2018) | *TerraLib 5.4.0 Ubuntu 14.04
Linux - Ubuntu 16.04 - 64 bits (29/08/2018) | *TerraLib 5.4.0 Ubuntu 16.04
Mac - OS Sierra - 64 bits (29/08/2018)
TerraAmazon 7.0.2
Windows - 64 bits (18/07/2018)
Linux - Ubuntu 14.04 - 64 bits (17/07/2018)
Linux - Ubuntu 16.04 - 64 bits (18/07/2018)
Mac - OS Sierra - 64 bits (19/07/2018)
TerraAmazon 7.0.1
Windows - 64 bits (10/05/2018)
https://undergroundload135.tumblr.com/post/657064058373193728/download-targus-group-int-driver. Linux - Ubuntu 14.04 - 64 bits (10/05/2018)
Linux - Ubuntu 16.04 - 64 bits (10/05/2018)
Mac - OS Sierra - 64 bits (10/05/2018)
TerraAmazon 7.0

Windows - 64 bits (21/12/2017)
Linux - Ubuntu 14.04 - 64 bits (21/12/2017)
Linux - Ubuntu 16.04 - 64 bits (21/12/2017)
Mac - OS Sierra - 64 bits (21/12/2017)
TerraAmazon 6.0
Windows - 64 bits (08/03/2017)
Linux - Ubuntu 14.04 - 64 bits (08/03/2017)
Linux - Ubuntu 16.04 - 64 bits (08/03/2017)
Mac - OS Sierra - 64 bits (08/03/2017)
TerraAmazon 6.0_Beta
Windows - 64 bits (13/01/2017)
TerraAmazon 5.2

Windows - 64 bits (18/11/2016)
Spectronic Devices Ltd. 106a Bedford Rd., Wootton, Bedfordshire, MK43 9JB, United Kingdom Tel: +44 (0)1234 765185 - Fax: +44 (0)1234 767514 Email: [email protected]@SpectronicDevices.com. Download spectronic devices usb devices driver windows 7. Just plug the electronic into a USB, RS232 or parallel port. Driver software enables quick and easy application program development. As well as a wide range of Line Cameras Spectronic Devices offers a range of miniature Spectrometers, Single and Dual channel.
Linux - Ubuntu 14.04 - 64 bits (18/11/2016)
Mac - OS Sierra - 64 bits (18/11/2016)
TerraAmazon 5.1
Windows - 64 bits (09/2016)
Linux - Ubuntu 14.04 - 64 bits (09/2016)
Mac - OS Sierra - 64 bits (09/2016)
TerraAmazon 5.0
Smc driver download for windows 10. Download Smc Wi-Fi device drivers or install DriverPack Solution software for driver scan and update. Windows XP, 7, 8, 8.1, 10 (x64, x86) Category: Wi-Fi devices. Download SMC SMC-BT10 Driver 2.12 (Other Drivers & Tools). Windows 10 Windows 10 64 bit Windows Linux Windows Mac Windows All Windows Unix file size: 28.4 MB filename. Secure Watch Data Sheet Secure Watch Mobile App for iOS Users Manual Secure Watch App for Android Devices Users Manual Secure Watch Desktop Program Users Manual. Desktop Application Downloads: Secure Watch (Windows) Secure Watch (Mac). Decompress the downloaded file before use. Install the software to the PC according to the Installation Manual. Operation Manuals / Installation Manuals Note: The Controller Setting Software (Chinese version) is a PC software that can only be used in a Chinese language environment.
Windows - 64 bits (07/04/2016)
Linux - Ubuntu 14.04 - 64 bits (07/04/2016)
Mac - OS Sierra - 64 bits (07/04/2016)
Terra Industria Da Amazonia Driver Download For Windows 10
1Samba Da Zona
Written-By – Joyce
Written-By – Joyce
2:592Havana-me3:513O Chinês E A Bicicleta
Written-By – Joyce
Written-By – Joyce
4:364Rodando A Baiana
Percussion – Zero (51)
Percussion – Zero (51)
4:435Até Jazz2:516Sexy Sílvia3:547Receita De Samba
Written-By – Joyce, Paulo César Pinheiro
Written-By – Joyce, Paulo César Pinheiro
4:238Deus E O Diabo (Na Dança Do Baião)
Cello – Jaques Morelenbaum
Pandeiro – Marcos Suzano
Cello – Jaques Morelenbaum
Pandeiro – Marcos Suzano
3:239Paraíso
Viola – Jairo Santos
Written-By – Joyce, Mauricio Maestro
Viola – Jairo Santos
Written-By – Joyce, Mauricio Maestro
3:3910Delicadeza3:1111 Feijão Com Arroz4:3812Oásis
Written-By – Joyce, Léa Freire
Written-By – Joyce, Léa Freire
3:3913Viola de Prata
Arranged By, Piano – Hermeto Pascoal
Arranged By, Piano – Hermeto Pascoal
5:4214Antônio / Ilha Brasil
Written-By (Antônio & Ilha Brasil) – Joyce
Written-By (Antônio & Ilha Brasil) – Joyce
5:27
0 notes
Text
Drivers XEN Laptops & Desktops

Unlock your phone. With a USB cable, connect your phone to your computer. On your phone, tap the 'Charging this device via USB' notification. Under 'Use USB for,' select File Transfer.; A file transfer window will open on your computer. For a list of the driver versions and the latest driver disk updates available, see Driver versions for XenServer and Citrix Hypervisor. If you experience any difficulties, contact Citrix Technical Support. For information on how to build driver disks, refer to Citrix XenServer Supplemental Packs and the DDK Guide. The Windows PV Drivers are built individually into a tarball each. To install a driver on your target system, unpack the tarball, then navigate to either the x86 or x64 subdirectory (whichever is appropriate), and execute the copy of dpinst.exe you find there with Administrator privilege. For more information read the installation instructions.
downloaddriver-intel-i40e-2.9.21.zipWhy can't I download this file?
XenServer 7.1 LTSR Cumulative Update 2
Who Should Install this Driver Disk?

Customers running a Citrix XenServer 7.1 LTSR Cumulative Update 2 who use Intel's i40e driver and wish to use the latest version of the following:
Driver ModuleVersioni40e2.9.21
Issues Resolved In this Driver Disk
This driver disk contains mitigations for the issues described in CTX263684 - Citrix Hypervisor Multiple Security Updates.
Installing the Driver Disk
Customers should use XenServer Command Line Interface (CLI) to install this update. Once the driver has been installed, the server must be restarted. As with any software update, Citrix advises customers to back up their data before applying this driver disk. Download spectronic devices usb devices driver.
Please note that the attachment to this article is a zip file. It contains both the driver disk ISO mentioned below, and the source code for the driver. The zip file should be unzipped (to produce the driver disk ISO image), before carrying out the steps below. The source code file is not necessary for driver disk installation: it is provided to fulfill licensing obligations. Smc driver download for windows 10.
Installing as Part of a Clean XenServer Installation
After you have selected your keyboard layout at the first installer prompt, you will be presented with a welcome screen. At this point, press F9 on your keyboard, and insert the CD with the driver disk in it, or use one of the other methods such as installation over the network.
Note: If installation over HTTP or FTP is to be used, the ISO image must be unpacked at that location (i.e. the installer expects to find the contents of the ISO at that network location, not the ISO itself).
The installer will proceed to attempt to load the driver. If this is successful, you can continue with the installation as normal. Near the end of the installation, you will be prompted to re-insert the driver disk (otherwise known as a XenServer supplemental pack) so that the driver can be installed onto disk. You must re-supply the driver disk at this point. Failure to do so will mean that the installation will not contain the new drivers. After this step, no further action is required.
If the installer fails to load the new driver from the driver disk, it is likely to be because an earlier version of the driver has already been loaded. In general, this is because a hardware component is present that is supported by the version of the driver that ships as part of XenServer (even if another component is present that requires a newer version of the driver). To avoid the existing driver being loaded, use the following procedure.
Targus USB To Serial (RS232) Adapter: PA088UZ. By downloading any of the files below, you acknowledge that you have read and accept the following agreements: Targus End-User License Agreement (EULA) Software License Agreement (DisplayLink) Downloads; Driver; Select Driver Driver. Download targus group int driver. Driver and Software Downloads. Find and download drivers, software, and user guides for Targus products including docking stations, USB hubs, video adapters, and tablet cases. For Technical News and Updates: Vist our Tech Talk Blog. For Assistance: Visit our. Essential accessories for portable computing including notebook computer cases, security devices, PDA/Handheld accessories and more!
Reboot the host, leaving the XenServer installation CD-ROM in the drive.
At the boot: prompt, type:
shell
You will now be presented with a command prompt. Type the following:
rmmod i40e
If this succeeds (i.e. there are no error messages printed), the installer's versions of the drivers have been unloaded. If error messages are presented, it is likely that other drivers depend on one or more of the drivers you are attempting to unload. If this is the case, please contact Citrix Technical Support.
Type
exit
or press Control+D on your keyboard, to return to the installer.
Use the procedure described above to provide the driver disk to the installer, which should now load correctly.
Drivers XEN Laptops & Desktops
Installing the Update by using the xe Command Line Interface
Perform the following steps to install the update remotely using the xe CLI:
Download the update to a known location on a computer that has XenCenter installed.
Upload the update:
xe update-upload file-name=driver-intel-i40e-2.9.21.iso
Note: The UUID of the update is returned when the upload completes.
Apply the update:
xe update-apply uuid=12a81720-a4a4-4708-97b6-1b7f0d8b5cc3
To complete the installation, restart the host. This ensures that the driver loads correctly.
Files
Update Files
ComponentDetailsFilenamedriver-intel-i40e-2.9.21.isoFile sha25682db5e4fe433e07c7bb1856e9710b11a4f696d10e49b63c7946de110b650f4aeSource Filenamedriver-intel-i40e-2.9.21-sources.isoSource File sha2560f7ebf06abb417e632a368c6fd72e757c92163a72c5ae632d0631bef8619077eZip Filenamedriver-intel-i40e-2.9.21.zipZip File sha2564ff659a1da25988465b351a4ec75b0d2c82847d5d8a55aaf33696bc881195f13Size of the Zip file135.93 MB
RPMs Provided
Drivers Xen Laptops & Desktops Computers
RPM Nameintel-i40e-2.9.21.p1-1.x86_64.rpm
More Information
For a list of the driver versions and the latest driver disk updates available, see Driver versions for XenServer and Citrix Hypervisor.
Drivers Xen Laptops Lenovo
If you experience any difficulties, contact Citrix Technical Support.
For information on how to build driver disks, refer to Citrix XenServer Supplemental Packs and the DDK Guide .
Drivers Xen Laptops Reviews
Help
hello, im having an ASUS K501N series laptop that has a G102M GeForce NVIDIA graphic card.Im having a dual boot with windows XP and OpenSUSE 11.1.i have already installed the graphic driver to windows but dont really Know how to installed it in SUSE 11.1.so i came up to this forum topic and did as what was told: > Start the Software installer and make sure you have the pattern 'Linux > Kernel Development' installed. > > Open a terminal window and issue following commands: > > mkdir NVIDIA-driver > cd NVIDIA-driver > wget ftp://download.nvidia..
11.4
Nvidia h/w: Quadro FX 570 Installed 11.4 yesterday. No problems. Installed Gnome 3 today and it goes into fallback mode. Assuming that the graphics driver might be the culprit, I attempted to install the latest nvidia driver. Added repo ftp://download.nvidia.com/opensuse/11.4/ in Yast2. Did a refresh and it complains that it cannot access installation media at the above. Paste the above in Firefox and it gets there OK. One-click method also fails. Never had a problem with updating nvidia driver before. Not sure what to check. I did delete and add with no succe..
installing modified nvidia driver for xen
Hello, iwant to install a modified nvidia driver to my xen kernel. running linux-z9ac:/temp/NVIDIA-Linux-x86_64-185.18.36-pkg2/usr/src/nv # *make module * I get following error massage make CC=cc KBUILD_OUTPUT=/lib/modules/2.6.31.8-0.1-desktop/build KBUILD_VERBOSE=1 -C /lib/modules/2.6.31.8-0.1-desktop/source SUBDIRS=/temp/NVIDIA-Linux-x86_64-185.18.36-pkg2/usr/src/nv modules make -C /lib/modules/2.6.31.8-0.1-desktop/build KBUILD_SRC=/usr/src/linux-2.6.31.8-0.1 KBUILD_EXTMOD='/temp/NVIDIA-Linux-x86_64-185.18.36-pkg2/..
Nvidia driver with Xen in 11.1
Hello peeps, One major hold up for me in using openSuse natively is not being able to get 3d support in Xen. I need virtuals to run Visual Studio but I also play COD4 and CS:Source. Not much gaming but enough to need the fix every once in a while. I found a post here: 'Use Nvidia driver with Xen - openSUSE' (http://en.opensuse.org/Use_Nvidia_driver_with_Xen) However, this is outdated and even the reply on the discussion tab seems outdated. I use a GTS 250 card and so I need the newest nvidia driver. Does anyone have the new drivers successfully working in XEN? I..
suse 11 patch1, installed Xen hypervisor having problem boot up xen kernel
Anyone has experience with this? whenever I tried to boot into V1 in the following, it hang. # uname -a Linux tadpole 2.6.32.12-0.7.1.1381.1.PTF-default #1 SMP 2010-05-20 11:14:20 +0200 x86_64 x86_64 x86_64 GNU/Linux # cat /etc/*release* LSB_VERSION='core-2.0-noarch:core-3.2-noarch:core-4.0-noarch:core-2.0-x86_64:core-3.2-x86_64:core-4.0-x86_64' cat: /etc/lsb-release.d: Is a directory SGI Foundation Software 2SP1, Build 701r3.sles11-1005252113 SGI ProPack 7SP1 for Linux, Build 701r3.sles11-1005252113 SGI ProPack 7SP1 for Linux, Build 701r3.sles11-1005252113 SUSE Linux ..
11.4 new nvidia driver install problems
11.4 with Gnome 3. Saw a new nvidia driver -- let's get it. 290.10 Tried to install with both one-click and zypper with no luck. Log file entry: missing or misconfigured D-bus session bus daemon ------- I've been able to install nvidia in the past using either method in the past with no problems but I'm pretty sure this is the first time I've tried since installing 11.4 and Gnome 3. Searched for similar problems but all I came up with was the D-bus message for other issues, not installing nvidia. Maybe 12.1 has similar problems? Dunno. -- gudewdl ..
Install problem for laptop nvidia drivers with 11.4
In a fresh install from DVD I do a new boot and root partition and try to direct Yast to the repo for the Nvidia drivers. Yast does not want to connect to any repos in the installation system. I let it do the Network setup and use DHCP then the list of community repos comes up blank. I also tried to enter a URL for Nvidia and it just won't connect. This wouldn't be a problem but the generic driver does NOT work on this laptop and did NOT work in 11.3 either. The vid card is NVIDIA GeForce 7150M in the 'HP Pavilion dv2715nr' (http://tinyurl.com/3uzdlch). Whe..
Storage driver for NW65sp8 on Suse 11.1 Xen
I've got SLES 11.1 installed and Xen running. I started to install NW65.sp8 paravirtualized and got hung up at the storage controller screen. It has nothing listed and I'm not sure what driver I should use. Ideas? -- zeffan ------------------------------------------------------------------------ You may want to post this in the Linux Forum for the answer. My understanding is that it will pick the right driver when you are installing it. If there are several choices, just pick one and go with it. Ask the Linux guys. jgray -- jgray ---------------..
(11.4 RC2 64bit)
(11.4 RC2 64BIT) - HOW TO INSTALL NVIDIA DRIVER ? Hi, How do I install nVidia's proprietary display driver in openSUSE 11.4 RC2 64bit ? Thanks! Jesse -- JeZ-l-Lee ------------------------------------------------------------------------ There is guidance here (the hard way (which is not hard)): 'SDB:NVIDIA the hard way - openSUSE' (http://en.opensuse.org/SDB:NVIDIA_the_hard_way) Note you may need to disable KMS for this to succeed (hardware dependent) which can be done by running 'yast' (you can run yast in text mode with root permissi..
(HELP!!!) How to Install Ati Drivers on Suse 11.2
OpenSuse 11.2 is atm giving me a very hard time with the installation of Ati 9.11 Drivers >:( I've been searching the intraweb for an easy step by step guide on how to get the 3D acceleration to work but everything I find is 2 year old information.. Now this is my first time using OpenSuse and to give you an image of how bad I am at it. it took me 3 hours to get my internet working.. :sarcastic: So I was wondering if someone could PM or post here a Very Very Very Easy way of getting things to work so I can finally enjoy my laptop and OpenSuse I've followed th..
how to have two desktop kernels and nvidia drivers in suse 11.4
I would like to have 2 desktop kernels in my suse 11.4, I also would like to have nvidia drivers working on both, how can I get this? situation: dell latitude e6510 /windows partition /data partition /home and / separated partition with 11.3 (I dont want to touch this becouse it works:-)) /home and / separated partition with 11.4 and kde 4.6.2 and kernel 2.6.37.1-1.2-desktop and nvidia drivers 270.41.06 (installed in the hard way that is not hard) as I'm interested to test new kernel becouse my touchpad scroll doesn't works, but I don't want to bork my 11.4, is it pos..
Re: Nvidia drivers - suse 11.4
Gentleman, I do not know why lord_valerian started his thread here, nor why stakanov answered here, both in English, in the Dutch part of the forums. It escapes me completely how you venture here either by: . not knowing Dutch, but nevertheless fopllowing the Forums - subforums tree down to here without ever asking yourself 'why can't I understand the subjects here?'; . or knowing Dutch and thus understanding where you went, but then posting in English (in the hope nobody understands you?). Please understand that the languae parts of the forums are made to serve peop..
NVIDIA drivers with Xen
I'm running 11.3, setting up Xen. I have a PNY NVIDIA NVS290 video card. My server is connected to an 8-port VGA KVM switch. With the open source 'nv' drivers, EDID isn't handled properly -- if use high resolutions I get screen flashing. I can resolve that by using an EDID adapter or connecting direct, however I find that the NVIDIA proprietary drivers, when applied to my base kernel the 'hard' way, handle EDID fine and actually look better than the 'nv' drivers in other areas. The problem is I can't build those drivers for my Xen kernel. ..
need help to install nvidia driver on GEFORCE 6150se hardware in opensuse11.4
hi all i need help with installing nvidia driver . i'm useing gnome desk top.thank's -- aburroughs92 ------------------------------------------------------------------------ 'nVidia Driver via Repo in 11.3 & 11.4 - Guide' (http://tinyurl.com/29vv32s) -- Box: openSUSE 11.4 | Gnome 2.3 | AMD 64 X2 5200+ | nVidia 8500GT | 4GB RAM Lap #1: openSUSE 11.4 | Duo T4300 | KDE 4.6 | Gnome 2.3 | Intel M4 Graphics | Lenovo G550 | 3GB RAM Lap#2: 11.4 | Gnome | Celeron 550 | Intel 965GM | Lenovo R61 | Tumbleweed 'My Guides' (http://tinyurl.com/..
0 notes
Text
Download Targus Group Int Driver

Archicad is a professional building information modeling software solution complying with all digital-delivery requirements, offering an intuitive design environment, accurate building information.
Download Targus Group Int Drivers
Targus Software Download
Game Ready Drivers provide the best possible gaming experience for all major new releases, including Virtual Reality games. Prior to a new title launching, our driver team is working up until the last minute to ensure every performance tweak and bug fix is included for the best gameplay on day-1. Targus group international amw1601 driver for windows 7 32 bit, windows 7 64 bit, windows 10, 8, xp. Totally volunteer-supported device and software license.
Download the latest version
Archicad
Extensions for Archicad
Archicad plugin for Autodesk Revit
More Add-ons
COBie packages
Structural Analytical Model Data
Library Part Maker
VersionLanguageBuildPackagesRelease DateInfoNot yet available for this language version.
Licensing
Download Targus Group Int Drivers
Downloads for GRAPHISOFT License Management and Protection Key Drivers
DownloadMore
Archicad 24 INT
1.89 GB
1.95 GB Archicad 24 GER
2.01 GB
2.07 GB
Troubleshooting - Printer / Modem not recognized How do I get my printer and Modem to work?
Troubleshooting - Modem Connection My modem still isn't Recognized. How do I connect my modem?
Troubleshooting - Printer My printer still isn't recognized. How do I get my printer to work?
Printer Port Can I connect storage devices like my Zip drive or CD ROM to the Parallel port?.
Technical SupportHow do I get Technical Support for my USB Mobile Port Replicator
Q. What is the Targus USB Mobile Port Replicator?
A. The Targus USB Mobile Port Replicator is the world’s smallest expansion hub that provides instant peripheral device attachment via a single USB connection to Windows 98/ ME /2000 based computers.
Packaged in a small and attractive enclosure, the PA070U can fit any place on a desktop space.Add devices like mice, keyboards, joysticks, printers, PDAs, scanners speakers, cameras, telephones and many more without rebooting your computer.
The USB Mobile Port Replicator features a self powered, stand alone USB hub (2 ports), Serial (DB-9) port, Bi-directional printer (DB-25) port, Mouse (PS/2) port, Keyboard (PS/2) port and power connection.An AC Adapter and software driver is included.
Q. Compatibility What are the System Requirements?

A.
Hardware:Pentium Class CPU
USB v1.1 Compliant Port
Operating System:Windows 98
Windows ME
Windows 2000
Q. Compatibility - Windows ME is not listed on my Driver Disk. Is Windows ME supported?
A. The drivers for Windows ME were released after the first shipments of the USB Port Replicator. If your disk does not have Windows ME support, you can download the latest drivers from our web site www.targus.com/support,
Q. Installation I thought that USB was 'Plug & Play'. Why do I have to install drivers?
A. The USB and PS/2 ports on your USB Mobile Port Replicator are supported by the Windows 98, ME, 2000 operating systems and do not require any additional drivers. However, drivers are required to recognize the Parallel and Serial ports and convert them to USB.
Q.Installation I got an error message while installing the drivers. What do I do now?
A. Windows 2000
Restart Windows. After searching for a new driver, Windows will report that it found more than one driver. Click on the checkbox next to “Install one of these drivers”
Windows will report that it found two drivers. Click to select 'A:WIN2000U2SWDM.INF'.
Continue as instructed.
Note: The first driver that Windows Detects is the driver for Win 98. The instruction above will redirect Windows to the correct driver for Windows 2000.
Windows 98/ME
If you receive the message 'Windows was unable to locate a driver for this device ' during installation, click on the 'Back' button.
Check the box next to Specify a location. Tab to the input box and type in one of the following locations:
For Windows 98 users, 'a:win98 '
For Windows ME users, 'c:hub' (if using the drivers downloaded from our website)
Continue as instructed.
If you have already told the Hardware Wizard to continue, see the question & answer below.
Q. Installation How do I verify that the devices are installed correctly?
A. Move the cursor to My Computer (on your desktop) and click the right mouse button. Click Properties to display the System Properties window. Next click Device Manager and select Ports (COM&LPT). The new path, Serial on USB (COMx), appears in the window, where 'x' is the COM port assigned to the Serial Port on the PA070.
If the drivers are not completely installed, you will also see a heading labeled 'Other Devices'. If you see this heading, follow the instructions below:
Highlight 'Targus Group Int'l USB Device' (under 'Other Devices') and click on 'Remove'.
Click the 'Refresh' button.
Windows will now begin the Add New Hardware Wizard. Follow the instructions for your operating system:
Windows 98 Users, type 'A:Win98' (Where A: is the letter of your drive).
Windows ME Users, type 'C:hub' (The default location for the drivers downloaded from our website)
Windows 2000 Users, type 'A:Win2000' (Where A: is the letter of your drive).
Q. Installation / Troubleshooting on a non-legacy system. Are there special considerations using the Port Replicator on a non-legacy system (computers that have no Serial or Parallel Ports)?
A. There are some special considerations when using the USB Mobile Port Replicator on systems that don't have legacy (Printer/Serial/PS/2) ports.
1. When installing the Port Replicator, do not plug any devices into it until after the hub has been installed. Doing so can cause errors in the install sequence and may cause some devices not to install correctly.
2. If you are using a USB floppy drive on a system that has only one USB port, you need to:
- Plug the drive directly into the computer and copy the installation disks to a directory on your hard drive before trying to install the USB Mini Hub.
- Then remove the drive and plug in the hub.
- When Windows prompts for a location of the drivers, specify the directory on your hard drive where you copied the files
3. If you access setup by pressing a key during the system power on routine, you will need to have the keyboard attached directly to the computer to use this feature. The hub is not recognized until after the Operating System is loaded.
Q.Printer / Modem not recognized. How do I get my Printer and Modem to work?
A. If you have version 1.0 of the drivers, follow the steps below to ensure that Windows has installed all of the device support. If you have version 2.0 of the drivers, these steps are not required.
Move the cursor to My Computer icon and click the right mouse button. Click Properties to display the System Properties window. Then click the Device Manager tab
Check to see if there is a heading labeled 'Other Devices' . If so, follow the instructions below:
Highlight 'Targus Group Int'l USB Device' and click on the 'Remove' button
Click the 'Refresh' button
Windows will now begin the Add New Hardware Wizard. When prompted for a location for the drivers, insert the 'Targus USB Mobile Expansion Hub' disk in your drive & Check the box next to 'Specify a Location' and enter the location as below:
For Windows 98 users, type 'A:Win98' (Where A: is the letter of your drive)
For Windows 2000 users, type 'A:Win2000' (Where A: is the letter of your drive)
Note: If there are two ports listed, you will need to repeat the steps above.
Q.Modem Connection My Modem still isn't recognized. How do I connect my modem?
A. When attaching a modem to the serial (RS232) port, verify that the port assigned to your modem is Serial USB (COMx). To do this, you can rerun the Hardware Wizard, choose Select from the list instead of Autodetect, then select Serial USB (COMx) as the COM port.
Q.Printer My Printer still isn't recognized. How do I get my printer to work?
A.If your printer is not recognized, click on Start, select Settings, then select Printers. Highlight your printer, right-click the mouse button and select Properties. If the assigned port is LPT1, in Windows 98/ME, change it to PB1284-1 (USB port). In Windows 2000, you will need to click the box next to USB001 Virtual printer port for USB.
Note: While the parallel port supports most printers, there are some older dot-matrix printers that will not work on the the USB Mobile Port Replicator. Also, some printers may not support Bi-Directional printing via the Mobile Port Replicator. To test this, highlight your printer, right-click the mouse button and select Properties. Click 'Details', 'Spool Settings' and click 'Disable Bi-Directional Support'. Click 'OK' a try to print again.
Q. PDA My PDA won't sync through the Serial Port. How do I sync my PDA?
A. When having problems synching a PDA through the serial port on the Port Replicator it is usually one of two things.
1) COM Port Settings: Before plugging the PDA into the Port Replicator, the Sync software (HotSync, ActiveSync) needs to be set to the correct COM port.To check the COM port that is assigned to the serial port on the Port Replicator, go to Device Manager and click on the + next to 'Ports (COM & LPT)' and there will be a listing that says 'Serial on USB (COMx)' where 'x' is the COM port that needs to be set in the Sync software for the PDA.
2) Palm Desktop Software: If you are having problems synching a Palm PDA, download and install the newest version of the Palm Desktop software, available at www.palm.com.
Back to top
Q.Printer Port Can I connect Storage devices like my Zip drive or CD ROM to the Parallel port?
A. The Parallel Port on the USB Mobile Port Replicator does not provide support for Storage devices.
Q.Printer Port Can I connect a Scanner to the Parallel port?
A. The Parallel Port on the USB Mobile Port Replicator does not provide support for Parallel Scanners.
Q.General Troubleshooting Everything looks fine in my device manager, but a device is not recognized. What else can I do?
A.Step 1 - If a device attached to the expansion hub is not recognized, press and hold the Reset button until the lights flash. Verify that the device is now recognized. If not, proceed to step 2.
Step 2 - Detach all cables from the expansion hub. Plug in the AC Adapter. Connect the power cable to the power input jack. Plug in each device, one at a time. Verify that each device is recognized before plugging in the next one.
Step 3 - Plug the device into a different port on the expansion hub. If it is still not recognized, try plugging it into the USB port on your notebook computer.
Q.Can I attach other USB hubs to my USB Mobile Port Replicator?
A.Yes, as long as the other hubs have their own power supply.
Q.Do I need to carry the AC Adapter when I'm traveling?
A. We recommend using the AC Adapter to ensure trouble free use of all supported devices. The USB Mobile Port Replicator will supply up to 500 ma of power (total) to USB devices. This is enough to power most low power / low speed USB devices (like mice).
Q.Mouse The Screen scroller features of my mouse are not working properly, what's wrong?
A.If your mouse is attached to the PS/2 port, and the enhanced features are not working, you may need to disable the built-in mouse on your computer.
The PS/2 Port on the expansion hub is configured by the Operating System as a USB HID mouse. If your mouse software continues to look for the mouse on the computer's PS/2 port, the enhanced features may not be available and your mouse will function as a standard two button mouse.
If your mouse is attached to the serial port, the enhanced features (e.g. screen scrolling) may not be available. The mouse will function as a standard, two-button serial mouse.
Q.Green Question Marks I see green question marks next to some of the PA070U drivers in Windows ME when I check them in the Device Manager. Did something go wrong with the driver installation?
A.The PA070U is most likely working properly. The green question marks are a new addition in Windows ME and simply mean that Windows ME cannot verify that the best driver is installed for the device.
Q.Technical Support How can I get further assistance with the Targus USB Mobile Port Replicator?
A. If you need additional assistance after reading the FAQ information:

Technical Support can be reached at www.targus.com/support or email: [email protected].
Or by phone at one of the numbers below:
North America: 8:00am to 6:00pm EST : 1-(800) 283-6325
Europe: Monday through Friday, 8 AM (08: 00) to 6 PM (18: 00) C. E. T.
Belgium + 32( 0) 02- 717- 2451
Denmark + 45( 0) 35- 25- 8751
France + 33( 0) 1- 64- 53- 9151
Germany + 49( 0) 21- 16- 579- 1151
Italy + 39( 0) 24- 827- 1151
Netherlands + 31( 0) 53- 484- 9470
Spain + 34( 0) 91- 745- 6221
Sweden + 46( 0) 8- 751- 4058
Targus Software Download
Switzerland + 41( 0) 1- 212- 0007
UK + 44( 0) 20- 7744- 0330
Eastern Europe and Others + 31( 0) 53- 484- 9479
Q.Warranty - What is the warranty?
A.Targus warrants this product to be free from defects in materials and workmanship for one year. If your Targus USB Mobile Port Replicator is found to be defective within that time, Targus will repair or replace your Targus USB Mobile Port Replicator. This warranty does not cover damage from everyday wear and tear, or from transportation by a common carrier.
Under no conditions is Targus liable for any of the following: loss or damage to a computer; loss of, or damage to, programs, records, or data; and consequential or incidental damages, even if Targus is informed of their possibility.
Warranty Registration at www.targus.com/product_registration.asp
Back to top
0 notes
Text
Download Spectronic Devices USB Devices Driver

Click Browse and then locate the USB driver folder. For example, the Google USB Driver is located in androidsdk extras google usbdriver. Click Next to install the driver. To install the Android USB driver on Windows 8.1 for the first time, do the following: Connect your Android device to your computer's USB port. Improvements and fixes. This update includes a fix for an incorrect device driver (“Microsoft – WPD – 2/22/2016 12:00:00 AM - 5.2.5326.4762”) that was released by a third-party on March 8, 2017 that affected a small group of users with USB connected phones or other media devices that rely on Media Transfer Protocol (MTP).
Download Spectronic Devices Usb Devices Driver Windows 7
Download Spectronic Devices USB Devices Driver
Download Spectronic Devices Usb Devices Driver Updater
Download Spectronic Devices Usb Devices Drivers
Download Spectronic Devices Usb Devices Driver Windows 10
*Only compatible with Windows Vista/7/8/10 OS (Does not operate on Mac OS)
Download Spectronic Devices Usb Devices Driver Windows 7
This article includes all of the software downloads. Navigate through the tabs to select the software you need, click on the red 'Click here' link to download the program of your choice.
Device Updater
OS Requirements: Windows Vista/7/8/10
*Used to download updates for GTX, BDX, X4, Livewire, ITSX
Click hereto download the Device Updater.
Make sure all devices are unplugged during the install process.
Livelink Gen-II
OS Requirements: Windows Vista/7/8/10
*Datalogging software.
Click hereto download Livelink Gen-II.
Make sure all devices are unplugged during the install process.
Advantage III
OS Requirements: Windows Vista/7/8/10
Download Spectronic Devices USB Devices Driver
Click hereto download Advantage III.
Make sure all devices are unplugged during the install process.
Drivers
Windows 32bit drivers click here.
Windows 64bit drivers click here.
Install Instructions
If you installed the SCT device updater before you plugged the device in then this should be easy to fix.
With your device connected:
Open your computers Device Manager.
Look for a device that is not installed like one with a yellow exclamation mark. (Here is a screenshot of what you are looking for.)
If you see this, right click it and select update driver.
A new window should open up and give you the option to either automatically search, or browse for files.
Click browse for files
Navigate to the folder you downloaded, and select “Open”.
If you did this correctly, it’ll tell you your drivers have successfully been updated and once you click “OK” you should see something similar to the picture below.
Now your communication should work between the device and the computer. With most devices, you will want to unplug it and plug it back in and restart the device updater. Then click “Display Device Settings and Serial” and if the serial number shows up, it is communicating.
Update Agent for GT's
How do I update my Bully Dog GT Tuner?
Basic Steps to Update a GT Tuner
1. Run the Update Agent.
2. Connect the Micro SD card to your computer.
3. Choose the vehicle application and let the Agent search.
4. Click the Update button.
5. When the Update is finished, put the Micro SD card in the GT.
6. Update the GT Platinum from the SD card by choosing Update GT Software, or Update GT Firmware on the Main Menu. (option will be all the way at the bottom of the main menu.)
Detailed Steps to Update a GT Tuner
Where do I Find the Bully Dog Light Duty Update Agent for a Bully Dog Gauge GT Tuner?
To install the Bully Dog Light Duty Update Agent please open the following link. Then open and run the file.
Open the update agent. Note: the tune will need to be uninstalled from your vehicle to update. You can check the vehicle is stock by going to show settings, the status will read “installed” or “not installed”
Connect the SD with either the card reader or the GT itself and the USB cable
Highlight the card in the update agent, and select “select device”
4. Select your device (40417, 40420, etc.) then select “download and upgrade”
5. Wait for the download to finish, you will see this message.
6. Select ok, then with the sd card in the device, go to change vehicle at the top of the menu, if it is the first time updating, and select your vehicle. Or go to update software at the bottom of the main menu to update with the latest files.
USB Device Tree Viewer is a small application which interfaces with the Microsot 'USBView' developer tool which provides detailed information about connected USB devices.
The program, as the name might suggest, features a tree-like view of devices connected. Browsing through USB controllers and connected devices will display a lot of different technical information about the particular device.
Download Spectronic Devices Usb Devices Driver Updater
USB Device Tree Viewer provides details about connection status, driver description, device ID, power state, address, etc.
Features and highlights
Download Spectronic Devices Usb Devices Drivers
Tree View with handmade 16x16 icons, USBView used 32x32 icons scaled down to 15x15
Information from the Windows Device Management are collected and matched with the found USB devices
Window position is saved
Background color and font of the right pane can be set
Text output rearranged
Keeps the tree item selection over refresh
Some more descriptors are decoded
USB Device Tree Viewer 3.5.1 on 32-bit and 64-bit PCs
Download Spectronic Devices Usb Devices Driver Windows 10
This download is licensed as freeware for the Windows (32-bit and 64-bit) operating system on a laptop or desktop PC from hardware diagnostic software without restrictions. USB Device Tree Viewer 3.5.1 is available to all software users as a free download for Windows.
Filed under:
USB Device Tree Viewer Download
Freeware Hardware Diagnostic Software
Major release: USB Device Tree Viewer 3.5
USB Controlation Software
0 notes
Text
SMC Driver Download For Windows 10

How to Update SMC Device Drivers Quickly & Easily
Smc Driver Download For Windows 10 32 Bit
Download Mac/SMC Fan Control for Windows (+ Temp) for free. Allows control of fans in Apple computers in Windows and monitoring of temperatures. All Intel Macs supported + any conflicting programs are automatically closed and reopened. Secure Watch Data Sheet Secure Watch Mobile App for iOS Users Manual Secure Watch App for Android Devices Users Manual Secure Watch Desktop Program Users Manual. Desktop Application Downloads: Secure Watch (Windows) Secure Watch (Mac). Secure Watch Data Sheet Secure Watch Mobile App for iOS Users Manual Secure Watch App for Android Devices Users Manual Secure Watch Desktop Program Users Manual. Desktop Application Downloads: Secure Watch (Windows) Secure Watch (Mac). Smc Wireless Adapter Driver Download DriverGuide maintains an extensive archive of Windows drivers available for free download. We employ a team from around the world. They add hundreds of new drivers to our site every day.
Tech Tip: Updating drivers manually requires some computer skills and patience. A faster and easier option is to use the Driver Update Utility for SMC to scan your system for free. The utility tells you which specific drivers are out-of-date for all of your devices.
Step 1 - Download Your Driver
To get the latest driver, including Windows 10 drivers, you can choose from the above list of most popular SMC downloads. Click the download button next to the matching model name. After you complete your download, move on to Step 2.
If your driver is not listed and you know the model name or number of your SMC device, you can use it to search our driver archive for your SMC device model. Simply type the model name and/or number into the search box and click the Search button. You may see different versions in the results. Choose the best match for your PC and operating system.
If you don't know the model name or number, you can start to narrow your search down by choosing which category of SMC device you have (such as Printer, Scanner, Video, Network, etc.). Start by selecting the correct category from our list of SMC Device Drivers by Category above.
We employ a team from around the world. They add hundreds of new drivers to our site every day.
Tech Tip: If you are having trouble deciding which is the right driver, try the Driver Update Utility for SMC. It is a software utility that will find the right driver for you - automatically.
SMC updates their drivers regularly. To get the latest Windows 10 driver, you may need to go to the SMC website to find the driver for to your specific Windows version and device model.
Step 2 - Install Your Driver
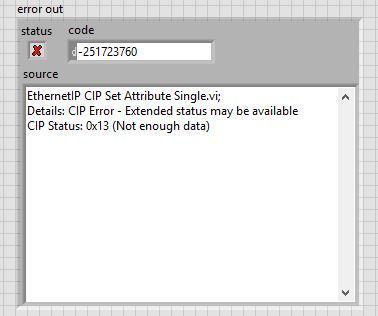
Once you download your new driver, then you need to install it. To install a driver in Windows, you will need to use a built-in utility called Device Manager. It allows you to see all of the devices recognized by your system, and the drivers associated with them.
How to Open Device Manager
In Windows 10 & Windows 8.1, right-click the Start menu and select Device Manager
In Windows 8, swipe up from the bottom, or right-click anywhere on the desktop and choose 'All Apps' -> swipe or scroll right and choose 'Control Panel' (under Windows System section) -> Hardware and Sound -> Device Manager
In Windows 7, click Start -> Control Panel -> Hardware and Sound -> Device Manager
In Windows Vista, click Start -> Control Panel -> System and Maintenance -> Device Manager
In Windows XP, click Start -> Control Panel -> Performance and Maintenance -> System -> Hardware tab -> Device Manager button
How to Install drivers using Device Manager
Locate the device and model that is having the issue and double-click on it to open the Properties dialog box.
Select the Driver tab.
Click the Update Driver button and follow the instructions.
In most cases, you will need to reboot your computer in order for the driver update to take effect.
Tech Tip: Driver downloads and updates come in a variety of file formats with different file extensions. For example, you may have downloaded an EXE, INF, ZIP, or SYS file. Each file type has a slighty different installation procedure to follow.
If you are having trouble installing your driver, you should use the Driver Update Utility for SMC. It is a software utility that automatically finds, downloads and installs the right driver for your system. You can even backup your drivers before making any changes, and revert back in case there were any problems. You can safely update all of your drivers in just a few clicks. Once you download and run the utility, it will scan for out-of-date or missing drivers:
When the scan is complete, the driver update utility will display a results page showing which drivers are missing or out-of-date. You can update individual drivers, or all of the necessary drivers with one click.
Smc Driver Download For Windows 10 32 Bit
For more help, visit our Driver Support Page for step-by-step videos on how to install drivers for every file type.
1 note
·
View note