
tomfitzjohn
a n i m a t e
a blog about animation, college, and demonstrating mediocrity in a highly-competitive industry.
13 posts
Don't wanna be here? Send us removal request.
Last Seen Blogs


ms-moon
i am a breathing time machine.
timdoubleyou
you’re tim wright, right?


lark-of-life
Forever Young
Text
CAPSTONE PROGRESS REPORT - Week 11
Since getting my P2 finished, I’ve been putting all my time into getting my Capstone up to date and ready to hand in.
My P2; Ubisoft NXT Animation Apprentice 2017 Traversal Sequence
youtube
Ultimately, this piece is the one I am least-happy with. It still has a lot of issues and there’s not much I can do about it at this point.
CAPSTONE
I’ve been putting all my time over the past 2 weeks into this. I’ve been animating my blocked out shots and tidying up the others. I’ve cut it all together too to get a rough idea of how it’ll go. I’ll update this post when the video is done uploading.
DEMO REEL
vimeo
Here is a WIP cut of my demo reel. It’s very rough still, but should give a good idea of the finish product
0 notes
Text
CAPSTONE PROGRESS REPORT - Week 9
The Last few weeks have been dedicated to my P2.
vimeo
This is the current state of the P2, at the time of typing this, I am rendering it.
There are still a lot of issues with it, but I’m quickly running out of time, so I’m dealing with what I’ve got.
Things I would like to have fixed:
- The run and the climb was too snappy.
- The final antic into the run was too laggy.
- The leap to the ledge had a few issues too.
Unfortunately, due to time constraints on the P2 project, I haven’t put any time into getting the capstone done.
0 notes
Text
CAPSTONE PROGRESS REPORT - Week 7
So last week we had to hand in our Finished P1s and Vertical Slices. Here’s mine.
vimeo
VERTICAL SLICE
Here’s my Vert Slice. With this assignment, I wanted to see how long it would take to get one of the more action-heavy shots animated to a decent point. Obviously there’s still issues, and I would’ve liked to have got it completely rendered, but I sadly didn’t have the time.
vimeo
P1
Here’s the almost completely finished P1. It needs one more detail pass before it can be finally rendered.
P2
With P1 done, I needed to get a start on P2. I decided a while back I’d be entering into the Ubi NXT contest, and so I spent the past week getting my scene set up for an acting piece featuring the Mery Rig. I kept running into lots of little issues in the pre-production and issues with the IK on the Mery Rig, so I decided to cut my losses and start a new piece.
I’ve decided to do a traversal sequence for the NXT for a few reasons.
1. My aforementioned issues with starting an acting piece for the NXT.
2. I already have one acting piece on my reel with my P1. This way I can get some more diversity.
3. A traversal sequence will be significantly quicker than lip-syncing a 22 second clip.
4. Lots of people will try the acting clip and the 3-hit combo animations. Less people will do the traversal sequence.
So to wrap up this past week or so, I haven’t done much work on my capstone sadly, but have been focusing on my other two projects.
0 notes
Text
CAPSTONE PROGRESS REPORT - Week 5
The last few weeks have been aimed at finishing my capstone blockout and finalizing my P1.
CAPSTONE BLOCKOUT
vimeo
So this is a very rough cut with a lot of issues still. Here are the three primary issues I see:
1. The Intro needs to establish the two characters existing in the same space. I have ideas on how to do that.
2. The final shot needs to be changed to frame the Hero and Dragon better. The pull back of the camera is messy.
3. The Dragon’s crawl shot is really awkward. It needs some serious alteration.
0 notes
Text
CAPSTONE PROGRESS REPORT - Week 3
Over the last week I’ve been working on my capstone almost exclusively. I felt that my P1 project was in a good position and that I was falling behind on my other project. So here’s some of the shots I’ve worked on, and a short description of what’s going on.
Capstone Outline:
A 30 - 45 second animated short. A Hero steals a Dragon Egg and the Dragon begins to chase the Hero as he races to the cavern’s exit.
HERO RUN CYCLE
vimeo
Here is the Hero Run Cycle I made on the weekend. I am using this cycle for a few shots, so I have built it as it’s own file, and am importing the animation into the shots I need it in.
SHOT 01 BLOCKOUT
vimeo
The Animation is blocked out and I have camera movements and cuts in roughly, though they are not shown here to show the posing.
SHOT 03 BLOCKOUT
vimeo
Here’s my blockout for Shot 03 with a (hopefully) finalized camera shot. Hero disappears for a moment because he is going to drop completely out of frame and then jump up, examining the egg. The second half of the shot will hopefully be similar to that shot of Finn in Star Wars VII after he crashes on Jakku. Here’s the shot I’m talking about:
youtube
P1 PROGRESS
vimeo
In other news, here’s my P1 in it’s current state. I’m taking my weekends to work on my P1 as I begin to rough in the motions and movements of each action.
So this has been my Progress Report, mostly just catching up on my Capstone blockout.
0 notes
Text
Tutorial - My Pipeline for my Proof of Tech
Here I’m going to quickly talk step-by-step through the process and my pipeline of how I created the shot.
I quickly go through each major step from Pre-Production, to Animating, to Post-Production.
Hit Keep Reading to see more.
PRE-PRODUCTION
1. Initial Sketches
Here we have the sketch that set me on a new path towards my final product.
While the final product didn’t come out looking the same way, it heavily influenced the idea, of displaying the character using some form of magic.
2. Prepping the scene
ANIMATING
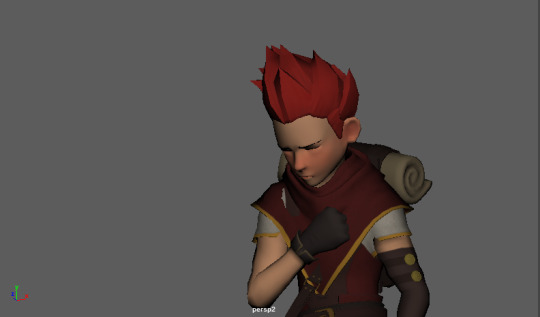
1. Preparation - So I started with blocking out my two key-poses, the held-in pose and the flourish.

2. After that I focused on making him settle into the poses and antic into them.
3. Once the major action was in, I worked on the moving hold at the end, adding eye darts, and secondary animation.

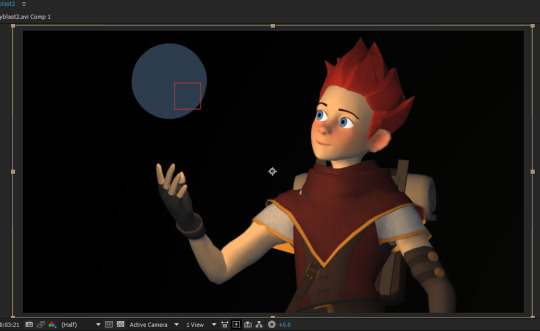
4. Once all the animation was done, I added the proxy ball, the lighting and green-screen. I then rendered it all out.
EDITING AND VFX
1. I started with importing the footage and motion-tracking the ball. I also colour-keyed the background using the built-in Keylight 1.2 plugin.
2. I then used Video Copilot’s SABER plugin to create the glowing orb of magic and the built-in CC Particle World to make the effects around it. I also added in the Background elements too.
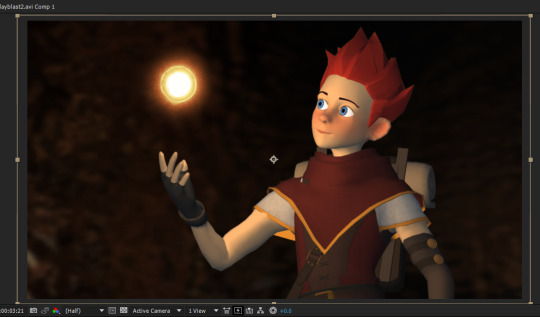
3. Colour-Correction, adjusting the lighting and adding camera shake. Also adding in particles around the scene to give it more depth and realism.
Click Here for a more in depth look on how I did the Camera Shake.
4.The final render and export.
Here we have the final export from Maya, then the final product after After Effects.
vimeo
vimeo
0 notes
Text
Tutorial - Adding a Camera Shake in After Effects
In my Proof of Tech, I used a minor camera shake to help give the scene a little more depth and life. There are many ways to deal with this, but as with all things in the games, animation and VFX industries, the quicker something can be done the better, especially if it produces good results.
With this in mind, let’s look at the most obvious and long, inefficient way of doing this. Now, we can go to the transformations of our objects and keyframe the positions all over the place. Not only is this a very time-inefficient way of doing it, but also looks messy on our timeline. This other is a lot cleaner and can be adjusted at any point for excellent results.
Something many people new to After Effects do not know is that you can use Expressions in place of keying. With a simple expression, we can do so much in such little time.
Lets assume in our example we are going to make the whole composition shake the same way I made my Proof of Tech shake, in a way similar to how a handheld or shoulder-mounted camera would naturally shift in most live-action productions.
1. We’re going to create an adjustment layer. This is the layer that we will add the shake to.
Layer>New>Adjustment Layer (or Ctrl + Alt + Y)

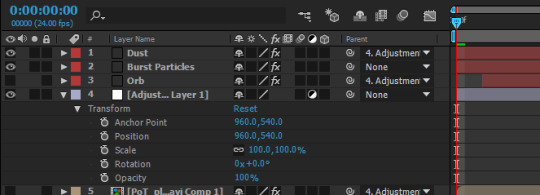
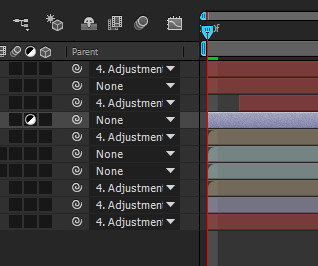
2. Parent everything we want to shake in the composition to the Adjustment layer. This way, we can control the shake on everything under one layer. On the timeline, there is a parent section for every layer next to the timeline. In the example image below, I have parented a few of the pieces to my fourth layer, the Adjustment layer.
3. Now we will add the expression to the Adjustment Layer. opening up the adjustment layer, and expanding out the Transform options, we gain access to the different ways we can move all the layer around. Now this movement we are going to perform is affecting the Position of the objects within the space of the shot. By Alt+Clicking the Stopwatch next to Position we open up the ability to write in an expression.
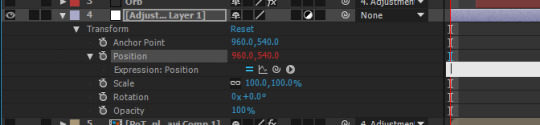
In the newly-opened expression bar, we need to type in:
wiggle(2,3)
The Wiggle expression randomly adjusts the targeted X and Y values by the specified amounts.
Hit play and you should have a camera shake! You can adjust the intensities up or down as needed by changing the numbers in the expression.
0 notes
Video
vimeo
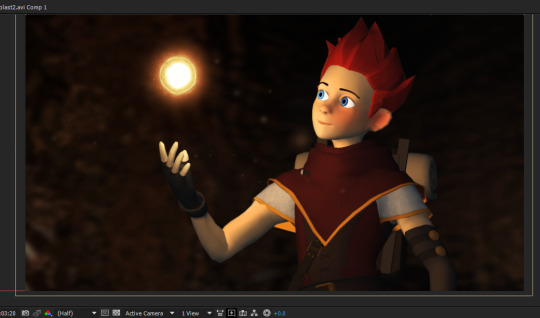
Here we have the final product, my finished test shot for my animated short.
After all was said and done, this went much better than I expected it to. I consider the animation to be one of the best animations I’ve done to date, and the VFX and editing went much smoother than expected too.
After the last pass, I darkened the background, colour-corrected everything, added some particles to the magic, and then added some subtle dust particles into the air. A slight camera shake was added to give the scene a little more life.
The whole shot took approximately 9 hours to complete. Here is a small breakdown of timing.
Animation - Layout and Blocking: 2 hours
Animation - Breakdowns and Refining: 2 hours
Maya - Final touches and Render: 30 mins
After Effects - First Pass: 2 hours
After Effects - Second Pass: 2 hours
After Effects - Final Render: 2 mins
I feel that if I can get all shots done in a similar time-frame, then the short will come together much quicker than expected. Considering the amount of editing that needs to go into many of the other shots, I will need to spend much less time working on them than this test shot.
I will also have my storyboards to work with, so I shouldn’t need as much time in the beginning of the animation process coming up with the shot like I did with this test shot.
1 note
·
View note
Video
vimeo
Here is the first Work-in-Progress shot of the video of the VFX pass.
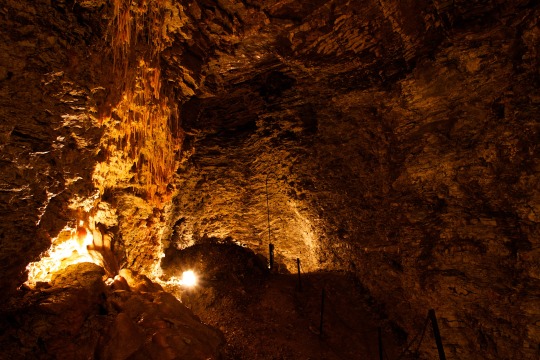
I found a photo of a cavern and edited it and faded it into the background
I used the built-in After Effects tracker to acquire a motion trail from the placeholder magic ball. I then used the Video Copilot plugin SABER and the built-in particle generator CC Particleworld to create the magic effect.
There were many things not working with this first pass. The Background is way too bright and colourful, distracting from the main action and animation. The magic effect was also lacking emphasis. I also feel that the camera is too static. Another pass is in order.
0 notes
Video
vimeo
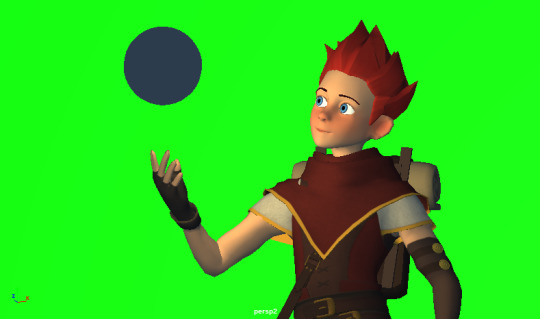
Here is the animation I finished with.
After around 4 hours of animating, I had this. I added the sphere as a placeholder for the effect, and gave it a point light to get some light onto Hero when the magic effect begins.
Now I have this, VFX and compositing can begin.
0 notes
Photo

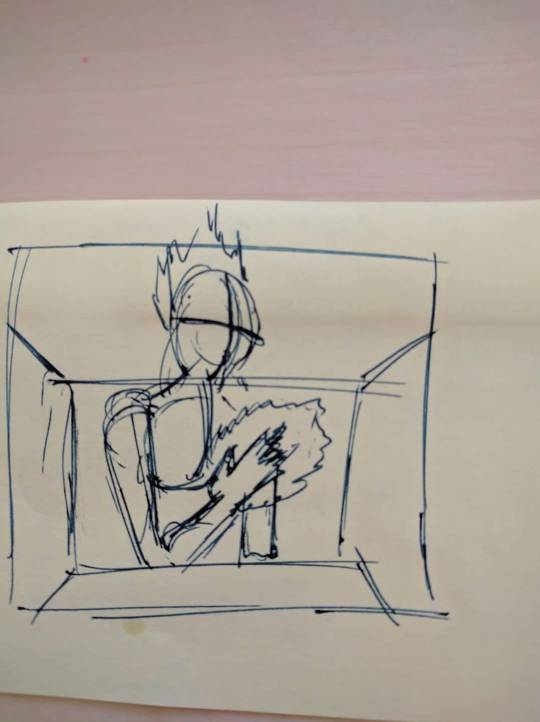
This was the initial sketch that set me on the new path.
The new idea was to have the Hero extend his arm and perform some sort of fireball spell. This way, the VFX help sell the animation, and the animation is the trigger for the VFX, allowing them to blend together very naturally.
I have begun to work on the animation.
0 notes
Video
vimeo
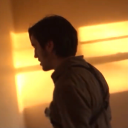
The First Animation
This was the first animation I produced to act as a subject for the Proof of Tech. The idea was to place the Hero into a dark, atmospheric cavern. Adding some Dust into the air, some mild colour correction, etc. It was a simple idea, simply to resemble similar effects to what I’d want for most of the shots in my short.
I soon realised the animation was not what I needed. I wanted something simple, but ultimately decided a moving hold was not the way to go. It needed to be one full action, and it needed to lend itself to the VFX and help to display it better.
I spoke to some profs and friends to got some other ideas.
0 notes
Text
Capstones and Proof of Tech
Here we are. Our third and final year in Game Dev.
As we begin to work on our pre-production for our capstones, we begin our proof of tech assignments to ensure we ultimately know what we're doing.
With my focus being on animation, my capstone will be a short fantasy cinematic. Starting at the beginning, we’ve started pre-production with script-writing and production of some rough storyboards. Soon we will be moving into layout and blocking in animation, but before that I need to make sure all skills are up-to-date and at the appropriate level for a project of this magnitude.
With this in mind, I’ll be using some VFX in post-production to really emphasize and help sell the animations. Therefore, my Proof of Tech will be working on compositing and VFX, primarily with Adobe After Effects.
The Proof of Tech will in many ways be a test shot. I will also be observing how the whole project goes, as it will in many ways reflect the pipeline I will be using to create the short as a whole.
0 notes