
thehpprintersupport
Howtosetup
i am smith leo i have give a best support for houtosetup.us we are call on me
Visit:- advisor for you office.com/setup | office.com/setup | | Norton.com/setup | plumbers near me | Telstra Webmail Account.
486 posts
Don't wanna be here? Send us removal request.
Last Seen Blogs

theoluise
Theo & Luise

ph1lsimpmcu
Ph1lsimpMCU

vincius
Untitled

ssorethroat
please i wana talk to somebody abt mxtx

ardranaline
Ivy's Insights🦚
Link
11 notes
·
View notes
Link
1 note
·
View note
Text
primevideo.com/mytv

Since we have discovered the list of eligible devices for Amazon Prime Video we can also check out the steps to activate primevideo.com/mytv on your device. We only need an activation code for the activation process. You can generate the activation code on your device with the help of Prime Video application. With this information handy, you can get a unique code and activate their devices in less than one minute. https://sites.google.com/view/primevideocommytvs/home
1 note
·
View note
Text
Godaddy Email Login

GoDaddy email login is a renowned domain registrar that has become the talk of the town among the people who are anyhow related to the thriving digital world. The company was introduced in the year 1999 to offer hosting and business emails to people who want to go digitized. It offers you complete control over your website so that you can mark your presence on the internet.
1 note
·
View note
Link
1 note
·
View note
Link
1 note
·
View note
Video
How to Create an AOL Account
0 notes
Text
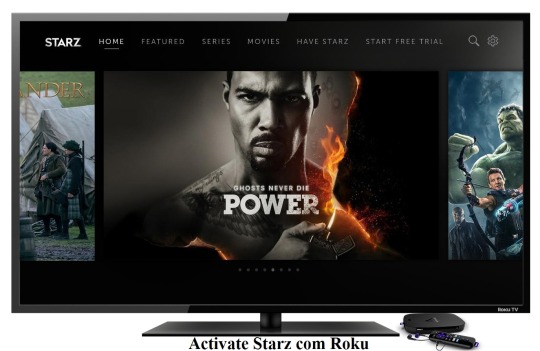
Learn How To Activate Starz On Roku TV, Smart TV And Other Devices
With the developing changes in the innovation, an ever increasing number of individuals are currently settling on Smart TVs as it offers them the best options in contrast to the conventional link channels. With Smart TVs, clients can likewise watch different web based channels, for example, YouTube, Starz, and so forth.

Starz is a notable US-based streaming application and it has picked up fame because of its premium and amazing projects. When you get Starz TV membership, you can get to its library of narratives, films and unique programming. In any case, for that, you have to actuate Starz on various gadgets. You can activate Starz on many streaming gadgets that incorporate Apple TV, Roku, Amazon Fire TV, Android and Apple gadgets.
How to Activate Starz?
By utilizing the Starz official site, you can undoubtedly initiate Starz. What you have to do is go to its official site. From that point forward, from the Starz application, you will get the Starz enactment code. On the off chance that, you have seven days of free preliminary initiated, you can continue with its actuation method. Likewise, you have to include the sign in subtleties of your record to the channel.
Further, check out the below steps for activation of Starz:
Go to Activate Starz
Select the “Start Your Free Trial” option.
Now, proceed to sign up by adding the details.
After you have finished setting up a record, presently you can add the Starz application to your ideal gadgets. You can stream up to four gadgets each in turn. When you sign in through application, presently you can enact Starz on your preferred gadget by giving all the subtleties of your record.Step-by-Step Instructions to Activate Starz on Roku TV:
With the help of some simple steps discussed below, you can easily activate Starz on your Roku TV.
At first, sign in to your Roku device.
After that, move to the Roku TV Channel Store.
Next, search for Starz Play and select a relevant option from the list of results displayed.
Thereafter, choose the Add Channel option and enter the PIN. Doing this will complete the installation of the app.
Now, you need to open the app and on the screen, you will find a code for activation of the account.
Next, look for activate.starz.com. Then within the space provided there, you should enter that activation code.
At last, tap on the Submit button.
This will successfully activate Starz on your Roku TV.
Easy Process to Activate Starz on your Apple TV:
Activating Starz on Apple TV is quite an easy process. Take a look below to know the complete process.
First of all, you need to download the Fox Sports Go app on your Apple device.
After doing this, visit foxsportsgo.com/activate.
Now, try to log in using the username and password of your Fox Go account.
Further, visit activate.starz.com.
There you need to enter the activation code on your Apple TV and at last, don’t forget to tap on the Submit button.
Fortunately, now the Starz app is activated on your Apple TV.
Simple Steps to Activate Starz on your Android Device:
Check out the listed below steps to activate Starz on your Android device:
Primarily, you need to install Starz Play on your Android device from Google Play Store.
Next, open the app and try to log in to your Starz account by providing the login credentials.
After that, from your device, visit activate.starz.com.
Then you will get to see the activation code on the screen of the Starz app.
Next, enter the activation code and hit the Submit button.
Once done, now you can enjoy streaming Starz on your Android device.
Activate Starz on your iPhone with these Steps:
As the Starz application is also available on your iPhone, now you can easily activate it with a few easy steps cited below. So go through them to install Starz on your device:
At first, go to the App Store of your iPhone. From there, you need to locate the Starz application.
Once you get it, then download and install the app on your iPhone.
After that, open the app and proceed by sign in to your Starz account details.
Then, go to the official website of Starz to activate it.
At last, click on the Submit button to successfully register your device.
This is all that you need to do to activate Starz on your iPhone.
Easy-to-Apply Instructions to Activate Starz on Amazon TV:
If you own an Amazon Fire TV, then you can also enjoy streaming Starz by simply activating it on your device. The steps to do so are as follows:
Firstly, you need to download the Starz app on Amazon Fire Stick.
Next, try to log in to your Starz account by opening the app. Provide complete Starz login credentials.
Further, visit activate.starz.com
Put in the activation code that appears on the screen and finally, hit the Submit button.
After doing this, you can now seamlessly enjoy the original series of Starz application.
How to Activate Starz on Smart TV?
For activating Starz on your Smart TV, you need to go through the guidelines provided hereunder.
Start with turning on your Smart TV. Then go to the App Store.
Next, search for the Starz Play app and try to install it on your own device.
Further, try to log in to your Starz account by providing the required Starz account credentials.
After that, visit activate.starz.com
Now, go to the webpage of your smart device and on the screen, you will find the activation code.
You have to enter that activation code on that particular box and finally, click on the Submit button for registering your device.
Hopefully, by following the above steps, you have activated Starz on your Smart TV.Final VerdictSo, by going through this article carefully, you will be able to understand the overall steps that you need to follow to activate Starz on different devices. Now, you will be able to watch your favourite TV shows, a lot of other movies and exclusive originals from Starz on the device that you want by simply activating Starz.
0 notes
Text
Best App Lockers for Android
Security truly matters in this day and age. In the current world, it is essential to focus on security as the majority of the errands are done on the web. These days, cell phones are much the same as a fortune confine which the most significant information and data are kept, so it is truly critical to know who else is attempting to get to your gadget. A cell phone may have financial balance subtleties, photographs, and significant information. When they go into an inappropriate hands, you may get caught in the troubles. Before it transpires, it is essential to think about probably the best application storage spaces that will upgrade security. How about we investigate the best application storage spaces for Android.

AppLock by IvyMobile
AppLock by IvyMobile is one of the most famous application storage spaces on the rundown. It can obstruct any applications on your gadget. The application catches the photograph of the individual who is attempting to get to your gadget without knowing the passwords. It isn't simply restricted to locking applications, notwithstanding it, you can shroud pictures and recordings in only a couple of snaps. AppLock by IvyMobile is accessible on Google Play Store. The extraordinary thing about this incredible application storage is, it is totally free.
Norton App Lock
Norton is viewed as the best antivirus application, yet now it has begun procuring its eminence for being a decent application storage as well. It is a standout amongst other application storage spaces that a decent number of individuals use. The application storage lets you lock a particular application on your gadget. You can stow away photographs and recordings additionally with the assistance of this application. In the event that anybody is attempting to get to your gadget, the application will catch a photograph of the individual attempting to get to your gadget. You can download it on Google Play Store for nothing.
Impeccable AppLock
Immaculate AppLock is the decision of many. The explanation behind the notoriety of the application storage is its extraordinary highlights. It blocks WiFi and Bluetooth. On the off chance that somebody is attempting to get to your gadget, the application will show a phony message saying "specialized blunder" so the individual attempting to get to your gadget will quit any pretense of endeavoring. The application accompanies both paid and free forms. The free form of Perfect AppLock has promotions that may trouble you. On the off chance that you need to dispose of these irritating promotions, you can purchase the star rendition.
Brilliant AppLock
This is the ideal opportunity to have a look at a standout amongst other application storage spaces for your Android. Keen AppLock lets you conceal pictures and recordings. It can conceal settings and switches as well. It is truly astonishing, right? It contains a unique mark scanner too. The application offers numerous different highlights that make Smart AppLock truly more astute. What numerous individuals like about this application is, it is totally free. You can download it on Google Play Store. The application is upheld by advertisements, so its absolutely impossible to eliminate promotions from the application. If its all the same to you promotions, Smart AppLock might be a decent choice for you.
Savvy Launcher 5
Savvy Launcher 5 is an amazing application storage that has great security highlights. Keen Launcher 5 lets you alter your gadget in the most effortless manner. You can alter symbols, apply signal settings, and change subjects so your Android looks more appealing. Keen Launcher 5 offers an application storage moreover. With the assistance of Smart Launcher 5, you can stow away photographs, applications, and recordings. You can set a PIN to open the applications, recordings, and photographs on your Android. This is a fantastic launcher that offers an element to bolt applications, photographs, and recordings. In the event that you are searching for a truly extraordinary application storage, you can settle on Smart Launcher. You can download it on Google Play Store for nothing, yet the free form has a few restrictions. You can dish out $6.99 for the ace adaptation.
The reason for the rundown was to tell you about probably the best application storage spaces for android. You can decide on whichever you like.
Hey, I’m leala. I’m an artist living in New york. I am a fan of arts, outdoors, and video games. I’m also interested in fashion and cooking. You can read my blog with a click on the button above.:- office.com/setup.
0 notes
Video
How to take a screenshot on Surface Pro 7 | #SurfacePro7
0 notes
Photo

How To Activate Starz On Various Devices? (on Wattpad) https://my.w.tt/Q2vTaFJKL9 Starz is an exemplary channel for enjoying popular and exciting movies and TV shows in the comfort of your own house. Starz is a premium cable and satellite TV network, which is owned by Lionsgate (a top production house in the world). Coming from the house of such a revered production company, Starz is ought to have the best content for users to watch such as Spartacus, Black Sails, American Gods, and the list goes on. Visit:- | <a href="http://go-myoffice.com">office.com/setup</a> | https://go-myoffice.com/
0 notes
Text
How To Activate Starz On Various Devices?
Starz is an exemplary channel for enjoying popular and exciting movies and TV shows in the comfort of your own house. Starz is a premium cable and satellite TV network, which is owned by Lionsgate (a top production house in the world). Coming from the house of such a revered production company, Starz is ought to have the best content for users to watch such as Spartacus, Black Sails, American Gods, and the list goes on.
However, to enjoy the wide range of content available on Starz, you need to install it on your streaming device and then, activate it. Here is how you can do all that in the following sections:
Subscribing to Starz Service
In order to access content on Starz, you will have to subscribe to the premium plan of the channel. To purchase the subscription, here is what you are going to do:
Go to the Starz website on your PC or smartphone.
Once there, click on the ‘Start your free trial’ option.
Enter the necessary details in the correct fields, which include your email address and password, as these details will be required to sign up for the service.
With that, you can add the ‘Starz’ app to any streaming device and enjoy your favorite movies and TV shows.
How To Activate Starz On Various Devices?
The activation process of Starz depends on the streaming device you are using. Check below for the complete guide on how to activate Starz via www activate Starz com on different streaming devices.
Starz Activate Roku – A Complete Guide
Starz can be added into Roku streaming player, and in order to have it, you need to follow certain steps, details of which are provided below:
Turn on your Roku player and TV, and then, sign in to your Roku account.
Go to Roku’s ‘Home’ screen followed by selecting ‘Streaming Channels’.
Search for Starz Channel, once found, select ‘OK’ to add it to your Roku account.
Launch the channel followed by logging into your Starz account by entering your email address and password.
Go to ‘http activate Starz com’ followed by entering your activation code on the TV screen in the correct field to activate the channel on Roku.
That sums up the Starz activation process on the Roku streaming device.
How To Activate Starz On Amazon Fire TV / FireStick?
Starz app is available on the Amazon Fire TV platform as well, so if you are using this particular streaming device, then here is how you can activate the app on it.
Turn on your TV and Amazon Fire TV followed by going to the ‘Home’ screen on your Fire TV.
After that, launch the ‘App Store’ and search for ‘Starz’. Once found, you need to download the app.
Once the app is downloaded and installed, launch the app on your device followed by logging into your account using your email and password.
On your PC or smartphone, launch a web browser and go to activate Starz com. Then, enter your Starz activation code to activate Fire TV that you have seen on the TV screen to activate the app and begin with the streaming of your favorite content. The process of activate Firestick is same as that of Fire TV.
How To Activate Starz on Apple TV?
The process of Starz com activate Apple TV begins with going to the ‘Home’ screen on the Apple TV followed by launching the app store.
Search for the ‘Starz’ app and download it on your Apple TV.
Once the app is downloaded, launch the app and log in using your email and password.
Now, on your computer or smartphone, launch a web browser and go to ‘ActivateStarz com’ followed by entering an activate Starz com code that you see on the Apple TV screen. After entering the code, click ‘Submit’ to activate the streaming device.
How To Activate Starz On Xfinity?
Xfinity Comcast is another device where the Starz app can be accessed, but in order to stream anything from Starz on Comcast, you need X1 set-top box. Here is how you can activate the service:
Turn on the X1 set-top box and press the ‘Guide’ button on the remote of the Comcast Xfinity to display the main guide.
Then, you need to browse the guide followed by selecting the ‘Starz’ channel. Then, add it to your favorites.
Once added, launch the channel and sign in to your account using your email and password.
On your computer or smartphone, launch a web browser and enter ‘https activate Starz com Comcast’ followed by entering activate Starz com enter code that you see on the screen.
How To Activate Starz On Sling TV?
The process of activating Starz on Sling TV is also similar to the processes you have read above, but here is what you are going to do exactly.
Sign in to your Sling TV account. If you don’t have an account, then sign up for the same.
Now, go to ‘Change Subscription’ in the ‘Account Setting’ section.
Click the ‘+Select’ button that is located beside ‘Starz’.
Click on ‘Submit Order’ to add the channel to your Sling TV.
That sums up the activation process of Starz on various streaming devices, but in case, you are experiencing activation related issues, then you can easily fix them by taking the help of experts.
Starz App Not Working
The problem of the Starz app not working is a very common issue after activating the app. This issue can occur due to various errors such as inclusion of a bug, outdated app or third-party app problems. However, you can fix the issue by following below-mentioned steps:
Login to your Starz account on the Starz official website.
Go to the streaming device in which the app ceases to work. Delete the app from the app store of your streaming device.
Reboot your device followed by reinstalling the app.
Once the app is installed, launch it and log into your account.
Unable To Activate Starz
This is another issue, which users face after installing the app on their streaming devices. This problem occurs due to a temporary error such as issues with servers.
No matter what the reason is, the problem can be solved by experts who take a diligent look at the settings of your streaming device and the app. In case, there is an issue in the settings, then those are rectified in the most comprehensive manner.
Hey, I’m leala. I’m an artist living in New york. I am a fan of arts, outdoors, and video games. I’m also interested in fashion and cooking. You can read my blog with a click on the button above. :- office.com/setup, activate Starz.
0 notes
Text
How to reset fire stick
This article will help you learn how to reset Fire stick and basically make your device to work like new again. You can use the same process outlined here to spruce up any model and this goes for your Fire TV Cube as well. The Amazon Firestick is one of the most used streaming devices around and that’s mainly because it entered the market at an insanely low market price.

The only downside to this is that Amazon had to cut costs somewhere which is why this device only comes with 8 GB internal storage which is never enough for most users. But, once your Firestick fills up, you can reset it to wipe its memory clean so you can enjoy it like it was when it was new. This reset process is super easy and takes only a few minutes to reset both your Fire TV and Firestick devices.
How to reset fire stick to factory settings
Guide to resetting your firestick
Go to the ‘Settings’ menu of your Firesticks / Fire TV device
Click the My Fire TV icon
Select the option “Reset to factory settings”
Click on “Reset”.
Give the system a few seconds to do its job
At this point your Firestick / Fire TV will automatically restart. You will then see a screen labeled “Reset your Fire TV stick”.
Next you will be asked to connect to a Wi-Fi network. Once that’s done, the Amazon login screen will appear and you’re good to go!
Reset firestick without settings
How to reset amazon fire stick
It is not uncommon for a Firestick / Fire TV to freeze while trying to access the Settings page. This often happens when the device is running with full memory. The good news is that you can fix this problem in minutes by doing a factory reset on the device. You can do this by pressing the Ring and Back buttons simultaneously for at least 10 seconds.
How to reset Amazon fire stick without remote
How to do it without wi-fi or remote control
Amazon Fire stick Review
Based on the above methods, you need WiFi to access your remote. This is not always possible because your TV may not support CEC, you may have forgotten your remote control for some reason, or your app may be working over a different Wi-Fi connection. If this problem occurs when resetting Firestick, you need to trick the Fire TV Stick into believing that you are trying to reach it over the old Wi-Fi network. To do this, you need to use your phone to connect to a hotspot, or change your router’s username and password to match your old Wi-Fi connection. This is the fastest way to connect your phone to your Fire TV Stick so that you can access the Fire TV app from your phone. This way you can control your Firestick reset and other settings directly from the app.
How to reset Amazon fire stick without remote
If you don’t have the Fire TV remote at hand, check the sofa cushions first. If it doesn’t exist, you may want to ask a friend with a Fire TV or Fire stick if you can borrow their remote to pair with your device for a reset.
Reset your Firestick to factory settings with the Fire TV Remote app
Otherwise, you can download the Fire TV Remote app at any time from the Amazon App Store to your Android phone or tablet and use it to navigate through the Fire OS settings and reset your Firestick.
Resetting the Amazon Fire Stick without a remote control To use the Fire Stick without a remote control, you can download and use the apps and products listed below.
Reset the Amazon Fire Stick
Perform a reset if you have problems using the Amazon Fire Stick or if you cannot access the device. There are two methods of resetting the Amazon Fire Stick. You can navigate to the Fire Stick’s settings to reset the device. The other method is using the Amazon Fire Stick remote control.
Turn on your Amazon Fire Stick and go to the Settings menu.
Select My Fire TV and click on Factory data reset.
On the confirmation screen, click Reset.
A window will appear with the message resetting Your Amazon Fire TV Stick 4K to Factory Settings.
Now your Amazon Fire Stick will restart and you will be taken to the next screen.
You will be asked to connect to your Wi-Fi network.
Once you’ve connected your TV to the Wi-Fi network, the login page will appear.
Sign in to your account and complete the setup to connect the Amazon Fire Stick.
Sometimes you won’t be able to access your Firestick due to a frozen issu.
You can restore your Fire Stick to its factory settings using the remote control.
Press the Right and Back buttons at the same time for about 10-15 seconds.
After a while, your Amazon Fire Stick will restore the factory default settings.
After completing the steps to reset the Amazon Fire Stick, prepare for a quick install.
Now you install again your favorite apps.
How do I reset a Firestick without a remote control?
It creates a lot of trouble when you want to reset the Fire Stick without a remote control. However, there are three methods to reset the Amazon Fire Stick.
Purchase a USB mouse to access the Amazon Fire Stick TV.
Pair the USB mouse with the Fire Stick TV.
Use the USB mouse to navigate to the Settings menu.
Select My Fire TV and click on Factory data reset.
A confirmation window will appear on the TV screen.
In the confirmation window, select Reset.
Now your Amazon Fire Stick will restart. If you can’t use the USB mouse, you can use the Fire TV app. You can download the Fire TV app from the App Store. You can use the Fire TV app to control the Fire TV Stick.
You will need to Pair your device to the same Wi-Fi network
In the app, select your Amazon Fire TV and tap OK.
A four-digit code will appear on your TV screen.
Enter the code in the appropriate field.
Now go to Settings and tap on System.
Select Factory data reset.
You can also use third party applications like Blink 2.0, ES File Explorer, or Jitsi to reset the Amazon Fire Stick.
We recommend purchasing a new Fire TV remote as soon as possible. It is not advisable to rely on third-party apps.
How to reset Amazon fire stick wifi password
If you want to change the router’s default WiFi password, follow this step-by-step guide.
Launch your web browser on the fire stick and then follow below process to change or reset amazon fire stick wifi password according to your router:
TP-Link:
Log in to the router administration area with its standard IP address – 192.168.0.1 / 192.168.1.1.
Enter the default user name and password (in most cases admin / admin).
Navigate to Wireless> Wireless Security> WPA / WPA2 – Personal (Recommended)> Password.
Enter your preferred password and save the change.
D-Link:
Log in to the router settings page using the default IP address 192.168.1.1 / 192.168.0.1.
Enter your username and password (or here is the list of default usernames and passwords).
Go to Wireless> Wireless Security> Security Mode only set to WPA2> Pre-Shared Key: Enter your preferred password.
Apply the change> restart your WLAN and the new password will be applied.
NETGEAR:
Open the setup page of your router with the default IP address 192.168.1.1 / 192.168.0.1 / http://routerlogin.com/.
Enter the default user name and password for authentication.
Go to Wireless> Security Options> Select WPA2-PSK [AES]> Now enter your preferred password in Passphrase.
Use opportunities and restart your WiFi for changes to take effect.
How do I factory reset my Firestick from my computer?
Firestick factory reset
You can use different approaches to reset your Firestick to the factory settings. Some of them may be a little confusing, but they should all work with your PC. How to reset your Firestick to factory settings.
USING THE TV SETTINGS
Once you’ve set up the Firestick on your PC, you can use it the same way you would if you connected it directly to your TV. To reset the device to factory settings using the TV, turn on the TV and go to the Amazon Fire TV app. Use the remote control to navigate to the Settings menu at the top of the screen and enter it. Now go to My Fire TV and click Down. Scroll down until you get to the Factory Reset option. As you have probably assumed, click on it and confirm by selecting Reset in the dialog box.
Conclusion
Once your Firestick has been reset you want to install some great streaming apps on it. Visit our list of the best Firestick apps to get started. You may even find some new favorites there as well as all the great Kodi addons that let you watch every movie, TV show, and sporting event you want to see. Your Fire TV and Firestick feel like new and the streams flow like spices again.
Hey, I’m leala. I’m an artist living in New york. I am a fan of arts, outdoors, and video games. I’m also interested in fashion and cooking. You can read my blog with a click on the button above. :- office.com/setup, Plumbers Near Me.
0 notes
Text
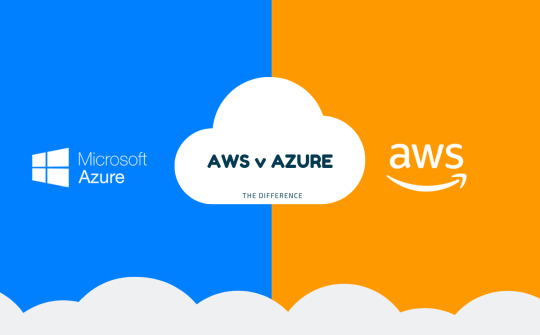
Microsoft Azure Vs Amazon EC2
So as to get a handle on the contrasts between Microsoft Azure and Amazon EC2, it's basic to initially comprehend the essentials of distributed computing. Cloud-put together processing includes putting away records with respect to an Internet worker as opposed to putting away them on the hard drive of a PC. Since they don't should be put away on a worker inside the clients' office, the documents might be gotten to from anyplace a PC is utilized.
Since numerous organizations have a lot of data put away on PCs, the requirement for memory is fundamental. Distributed computing eliminates the need to introduce committed programming to the PC, consequently decreasing the measure of memory required. Microsoft Azure cloud-based figuring offers a virtual worker for stacking programming. It might be overseen by getting to it through a Web program. This type of cloud-based figuring is referred to as stage as a help.
Not at all like Microsoft Azure distributed computing, Amazon EC2 utilizes framework as an assistance. This gives bunches, lattices or virtual workers just as capacity, frameworks, programming, and systems that replace server farms. Amazon EC2 and Azure are the two advertisers of uses through free programming sellers or "ISVs." The thing that matters is that EC2 highlights endeavor applications and Azure highlights work-bunch measured client gatherings.
Microsoft Azure is viewed as more available to engineers who are natural and Visual Studio. Despite the fact that this is less difficult for Windows designers to utilize, the applications they can port to are restricted. Amazon EC2 offers Windows, Mac OS X and Linux. Be that as it may, they have prerequisites for capacity and engineers must consider the registering time and transfer speed the applications will require.
Both EC2 and Microsoft Azure distributed computing advancements permit the development of the virtual machines or VMs utilized for applications – both in number and force. Purplish blue uses a pay-more only as costs arise framework for the quantity of virtual machines required for the application permitting the number to be changed utilizing an administration reassure. EC2 utilizes Elastic Compute Units (ECUs), which incorporate capacity or flexible square stores (EBS) and Amazon Machine Images. The exhibition is identical to 32-or 64-piece processors.
A few clients state the EC2 is all the more expensive, in spite of the fact that it tends to be monetarily beneficial for little ventures. Nonetheless, there have been a few grumblings about the expense of Azure also. The expenses are really comparative with a couple of special cases. Microsoft Azure offers just a for each information base estimating. EC2 gives MySQL, a full information base, which isn't as costly as the SQL Azure offers a bundle accessible for a month to month charge, bringing about a half investment funds off the standard costs. Cases bought from one to three years are accessible from EC2, which can spare 37% to half whenever utilized for the whole time frame bought.
Microsoft has been more cautious with an end goal to discover the improvement of this new innovation. They accept as certain experts do likewise, that shoppers need records put away on location. The eventual fate of distributed computing is not yet clear. In any case, with the distinctions clarified here, clients intrigued by this innovation ought to have the option to settle on the decision among EC2 and Microsoft Azure distributed computing.
Hey, I’m leala. I’m an artist living in New york. I am a fan of arts, outdoors, and video games. I’m also interested in fashion and cooking. You can read my blog with a click on the button above. :- office.com/setup.
0 notes
Text
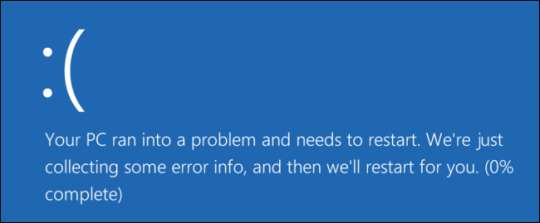
How to Fix the Windows Blue Screen Errors?
How to Fix the Windows Blue Screen Errors? –
Every operating system is not perfect. At some point in time, you are going to face some issues in windows. In this blog post, we are taking an example of Windows 10 is showing a blue screen. It can occur due to your negligence or some other reason. Getting Blue Screen on your PC doesn’t mean that your computer will not work anymore. You can fix this error by following our guidance. We, Tech Support Expert is providing you with the best solution on How to Fix the Windows Blue Screen Errors?
In this situation, you can’t fix the error if you don’t know what the problem is precise. When the Blue Screen error code appears you will get the error code that will describe you about the problem your computer gets into. If you are a person from a non-technical background then don’t worry as we are here with our step-by-step guide on blue screen error. Read our blog that consists of How to Fix the Windows Blue Screen Errors?
For any further assistance regarding windows errors or printer problems, feel free to give us a call at our toll-free number. You can also drop us a mail.
Ways to Fix the Windows Blue Screen Errors?
There are various ways to fix the Windows Blue Screen errors. Here we have explained few of them in details. Follow them and get rid of the error as soon as possible:
Update the Drivers of Computer
Outdated drivers can be the reason behind the blue screen error. We always advised keeping your computer drivers up to date so that you don’t have to come across any uncertain windows errors. To check if you have any pending updates then navigate to:
Firstly go to Settings.
Then Update and Security
Lastly Windows update
If there are any pending updates then you will find them in the above steps. See the drivers by right-clicking on the Windows start menu. This will open the power user menu and when it does select the Device Manager. Look at your computer’s drivers, If you any yellow triangle next to your drivers then it means that are outdated. In case the updating drivers did not work, you can also try uninstalling and reinstalling them. Follow the steps to uninstall the drivers:
First of all, right-click on the Windows Start menu.
Then choose Device Manager.
After that right-click on the device’s drivers that you want to uninstall.
Now click on uninstall
At last reboot your computer.
To install the latest drivers for your particular device, you need to visit the manufacturer’s website. When you are there search for your device to install the drivers.
Check Malware in your Computer
Malware can be the reason behind the blue screen issue. As it has the sneakiest way of getting into your computer. Do a deep scan in your computer and you will get to know about the malware.
Uninstall Apps in your Computer
Another possible reason that causes blue screen error to appear in the recent apps that you have installed is not playing okay with your computer. Try and remember the last few apps you have installed before getting the blue screen error. Uninstall those apps by following the steps:
First of all, go to Settings
Then go to Apps and features
After that click on the app, you want to uninstall
Next click on the Uninstall button
Disconnect the Connected Device
In case you got the blue screen right after you connected a new device, by disconnecting the device you can eliminate the error. The reason behind this, the new device’s software is not compatible with your PC. If the software is not compatible then you can try contacting the device’s manufacturer or you can also connect with our team and tell them your case. Our team must have the best possible solution that will fix the issue within no time.
Uninstall Recent Updates
Updates always don’t make things better. Some updates can also make things worse and give your errors such as Blue Screen Error. If you see that the update is causing a problem then you can uninstall it. Follow the steps to do so:
Firstly go to Settings
Then select Update and Security
View update history
Now click on uninstall update option
After that select the newest update
Next click on uninstall button
Best Technical Support for Window Issues
Tech Support Expert is the best technology company who is working to provide the best services and solutions to the customers. Our services are available 24/7 and thus you can connect with us anytime without any hassles. If you are unable to resolve the issue manually by following our steps then just give us.
Hey, I’m leala. I’m an artist living in New York. I am a fan of arts, outdoors, and video games. I’m also interested in fashion and cooking. You can read my blog with a click on the button above. :- office.com/setup.
0 notes
Text
Download anti revoke for iOS – iPhone/iPad/Mac
Anti Revoke is a very useful application that helps you in disabling using revoked iOS apps on non-jailbroken devices. After installing AntiRevoke.IPA (.mobileconfig) file, your device will no longer provoke you to application error. When Apple says there’s an app for that, they only are only talking about the apps on the App Store.

When you include the apps that you sideload or get in third-party stores, you now see the incredible possibilities with even more apps. You get all kinds of apps for your device, regardless of what you wish to achieve.
However, Apple has begun to crack down on these third-party stores by revoking app certificates on iPhones, iPads, and all its devices. If your iPhone shows the prompt that says Untrusted Enterprise Developer or Unable to verify app, then your iPhone has revoked your app.
If this is you, then read this page to learn how to make use of revoked iOS apps by downloading anti revoke or a VPN for iOS.
How do I use my iPhone app when it’s revoked?
Use a VPN service
Download anti revoke iOS on your iPhone or iPad.
1. Use a VPN for iPhone or iPad
A VPN (virtual private network) service tunnels your traffic through its network. These programs trick the revoked iPhone/iPad app to think that you are accessing it from a different location, network, IP address, etc. VPNs for iPad/iPhones are popular because they help you unlock location-restricted content, but if you get the unable to verify app message, VPNs will help you out and let you use the iPhone app without issues.
Without getting too much into the technical aspect, if you run a VPN program while accessing the revoked iOS app from an untrusted enterprise developer, you won’t get the unable to verify app message. I always use Nord VPN or Express VPN. You can’t go wrong with either of those, but check out this detailed guide on how to select a VPN for your iPhone or iPad.
For an in-depth research about VPN services in general, you may want to see this page.
2. Download anti revoke for iOS
If you prefer not to use a VPN for iPhone or iPad, you can also download anti revoke for iOS. Thanks to anti revoke, you can use unable to verify apps on any iPhone or iPad. Anti revoke for iOS even works on non-jailbroken devices.
Watch this video to learn how to quickly install anti revoke on your iDevice. Keep reading for a breakdown of the steps.
Anti revoke for iOS comes as a file named anti revoke.ipa (.mobileconfig). To use this file to verify your apps, just download the file and follow the steps below for your iOS version.
If your device runs on iOS12 or older, don’t worry; we’ll cover anti revoke for iOS 12 or older below, after this. Third-party app stores contain not only crucial tweaks and apps for your device; there, you can also find paid apps for free download. Most of these apps are from untrusted enterprise developers, and so their certificates are bound to get revoked.
Reasons to download anti revoke for iOS
Anti revoke for iOS 13 works correctly and helps you verify all apps no matter the store you downloaded it from. It also supports mod iOS apps. Don’t take my word for it; here are some reasons why you should consider anti revoke for your iOS 13 device.
Block revoke of modified apps
Works on devices on all iOS versions
Compatible with all iPad and iPhone models
Anti revoke for iOS can work together with a VPN (recommended)
100% safe to use
Verifies apps from untrusted enterprise developers
Anti Revoke file is 100% safe and works on all iOS versions. If you have any problems with this file feel free to contact me by this form.
Steps to download Anti Revoke For iOS 13
Downloading anti revoke for iOS 13 is straightforward. Follow the steps below to skip the app verification from an untrusted enterprise developer.
First of all, download anti revoke for iOS 13 from the section below. The file is called anti revoke IPA (.mobileconfig) file.
After downloading it successfully, open the Settings app.
Next, go to General > Profiles. Alternatively, if you see a Downloaded Profiles option in Settings, tap on that.
On the next screen, you will find the profiles on your iPhone. Tap on Tweakbox
Next, when the Tweakbox profile opens, tap the Install button and enter your iPhone passcode.
Your device will warn you about the authenticity of Tweakbox. Ignore that and hit Install again. Tap on Install again.
The profile will now get installed successfully in a few seconds. Tap Done to save and close this page. Tweakbox will now show up on the Configuration Profiles area.
Download anti revoke for iOS 12 or earlier
Anti revoke is also available for devices running on iOS 12, iOS 11, iOS 10, or even older. If Apple revoked your app, read on to find how to verify the app. Non-jailbroken and jailbroken iPhones and iPads can escape the unable to verify app problem with the use of this wonderful utility. A large number of third-party applications can be found on the market for Apple devices and by using this Anti revoke App you can use all of them with no revoking.
With anti revoke, non-jailbroken iPhones and iPads can escape the unable to verify app problem on your modded app or apps you download off third-party stores.
Hey, I’m leala. I’m an artist living in New york. I am a fan of arts, outdoors, and video games. I’m also interested in fashion and cooking. You can read my blog with a click on the button above. :- office.com/setup.
0 notes
Text
How to Fix Android File not Transferring to Macbook
If you have earlier installed Android File Transfer Application on your Macbook, then you may view a warning message on your Macbook screen that says your Android phone not connected to the device. There can be numerous reasons as to why this is happening, and we will try to figure them out. Here you can learn how to transfer an Android file into your Macbook. Here are some steps to help you to transfer your Android data into your Macbook device.
First Method: Enable USB Cable instead of USB Debugging
Use different USB cable, when you are facing the same issue.
Now attach your Android mobile phone into Macbook through USB data cable.
On your Android mobile screen, open Settings.
Switch on your USB option and select MTP (Media device) option.
Second Method: Diagnose Macbook
You have to assured to use Macbook OS X and Android version 3.0
Reboot your Macbook computer.
Open the Android Data Transfer application on your Macbook.
Third Method: Update your Android Mobile Phone
You have to upgrade your Android Mobile by completing the orderly Update.
Reboot your Android mobile phone and check that it is approved by your Macbook.
Use Android Mobile Assistant
Here is another way to solve your issue using Macbook to fix the Android file transfer issue with Macbook.
There is an Android Assistance Software for Macbook to handle an Android mobile file on your computer. It is easy to transfer your file from Android phones to Macbook PC with the app. You can also backup your data like pictures, contact, message, music and, videos in some moments. You can follow the step to do.
First Method: Download Android Manager and install on Macbook
First, you must have to download the Android Manager into your Macbook and then you have to install it in your MacBook. This software only supported in the current version of the Macbook device for the best performance. If you have installed, then perform these steps.
Install the software into your Macbook computer.
Launched the Application
Here you can see the Application on your Macbook application.
Navigate your cursor to Transfer icon
Tab the button.
Second Method: Link your Android Phone with Macbook
you can attach your Android mobile phone to your Macbook computer via USB cable. Computer software automatically attached to your phones and display program into your computer screen.
Third Method: Transfer your chosen Folders
Here you can transfer your data from Macbook to an Android mobile phone or vice versa. With using this Application, you can also transfer your picture, documents, contact, videos, music, etc. you can import your files from Macbook to your Android mobile phone or vice versa. Android Assistance helps you to transfer your data from your Macbook to your Android as well as you can restore your backup too. Follow the steps carefully to ensure you get optimum results.
Hey, I’m leala. I’m an artist living in New york. I am a fan of arts, outdoors, and video games. I’m also interested in fashion and cooking. You can read my blog with a click on the button above. :- www.office.com/setup.
0 notes