#wifi.wavlink.com extender setup
Text
#wifi repeater setup#wifi.wavlink.com extender setup#wifi.wavlink.com repeater setup#setup tutorial#wavlink wifi repeater setup#wavlink ac600 setup#wavlink n300 wifi repeater setup#wavlink router setup#how to setup wavlink n300 wifi router#wavlink extender setup#wavlink n300 wifi range extender setup#wifi.wavlink.com#wifi.wavlink setup#wifi.wavlink.com login#wifi extender setup#wavlink setup#how to setup wifi extender#wifi range extender setup
0 notes
Text
Wavlink WiFi Extender Setup
Consider that you have a big house and your Wi-Fi is unable to provide Wi-Fi in your entire house. Simply don’t roam around your home in search of a strong Wi-Fi network. Thus, you must complete the Wavlink WiFi Extender Setup to establish an uninterrupted & flawless network coverage. Through this blog post, you will learn to set up the Wavlink extender. So, go through this blog post right away.
Steps for Wavlink WiFi Extender Setup
Now that you want to extend your Wi-Fi network, you can carry out the Wavlink WiFi extender's setup process. You can set up your Wavlink extender through the web address as well as using the "WavRouter" app. Simply follow the below setup process now.
Connect your smartphone or computer to the Wavlink extender's WiFi network.
You will find the extender's network name (SSID) & password on the extender's label.
Once the connection is established, open a web browser on your device.
After that, type in the default web address or IP address for the Wavlink extender.
It's usually something like "wifi.wavlink" and "192.168.10.1".
Consequently, you must hit the Enter button to access the configuration page.
Next, follow the on-screen instructions and set up your Wavlink extender.
Hereon, you must choose your existing Wi-Fi network and enter the network password.
Once you are done, save the configured settings and wait for your extender to restart. This will eventually complete the Wavlink WiFi extender setup process.
Wrapping Up
At last, this blog post includes the complete Wavlink extender setup process. But if you are still facing certain issues during the extender setup process, connect with our technical experts now. Our technical experts will guide you through the complete setup process.
0 notes
Text
Why is wifi.wavlink.com not working?
See the world with wifi.wavlink.com wireless mesh WiFi,wifi repeater. Wavlink with rich experience in wireless network, our router series consist of high power router, gigabit WiFi router, smart WiFi router with managing APP.
0 notes
Text
#wavlink setup#wavlink wifi setup#wifi.wavlink.com setup#ap.setup wavlink login#wavlink login#wavlink extender login
0 notes
Text
Wavlink setup using the wifi.wavlink.com setup manual
Are you having trouble setting up Wavlink using the instructions on wifi.wavlink.com? Looking for a straightforward setup tutorial for a Wavlink WiFi extender? You have indeed discovered one. This page contains all the information required to set up a Wavlink extender.
Wavlink WiFi extenders are valuable networking tools that are known to improve the speed and ease of using the internet. It implies that it is possible to download a movie while playing an online game. In other words, setting up a wifi wavlink is an excellent way to solve internet-related issues. However, as was already indicated, many consumers are unable to configure their Wavlink WiFi extender devices using the handbook.
1 note
·
View note
Text
Complete Guide to Do Wavlink Router Password Change
Your top objective after configuring the Wavlink WiFi router should be to increase security. You must adjust your wireless router's settings in order to do that. You can increase the security of your device by following the instructions in this guide on how to change the password on your Wavlink router. But first, allow us to explain why it's crucial to change your Wavlink router's default password.
HOW TO CHANGE THE WAVLINK ROUTER PASSWORD
Open an Internet Browser
Access the Wavlink Login Screen
Enter the Router Password
Navigate to the Setup Tab
0 notes
Text
wifi.wavlink.com is an inbuilt web server that allows a user to keep a track of the status of the performance of the Wavlink range extender .The Web based management window can be used in Windows or Macintosh using a Web browser.
0 notes
Link
If your wifi wavlink com is not working then no need to worry you are in the right spot. Here you can check out the steps to setup your wavlink wifi extender. For info about the wavlink you can visit our website. Or call and chat with our support team.
0 notes
Link
If wifi.wavlink.com is unavailable, Don't worry. If the site does not work for some reason, you can use the IP address of your device to connect to the gateway. Click here to find out why you can't reach http://wifi.wavlink.com.
#wifi.wavlink.com not working#wifi.wavlink.com error#wavlink login#wavlink setup#configure wavlink extender
0 notes
Text
0 notes
Text
Wifi.wavlink.com Router Setup & Login
In order to ensure that the Wavlink Extender Setup process goes smoothly, you have to make sure that you are using a secure and strong internet connection. You should also take note of the web address wifi.wavlink.com that you will need to be able to complete your setup. To begin, you need to access the Wavlink router login page to tweak some settings. Now let’s take a look at the steps you will need to take to login into the Wavlink router.
1 note
·
View note
Text
Wavlink AV500 Powerline Setup
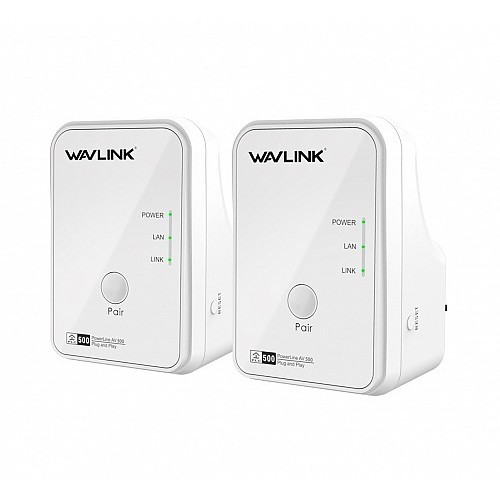
A strong internet connection is offered by the Wavlink AV500 Powerline setup of the wireless range extender, which may be extended using your Wi-Fi router/AP setup. It's ideal for frequent internet usage, including surfing, online gaming, video chats, buffer-free 4K HD video streaming, and more. It enables you to provide your mobile, computer, laptop, and other devices access to a high-quality wireless network. Starting with the Wavlink AV500 Powerline setup
Installation of Wavlink AV500 Powerline
This page contains instructions for setting up a Wavlink AV500 extender as an access point. One by one, the process is explained, and you won't need any further information.
Connect your AV500 repeater's power source to the wall outlet.
Switch on the access point and attach the Ethernet wire from the router to the LAN port of the extender.
Now that the Wi-Fi list is open on your computer, connect the Extender to the default Wi-Fi network.
Open any tab on the connected computer, type "http://wifi.wavlink.com or ap.setup" in the address box, then press Enter.
Request the login and password to open the web tab. Type "admin" as the choice in both locations, then click "Login."
To access the subsequent Wavlink Extender setup menu, select Wizard -> Select Access Point.
Create a new SSID, password, and protection from.
Once the progress meter is filled, wait an additional 60 seconds before requesting more.
After configuration changes and a reboot, the Wavlink AV500 repeater may now work as an access point.
Wavlink AV500 Powerline wps setup
Setting up a Wavlink AV500 extender using WPS:
You must carry out these actions one at a time if your Wavlink setup employs WPS.
Hold your Wavlink AV500 extender close to your router when it is connected to the power source to avoid disruptions.
An LED indication begins flashing after roughly 45 seconds of startup time.
When the router's light blinks to indicate it's ready to attach, press the WPS button to unlock it.
Before a flickering light indicating that it is connected to the router appears, press the WPS button.
Until the blinking light stops, you won't know the Wavlink AV500 extender setup is connected to the router.
Web browser setup for Wavlink Extender
The Wavlink AV500 powerline Extender may be configured via a web browser. You may finish the setup procedure using these steps.
Make sure your Wavlink extender and router are close to the power source when you plug them in.
After connecting the device to the socket, wait around 45 seconds for the LED light to begin blinking.
Go to the default network for Wavlink, Wavlink 2.4 GHz, in your mobile device's or computer's Wi-Fi list, and connect to it.
On the same computer or mobile device that you are connected to, launch the new web browser.
The Wavlink extender setup interface will launch. Please use the default username and password of "admin."
Select a language. Login Press.
On the following tab, you will be prompted to select your nation, time zone, and new password. The most recent password will be used when you log in again.
Open the Wavlink Web UI, choose the Wizard option, then choose Repeater mode. Next, find and choose your Wi-Fi host network.
Wait around 40 to 60 seconds until the progress metre is full before trying again.
When the flashing LED light returns to solid, the setup is sound.
0 notes
Text
ap.setup Wavlink WiFi Extender Login | https://wifi.wavlink.com
Here is how to do Wavlink WiFi extender login. Know about Wavlink login password and get success with https://wifi.wavlink.com or ap.setup wavlink login. Are you trying to do Wavlink WiFi extender setup? Get in touch with our experts and learn how to set up Wavlink WiFi extender & wavlink extender login. We at apwavlinkwifi.com provide online support and information for issues with Wavlink WiFi devices. In case you are still struggling to perform Wavlink setup or need help managing your extender, contact our experts for quick help.
#ap.setup wavlink login#wavlink extender login#wifi wavlink com#wavlink login#Wavlink setup#wavlink login password
0 notes
Text
Wavlink AC1200 Setup
Wavlink AC1200 setup is very easy and will be done in different ways. It extend the range of your current wireless connection to the farthest corner of your home or office.
How to Use the Wavlink AC1200
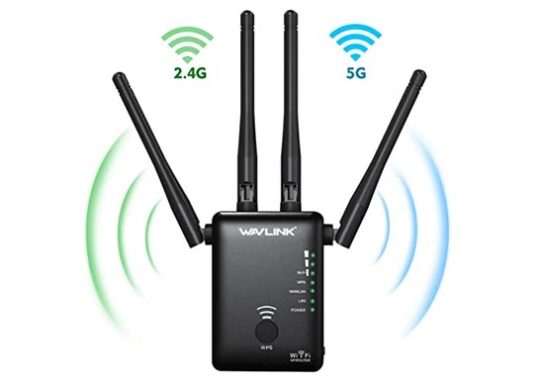
With the Wavlink AC1200 wireless range extender, you can easily extend the range of your current wireless network anywhere. Four antennas are set up in a way that makes them work in all directions. This makes your existing network better and more reliable. With the help of the Wavlink AC1200 dual-band wireless range extender, you can slowly improve your wireless network. Because it is small and easy to use, it lets you set it up without much trouble. Also, its sleek design makes it easy to fit in with the rest of your home or office decor.
You can connect all of your devices from anywhere in your house because the antennas are so good. Also, the Wavlink setup connects to your router wirelessly. So, it automatically finds your router's signals and starts to boost them.
Wavlink AC1200 Setup using WPS
Follow the step-by-step instructions below for Wavlink AC1200 Setup using WPS:
Plug the Wavlink AC1200 into a power source.
Wait until the solid blue light comes on. This shows that the extender is working.
Now, push the WPS button on the extender as well as the wireless router or modem.
Don't unplug the AC1200 while the extender's light is blinking.
The WPS method for setting up the Wavlink AC1200 has now been completed successfully.
On the WIFI repeater, the power, client, device, and WPS lights will all be solid green.
Now, put the Wavlink extender in the spot where the signal is weakest. And make sure your WIFI works well.
Wavlink AC1200 Setup with wifi.wavlink.com web URL?
To finish setting up the AC1200 WiFi extender, you just need to plug the repeater into a power outlet.
Check to see if the button on the extender is set to the repeater mode.
Once the extender's power led light is on, you can move on.
Get all of your wireless devices together, go to the WiFi settings option in the menu, and then connect to the Wavlink network.
After connecting, open any browser and type wifi.wavlink.com into the address bar.
You are now on the screen where you can set up the Wavlink AC1200 extender.
Make sure to follow the on-screen instructions when connecting your Wavlink WIFI AC1200 Dual-band repeater to your home's WiFi router or modem.
How to setup my Wavlink AC1200 WIFI Range Extender?
Follow the steps below in order to connect the Wavlink AC1200 extender using a web browser:
Use the plug that came with your AC1200 Range Extender to connect it to a power source.
At this point, you will need to set your extender to work in the repeater mode.
Get a portable computer, like a laptop or tablet, and go to the WIFI settings.
Also, look for the Wavlink-N network and set up a connection to it.
Once you're connected to the extender network, open a web browser like Google Chrome, Mozilla Firefox, Microsoft Edge, or another one.
Then, type 192.168.10.1 or wifi.wavlink.com where it asks for the address.
You have reached the page for setting up the Wavlink AC1200.
Follow the steps that show up on the screen to add your extender to your home network.
How to reset Wavlink AC1200 Dual-band WIFI extender?
To start resetting the Wavlink AC1200, plug it into a power outlet.
When the extender's power led light is on, move on to the next step.
Use something like a toothpick or a paperclip.
You can let go of the pinhole after you press and hold the reset button for ten to fifteen seconds.
At this point, you have to wait until the power led light turns solid green.
You have now set the extender back to how it was when it came out of the factory.
Follow the steps for setting up the Wavlink AC1200 to put the WiFi extender back in place.
Wavlink AC1200 setup using Wifi.wavlink.com
Plug the Wavlink AC1200 wifi extender into an outlet.
Make sure the repeat button is set on the extension button.
When the power led light on the extender is turned on.
You can connect to the Wavlink network on any wireless device by going to the WIFI settings menu.
Once you're connected, open any web browser and type wifi.wavlink.com into the address bar.
You have reached the screen for setting up the Wavlink AC1200 extender.
Follow the steps on the screen to connect your Wavlink WIFI AC1200 Dual-band repeater to your home WiFi network or modem.
Troubleshooting steps for Wavlink AC1200
By default, the WPS button is turned off on some IP 192.168.10.1 gateways. If you can't connect using the WPS button, you can go to the Wavlink wifi extender setup management website for your extender and set it up there.
Make sure that your wireless router is close to where you put your extender.
If you don't, the way your improved network works will be very different. Keep the extender one metre away from your router.
Make sure that your extension is far away from any electronic equipment that could cause trouble. Things like baby monitors, microwaves, and cordless phones that use Bluetooth should be avoided.
How do I set up Wavlink AC1200 as an access point?
After you've connected the hardware and registered into the WAVLINK AC1200, you can start the installation process.
Follow these simple, straight-forward steps:
You will be taken to the page for setting up the wavlink ac1200.
Use the drop-down menus to choose your country/region and time zone.
Fill in the new login information for your page's web interface.
After choosing the "Access Point" mode of work, follow the instructions on the screen.
Choose the primary router's wireless network that you want to add an extension to.
Enter the same wifi password you used for your home router into your outdoor extender.
Give the setting some time to take effect. This might take some time.
Then, look up the name of your outside ap wireless network and use its wifi password to connect to it.
Your wavlink ac1200 outdoor extender is now set up the way you want it. Now you can put the thing wherever you want.
Wifi Extender Setup is an independent third-party service provider. Wifi Extender Setup is not connected to any of the companies whose trademarks, brands, products, or services are used on this site, unless that connection is made clear. All of these references are just there to give you information.
#Wavlink AC1200 Setup#Wavlink AC1200 Setup with wifi.wavlink.com web URL#Wavlink AC1200 setup using Wifi.wavlink.com
1 note
·
View note
Text
Wavlink AC1200 Setup
Wavlink AC1200 setup can be easily performed in a variety of ways. And improve the range of your current wireless connection all the way to the farthest corner of your home or office.
Wavlink AC1200 Instructions
With the help of the Wavlink AC1200 wireless range extender and the Wavlink AC1200 Setup, you will be able to easily extend the range of your existing wireless network to any location. In order to improve the quality and dependability of your current network, we have incorporated four antennas into our one-of-a-kind and patent-protected wide band design. With the assistance of the Wavlink AC1200 dual-band wireless range extender, you can gradually improve the performance of your wireless network. Because of its extremely compact and user-friendly design, it enables you to enjoy a placement process that is devoid of any complications. In addition, because of its simple layout, it can easily be incorporated into the décor of your existing home or office.
As a result of the high-performance antennas, you are able to connect any and all of your devices from anywhere in the home. In addition, the Wavlink installation process establishes a wireless connection with your router. As a result, it will search for the signals coming from your router and begin to boost them automatically.
Wavlink AC1200 Extender Setup
To install the Wavlink AC1200 using the WPS method, please follow the step-by-step instructions that are provided below:
Establish a connection between the Wavlink AC1200 and the power source.
Wait for the extender to be powered on, which will be indicated by the solid blue light that will illuminate.
At this point, press the WPS button located on the extender.
After that, you need to press the WPS button located on your wireless router or modem.
It is important to remember not to unplug the AC1200 while the light is flashing on the extender.
The WPS method used to set up the Wavlink AC1200 has now been successfully finished.
On the WIFI repeater, you will notice that the power, client, device, and WPS indicators have all turned solid green.
Now position the Wavlink extender in the area where the signal strength is lowest. Make it confirm that your WIFI connection is strong.
How to install Wavlink AC1200 with wifi.wavlink.com web URL
To complete the setup for the AC1200 WIFI extender, simply connect the repeater to an available electrical outlet.
Check to see that the button on the extender is set to the repeater mode.
Once the power led light on the extender is lit up, you can proceed.
Gather all of your wireless devices, navigate to the menu option for the WiFi settings, and then connect to the Wavlink network.
After connecting, open any browser and type in wifi.wavlink.com on the address bar.
You have now arrived at the setup screen for the Wavlink AC1200 extender.
When installing your Wavlink WIFI AC1200 Dual-band repeater to your home WiFi router or modem, make sure to follow the instructions that appear on the screen.
How to setup my Wavlink AC1200 WIFI Range Extender?
To connect the Wavlink AC1200 extender using a web browser, please follow the steps below in order:
Connect your AC1200 Range Extender to the power source using the plug provided.
At this point, you will need to set your extender to operate in the repeater mode.
Obtain a portable computing device, such as a laptop or tablet, and navigate to the WIFI settings options.
Additionally, search for the Wavlink-N network and establish a connection with it.
Open a web browser, such as Google Chrome, Mozilla Firefox, Microsoft Edge, or another one, once you have successfully connected to the extender network.
Then, in the space designated for the address, type 192.168.10.1 or wifi.wavlink.com.
You have arrived at the setup page for the Wavlink AC1200.
How to reset Wavlink AC1200 Dual-band WIFI extender?
To install your extender onto your home network, follow the instructions that appear on the screen.
To begin the process of resetting the Wavlink AC1200, first plug the extender into an available power outlet.
When you have the power led light on the extender, proceed to the next step.
Find a toothpick or a paper clip and use those.
After pressing and holding the reset button for ten to fifteen seconds, you can let go of the pinhole.
The light on the power led changes to an amber colour; at this point, you must wait for the light on the power led to change to a solid green.
You have now successfully returned the extender to its original settings from the factory.
To reinstall the WiFi extender, follow the steps outlined in the setup process for the Wavlink AC1200.
Wifi Extender Setup is a third-party service provider that operates on its own.Wifi Extender Setup is not associated with any of the companies whose trademarks, brands, products, or services are used on this site unless that connection is made explicitly clear. Any and all such references are merely for informational purposes.
#Wavlink AC1200 Setup#how to setup wavlink ac1200 extender?#ap.setup#192.168.10.1#wavlink extender setup
0 notes
Text
How to Perform wifi.wavlink.com Login?

After installing a Wavlink range extender, the time to tweak its settings arrives. However, a lot of users face issues doing so because of their inability to perform wifi.wavlink.com login. The reason is lack of knowledge. Are you also unable to log in to your Wavlink extender? Nodding yes? Well, you are on the right post right now. All you have to do is read the steps discussed in this post and follow them carefully to log in to the Wavlink wireless extender.
Steps to Do wifi.wavlink.com Login
First and foremost, get access to a power socket and connect your Wavlink WiFi range extender to it. The extender must perfectly fit the socket. Thereafter, press the Power button located on your extender’s periphery to switch it on.
The moment the lights on your Wavlink device come to life (start glowing), consider grabbing a network cable and with its aid, connect your extender to the main router. In case you are unable to get your hands on the cable, continue with the wifi.wavlink.com login process with the help of a wireless source.
Now, the time to take the help of a computer or a laptop has come. So, switch on the device, whatever you prefer to use. Thereafter, load a web browser on it. Move the mouse cursor to the URL field of your browser as the next step. Done? Great! Key in the default Wavlink extender web address into it. Hit the Enter key to move ahead.
What’s that welcoming you? It is the login window of your Wavlink wireless range extender. Do you know what to do here? Here, you are required to input the default password of your Wavlink device. So, enter the same into the designated field and click Login.
The appearance of the dashboard of your Wavlink wireless device will be an indication that you have achieved wifi.wavlink.com login success. In case you fail to make it to the Wavlink extender setup wizard, check out the next section in order to do away with the hurdle that is stopping you from getting success.
Fixed: Can’t Do wifi.wavlink.com Login
If you are not able to get into the management page of your extender, then its first reason might be the incorrect entrée of the Wavlink password. Therefore, check the password you key in on the extender’s login screen. Is it correct? No? Well, in that case, mend your ways and see if the extender’s dashboard makes an appearance.
Did you even fail to make your way to the login page? This might happen if there is a mistake in the web address entrée. By entrée mistake, we are referring to the typos and the location where you input the extender’s web address. Do not enter the web address into the browser’s search field in any situation. Additionally, cross-check the web address before hitting the Enter key.
Another thing that might be preventing you from doing wifi.wavlink.com login and tweaking the settings of your range extender might be an improper extender-router connection. Wondering how? Well, the strength of the extender-router connection determines the internet connection's steadiness. If you are using an Ethernet cable for connecting your devices, then see to it that it is damage-free. Otherwise, you will keep facing the issue.
In case a wireless source is holding a connection, then ensure that your Wavlink extender and router are not too far. If they are, it is time to pull them a little closer. However, do not make the mistake of making the distance zero.
Are you sure that the web browser you’ve used in order to perform Wavlink WiFi extender login is updated? FYI, using an outdated web browser for accessing the wifi.wavlink.com login window can also drag you to login issues. Thus, upgrade your internet browser. In addition to that, consider navigating to the settings of your web browser to delete its cache, cookies, and search history.
The Conclusion
With that, we’ve reached the end of the post revealing the information to do wifi.wavlink.com login. Hopefully, the information mentioned in the post will be helpful for you and you will gain access to the web-based management utility of the range extender. Once you reach there, do not forget to get the firmware of your device updated. It will ensure that your device is performing well.
#wavlink extender#Wavlink WiFi Extender Login#wavlink extender setup#wavlink wifi extender#wavlink setup#http//ap.setup#how to set up wavlink wifi extender#wifi.wavlink.com login
0 notes
Last Seen Blogs

aikarialeanbellyjuice
Ikaria Lean Belly Juice

aidenchampionnefeet
jolie guerrèries au beau pieds


thebramblestaff
The Bramble Staff

aloutra
Aloutra