#upgraded whiplash era part 2
Text

taeyong honey drop the full lyrics don’t be shy
#taeyong#ghost#from whip me more so i can feel it more to wanna hit it so bad till you can't move...okayyy#upgraded whiplash era part 2
222 notes
·
View notes
Text
Safety First: Add Safety with YearOne Three-Point Seatbelts
A lot of us willingly invest time and money into parts that’ll make our Mopars accelerate faster, turn quicker, and stop in a shorter distance, but very few of us give personal protection like seatbelts much consideration. Early production vehicles didn’t come with seatbelts, because at the time it was believed that it was safer to be launched from the vehicle in an accident. This was proven wrong, but in the 1950s, only a few vehicle manufacturers offered front outboard lap belts as an option, and they were rarely purchased. However, if seatbelts were purchased, the usage was almost 100 percent. Depending upon the year of your Mopar, there may not be any seatbelts at all; there may be front outboard lap belts with or without outboard rear lap belts, or there may be a sash and lap belt or three-point front seatbelts with lap belts in the rear.
Our 1967 Dart came from the factory with outboard front and rear lap belts, and they’re still in the Dart 52 years later. If you cruise your ride on the streets (regardless of the seatbelt arrangement in your car), it may be time to upgrade the aged seatbelts (or add new belts if unequipped), and at the same time, take advantage of the seatbelt technology introduced in the last 50 years, which will bolster the safety for you and your passengers. To update the front lap belts of our Dart, we contacted the reps at YearOne about a pair of three-point seatbelts.
Before we get started, we’ll briefly cover some seatbelt regulations that affected the muscle car era as well as the pre- and post-muscle car eras (1960-1976). While several states started requiring outboard front lap belts in the early 1960s and by 1965 all 50 states required front outboard lap belts for new production vehicles, it wasn’t until 1968 that the Federal Government passed the first federal seatbelt legislation. The Federal Motor Vehicle Safety Standard (FMVSS) 208 required a front outboard lap belt in conjunction with a sash belt anchored above the B-pillar that latched separately to a buckle next to the lap belt buckle. The FMVSS mandate required the rear seats to have outboard lap belts.
Over the next few years, additional safety aspects were required to increase occupant safety in conjunction to the occupants wearing a seatbelt. In 1969, the National Highway Traffic Safety Administration (NHTSA) in combination with FMVSS 202 required head restraints (headrests) in all new cars sold in the U.S. after January 1, 1969. Headrests protect the head and neck from the whiplash affect from rear impact (as well as front impact recoil). On January 1, 1972, the NHTSA required all vehicles to be equipped with a buzzer that’d sound when the seatbelt wasn’t installed. Crash-absorbing bumpers (5 mph bumpers) were required (September 1, 1972) for all 1973 model year (MY) and later models, and although manufacturers had been adding side impact reinforcement bars in the doors and pillars since the 1970 MY, they became mandatory on January 1, 1973. For the 1974 MY, regulations required the manufacturers to make a single belt that had three anchor points (three-point seatbelt) for all front outboard seats. The last regulation of the first wave of occupant safety and seatbelt improvements was the seatbelt interlock system (vehicle wouldn’t start with the driver or passenger seated unless the front seatbelts were worn) that was effective August 15, 1973 and required by NHTSA for all the 1974 MY passenger vehicles. While this law was extremely successful in getting front seat occupants to wear a seatbelt (28 pecent belt wearers in 1973 MY versus 59 percent in 1974 MY), the system’s complexity and resulting difficulty in starting the vehicle led to it being vehemently hated by most, and congress actually rescinded the legislation on October 16, 1974.
Let’s get back to the installation of our three-point seatbelts in our 1967 Dart. We selected YearOne’s three-point conversion seatbelt set (manufactured by Seatbelt Solutions, PN MN724BLKU) with black webbing and a chrome lift latch buckle that was similar to the factory buckle. This set of belts will fit a 1964-1967 Plymouth or Dodge with bucket seats, and Seatbelt Solutions offers additional belt sets for 1964-1974 Mopar models. All Seatbelt Solutions belts are manufactured in the USA and meet all the FMVSS requirements. Included with the belts were all the mounting hardware and instructions to download the installation guide from the internet. After downloading and looking over the seatbelt installation guide, it appeared we’d be able to use the two factory seatbelt anchors in the floor, but we’d have to install an adapter plate under the headliner in the area the coat hook currently occupied. Earlier vehicles may have required the floor anchors to be modified or added (all the hardware was supplied and no welding would be necessary).
The front lap belt removal required a 13/16-inch socket and ratchet, and each lap belt consisted of two separate belts. It took us no time to remove all the lap belts from the Dart. We kept the anchor bolts for reuse, and we carefully boxed the old belts and stored them. The new belts with the latch buckle were installed at the factory locations on the driveshaft tunnel. Each new belt came with a plastic sleeve to provide extra protection for the belt, but we experienced some difficulty with the angle of the sleeve making contact with our center console and placing the buckle in an undesirable position. Each sleeve was slipped off the belts, and the belts were reinstalled and channeled following the factory belt routing, which resulted in no interference with the center console and a more suitable belt buckle position. If there were no factory mounting locations, a hole would have to be drilled to provide an anchor point for each belt and mounted with the included hardware and reinforcement washers.
To install the other belt, the headliner had to be pulled down (at each side of the vehicle, the headliner could remain installed in the vehicle) to gain access to the roof substructure. Seatbelt Solutions’ installation guide required an anchor plate to be installed behind the area where the coat hanger was currently connected. Starting on the driver side of the Dart, all three screws from the plastic A-pillar trim were unthreaded, and the trim was removed. One of the screws for the A-pillar trim also held a painted metal trim piece in place that that extended from the A-pillar to the base of the C-pillar. This painted trim was pulled in a downward motion to loosen it from the roof’s pinch weld. Five steel clips held the trim to a pinch weld. With the trim loosened, the trim was pulled toward the front of the Dart to release the trim from the base of the C-pillar. Once the trim was removed, we could see that the trim clips along with glue kept the headliner in place.
The coat hook and all the trim clips were removed from the headliner before it could be dropped. The glued edge of the headliner was gently pulled away from the pinch weld in the area around the coat hook. With limited access to the coat hook mounting hole, we moderately increased the amount of headliner we removed from the pinch weld. Eventually, most of the headliner was dropped from the A-pillar to the C-pillar. We also slipped each bow from its anchor, allowing the headliner to drop down further. With the headliner sufficiently out of the way, we drilled a ½-inch hole through the hole that had held the coat hook. Even though the headliner is a low-quality aftermarket piece, great care was taken to not catch the headliner with the drill or bit.
The installation guide required a 4-inch slit to be cut approximately 2 inches above the coat hook, so the anchor plate could be slipped behind the steel substructure in the roof of the Dart. The area where the cut was required was too close (in our opinion) to the roof to allow the adapter plate to slide into place, so we made a cut on the underside of the coat hook area on the outside of the pinch weld. This provided great access to the ½-inch hole, and the adapter plate would easily slip through the slit. Once the cut was made, the instructions guided us to drill on 5/32-inch hole on either side of the ½-inch hole for pop rivets. The adapter plate was laid over the ½-inch hole and used as a template for the two holes. The contour of the coat hook area of the roof required us to make new holes in the adapter plate and transfer those holes to the roof of the Dart. The rivets hold the adapter plate in place inside the substructure, so the anchor bolt can be screwed in place. The rivets don’t provide any strength to the anchor, so moving the holes wouldn’t cause any problems with the belt’s usage.
Once the holes were drilled, safety wire was pushed through one of the rivet holes in the roof and extended to the anchor plate where it was wrapped around a rivet hole on the adapter plate. With the aid of the safety wire, the adapter plate was pulled into place. The included anchor bolt was loosely installed into the adapter plate through the roof substructure, and the safety wire was freed from the plate and the roof. The adapter plate was positioned by manipulating the anchor bolt, and the included rivets were installed through the steel roof structure into the adapter plate. With the adapter plate secured to the roof substructure, the slit cut into the roof was filled with a bead of RTV. This wasn’t necessary, but it cleaned up the slit. The anchor bolt was removed from the anchor plate.
The headliner bows were pushed back into their anchors, and the five trim clips were lined up in the trim that had been previously removed. The trim was pushed into place at the C-pillar. Then, with the headliner stretched into place, we pushed the trim (and clips) onto the pinch weld working from the back to the front. Before the last clip was pressed onto the pinch weld, the A-pillar trim was installed. The last clip was pressed onto the weld, and the three A-pillar screws were returned to the factory location.
Once the headliner was reinstalled, the small hole in the headliner where the coat hook had been was opened up to allow the anchor bolt to slip through it. The anchor bolt was installed in the new seatbelt shoulder belt anchor bracket, and then it was pushed through the hole in the headliner and threaded into the adapter plate. The belt sleeve was adjusted, and the anchor bolt tightened. At the opposite end of the shoulder anchor, the retractor was lined up with the factory mount and attached to the floor with the factory anchor bolt. The entire procedure was performed on the passenger-side seatbelt.
We performed a final check of the belt routing and retightening of the belt anchors before we tested the seatbelts. The seatbelts wrapped around the body very well. The lap portion of the belt fit across the hips properly, and the shoulder portion of the belt dropped over the shoulder across the core of the body to meet the lap belt at the chrome latch buckle. When driving the Dart, the belt didn’t restrict motion, and it stayed snug as we moved back and forth in the seat. However, with a sudden pull of the belt with our hand slipped under the shoulder belt, the belt’s centrifugal clutch locked. Hopefully, we won’t have to put the belts to the test, but we feel our personal safety has been improved with these 3-point belts.
The advancements in vehicle occupant safety have moved well beyond our classic Mopars, and the question has to be asked, “Is it time to consider an update for my street-driven ride?” The U.S. manufactured, FMVSS-approved, and cost-effect Seatbelt Solutions belts fit the bill and can be installed in a full day’s work. Once installed, you will enjoy how well the belts fit, and there’ll be peace of mind that you have enhanced the safety of your Mopar for you and your passengers. For more information about the seatbelts, get in touch with the reps at YearOne and Seatbelt Solutions and increase the safety of your Mopar.
The YearOne seatbelt sets are manufactured in the USA by Seatbelt Solutions. The belts come with all-new parts and webbing, and each belt meets the Federal Motor Vehicle Safety Standards. The belt sets include all the belts and mounting hardware to convert your two-point front seat lap belt to a three-point seat belt with a shoulder belt. YearOne and Seatbelt Solutions offer seatbelts for 1964 to 1974 Mopars.
Our recently purchased 1967 Dart was an excellent candidate for a seatbelt update. The lap belts are the 52-year-old originals, and they’re not in the best condition. Seatbelt technology has advanced greatly since the Dart was manufactured in the spring of 1967. The Dart has lap belts for all the outboard positions. The rear center seat doesn’t have any belt provision. There were no federal laws to require which seats had belts and what style of belts should be used until 1968.
Lap belts offer some protection as they generally keep the occupants inside the vehicle during an accident, but the belts tend to bend the occupants into two halves, leading to serious spinal injuries. The upper body also takes a beating as the core, neck, and head can hit the steering wheel or other interior components in an accident. Our belts were faded and frayed. It was a good time for an update.
The lap belt fits fine and will keep me in the car if an accident should occur. After driving for almost 35 years with a three-point belt, the lack of a shoulder belt left me feeling as though I was falling forward whenever the Dart was driven. The addition of the three-point seatbelt should end that concern while providing additional protection.
The inboard half of the lap belts were attached to the driveshaft tunnel. To gain access to the anchor bolts, the front seats were folded forward, and the use of a 13/16-inch socket and ratchet removed the anchor bolts. With our Dart, we could reuse the anchor bolts, and the factory anchor positions would work with the new belts. If your vehicle doesn’t have factory anchor provisions or the anchors won’t work with the new belts, holes would have to be drilled into the floor, and the supplied hardware would secure the belts to the chassis.
A comparison of the old and the new. On the left is the new belt, and on the right is the original belt. The chrome latch buckles are similar, and the belts are the same width. Nobody will notice the small differences in the new buckles once the belts are installed in the Dart. For the later Mopars that use the push-button-style buckles, Seatbelt Solutions makes buckles very similar to those factory buckles.
The new inboard belts came with a plastic sleeve that didn’t fit well with our factory console and the factory low back seats. We simply slipped the sleeves off the belts, allowing the belts to be neatly routed between the console and the seats.
We wanted a clean look for the installed belts and desired to cover the anchor bolts. We learned that Jegs offers restoration parts, so we checked their online catalog. We found factory-looking seatbelt anchor covers (PN 759-CH23185, suggested retail price of $35.14). They’re for 1967-1972 A-Body GM products … just don’t tell your friends about GM parts on your Mopar.
The covers slipped behind the anchor bolt, and the snap was closed around the belt. The fit is great, and nobody will know that they didn’t come with the seatbelt set. Best of all, they didn’t restrict the movement of the belt between the seats and the console.
To gain access to the coat hook anchor, we had to drop the headliner from the A-pillar to the C-pillar. The full-length trim and the A-pillar trim had to be removed to gain access to the headliner bows, which would also have to be slipped from their supports. Approach this procedure slowly and deliberately, so the headliner isn’t damaged.
Once the trim was removed, five clips that held the trim to the pinch weld and kept the headliner taut had to be freed. Great care was taken to not put a hole in the headliner as the clips were pried off the pinch weld. We ended up using a scratch awl to slip under the clip and slide it off the pinch weld.
We pulled the headliner from the pinch weld and then released five bows from their anchors to give us enough access to the coat hook anchor in the roof. The green arrow points to the hole to which we needed access.
We had to drill the hole to a size of ½ inch. Our biggest concern was to keep the drill bit and chuck clear of the hanging headliner as we drilled the hole. The last thing we wanted to occur was the bit catching and damaging the headliner. We held the headliner out of the way with one hand while the drill was maneuvered with the other hand. It was a close fit. A 90-degree drill may have provided more room to perform this step.
The anchor plate that had to be slipped behind the coat hook anchor was modified by adding two additional holes (not drilled yet). This was necessary due to the shape of the coat hook mount in the roof.
The instruction guide suggested a 4-inch cut approximately 2 inches above the coat hook anchor to install the anchor plate. This was going to be nearly impossible based upon the contour of the substructure in the roof and the headliner hanging in the way. An easier place to make the access slot for the anchor plate was from below and on the outside of the pinch weld area.
The ½-inch hole can be seen between two 5/32-inch holes (green arrows). The two smaller holes will line up with the anchor plate holes we added, and two pop rivets will hold the anchor plate to the roof, allowing the anchor bolt to be installed after the headliner is reinstalled. The access hole can be seen in this photo as well. We used a die grinder to open up the hole slightly to allow the adapter plate to slip through it.
To get the adapter plate in position, we fished safety wire through one of the smaller drilled holes in the roof, and then wrapped the wire through the adapter plate. We simply guided the adapter plate into place with the safety wire and a screwdriver. This took some time, so work patiently.
The anchor bolt was loosely threaded into the anchor plate to hold the plate in place. We pulled the safety wire out of the anchor plate and the roof of the Dart.
We lined up the 5/32-inch holes and then popped a rivet (included in the kit) into the each hole. If you don’t have access to a pop rivet installer tool, two small set screws could’ve been used to secure the plate. The objective of this step is to fasten the anchor plate into position, allowing the anchor bolt to be removed and then reinstalled after the headliner is back in place.
We pushed the supplied anchor bolt through the shoulder belt anchor. The bolt was loosely threaded into the anchor plate. We hadn’t completely reinstalled the headliner at this point (all the bows had been reinstalled), because we wanted to be sure the anchor bolt would thread into the anchor plate before we finished the installation.
Even though there was no need for it, we dabbed a small amount of RTV over the access slit we had cut into the Dart. This area isn’t exposed to the weather, so the rust concern should be minimal, but we wanted to coat any fresh cut metal to keep any rust formation from starting.
The trim panels were reinstalled, and the anchor sleeve was slipped over the belt anchor. The sleeve cleaned up the installation, and it looks like a factory-installed piece. This is a very well-engineered seatbelt kit.
The belt retractor came with hardware for a floor mounting. In our case, we could remove the L-shaped bracket and use the factory anchor bolt at the factory mounting point. If there hadn’t been a factory mounting point, a hole would’ve been drilled through the floor, and the supplied hardware would’ve retained the retractor.
The retractor bolted to the chassis at the factory mounting point. The installation was smooth and clean. It looks like a factory installation. The retractor fit neatly between the seat and the door with plenty of clearance between the two.
The factory anchor bolt retains the retractor. The instruction guide recommends the retractor anchor point to be positioned approximately 13 inches forward of the rear seat rise in the unibody frame. The factory mounting point is almost dead on that number.
The seatbelts fit great. The lap belt fits snuggly across the hips, and the shoulder belt crosses the core of the body in a comfortable position. With a quick tug of the belt, the retractor will lock, but normal movement doesn’t cause the retractor to engage. The shoulder belt doesn’t restrict movement, and it stays against the body when the body is moved forward and then back into the seat.
A contrast of almost a decade of automotive technology with a 1967 and 1975 Dart. By 1975, the Feds had implemented several regulations that pertained to occupant safety. This early build ’75 has the starter interlock system, battle ram-style 5-mph crash bumpers, door reinforcement bars, increased roof bracing for roll-overs, high back front seats, and seatbelts for all (six) occupants. The outboard front seatbelts are a three-point design. Until we added the three-point belts in the ’67, it had none of these.
The interior of the “disco” Dart is decades behind today’s occupant safety technology, but with improved seatbelt layouts, better seat designs, increased side and roof strength, and an interior clad with plastic trim rather than metal, it seems light-years advanced compared to the 1967 Dart.
The “flower power” Dart is just about as primitive as it can get. Lap belts were marginally adequate then, and based upon today’s technology, they seem almost useless. We cannot redesign the classics with crumple zones, supplemental restraint systems, breakaway rearview mirrors, and smooth buttons and knobs in the interior, but if you’re going to drive your Mopar on the road, it may be a good time to update what you can to increase the occupant safety.
The post Safety First: Add Safety with YearOne Three-Point Seatbelts appeared first on Hot Rod Network.
from Hot Rod Network https://www.hotrod.com/articles/safety-first-add-safety-yearone-three-point-seatbelts/
via IFTTT
0 notes
Text
The Djokovic Paradox: Reigniting a burnt out comet and the super Serb’s new nemesis
Legionnaires and Centurions! Gather around! The Finals of the Rome Masters we just finished and now we have arrived at the French Open. The Clay Slam.
Back in Rome, Zverev faced off against Djokovic...and won. I’ll let that sink in for a moment. The master of masters 1000′s was beaten, in straight sets, by a talented rookie playing his first final at that level? Yup. That actually happened.
“Poor is the pupil who does not surpass the master”
A famous quote attributed to the most storied polymath of all time – Da Vinci. Remember this.
Djokovic hasn’t been playing great this year. Everyone’s been reported on this and unfortunately if you were to google the words, ‘Slump’ and ‘Djokovic’, it would appear a million times (309,000, to be precise).
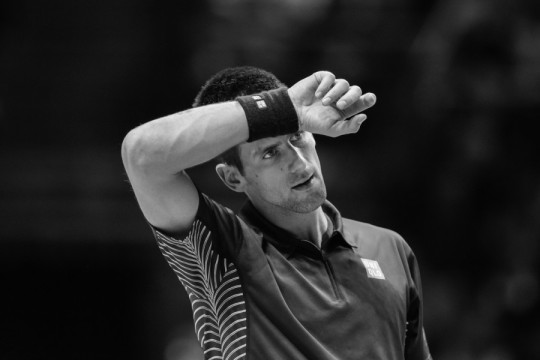
I’ll confess to you: I’m a Rafa fan and from 2015-2016, my sister (who is probably the biggest Novak fan) tormented me with texts, dripping with sarcasm after every one of Rafa’s seven losses against the mighty Serb.
Flashback
Location: Caja Magica. Also known as the Magic Box.

The sun blazed above the Caja Magica stadium. Clad in my burgundy suit and tie, I was in attendance. My Beretta was holstered, just in case I received the text from the mysterious tennis benefactors (also known as the MTB) to shoot Ille Natase. Far too magnanimous, she was and called off the hit (That was an insiders joke that only tennis junkies would understand). Anyways, no point letting a good ticket go to waste, so my bottom eagerly clung onto the comfortable seating, and I sipped my lemonade.
Nadal, came onto the court first, because he was the lower seed; but most odds makers favored the Spaniard because of his good form. The Spanish crowd cheered him on fervently. I’m not going to make this about the King of Clay. (Don’t complain now. I’m writing a separate piece on him).
There’s something about the sight and feel of red clay that reminds me of the gladiators of the Roman Empire. Sipping my drink, I surveyed both of them. Nadal looked determined to snap his seven match losing streak against the mighty Serb. That fervent obsessiveness was in his eyes and you could see it. (On related news, my tour guide, got me some roasted cod. Quite scrumptious).
Then came Djokovic. The higher seed. There were some cheers for him, but he was hardly the crowd favourite in the strongly partisan crowd. Don’t expect that to faze him. He managed to feed off the hate that spilled from the American crowd when he played against Roger in New York in 2015. But, he wasn’t in that same rhythm anymore. His box lacked his old-time backbone – Marian Vajda. The match ended after two hours. There was no sarcastic text from my sister. Nadal had finally snapped is seven match losing streak against Novak and has galvanized his status as the undisputed favorite for the French Open.
(Head’s up: I’ll be tangoing between the second and third person. I’d like to address Novak directly here).
You have a winning record against Federer and Nadal. (23-22 & 26-24). History can never be erased. Numbers are objective. Muscle memory can kick in anytime. It just takes six matches. Every supernova needs just one spark. All know this. Nadal, of all people, dismissed Spanish reporters of your so-called slump. No one expected the bombastic vintage throwback to 2007. Federer and Nadal are on your tail again. You thrive off rivalries. They’re back. Becker said it himself last year that one of the reasons you cooled during the second half of 2016, was because “your rivals were not there”.
If it weren’t you, Nadal probably would have passed Federer’s Slam total by now. But, you took this game to a new level. Even a diehard Nadal fan would concede that. You’re one of the Big 4! Tennis’s equivalent of the Justice League! (That reminds me, why don’t more tennis players get into movies? Am I the only one who would love to see a buddy cop franchise with any one of the Big 4, alongside Shaq? It’d be ridiculously fun).
And, now let us get to the matter of your new nemesis. It isn’t Federer. You haven’t faced him this year, and he is miles ahead of you in the Barclays Race to London. Nor is it Nadal, who is noisily gunning for the number one ranking again. You faced him this year just once…and lost. But, it’s not him either. You were beaten twice this year…by…Nick. I suppose on court, you could consider him to be a rival. He has beaten you on the tangible tennis court. Nevertheless, tennis is a psychological sport - so it’s not him either. (Has my preamble gone longer than needed? Almost there).
It’s Boris Becker.

Yes. You read correctly. A six time grand slam winner. Former world number one. The Baron Von Slam from Germany. The old mentor. He’s gotten inside your head. With not-so cryptic tweets directed towards to you after your defeats, he really does take extra relish in rubbing salt in your wounds.
The silent message: You were a winner when I coached you; and a loser without me.
(During happier times)

And, the thing is…don’t hate me for it, but I do find all this drama to be…deliciously entertaining.
Becker once famously said, “I am not God. I am far from perfect”. Tennis players, retired and current, tend to be extremely diplomatic in their opinions. Even politicians are rarely as politically correct. Not Becker though. Right from the start of this year, he has dropped such shade on his former protégé, that Regina George would have been impressed.
Becker expected Djokovic to keep him by his side as they chased Federer’s slam total. Becker’s vindictiveness probably was no more reflective when he praised Novak’s dethroner at Indian Wells, Nick, with the following tweet:
“Hope my man, Novak, is watching”.

(In my mind, that’s Becker’s expression through that match in California. I love the fact that Becker has such an appetite for melodrama. It doesn’t surprise me that he’s fond of Shakespeare. He’s openly admitted that he never wants anyone to surpass his prodigal breakthrough at Wimbledon at the age of 17).
I wonder if on some level, Becker wants to motivate him, to use his criticisms to spur him to his old self. Or, maybe, it is coming from his Id and not his SuperEgo. I am reminded by a line by the great Augustus, “I found Rome a city of bricks, and left it a city of marble”.
If you think my theory is too far-fetched, then wait. I have proof. It was reported in numerous sources that Djokovic’s new super coach is going to be Agassi. Becker’s old nemesis. The guy who managed to read his Blitzkrieg serve by the way he would stick his tongue out on each ball serve. Has he found an ally in this psychological war against his former mentor?
You brought Becker to help deal with your tangible nemesis – Nadal. And, this time another super coach. Your silence to Becker’s quotes could be interpreted as magnanimity. But, I’d like to quote one of my favorite video game characters, GlaDOS,
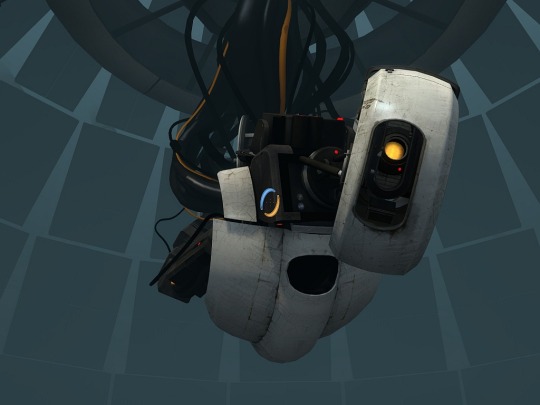
“We have both said a lot of things that you are going to regret”. That’s GlaDOS laying it down to Wheatley in Portal 2, and then proceeds to banish him to the Moon.
The silent message he has sent: ‘Time for an upgrade’. Open Era experts would all concede that Agassi had a better career than Becker, being one of only two individuals with a career golden slam (Nadal, being the other).
Imagine if you made to the finals at Roland Garros. I know, I know. There are many obstacles ahead. Besides, Nadal, there’s Thiem, who is showing good form, plus the likes of Zverev, Wawrinka and Dmitrov. Plus, there’s Krygios. But, a key part of sport psychology is visualization. Just imagine if you were there again. Wouldn’t it be quite satisfying to repeat the Guga heart across the Phillipe Chartier Stadium again?
Becker’s going to be watching.
Surprisingly, Becker sent out a tweet, praising Novak’s move to hire Agassi. A diplomatic touch, perhaps?
There is a Spanish song by the band – Gotan Project – Epoca; this springs to mind, particularly the first verse.
youtube
“Si desapareció
en mi aparecerá
creyeron que murió
pero renacerá
(which translates to)
If he disappeared
I would believe
That he died
but will revive.
There’s more history to be written. There are more memories ahead. Do me a favor and just don’t lose to Krygios because then both me and my sister are going to be bummed out. Nadal’s ranked fourth and he just missed out on being the third seed (to Wawrinka, by a hundred points).
This means the two of you could possibly face each other in the semi-finals. Just like the good old days of 2013, when the two of you dueled in what many regard to be the greatest clay-court match, ever.
The legendary skier - Shane McConkey, once said that “there’s no better feeling than that moment before you take off”. It’s time to hit the ignition again. Slap that crosscourt sliding backhand – a thousand times if you have to. You destroyed Thiem in less than an hour at Rome. Zverev’s serve left you undone in the finals at Rome. But, that’s not a Grand Slam. In a best of five setter, I’d say experience trumps exuberance.
I can understand the hiring of Pepe Imaz, with his quasi mantra of ‘Love & Hugs’. And, Becker’s strict coaching regime reminds me of J.K Simmons from Whiplash. But, we have months of hindsight now and lets admit it together, that Pepe’s nuttier than a squirrel’s snack box. Anyways, good luck with Agassi. Idemo!
0 notes
Last Seen Blogs