#the paint brushes are most likely covered in dried bookbinders glue
Text
I have not been tagged for this but I gone done it anyway, so here's an open invitation for you to do a silly thing, whoever you are <3
rules: go to pinterest, search your name + core aesthetic and create a mood board from the first nine images

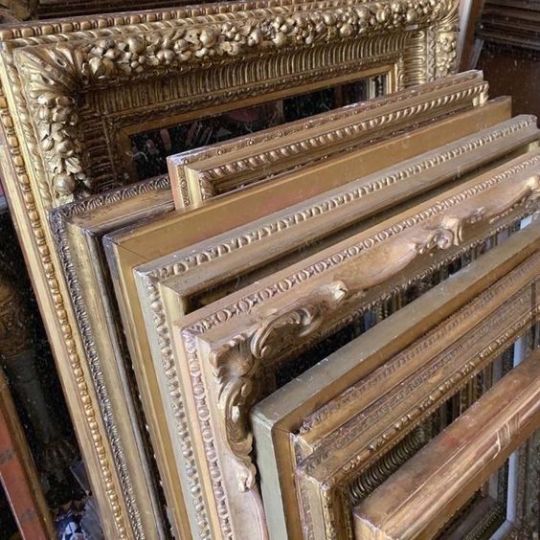


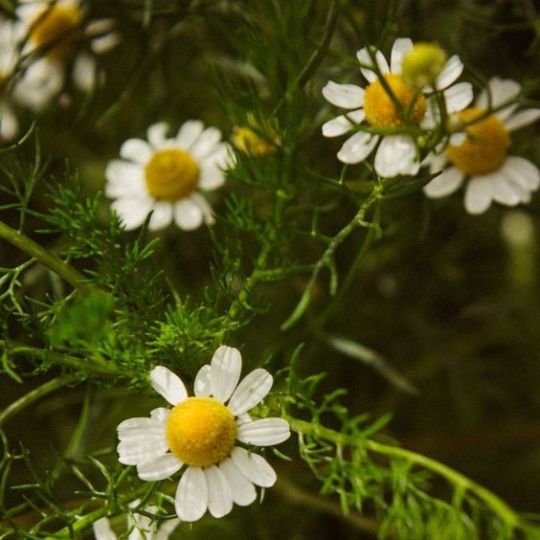


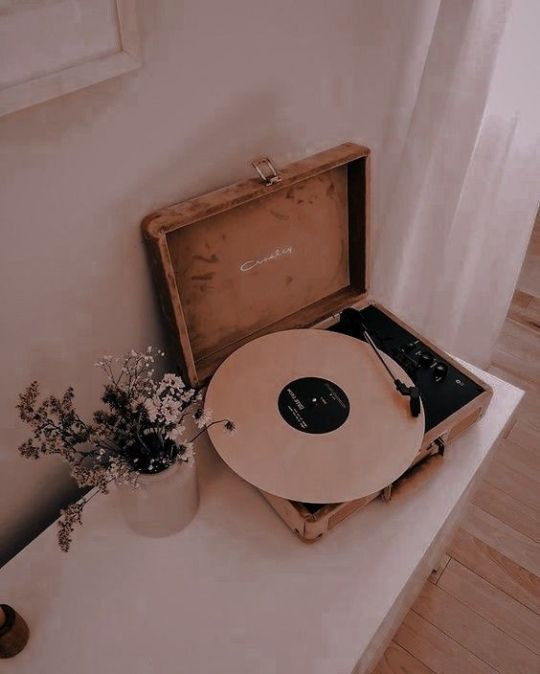
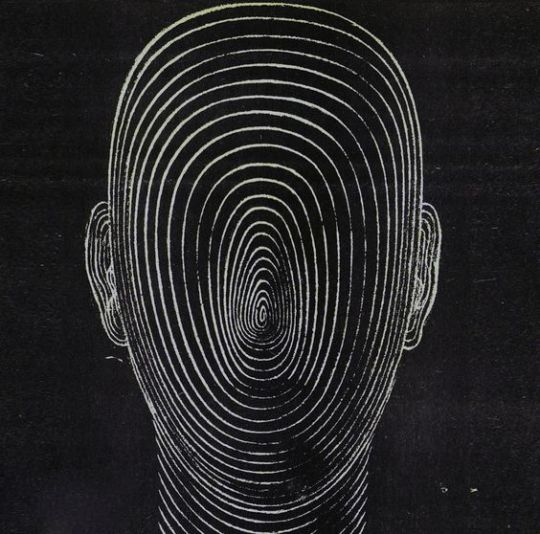
#i excluded the ads#and two images that weren't ads but had brand names in them#and so looked a bit like ads#i don't know#i made up an arbitrary rule so i could exclude wine and cigarettes from my aesthetic moodboard#the strawberries are very swedencore i suppose#the paint brushes are most likely covered in dried bookbinders glue#me and ilikedaredevil high-fiving with our glued-up paint brushes#the white vinyl is maskineri by kaizers orchestra#i've never realistically wanted to be in a relationship but i've always had this longing for someone to play the piano#in a distant part of my house#so a piano-playing neighbour would work just as well i suppose#anyway picture frames yes#moody art print yes#pinterest did surprisingly good
13 notes
·
View notes
Photo
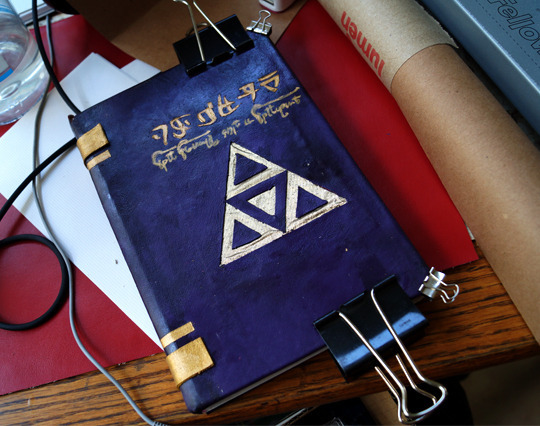
-GOETIA Pad Cover Tutorial-
‘Sup Emblem nerds, if you saw my post on the handmade Goetia notepad on my general blog, well here’s how to do it.
NOTE: The cover tutorial is for a half-letter hand-bound notepad (14 x 21.5 cm). If you’re using a different size adjust measurements.
Also, super long post ahead!
You’ll Need:
For the Goetia cover:
Acrilic Paint: Red, blue, pink, white, yellow and gold.
Golden fabric.
Pleather, preferably thin.
An x-acto knife and/or cutter and scissors.
Butterfly clips, various sizes
A pen or marker
A ruler, I used a T-Ruler and my sets of squares for extra precision.
Brushes: One thick (1 inch or more) for coating and for details and correcting two or more small, painting brushes (as thin or thick as you need them).
Needles or pins, the thinner the better.
A golden ink marker.
Masking or blue tape.
Craft or electricity pliers.
Metallic spatulas, one for the paint and one for the glue.
A printed stencil for the type and another stencil or guide to cut out the details.
Varnish or laquer to seal the paint.
A cutting board or safe surface.
A godette or bowls to mix your paint and a little water on the side.
Glue, you can use the bookbinding cement from your pad or silicone.
Your notepad ready for the cover, the pages sown and glued together. (Or an old notebook, hard cover)
Cardboard cutouts, the same size or a few milimeters larger than your notepad. Two for the sides and one for the spine.
RESOURCES:
Goetia Template (AI File) | Goetia Design Reference
Title Font (SS Ancient Hylian) | Ancient Tongue Font
INSTRUCTIONS:

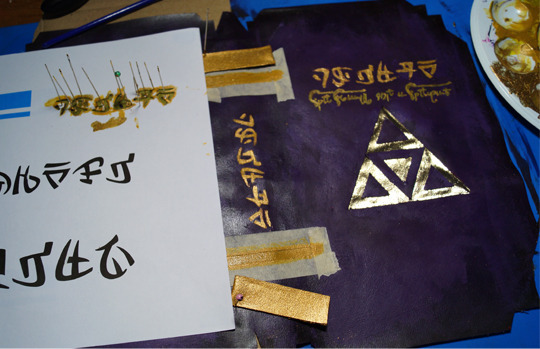
Here’s an example of my template.
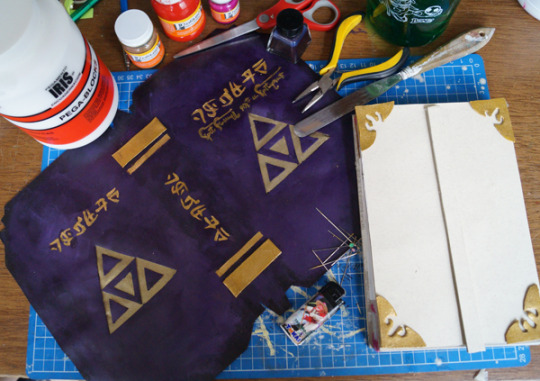
So you got your notepad ready as explained in the DIY bookbinding tutorials, time to make it cool. Place your materials on or close to the cutting board.
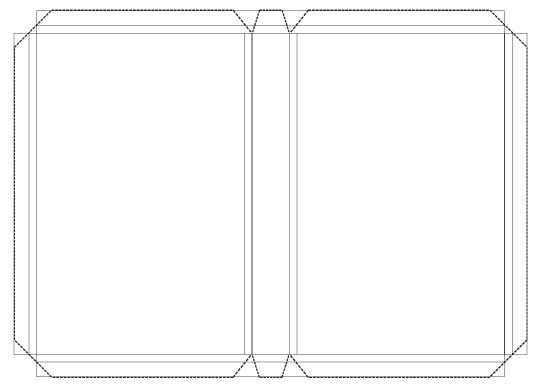
(excuse the diagram, I forgot to take a picture)
Trace the size of your sown and glued pad with 5mm of allowance between sides. Add 5mm of allowance on the border around the whole area, then another border with the same proportions and trace the corners into flaps. Cut the fabric as marked by the general outline.
NOTE: I made the slight mistake of cutting the symbol pattern before painting, you might want to skip these steps and return once your cover is painted and sealed.
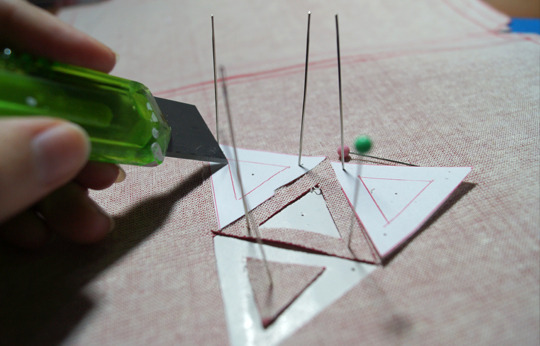
Get your cutting stencil and place it on the top of your fabric where the symbol should be. Fix it to the fabric with the pins, you may want to use a layer of cardboard underneath to pin it real good.
Cut the fabric according to your pattern, I did it on both sides but the books in canon only have the symbol on the cover.
If you missed the painting first like I did, pin down the pieces of the pattern you will use so they won’t move when the brush applies the paint.
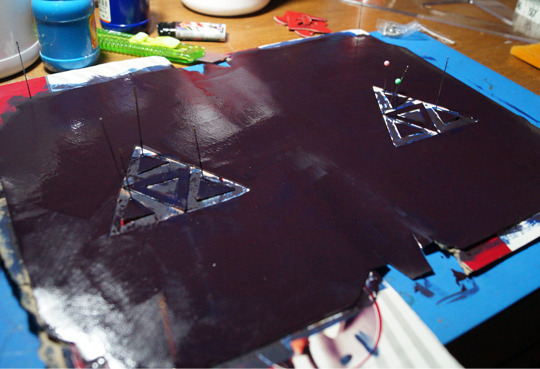
Mix a navy blue and red to make a nice, dark purple and add the first coat of paint. If your fabric isn’t purple (like mine which is red) make sure the paint covers all spots, this might take a second or third layer.
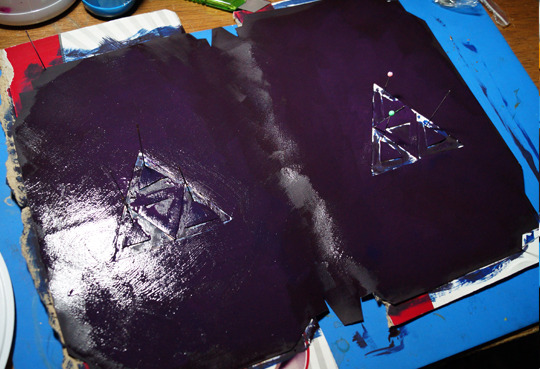
Add some pink to the mixture to get a prettier shade of plum and paint the cover unevenly to give it an old timey texture with quick, lighter strokes. Add more pink and a teensy bit of white and as many layers as you think the texture will look best. I added about 5-7 layers of paint total, but if you want a different effect or a darker shade of purple feel free to do so.
Once your cover is painted, get some varnish or lacquer and seal it. I usually add two or more layers just to be sure.
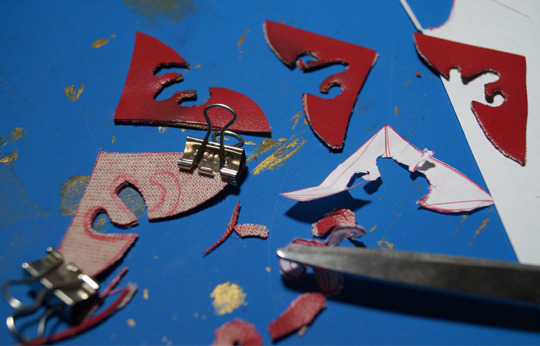
While your paint dries, cut the golden corners as they’re shown in the reference pictures, I used double-sided cutouts (glued together with the cement, if you don’t have cement use silicone), the x-acto knife, and the butterfly clips to shape the inner pattern on several pieces at a time. If any edge gets wonky I used a lighter to burn out the ugly edges, careful though pleather is flammable.
Similarly, while or after the purple paint is done, cut two straps double the size of the large markings that should be on top of the spine of your pad. Fold them and glue them together with the cement. You can reinforce the glueing process with the butterfly clips.
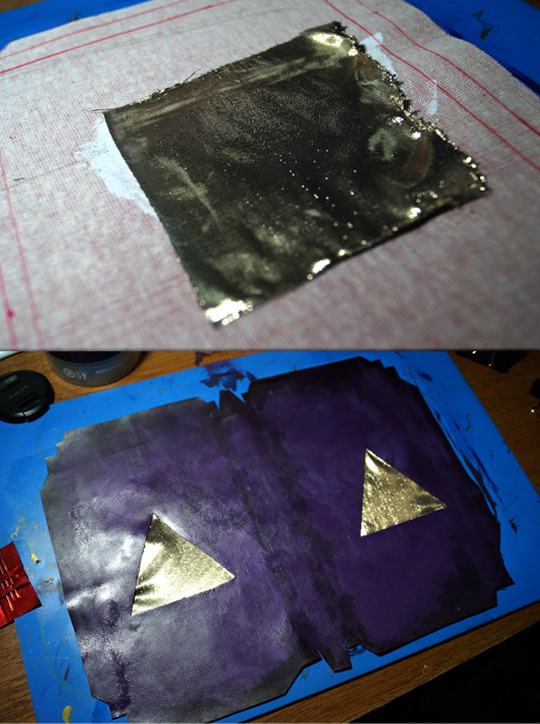
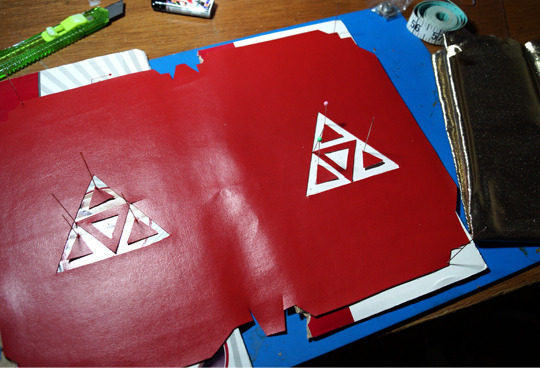
If you haven’t cut out the design on the cover, do that now. Sepparate the pieces and you’ll be left with a big triangular hole on the pleather. Glue the pieces of the golden fabric to cover the hole up from the back of the pleather.
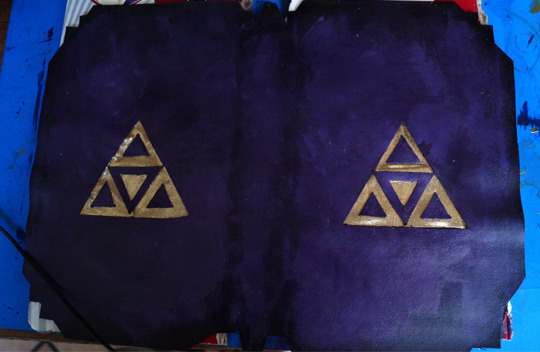
Once dry, flip the cover and glue the pieces from the design. I used the pins to make sure they wouldn’t move and to prevent the fabric from staining or hardening with the glue. (Bookbinding cement is very noble though)
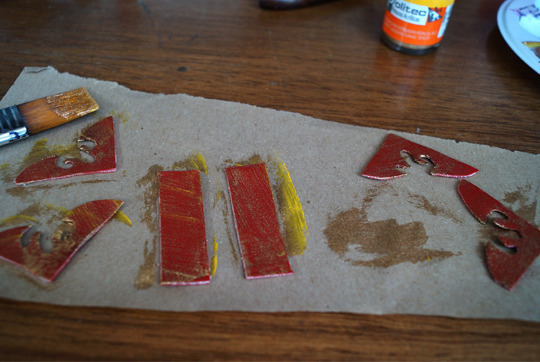
Time to coat your extra pieces. Since most metallic paints have an annoying transparency to them, we’re first making a mix of yellow, a bit of the gold paint and a little drop of red. The red should turn the yellow darker, not orange. Give it the first coating and let it dry. Give it another coat of yellow, and then at least two of gold, there’s no need to paint the side you’ll glue on but I did it just in case.
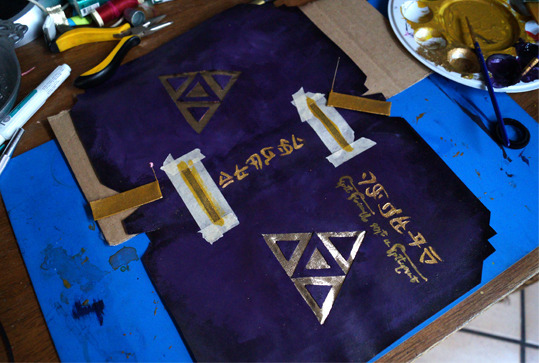
For the second line in the spines I made a mask with masking tape and painted them the same: two coats of yellow and two or more of gold. Remove the tape and correct if necessary. I used the cut parts to measure the position and length.
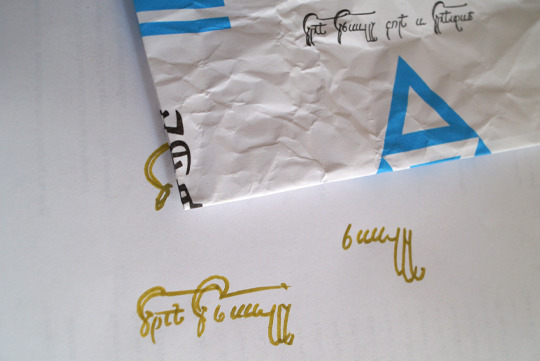
Meantime I practiced the ancient tongue script on a sepparate sheet of paper as indicated by my stencils.
Once your parts are ready, take your lettering stencil and cut out the words, careful with the closed shapes or you’ll have to draw the lines by hand or correct the centers. Use the pins to fix the stencil and a thick paper so the humidity would let me use it more than once. With the thin brush(es) apply two coats of yellow and at least two of gold. Repeat on back and spine or wherever you want.
Remove the stencil carefully and correct any mistakes.
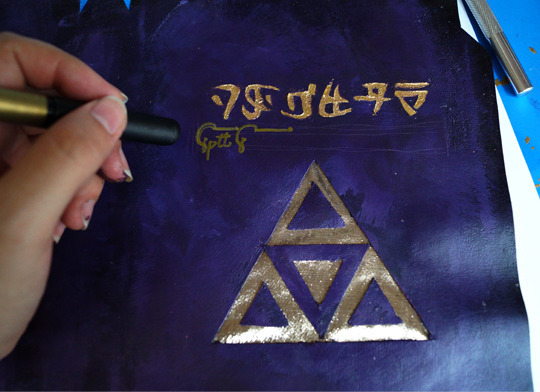
With the golden marker, write the ancient tongue message on your pad. I scratched a grid with the x-acto to make sure I didn’t get out of line, then repainted the scratches.
NOTE: The title stencil reads GOETIA, but I couldn’t find the font for the runes used in Awakening and didn’t feel like vectorizing so I used a Zelda font which is very similar. The ancient tongue message reads “Not Really just a Noptepad”.
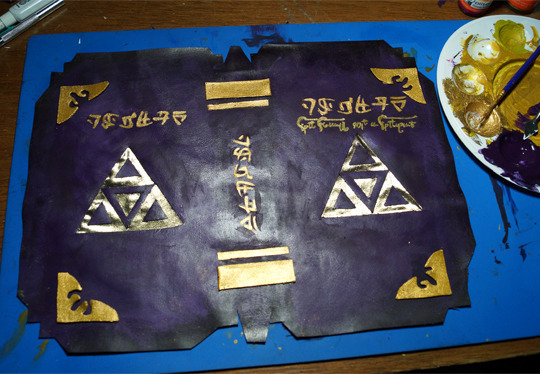
Glue the spine lines and coat again with varnish, don’t worry the fabric should be fine. I gave it several coatings of varnish so the letters wouldn’t tore off the previous acrylic layer. You may add varnish to the corners separately or once the book is complete.
(The corners are just put on for reference, I’ll glue them last)
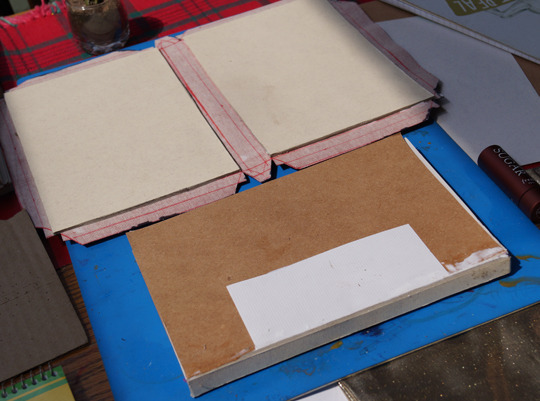
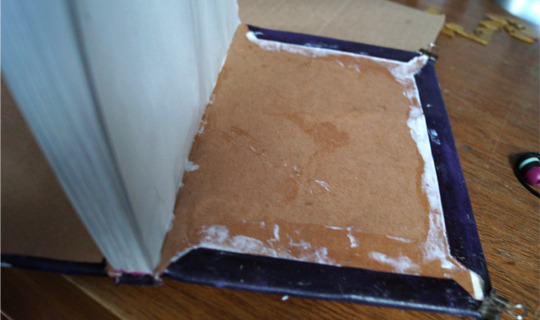

Next, paste it together accordingly to the cardboard/hardcovers of your notepad, add a kraft sheet on top to cover the flaps and firmly glue the spine parts.
Finally, glue the corners. You may varnish one last time if you didn’t coat the corner cutouts. Let it dry completely.
Ta-dah! Your magic tome is ready, try combining different papers (for notes, or special drawing paper, you name it!). You can create your own stencils for other designs, FE-Themed or otherwise, enjoy!
#fe cosplay#diy#maligcrafts#goetia#magic tome tutorial#cosplay tutorial#diy tutorial#bookbinding cover#book cover tutorial#goetia tutorial#i cant believe thid is still in my drafts wtf#fe13#crafts
5 notes
·
View notes
Last Seen Blogs

oxventurecrackheadcanons
This Is A Dumpbox Of Oxventure HCs, What About It?

nowritkir
My Mood For Today

monttagues
whatever our souls are made of

anothermcytblog
POV: It's 2012 again

antara93
Antara Dhar