#paint calculator per square feet
Text
Revamp Your Walls with JK Wall Putty 20 KG: Quality and Affordability at Site Supply


Introduction:
Transforming your walls into a masterpiece of smoothness and durability has never been easier, thanks to JK Wall Putty available in the convenient 20 KG packaging at Site Supply. Renowned for its superior quality and unmatched performance, JK Wall Putty has become the preferred choice for builders and homeowners alike. In this comprehensive guide, we delve into the world of JK Wall Putty, exploring its benefits, pricing, and answering common questions to assist you in your home improvement journey.
Unveiling JK Wall Putty: Quality Redefined
JK Wall Putty is a premium-quality, water-resistant white cement-based putty that acts as an excellent base for painting. It provides a smooth and even surface, enhancing the longevity of your paint while ensuring a flawless finish. At Site Supply, we take pride in offering this high-grade product, providing our customers with the best solutions for their construction and renovation needs.
FAQs: Navigating Common Queries
How much area does a 20 kg wall putty cover?
A 20 KG bag of JK Wall Putty from Site Supply can cover approximately 180 to 200 square feet, depending on the surface's texture and porosity.
What is the price of 10 kg wall putty?
For pricing details on the 10 KG variant of JK Wall Putty, please visit Site Supply's official website. Our platform offers competitive rates, ensuring affordability without compromising on quality.
How much putty is needed for a 10x12 room? (10 12 कमरे के लिए कितनी पुट्टी चाहिए?)
To cover the walls of a 10x12 room, approximately 20 to 25 kg of JK Wall Putty is required. Site Supply offers convenient 20 KG packaging, making it ideal for your project.
How much putty is needed for a 12x12 room?
For a 12x12 room, around 25 to 30 kg of JK Wall Putty is recommended. Site Supply ensures you have access to the required quantity to complete your renovation project seamlessly.
How many kg wall putty is required for 100 sq ft?
Approximately 10 to 12 kg of JK Wall Putty is needed for covering an area of 100 square feet, ensuring a smooth and flawless surface.
What is the coverage area of JK wall putty per kg?
Each kilogram of JK Wall Putty can cover approximately 9 to 10 square feet, providing efficient coverage for your walls.
How much area does a 40 kg wall putty cover?
A 40 KG bag of JK Wall Putty can cover approximately 360 to 400 square feet, catering to larger projects with ease.
How do you calculate putty cost?
To calculate the cost of putty required for your project, multiply the total area to be covered (in square feet) by the required thickness of putty layer (in inches) and then divide it by the coverage area per kg. Site Supply offers competitive rates, allowing you to estimate your project costs effectively.
Conclusion: Enhance Your Walls with Site Supply
Incorporating JK Wall Putty into your home improvement projects ensures not just aesthetic appeal but also longevity. Site Supply offers a seamless experience, providing premium-quality products at competitive prices. Trust in the reliability of JK Wall Putty and the convenience of Site Supply to transform your walls into a canvas of perfection. Visit our website today to explore our range and redefine the beauty of your living spaces.
#buy cement online#building material#construction materials#white cement price#cement prices#birla white cement price in lucknow#buy j k white cement#buy white cement online
0 notes
Text
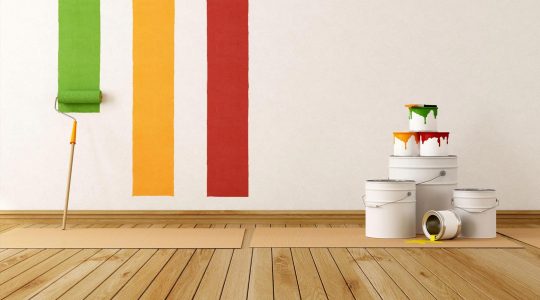
Estimate the cost of your Painting Project
The Painting Cost Calculator is a helpful tool that allows you to estimate the cost of your painting project based on the size of the area you want to paint, the type of paint you prefer, and other factors such as labor costs and preparation needs. By using this calculator, you can get a better understanding of how much you should budget for your painting project, helping you to make informed decisions and avoid surprises. Simply input the relevant information and receive an estimate of the total cost of your painting project.

PAINT CALCULATION
AapkaPainter’s Paint Calculator aims at reducing all the hassle that comes with selecting the best suitable paint for the walls of your home. With this in mind, we want to make sure that your paint cost estimation process goes smoothly and leads you to the results you want. We understand that choosing the right paint at the right price is indeed a difficult task. AapkaPainter's Paint Calculator makes the entire process simpler for you. Our Paint Calculator is designed to take into account all the necessary details to help you choose the best paint for your home and other living spaces.
WHAT IS PAINTING COST CALCULATOR?
A paint calculator is a highly useful tool for individuals who want to estimate the amount of paint required to cover a particular surface area. This tool calculates the quantity of paint required by inputting the desired coverage rate, usually measured in square feet (sq ft). It is a handy tool for individuals who want to paint their homes or any other surface, as it allows them to make an informed decision about the amount of paint needed to complete the project.
Apart from determining the amount of paint required, paint calculators also provide users with an estimate of the total cost of the project. By entering the cost of the paint per square foot, the calculator can provide an accurate estimate of the total cost of the project. This helps your budget for the house and ensure that you do not overspend. Using a paint cost calculator is an easy and convenient way to estimate the amount of paint required for a particular project. It eliminates the need for guesswork and ensures that individuals have an accurate estimate of the amount of paint needed. Whether it's a small touch-up or a large painting project, a paint calculator is an indispensable tool that can save individuals time, money, and effort.
HOW DOES THE PAINTING COST CALCULATOR WORK?
Our house painting cost calculator typically works by taking into account the total area of the surface to be painted, the type of paint required, and the labour costs involved. To calculate the area of the surface, you can use our paint calculator which takes in the dimensions of the space in square feet or meters. The cost of painting a 1 BHK or 2 BHK home would depend on the total area to be painted and the type of paint selected.
To use a house painting cost calculator, you need to input certain details such as the area to be painted, the number of rooms, the type of paint you want to use, and the labour charges. Some calculators may also take into account the type of surface to be painted, the number of coats needed, and the condition of the walls. It is important to note that the actual cost may vary based on factors such as the condition of the surface to be painted, the number of coats required, and the location.
Once you enter all the required details, the paint calculator India or AapkaPainter will provide you with an estimated quotation for painting work, including the cost of materials and labour.
HOW TO CALCULATE THE PAINTING COST BY SQFT?
The AapkaPainter Paint Cost Calculator is a convenient tool for estimating house paint cost for your ideal home with just a few simple steps. This calculator enables you to determine the cost of painting per square foot and also helps you choose the most suitable paint scheme from a wide range of options. By providing essential details about your house, such as its size and the number of rooms, homeowners can easily calculate the painting house cost using the AapkaPainter Paint Cost Calculator. This tool is especially useful for estimating the cost of wall paint, paint work, and building paint for your house.
Calculating the cost of painting per square foot for your house involves several factors. AapkaPainter services provide a comprehensive approach to estimating painting costs.
Here are the steps they typically follow:
Measure the area: Determine the total square footage of the surfaces that need to be painted. This includes walls, ceilings, trim, and any other relevant areas.
Determine the painting house cost per square foot: Our services consider the type and quality of paint you choose. Our experts will provide you with the paint cost per square foot based on the specific paint products you prefer.
Assess the surface condition: A thorough inspection of the surfaces is conducted to evaluate their current condition. If any repairs, priming, or surface preparation are required, this will be factored into the overall cost.
Calculate labour charges: Our services take into account the complexity of the painting work, such as the number of coats needed, intricate designs, or high ceilings. They provide an estimate of the labor cost per square foot based on these factors.
Include additional expenses: Apart from paint and labour, there might be additional costs associated with the painting project. This can include the cost of materials like brushes, rollers, tape, drop cloths, and any scaffolding or ladders required.
Factor in overhead costs: AapkaPainter services consider the overhead costs, such as transportation, insurance, and administrative expenses. These costs are proportionally distributed across the project and incorporated into the estimate.
Provide a detailed quote: AapkaPainter services will present you with a comprehensive quote that includes the cost per square foot for paint, labor charges, additional expenses, and overhead costs. We will give you a clear understanding of the overall painting cost.
The actual cost may vary depending on factors such as the location, size of the project, complexity of the surfaces, and the specific requirements of the customer. Therefore, it is recommended to reach out to AapkaPainter services to get an accurate and personalized estimate for your paint work.
0 notes
Text
How Much Does It Cost to Paint a House Exterior?
Exterior House Painting Cost Guide
Painting the exterior of a house can dramatically enhance its curb appeal and provide protection against the elements. However, homeowners often wonder about the cost involved in such a project. The cost to paint a house exterior depends on various factors, including the size of the house, the condition of the surfaces, the type of paint used, and additional factors that can impact the overall expense. By understanding these factors, homeowners can better estimate the cost and plan their painting project accordingly.
Cost To Paint Exterior by Square Foot
When estimating the cost, one crucial step is determining the square footage of the house. To calculate the total square footage, you can use the formula Length x Width = Total Square Footage. This calculation becomes easier if you keep in mind that one foot is equal to 12 inches, and one square foot is equivalent to 144 square inches. Similarly, for metric measurements, one square yard is equal to nine square feet (3 ft length x 3 ft width). In the metric system, one meter is equivalent to 3.28084 feet, and one square meter equals 10.7639 square feet.
By understanding these conversion factors and formulas, you can accurately calculate the square footage of your house when discussing your project with a house painter in Windsor.
Exterior Price Calculator
To provide a rough idea of the cost, let's look at average exterior painting costs based on square footage:
1000 sq ft: $3,030
1500 sq ft: $4,544
2000 sq ft: $6,059
2500 sq ft: $7,576
3000 sq ft: $9,091
3500 sq ft: $10,605
More Exterior Painting Price Factors
In addition to square footage, several other factors can influence the overall cost of painting a house exterior. These include:
Caulking Cost Per Linear Foot:
The cost of caulking typically ranges from $0.46 to $0.88 per linear foot. Caulking is necessary to seal gaps and prevent moisture penetration.
Power Washing Rates Per Hour:
Power washing the exterior surfaces before painting can remove dirt, debris, and loose paint, ensuring a clean and smooth surface for paint application. The average power washing rates range from $50 to $80 per hour.
Scraping, Sanding, & Priming Price Per Sqft:
If the exterior surfaces have peeling or cracked paint, scraping, sanding, and priming may be required. The cost for these preparation tasks typically ranges from $0.58 to $0.93 per square foot.
Prep Work Labor Rates:
In addition to material costs, labor expenses for prep work should be taken into account. Labor rates can vary depending on the complexity of the project and the region. Hiring professionals for proper surface preparation is crucial to achieving a long-lasting and high-quality paint job.
Exterior Paint Cost by the Hour:
When it comes to hiring a house painter in Windsor, it's important to consider the average labor cost for exterior painting. The cost typically ranges from $54 to $91 per hour, but it's crucial to keep in mind that painter labor costs can vary significantly depending on the city or region. Therefore, when planning your project, it's advisable to collect quotes from local painting contractors. This will give you a more accurate estimate tailored to the Windsor area.
While the provided information serves as a general guide, it's essential to understand that these figures represent average estimates. The actual cost to paint a house exterior can vary based on various factors. The complexity of the project, the type of paint selected, and any additional repairs or surface treatments required can impact the overall cost. Furthermore, there may be regional variations in labor and material costs, which should be taken into account.
To obtain a more precise estimate for your specific house painting project, it is highly recommended to consult with professional painters or painting contractors in Windsor. They will be able to assess the unique characteristics of your house, provide a detailed quote, and offer valuable insights and recommendations based on their expertise. By working closely with a Windsor house painter, you can ensure that your project is completed to your satisfaction, both in terms of quality and budget. We are available for residential, commercial, cabinet, and limewash painting services. For more information please visit, or website or contact us.
1 note
·
View note
Text
How Long Does it Take to Paint a Room

Painting a room is a project that some homeowners try to tackle on their own. But how long does it take to paint a room? The answer to that question depends on several factors, including the size of the room, the number of walls, the type of paint, and the painting technique used. In this blog post, we'll break down all those factors so you can have a better idea of what to expect when painting your own home.
How Big Is the Room?
The first factor to consider is the size of the room. An average room size is about 432 square feet according to the National Home Builder Association. For most painters, this room size takes about 4-6 hours from start to finish including preparation and cleanup. On average, it takes forty seconds to paint per square foot. When you hire professional painters, they can do it in half the time!
To get a better idea of how long it will take to paint your specific room, try this quick calculation:
Number of walls x height of walls x width of walls / 100 = gallons of paint needed. For example, if you’re painting a 10x10-foot room with 8-foot ceilings, you would need 0.80 gallons of paint. Most cans of paint contain around 1 gallon, so for this size room, you would likely only need one can.
Now that you know how much paint you need, you can estimate the amount of time it will take to apply it by using this formula:
Gallons of paint x 8 / hour = hours to complete Using our previous example, 0.80 gallons x 8 hours = 6.4 hours. This means that, assuming you have everything else ready (more on that in a minute), you should be able to complete the job in just over six hours. Of course, this is just an estimate—the actual time may be slightly less or more depending on your individual painting speed.
Of course, these are just estimates; the actual time to complete the paint job will vary depending on your individual circumstances.
Prep Work
The first step to paint a room is prep work. This includes tasks such as removing furniture from the room, laying drop cloths to protect surfaces that will not be painted (such as flooring), and repairing any damage to the walls (such as cracks or holes). All of this work can take quite a bit of time, especially if you are working alone.
Depending on the condition of the walls, prep work can also include sanding (to create a smooth surface for the paint to adhere to) and priming (to help cover dark colors or stains). These tasks can add even more time to the painting project.
Number of Walls
Another factor to consider is the number of walls. If you're only painting one wall—perhaps as part of an accent wall—you can obviously do that much faster than if you're painting all four walls in the room.
Type of Paint
The type of paint you choose will also play a role in how long it takes to paint a room. For example, Latex paint is the most common type of paint and it's easy to work with and cleaning up is a breeze. Acrylic paint dries quickly but doesn’t provide as much coverage as oil-based paint. So if you’re using a light color, you may need to apply several coats of acrylic paint to get even coverage. On the other hand, oil-based paint takes longer to dry but provides better coverage, so you may only need one coat.
How many colors are you using?
If you’re painting an entire room in one color, then you can likely finish the job quicker than if you divided the space up into multiple colors. However, if you’re planning on painting stripes or another design onto your walls, that will obviously take more time.
The Right Tools for the Paint Job
Another factor that can influence how long it takes to paint a room is the type of painting tools you use. If you opt for paint brush instead of rollers, for example, the job will undoubtedly take longer since brushes require more time to evenly distribute paint onto surfaces.Synthetic-bristle rollers also tend to work more quickly than natural-bristle ones since they don’t absorb as much paint and can cover larger areas more quickly.Choosing quality tools can also help save time by reducing the number of trips back and forth to the paint store for touch-ups or repairs—so don’t skimp!
Tip: When painting trim or other small details with a brush, use an angled sash brush instead of a standard flat brush. These brushes are designed specifically for cutting in clean lines around trim and are shorter than standard brushes, so they’re easier to maneuver in tight spaces.
Tip: Use painter’s tape rather than masking tape when taping off areas like baseboards or trim—it’s specifically designed not to pull off paint when removed and can usually be left in place for up to 14 days without damaging surfaces beneath it.
The Best Time for Painting project
While there's no definitive answer for when the “best” time is to paint your room, there are certain times of year when painting may be more convenient (or less convenient) depending on your climate. For example, if you live in an area with cold winters, it's probably not going to be ideal to try and tackle a painting project in January. The same goes for areas with hot summers - August might not be the best month for painting if you don't have air conditioning in your home!
In general, spring and fall tend to be ideal times for exterior painting projects since the weather isn't too hot or too cold. For interior projects, mid-late spring or early fall might work best in most climates since windows can be left open during those times of year without risking too much heat or cold entering the home. Of course, this may not always be possible depending on your schedule so ultimately it comes down to what works best for you. Just remember that trying to paint when it's too hot or too cold outside can make the job harder (and take longer) so take that into consideration when planning your project timeline.
DIY or Hiring Professional Painters?
When it comes to painting a room in your home, you may be wondering if it's better to hire a professional painter or do the job yourself. There are pros and cons to both, so it really depends on your specific situation.
If you decide to paint the room yourself, keep in mind that it will probably take longer than if you hired a professional. The prep time, priming, and painting is a time consuming process. You also need to be careful not to use too much paint, as this can lead to a mess.
Professional painters usually have painting techniques that the average person does not know. On the other hand, if you're working with a professional painter, the process will be much smoother and faster. Professional painters have the experience and expertise to get the job done quickly and efficiently. They also have access to high-quality painting materials that can help ensure a beautiful, long-lasting finish.
Once the job is done, the painter will clean up their materials and remove any painter's tape, put switch plates and pictures back, and move the furniture back in. Then, all you'll have to do is sit back and enjoy your newly painted room!
Read the full article
0 notes
Text
HOW MUCH DOES IT COST TO PAINT THE INTERIOR OF A HOUSE?

A new coat of paint is a great way to not only refresh the aesthetic appeal of your home, but also rejuvenate the quality of your daily lifestyle experience. Imagine the impact of bright new colors (or subtle) on your mind and mood, as you settle comfortably in your living room or head into the kitchen to fix up a meal or wander into your children’s room for a playful session. It’s an investment that’s sure to give your daily life a whole new layer of fun, cheer and excitement.
Before you start looking for interior house painters, house painting services or an exterior painting contractor, we recommend you give this piece a quick read. Compiled by the experts at Hynes Roofing & Siding – a high-quality home improvement company you can count on for painting and a whole lot of other services, this article will give you a broad idea of the costs to prepare for, when considering a paint job for your home.
The overall cost of painting a home’s interior
Your painting estimate is directly proportional to the size of your home. The more square feet you expect the painter’s rollers or brushes to cover, the higher your overall painting cost is going to be. As per the national average, the cost of painting a home ranges from $1800 to $10,000 depending on the square foot area that needs to be covered. Here’s a detailed breakdown of the interior painting costs, calculated as per the size of a home. This reckoner will also prove useful when checking costs with house painting services or exterior painting contractors in your local area.
Home Area (Square Footage) Average Cost
800 $800 to $3200
1000 $1000 to $4000
1200 $1200 to $4800
1500 $1500 to $6000
1800 $1800 to $7200
2000 $2000 to 8000
2500 $2500 to $10,000
3000 $3000 to $12,000
(*Source: https://www.thisoldhouse.com/painting/reviews/interior-painting-cost)
The cost of painting individual spaces
While the table listed above gives you a glimpse of the overall cost you’re likely to incur, here’s a specific room-by-room or space-by-space breakdown of individual costs.
Bedrooms
An average bedroom measuring up to 132 sq. ft. will cost roughly $300 to $800 to color up, when you engage house painting services or interior house painters ‘near me’. A larger master bedroom however, may raise the cost up to $1500.
Living Room
These are among the larger spaces within a home and not only take more time and effort but more materials as well. Since the size of a living room varies from home to home, the cost to paint this space usually ranges from $600 to $2000. The actual cost may vary depending on the house painting services you ultimately choose to hire.
Dining Area
The space that brings your family together for great conversations over flavorsome meals. The cost to give this space an appetizing new look could range from $600 to $1000. Make it a point to check prices with multiple interior house painters ‘near me’ or house painting services to get the best quote.
Kitchen
A kitchen has a lot of fitments – from cabinets to appliances to sinks. As a result, this area has comparatively less wall space to cover than other spaces around the home. The cost of painting a kitchen would lie in the range of $200 to $750.
Kitchen Cabinets
Apart from the walls, you may need to repaint the cabinets that provide a combination of utility and aesthetics to your kitchen. Painting cabinets would cost you between $3 to $8 per sq.ft. area of the cabinet.
Bathrooms
This area is smaller in space and will therefore have a reduced share in the overall cost of painting your home. A modest bath would cost you between $50 to $150 while a master bath could cost you between $350 to $650.
Hallways
The passage into your home is where you’ll experience a higher density of people movement. This area requires paint of a tougher caliber and will add between $300 to $1000 to your total cost.
Ceilings
As compared to walls around your home, you can save on painting overhead spaces by using paint that’s less priced. Expect to spend between $1 to $2.50 per sq. ft. of ceiling space, no matter which house painting services or interior house painters ‘near me’ you finally engage for the job.
Doors
Among the easiest to paint surfaces, doors will demand between $40 to $100 per door, out of your overall painting cost.
(*Source: https://www.thisoldhouse.com/painting/reviews/interior-painting-cost)
The cost of labor
Painting your home requires a considerable amount of pre-painting or prep work. From removing stains to sanding uneven spots to covering up holes to sealing cracks and more, there’s significant manual effort involved in making your home ready to receive its next coat of color. The cost of labor is likely to range between $20 to $60 per hour, and depending on the requirements, could scale up to $75 and upward.
The cost of paint
There are two things to consider when calculating the cost of paint. One, the price of paint per gallon and two, the number of gallons needed to cover your entire home. Here’s how you can arrive at the rough figure all by yourself, without depending on interior house painters, exterior painting contractors or house painting services.
Calculate the surface area of your home in square feet and then arrive at the net surface area by subtracting the area of windows, doors, cabinets and other such elements. Since a gallon of paint can roughly cover approx.. 400 sq.ft. of area in one coat, divide your net surface area by 400 to calculate the number of gallons needed for one coat. And because a thorough paint job would require at least 2 coats, multiply this figure by 2 to arrive at the actual amount of paint material your home will need.
Paints sell between $15 to $60 per gallon with base brands costing $15 to $35, mid-tier brands costing $35 to $50 and top brands costing $50 to $60.
All you now need to do is multiply the cost per gallon of paint that you choose with the number of gallons that you have already computed, to arrive at the rough total cost of painting your home.
0 notes
Text
Corrugated Roof Sheets
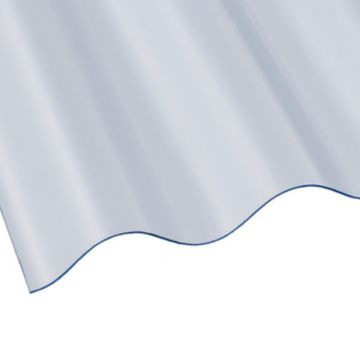
Corrugated roof sheets are a perfect option for a variety of different roofs. The following article will explore the types of corrugated roof sheets, the noise factor of these roof sheets, and how to properly nail corrugated roof sheets. It will also help you decide if corrugated roof sheets are the best choice for your home.
Noise factor of corrugated roof sheets
Corrugated roof sheets are a popular roofing material. Unlike a solid sheet of metal, corrugations provide additional strength in a perpendicular direction. They can withstand more stress and bend longer than a flat sheet, and they are also easy to install. Most corrugated roof sheets are made of steel, and their pitch can vary from 25 mm (one inch) to 125 mm (5 inches).
Noise-absorbing properties of corrugated roof sheets mean that they reduce the noise from passing vehicles. However, this material is more expensive than some other alternatives. It can also be harder to cut and install, and may require the services of a professional. It can also be noisier during heavy rain.
The noise-absorbing properties of corrugated bamboo roof sheets are better than those of zinc or plastic. They have the lowest thermal transmission coefficient and the highest thermal resistance. Bamboo sheets are a natural resource and are a healthy alternative to traditional corrugated steel roofing. They are also available in different sizes and can be trimmed for special applications.
Cost of corrugated roof sheets
The cost of corrugated roof sheets depends on how large the roof is and what is covered. Corrugated metal panels come in a variety of gauges. Twenty-gauge is the thickest and 29-gauge is the thinnest. Twenty-four and twenty-six-gauge corrugated metal roof sheets are more common.
Corrugated roof panels are inexpensive alternatives to asphalt shingles. The cost of corrugated metal roof panels is around $1 per square foot for unpainted galvalume steel and as little as $5.00 per square foot for thicker steel with a premium Kynar 500 color coating. Using a metal roofing calculator will help you determine the exact cost of corrugated roof sheets for your home.
Corrugated metal roof panels are typically two to three feet wide and come in various lengths. They overlap along their curves and are fastened together with metal screws. These screws penetrate two panels, as well as the roofing deck or substrate. Unlike asphalt shingles, metal roofs are resistant to fire and hail. Moreover, many states offer a home insurance discount to homeowners who have metal roofs.
Types of corrugated roof sheets
Corrugated roof sheets are one of the most popular types of roofing material. They are strong and durable, and can be made of a variety of materials, including galvanised steel. These sheets are also highly resistant to rust, making them a great option for many types of roofing projects. Additionally, these sheets are extremely easy to install and are relatively quiet, even during torrential rains.
There are two main types of corrugated roof sheets, the Type B and the Type F. Type B is typically available in galvanized steel, while Type F is available in stainless steel and aluminum. The Type F has a standard sheet width of 36" and can be ordered in galvanized or painted steel.
Corrugated roof sheets are easy to install, and most manufacturers supply the fixings and flashings you need to complete the job. However, there may be slight differences between brands and types, so be sure to follow the manufacturer’s instructions for installation. Following these instructions will ensure proper installation and prevent voiding your warranty.
Nailing corrugated roof sheets
When nailing corrugated roof sheets, you must remove the nails first, before moving on to the next step. Before doing this, make sure that you have the right safety gear and a ladder stopper. You may also want to use a nail puller to loosen any nails that may be left in the roof. After removing the nails, make sure that you clean up any debris that remains in the corrugated roof sheet.
When installing corrugated roof sheets, you need to take into account the prevailing winds. If the wind is blowing the sheets apart, they may cause damage to the structure. When attaching the corrugated roof sheets, ensure that the overlaps are the correct size and are 125mm apart. Make sure to use a spacer between the overlapping corrugated sheets and the fascia. You also need to make sure that the overhangs between the overlapping sheets do not exceed 70mm.
Once you have found the right size and type of nails, you can begin nailing the corrugated roof sheets. You can use nails that are longer or shorter. If you want to make things even easier for yourself, use hammers that have a flat head. This will help you find the nail head quickly and easily.
0 notes
Text
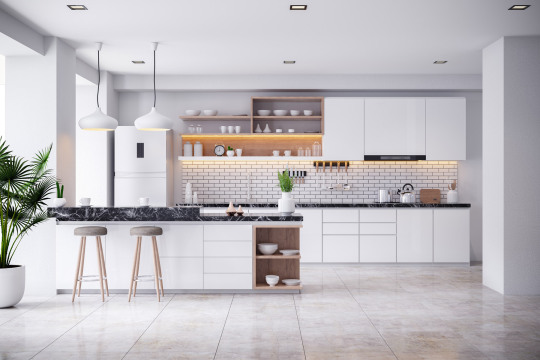
Modular Kitchens: Choosing a Colour Palette
You must have read a lot about Modular Kitchens. It’s true they provide a lot of benefits and have really changed lives. But as much as designing and planning a modular kitchen is important, it’s also important to choose the right colour. A modular kitchen is suitable for every home. There are different modular kitchen sizes for different spaces. The average modular kitchen size is 8 feet wide and 10 feet long.
Colours: If you look around you’ll see a lot of colours. Before choosing a colour a lot of things have to be taken into consideration, as it’s crucial to select the right colour.
The colour that you choose should be good, it should welcome you. A colour can change a person’s mood. So colours play an important role.
How to choose the right colour for your kitchen?
The colour that you choose has to match your personal style and it has to complement the interior design of your house.
The kitchen that you build is going to be with you forever so you need to choose a colour that’s a classic.
If you have small homes, then go for light colours as it will make the room spacious.
If you have a big kitchen, with lots of lighting then you can opt for dark colours.
Before selecting a colour for your kitchen, it’s essential to consider the space, size and natural lighting of the kitchen. There are also many themes like:
● Modern
● Scandinavian
● Eclectic kitchen theme design, etc.
Choosing the right colours for your walls, floors, etc is also essential as it will help to flatten the look. Adding a vibrant backsplash in your kitchen will add a splash of colour. You can add different kitchen shutters as well to your cabinets it will give a nice look.
The kitchen flooring will also determine how your kitchen will appear. When choosing the flooring, it’s important to keep the safety part in mind. It should not be slippery or there will be a lot of accidents.
To make your kitchen look more attractive you can add a finish as it will give your kitchen a sleek look:
1) Acrylic finish: It is a glossy type of finish that will make your cabinets shine. But you need to keep wiping them as they are prone to stains and smudges.
2) PU finish: It’s another high gloss finish. It’s a royal finish, its colour painted over MDF boards.
3) Veneer: Veneer gives a classic look but it’s hard to maintain it.
4) Matt laminates: It’s a popular choice because they are affordable. There is a wide range of matt laminates.
If you’re confused about which colour to choose, here are some colours that you can try.
Modular Kitchen Colour Ideas:
● Green and Gold
● Grey and Yellow
● Brown and Mint Green
● Pink and White
● Yellow and Black
Here are some Modular Kitchen Colours Ideas that you can try. Lighting is also an important factor as it will make the kitchen look more beautiful. There are many lights that you can put in your kitchen:
● Ambient lighting.
● Under Cabinets Lightings, they help to illuminate your countertops.
● Task lightings
● Overhead lightings.
Countertops, stove, etc need to be well-lit so it makes it easier for you to cook and do other activities in the kitchen.
Wondering, how much will your kitchen cost if you colour to customize it?
The modular kitchen can be customised as per your needs. The cost of a modular kitchen is given after calculating the total square feet of the kitchen. The factors that determine the cost of the modular kitchen are:
● The layouts that you choose.
● Brands
● Materials, choose high-quality materials.
● Space available.
The above factors are also taken into consideration while calculating the cost of the modular kitchen. A modular kitchen is affordable and you can also select different materials, colours, etc and build a kitchen.
It’s important to choose the right colour. Now you know the colours that can be selected depending on your space. If you want more modular kitchen colour ideas you can get in touch with a designer. Even catalogues have a wide range of designs, colours, etc.
0 notes
Text
Real Remodeling Costs
Home remodel costs vary widely from country to country and can be up to 40 percent higher than the national average. This is because estimates are based on actual projects, not a standard national average. Additionally, contractors are not always as cheap as they might seem. Here are some tips to keep in mind when calculating your project costs. Read on to discover the real remodeling costs of your next renovation. And remember to always ask for multiple estimates before you begin.
Home remodeling costs vary by up to 40 percent more than the national average
The cost of renovating your home depends on the size of the space. If you're looking to add a master suite or expand your kitchen, you should budget between $40 and $125 per square foot. If your home is more than 3,000 square feet, you'll need to spend between $75,000 and $100,000 for your renovation project. However, don't think that having more bedrooms means higher costs - they don't necessarily correlate. You can expect to pay between $10 and $25 per square foot for a bedroom and up to $250 or $400 for your kitchen.
Mid-range home renovations are the most economical way to upgrade your home. They may cost from $48,000 to $75,000, depending on the scope of your project, the number of rooms you're renovating, and local labor rates. High-end home renovations cost upwards of $100,000, and may involve a complete overhaul of your home. High-end renovations can be as involved as adding a new roof, rearranging your rooms, or replacing appliances.
If you're considering a remodeling project, make sure to factor in the costs of materials and labor. Materials for a kitchen remodel, for example, may cost forty percent more than the national average. The costs of a bathroom remodel, on the other hand, may be just $5-ten percent higher. If you're a novice at home renovation, you'll be shocked by the unexpected expenses and delays.
Estimates are based off of actual projects
An accurate estimate is crucial to project management. It motivates team members to finish projects and facilitates rigorous accountability. Estimates are difficult to come by; there is no way to simply make one up off the top of your head. They are intricate and based on actual projects. Experts in the field share the keys to mastering the estimating process. Having the knowledge of normal steps to follow in estimating a project is vital for your career.
Expert judgment estimating is another method of determining project costs. It is commonly used for intermediate and order-of-magnitude estimates. It relies on drawing parallels between past projects and future projects. It is often presented as a range, but this can limit its use. However, it can make the project manager accountable. The more accurate the estimate is, the better. Therefore, experts recommend the use of expert judgment.
Another key tip is to avoid inflated estimates. The project team must communicate the results of the project to the marketing and customer teams. This step is crucial, because most customers will revise their expectations after being presented with the estimates. Over time, these estimates will become apparent. It is important to note that there are three main types of estimates. All of them have varying degrees of uncertainty. This is a common mistake among project teams.
Contractors aren't always as cheap as they seem
When selecting contractors, make sure you check the references. If you're getting bids from contractors who don't have skin in the game, their estimates are likely to be lowball. Then, if they end up overcharging you, it's difficult to switch to a more affordable contractor. Before you hire a contractor, create a plan of the remodeling project. It can help you focus discussions with contractors about time estimates and labor costs.
Remodeling an exterior part of your home will cost a lot more than a simple paint job. A kitchen can cost from $10,000 to $15,000, while a 3,000 to 4,000-square-foot home will cost anywhere from $75,000 to $100,000. And don't think that more bedrooms means lower costs - the more square feet you remodel the more you will pay. Typically, remodeling a kitchen and a bathroom can cost anywhere from $10 to $25 per square foot.
Home renovation shows are an excellent way to get a general idea of the cost of a renovation project. While a general contractor's fee can range anywhere from ten to twenty percent of the budget, it can vary by up to 40 percent from one area to another. This is because the market for home remodeling varies from state to state, and it's common to see a difference of up to 40 percent between two neighborhoods.
.video-container {position: relative;padding-bottom: 56.25%;padding-top: 1px; height: 0; overflow: hidden;} .video-container iframe, .video-container object, .video-container embed {position: absolute;top: 0;LEFT: 0;width: 100%;height: 100%;}
youtube
from https://remodelassist.blogspot.com/2022/05/real-remodeling-costs.html
0 notes
Text
How can a Painter Estimation a Paint Job?
There are from Learn more that a plumber might estimate the paint job.
These kinds of will be "guestimating", square footage of the region to be coated, and a thorough "take-off".
"Guestimating" will be when the painter or estimator comes in order to the job, looks things over, in addition to 5 minutes side write an approximation on a scrap of paper, some sort of match book or perhaps the back of the business card. The benefits of this type of estimation are that the particular painter may influence the owner that this particular painter is definitely an incredible person, a sorcerer of painting, some sort of guru from the car paint world. I am talking about precisely how else can the artist only spend five minutes in the particular house and produce an estimate thus quickly. Another advantage would be that the painter won't have to put virtually any energy in to the estimation. The negatives in order to this type involving estimate are several. One is that this client may include other contractors appear to do the idea and may note that the other group of painters don't guess, or "wing-it", they spend a good amount of time requesting questions and calculating. The second negative is definitely that this technique is of course remarkably inaccurate, and could cause problems for that owner and typically the painter. The user probably will get an inferior job, in case the painter starts out with the inferior approximation then just just how good of a coloring job does the crew do? The plumber will probably lose money because things obtain missed or neglected with this less than professional approach.
The square footage way of price is once the artist measures the main market square footage of typically the floor or floor surfaces from the areas to be able to be painted and quickly multiplies the particular square footage moment the price per square feet, that a person told him might work if not this individual has averaged their estimates and developed an average price which he may or perhaps may not adapt. This system is how contractors compare estimates which is probably where the painter learned in order to estimate, a really poor solution to imagine. The downfalls associated with this type involving estimate are quite much just like the "guestimate". One thing is that no two car paint jobs are actually alike, one might have lots of doors another may well be just wall surfaces. This is the painter who scuff marks his head and even wonders why the particular company never makes any money or loses money.
Typically the "Detailed Estimate", is usually where the painter or estimator thoroughly measures the ceiling and walls, in that case counts and notices the different forms of doors, windows in addition to moldings. The painter then calculates cleanup, preparation and clean-up. The painting company or estimator takes the total hrs and multiplies the hours times the particular contractor's historical work times that have got been saved by previous work. This specific painter generally has a better grasp from the paint job. This specific estimate is very accurate and very professional. It is strange if the service provider loses money about estimates that are done using this particular technique and the client can be assured that the job will be done to the particular detail of typically the estimate.
1 note
·
View note
Link
Aapka Painter is India’s largest house painting services in Hyderabad, Bangalore, Pune, Mumbai, and Delhi NCR. We provide cost effective Asian Paint home solutions for different brands such as Asian Paints, Berger Paints, Kansai Nerolac Paints, and Dulux Paints. Call us @8088777173 to get free consultation Services. 8088777173
#paint cost#wall paint calculator#paint cost calculator#cost to paint a house#paint calculator per square feet
3 notes
·
View notes
Text
@cthene @squeeto and @failedintsave have written three distinct flavors of Skwistok Apocalypse Fic and they all live in my head rent free so I felt like doing a lil end-of-the-world scene. (If a modified version of this pops up in the Stay Alive sequel that doesn’t exist shh shh shh shut up ❤️)
The bunker didn’t offer much in the way of creature comforts. A holdover from the Cold War, it was 1500 square feet of steel buried beneath four stories of cement. There were suggestions it had been built for a group, but there was only one bed—a twin cot that only Pickles could fit on comfortably, though Toki made due if he tucked in his knees. The bar and the armory were fully stocked. A connection to the outside world was available via a 360-degree live feed of the surface, visible from a claustrophobic surveillance room. It wasn’t impenetrable, but it was a lucky find. And until they received marching orders from Offdensen, it was home.
The only spray of color amongst the sterility was a faded, amateur mural canvasing the entirety of the southwest wall. A panorama of the snowy, mountainous Montana landscape. The proportions are all out of wack: Distant trees and prominent foreground boulders seem to have the same weight and dimension. Toki sits on the floor opposite it, eyes fixed on the blobby bug-eyed buffalo grazing the sorta serene-ish tableau. He thinks of the person who painted this. How they were probably really proud of it. How making it probably brought them some form of peace. How they were long dead. The despair makes him nauseous.
Skwisgaar is curled in the space between Toki’s legs, head resting on his chest, arms wound lightly around his waist. They all agreed to take turns “keeping watch” in the surveillance room. But everyone was on-edge, everyone was scared, everyone was a little too focused on their own anxiety to notice how deftly Skwisgaar switched shifts. His impulse to assuage the others often tipped into the unhealthy territory but in the last few weeks it had made a full tilt into self-destruction. He’d been holed up in that room, delirious with sleep deprivation, for almost two days days before Toki caught on. He was only convinced to leave when Toki started crying. (He’s not proud of that tactic, but hey, it’s the end of the world. Lots of people are doing lots of things they’re not proud of.)
As he idly plays with the ends of Skwisgaar’s hair, Toki hears the echo of footfalls drawing near. They’re so swift, so light, Toki knows exactly who it is well before the worn sneakers appear in his periphery.
“Hey,” Pickles says.
“Heys,” Toki answers.
A half-empty handle of vodka dangles from Pickles’s fingers. He tips his chin at Skwisgaar’s sleeping form. “Why doncha take th’bed?”
“Nathan’s using its.”
Pickles nods and takes a long pull from his drink. A beat passes.
“…That buffahlo is pretty fucked up, huh?”
“I can’ts stops looking at its.”
“I’ve never SEEN a buffahlo in real life but I’m,” he pauses, squinting to calculate, “73 percent sure they don’ look like that.”
“Onlys 73 per-cents?”
Pickles shrugs. “I mean, hey, maybe buffahlos look exactly like that, I dunno whut I dunno.”
Toki’s silent laughter shakes him. But then a muffled moan vibrates against his collarbone.
“Toki?” He murmurs, sluggishly starting to rise.
He code-switches on instinct. To answer in English, with an audience, is too raw.
“Jeg er her.” He cups the base of Skwisgaar’s skull and guides him back to his chest. “Gå tilbake til sengs.”
Skwisgaar’s hold tightens. “Lämna mig inte.”
“Aldri, elskede.”
He settles against him and sighs. “Tack, älskling.”
Skwisgaar’s weight sinks into him, and after a few moments his muscles relax as his breathing falls into a slow, even rhythm. Again, it is quiet.
“Whut does it mean?”
Oh right Pickles is here.
“Whats?”
“Th’ e word and th’ a word you guys use fer each other.”
Toki freezes.
“At least I think they start wit’ an e and an a, I can’t be bothered t’ look up th’ spellin’ in that elven language a’yours.” He smiles crookedly but his eyes glass over. “That and we’re 40 feet underground and th’ internet doesn’t exist anymore.”
“You’ve heards us says dat?”
“Dood ya do it all’a time. I may naht know what yer sayin’ but I’m pretty good at pickin’ up patterns.”
He taps out an invisible rim shot, hissing the cymbal crash as he winks.
Toki briefly considers lying. But he knows it’s a waste—Pickles is primed to hacksaw through all his bullshit.
“It don’ts...translates, exactly, into English.” He waits a moment to see if Pickles accepts this as an adequate explanation. He doesn’t. Toki continues shakily: “Wells, it does but nots, um, de emotion…” He scrunches his nose and starts over. “Yous don’ts use it for everybodies, yous supposed to saves it for somebody who’s really…” Sighing, he thumbs Skwisgaar’s shoulderblade like it’s a lucky talisman. “I don’ts know whens we starts doesing it.”
“A while ago, dood.”
Oh.
“Oh. Um. Wells.” Heat rises to his cheeks. “Elskede in Norweigian means,” he winces, “beloved, and älskling ams kinds of de ex-quibbi-kent in Swedish buts it means, uh.” He tucks his chin to his chest and shields his eyes in embarrassment. “It means darling buts you don’ts use its de way you does ins English, it’s, um...”
His thumb and middle and index finger squeeze into his eye sockets so hard stars flash across his vision.
“...It’s somet’ings you use for de poirson what ams most specials to yous, likes de poirson you mights maybe marry one days wowee saysing all dis outs loud makes me feel real stupids cans I please stops?”
“Okey okey.” When Toki opens his eyes he sees Pickles waving his hands like he’s trying to break up a bad smell. “Asked an’ answered.”
The tips of Toki’s ears burn, a shameful sludge spreading thickly behind his sternum. He tips his head back, skull thunking dully against the wall.
“Don’ts tell de guys abouts dis, Skwisgaar will nevers forgive mes.”
“Nah, dood, don’ worry, this stays in th’ vault.”
The drone of the overhead fluorescent lights and the muted thrum of generators thrums like locusts. Skwisgaar inhales deeply, exhales sharply, and nestles closer. Toki’s gaze darts about the terrible mural, searching for something to latch to, but his focus swings as if by gravitational pull back to Pickles’s face. When he at last resolves to glance up at him, he’s braced for ridicule. But when he does, his tension deflates. Pickles doesn’t look like he’s about to make fun of him. Pickles looks like...Toki doesn’t know what Pickles looks like.
“Whats dat face?”
Pickles’s smile widens, head cocking to the side.
“Stops dat! What’s dat face!”
“What face! There’s no face! I don’ even have a face!” He bites his lower lip, muffling a chuckle. “Awright bud, I’m naht gunna lie, me and these other dooshbeegs have had our suspicions about the, errrr aaaah...”
He cinches one eye shut.
“...Nature of yer relationship. But none’a us suspected you guys were, y’know…”
He rolls the wrist holding the vodka, liquid splashing to the floor. Toki stares at him questioningly.
“...Fully in it.”
Toki blinks. “In whats?”
Pickles pinches his lips and squints as if to say, come on dude, but doesn’t press further.
“Welp.” He kicks backwards to push himself off the wall and stand upright. “It’s almost sunrise. Or sunset, I dunno, this steel box has really fucked up my internal clahck. But I’m gonna watch th’ sun do somethin’ wit’ Murderface until my shift on watch.” He pivots to face the long corridor leading to the surveillance room. I’ll see ya around.”
He pauses. He points a finger in the air, draws a small circle, and glances over his shoulder with a small smile.
“Abviously.”
He’s gone as quickly as he arrived.
Toki’s attention returns to the mural. The staticky grasslands. The angular mountains. The flat plane of the lake. Toki’s not an art guy but he knows this is bad. Still, it moves him. He doesn’t understand why. Maybe he doesn’t have to.
He and Skwisgaar have always talked around it. They’ve always had an understanding, leaving little secrets and codes for the other to crack. They did, mostly. It’s the same, mostly. But it’s the end of the world and Toki needs to say it out loud.
He buries his face in that soft golden crown and whispers, “I loves you.”
“I loves you, too,” is the sleepy reply.
He was wrong. It’s different. It’s better.
“Is likes Pickle says.” He pushes himself up to press his lips to Toki’s neck. “We’s fully ins it.”
32 notes
·
View notes
Text
How to Calculate the Cost to Paint a Ceiling

What type of property are you in?
Condo / Apt
Townhome
House
What is the approximate square footage of your property?
500 - 800
801 - 1300
1301 - 2000
2000 - 3000
Previous
Is this interior or exterior?
Interior
Exterior
Previous
How many levels?
1
2
3
Previous
Walls are assumed, do you want baseboards and door casings?
Yes
No
Yes and they are currently wood stain
Previous
Are we painting ceilings?
Yes
No
Previous
How many windows casings do you want painted?
None
5 - 8
9 - 15
16 - 25
Previous
How many doors?
1 - 3
4 - 8
9 - 16
None
Previous
Prep work
Basic - nail hole and screw holes
Advanced - Cracks, seams coming apart or small fist sized patches
Complex - significant drywall cutout and replacing
Previous
Lastly, are we doing:
Your whole unit
Roughly half your unit
Roughly a quarter of your unit
Previo
Are we doing?
Your whole house?
Only Siding?
Only Trim?
Previous
How many stories tall?
1
1.5
2
2.5+
Previous
What does the ground look like around your property?
Flat ground
Some slightly angled ground
Aggressive angle
Previous
What does your roof line look like?
No tiered roofing
Some roofing tiers
Multi tiered roofing
Previous
Are we doing?
Your full house
Half your house
One side of your house
Previous
Include or exclude doors?
Exclude
Include
Previous
Lastly, is your house
Victorian / Historic
English Tudor style
Multiple colors for trim and / or siding
None of these
Previous
Prep work
Light flaking, caulking
Medium peeling
Heavy peeling/rotted wood
Previous
Your Quick Estimate is:
Add your name & email to get a copy of this estimate. For an exact quote in just 10 minutes, add your phone and address.
Name:*
E-mail*
Phone
Address
Submit
Thanks
Thank you for using our quote service. We will contact you shortly
Close
A fresh coat of paint can do wonders for a room, and painting the ceiling is a great way to freshen up your home. But before you start painting, you need to calculate the cost of the project. The cost of painting a ceiling will depend on several factors, including the type of paint, the size of the room, and whether you hire a professional or do it yourself. In this article, we'll break down all the costs involved so you can budget for your project.
Cost to Paint a Ceiling
The cost to paint a ceiling will depend on the size of the surface area being painted and the type of ceiling you have. Certain ceiling types are more difficult to paint than others, so this will also affect total cost.
If you are planning on painting a ceiling in your home, it is important to know how much it will cost so that you can budget accordingly.
Size Of The Room
Hiring professional ceiling painters to help with a painting project in your home usually means paying by the square foot. The larger the room, the more square footage there is to paint, and it will cost more to have it painted.This is because not only does the size of the room impact the paint and material costs, but also the labor costs associated with painting a larger space.
To get a sense of how much paint you'll need, plan on one gallon for every 350 square feet. So, if your room is 700 square feet, you'll need two gallons of paint.
By Type
There are a few types of ceilings out there, and each one will have a different cost to paint. In general, most ceilings are just smooth surfaces. But in historic homes or unique rooms, you may find decorative plaster, tin, or other types of ceilings. Here’s a quick rundown of the most common types of ceilings.
Smooth Ceiling: The vast majority of ceilings are smooth, and they’re easy (and inexpensive) to paint. You can expect to pay $1 to $2.50 per square foot for paint and supplies if you hire a contractor.
Popcorn Ceiling: : This is a textured ceiling that has been around since the 1930s through the 1990s, but they’ve fallen out of favor in recent years. They were popular because they were easy to install and hide imperfections in the ceilings. If you want to remove the texture entirely before painting, it will cost between $2 and $6 per square foot. Part of this cost goes toward laying down a plastic containment field to get all of the particles and dust. A lot of the variance in price is related to how difficult it is to scrape off the popcorn ceiling. If it’s easy, removal can be less expensive and faster, but removing the more difficult popcorn will take longer and leave a very uneven surface that will require one or two skim coats -essentially a thin drywall patch. Plus there is sanding needed between coats and then priming and finally painting. If you pay upfront for the popcorn removal, you’ll often pay more to cover the variance in price. Other painting companies will charge a nominal upfront charge and then add an additional fee depending on difficulty.
Ceiling Grid or Drop Tiles: If your ceiling has a grid system or drop tiles, painting will be a bit more tricky. You’ll need to remove the tiles before painting, which will add to the overall cost. Once the tiles are removed, painting will cost $1 to $3 per square foot.
Exposed Basement Ceiling: If your basement ceiling is exposed, you may want to finish it with drywall before painting or consider painting the exposed ceiling as-is. They can be challenging to paint because of the awkward angles and tight spaces. But if you’re up for the challenge, it can be a fun project. Some contractors will also install drywall as part of the job. We’ll do this for $6 per square foot or paint the exposed areas for around $2.
Ceiling Painting Cost Factors
When it comes to painting your ceiling, there are a few different cost factors to keep in mind. Some of these cost factors include:
Labor Costs
The cost of labor will depend on whether you hire a professional or do it yourself. If you decide to tackle the project yourself, there won't be any labor costs beyond your own time.
Most professional painters will bid the entire project, rather than charging by the hour, which includes all work hours. Some painting contractors may charge by the hour, but be wary of this pricing structure, as it may end up costing you more in the long run.
However, if you hire a professional painter, you can expect to pay $25-$50 per hour.
For example, let's say it takes two painters to paint a small bathroom ceiling that's 8 feet high, it should take about four hours to complete the job (not including set-up and clean-up time). This means the labor cost would be $100-$200 if you hired a professional painter.
But if those same two painters were working on a large high bedroom ceiling (10 feet), it would likely take them six hours each to finish the job. That would come out to a total labor cost of $600 (6 hours x $50 per hour x 2 painters). As you can see, increasing the size of the room and/or the height of the ceilings can have a big impact on labor costs.
Type Of Paint
Not all paints are created equal. Better paint quality will cost more upfront, but will save you money in the long run because it will last last longer and provide better coverage.
There are five main types of paint sheens: flat/matte, eggshell, satin, semi-gloss, and high gloss.
Flat hides imperfections and touches up easily. it is not washable. High gloss is the most durable, but reflects every imperfection when light hits it. Flat is good for ceilings, large areas of house exteriors, garage walls. Matt/velvet is great for interior walls of homes that don't have kids or pets.
Eggshell is most common for interior walls as it hides well but is still washable. Satin in summon for exterior trim. Semi gloss is common for interior trim and front doors. High gloss is reserved for expertly done cabinets.
If you're painting a ceiling, opt for an eggshell or semi-gloss finish, which will be easier to wipe clean if there are any spots or stains.
Prep Work
Before painting a ceiling, there are some important prep work tasks that need to be completed. This usually takes longer than the actual painting, but it's important to do a good job so that the paint will look great and last for a long time. Your painter will likely tape off all edges, move furniture, and put down clothes to protect your furniture and floors.
Ceiling Height:
The average ceiling height is eight feet, but if you have an entryway with a vaulted ceiling, for example, it will cost more to paint. Higher ceilings will require more paint and labor, and will therefore be more expensive. But the results will be worth it – a freshly painted ceiling will add beauty and value to your home.
Trim and Crown Molding
One of the main factors that contributes to the cost of painting a ceiling is the trim and crown molding. This is not typically included in the base price to paint your ceiling, and can therefore end up costing you more money. Crown molding painted while your ceilings are being painted will cost between $0.50 and $1.50 per linear foot. However, if you only need the crown molding painted, it will cost you $1 to $3.50 per linear foot. It is generally better to paint the crown molding alongside the ceilings in order to save money.
Ceiling Condition
The condition of your ceiling is one of the most important factors when it comes to painting costs. If your ceiling is in good condition, then painting it will be relatively straightforward and won't require too much prep work. However, if your ceiling is in poor condition - for example, if it has cracks or water damage - then you'll need to factor in the cost of additional prep work, which will drive up the overall cost of painting.
Supplies and Materials Costs
Ceiling painting costs will vary based on the type of paint you use and the complexity of the job. Latex paint is less expensive than oil-based paint, but it doesn't always adhere well to ceilings. If you're painting over an existing layer of paint, you may be able to get away with using latex paint. However, if the ceiling is bare drywall or has never been painted before, you'll need to use an oil-based primer and then top it off with latex paint. If you're painting a small, simple ceiling, you can expect to pay less than if you're painting a large, complex ceiling. This will add to the cost of supplies and materials.
You'll also need to factor in the cost of supplies like drop cloths, masking tape, and brushes. These items can be reused on future projects, so they're not a total loss. However, they do add to the upfront cost of the project.
Finally, you'll need to calculate how much paint you'll need. A good rule of thumb is one gallon of paint for every 300 square feet. So if your ceiling is 900 square feet, you'll need about 3 gallons of paint.
Doing It Yourself Vs Hiring A Professional
When it comes to painting your ceiling, you have two options: doing it yourself or hiring a professional. If you're considering taking on the task yourself, be aware that it's not as easy as simply rolling paint onto the ceiling. You'll need to invest in supplies, and the process can be quite repetitive and physically demanding (not to mention messy). Expect to spend around $200 on supplies, and be prepared for a project that will take several days to complete.
If you'd rather not deal with the hassle and mess of painting your ceiling yourself, your other option is to hire a professional painting contractor. This will obviously come at a cost, but it will save you time and hassle. Plus, a professional will be able to do a much better job than you could, and they won't leave any paint marks on your ceiling (or anywhere else). Expect to pay around between $1-$4 per square foot of painted surface area. So, if your ceiling is 700 square feet, the total project could cost between $700 and $2800.
Conclusion:
The actual cost will depend on the size of your ceiling, the type of paint you use, and any special features or treatments you want to add. If you're not comfortable painting your own ceiling, you can always hire a professional painter to do the job for you.
Read the full article
0 notes
Text
Tiles Are Simple to Mix at a Mosaico Terrace Flooring
This is really a story. My small and comfy roof flat, the maximum flat of the construction, was maintaining water on the ground when it rains.
This patio is similar to a pocket sized open-space where our flat runs towards the surfaces of the condominium. It appears south and sunlight is current because 12 am until twilight. I hadn't ever considered making another flooring sidewalk until one night that the rain started to fall and also to pay all of it.
The folks living beneath our flat maintained about all of the rain which had gone through their ceiling and also falling out of our flooring oust standing within their living area.
I had this fantastic idea! I moved tiles searching and discovered some 2ND alternative beauty ground colors belfast tiles.
They were rare and smooth! And, I really could split them with a tough instrument. Easy as dividing an egg!
Therefore, something came into my head, the gorgeous Mexican flooring I'd seen a lot of occasions and I adored a lot. It had been so straightforward. I will provide you a few hints you might develop in accordance with your floor dimensions. To start with, start looking for tiles in colours you prefer and a fantastic 2ND option that satisfies your budget. Three colours may be OK.
Subsequently:
Purchase enough cement adhesive, asked the man at the store for amounts per square feet
Step well the intense sides of your patio and divide it by the duration of the tiles you've purchased
Organize a pathway of tiles (mixing colours if you want ) across the extremes of the flooring (it will resemble a frame boundary )
As soon as you have all of the floor intense sides coated with all the tiles, then start to assess the space between every intense edge to observe how much distance you've got at the middle
Until all know, you're making only an "informative article " of this floor sidewalk without adhering the Tile t the previous ones.
Within the space between the boundaries, start to place the tiles at a circle dividing them such as 20 centimeters one in another
Mix their colours and simply rotate them somewhat so that they follow the ring ring
Nowadays you have the magnitude of this Mexican ring completed using bricks, swinging to the ring
Place some tilesof all colours,within towel. Have a hammer and then provide a hard stroke onto the towel
Open the towel and then take the bits out, then dividing them by dimensions and projecting those who missing some bits in their boundaries because of the stroke. Set them apart
At this time, you'll have the ability to love doing the Mexican ground.
First start in the ring.
Be Sure the circle is located in the Ideal middle of All of the distance left between the boundaries of tiles onto the intense of the floor area
Place some glue below the tile and then use it nicely to the sidewalk.
Do this with every single tile of this ring till you find yourself with a round shape.
Calculate well distance left between the ring and the intense tiles to check if it may be possible to perform another "framework " (square foot ) around the ring. It will be a tiles straightforward between the ring and the boundaries.
Do the square foot, altering colours and implementing glue beneath the tiles. Remember it's going to take a while for it to wash.
It's time now to create the boundaries, except the base side of this ground, that intense on which you'll be walking back and forth. Make as previously across the sides of the sidewalk. It'll be a rectangle or square as for the sidewalk 's dimension. Bear in mind the tiles we'd broken?
It gets fun!
You'll be filling all areas left with these small bits of the very same colours of these tiles. And as soon as you've covered all of the sidewalk, today it's the time for projecting the plaster.
1 evening of glowing temperature of 2 weeks of cloudy or windy time is likely to make it! It'll become your pride when inviting friends! We'll meet for creating the table which resembles the flooring! It merely depends on if you enjoyed this thought!
Great luck! Have fun!
We had no cash for calling employees to perform this a Terrace sidewalk, they'd have requested for a whole lot of cash, so? I opted to take action myself! Plus it was real pleasure!
Floors: Selecting Tile Color
There are facets of floors which could be hard for even the most skilled craftsman to comprehend. Then you will find little decisions like picking what colour tile to set in your toilet. However, although not every choice is always something which needs spending three times on a mountaintop with a professional, it's not uncommon to get stuck while attempting to make the ideal option.
After all, you're likely to need to stay with your choice for quite a while. You have to select something which not only matches you today, but won't put on your nerves in a couple years. Below are a few items to think of when picking between colours.
If you don't 're actually attached to these, don't make the mistake of attempting to fit your floors to the present decorations. If you would like to fit it into the wall, then that's nice. This is logical, even though a wall could also be painted or covered with background too. But decorations are completely removable.
In case you've got an idea for the best motif and this notion is based around a painting, then , you have to attempt to find some stability between your own tile along with the painting. Otherwise, cure tile buying as the opportunity to try out something new. Fit your decoration round the ground, rather than attempting to get it done in the opposing side.
Along with deciding upon the real colours, then you 'll soon realize you have numerous choices to make concerning the fashion of the floors. We're speaking about tile , so that choice has been made. However, it's not like you merely need to select a rip-off the colour wheel and be finished with that. It's true that you may ensure it is easy on your own, however you'll be depriving yourself of a universe of alternatives and customizations. All these options are available and you will need to make a decision as to what's best for youpersonally.
Among the best things that you can do to make a choice would be to attract samples of this tile to the area you're redecorating. No additional light will perfectly fit that light in your house, meaning a colour may seem 1 way in a shop and a different way when it's in your toilet. If you buy a sample and then bring it in the area, it is possible to find a lot better sense for how it should look as it's all placed in and ended.
1 note
·
View note
Text
Dallas, Georgia - Fence contractor - Prime Fence
Wood fences are an appealing as well as strong material choice for fences. Timber fences are often made use of in even more long-term applications. Timber fencing are usually put on hold on timber messages with sections of wood secure fencing suspended in between the fence posts.
As a seasoned qualified home renovation contractor, I understand initial hand what it need to cost for different levels-- from Standard, Much better, and naturally the best. This Vinyl Fencing price estimator will give you with up to day pricing for your area. Just enter your zip code and the square footage, following click upgrade and you will see a break down on what it should set you back to have actually Vinyl Fence installed onto your house
Dallas, GA Vinyl Fencing Installer
Details on residential property lines can be discovered in your deed, or in land surveys supplied to you when you purchased the residential property. Recognize the home lines, then measure and also tape-record the straight feet. You wish to see to it to remain within your residential property lines to avoid legal difficulties (or unfriendly glimpses from your neighbors).
Fencing Calculator
Fences are made use of in farming for 3 key objectives. The first is the constraint of animals which includes humans sometimes. The 2nd is to supply a general separation of an area. And also the last is for visual purposes. In each case, materials should be selected with care to make best use of the probability of success in the purpose of the fencing and lessen the expense in products and also labor amortized over the life of the fencing.
Timber Fence Installation in Dallas, Georgia
Most people are looking for the best fence company Dallas, GA when they choose to fence their yards. We desire privacy, particularly if we have a pool or warm bathtub. Yard fencing often tend to be 6 to 8 feet high to make certain privacy, and the most popular fencing product is wood pickets.
It's something you can be pleased with. To develop something by yourself needs a great deal of skill. In this instance, you require to know exactly how to develop a fencing, compute just how much does a fencing cost & the quantity of fence products you need, as well as, most significantly, do the actual workmanship yourself. Discovering to do all these things is most definitely a reason to proud be of on your own.
Fencing Installation Calculator
An additional type of unseen fencing utilizes a radio signal to create a zone for pleased play. The dog uses a collar that connects with the fence. Once the canine experiences the border, it is reminded by a mild shock to return to the lawn.
Just How Much Material Is Required To Fence An Acre Of Land?
1. Preparation: Contact your city so you understand specifically where you can and can not set up the fence. Also, see if you have to pull permits. Call 811 so they can note your property and also energy lines. This guarantees you don't cut electrical energy for the whole block.
Fencing Paint Calculator: Determining Paint Costs
A safety and security fencing sets you back $30 to $60 per foot and also is normally created from steel, iron, cable mesh, chain link, or a mix of steel. For the average home, anticipate to invest in between $4,500 as well as $9,000 on security fencing.
Timber fencing are an attractive and strong product option for fences. Timber fencing are often utilized in even more irreversible applications. In this instance, you require to understand exactly how to develop a fence, determine exactly how much does a fencing price & the quantity of fence products you need, as well as, most notably, do the actual creation yourself. Another kind of unnoticeable fence makes use of a radio signal to create a zone for pleased play. A security fence costs $30 to $60 per foot and is typically constructed from steel, iron, wire mesh, chain link, or a combination of metal.
from http://primefence.blogspot.com/2020/03/dallas-georgia-fence-contractor-prime.html
1 note
·
View note
Text
33. Better than Instant Ramen
read the scarecrow and the bell on ao3
index | from the beginning | < previous | next >
Here's the video for the recipe Rei and Kakashi make together!
Kakashi was determined to make this a perfect night. He and Rei had been busy with their work, so much so that they had hardly seen each other for weeks. Whenever he did catch sight of her, she looked absolutely exhausted. Her hair was even messier than usual, she dragged her feet, and there were dark circles under her eyes. He left a bag of pastries at her doorstep, per usual, with an invitation slapped on the bag: My apartment. Dinner. Friday night. 6pm. It was obviously an offer she couldn’t possibly refuse.
He spent the entire afternoon preparing dinner, so that his apartment by now smelled incredible. He pulled back the curtains so that there was a stunning view of the stars overhead, and even cracked the window open to let in some fresh air. He lit a few candles, then began tidying the books on his shelf when she knocked on the door.
She looked exhausted but had a huge grin on her face as she leapt into his arms and hugged him tightly. “God, I’ve missed you” she sighed into his chest. He hugged her back just as tightly, then ushered her inside. “It smells incredible in here” she commented, surveying the room. He was clearly aiming to achieve a romantic aura, and quite frankly she would say he succeeded. She kicked off her shoes and approached the kitchen, eager to peek in the oven and see what he was cooking. Before she could catch a glance, though, Kakashi slid in front of her and blocked her view.
“Why would you want to go and ruin the surprise?” he asked. He placed his hands on her shoulders, spun her around, and guided her to the table. She sat in the nearest chair, looking up at him with a playful pout as if she was a child who was just reprimanded. “Relax. You look exhausted, so tonight I’m going to treat you.”
“What about you?” she asked as he made his way back to the kitchen. “You’ve been working your ass off, too. Aren’t you tired?”
“Yes” he answered, then added, “But I’ve been doing this far longer than you have. I’ve gotten used to it.” The timer dinged, and Rei attempted to take a peek at whatever Kakashi was pulling out of the oven but he effectively blocked her view. Defeated, she leaned back in her chair and sighed as she awaited dinner. After a few minutes, Kakashi set down two platters of fish and a bottle of sake. He gave Rei that signature masked smile as he sat down across from her, and with locked eyes they ceremoniously chanted Itadaakimasu.
Rei closed her eyes and smiled as she took that first bite of food. She remembered Kakashi being a skilled chef as far back as their childhood, but it was starkly different experiencing the food firsthand after so many years. His skill had drastically improved. “This is so much better than instant ramen every night” she sighed.
Kakashi swallowed his bite, then asked, “You eat instant ramen every night?” Rei shrugged a casual yes. “But don’t you cook at all?”
“I mean, on days off sometimes I’ll make an omelet or rice or something if I care enough but most days…” she started, then groaned and shook her head. “Cooking is too much work. Why waste my energy when my microwave can literally give me dehydrated noodles in a cup in a matter of minutes?”
“You know you can’t live off of instant ramen for the rest of your life, right?” Kakashi asked.
Rei shrugged. “Lots of people do it. Like that little menace who always splatters paint on Hokage Rock. I’m sure he eats exclusively ramen. I see him at Ichiraku all the time.”
“You see my point” Kakashi replied.
“Okay, well what do you expect me to do?” Rei asked. “Actually cook?”
“That’s what everyone else does” Kakashi countered.
A sly smile touched Rei’s lips as she looked down at her plate and picked apart another piece of fish. “I mean, you could just cook for me for the rest of your life” she chuckled.
“And what about when I’m gone?” he asked. “What are you going to do then?”
Rei then raised her chopsticks high above her head in a terrible sense of triumph and shouted, “Instant ramen!”
Kakashi rubbed his forehead in distress, but he was chuckling all the while. “You’re a lost cause, you know that?” he said. Rei simply shrugged and took another bite of her food, but deep down something within Kakashi was taking root. Hadn’t her parents taught her anything? Knowing Hana and Yuruganai, the chances were slim. As much as Hana yearned for her daughter to become a housewife and mother, she also yearned for her daughter to stay put for as long as possible. From what he had seen, he was certain she babied Rei in terms of housework for ages just to keep her trapped there. It was simply’s a mother desperation, even if it was harmful in the end. He hated to think he would have to teach her everything, but he knew there was at least one thing he could take the responsibility of.
Come midnight, Rei decided she ought to head back to her apartment but not without a goodnight kiss first. “This was really great. We should definitely do this again” she sighed, foreheads pressed together. Kakashi smiled.
“How about next week?” he offered. She furrowed her brow a moment, calculating what she knew so far of her work schedule, then grinned up at him and accepted the offer. He smiled back. “Then it’s a date.”
Rei arrived right on time the following Friday night, exhausted and fully prepared to sit back and just enjoy another great meal with her boyfriend. When she entered his apartment, however, there was no incredible fragrance, and nothing in the oven. Rather, there was an array of raw food set out across the countertop and a frying pan on the stove. “Uh…are we having sushi or something?” Rei asked. Kakashi chuckled and shook his head.
“Nope” he replied, guiding her into the kitchen.
“I thought you were having me over for dinner” she said, trying to mask her disappointment.
Kakashi grinned underneath his mask. “I am, but this time you’re cooking it!”
Rei’s face fell. “K-Kakashi, but I don’t know how—” she stammered, but the copy ninja lifted a finger to quiet her and interrupted.
“That’s why I’m going to teach you” he said.
The redhead slumped her shoulders and groaned. “But why? This is so much work!”
“Rei” he replied sternly, “Learning to cook is essential to living on your own. You’re going to have to learn sooner or later.”
Crossing her arms, she pouted and averted her eyes from him, muttering, “I can’t believe you’d deceive me like this.”
Kakashi, however, just chuckled and pulled her closer so that she was squarely in front of the counter. “Step one is preparation. I’m going to need you to cut up all of these vegetables” he explained, holding up a knife. Before her sat carrots, cabbage, and a large onion, most of which she couldn’t even begin to comprehend how to cut because they were all round. When Kakashi noticed the hesitance on her face, however, he wedged the knife into her hands and then slid in behind her so that he could guide her through the motions.
Rei of course did her fair share of complaining the entire time, saying this was far too much work and asking why they couldn’t just go out to eat (“Restaurants are expensive, you can’t eat out every night” he’d argue, to which Rei would counter with “That’s why some nights there’s instant ramen!”), but Kakashi refused to let her quit. He guided her through all the steps, warned her about the stove dials and how she didn’t need to turn it up quite so high, and showed her how to mix everything in the pan so it would all cook evenly.
By the time 8pm rolled around, Rei was so sick and tired of this. The kitchen was hot and she was tired and this was taking way too long. Kakashi watched from afar for a while, then stepped up and tested the food for completion. Once he was sure everything was cooked thoroughly, he smiled down at her and announced, “You’re all finished.” He flicked off the stove, moved the frying pan to a cool burner, and grabbed a bowl for each of them.
“It’s probably going to taste like shit. It’s probably going to kill you. I wouldn’t even try it, honestly” Rei complained as Kakashi divided the portions among their bowls. He handed her a pair of chopsticks and followed her to the table. “You know, we should just get up and go to Ichiraku right now so we can avoid the food poisoning we’re definitely going to get.”
“Don’t be so cynical” Kakashi told her. “I’m sure it’ll taste fine! Besides, I was right beside you the whole time. I wouldn’t let you feed me anything that would kill me.” Rei rolled her eyes and laughed mockingly, angrily grabbing a wad of pork and vegetables with her chopsticks and shoving it in her mouth. She paused a moment, and Kakashi looked at her anxiously. “Well?” he asked. She looked at him with wide eyes, as if she was taken aback, finished chewing and then swallowed. A smile tugged at his lips—he could tell she liked what she had made.
Rei shrugged and poked at the rest of her food. “Well, I mean, it’s alright. It’s not, like, mind-blowingly delicious or anything, but like…it’s stir fry. It’s, you know…it’s fine” she replied nonchalantly. Kakashi could tell she was struggling to keep the smile off her face.
Kakashi chuckled. “You like it, don’t you?” he asked. The redhead fed him a death glare as she angrily shoved another chopstick-full into her mouth.
“Don’t expect me to make a habit of this!” she protested. “It’d be fine for a once in a while thing, I guess. You know, if I’m feeling energetic or whatever.” Smiling, Kakashi pulled down his mask and planted a quick kiss on her cheek. Rei’s face turned bright red. “What was that for?”
“Nothing in particular” Kakashi replied. “I’m just proud of you. You did a good job for your first time.”
“You really think so?” Rei asked.
The copy ninja nodded. “I’m not dead, am I?” he joked.
“Fair point” Rei replied. They sat together eating their stir fry in comfortable silence, watching the stars twinkle through the open window. A soft, cool breeze blew into the apartment, fluttering the curtains and brushing against their faces. A dog barked down the street. Everything was good.
1 note
·
View note
Text
5 problems with the interior
5 problems with the interior
1. I don't want the house to collapse and the floor cracks because of heavy bookcases. Try the following.
to have a home or have to build a house Find a home builder company บริษัทรับสร้างบ้าน to make a good house, but eventually the house collapses. Many people may not know that your bookcase that is 2-3 meters tall is heavier than a whole log. Because the logs are still enough to have some air gaps inside. But your bookcase probably doesn't have room for bubbles at all. So if you have a library at home or a large bookcase (Especially high cabinets) The floor for a residential house, which is designed to withstand the weight of 150 kg per square meter. It may be daunting to bear the weight of your beloved bookcase set at 500 - 1000 kg per square meter. The symptom or reaction is that the load-bearing area may bend or rupture. Or collapse, the solution would not be for you to stop reading or sell the book. Which will definitely make you unhappy. There are 2 solutions:
1. Design (or order design) Prepare what area you will use as a library. Or where would you like to place a bookcase? In order to allow the structure to be strong enough... But this method would be difficult. because you might not have thought Or buy a housing estate or buy a house from someone else again.
2. Try to figure out where the floor of your room is near the beams. (Most often on the wall) where the floor of the room should be able to bear more weight than the floor in the middle of the room. Because the weight can be transferred from the floor to the column beam faster and shorter, but do not trust that it is the beam area and will put any weight into it. because if there is too much weight This time, there will be no tilted floor, cracked floor, collapsed floor, but there will be a new symptom that they call "Ban Phang".
2. Red wood parquet For some gaps in the wall would be good.
Red wood parquet is equally popular. with maka wood parquet and teak parquet because it is strong and beautiful But red wood parquet has more contraction than macha and teak. When laying red wood parquet, there should be some space between the planks and the wall. in case there is an expansion of the parquet so that it will not push until the wall is beautiful your crack (Don't worry about the ugliness of that channel. because we will have a lotus at the foot of the wall to cover it)
3. Cracked walls may be due to frequent repositioning of plugs, switches, or lamps. at the time of construction
because of your order to change Or add the location of the electrical equipment when your wall is already masonry. The mechanic needed to drill a new wall. and then run the conduit (If it is a hidden pipe system in the wall) Drilling into the walls to light these fires will cause the wall structure to vibrate. Sometimes it may pass through the tendon pole. Lintels lost the strength of the walls. Once you've replaced the power point (And plaster over the filling) new and old mortar may not be compatible with each other. coupled with less strength Once you're done painting, you're in the house. Traces of trauma will occur as follows. Rage... Rage... and angry
4. Length 4 inches = 10 cm. But 4 inches of tile is not as big as 10 cm. Haha.
Is it the strangeness or the uniqueness of the Thai construction industry, we do not know. There are always strange things in our house. For example, we measure the size of wood in English by inches, such as 1.5 X 3 inches or 2 X 8 inches, but when it comes to length It is measured in metric scale, that is, in meters, for example, a wood is 3.00 meters long. When we calculate the price to find the volume, we sell it in cubic feet, etc. Our porcelain tile is the same as a 4-inch tile, which is probably the same width as 10 X 10 centimeters. To have a size of about 11 X 11 centimeters when measuring the wall to arrange the tiles. or when calculating the amount of tile purchase So they often make mistakes. ...But don't overthink it. Considered that the factory had already added it.
5. Do not design the glass shutters to be very wide!
glass shutters (especially the adjustable angle Should not be designed to have a very wide opening. because the mirror can't bear its own weight (Especially horizontal loads) can bend or break. But if you think of using a thicker glass to prevent Ann Be careful that the angle adjustment device can't support the weight of the glass. Even thinking about using a large device that is strong enough to support the weight of glass be considerate of people who have to turn and turn off how difficult they will be (maybe you can be yourself Therefore, in order not to be too busy, do not use shutters that are larger than 90 centimeters if the channel size is larger than that. It's better divided into 2 channels.
0 notes
Last Seen Blogs

phantom-gifs
The Phantom

seasonaldelightsbingo
seasonaldelightsbingo

selfships-in-spanish
Just a self-indulgent corner

mistyjessart
mistyjessart

sertealzatya
سيرتي الذاتية