#imagine relearning how to draw humanoids after months of not drawing but you do it through a meme and it still takes you forever
Photo
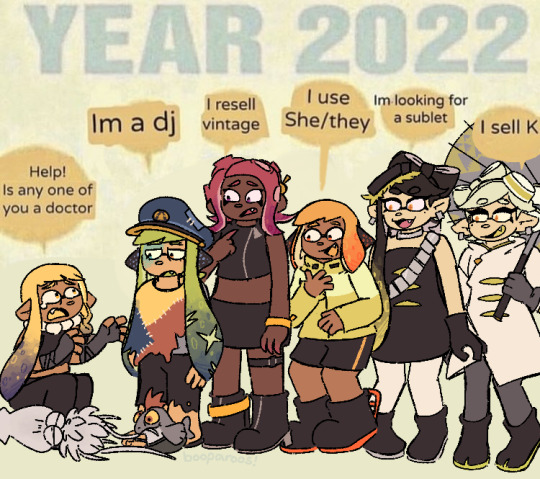
the NEW new squidbeak splatoon
#splatoon#splatoon 3#captain 3#agent 3#agent 8#agent 4#callie cuttlefish#marie cuttlefish#craig cuttlefish#little buddy#splatoon 3 spoilers#DO PEOPLE STILL NEED THAT TAGGED#posting on main instead of my art blog because. lol#imagine relearning how to draw humanoids after months of not drawing but you do it through a meme and it still takes you forever#neo agent 3#is that what theyre called...#my art#THANK YOU SOOO MUCH FOR 7K+ NOTES!?#fun facts abt this piece!#i intentionally drew craig and smallfry over both 3s feet so i didnt have to draw them#i edited the original year from 2030 to 2022#since splat3 takes place in their 2022#also i hadnt drawn a fullbody in 4+ months prior to this
9K notes
·
View notes
Text
Evaluation of Process
Throughout Unit 2 I’ve learnt lots of new skills and a brief understanding of different programs such as Maya & ZBrush. This is my first time creating a character so I was also developing my own personal work flow through this Unit.
Preproduction
I started my process with preproduction specifically creating mind maps of different ideas for both my protagonist and antagonist. I knew I wanted to create characters that would be used in my game next year so they both needed to suit the setting of the game.
I feel mind maps are a great way of organizing my ideas and I will definitely continue to use them as part of my creative process. It really helps to have a clear map of the initial idea and then branch off. Before creating a character, you want to have a solid concrete idea of exactly what you’re creating so it’s important to get your preproduction done right to not waste time.
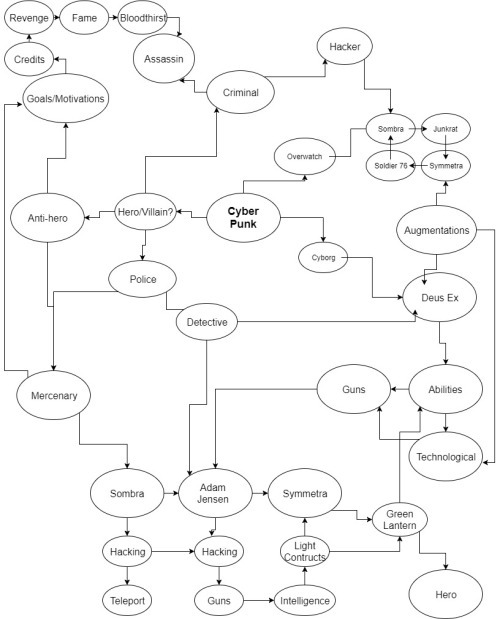
In my mind map I looked at possible motivations, attacks and backgrounds for my character. I also related my ideas to existing characters in pop culture and games and took inspiration from them. I really liked using the mind map and it helped me narrow down an exact idea for my character. I personally like to have a clear idea in my head before I begin drawing my character to save time.
Once I had settled on an idea for my character I began searching tags I’d used in my mind map and used Pinterest to create mood boards. It was great having visual references for my ideas and seeing what other people tend to use. This was also the part of the process where I decided to base the character’s weapons around the “Player 1 & 2” Pink and blue arcade guns.
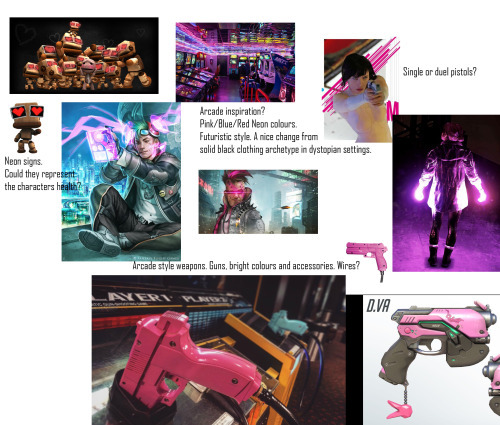
This is just one of four different mood boards that I created. I added small annotation to point out points I liked about the images and went into more detail about them on my blog post. Mood boards are seen commonly in the industry especially when creating concept art for characters.
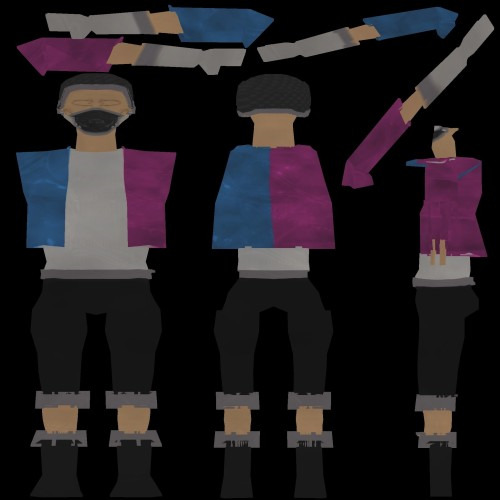
After creating mood boards I went into Photoshop to begin the concept art. I’m quite familiar with Photoshop so I was able to get right into finding a pose and body type that I liked. I decided to settle on a smaller body type instead of the large bulky muscular male you typically see in video games. This is just because I’ve planned for his attacks to be quite mobile and feel it’ll work better for the animation.
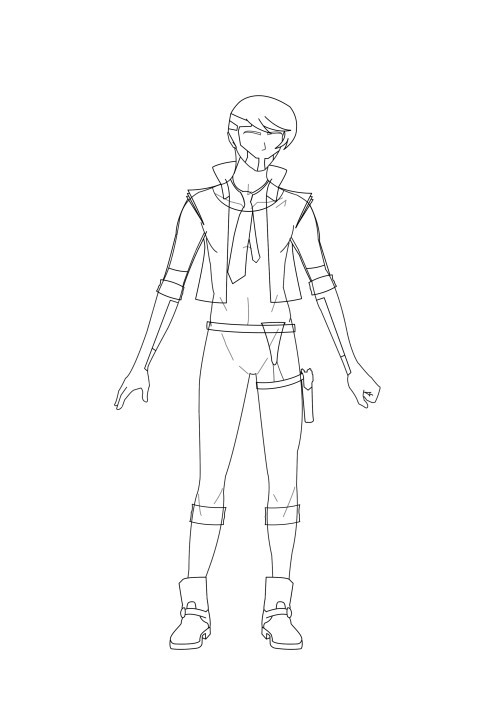
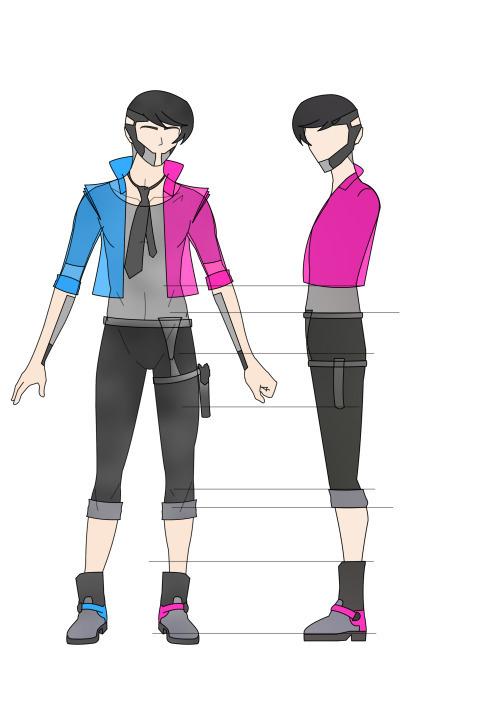
This simple turnaround helped a lot later on the in the modelling process as I was able to open the PNGs into the image plane on Maya. I can’t imagine modelling without a reference open directly in Maya and this is something I’ll probably always use in the future. I really enjoyed using Photoshop and it’s definitely my go to program when doing anything art related. Since I created this art a few months ago and have been practicing almost daily I found my drawing and Photoshop skills have improved a lot since then. Over the summer I plan on going back over and redrawing my character to create higher quality art. I’ll also begin the process of drawing different poses to show off his personality and possible animation ideas. This will help a lot next year when we begin to animate our character in UE4 and work on creating our game prototype. My game design document already has a list of attack ideas but it’ll be nice to have concept art included.
In a VICE interview with Bill Petras (Art director for Overwatch) and Arnold Tsang (Character-concept artist) they spoke about their role as artists in the games development and the importance of concept art.
“One of the main jobs that we do as art directors is having a vision for what the game looks like, of what the heroes look like, the feeling of the animation, the color palette, and the architecture of the buildings of the world.” And often that means putting ink to paper: “A lot of times the art directors themselves will do a painting of a concept to show a vision to the team. That’s step one.” –Bill Petras
Arnold Tsang speaks about how the concept art is important for making the vision and idea of the game clear to the other developers.
“Early on, our first job is to inspire and rally the team behind our vision. The development of the style guide is a huge first step in getting our feet on the ground for Overwatch.” Setting down the core of the game’s look is an incredibly important part of the early process. “After we had the core tenets in place,” says Tsang, “we worked with the engineers and some of the animators to start to realize that content and make visual targets that start to realize what we set out to do in the style guide. And we saw how things worked in the game engine, and how these characters moved and acted.” –Arnold Tsang
When we have an idea in our head it might be obvious to us what the character looks and moves like but to others it’s not clear at all so concept art is integral for making that vision clearer to others. In the industry where you have specialised modellers, programmers and animators it’s important everyone is on the same wavelength. You wouldn’t start building a game without a games design document and you wouldn’t start creating a character without completing preproduction.
Maya
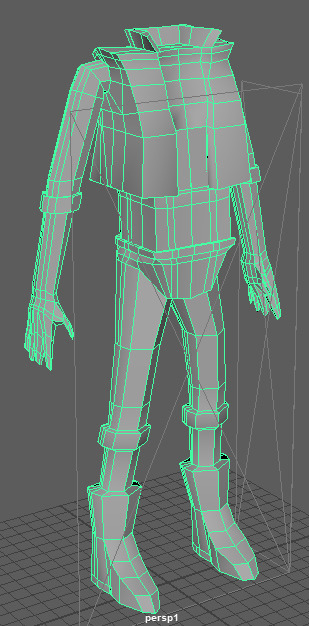
When I finished preproduction I moved into the next stage of modelling my character in Maya. I also installed the student version at home so I can continue working on my model outside of college. I opened the turnaround images and began shaping from a simple cube. There are plenty of different methods of creating a character and everyone has a different workflow but I decided to stick with this recommended method as it’s good for beginners like myself. I extruded and multi cut the shape to create a simple humanoid shape and then started adding finer details such as clothing later on. I had to go back a few times to recreate certain sections of the model. I had issues with multi-facing where Maya placed faces underneath faces and I had to slowly go through the whole model deleting these issues. It was also a challenge dealing with edge loops and topology. I’ve never dealt with it before so it was a lot of trial and error figuring out what works.
My main issue with modelling is I chose to create an organic human shaped character but my result was a lot blockier and square especially in the waist/torso area.
Even with some adjustments I wasn’t 100% happy with my result. I also struggled a lot on the fingers as they were too sharp and pointed and almost resembled claws. I used MudBox which detected errors in my model so I could go back into Maya and fix them. This however was a difficult process as I had to go back and remodel entire sections again. I was getting frustrated with my model and did quite a large rework.
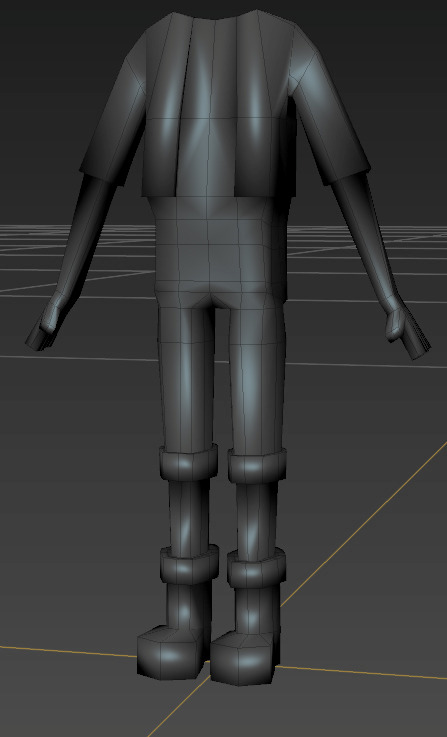
This model although fixed is a lot less detailed and not what I envisioned for my character. I decided instead of beginning again I’ll just begin the UV process as that will take a while and I was beginning to run out of time. I repeated my preproduction and modelling process with my villain character. I found the second time around was considerably quicker as I wasn’t relearning all the hotkeys and jargon.
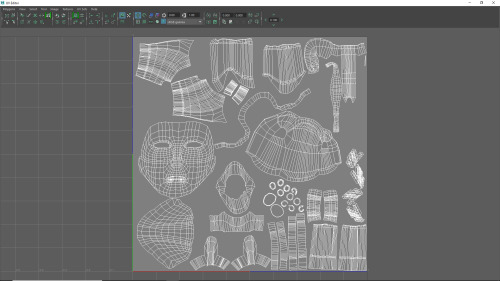
A huge mistake I made with my first UVs was doing the front, back and side as three large chunks. I didn’t fully understand how the UVs related to the texture maps and so I didn’t see how much of an issue the overlap caused until I placed the image onto the UV. You can see the grey areas where the black pants and grey accents share a UV and cause issues. I had to delete these UVs and looked into other methods.
I used planar mapping and unfolding the different pieces of my model to create clear separate sections. This thankfully allowed me to avoid the same mistake I made without any overlap.
The UV process was a long task but essential for creating a character. I now have a better understanding of how to do it and how it relates to textures and painting the character later on. In the future I’ll be a lot quicker at the process. Like most of Maya it was simply a learning curve but the best way of learning a new program is by practice.
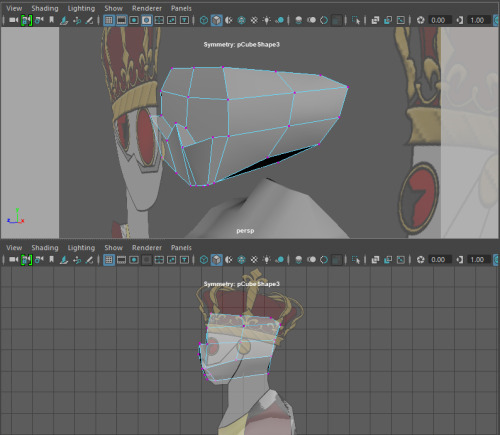
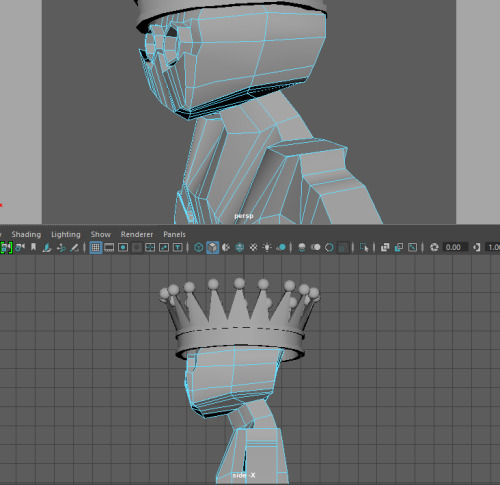
ZBrush
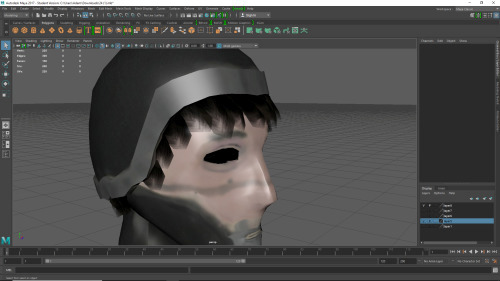
The next step after finishing my UVs was exporting my model as an OBJ and opening it in ZBrush. I decided to keep the Hair and Eyes as separate subtools.

My first attempt at Polypainting was rough as I didn’t fully understand the tools and brushes I was using. I looked at different methods online and went back over my model. I found the ZBrush youtube channel as a great resource as they do really quick tutorials on the different tools in ZBrush.
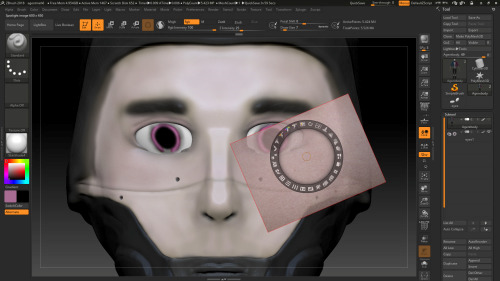
The spotlight is a really powerful tool that allows you to paint directly onto the model with other images. You can scale, rotate and adjust these images and apply them directly onto the model with total control. I was using a tablet too so the amount of pressure I applied also determined how strong the brush was. I saw the potential with the insane detail you could put into the skin with ZBrush. I’m not going for a super realistic human character though so I didn’t want to add loads of blemishes so just simple colours and blush was enough for me.
My favourite tools and brushes in ZBrush was the DamStandard, Curve and Curvepinch brushes. This was useful for creating folds around the eyes and also definition on the welded sections of the face. I spent a lot of time experimenting with different brushes but next time I create a character. Surface, Noise Editor and the Deformation tools were also great ways of quickly editing large portions of the model.
Because I like Photoshop so much I decided to go back on the hair and see if I could try a different method of texturing them. I opened the UV as a png and a simple hair texture with Photoshop brushes.
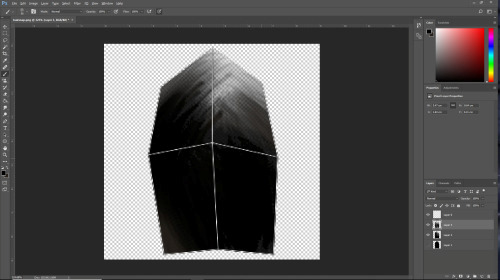
I like the different layers of opacity and think it looks more interesting than just block opaque colour. I’ll probably stick to ZBrush in the future however as it’s a much more powerful tool than Photoshop.
I was able to create the texture maps from Polypaint and then create Normal maps directly in ZBrush. If I wanted to neaten up or edit my textures, I could open the JPEG directly in Photoshop and paint on that.
Conclusion
I really enjoyed this Unit. I found it really interesting to go from having a character concept to a 3D model. It was my first time ever modelling something as complex as a character and I’m really proud it’s my own original idea and not an already existing character.
I didn’t have much trouble preproduction with generating ideas and creating mind maps/mood boards. The majority of my issues this Unit came in the production phase but that was mainly due to inexperience and some issues with the programs. I have however begun to enjoy using ZBrush after painting my character.
I got quite frustrated at points as I felt I wasn’t at the quality I wanted. I’m still not happy with the end product but I now have a much better understanding of the tools and programs and know I could work at a faster pace. I’m planning over the summer to do a full rework of my hero character.
As my game concept has changed my characters have changed slightly. I want to go for simpler cartoony proportions for my hero instead of realistic. I think this style would suit my game better. I also think a more cartoony player character will blend better with my very wacky cartoony robot villain. At the moment they contrast and look like they’re from different games.

I’m excited to redesign my character and think this will a much better style for my game concept. I think it’ll also be great for creating fun dynamic animations as the games attacks and mechanics I have planned are very fast paced and colourful.
0 notes
Last Seen Blogs
arttmeow
⠀
lunii12
Luna on Eldarya

sfmuseum
The Museum of the City of San Francisco

houston2-blog2
Untitled
seibercore
HOME