#how to buy domain and hosting from godaddy
Text
I slept in and just woke up, so here's what I've been able to figure out while sipping coffee:
Twitter has officially rebranded to X just a day or two after the move was announced.
The official branding is that a tweet is now called "an X", for which there are too many jokes to make.
The official account is still @twitter because someone else owns @X and they didn't reclaim the username first.
The logo is 𝕏 which is the Unicode character Unicode U+1D54F so the logo cannot be copyrighted and it is highly likely that it cannot be protected as a trademark.
Outside the visual logo, the trademark for the use of the name "X" in social media is held by Meta/Facebook, while the trademark for "X" in finance/commerce is owned by Microsoft.
The rebranding has been stopped in Japan as the term "X Japan" is trademarked by the band X JAPAN.
Elon had workers taking down the "Twitter" name from the side of the building. He did not have any permits to do this. The building owner called the cops who stopped the crew midway through so the sign just says "er".
He still plans to call his streaming and media hosting branch of the company as "Xvideo". Nobody tell him.
This man wants you to give him control over all of your financial information.
Edit to add further developments:
Yes, this is all real. Check the notes and people have pictures. I understand the skepticism because it feels like a joke, but to the best of my knowledge, everything in the above is accurate.
Microsoft also owns the trademark on X for chatting and gaming because, y'know, X-box.
The logo came from a random podcaster who tweeted it at Musk.
The act of sending a tweet is now known as "Xeet". They even added a guide for how to Xeet.
The branding change is inconsistent. Some icons have changed, some have not, and the words "tweet" and "Twitter" are still all over the place on the site.
TweetDeck is currently unaffected and I hope it's because they forgot that it exists again. The complete negligence toward that tool and just leaving it the hell alone is the only thing that makes the site usable (and some of us are stuck on there for work).
This is likely because Musk was forced out of PayPal due to a failed credit line project and because he wanted to rename the site to "X-Paypal" and eventually just to "X".
This became a big deal behind the scenes as Musk paid over $1 million for the domain X.com and wanted to rebrand the company that already had the brand awareness people were using it as a verb to "pay online" (as in "I'll paypal you the money")
X.com is not currently owned by Musk. It is held by a domain registrar (I believe GoDaddy but I'm not entirely sure). Meaning as long as he's hung onto this idea of making X Corp a thing, he couldn't be arsed to pay the $15/year domain renewal.
Bloomberg estimates the rebranding wiped between $4 to $20 billion from the valuation of Twitter due to the loss of brand awareness.
The company was already worth less than half of the $44 billion Musk paid for it in the first place, meaning this may end up a worse deal than when Yahoo bought Tumblr.
One estimation (though this is with a grain of salt) said that Twitter is three months from defaulting on its loans taken out to buy the site. Those loans were secured with Tesla stock. Meaning the bank will seize that stock and, since it won't be enough to pay the debt (since it's worth around 50-75% of what it was at the time of the loan), they can start seizing personal assets of Elon Musk including the Twitter company itself and his interest in SpaceX.
Sesame Street's official accounts mocked the rebranding.
158K notes
·
View notes
Text
#ssd hosting#purchase domain cheapest#domain to buy purchase a domain#purchase domain name#purchase domain from godaddy#how to buy .in domain
0 notes
Text
If I disappear from society, don't be surprised.
I am so so so tired of capitalism.
For Christmas I got a Raspberry Pi. The goal was to host my own website off it. This was entirely for fun.
Step one: set up raspberry Pi so I can host a site on it. Easy. Ubuntu is free (thank fuck), I know how to set it up, but hold on! According to xfinity, I cannot change dmz or dms rules on their router. I can't even REQUEST it. I can't even use a workaround because I'm not allowed to edit the port forward that was automatically added to my router. I dig through years old forums and find out that this is because I'm using the modem provided by xfinity. I now have to buy a new modem from xfinity's "approved list".
Step two: get a domain. I swim through 4 million outrageous prices that say shit like "pay $0.01 for the first year!" with the text below saying "with purchase of 3 year agreement". I finally get to godaddy and am able to convince the stupid checkout to give me 1 year of my domain (after, of course, it corrected my awful mistake to 3 years and, if I hadn't been hyper-vigilant, I wouldn't have noticed. I have to dig through 5 pages in settings to find a way to turn off auto pay because I know better by now. While I'm there I also turn off all email notifications, which were all automatically on. It also didn't tell me that I can't transfer my domain outside of godaddy for 60 days, so I just essentially paid for something I can't use for 2 months. Great. (out of curiosity, I dug through godaddy for some time. The 60 day thing appears nowhere except on the help center page when specifically searching for it.)
Step three: create a site. WordPress, once my most beloved website creation software, now slams subscription fees on me like cardi B audios on teenager girls's tiktoks. Unrelenting. Bloodthirsty. I power through to just get past "let AI design your site!" and "pick one of our patterns" so I can reach the point where I can edit the template. I already have a free template zip file. I drop it in the box. "wait!" says WordPress, in a screen-covering popup "upgrade to the creator plan to access the theme install features!" I click the only button on the screen. It takes me IMMEDIATELY to a filled out checkout page. WordPress Creator is $300 per year. Per. Year.
I read through the "features included with your purchase" to see things like "sftp/SSH certificates", "github deployments", "free staging site", and "install plugins and themes". All of these were free 5 years ago. "Save 20% by paying for two years!" No, I don't think I will.
Out of pure spite against the demon that is modern capitalism, I'm teaching myself html and css. I would kiss the creator of w3schools on the mouth, right after I kiss the creator of Ubuntu. I'm so angry. The internet is useless now.
4 notes
·
View notes
Text
5 Best: Web-Hosting With Free Domain Name (2023)
Do you want to start a blog or online store on a budget? You’ve come to the right place! We’ve compiled a list of the best web hosting providers that offer free domain names, so you can get your website up and running without breaking the bank.
While starting an online store or a WordPress blog, a domain name and web hosting plan are two of the necessary things you need. Typically, most people will purchase the domain name and hosting plan individually, spending more money.
There’s a hack to save money on your next domain purchase! And that’s exactly what I’m going to share with you today.
A few high-quality hosting companies offer free domain registration when you purchase their hosting plan for a year or more. They do this to market there product, and usually when people start an online business, they don’t change hosting often. With this tactic, there’s no catch, and you save $10 – $15.
Sounds interesting, right?
To help you save money on domain purchases, this article will show you the top five web hosting companies that offer free domain name registration. But before diving deep, let’s look at some essential things about the free domain name offer.
Page Contents

Important Things You Should Know About the Free Domain Offer
Understand the idea: The hosting providers will only give you a free domain name when you purchase any of their hosting plans. Most of the hosting offers this when you buy hosting for one year or more. If you are starting now, you should check my guide on how to save money on hosting.
No cancellations/refunds: While most of the hosting companies here offer 30-60 days refund, but domain name can’t be refunded. So even if you cancel hosting, you will be paying the domain name fees which is roughly $10, and this is only in case you end up asking for refund. Since these hosting companies are tried and tested by us, most of our users are happy users of these hosting companies.
You’ll get only selected extensions: The most popular extensions you can get are .com, .net, .org, .info, and so on. So, ensure the domain extension you need is available with the offer.
Renews at the standard rate: The free domain name registration is only available for the first year. You should renew it at the standard rate from the second year and afterward.
Best Web Hosting Companies that Offers Free Domain Name
In a nutshell, the companies are:
Bluehost
DreamHost
HostGator
GoDaddy
HostArmada
Below, I will explain what makes each platform different and unique. So based on your preference and requirements, you can choose a platform.
Without any further ado, let’s get into the list.
1. Bluehost – Trusted by Millions
Save
Bluehost is be the first web hosting provider that I recommend. I use Bluehost for a couple of my side projects, and it is one of the best platforms for hosting WordPress websites. The platform is also recommended by WordPress, which makes it even better.
When you purchase any of the Bluehost shared or managed WordPress hosting plans, you will get access to a free domain for a year! Besides free domain registration, Bluehost will also reward their customer with a $150 credit for first-time AdWord users in the US. With the credits, you can boost your ad campaign and get more potential customers.
To help you protect your online business from threats, they will offer you a malware-scanning option. If any of the theme files or WordPress core files get affected, the scanner will notify you regarding the case, and you can take appropriate action.
You can also use the in-built backup feature to protect your hard work from hackers. After purchasing the hosting plan, you’ll get instant access to the backup feature. When you start using the in-built backups feature, you do not need a dedicated WordPress backup plugin.
Finally, if you are running a WooCommerce store and need to enhance the user experience and conversions, Bluehost got something unique. Their online store hosting plans will give you access to plugins worth more than $450. It is an excellent start to creating a stunning online store without any hassle.
Notable Features
Free domain name registration
Google AdWord credits
Malware scanner
Daily backups
Free dedicated IP address
Free CDN
Pricing
Their most popular shared hosting plans are:Hosting PlanPriceRenewal PriceBasic$2.95/month$10.99/monthChoice Plus$5.45/month$19.99/monthOnline Store$9.95/month$24.95/monthPro$13.95/month$28.99/month
Every subscription comes with a 30-day money-back guarantee. So if you are unhappy with their hosting platform, you can claim a full refund.
1 note
·
View note
Text
Build your own eCommerce store with the Right Solution
It is impossible to comprehend how time-consuming and detailed the procedure is if you have never started an e-commerce store from scratch. When you look at any e-commerce website, you never give much thought to the fact that someone had to write the content and load each product individually. In addition, before the actual listing process even begins, you must negotiate with each manufacturer to be able to list their products online.
In addition to the amount of work required to construct the website, my experience working in a marketing agency made me aware of how discouraging it can be to have a functioning website and business model that you have put so much effort into, but not to generate organic traffic. As a result, while simultaneously building our website, we began our SEO strategy early, one year prior to the launch of our website. Since we already required this amount of time for growth, why not make the most of it and slay two birds with one stone?
1. Invest in a domain name
Before you decide to create your website to sell electronics online, you need to look for a domain name. This is pretty easy to understand. A domain name that perfectly identifies your brand is required. Avoid overthinking the procedure. You can get a domain name for less than $10.00 by purchasing it from a website like GoDaddy.
2. Look for a web developer
When you launch your website using an eCommerce solution, this is a very important part. When it comes to hiring a developer, be sure to conduct your due diligence if you want to launch your website quickly and professionally. Get recommendations from the developer's previous e-commerce websites. Request a timetable detailing the anticipated duration of the site's launch. They will be able to crop images in a way that matches your website if they have a background in graphic design. Make sure to inquire about the developer's previous work with the e-commerce platform you select (see step 4).
3. Obtain all necessary paperwork for a legitimate business
Get a vendor's license, register your business, and start researching legal business issues before you decide to sell electronics products. To get assistance setting up your business, you should get in touch with a local attorney. Despite the upfront cost, it will probably save you a lot of time and money in the long run.
4. Choose a platform for hosting websites and e-commerce
Choose a well-known e-commerce platform to save time and money. Because most developers are familiar with these, integrating plugins, payment processing, and other features is simple. Make sure the platform comes with a pre-made custom catalog software.
5. Choose a theme that complements your e-commerce strategy
You can save even more time by purchasing a theme from ThemeForest to find a layout that resembles your desired ecommerce look and feel. Over 28,000 website templates and themes start at $2 on ThemeForest. They are the best place to buy templates for websites.
Don't try something new. Download a template from ThemeForest or a site that is similar to it instead of starting from scratch to build eCommerce store.. We discovered through experience that the customization procedure can be extremely time-consuming and discouraging. Therefore, picking a theme that appeals to you will probably save you a lot of time and effort.
4 notes
·
View notes
Text
How To Create A Website In Wordpress | Web Development Tutorial

Are you considering creating a website? Especially if you’re not tech-savvy, starting a website could seem a daunting idea. Just be calm; you are not alone.
A good website is essential whether you’re establishing a small business from scratch or you already have one and want to increase your internet exposure. While there are many platforms to create a website, WordPress is one of the most popular website hosts due to its flexibility and customization options.
To help those who are not familiar with coding, Our web design institute trainer have made the most step-by-step tutorial on building a WordPress website.It can benefit users of all ages and ability levels.
This is a comprehensive rundown of every step we’ll cover in this guide, from beginning to end.
Understanding a Domain & Web Hosting
Buying a Web Hosting with Free Domain
Installing WordPress
Installing a Free WordPress Theme
Installing Few Necessary Plugins
Configuring or Customizing Settings of website
Creating & Designing Pages
Set up your Website
Setting up the website requires two steps to be done thoughtfully. First is to get a good hosting plan and then an apt domain name for the website.If you’re still unclear about what a domain name is, web hosting is, and how these things relate to websites, see our article How do a website, a domain, and hosting relate to one another?
Getting Web Hosting
Getting web hosting is the first step in creating a WordPress website.WordPress requires web hosting for your site to be accessible online.While there are several platforms offering basic to premium hosting services, some of the most popular ones include GoDaddy, Hostinger, and Bluehost.
Getting a Domain Name
Now buy a domain name from one of the top domain name registrars, such as GoDaddy or Google Domains, and manually link it to your web hosting provider.
The following factors should be considered while selecting a domain name:
The shorter, the better.
Eliminate dashes and numerals.
Though there are other excellent choices as well, try to stay with.com.
Steer clear of copyrighted content and names that are trademarked.
Verify if the domain is still accessible.
Avoid using terms that are hard to spell or pronounce.
Install WordPress
Once you are done with hosting and domain purchase, it’s now the time to install WordPress. Just link your web hosting account to WordPress.
Installing WordPress in Hosting has a process that directly depends on the hosting you are using. Check help page of your hosting and then install it. Once it is installed, login into the wp-panel. Just type “ /wp-admin” just after your domain name in the search bar , it will ask you for the username and password. It will then prompt you to the dashboard of the wordpress where you will be able to customize the website.
Install WordPress Theme
A theme is essentially a website template in the WordPress world. Your website’s appearance, features, and initial capabilities are all controlled by the templates. Every WordPress website has a default theme installed. If you go to your website, it will appear like this:
But don’t fret. You can install dozens of premium and free WordPress themes on your website.
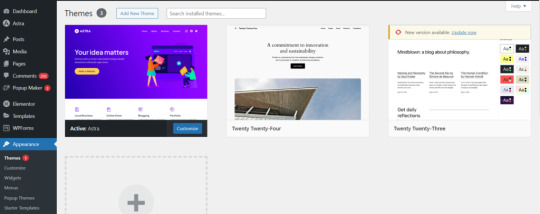
From the admin panel, you can modify the WordPress theme for the site. Go to the “Appearance » Themes” tab and select “Add New.”
The official WordPress.org themes directory offers over 11,000 free WordPress themes for search on the following screen.We’ll be utilizing Astra for the purpose of this guide. It is a widely-used free WordPress theme that can be used for many different types of websites and has versatile design choices.
You can look for the free theme you wish to install by entering its name in the search area.The theme will appear in search results on WordPress. To install the theme, move your cursor over to it and click the Install option. After installing your theme, select the Customize option from the Appearance menu to begin customizing it. This will take you to the theme customizer, where you can modify the theme settings while seeing a real-time preview of your website.
Install Plugins
Plugins for WordPress work similarly to applications on your website. They let you customize and add new features to your WordPress website like contact forms, picture galleries, AI Chat etc. Following the installation of your theme, you must install and activate all essential plugins to let you increase the functionality of WordPress. However, you should strive to restrict the amount of plugins you use, since too many might slow down your site or cause other plugins to malfunction.
To install plugins, navigate to the Plugins page from your WordPress dashboard. For WordPress, there are presently around 59,000 free plugins available. Additionally, third-party websites and developers sell premium plugins.
All corporate websites should have the following plugins installed:
Elementor
Turn your page editor into a more user-friendly drag-and-drop editor by using a page builder plugin, for example Elementor.
Akismet
Defend your website against comment spam.
Google Analytics
Monitor the traffic and activity on your website. This is a must if you’re a blogger since without it, most businesses won’t collaborate with you.
Jetpack
Offers upkeep, security, and performance improvements for your website.
HubSpot
Enhance your WordPress website with complimentary live chat to offer customer service, email marketing for newsletters, and CRM. Combines well with OptinMonster.
Yoast SEO
Aids in search engine optimization of your postings.
LiteSpeed Cache
An all-in-one, comprehensive plugin for site acceleration that comes with a variety of optimization tools and a dedicated server-level cache.
Disable Gutenberg
It will deactivate the basic WordPress webpage builder that has lots of limitations and will make it easy to use plugins and theme functions that extend the Classic Editor.
Tweaking the Settings
You must set up the settings, such as naming your homepage and blog posts page and modifying your site’s name, tagline, and icon, before you start customizing your web pages or laying out the content of your website.
Here’s how to set up the most popular settings:
Logo: Go to “Appearance” > “customize” > “site identity > “change logo” > upload your logo.
Site title: Go to “appearance” > “customize” > “site identity > input site title (a.k.a. your business name).
Site tagline: Go to “Appearance” > “customize” > “site identity > input site tagline (or simply delete the default WordPress tagline).
Site icon: Go to “Appearance” > “customize” > “site identity > under “site icon” click “change image” > upload the image you want to display as your site icon (a.k.a. favicon).
Homepage: Go to “Appearance” > “customize” > “homepage settings” and select the webpage you want to set as your homepage.
Blog: Go to “Appearance” > “customize” > “homepage settings” and under “posts page” select the page you want to set as your blog.
Permalink settings: Go to “settings” > “permalinks” then choose your preferred structure (typically “post name”) and save changes.
Create Pages
It’s time to start creating your web pages that form the foundation of a website. A company website, for example, usually consists of many pages, including the homepage, prices, services, about, and contact. Posts and pages are the two default content kinds that come with WordPress. Blogging features include posts, which are arranged chronologically backwards (newest entries are seen first). Pages, on the other hand, including your privacy policy, custom landing page, about page, and contact page, are supposed to be static, “one-off” types of material.
To display your most current postings, you can make a distinct page for your news or blog area. As an alternative, you can set up a website with no blog area at all. Here’s how to use WordPress to build and/or modify pages:
Navigate to “pages” using the vertical menu on the left side of the WordPress dashboard.
Click “add new” to start a new page.
Go to “all pages,” find the page in the list of pages, and click “edit” to make changes to an already-existing page.
Choose the option to edit with the page builder (i.e.”edit with Elementor”) at the top as we have installed a page builder plugin.
Compose the copy for your website and add personal touches to each page.
Press publish once you’re finished.
For any additional pages you wish to build, follow these instructions again.
Set Up Navigation Menu
After setting up your pages, design and build your menu. This is how people browse your website; the number of menus you have, such as those at the top and footer of the page, will depend on your theme.
This is how to set up the menu on your website:
Navigate to “menus” under “appearance” from your dashboard.
Choose the page from the list on the left to add it.
To rearrange your menu or to arrange pages as sub-pages beneath other pages, click and hold the pages.
Select “Save Changes.”
Following menu setup, locate the “menu settings” section by scrolling down the same page. In the “display location” column, select “primary” by checking the box. This will configure the menu to appear in your header as the primary menu for your website.
Add Content & Media
Now you need to add blog posts or other needed content to the pages.Many organizations prefer to include blog postings to boost their chances of being seen in search engines like Google. Here’s how to use WordPress to write a blog post:
On your dashboard, choose “posts” from the left side, then click “add new.”
Enter the title of your post.
Decide which category to place it in.
Compose the material for your blog.
When you’re finished, click “Publish.”
The primary difference is that, unlike a page, you can compose a blog post and then set it up to publish at a future date.
You can even add media and other images to enhance your content. You can, for example, include a gallery of your products or work images to make the homepage more appealing.
Market Your Site
It’s important to consider how you’ll market your website. Companies who have engaged in various internet marketing tactics to increase their online exposure and attract more visitors to their website are those that are easily found online.
The following are some of the best strategies for website marketing:
To help your website rank right away, submit the URL to Google Search Console.
When creating any kind of marketing material, such as business cards or email signatures, don’t forget to include your URL.
Make social media profiles for your website (such as a Facebook business page, an Instagram account, or a Pinterest business account) and link to them from your postings.
Establish a Google My Business profile to appear in local search results.
Submit your website to Yellow Pages, Tripadvisor, Yelp, and other pertinent internet directories.
We’ve now already covered how to create a WordPress website, install necessary plugins, add new web pages, and add new themes. If you’d want to go even farther, you can develop strong specialty websites that are able to perform much more. For example, you can add an e-commerce store,start your own podcast, create a web directory etc..
WordPress can be helpful for non-technical people to build simple websites but when it comes to customizable feature rich websites, you need expertise. ESS institute is one of the top Web development institute in Delhi and have recently launched a new online web design course to help you make websiyes. You can enrol in both online and offline batches now for detailed knowledge.
#Website development in wordpress#Web Development Tutorial#Create A Website In Wordpress#web development course#web development institute in delhi
0 notes
Video
youtube
How To Buy Domain And Hosting From GoDaddy 🔥 - (GoDaddy Tutorial!)
1 note
·
View note
Text
How To Create a Website in WordPress | Web Development Tutorial
Are you considering creating a website? Especially if you’re not tech-savvy, starting a website could seem a daunting idea. Just be calm; you are not alone.
A good website is essential whether you’re establishing a small business from scratch or you already have one and want to increase your internet exposure. While there are many platforms to create a website, WordPress is one of the most popular website hosts due to its flexibility and customization options.
To help those who are not familiar with coding, Our web design institute trainer have made the most step-by-step tutorial on building a WordPress website.It can benefit users of all ages and ability levels.
This is a comprehensive rundown of every step we’ll cover in this guide, from beginning to end.
Understanding a Domain & Web Hosting
Buying a Web Hosting with Free Domain
Installing WordPress
Installing a Free WordPress Theme
Installing Few Necessary Plugins
Configuring or Customizing Settings of website
Creating & Designing Pages
Set up your Website
Setting up the website requires two steps to be done thoughtfully. First is to get a good hosting plan and then an apt domain name for the website.If you’re still unclear about what a domain name is, web hosting is, and how these things relate to websites, see our article How do a website, a domain, and hosting relate to one another?
Getting Web Hosting
Getting web hosting is the first step in creating a WordPress website.WordPress requires web hosting for your site to be accessible online.While there are several platforms offering basic to premium hosting services, some of the most popular ones include GoDaddy, Hostinger, and Bluehost.
Getting a Domain Name
Now buy a domain name from one of the top domain name registrars, such as GoDaddy or Google Domains, and manually link it to your web hosting provider.
The following factors should be considered while selecting a domain name:
The shorter, the better.
Eliminate dashes and numerals.
Though there are other excellent choices as well, try to stay with.com.
Steer clear of copyrighted content and names that are trademarked.
Verify if the domain is still accessible.
Avoid using terms that are hard to spell or pronounce.
Install WordPress
Once you are done with hosting and domain purchase, it’s now the time to install WordPress. Just link your web hosting account to WordPress.
Installing WordPress in Hosting has a process that directly depends on the hosting you are using. Check help page of your hosting and then install it. Once it is installed, login into the wp-panel. Just type “ /wp-admin” just after your domain name in the search bar , it will ask you for the username and password. It will then prompt you to the dashboard of the wordpress where you will be able to customize the website.
Install WordPress Theme
A theme is essentially a website template in the WordPress world. Your website’s appearance, features, and initial capabilities are all controlled by the templates. Every WordPress website has a default theme installed. If you go to your website, it will appear like this:
But don’t fret. You can install dozens of premium and free WordPress themes on your website.
From the admin panel, you can modify the WordPress theme for the site. Go to the “Appearance » Themes” tab and select “Add New.”
The official WordPress.org themes directory offers over 11,000 free WordPress themes for search on the following screen.We’ll be utilizing Astra for the purpose of this guide. It is a widely-used free WordPress theme that can be used for many different types of websites and has versatile design choices.
You can look for the free theme you wish to install by entering its name in the search area.The theme will appear in search results on WordPress. To install the theme, move your cursor over to it and click the Install option. After installing your theme, select the Customize option from the Appearance menu to begin customizing it. This will take you to the theme customizer, where you can modify the theme settings while seeing a real-time preview of your website.
Install Plugins
Plugins for WordPress work similarly to applications on your website. They let you customize and add new features to your WordPress website like contact forms, picture galleries, AI Chat etc. Following the installation of your theme, you must install and activate all essential plugins to let you increase the functionality of WordPress. However, you should strive to restrict the amount of plugins you use, since too many might slow down your site or cause other plugins to malfunction.
To install plugins, navigate to the Plugins page from your WordPress dashboard. For WordPress, there are presently around 59,000 free plugins available. Additionally, third-party websites and developers sell premium plugins.
All corporate websites should have the following plugins installed:
Elementor
Turn your page editor into a more user-friendly drag-and-drop editor by using a page builder plugin, for example Elementor.
Akismet
Defend your website against comment spam.
Google Analytics
Monitor the traffic and activity on your website. This is a must if you’re a blogger since without it, most businesses won’t collaborate with you.
Jetpack
Offers upkeep, security, and performance improvements for your website.
HubSpot
Enhance your WordPress website with complimentary live chat to offer customer service, email marketing for newsletters, and CRM. Combines well with OptinMonster.
Yoast SEO
Aids in search engine optimization of your postings.
LiteSpeed Cache
An all-in-one, comprehensive plugin for site acceleration that comes with a variety of optimization tools and a dedicated server-level cache.
Disable Gutenberg
It will deactivate the basic WordPress webpage builder that has lots of limitations and will make it easy to use plugins and theme functions that extend the Classic Editor.
Tweaking the Settings
You must set up the settings, such as naming your homepage and blog posts page and modifying your site’s name, tagline, and icon, before you start customizing your web pages or laying out the content of your website.
Here’s how to set up the most popular settings:
Logo: Go to “Appearance” > “customize” > “site identity > “change logo” > upload your logo.
Site title: Go to “appearance” > “customize” > “site identity > input site title (a.k.a. your business name).
Site tagline: Go to “Appearance” > “customize” > “site identity > input site tagline (or simply delete the default WordPress tagline).
Site icon: Go to “Appearance” > “customize” > “site identity > under “site icon” click “change image” > upload the image you want to display as your site icon (a.k.a. favicon).
Homepage: Go to “Appearance” > “customize” > “homepage settings” and select the webpage you want to set as your homepage.
Blog: Go to “Appearance” > “customize” > “homepage settings” and under “posts page” select the page you want to set as your blog.
Permalink settings: Go to “settings” > “permalinks” then choose your preferred structure (typically “post name”) and save changes.
Create Pages
It’s time to start creating your web pages that form the foundation of a website. A company website, for example, usually consists of many pages, including the homepage, prices, services, about, and contact. Posts and pages are the two default content kinds that come with WordPress. Blogging features include posts, which are arranged chronologically backwards (newest entries are seen first). Pages, on the other hand, including your privacy policy, custom landing page, about page, and contact page, are supposed to be static, “one-off” types of material.
To display your most current postings, you can make a distinct page for your news or blog area. As an alternative, you can set up a website with no blog area at all. Here’s how to use WordPress to build and/or modify pages:
Navigate to “pages” using the vertical menu on the left side of the WordPress dashboard.
Click “add new” to start a new page.
Go to “all pages,” find the page in the list of pages, and click “edit” to make changes to an already-existing page.
Choose the option to edit with the page builder (i.e.”edit with Elementor”) at the top as we have installed a page builder plugin.
Compose the copy for your website and add personal touches to each page.
Press publish once you’re finished.
For any additional pages you wish to build, follow these instructions again.
Set Up Navigation Menu
After setting up your pages, design and build your menu. This is how people browse your website; the number of menus you have, such as those at the top and footer of the page, will depend on your theme.
This is how to set up the menu on your website:
Navigate to “menus” under “appearance” from your dashboard.
Choose the page from the list on the left to add it.
To rearrange your menu or to arrange pages as sub-pages beneath other pages, click and hold the pages.
Select “Save Changes.”
Following menu setup, locate the “menu settings” section by scrolling down the same page. In the “display location” column, select “primary��� by checking the box. This will configure the menu to appear in your header as the primary menu for your website.
Add Content & Media
Now you need to add blog posts or other needed content to the pages.Many organizations prefer to include blog postings to boost their chances of being seen in search engines like Google. Here’s how to use WordPress to write a blog post:
On your dashboard, choose “posts” from the left side, then click “add new.”
Enter the title of your post.
Decide which category to place it in.
Compose the material for your blog.
When you’re finished, click “Publish.”
The primary difference is that, unlike a page, you can compose a blog post and then set it up to publish at a future date.
You can even add media and other images to enhance your content. You can, for example, include a gallery of your products or work images to make the homepage more appealing.
Market Your Site
It’s important to consider how you’ll market your website. Companies who have engaged in various internet marketing tactics to increase their online exposure and attract more visitors to their website are those that are easily found online.
The following are some of the best strategies for website marketing:
To help your website rank right away, submit the URL to Google Search Console.
When creating any kind of marketing material, such as business cards or email signatures, don’t forget to include your URL.
Make social media profiles for your website (such as a Facebook business page, an Instagram account, or a Pinterest business account) and link to them from your postings.
Establish a Google My Business profile to appear in local search results.
Submit your website to Yellow Pages, Tripadvisor, Yelp, and other pertinent internet directories.
We’ve now already covered how to create a WordPress website, install necessary plugins, add new web pages, and add new themes. If you’d want to go even further, you can develop strong specialty websites that are able to perform much more. For example, you can add an e-commerce store,start your own podcast, create a web directory etc..WordPress can be helpful for non-technical people to build simple websites but when it comes to customizable feature rich websites, you need expertise. ESS institute is one of the top Web development institute in Delhi and have recently launched a new online web design course to help you make websites. You can enroll in both online and offline batches now for detailed knowledge.
#Computer Institute in Delhi#Best Computer Institute in Delhi#Graphic design course in delhi#Graphic design institute#graphic design institute in delhi#Web development institute in delhi
1 note
·
View note
Text
Inactive Account Policy: Don’t Let New Google Rules Lock You Out of Your Site
Google has announced a new Inactive Account Policy that every business owner needs to understand. From their update:
Starting later this year, if a Google Account has not been used or signed into for at least 2 years, we may delete the account and its contents – including content within Google Workspace (Gmail, Docs, Drive, Meet, Calendar) and Google Photos.
The policy only applies to personal Google Accounts, and will not affect accounts for organizations like schools or businesses.
The new inactive account policy is a good idea, but it may come with some significant hidden risks for your website, domain, security certificates and online presence.
How could the Inactive Account Policy harm my business?
As nearly anyone who has worked at an IT firm, digital agency or cyber security business can tell you, some businesses lose their security certificates, hosting or websites because they do not respond to renewal emails. The problem typically begins with a business owner setting up a website using a personal account as the email address, buying services for several years, then forgetting that those services need to be renewed. This happens more frequently than most business owners realize, and it can be devastating if a site host wipes out a business website, or if a business loses access to its domain.
Think about every piece of collateral with your website on it: business cards, letterhead, advertising, online links. Now imagine that all of it is lost because you failed to renew your web address on time. While many online service providers have built recovery options into their renewal processes, those processes may not work if you do not have access to the email used to register the service. At a minimum, you can expect to spend a lot of time on the phone with the provider attempting to resolve the problem. If you lose your web domain, your business email will stop working. These are not problems to take lightly.
How can I stop a lost email address from shutting down my business?
The first step in protecting your online assets is to know what you pay to access to keep your site online. This will always include the following:
Domain Name: This is the URL of your business, such as https://protectnowllc.com. Domains are not owned; businesses purchase access to them for a set period of time from a domain name registrar, such as GoDaddy or Google Domains. Most businesses opt for 2- or 3-year domain registrations, though you can register a domain for longer or for as little as a year.
Site Hosting: Unless you run your own server, someone provides a service to keep your website online. This could be an all-in-one site builder and hosting provider provider, such as Squarespace; a company that specializes in a particular site platform, such as WP Engine, or companies like SiteGround and HostGator that provide server space and allow you to build your site any way you like.
Security Certificates: Your site should have some sort of SSL certificate. Sites that lack them will not be indexed by search engines and may be blocked by web browsers and smart phones.
Third-Party Services: Many things fall into this category, such as image hosts, data feed providers and some website widgets or modules.
Losing access to your domain is the worst case scenario for any business. Sites and email will no longer function.
Most hosting providers have a grace period for renewal. Your site will go offline and your email may stop working, depending on whether your host provides your email as well as your website. Contacting their customer service and updating your agreement with the provider will typically get your site back online quickly. In the worst case scenario, all of your data and site content could be deleted.
These certificates must be renewed annually. You may find it very difficult to access your website if the security certificate expires, but your email will work.
Only specific functions or parts of your website will stop working if one of these services is interrupted.
Make a list of the services you use and the companies that provide them. At a minimum, the list should include your domain name provider, your email provider, your web host and your security certificate provider. If you have trouble identifying any of these providers, look through old emails or review old bank statements and look for one-time charges for companies that may provide these services. You should keep the list of services and providers in a spreadsheet. Do not include passwords in this spreadsheet, as this creates a security risk.
Once you have services and providers listed, log in to each provider and note the date when your service must be renewed. As you attempt to do this, you may discover that a service was registered with a personal email you can no longer access. This is the time to contact the company directly and update your account information. Do not wait until services go down and you are potentially losing business.
Make sure that the email used for each service is active; it can be a personal email, as long as you use that personal email account at least a few times a month. Preferably, it should be a business email associated with a business owner or a company’s IT department. Remember that the new Google Inactive Account Policy will only apply to personal accounts, not Google Workspace or business accounts.
Add the email used to register each service to your spreadsheet. Check the spreadsheet on a regular basis; if you see a renewal date coming up, be sure to check the email associated with that service, including spam folders. Service providers will typically send renewal notices 60 days, 30 days and 14 days before a service is suspended for nonrenewal.
Following these steps will ensure that you do not suffer any service interruptions. In larger organizations, it is a good idea to task someone with service monitoring and renewal so that notices do not slip through the cracks or get overlooked in spam folders. If you contract IT services or have an in-house IT department, make sure that your service providers are whitelisted so that emails can get through.
Why is Google changing its Inactive Account Policy?
Unused email accounts can be used by cyber criminals to carry out attacks, including fake ad attacks that direct users to malware sites. Cyber criminals may also mine unused accounts for personal contacts that can be used in phishing attacks, which is why it is a good idea to be wary of unexpected contacts from people you have not heard from in a long time. An abandoned account may have been compromised, and you could be talking to a criminal.
By suspending these unused accounts, which may have passwords for sale on the Dark Web, Google eliminates an avenue for cyber crime. This is a welcome step for everyone who is concerned with cyber security. Take inventory of your services and the accounts used to access them, and it will have no impact on your business.
Protect Now offers CSI Protection Certification, cyber security employee training that creates meaningful changes in employee attitudes toward individual and business security. We also help businesses manage their overall cyber security with Virtual CISO services. Contact us online or call us at 1-800-658-8311 for a free consultation.
0 notes
Text
Looking to buy a domain or hosting?
Looking to buy a domain or hosting?

As an AI language model, I can't sell domains or hosting services. However, I can provide you with some guidance on how to purchase a domain or hosting.
When it comes to buying a domain, there are several reputable domain registrars to choose from, such as Namecheap, GoDaddy, and Google Domains. These companies provide a user-friendly interface to search for and purchase domains, and they also offer various hosting and website-building services.
As for hosting, there are many options available as well, including shared hosting, VPS hosting, and dedicated hosting.The most popular hosting providers in the field include Bluehost, Namecheap, SiteGround, HostGator, and more. It's essential to research and compares different hosting options based on factors like price, uptime, customer support, and features such as storage, bandwidth, and security.
Before making any purchases, be sure to carefully consider your website's needs and budget to ensure you're getting the best value for your money.
Domain and hosting by Namecheap
Namecheap is a reputable domain registrar and hosting provider that has been in business since 2000. They offer a variety of domain extensions, including the popular .com, .net, and .org, as well as less common extensions like .me and .io. Namecheap also provides hosting services, including shared hosting, WordPress hosting, and VPS hosting.
One of the advantages of using Namecheap is its affordable pricing. They offer domain registration for as low as $0.98 for the first year, and their hosting plans start at just a few dollars per month. Namecheap also provides excellent customer support, with 24/7 live chat and email support available.
Overall, if you're looking for a reliable and affordable option for domain registration and hosting, Namecheap is worth considering. They have a solid reputation and a wide range of services to meet your needs.
Want to buy and how to register and buy? Enter my article here
1 note
·
View note
Text
How to Easily Create a Blog or Website and Monetize It in 2023?

Creating a blog or website is an excellent way to share your ideas, expertise, and passions with the world. Here’s a step-by-step guide on how to create a blog or website and monetize it in 2023:
Step 1: Choose your niche
Choose a niche that you are passionate about and knowledgeable in. It could be anything from personal finance to lifestyle, fitness, food, travel, or technology.
Step 2: Choose a blogging platform or website builder
There are many options for building a website or blog, including WordPress, Wix, Squarespace, and Shopify. Choose the platform that suits your needs and budget.
Step 3: Choose a domain name and hosting
Choose a domain name that is catchy and easy to remember. You can buy your domain name from a domain registrar like Namecheap or GoDaddy. Also, you will need to choose a hosting provider to host your website. Some popular hosting providers are Bluehost, HostGator, and SiteGround.
Step 4: Design your website
Choose a design that is visually appealing and easy to navigate. You can either use a free theme or buy a premium one. You can also hire a web designer to help you create a custom design.
Step 5: Create quality content
Create high-quality content that provides value to your readers. Ensure that your content is well-researched, informative, and engaging.
Step 6: Build your audience
Promote your blog or website on social media, forums, and other platforms to build your audience. You can also use email marketing to keep your subscribers engaged.
Step 7: Monetize your website
There are many ways to monetize your website, including:
Affiliate marketing: Promote products or services and earn a commission for every sale made through your referral link.
Advertising: Sell ad space on your website to businesses and earn money for every click or impression.
Sponsored content: Get paid to create content for brands or promote their products on your website.
Digital products: Create and sell digital products like eBooks, courses, or printables.
Step 8: Keep learning and improving
Keep learning and improving your website to attract more visitors and earn more revenue. Join online communities and attend conferences to stay up-to-date with the latest trends and strategies.
Creating a blog or website and monetizing it requires effort, patience, and dedication. But if you follow these steps and remain consistent, you can turn your blog or website into a successful business.
I will make stunning & eye-catching looks for blogging website design/redesign or fully functional e-commerce website (that you can edit yourself) using Wix Builder / WordPress. I don’t use pre-build wix design templates. I will work according to the client’s requirements
#mahanandame#web design#design#wixseo#wixdesign#wixwebsite#wix#wordpressdevelopment#wordpress#wordpressdesign#wordpresswebsite#blog#blogging#landingpage#landingpagedesign#seo friendly website#websitedesign
1 note
·
View note
Text
How To Make A Website ~ 2023 ~ A Website Tutorial For Beginners
How To Make A Website ~ 2023 ~ A Website Tutorial For Beginners
There’s no denying that the internet has had a big impact on our lives. From communicating with friends and family to finding jobs and learning about new things, the internet has become an integral part of our day-to-day lives. But what about making your own website? For many people, this is something that seems daunting or even impossible. That’s why we’ve put together this tutorial for beginners. In it, we will teach you everything you need to know about website design and how to make your own website. So whether you’re a beginner or a more experienced web user, read on to learn more about making your own website. https://youtu.be/MbKpfDyRMyo
What You Will Need
To create a website, you will need a computer and internet access. You can use free or paid services to create your website. Websites can be accessed from any device with internet access, including phones, laptops, and tablets.
To create a website using a free service:
1. Go to Google and type “free website creator” into the search bar.
2. A list of websites that offer free website creation tools will appear.
3. Click on one of the websites to open it.
4. On the homepage of the website, click on the “create my website” button to start creating your website.
5. Fill out the required information and click on the “submit” button to create your website.
6. Your new website will be created and can be accessed by visiting http://www.yourwebsite domain name/. Note: If you do not want your domain name to be public, you should choose a different domain name before submitting your site (for example, www.[Your Name]domainname).
To create a website using a paid service:
1. Go to Google and type “paid web hosting” into the search bar.
2. A list of websites that offer paid web hosting services will appear.
3. Click on one of the websites to open it.
4a On the homepage of the website, click on the “
Creating Your Website Domain
Creating a website is not as hard as you might think. In fact, it doesn't take that much time or money to get started. In this tutorial, we will show you how to make a website without any prior web design experience. All you need is a domain name and hosting.
The first step is to find a domain name. You can buy or lease a domain name from companies like GoDaddy, HostGator, and Bluehost. Be sure to choose a domain name that is relevant to your business or topic. Once you have your domain name, you need to register it with the appropriate registrar.
Once your domain registration is complete, you will need to create an account with hosting providers like WP Engine, Siteground, and GoDaddy Hosting Solutions. These providers offer different types of hosting plans that range in price and features. Choose the plan that best suits your needs.
Finally, set up your website by registering your chosen host with the desired settings and creating your website's content using a platform like WordPress or Medium. You can also use free tools like Google Sites and Blogger if you don't want to invest in a more professional platform.
Choosing a Hosting Provider
Choosing a hosting provider can be daunting for novice users. There are so many options and providers to choose from, and it can be difficult to know what you need or want in a hosting plan. In this article, we will discuss some factors you should consider when choosing a website host. We'll also provide a guide on how to choose the best hosting option for your needs.
When choosing a website host, there are a few key things you should keep in mind:
1. Budget: When selecting a hosting provider, be sure to take into account your budget. Some hosts offer higher-end plans with more features than lower-end options, while others may have lower prices but fewer features. It's important to find a host that fits your specific needs and budget.
2. Features: Another important factor to consider is the features offered by the host. Some hosts offer unlimited storage space, bandwidth, domains, and email addresses while others only offer limited amounts of each type of service. Be sure to read the host's terms of service (TOS) before signing up in order to see what features are available and their limitations.
3. Scalability: One of the most important factors when choosing a hosting provider is scalability - do you need enough space for your website? Do you need multiple domains or email addresses? Will your site grow over time? These questions are important to ask yourself before signing up with any host because not all hosts are able to
Setting Up Your Website
website
This tutorial will show you how to make a website. This is for beginners who are just starting out. 1. First, go to Google and type in "how to make a website." You will get many different results.
2. On the first page of results, click on the link that says "How to Make a Website - Step by Step"
3. This will take you to a website called Wix.com.
4. If you don't have an account yet, you'll need to create one now before you continue.
5. When you're logged in, click on the "Website Builder" tab at the top of the screen.
6. On the Website Builder tab, under "Properties," click on the box next to "Title."
7. In the "Title text field," type in your website's name (ex: mywebsite).
8. Under "Description," type a short description of your website (ex: This is my website).
9. Click on the blue button next to "I agree" and then click on "Create Site."
10 . Your new website should be online now! If it isn't, check that your internet connection is working and that you're logged in correctly... Then try again!
Configuring Your Website
That’s right, you can make a website without any prior coding experience! In this tutorial, we will show you how to create a basic website with the help of some easy-to-use tools. Let’s get started!
First, you will need to sign up for a free platform like WordPress or Blogger. Once you have your account set up, click on “Create A Site” in the menu bar at the top of the page.
In the “Site Name” field, type in the name of your new website. In the “Country/Region” field, select your preferred language and location. Click on “Next”.
In the “Site Layout” section, choose between a custom or default theme. If you don’t have any ideas yet, we recommend choosing one of our popular themes like BlueStack or Twenty Fifteen. Click on “Next”.
Now it is time to enter your site's information! Underneath “Title & Description” paste in a brief description of your website and title it accordingly. Make sure to include all necessary contact information such as email address, social media links and website stats (views and subscribers). Finally, under “Legal Info” paste in your copyright info and agree to our terms of service by clicking on “I Agree”.
Now it is time to add
Adding Content to Your Website
1. Decide what you want your website to be about
The first step in creating a website is to decide what it will be about. This might seem like a simple task, but there are a lot of different ways to approach this.
Some people start by brainstorming all the different topics that they’re interested in and compiling them into a list. Then, they narrow down the list based on their own interests and how relevant those topics are to their target audience. Other people start with an idea for a website and then figure out what they need to do in order to make that idea a reality.
Whichever route you choose, make sure that the content on your website is relevant and interesting to your target audience. If you can’t come up with any good ideas or your content isn’t engaging enough, then it might be time to revisit your goals for the website...
Marketing Your Website
If you have a website, congratulations! However, before you can really start marketing it, you need to make sure your website is up to scratch. Here, we’ll cover the basics of creating a website and give some tips on how to market your website.
1. Choose A Domain Name:
When choosing a domain name for your website, it is important that you consider both the name itself and the marketability of the name. Make sure that the domain name is easy to spell and remember, and that it is not already in use by another business or organization. Some good domain names to consider include:
-simplewebsitesolutionsoftware.com
-startupwebinars.net
-webdesignerpros.info
2. Choose A Hosting Provider:
Once you have chosen a domain name, it is time to choose a hosting provider for your website. There are many reputable providers out there; however, if you are new to web design or SEO (search engine optimization), choose a provider with experience who can help guide you through the process. Some recommended providers include Dreamhost and Bluehost .
3. Create Your Website Layout:
Next, you will need to create your website layout using an online tool like Wix or Weebly . Once your layout is created, add content for your site using either text or articles from external sources (like Wikipedia ). You can also use templates available on platforms
Conclusion
Making a website is a great way to showcase your unique personality and creativity. Whether you are starting from scratch or want to improve on an existing website, this tutorial will teach you the basics of how to make a website. From designing your website to setting up hosting and getting online, this tutorial provides everything you need to get started. So whether you're a beginner or an experienced web user, take advantage of our 2023 tips for making a website!
0 notes
Photo

Bluehost Affiliate Program - Everything you need to know
In this topic of Bluehost Affiliate program, You get to know how you can earn money online by referring users to buy Bluehost hosting services, Know how much you can earn per referral? What are the hosting plans? How can you do marketing? and so on.
NOTE: In contrast Must see our OFFER below end of the post, Happy Reading!
What is Affiliate Marketing?
Affiliate marketing is when you promote other people product and when people click on your referral link and they buy the product you get a commission.
What is Bluehost Hosting?
Bluehost is a web hosting company. It is one of the 20 largest web hosts, collectively hosting well over 2 million domains.
In General, every business needs to have a website so for that website to run properly you also need to have a hosting service that maintains all that website who takes care of loading speed, storage, and everything. So that is what Bluehost does so there's always a demand for Bluehost.
How can you earn money online with the Bluehost Hosting Affiliate Program?
Bluehost Hosting Affiliate Program is paying $65 for each qualified sign-up. In this case, if even a single person clicks on the link and they buy Bluehost service, also you will be getting $65, You can promote all these hosting services.
Especially, In the hosting services they also have different kind of hosting which is Great for a new website or blog.
Shared HostingVPS HostingDedicated HostingOur most popular solution provides everything you need to get started.Power, control, and flexibility. Run a server the way you want.Dedicated hosting provides improved security and complete customization.Price: $3.95/mo*Price: $19.99/mo*Price: $79.99/mo*Easy-to-use customer dashboardScalable with on-demand resourcesFor resource-intensive needsFully managed solutionFull root access for additional controlUltimate security and performanceBUY NOW
BUY NOW INDIA ONLYBUY NOW
BUY NOW INDIA ONLYBUY NOW
BUY NOW INDIA ONLY
If you go for the minimum package, For example, Shared Hosting at $3.95/mo, you will be still getting $65, you know how cool is that so that is how it works and also all these packages are really cheap, look at the first package Shared Hosting it's just like around $4 per month.
How to Join the Bluehost Affiliate Program?
Above all it's Free to Join
Signing up takes only a few minutes and is completely FREE.
Click here: Sign-up - Bluehost Affiliate Program
Get Tracking Link
After Sign-Up, You will get a custom tracking code, For example, https://www.bluehost.com/track/stepphase/. Bluehost Hosting also uses advanced, customized technology to ensure you always get credit for every single referral.
Create Campaigns
Go to the Links Tab of Bluehost Hosting Affiliate Dashboard, You can also create a campaign by simply entering a valid name into one of the boxes next to links or banners on this page.
If your website coding, you can also handle scripts you can use one of the prebuilt scripts in the Banners section. These scripts will automatically pull in the image to your site and display it with your tracking code embedded. when someone clicks on the image it will forward them to our website using your tracking code.
There are 33 banners of different sizes, you can place that banner on your websites.
Track Campaigns
In the Campaigns section of Bluehost Affiliate Dashboard, you can also see the stats in brief and date wise and the Number of Signups, Percent of All Signups, Number of Clicks, Percent of All Clicks all in one page. You can export or download your report in PDF and CSV format.
How to do Affiliate Marketing?
Create Website or Landing Page
You can also create a beautiful and informative landing page to promote products and attract users to made them buy.
In face you can also create websites or landing sites from free online web-builder tools like Wix, Weebly, GoDaddy, Squarespace, WordPress, etc.
Promote via Social Media
You can create your own Page or Group to share information regarding hosting on Facebook, With its marketing tool, you can promote via its ads service and attract lakhs of users.
Either you can join various tech groups on Facebook and freely promote Bluehost products.
After all Here the list of 8000+ Facebook Buiness Groups
Email Marketing
Many B2B marketers claim that email is the most effective marketing, that generates more revenue.
To sum up You have to choose the right email marketing service.
WhatsApp Marketing
You can also share it by joining WhatsApp groups and can share your website to promote.
All in all Here the list of thousands of WhatsApp Groups List 1 & Groups List 2
Free Premium Theme Offer
If you buy from our Buy Now link we will give you premium themes for free, You have to do just contact us and send us your email address to us before buying, If you successfully purchased it, We will send you the premium themes. Learn More
Note: Before Purchase send us your email id so we can verify it.
BUY NOW (India)
BUY NOW (International)
You can also contact us to let us know if we are missing something on our page and I hope you like it, Thank you for your visit.
#Stepphase #technologies #technology #tech #technews #techworld #techtrends #smartphone #apple #techupdates #futuretechnology #newtech #techgeek #technologynews #technologythesedays #smarttechnology #technologylover #technologytrends #technologyblog #gadgets #smartphone #gadget #marketing #digital #india #technologyisawesome #amazing #repost
0 notes
Text
filezilla 3.8
1st - Choose ideal. Think about a domain address and begin searching to find one that. Go to any Domain Registrar, like Godaddy.com and try to find an available name that suits you! (Don't get stalled here, I'm slightly obsessive compulsive and this took me forever, nevertheless cheap, so don't worry, you can invariably just get another one if you locate one you just have to have.) Shouldn't only financial impact a person about $10-$15. Set some time limit your comfortable with for your search, for example 20 minutes, then buy it.
One within the first step that I learned how to make my own website is by learning primary web creation using free software application tools offered online. filezilla Cracked of several simplest website making using a HTML editor. Searching for of filezilla Torrent like NVU that are completely free of charge.
This is often a small tutorial about uploading files to a webserver pricey FTP patron. This is very simple and it's totally figure it out yourself. This tutorial has been said for fundamental newbie (Don't get upset! I was every newbie properly!) who is beginning with a blank slate.
You will also need to transfer those files you created with your hosting checking account. You can download filezilla for free and transfer all of the pages of your site. Again just Google FileZilla and download the Mac. or windows design.
Let's say, if may a file that's about 300MB a person would like to send it over back to your friend oversea immediately. What can you are going to do? Usually emails have attachment limit (usually it is not as high as 300MB) and rrt's going to be extremely slow and unstable in the event you try managed over im software like MSN. Really best solution will be setting your own FTP server both at home and authorize your friend to download from pc. Mind as well, you can set up an account so you just can view all of one's files and grab them wherever you travel.
You really have to buy suitable domain name for your website which would be the primary Url of your website. You can easily a website name for GoDaddy for $8 per . You also need a hosting space to keep your website files plus that you can buy a paid hosting space or you should use some free web hosting providers to host your files. Personally, i suggest in which buy a paid hosting space of your website to get better support and strength. A paid web hosting space may amount to around $5 per calendar month.
Usually the files about the left side is your local file and also the ones on the right side are the files moving into your server or service provider. If you really should upload a file, doing your drag the file around the left for the right and if you download a file, you will need to drag the file from the very best to the left counting on where you local host and server host can be found.
0 notes
Text
Namecheap Hosting review 2022: A Top Domain Registrar
What is Namecheap Hosting and how does it work?
In this piece, we'll examine Namecheap's hosting options for the year 2022.
To now, Namecheap hosting in 2022 has been the best low-cost hosting option available worldwide.
Initial Year of Shared Hosting for 51% Off!
All the information you need to know about Namecheap Hosting's features and pricing can be found on this page.
Namecheap hosting has built up a three million-strong clientele over the course of its 18-year history.
When it comes to managed WordPress hosting, Namecheap hosting 2022 is one of the cheapest and easiest options available.
2.Is Namecheap Hosting any good?
6 Advantages of Namecheap Hosting
Reasonably quick average response time
Multiple domains are permitted.
A large amount of disk space
Email accounts that are completely free
No charge for site migration
Money-back guarantee for 30 days
Namecheap hosting 2022 is the most simple, beautiful, and low-cost option.
GoDaddy or Namecheap: which is better?
Domain administration is a breeze with Namecheap as well. There is no better value than GoDaddy because of their free backups and SSL certificates.
While GoDaddy's plans may offer more total storage space, for the vast majority of users, that space is unnecessary, making Namecheap the better choice due to their superior customer service and support.
Is Namecheap based in Russia?
Namecheap does not employ Russians. In Ukraine, they have set up their main help desk and chat service. Most of their business actually takes place in Europe.
Business like this doesn't just happen in the United States.
Is it legal to buy a domain name from Namecheap?
Namecheap guarantees their hosting services will be up and running at all times, and their servers are fast and reliable.
Quickly and easily create your own website using one of Namecheap's many site builder programs.
Is hosting available through Namecheap?
Shared hosting, WordPress hosting, and e-commerce hosting are all services that Namecheap offers its customers.
What is the difference between a Namecheap domain and a regular domain?
Founded in 2000 by current CEO Richard Kirkendall, Namecheap is an ICANN-accredited domain registrar with headquarters in Los Angeles. More than 500,000 clients are serviced, and millions of domains are administered.
Namecheap is an industry leader in both domain name registration and web hosting.
Is SSL provided by Namecheap for free?
Namecheap will instantly apply the free SSL certificate to your account if you buy hosting from them. If you refer your domain to our hosting name servers, our Namecheap SSL plugin will activate automatically.
What is the procedure for deleting my Namecheap domain?
Select Manage next to the web host your domain is associated with. Click the Cancel service button that appears next to the package. To cancel your application, fill out the cancellation form and select "I understand, please consider my request"> "Submit application."
Namecheap Hosting's Best Features in 2022
Now we'll go through the advantages of Namecheap hosting.
Cost-Effective:
Fast, secure, and high-performing hosting services are yours from Namecheap in 2022 for only $2.88 a month.
You may, for instance, get 50% off the renewal price of PositiveSSL certificates and a free certificate for the first year.
If you have found your way to Hostinger's main page. If you go with them, you can expect cheap hosting rates. It has a surprisingly affordable service package.
Namecheap hosting 2022 offered a 30 day money refund guarantee, which we took use of.
Moreover, a real domain name will be provided to you. You may make reservations at a discount and see your balance rise. If you're looking for a cheap option, Hostinger is it.
In addition, Namecheap Hosting has built a dependable and safe environment in which to host your website.
With Namecheap hosting 2022, we save time and effort.
Namecheap deserves credit for helping make this happen.
We've finally found a hosting company willing to cut our rates by 25%, and it's name cheap.
Simple and Quick Onboarding
The Onboarding Process Should Be Straightforward and Quick
Namecheap hosting in 2022 is the most convenient and stylish option. Use of it has been simplified.
Right after you sign up, you'll get a welcome email and be able to access the site right away.
Show your support for Namecheap hosting.
At 2022, support is accessible anytime, day or night.
Just a minute is all you need to feel connected.
Backup Alternatives
With NameCheap hosting in 2022, you get unrestricted access to the backup feature. The free c panel backup offered by Namecheap is superior to all others.
Reliability
Namecheap's web hosting services are lightning fast and trustworthy, with a 99.9% uptime guarantee.
Sharing hosting packages were discounted by 73%, and we received a further discount of 25% since this was our first hosting purchase with them.
Domain Registrar
The fact that Namecheap, a domain registrar, is giving us a discount of 25% on our first hosting purchase is a huge help.
What is the difference between a Namecheap private email address and a Namecheap public email address?
Namecheap's Private Email is a high-end email client that gives you more flexibility and customization options.
Many company owners like private email because it is more secure, however professional Internet email is when a cloud mail server handles both incoming and outgoing email.
Which of the NameCheap plans should I choose?
You should start out with the more affordable option, as suggested by me. If the need arises, updates may be made at a later date.
Moving up to a more costly plan? NameCheap can help with that, too. A multiplication in visitors takes more time than expected, so only invest heavily if absolutely necessary.
It's possible that your requirements are unique, in which case you should consult with a NameCheap hosting expert.
50% OFF Namecheap Hosting 2022 offers three plans: 1. Stealler 2. Stealler plus 3. Stealler enterprise SSD Plan.
Stealler (Stealler):
a monthly fee of $1.44
SSD disk space of 20 GB
3.Bandwidth that is unmetered
Make use of three websites
Control panel ePanel
Plus Stealler
Monthly payment of $2.44
SSD Disk Space with No Limits
Bandwidth that is unmetered
an unrestricted website
5.ePanel is a control panel for ePanel.
Stealler business SSD Plan :
1.4.44$ per month
50 GB of SSD storage space
bandwidth that is unmetered
an unrestricted website
5.ePanel is a control panel for ePanel.
The following hosting coupons are available from Namecheap hosting.
Here are some options:
They provided a 73% discount on shared hosting plans.
Get a 32 percent discount on VPS hosting
On 24 different websites, you can get $3.98 off.
4.com has a 4.8% market share.
5.us received 5.3.88 percent of the vote.
On.xyz, you can get a 90% discount.
7.io domains are 7.21 percent discounted.
STORE domains are 8.96% off.
Green Bar Single-domain EV SSL is now $9.50 off.
VPN Service at a Discount of 10.68%
Dedicated Servers are discounted by 11.50 percent.
Security Products are discounted by 12.54 percent.
Bonus features:
NameCheap's plans include a lot of useful features, however there are a few perks that are left out.
For instance, you may see that the time allotted for requesting a refund is really little. Only for the next 14 days can you purchase a name for the low, low price of NameCheap. Corporate rivals like as HostGator, on the other hand, provide a 45-day money-back guarantee. Similar services from other rivals, such InMotion, Web Hosting Hub, and DreamHost, provide a money-back guarantee of at least ninety days.
Some of its improvements, like the dedicated IP addresses needed for SSL certifications, might be expensive. While many companies would provide one at no cost or for a little price, NameCheap will charge you $24 yearly.
Although none of them are deal-breakers, purchasers should be aware of them nevertheless.
Namecheap hosting 2022 is offering a special deal where students can receive free domains. They provide free domains to students. There is no need for students to have a Namecheap discount code to take advantage of this offer. Therefore, one of the best domain registrars and hosting companies is Namecheap in 2021.
In 2022, the pros and cons of using Namecheap Hosting
(1) A great place to start.
As many as three websites may be hosted for as little as $2.88 per month.
Namecheap's offer is beneficial and uncommon since most of the other companies I've researched limit their basic plans to just one website.
If you're looking to host two or three somewhat large websites, I think the lowest Namecheap package is amazing value for the money.
free migrations, among other liberties
Namecheap offers a free website migration service.
Migrating your existing cPanel site to Namecheap is quick, easy, and needs minimal work on your behalf.
Simply authorize Namecheap's hosting professionals to access your existing cPanel, and they'll take care of the rest. They will operate autonomously, requiring neither your assistance nor any downtime, from start to finish. Still, even if that's the case, we're talking about a wait of no more than 15 minutes at most.
Third, a reasonable pricing structure
When it comes time to renew, Namecheap's renewal fee does not rise much, unlike many other web providers. In light of the fact that the ridiculously low prices offered by certain businesses are impossible to maintain, I find this to be a welcome change.
You may end up paying for this site for many years to come if it becomes successful. GoDaddy and HostGator, both web hosting providers, adopt the tactic of charging a cheap initial charge followed by a much higher renewal fee. Namecheap's prices are stable.
Four, free backups
With every Namecheap subscription, you get free backup storage. Only the biggest corporations do backups every day, but even once a week is fair given that backups are costless.
With so many potential uses for backups, this is particularly important for websites.
Multiple factors need regular backups, including site redesigns, broken plugins, and malicious intrusions.
5 - Outstanding Domain Name Registration Options
If you look for 2019 Namecheap reviews without specifying that you want hosting, you will get a clear idea of the registrar's quality. Absolutely, that's the case.
I can say with confidence, however, that Namecheap is excellent. As the best domain registrar, they provide the most TLD options, a user-friendly interface, and tempting deals.
Sixthly: a sweet spot for users
Namecheap has an excellent user interface. It has a minimal design yet gives a plethora of data at a glance.
Options are presented clearly, and the product itself is easy to administer. The number of upsells is minimal, and the interfaces for managing payments, domains, and hosting accounts are as straightforward as is humanly possible.
Using two-factor authentication, you can keep your Namecheap account safe and secure for the long haul.
What a great update page
No doubt Namecheap is down or undergoing maintenance at the moment.
The status page provides a wealth of information. There you'll find promotions for things like server upgrades, network monitoring, email hosting, and domain registration. I like how helpful they are, and how often they release new versions.
Eighth, Bitcoin Dealings
This has nothing to do with site hosting, but I think it's fantastic that digital services may be purchased with actual digital money.
Namecheap's disadvantages
Namecheap hosting has a few flaws. Even if there are other aspects of the product that may be improved, this usually relates to average speed and uptime.
1 Boost from SSDs:
As I was doing research for my Namecheap evaluation, I came across the phrase "SSD acceleration" for the first time. If there is no advertising coverup, then the hosting is not on SSD servers.
Because SSDs are so much quicker than traditional hard drives, this may be the reason why my Stellar Plus plan isn't functioning as effectively as it should.
Inadequate space for:
50 GB of solid-state drive (SSD) space seems to be plenty, and 20 GB on three sides is a lot.
However, many of their rivals do not put reasonable limitations on how much space an account may use so long as it does not breach the terms of service.
a dearth of data centers:
The firm not only offers colocation services in the UK, but also operates a data center in Phoenix, Arizona. The second option is more costly.
Most of the other big hosts have three or more data centers of their own.
We hope you'll be happy to know that using Namecheap for hosting in 2021 is lot easier than you would think.
The learning curve for this tool is minimal. Here, no cost themes are readily available for download and installation.
2021 Namecheap hosting is lightning fast and loads pages quickly.
Briefly said, hosting services like Namecheap's have a lot to offer modern businesses.
Because of how easy it is to use, everyone can benefit from it.
Namecheap's Core Values and Company Image
the 2021 reputation and principles of Namecheap Hostng It has already been established that Namecheap Hosting is an independently owned and run company.
In the computer industry, where a few of corporations dominate the bulk of hosting providers, this is an extremely unusual event.
On the other side, having complete autonomy and secrecy isn't always preferable.
On the other hand, it's not necessarily a bad thing for hosting companies to fall into the hands of large corporations.
Namecheap Hosting 2021 stands out from the competition because to the company's commitment to openness and the clarity with which it defines its brand principles.
They are notorious for producing enormous confusion among professionals. It's great when a business is honest about everything, including the prices and services they provide.
I like that they include hosting solutions that interest me and that their renewal fees are advertised publicly.
Performance
Namecheap's hosting 2021 customer service starts with an easily navigable information base.
It's organized into digestible chunks, and it addresses both basic questions (such "How do I renew my domain?") and more complicated concepts. Regarding more specific questions ("DNSSEC management for domains specified by custom DNS").
Most of these pieces are rather extensive and comprehensive. Namecheap 2021 hosting users have the option of posting messages in the support center and reading those sent by other users.
This is a common way to get answers to specific questions concerning the content of an article from the Namecheap team, which is subsequently made available to the public (Namecheap does not appear to remove negative comments).
Even though they don't provide phone support, Namecheap has a live chat option and a ticketing system for when you need help. We tested it with a simple question, and we got a precise answer in under 30 minutes.
Namecheap hosting 2021 outperformed the competition, but we cannot guarantee this will continue to be the case in more difficult, real-world conditions.
In spite of this, our server testing showed that this was not the case.
Uptime.com monitored our test site every five minutes during the week, and although it was always available, the average response time was a dismal 718 milliseconds (ms), with a variation of 625 ms to 1.55 ms.
Our current 10th host (DreamHost) averaged 274 ms throughout testing, with a range of 235-465 ms, whereas the bulk of the original shared hosting plans ranged between 200 and 400 ms.
And when compared to other free services, it stands out.
While this is a drawback, it's important to remember that we only look at the cheapest plans from each provider and the vast majority are far more costly than Namecheap. Hosting with Liquid Web is $19 per month, Media Temple is $16.67, and Namecheap is $1.44 per month; these prices make sense as a performance cost.
Namecheap might be a suitable option if speed isn't a priority and price is. I realize this is a drawback, however bear in mind Namecheap has the lowest prices after comparing the lowest plans from all the providers.
Hosting with Liquid Web is $19 per month, Media Temple is $16.67, and Namecheap is $1.44 per month; these prices make sense as a performance cost. Choose Namecheap if saving cash is your primary concern and the service speed meets your requirements.
That choice is still open to you.
Service to the customer:
Assistance to Clients Evaluation of customer service is challenging.
What is happening in the background is murky at best.
The same holds true for figuring out whether the firm will be helpful when you contact them.
When looking for reviews of a company online, you will find either exaggeratedly negative encounters or overly positive ones.
The problem with anecdotes is that it's impossible to tell whether what you're reading is significant or just a fluke.
Instead, customers should look for indications that the company values customer service or views it as an expense.
Does this have any bearing on whether or not the company's priority is to increase long-term, satisfied consumers or short-term profits?
Host comparisons for Namecheap in the year 2022
My experience as both a consultant and a client with several of the industry's most prominent hosting companies is extensive.
Check out how NameCheap's hosting compares below!
NameCheap vs. iPage
Web Hosting Comparison: iPage vs. NameCheap HostGator's cheap hosting comes courtesy of a sister firm called iPage.
Although Endurance International owns this company, it does not seem to be as actively invested as Endurance International was with HostGator.
IPage seems to exist primarily to provide users with free or almost free hosting in the short term.
Those on a tight budget will appreciate this, but it comes at the expense of efficiency and satisfaction for regular customers.
Namecheap is my go-to web server, despite iPage's many features.
Domain Name Service Comparison: NameCheap vs. HostGator
Web Hosting: NameCheap vs. HostGator In the hosting industry, HostGator needs no introduction.
This firm, like iPage and Bluehost, is owned by Endurance International.
HostGator, a product of Endurance International, is lauded for its optimal harmony of helpful customer service, affordable rates over the long term, and enough functionality.
Hostgator offers superior customer service, faster speeds, and less restrictions than its competitors.
But if you're just starting out with a single little site and don't anticipate a lot of traffic, NameCheap is a great option.
Large-scale website builders will find HostGator to be the most beneficial service.
Conclusion:
If you don't want a lot of space for your websites, NameCheap Hosting 2022 is a great option.
Of course, you should go elsewhere if you have more stringent needs.
In my experience, they consistently performed below the averages for speed, uptime, and customer service.
For just a little bit extra money, you can have hosting that is light years ahead of what they provide.
Visit Namecheap, on the other hand, if saving money is a top concern.
In conclusion, in my opinion, NameCheap hosting is a great option for people trying to save money on their hosting.
If you're just getting started with a small website and are more concerned with costs than storage space, then Namecheap hosting in 2020 is your best bet.
Namecheap has several useful options. You must carefully read the TACs before registering, as there may be important information hidden there.
Research everything carefully before making a decision because the money-back guarantee only lasts 30 days.
0 notes
Text
How to Get Free Plumbing Leads in 2022
Nothing relevant will come up if you Google free plumbing leads. Instead, you will see a list of articles that explain how to get more leads from plumbing companies using different paid methods.
I'll let you in on something: there is no free plumbing lead.
Plumbing Webmasters could provide a list of marketing strategies that will generate plumbing leads. However, none of these techniques are free. We can only show you the most cost-effective methods.
The cheapest way to get leads for plumbers
While there are no free plumbing leads, they do exist. Organic website visitors are the best way to get plumbing leads. Your overhead will depend on whether you have a website or not, as well as how old the site is and whether it ranks for keywords.
The Average Plumbing Lead Cost
Low-Cost Plumbing Website Leads
It is important to spend as little money as possible to reach the most prospects. Contractors often fall for the trap of getting a free or extremely cheap website to increase their lead acquisition costs. Some websites, such as the ones below, don't get traffic.
Google Sites: Your Google Business Profile website won't rank in search results for any keyword.
Auto-Generated Sites: A site generated automatically from your scheduling software, or any other platform, won't rank.
Mobile Menu on Local Service Website
Customers want to do business with a plumbing company that is trustworthy, credible, and authority. A mobile website branded with your unique value proposition is the best way to do this.
Requirements for Plumbing Leads
Although each website offers low-cost and free options, none can help you achieve your main goal. What's the next step in your journey? You should spend as little money as possible to meet the basic requirements for a website that generates plumbing leads. These are the basic requirements.
Top-Level Domain: Must have a.com/.net (prefrably.com).
Hosting Plan: To launch your website, you will need a hosting plan.
Content: To rank for anything, you need content.
SEO: To get indexed, you need to have some technical and on-page SEO.
Example of branding on a plumbing website
Low Cost Plumbing Leads Websites
You might be wondering, "How much will this cost me?" You can get a domain name free of charge when you buy a website. IPage, for example, offers a free domain name for the first year with a hosting plan starting at $1.99 per month.
Although you can find SEO services and content for as low $99 per month, we do not recommend it. The content is often terrible, and the onpage SEO is even worse. These providers are often glorified hosting services. You will need to pay $750 for legitimate content and SEO.
Content + SEO Total Cost: $750 per month (for life).
This means that you can get all you need for $785.88 per monthly. You will also need 10-20 leads, as the average plumbing service costs between $50 and $200.
You can easily turn a substantial profit by using the services mentioned above. The good news? The lifetime value is much more powerful than the initial payment. They are likely to return multiple times over the lifetime, increasing their lifetime value.
GoDaddy Domain Search Screenshot
There are other ways to get plumbing leads for free or cheap.
Organic SEO is the best way for plumber leads to be found. If you're really desperate, you have other options. These tactics might not work for your plumbing contractor business but we wouldn't advise it.
Cold Calling
Telemarketing is becoming increasingly difficult to use as a legitimate business because Americans receive billions of spam calls each month. For truly desperate plumbers, a cold phone call could result in a lead.
You can call neighbors in dire need of emergency plumbing because of a weather event. This is similar to the way a roofer would help with hailstorm-prone areas.
Cold emailing
A strong online presence can also bring you additional benefits such as the ability to build a list of email subscribers. To encourage customers to engage with your plumbing company, you can offer discounts and newsletters to those who sign up for your website.
0 notes
Last Seen Blogs

justabout2rain
And I Won't Be Afraid, Of Anything Ever Again

aeoelu-archived
♚ ᴴ ᵉ ᶫ ᶫ ᵇ ᵒ ᵘ ᶰ ᵈ⋅

coolmusiciansphotographysoul
pebblescapes

gazkamurocho
Ain't I red hot?

flushstudio
Flush Studio