#dusahades
Photo
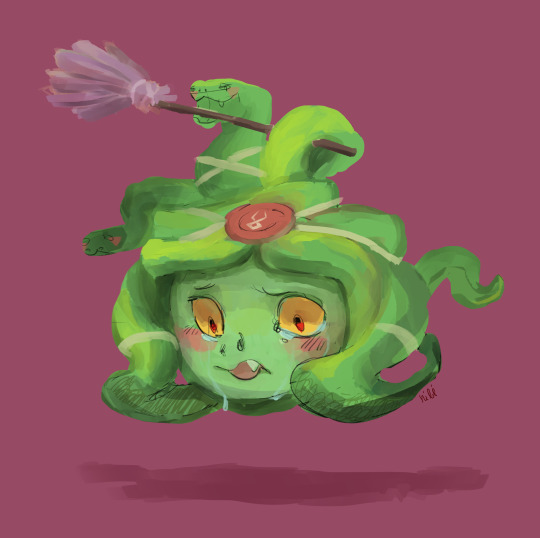
dusa my beloved
196 notes
·
View notes
Text
Dusa Pattern
I got a request for a crochet pattern for my amigurumi plushie Dusa, so here it is! She is actually pretty straightforward when it comes to the crochet bits, and the hard parts are embroidering the face and shaping the hair! As always, if you use this pattern, please link back to my page, and tag me here on tumblr or @erin.gurumi on instagram! I love to see what people make!
Technical stuff:
I used a 3mm hook and these yarns:
Red Heart Super Saver in Minty (head)
Loops and Threads Impeccable in Green Lagoon (hair)
Cream (scrap yarn from a stash, similar to Red Heart Super Saver)
Red (scrap yarn from a stash, similar to Red Heart Super Saver)
Red Heart Super Saver in Medium Purple
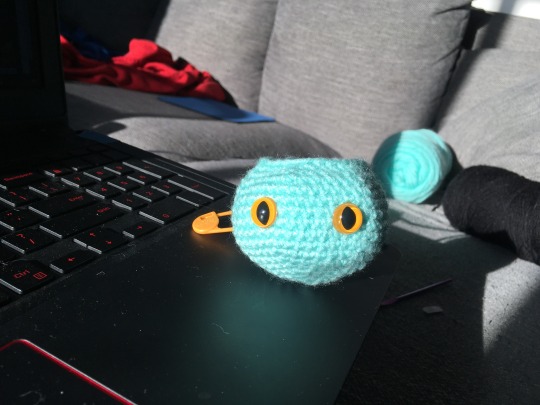
^ Head
As I mentioned, the crochet part is pretty straight forward. The head is just one big sphere, but the part I find the most challenging is doing the embroidery
6 sc in a magic circle
inc 6x to make 12 stitches
(1 sc, inc) 6x to make 18 stitches
(2 sc, inc) 6x to make 24 stitches
(3 sc, inc) 6x to make 30 stitches
(4 sc, inc) 6x to make 36 stitches
(5 sc, inc) 6x to make 42 stitches
(6sc, inc) 6x to make 48 stitches
7 rows of 48 stitches
(6 sc, dec) 6x to make 42 stitches
(5 sc, dec) 6c to make 36 stitches
(4sc, dec) 6x to make 30 stitches
(3sc, dec) 6x to make 24 stitches
(ADD EYES/STUFFING AND START EMBROIDERY- see below!)
(2sc, dec) 6x to make 18 stitches
(sc, dec) 6x to make 12 stitches
dec, until closed, finish stuffing and finish off

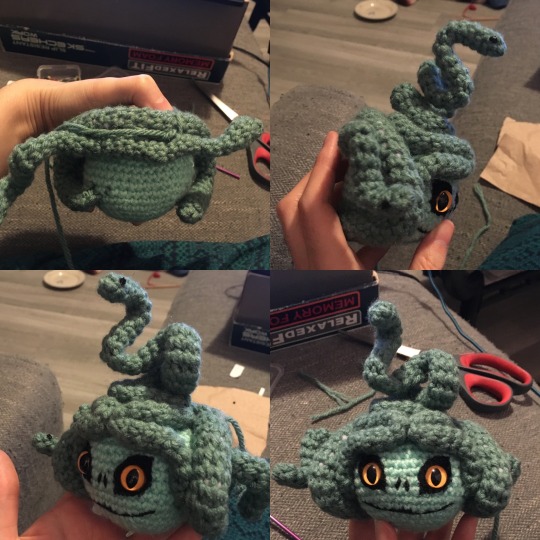
^ After you are nearly done with the sphere (for me, I like to start when I am at the 30 or 24 stitch row), I used some yarn to embroider her eye liner (it ended up looking a bit too thick, but I was really struggling with making it look even.. I even ended up cheating a bit and using some marker... which I bet would have turned out nicer had I just used that!). Then I also added her nose and mouth - I didn’t have black embroidery thread, so I used yarn and a bit of unraveled yarn... This is probably not recommended, so if you have a better strategy please go for it!! I think this turned out a bit more skeletal than snakelike, but I did my best!
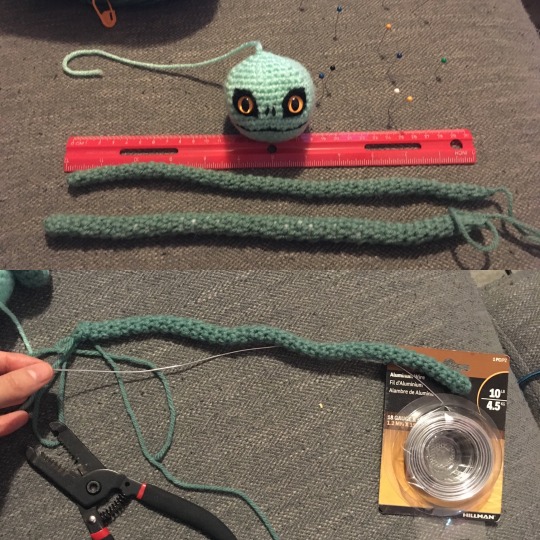
^ Hair Snakes
Making the actual tubes was very straightforward, it was the attaching them to the head which took some thinking! For simplicity’s sake, I made four tubes, one slightly thicker than the other, and all the same length. But, I imagine it’s really easy to make them a bit longer, or maybe add one more to fill in the back of the head!
Make one of:
6sc in a magic circle
sc 6x until you have a tube 12 inches (30 cm) long (stuff lightly as you go)
Make three of :
5sc in a magic circle
5sc until you have a tube 12 inches (30 cm) long (no stuffing in these ones, probably could do very light stuffing if you want)
* FOR TWO of these I added a metal armature - the stuff I had around is probably not right for making dolls, it looks like 1.2mm aluminum?

^ Ok, for the first two hair pieces, I used the empty (no metal) 5sc tube and the stuffed 6sc tube. I bent the 5sc tube into a sort of omega shape, looping around the crown of the head, touching points at the forehead, and coming down to make the bangs. The 6sc tube went behind the 5sc loop, coming down towards the cheeks and then curling back to make the front of her cute little bob! Use tons of pins and then sew in place, either with the tail of the yarn or a separate length of thread/yarn!
^ For the second two hair pieces, I used the two 5sc tubes with the metal armature in them. for the back, I sewed it behind the 6sc tube and bent the two ends to look like the snake head and tail that come from behind her head. For the second tube, I bent it into her cute snake on the top, with the bottom curled tightly to fit into the space left by the bangs-tube, and sewed it on there. I used some fabric paint to make little dots for the snake eyes!
^ Medallion, Wraps and Duster
Super simple, these were just chains that I made until they were the right length to wrap - you can mostly improvise... I think I could have made the head wraps longer, you can see they are kinda faked in the back! (Also, I experimented with a slightly larger medallion size, but ended up preferring the smaller one.)
2 small Side Wraps:
chain ~6, leaving a tail
2 long Forehead Wraps:
chain ~15, leaving a long tail
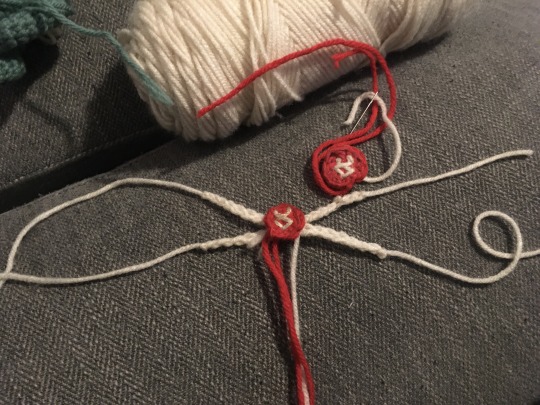
Medallion:
8 sc in magic circle, use yarn to embroider the Hades insignia
I used a candle to VERY CAREFULLY burn the fuzz off the medallion, so it would be a bit shinier. If you want to do this, please be cautious, mindful of the type of fiber your yarn is made of, and if you are little, have an adult help!
Hot glue the crisscrossed wraps and medallion together, tie all the wraps in their various places, then pull the ends inside a tube or head!
Duster: cut purple yarn into small strands, tie them tightly at one end, then hot glue the duster head to a toothpick... I’m sure there are nicer ways to make one of these, but I liked the look of the yarn!
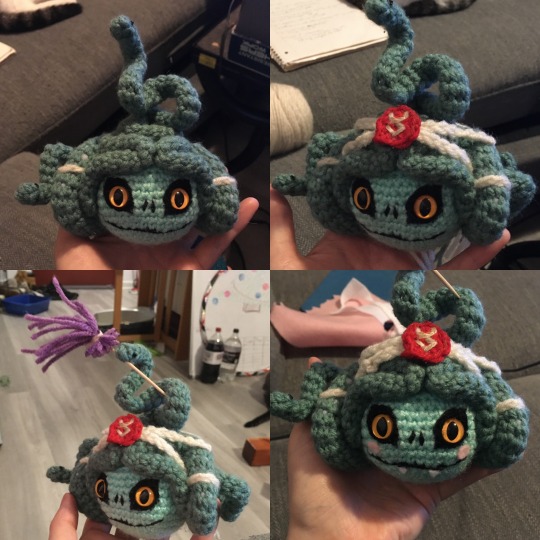
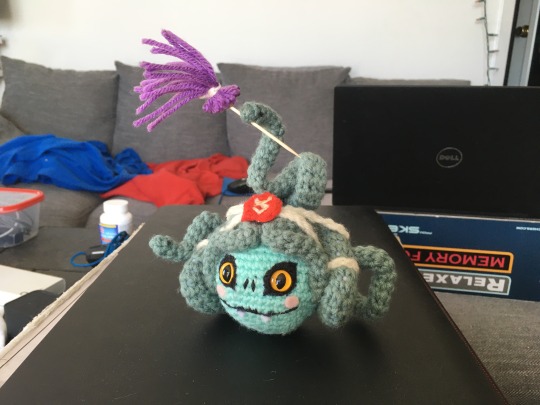
^ The last thing I did was add her fangs and pink cheeks using a bit of felt and glue - I did this last because I figured the more I handled her with all the sewing, the more they might get messed up.

Here you can see from the back a bit better... I definitely think it could be improved by making the wraps longer and adding an extra hair tube, but overall I am happy with how she turned out!


And that is it!! She is all ready to keep Hades clean and beautiful! If you have questions please feel free to ask me! Again, if you make her, tag me here or instagram @erin.gurumi - Good luck and happy crocheting! ^_^
#amigurumi#crochet#dusa#hades#pattern#freepattern#crochetpattern#freecrochetpattern#dusahades#dusa hades#hades game#zagreus#medusa#plush#plushie#stuffie#supergiant games#supergiant hades
996 notes
·
View notes
Last Seen Blogs

hardjudgelandshoe-blog
Sem título

squid--bae
I basically live on twitter now yup
effygiraffetalks
Effy Giraffe: The Official Blog

agency39click-blog
씨앤에스메이저사이트🦓 CJ602.COM 🦓카지노사이

kkamist
moved!! follow 914m~