#caulkreplacement
Text

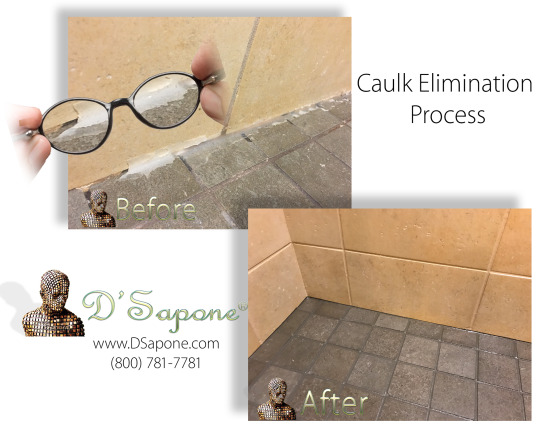
Caulking is temporary and has several performance issues. Our artists fill your shower corners with Sentura. To get a free estimate for our caulk removal service, visit 🌐 https://goo.gl/vBS38Z or call us ☎️ (770) 917-9200.
0 notes
Text
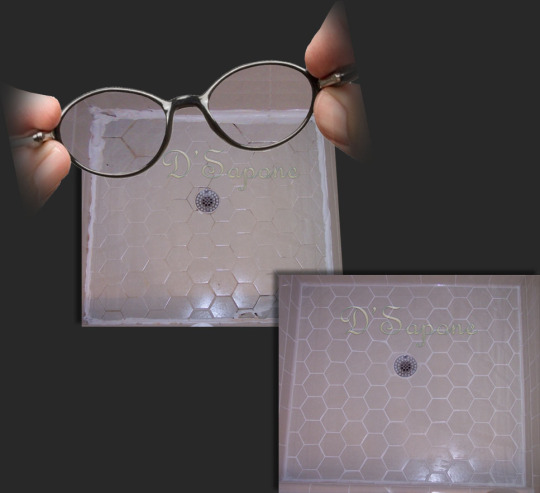
Caulking is temporary and has several performance issues. Our artists fill your shower corners with Sentura. To get a free estimate for our caulk removal service, visit 🌐 https://goo.gl/vBS38Z or call us ☎️ (770) 917-9200.
0 notes
Photo
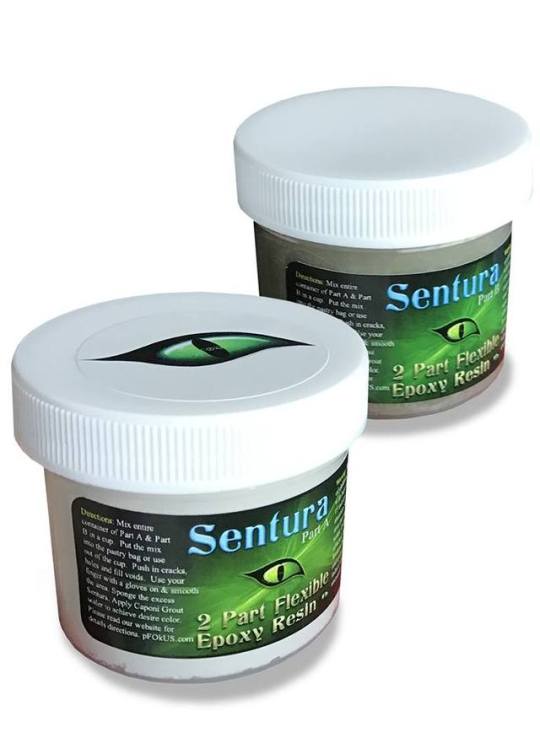
Eliminate the caulking curse and cracks from your tile and stone with Sentura.
Buy your pack @ https://goo.gl/BOkVw8.
0 notes
Text
How to Replace and Repair Wood Siding
New Post has been published on https://ecoursesfree.com/awesome/how-to-replace-and-repair-wood-siding/
How to Replace and Repair Wood Siding
How to Repair Wood Siding: Replace rotted siding
Evaluate the boards
Decide which boards need replacing and where to build your cuts. Stagger butt joints if you’re replacing multiple courses. Use a square to mark the cutting lines, centered on a stud. The nailheads on existing siding will indicate stud positions.
Cut the fingernails
Cut the nails at the bottom of the row above the boards you’re replacing. Use a small hacksaw with a sharp blade. Cutting the fingernails will let you remove rotted boards without damaging those your’e saving. To get at the fingernails, carefully wedge out the bottom of the siding 1/8 to 3/16 in. with wooden shims.
Make the first cut with a circular envisage
Cut out bad segments with a circular watch or even a sharp utility knife. Be sure to stagger the joints( see Photo 1 ). Most hardboard siding is 7/ 16 in. thick, so set your blade depth carefully to avoid cutting into other courses. Use shims to lift the boards so you can easily get at the one you’re cutting.
Finish the cut with a sharp utility knife
You won’t be able to complete the cuts with the circular foresee, so finish the cuts with a sharp utility knife or a keyhole saw.
Pry off the rotted boards
To learn how to repair wood siding, remove rotted boards with a flat pry bar. Protect voiced siding with a scrap piece of 1/4 -in. plywood. After you remove the rotted courses, use a small hacksaw to cut any protruding fingernail shanks, or if you have a very strong grip, use a good pair of wire cutters.
Install the new committees
When you replace the boards, use a homemade “reveal set” jig to match the reveal of the existing siding. The courses should overlap by at the least 1 in. Replace siding by running from the bottom up( you might need a helper here ). Attach the siding with 10 d galvanized box fingernails driven into the overlap at least 1/2 in. above the bottom edge. If you have insulated sheathing, predrill the nail holes to avoid crushing the insulation.
How to Repair Wood Siding
When hardboard siding is installed and maintained correctly, it can hold up for 30 or 40 years. But without proper attention, isolated areas can begin rotting in only a few years, especially near the foundation. Water splashes up from the ground, often soaking the vulnerable bottom edges. The newspaper face then flakes off, exposing the dark brown inner layers, and each soaking accelerates the rotting.
Replacing these rotted areas takes merely a few basic tools and a few materials, but it can make a huge improvement in your home’s appearance. Hardboard siding doesn’t cost that much, so it’s often worth it to replace an entire course. Doing this helps you avoid unnecessary butt joints.
Attain your mend last
Prime the back and edges of the new siding. Thoroughly paint all exposed edges and grooves. Do not drive the fingernails flush or countersink them. The heads will transgress the paper face, permitting water to soak in and deteriorate the siding. Caulk any nailheads that breaking the paper face. Leave a 1/8 -in. gap at corner and butt joints. Seal these joints with a 35 -year, paintable acrylic latex caulk. Prevent water from splashing on the siding by installing troughs or repairing leaky ones. Also, adjust lawn sprinklers so they don’t reached the siding. Where siding fulfills a roof, it will rot if the siding touches the shingles. When you replace these boards, make sure you have good flashing along the joint. Install the new siding so there’s a 1-in. gap between siding and shingles. Consider replacing rotted areas with fiber-cement siding. It’s 1/8 in. thinner than most hardboard, but it works in many cases, has a comparable expense, is highly rot resistant, and carries a 50 -year warranty. For help finding a dealer in your area, bellow James Hardie Products (8 88 -5 42 -7 343 or jameshardie.com) or ABTco ( 800 -2 65 -9 829 or abtco.com ).
Required Tools for this Project
Have the necessary tools for this DIY project lined up before you start–you’ll save hour and annoyance. Caulk gunCircular sawCombination squareDrill bit setDrill/ driver – cordlessExtension cordExtension ladderHammerHearing protectionLevelPry barSafety glassesSawhorsesScribing toolSpeed squareTape measureUtility knife
Required Materials for this Project
Avoid last-minute shopping trip-ups by having all your materials ready ahead of time. Here’s a list. 10 d Galvanized box nailsPaintable acrylic latex caulkReplacement siding boards
Read more: familyhandyman.com
0 notes
Text
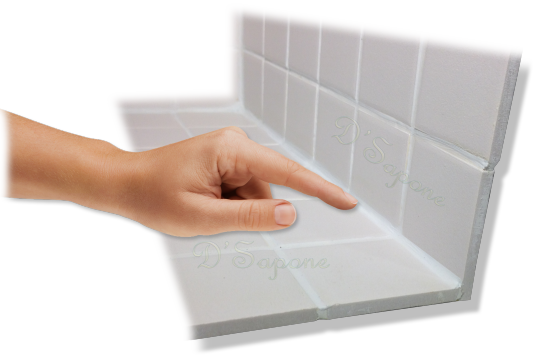
Enjoy a Caulk Free Shower Every Day!
Want to get rid of caulking issues? Notice in the picture, how clean and sanitized the surface is after our artists performed #caulkreplacement using Sentura. What are you waiting for? Get your free estimate today @ https://bit.ly/2M4VAYB.
0 notes
Last Seen Blogs