#both pics are in the diagonal dimension for some reason
Text
Propaganda
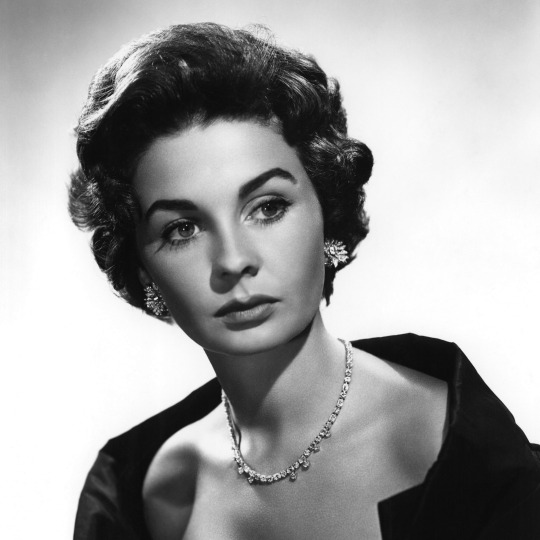
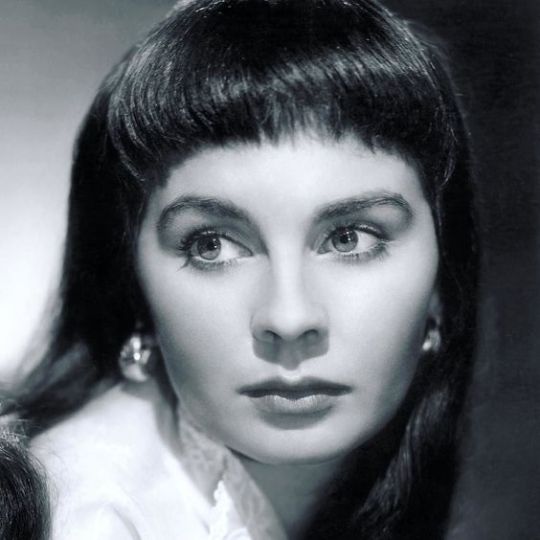
Jean Simmons (The Big Country, Guys and Dolls, Hamlet)— A fragile, heart-breaking, haunting beauty.
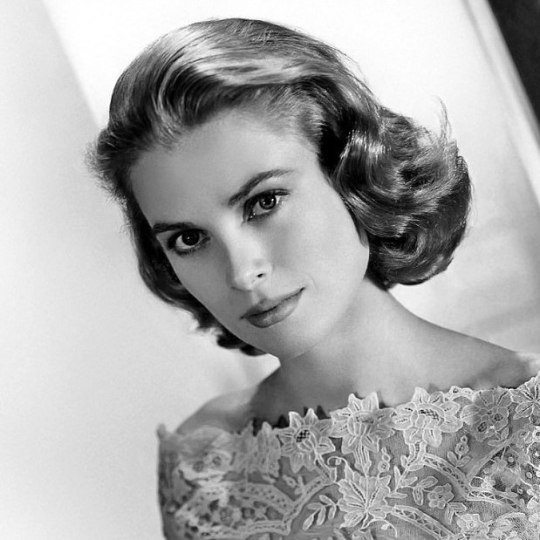
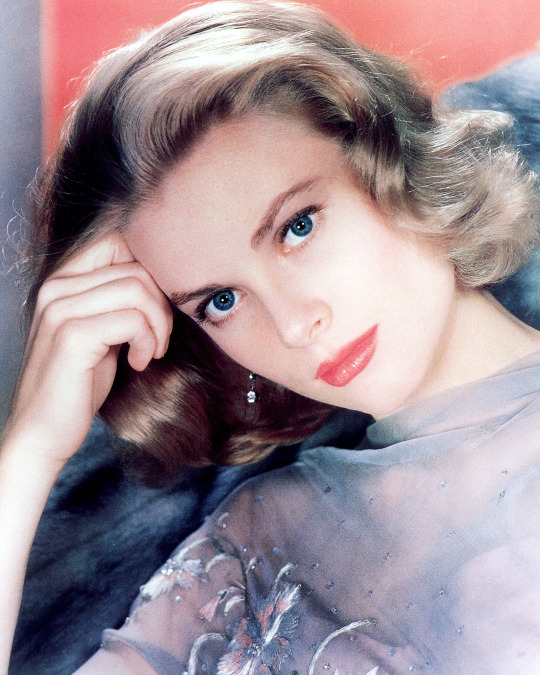
Grace Kelly (Rear Window, High Society, Dial M for Murder)—The literal princess of Hollywood (she retired at 26 to become princess of Monaco), her name said everything about why she was so hot. She carried herself with a grace and elegance you just don't see anymore. Her voice was sultry without being overbearing, and she had the ability to be sweet but suggest a deep sensuality at all times.
This is round 1 of the tournament. All other polls in this bracket can be found here. Please reblog with further support of your beloved hot sexy vintage woman.
{additional propaganda submitted under the cut]
Jean Simmons:
Grace Kelly:

flawlessly beautiful and a literal princess
Her facial structure? Flawless. Her eyes? Stunning. Her hair? Gorgeous. Her style? Immaculate. Every second she’s on screen, she just exudes this elegance and sophistication. It’s no wonder she ended up marrying a prince. But she’s got this mischief in her eyes that is compelling.

She was so elegant, so beautiful and perfect I could cry for real. A fairy disguised as a woman.
Not only was she princess of Monaco she also is Stéphanie de Monaco's mother and yeah, vote for her she's soooo pretty That red dress in Dial M.... hot damn
the most beautiful of Hitchcock's "icy blondes". elegant, glamorous, she left hollywood to became an actual princess, I mean, COME ON
She's just so elegant, look at her all dressed up like a Barbie doll in the latest fashions. There's a quiet dignity about her.
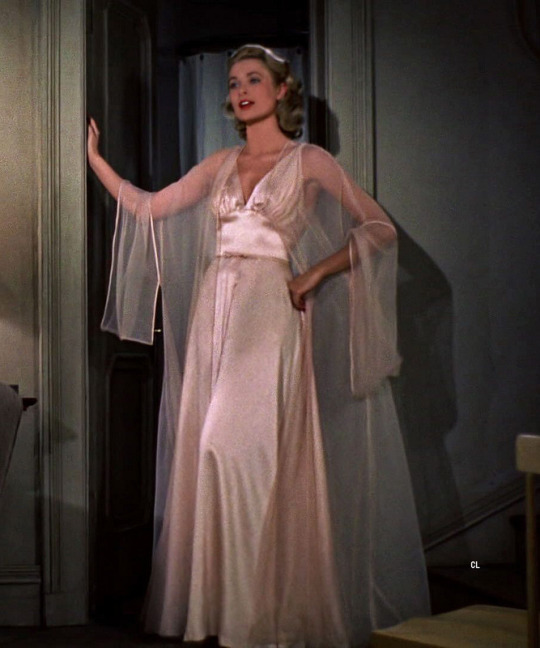
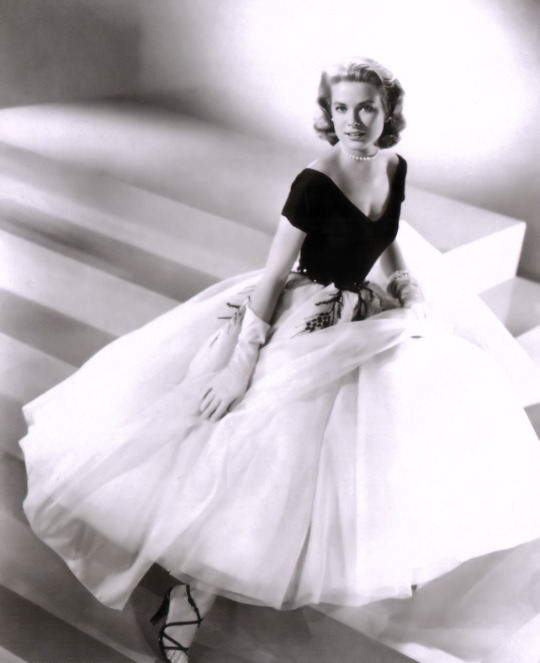
To me, she is the first and only blonde. She earned it. Paired with Edith Head's costume design she is unstoppable. I dare anyone to watch her as Lisa Carol Fremont in Rear Window and not be completely blown away by her hotness.
she's so pretty and refined and elegant! I'm pretty sure taylor swift's blonde hair red lip look is modeled partly after her
SHE IS SO PRETTY AND FASHIONABLE!! Not only that but she has an alluring aura to her in whatever film I've seen her in! Rear Window is just one of my personal favorite films she was in, especially for her costumes in that. And how many actresses can you say was a princess consort in addition to being a famous leading lady?
#grace kelly#jean simmons#hotvintagepoll#ladies 1#fuck that old woman#both pics are in the diagonal dimension for some reason
229 notes
·
View notes
Text
Photoshop Tutorial: How to Create Stunning, Photo Mosaic Portraits
New Post has been published on https://hititem.kr/photoshop-tutorial-how-to-create-stunning-photo-mosaic-portraits-3/
Photoshop Tutorial: How to Create Stunning, Photo Mosaic Portraits
Hi. This is Marty from Blue Lightning television. I’ll show you the way create wonderful photograph mosaic photos. Open a sharp, well-lit photo of any individual that you just’d like to make use of for this mission. I downloaded this one from Shutterstock. Step one is to organize all of your photos that you’ll use to create the mosaic pattern by means of inserting them all right into a folder. After you’ve got placed all your pix in a folder, we will create the snapshot that you can use to create your mosaic pattern. To do that, go to File, Automate and "Contact Sheet II". The Contact Sheet window may appear an additional than mine if you’re using an previous variation of Photoshop, nonetheless, the functions are the identical. Use "Folder", click on "select" and locate the folder wherein you could have position your snap shots. Opt for "inches" and make certain "Flatten All Layers" is unchecked. You can see why later. The Width is 12 and the height is 8. This determines the side ratio or shape all the graphics could have. The resolution is a hundred and fifty pixels per inch. The Mode is "RGB colour" and 8-bits per Channel.I’m going to location the thumbnails "across first". The number of rows and columns to your sample must be the equal. For illustration, i’m going to be utilizing 10 rows and 10 columns, which totals 100 pics. 10 instances 10. If you’re utilizing 5 rows and 5 columns, you can wish to position 25 photographs into your folder. 5 times 5. As we discussed, when you’ve got yet another quantity of photographs to your folder, ensure it is divisible by the same number and sort that quantity to your Columns and Rows. "Use Auto-Spacing" is unchecked. The Vertical and Horizontal are both 0 inches. Sick check Rotate for great fit, with the intention to rotate vertical pics 90 degrees onto their sides. For those who select to not have any graphics circled, dont determine it. Photoshop is now automatically positioning each photograph out of your folder onto its possess layer and possess layer masks. The reason we didn’t select to flatten the layers is as a way to fill graphics within their respective layer masks. To do this, first, make sure your move tool is lively. If it is not, press "v" for your keyboard. Then, investigate "Auto-pick".By means of clicking a distinct picture for your mosaic, Photoshop’s "Auto decide on" routinely selects the layer you clicked and makes it energetic. Click the chain-link icon to unlink the layer and the layer mask. Doing this permits us to resize and reposition the picture throughout the layer mask with no need the layer masks transfer at all. To resize the picture, open your turn out to be tool by using pressing Ctrl or Cmd + T. Go to a corner and whilst you see a diagonal, double-arrow, press and hold Alt or alternative + Shift as you drag it out. Notice, your photo is restrained inside its layer mask. To slide the snapshot in any direction 1 pixel at a time, use the arrow keys to your keyboard. Then, press Enter or Return. Continue these steps for each and every picture until your entire mosaic is completed. You may discover a thin white border along some of the edges. To do away with it, open your Rectangular Marquee software and drag a choice over your report to simply before the border.Then, go to picture and "Crop". To deselect it, press Ctrl or Cmd + D. Next, we will keep our mosaic as a pattern. Go to Edit and "define pattern". Name it some thing you want and click ok or press Enter or Return. Open your subject. Click the Adjustment Layer icon and click on "sample". Your mosaic will appear. I will lessen its dimension to 40%, but preserve in intellect, which you could regulate its measurement at any time. Alternate its combination Mode to Overlay. If you’d like to make the pattern more obvious in the darkest and lightest areas of your subject, first make your area right into a clever Object, so it can be modified non-destructively.Make your subject active and and click on the icon at the higher, right of the Layers panel. Click on "Convert to shrewd Object". Go to image, changes and "Shadows/Highlights". Tick "exhibit more options". Shadow’s/Highlights is among the most most often unused, yet strong filter in Photoshop. Considering each photograph has its possess characteristics, test with all the settings to get the excellent blend of shadows, highlights and adjustments. I’d like to see my pattern smaller, so i will double-click the sample Fill layer and style a smaller amount. You can additionally make the Shadows/highlight filter less extreme through decreasing its opacity. To try this, double-click this icon, which opens the "Filter mixing options" window. Then, cut down its opacity. In addition, you can additionally change its combo Mode and toggle through them one-with the aid of-one by clicking "Dissolve" and pressing the Down arrow in your keyboard at any time when to look the subsequent combination mode utilized.This is Marty from Blue Lightning television. Thanks for observing! .
0 notes
Text
Photoshop Tutorial: How to Create Stunning, Photo Mosaic Portraits
New Post has been published on https://hititem.kr/photoshop-tutorial-how-to-create-stunning-photo-mosaic-portraits-3/
Photoshop Tutorial: How to Create Stunning, Photo Mosaic Portraits

Hi. This is Marty from Blue Lightning television. I’ll show you the way create wonderful photograph mosaic photos. Open a sharp, well-lit photo of any individual that you just’d like to make use of for this mission. I downloaded this one from Shutterstock. Step one is to organize all of your photos that you’ll use to create the mosaic pattern by means of inserting them all right into a folder. After you’ve got placed all your pix in a folder, we will create the snapshot that you can use to create your mosaic pattern. To do that, go to File, Automate and "Contact Sheet II". The Contact Sheet window may appear an additional than mine if you’re using an previous variation of Photoshop, nonetheless, the functions are the identical. Use "Folder", click on "select" and locate the folder wherein you could have position your snap shots. Opt for "inches" and make certain "Flatten All Layers" is unchecked. You can see why later. The Width is 12 and the height is 8. This determines the side ratio or shape all the graphics could have. The resolution is a hundred and fifty pixels per inch. The Mode is "RGB colour" and 8-bits per Channel.I’m going to location the thumbnails "across first". The number of rows and columns to your sample must be the equal. For illustration, i’m going to be utilizing 10 rows and 10 columns, which totals 100 pics. 10 instances 10. If you’re utilizing 5 rows and 5 columns, you can wish to position 25 photographs into your folder. 5 times 5. As we discussed, when you’ve got yet another quantity of photographs to your folder, ensure it is divisible by the same number and sort that quantity to your Columns and Rows. "Use Auto-Spacing" is unchecked. The Vertical and Horizontal are both 0 inches. Sick check Rotate for great fit, with the intention to rotate vertical pics 90 degrees onto their sides. For those who select to not have any graphics circled, dont determine it. Photoshop is now automatically positioning each photograph out of your folder onto its possess layer and possess layer masks. The reason we didn’t select to flatten the layers is as a way to fill graphics within their respective layer masks. To do this, first, make sure your move tool is lively. If it is not, press "v" for your keyboard. Then, investigate "Auto-pick".By means of clicking a distinct picture for your mosaic, Photoshop’s "Auto decide on" routinely selects the layer you clicked and makes it energetic. Click the chain-link icon to unlink the layer and the layer mask. Doing this permits us to resize and reposition the picture throughout the layer mask with no need the layer masks transfer at all. To resize the picture, open your turn out to be tool by using pressing Ctrl or Cmd + T. Go to a corner and whilst you see a diagonal, double-arrow, press and hold Alt or alternative + Shift as you drag it out. Notice, your photo is restrained inside its layer mask. To slide the snapshot in any direction 1 pixel at a time, use the arrow keys to your keyboard. Then, press Enter or Return. Continue these steps for each and every picture until your entire mosaic is completed. You may discover a thin white border along some of the edges. To do away with it, open your Rectangular Marquee software and drag a choice over your report to simply before the border.Then, go to picture and "Crop". To deselect it, press Ctrl or Cmd + D. Next, we will keep our mosaic as a pattern. Go to Edit and "define pattern". Name it some thing you want and click ok or press Enter or Return. Open your subject. Click the Adjustment Layer icon and click on "sample". Your mosaic will appear. I will lessen its dimension to 40%, but preserve in intellect, which you could regulate its measurement at any time. Alternate its combination Mode to Overlay. If you’d like to make the pattern more obvious in the darkest and lightest areas of your subject, first make your area right into a clever Object, so it can be modified non-destructively.Make your subject active and and click on the icon at the higher, right of the Layers panel. Click on "Convert to shrewd Object". Go to image, changes and "Shadows/Highlights". Tick "exhibit more options". Shadow’s/Highlights is among the most most often unused, yet strong filter in Photoshop. Considering each photograph has its possess characteristics, test with all the settings to get the excellent blend of shadows, highlights and adjustments. I’d like to see my pattern smaller, so i will double-click the sample Fill layer and style a smaller amount. You can additionally make the Shadows/highlight filter less extreme through decreasing its opacity. To try this, double-click this icon, which opens the "Filter mixing options" window. Then, cut down its opacity. In addition, you can additionally change its combo Mode and toggle through them one-with the aid of-one by clicking "Dissolve" and pressing the Down arrow in your keyboard at any time when to look the subsequent combination mode utilized.This is Marty from Blue Lightning television. Thanks for observing! .
0 notes
Last Seen Blogs

al5marks
Untitled
skinnykweeen
guess who’s back on her bullshit?

vfdcatlady
VFD Cat Lady
tumbles1
Verse Original (Circle of Architects)

digitalpreetipathak
Untitled