#and reused the same color adjustments for every gif <- lazy
Photo
9k FOLLOWERS CELEBRATION: GIF TUTORIAL by winston-wilson
In this tutorial, I’ll try to show you the basics of making a gif. Of course, there are many ways for this joyful and absolutely not stressful part-time hobby slash addiction, but this is how I’ve been doing it for a couple of months now, and it’s worked out pretty well so far. I’ve learned a couple of tricks, created my own shortcuts, and at this point it’s just something that comes naturally.
I use Photoshop CS5 Portable (you can get it here)
for taking caps, I’m using KMPLayer (get the 4.2.2.22 verison, the .23 one is screwed up - you can get it here)
please, like / reblog if you find this useful
feel free to hit me up with any questions.

1. Don’t beat your laptop with a baseball bat. Yet. Use your chair.
1.1. Videos/clips/movies.
I explained that part in this tutorial. What I want to add is that if you want the highest quality of a trailer, get QuickTime, wait a day or two after it comes out, and get the trailer here.
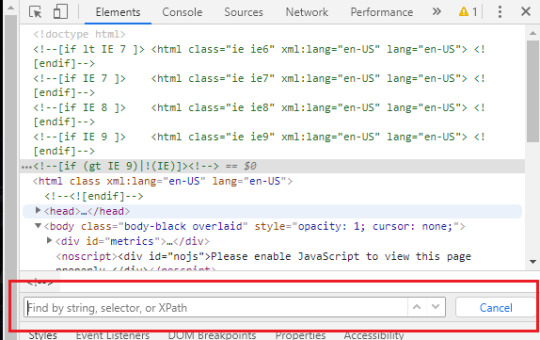
Find a trailer you’re interested in, play it, choose the highest quality option, press ctrl+shift+i, and you’ll get this:
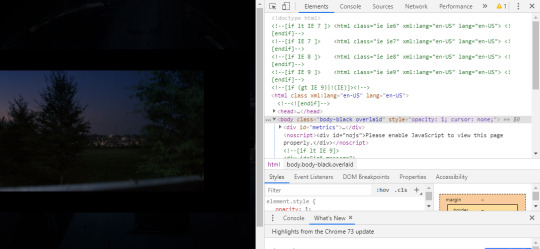
Click anywhere on that html codes and press ctrl+f. This will show up:
Put that brandy away. Search for ‘source’, find this:
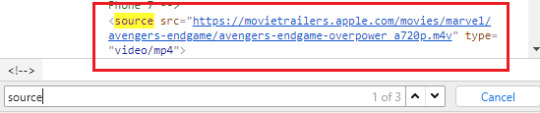
Clink on the blue link using the right-click of your mouse, choose open in new tab, and a download window should show up.
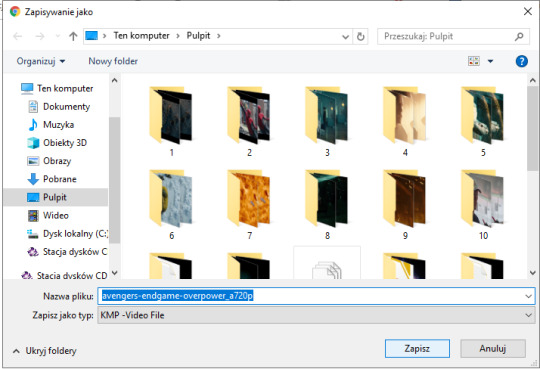
Save the video where you want to.
You can use videos from YT or movies you have on your computer or get those movies. Those movies also should be in the best quality possible. I suggest the ones with quality of 1080p and bit rate at least 6 Mb/s for best gifs.
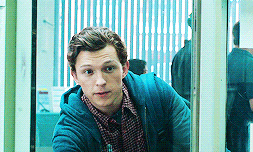
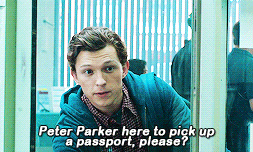
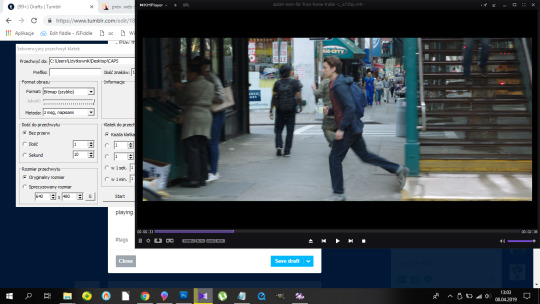
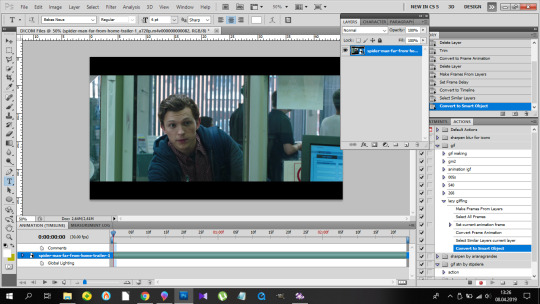
In this tutorial I’ll be using the trailer of Spider-Man: Far From Home. Because all my movies are on another disk and I, uh...
2. KMPlayer + taking caps.
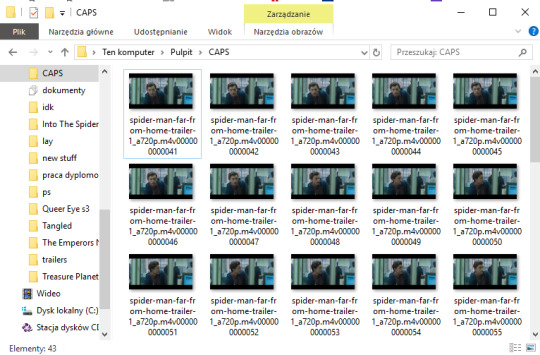
Before you open a video and take caps, I suggest you create a folder that’s easy to find and use on your desktop. I have one called ‘CAPS’.
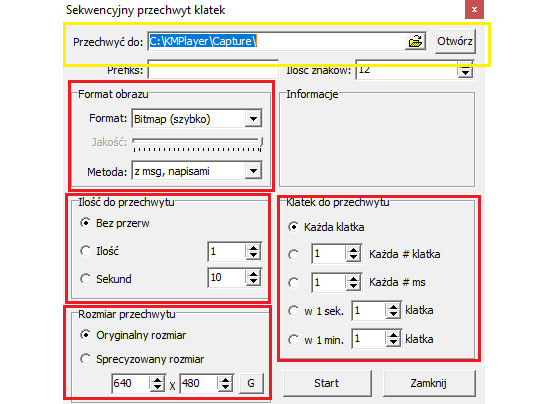
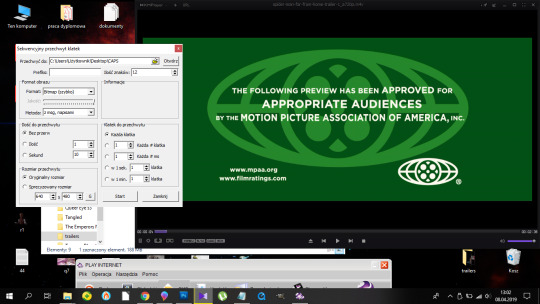
- Open your video in KMPlayer. Pause it because this version of KMPlayer stinks and you have to pause the clip in order to start taking caps. So pause it and press ctrl+g. When the caps window shows up, set it to those (red) options and choose your folder (yellow) where your caps will be stored. You have to choose that one thing every time you open that window. [Sorry for the language, but it doesn’t matter. Just choose them settings.)
- Play the video & make sure your caps window is somewhere on the side like this:
Find the part that you want to gif. You can pause before it, press start on the caps window and then play the video or just start taking caps while the video is playing. I’ll do it using the first way.
pause:
click ‘start’ on the caps:
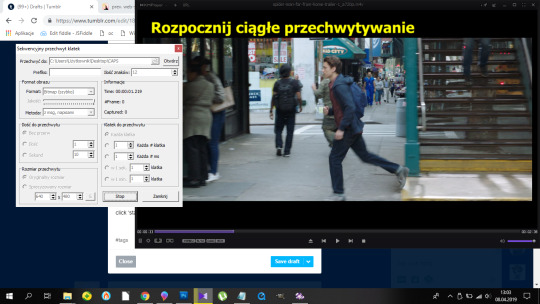
and then play the video until I get the caps I want and click stop on the caps window first, the video second.
Close that thing if you have what you want.
- Open your CAPS folder.
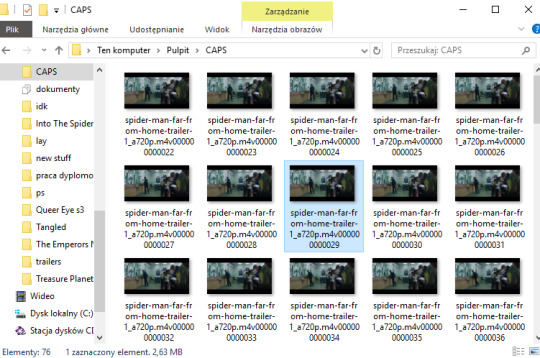
Get rid off the caps you don’t need. They’re trash and should be treated as such.
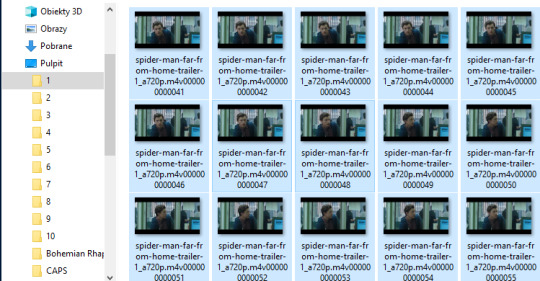
If you’re giffing more than one scene, you can sort them caps to folders. I have 10 folders named from 1 to 10 where I sort mine. And because for now I’m making just one, I’ll move those caps to folder ‘1′ on my desktop.
Time to make a gif. You good out there? If the answer is no, take Vicodin. No worries, when you’re done learning the basics, you’ll make gifs with Britney Spears playing in the background. Now shhh, focus.
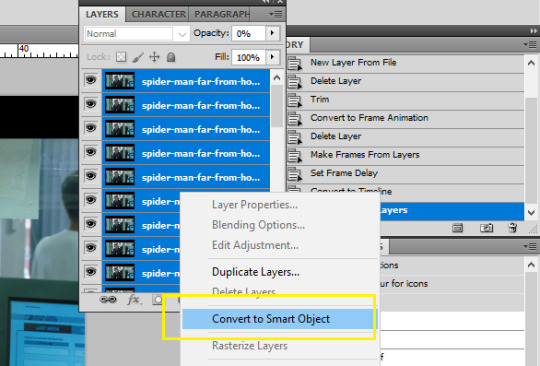
3. Photoshop, aka that scary part.
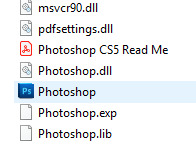
- When you install it, you’ll get a folder, and in that folder there’s the app.
- Open that thing (and maybe copy on your desktop).
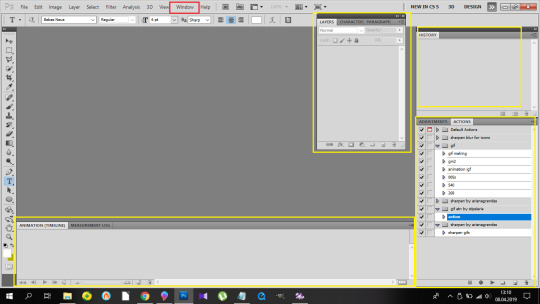
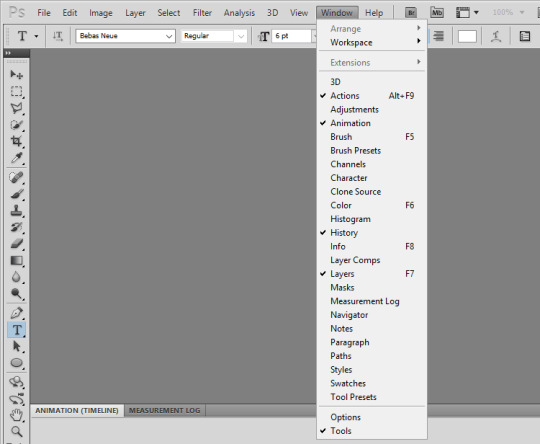
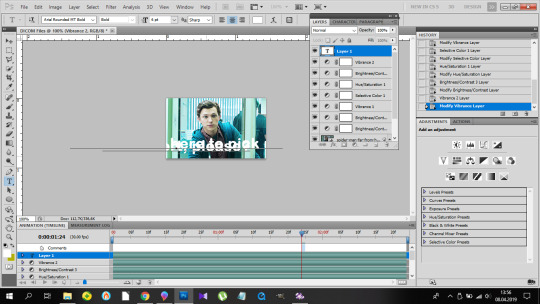
What you need is the layers window, the actions window, the adjustments window, the characters window, the animation window, the paragraph window, the history window... It... It sounds horrifying, I know, but cool your pits. It’s just this:
If you’re not laughing, take another Vicodin. Use this if those windows aren’t on display automatically:
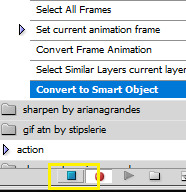
And sort them. Now, I use my own keyboard shortcut for gifs. I suggest you do the same. Trust me, you don’t want to do this:
every time you make a gif. As you can see, I use alt+ctrl+p. You can set your shortcuts using the ‘Edit’ window at the bottom of which you’ll find the ‘Keyboard Shortcuts’ thingy. Then it’s a bit of digging but it all makes sense, ok? Ok. Yeah, no, it’s a lot of digging but I believe in you.
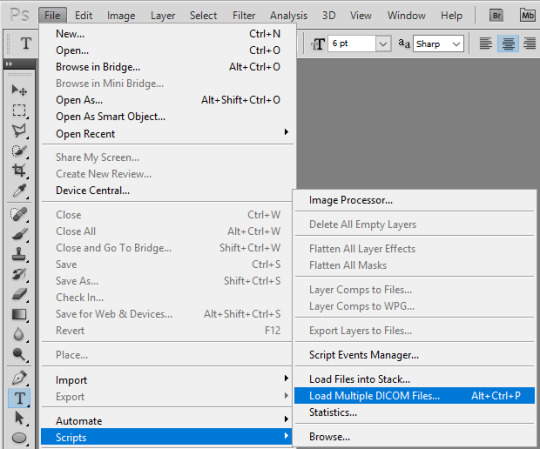
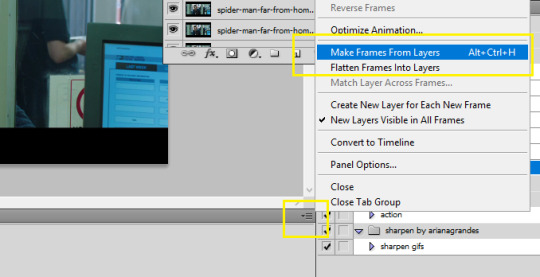
So you load them files, and this shows up:
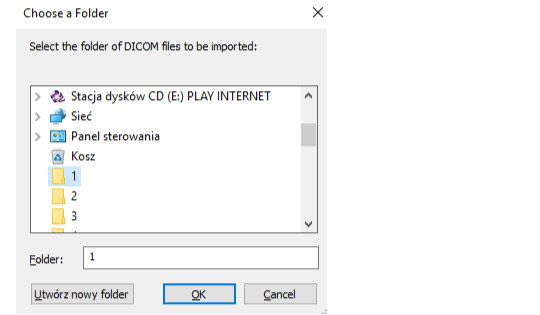
so choose your folder where your caps are, and click OK. Ta-dah:

- This is the ‘make gif’ part. Click this:
so you can get this

at the bottom. I have this whole process made into an action, and if you want it in an action too, at this point you should click this:
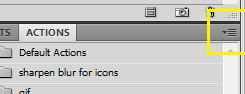
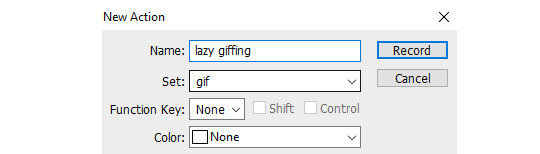
and choose ‘New Action’. Name it. Click record.
and now 1)
2) take Tylenol
2.1.)
3)

4)
5)
(you should be here now:)

6)
7) (right-click mouse)
8) stop the action recording here:
And this is how you should be looking right now:
Oops, not this. This:
Fine? Fine. Go smoke a cigarette.
You back? K.
- Dimensions. Very important. Like, 10/10 important. Don’t cross the 3Mb size.
Fitting into the tungler dimensions means your gifs will be posted in the highest quality. This is a visual of those dimensions (depending on how many gifs per row):
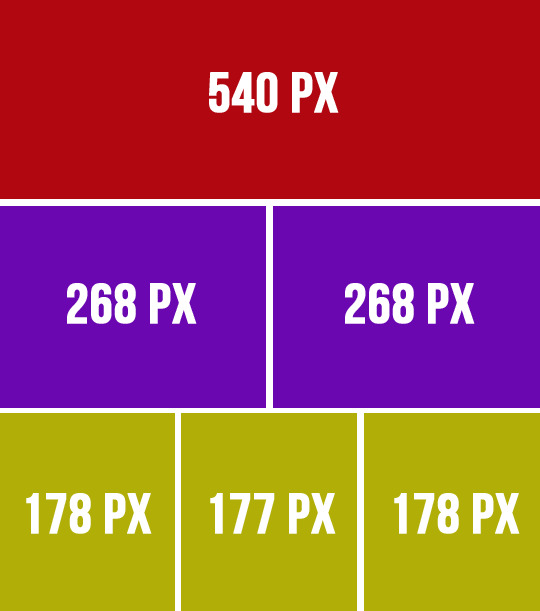
If you don’t do that, your gifs will look like blurred filmography of Zack Snyder’s.
I’m gonna make a 253px gif so it won’t stretch in that post. Gifs over I think 268px stretch on normal posts as in posts and look ugly.
So that brings us to the next steps.
- Cutting, resizing. Easy. Don’t panic.
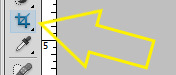
choose that tool:
set your... this:
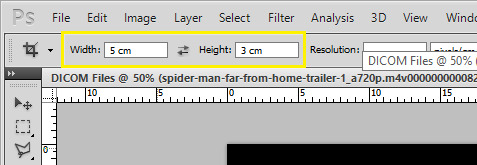
(make sure it’s ‘cm’, otherwise you’re screwed) and crop, baby, crop. I suggest the biggest area you can, of course without the black parts.
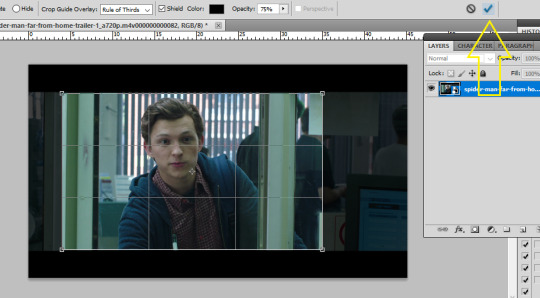
Also, depending on gifs, the dimensions can be different. For my 540px gifs I use 5x2 or 2x1 or 16x9. For my 268px gifs I use 11x7, 11x8, 5x3, 1x1. For the 177/8/7px ones, I usually use 3x5 or something. Just make it look nice. Not too thin, not too high.
Ok, so I’m cropping.
And now resizing. Crtl+alt+i.
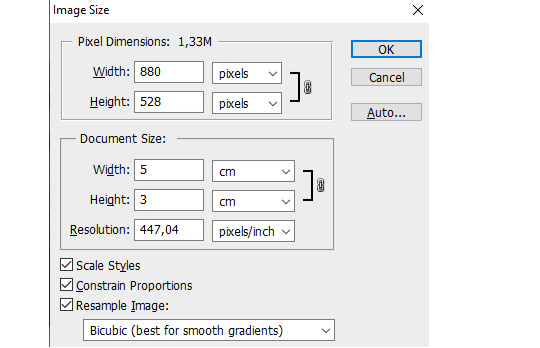
Make sure this thingy looks like that:

My width will be 253px, you make it 268, alright? Or something. Just don’t cross 540px. And put that beer away.
So I have this now:

Doesn’t look appealing, huh? Yeah.
Also click ctrl+’-’/’+’ to zoom in/out the gif.
- Sharpening.
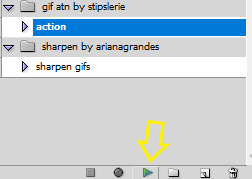
Some people use actions, some do their own thing, I use an action. I’m lazy. And I don’t look forward to just... You know. Clicking a lot. So I use this action. Download it, make sure you like or rb that post, and upload the action using this:
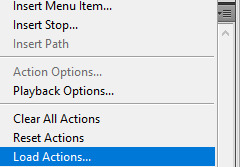
Find your action. Load. Choose it, click play.
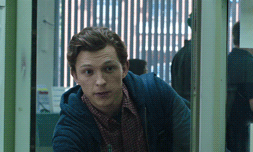
So this is how the gif looks without:
and with the sharpening:
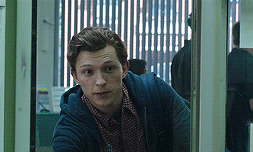
Magic, I know. Okay, you can have that beer. Or no, don’t mix alcohol with pills.
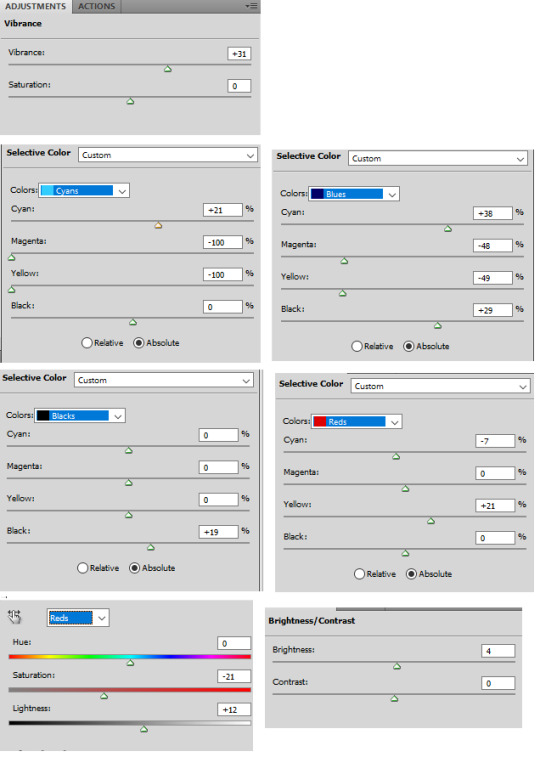
- Coloring.
This is the fun part. That’s where vodka comes in. The part with 390248 times you get frustrated and your laptop is in danger because it can never know when it will join the doves behind your window in a short fly. Anyhoo.
Start from brightness. This is one little trick I learned. You can use these options:
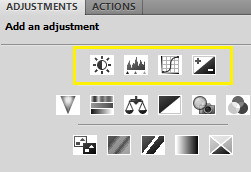
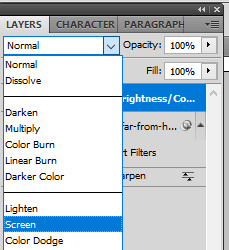
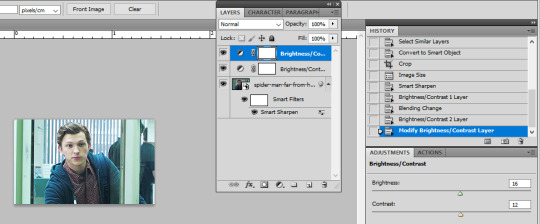
I start off with doing something else. I choose the first option, aka Brightness/Contrast, and when it appears on my layers window, I choose the ‘screen’ option.
So I’ve gone from this

to this
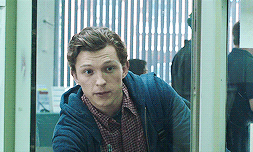
It’s clean. It’s cute. Brightens the whole gif.
Of course, you can do it traditionally and/or adjust the opacity of that ‘screen’ layer. I think I’m gonna brighten it just a tiny bit more and add some contrast.
Now cooolors. I’ll make a standard gif, nothing crazy. You can go crazy if you want to, just don’t make someone’s skin orange. It just... doesn’t look good, kay?
Kay.
Those are my options:
And this is the result:

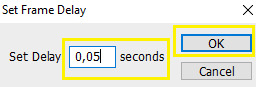
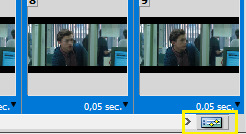
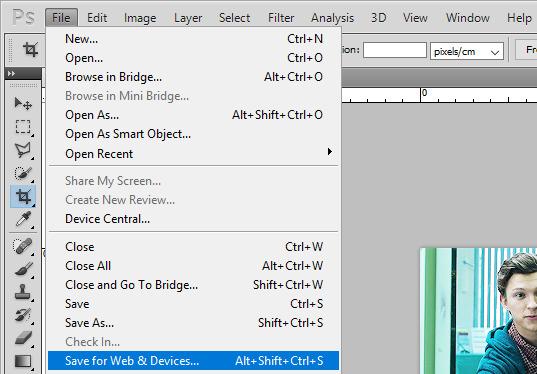
Save your gif using this (once again you can see my shortcut)
and your settings should look like this:
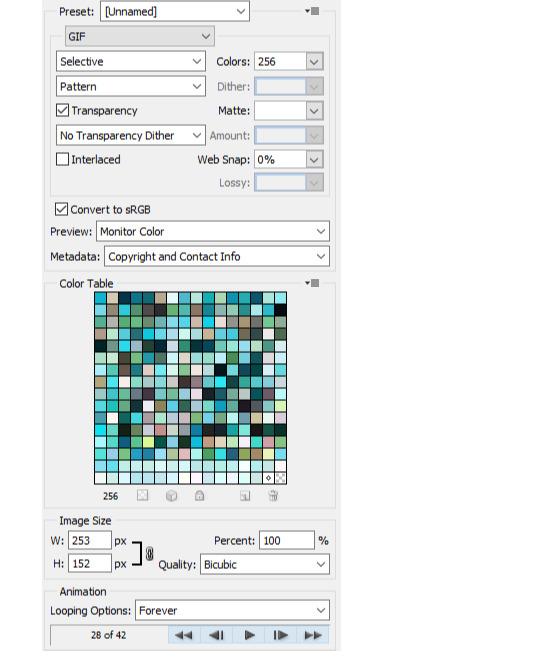
Click save, name the gif, save it wherever you want. And it’s done.
As a bonus we’ll go through...
4. Text on gif.
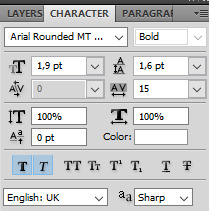
I use Arial Rounded MT Bold. You can use Calibri, it’s the one I used to use.
Choose this:
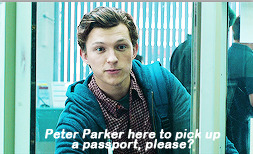
Click on the gif. Write your text. It looks like crap.
No worries. Choose the text (ctrl+a). Choose your character window. And manipulate until you get the result you’re happy with. Change the size of the font, the distance between letters and paragraphs (and choose the paragraph window to make the text centered).
My options:
and result:
Doesn’t look nice, we want it nice and clean and all that jazz. So. Back to the layers window. Choose that text layer and find this button
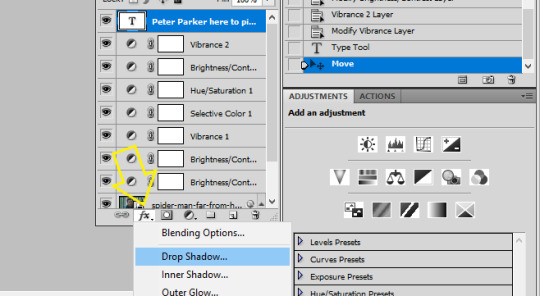
and choose drop shadow. When a window pops up, choose those settings (those are the ones I use:)
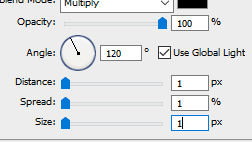
Then go to Stroke on your left and set it like this:
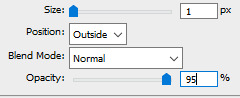
And click ok, and that’s the result:

Tips:
- create shortcuts. saves time,
- make gif actions. saves time,
- make sure you use the tumblr dimensions,
- don’t do orange faces, ok?
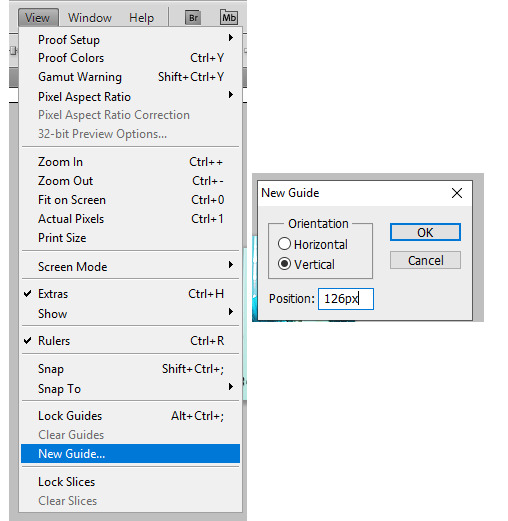
- when setting the text on your gif, you can do this little trick so it’s in the center:
x if my gif is 253x wide, the center is in 126,5, I make it 126px.
(make sure to write that ‘px’). click twice on your text layer, and this is the middle of that layer:
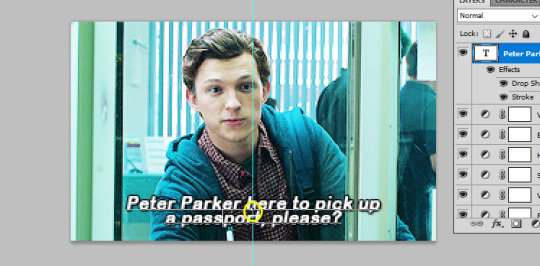
while moving that layer you should be able to see that tiny square and it’s the center of your text. Set it on the guide and you’re done. It’s centered.
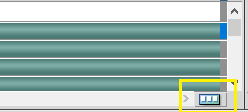
- use these


to cut your gif.
- play with the opacity and layer settings. for example, if you use color selection or saturation, you can set the layer’s option to ‘color’ and have it 70% opacity.
- you can save the text layer only and reuse it by using ctrl+shit+s and saving it as psd

and then just open it again anytime with ctrl+o and duplicate it to the gif.
- have fun with it. don’t throw your laptop out of your balcony, they’re expensive.
If you have any questions or want me to make a different tutorial on coloring or something, don’t be scared, I don’t bite (for real, I have braces, biting hurts).
I hope I helped and making gifs doesn’t look like magic to you anymore.
#completeresources#fyeahps#userlance#userjessie#biafrnc#userariella#photoshop help#ps help#making gifs#gif tutorial
389 notes
·
View notes
Last Seen Blogs

spicy-yucks
Spicy Yucks

viralberitadunia
Tanpa judul
nikorlov
Nikita Orlov Art
ozimagines
Oz Imagines
sailingsvmutiny
TheMutinyCrew