#Rent iPad Utah
Text
Hire Tablets is a well-established event technology renting service.
We enhance the digital experience of our client’s experience across the US with the short-term rental of technological products.
Hire Tablets provides a one-stop solution for event technology rental needs. We offer short-term rental for iPads, Android tablets, Business Laptop hire, and technical accessories to clients seeking access to advanced technology in the US. We use our experience of operating in the industry to provide the widest variety of IT products, technical event support services, and quality products that make an impact. Troubleshooting all technical issues with our experienced technical staff, we provide a complete technology solution at an economical price.
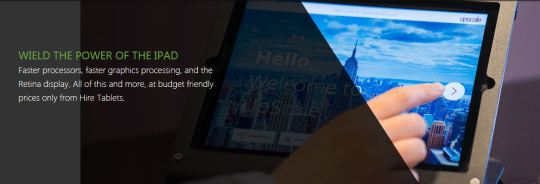
#rent iPad#rent Laptop for a day#renting iPads#Rent iPad South West#Rent iPad Utah#hire touch screen#iPad Hire Adelaide#iPad Hire Alaska
0 notes
Text
Hands on with DJI’s X7 Gimbal and the Inspire 2
Photo Credit: Haley Hays
Earlier this year I spent a month in and around Utah filming drone coverage on a show for Discovery. On that project I had access to both the Inspire 1 and the Phantom 4 Pro. Time and again I found myself flying the Phantom 4 Pro simply because I found it much easier to maneuver (both in terms of camera and mid-flight). The Inspire 1 just didn’t give me the kind of fine motor control I was looking for and the obstacle avoidance on the Phantom Pro made for safer flying.
What a difference a few months makes. The Inspire 2 feels like the Phantom 4 Pro in the air, accompanied by a superior image in the form of the X5 camera gimbal and now the X7.
The X7/Inspire 2 combo occupies an interesting place in the drone market. Does it provide the same image as flying an Alexa Mini or RED Weapon? Well obviously not, but do all of your projects need the image from an Alexa Mini or RED Weapon? Probably not. The image out of the X7 is gorgeous, and I would argue that it could cut into your projects shot on large cinema cameras.
The big sell for me on this is that it takes five minutes from box open to takeoff. Unbuckle the drone and lens case and in minutes grabbing shots with your favorite two or single person team. I still wouldn’t call the Inspire 2/X7 combo a cheap option necessarily, but in terms of bang for your buck, you can’t do much better than this.
US Space & Rocket Center in Huntsville, AL from the air filmed on the X7. We received permission for this flight. Image Credit: Rick Smith/Graham Sheldon
Once you’re jonesing to get this tool in your prouduction’s arsenal, you’ll need to look at how many days you’ll want to be flying to see if you can justify a purchase or need to stick to renting…so let’s talk about cost
The DJI Zenmuse X7 Camera and 3-Axis Gimbal Costs $2,699.00 and as of the time this article is being written, there are four available lenses for the X7. Each F2.8 DL mount carbon fiber lens costs about $1,300 and is available from your favorite retailer in 16mm, 24mm, 35mm and 50mm variants. If you purchase all the lenses you’ll land somewhere a little above $4000, but for the budget conscious purchasing the 16mm and 50mm provides you with a good start and you can build toward the whole kit over a few projects. Now, if you’ve been doing the math, a DJI Inspire 2 will set you back $3,000 without the camera or travel case and when you start adding on camera, lenses, media, pro res/cinemaDNG licensing and extra batteries things start to get well north of $10,000 for a really useful kit.
Once you factor in liability insurance you will definitely need to make sure you’re shooting enough drone footage to make this kit financially worthwhile. For owner/op/sometime drone pilots, you may find yourself perfectly happy with a Phantom 4 Pro package, now available in obsidian HERE.
If money is no object, you will also want to fork over the extra $500 for pro res or $1,300 for the CinemaDNG/Pro Res license combo. If you don’t, you’ll be limited to H.264 and H.265 — which begs the question why you didn’t purchase the DJI Phantom 4 Pro in the first place as it allows recording in both of those codecs. For this review, I was working on a project that was finishing in Premiere to 1920×1080 with limited post time, so I found ProRes 422HQ 16:9 3840×2160 to be the right format for me. However, with license purchases you’ll open up a whole host of tip top options that record to the drone’s onboard SSD:
Photo Credit: DJI
Note: Once the SD card fills up the SSD no longer records. When recording in the Inspire 2’s superior codecs (RAW CinemaDNG, 422HQ and ProRes 4444XQ), you’ll find yourself only pulling out the SSD and forgetting to re-format the SD card. This is not a surprise you want to have mid-flight with a client looking over your shoulder. Don’t forget to format the SD Card between each flight — even when only using the footage captured to SSD. You can record H264 ,H265 and stills to the SD card only. It’s worth noting that the SSD stick is much easier to take out once the batteries are removed.
Now, let’s get to the operation.
As aforementioned, setup is lightening fast. Where I would have difficulty locking the camera alignment with the inspire 1, the X7 easily locks into place on the Inspire 2 with little to no fiddling. Batteries slide quickly into place and the SSD stick slides into its slot easily. One button ejects the batteries and another button turns the Inspire 2 on and off. Pairing to a new controller is easy and I found the pilot/cam op controller relationship to be intuitive, though I did have to turn the app on and off once or twice before my older iPad mini detected the Inspire. In short, if you’ve spent any time with an Inspire 1 you’ll find setup is easy and if you are a Phantom user looking to make an upgrade, you’ll be up to speed with a five minute youtube video.
After flying with the Inspire 2/X7 over a dozen times I found the Inspire 2 a dream to fly and the X7 image to be significantly better when compared to the Inspire 1/X5 combo. Where I found the highlights to be blown out on an X5 camera, I was pleasantly surprised to see different shades of white and gray in the sky on an overcast day on the X7. In low light situations the level of noise was acceptable into 1600 ISO for my taste, but it’s worth noting that when shooting RAW you are limited to 1600 ISO with the X7.
Shoot in CinemaDNG and you’ll unlock the real grading potential of the X7, but handling the files can be a little daunting at first glance. Fear not. Once you plug your Inspire SSD into your computer using the DJI reader you’ll see your files displayed as individual stills (see left pic).
To view these stills as video you’ll need to pull them into Premiere using the Media Browser window. You can then drag a clip onto your timeline and enjoy working with RAW 6016×3200 X7 video at up to 30fps. Or, you could work with ProRes proxies and deal with the RAW files at the latter color stages of your edit process (recommended).
Want to give grading a raw 6K still from the X7 a shot? Download a .dng image HERE and pull into Lightroom or your favorite RAW stills editor.
Of course good ole fashioned H264 images shot in the “normal” color profile still look great on the X7. Golden hour helps too. Image Credit: Graham Sheldon
All the DL lenses have a uniform 46mm front diameter making filter purchasing (lots of 46mm threaded filters available) and threading easy. ND’s are essentially required if you’d like to shoot in and around F4-F8 during the day, which tends to also be the sharpest F-stop range for your lens. All four lenses are light, each weighing about 180 grams and click into place quickly on the X7.
Just as with the Inspire 1, focus has always been a little tricky for me to judge on mobile devices, so I often found myself tapping the screen in auto focus mode just to give myself ample opportunity to retrieve a sharp image. For this field review I used the Apple iPhone 7+ for one controller and an iPad Mini 3 for the other.
The inspire 2 hardened foam case that comes with the purchase of the UAV does a good job keeping the inspire 2 secure, but there isn’t room for the X7 or any of the lenses, so keep that in mind when purchasing. A pelican 1400 with pluck foam will hold all four DL lenses and the X7.
X7 Camera pictured on left. Photo Credit: Rick Smith
Obstacle avoidance with the Inspire 2 is a brand-new feature not included in the first inspire and I’ve come to rely on GPS mode + obstacle avoidance for peace of mind. Nothing replaces good ole fashioned common sense and hawkeye observaction when it comes to flying, but it is helpful having the Inspire remind me I’m too close to a tree. Many commercial drone pilots fly with obstacle avoidance off to get closer to foreground for dynamic shots, but I find with 90% of my shots that obstacle avoidance makes sense.
At this point it’s hard to find true competitors to DJI. They’ve led the field for a while now with their Phantom series, and now the Inspire continues to deliver professional results on realistic production budgets. The Inspire 2/X7 combo doesn’t require an electrical engineering degree to master, and if you’ve spent any time playing video games you’ll be right at home with the controller in your hands. It’s never been easier to pull up your production vehicle and grab RAW aerials in minutes, so get that FAA commercial certification and start flying.
DJI Inspire 2 Body Only: $3,000.00
X7 Camera Cost: $2,669.00
Availability: Shipping late November
Special thanks to Rin Ehlers Sheldon, Haley Hays and Rick Smith for their help on this field review.
The post Hands on with DJI’s X7 Gimbal and the Inspire 2 appeared first on ProVideo Coalition.
First Found At: Hands on with DJI’s X7 Gimbal and the Inspire 2
0 notes
Text
Delta Airlines
My 7 yr old and I recently went on a trip to Salt Lake City Utah from Chicago Illinois. Having a son with moderate a.d.d. can be difficult when you need him to sit still and this plane ride would be 4 hours. I thought ahead and brought snacks, candy, water, blankets, my iPad, the charger for it, a Sony portable DVD player that has a built in personal size screen, some dvds and some books, figet spinner, my Samsung smart phone, headphones ... all of this to make sure that this child would be entertained and comfortable. Well, turns out all I needed were the blankets. We flew Delta, coach. On the runway down to the bulk head door we met the captin, Paul. My son Beaux took a peak inside the cockpit. Every seat had a personal touch screen. My son watched "A Dog's Purpose" which is a premium movie on cable and costs 4.99 to rent, free on Delta. He had his own snacks but he liked the cokes he ordered, again free. Beaux was a bit scared when we were moving to the runway and ready to take off. I explained to him about how he would feel like he was being sucked back into his seat. It would only last a few seconds. He did pretty well with it. Beaux said that Delta was his favorite airline, his favorite plane. On the flight home he mostly slept, now being a pro at flying. He liked to interrupt his movie to go to the my flight info section on the touch screen. He got stats on wind, speed, duration, temperature and arrival time. He would periodically check where we were and how much longer, which was good because he never asked me how much longer, he could answer it for himself. So, thanks to the Delta crew for making his trip one I'm sure he will remember for a very long time.
0 notes
Last Seen Blogs

truesouthclothing
True South Clothing

eaphotographicartsat2010-blog
EA Photographic Arts at Twenty_ten

a-sneaky-bagginses
Bagginshield
godsquantumcrayon
Oktober

minneyar-lune
Minne