#Magento 2 Extension
Text
#magento jewellery product extension#magento product extension#magento 2 extension#magento extensions
0 notes
Text
Mastering Magento 2 Landing Pages: A Comprehensive Guide

Magento 2 Social Login allows e-commerce stores to easily and securely connect customers with their social media accounts. Find out why social login is essential for your online store and how to set it up in Magento 2.
1 note
·
View note
Text
Magento 2 Development Guide: Tips for eCommerce Success
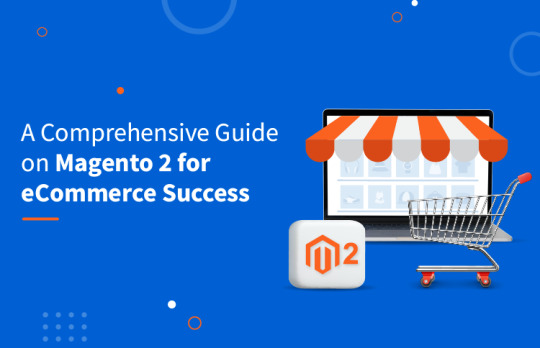
Dive into the dynamic world of Magento 2 with this engaging guide! It unveils the secrets to leveraging Magento 2 for creating standout eCommerce stores. From enhancing performance to ensuring top-notch security, the blog explores how this platform is a game-changer for businesses of all sizes. Perfect for those eager to elevate their online retail presence.
Uncover more captivating insights by reading the full blog here.
#magento 2#Magento 2 Development#eCommerce Solutions#web application development#magento 2 extension#Magento 2 Guide
1 note
·
View note
Text
E-commerce Success With Experts of Magento 2 Extenion Development Company
A Magento 2 extension development company specializes in crafting custom extensions and plugins for Magento 2, the powerful eCommerce platform. These tailored solutions are designed to enhance and extend the functionality of Magento 2 stores. With expertise in Magento's architecture and development best practices, these companies help businesses create unique features, improve user experiences, and optimize backend operations with our VT Netzwelt experts.
1 note
·
View note
Text
Magento 2 Video Gallery Extension
Create stunning video galleries and showcase your products effortlessly with our powerful Magento 2 video gallery extension. Integrate it now on your website.
Read more: https://magento-store.tridhya.com/video-gallery.html
0 notes
Text
How to Add Custom Tabs to Magento 2 Product Pages for Improved UX
What is Magento 2 add tab to product page
Adding custom tabs to Magento 2 product pages is a great way for online store owners to organize and display relevant information about their products. These custom Magento 2 add tab to product page can be created using extensions that provide additional functionality to the platform. The process involves selecting and installing an extension, configuring its settings, and adding content to the tabs. By adding custom tabs, customers can easily access important product details and specifications, leading to a better user experience and potentially higher sales.

If you're looking to improve the user experience (UX) on your Magento 2 store, one effective way is to add custom tabs to your product pages. Custom tabs can help you organize and present important information about your products in a clear and concise manner. In this blog post, we'll walk you through the steps to add custom tabs to your Magento 2 product pages for improved UX.
Step 1: Choose a Magento 2 Extension
The first step is to choose a Magento 2 extension that provides custom tab functionality. There are many extensions available in the Magento Marketplace, and you can choose one that suits your specific needs.
Step 2: Install and Configure the Extension
Once you've chosen your extension, install it on your Magento 2 store and configure its settings. The extension will typically provide options for defining the number of tabs, tab labels, tab content types, and tab layout.
Step 3: Add Content to Your Custom Tabs
With the extension installed and configured, it's time to add content to your custom tabs. You can add a wide variety of content to your tabs, such as product details, specifications, images, videos, reviews, and more. Make sure that the content you add is relevant, accurate, and engaging to provide a seamless user experience.
Step 4: Preview and Test Your Custom Tabs
After adding content to your custom tabs, it's important to preview and test them to ensure that they display correctly and that the content is easily accessible to customers. This can help you identify any issues or areas for improvement before going live with your custom tabs.
By following these steps, you can add custom tabs to your Magento 2 product pages for improved UX. Custom tabs can help you organize and present important product information in a clear and concise manner, leading to a better user experience and potentially higher sales.
#Magento 2#custom tabs#product pages#UX user experience#Magento 2 extension#installation#configuration
0 notes
Text
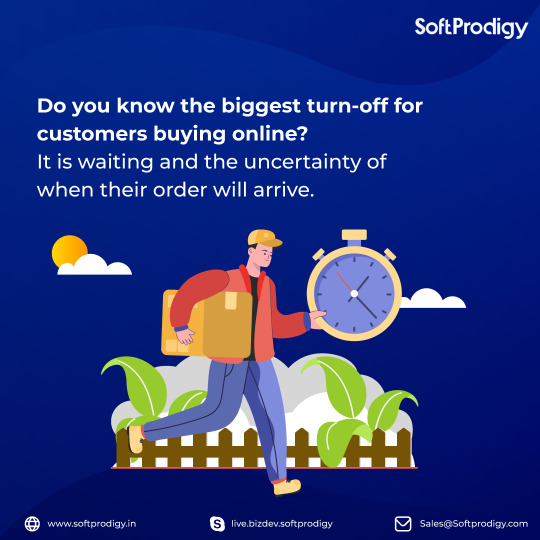
The good news is you can overcome this challenge with the Advance Magento 2 Blue Dart Shipping Integration extension. It allows your customers to track their orders in real-time and anticipate the delivery date. If you want to buy this extension, contact SoftProdigy.
0 notes
Text
How to set up an Elightwalk Magento 2 Social Login

Enabling Elightwalk’s Magento 2 Social Login extension involves multiple steps that may vary based on version and instructions. Here’s a general guide:
Install the Extension:
Follow the installation instructions provided by the Elightwalk Magento 2 Social login. This often involves using Composer, Magento Marketplace, or manually uploading files to your server.
Install via composar Copy code and past
composer require elightwalk/magento2-social-login
php bin/magento module:enable Elightwalk_Core Elightwalk_SocialLogin
php bin/magento setup:upgrade
php bin/magento setup:di:compile
php bin/magento setup:static-content:deploy
php bin/magento cache:clean
php bin/magento cache:flush
Configuration Path
From Magento Admin, select Store > Settings > Configuration > Elightwalk Extensions > Social Login.
Create Social Media Applications:
From Magento Admin, select Store > Settings > Configuration > Elightwalk Extensions > Social Login.
To enable Social Login, you must create applications on the respective social media platforms (e.g., Facebook, Google, Linkedin) to obtain API keys and secrets.
Go to their developer console for each platform and create a new project or application. Follow the platform-specific instructions to generate API keys and secrets.
Configure Elightwalk Social Login in Admin:
From Magento Admin, select Store > Settings > Configuration > Elightwalk Extensions > Social Login.
Log in to your Magento 2 Admin Panel.
Navigate to Stores > Configuration > Elightwalk > Social Login.
Enter the API keys and secrets obtained from the social media platforms in the appropriate fields.
Configure additional settings such as button styles, the display of social login options, and any specific behavior you desire.
Sign In Social Account
Google Client ID & Secret
Facebook Sign In
Linkedin Client ID & Secret
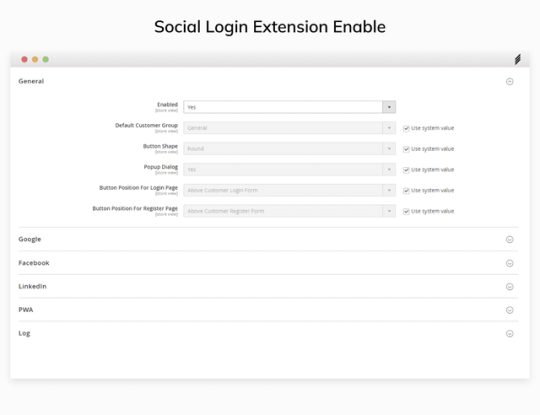
Enable Social Login Buttons:
In the configuration settings, enable the social media platforms you want to offer for Social Login.
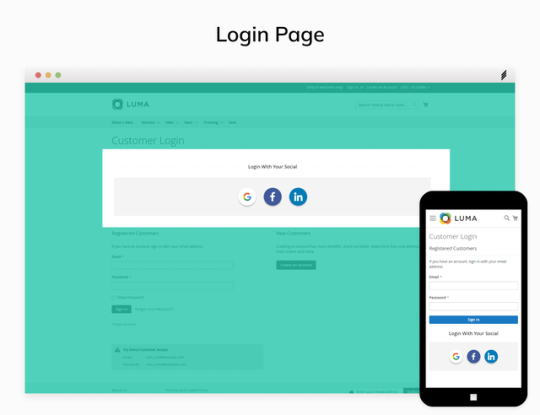
Choose the locations where the social login buttons appear, such as on the login page, checkout page, or customer account page.
Customize User Experience
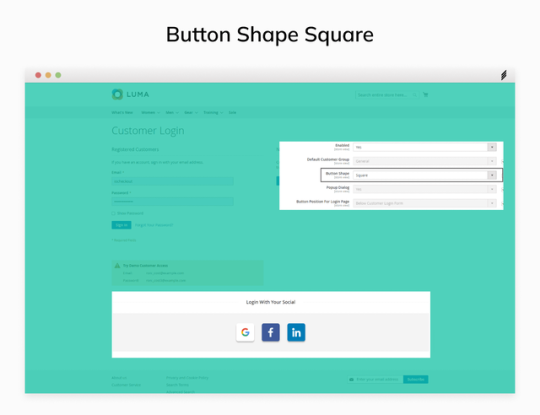
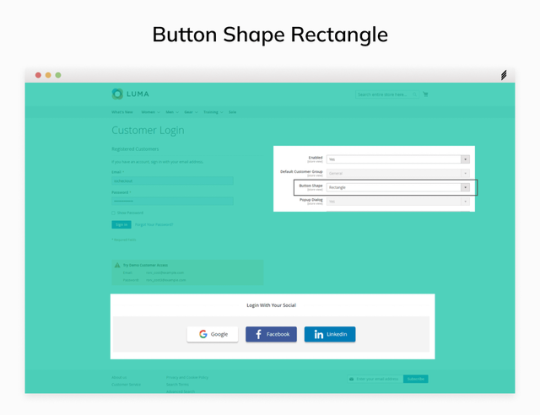
Button Shape: Squre OR Rectangle
Button position: Above OR Below
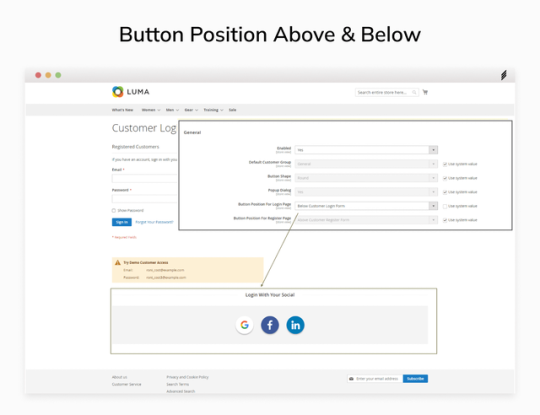
Button position: Landing Page
Test Social Login Functionality:
Test the functionality by navigating to the login page after configuring the extension and enabling social login buttons.
Click on the social login buttons to ensure they redirect users to the respective social media platforms for authentication.
Authenticate and confirm successful login to your Magento 2 store.
Monitor and Maintain:
Regularly monitor the social login functionality to ensure it continues to work smoothly.
Keep the social media API credentials secure and update them if needed.
Download the Elightwalk Magento 2 Social Login extension now! For any inquiries regarding the Magento 2 Social Login extension, be sure to consult the comprehensive documentation guide provided. Access the latest features, installation instructions, and customization details to enhance your Magento 2 store’s user experience. Explore the documentation guide for seamless integration and optimized performance.
#magento 2 social login#social login extension#magento 2 extension#elightwalk magento 2 social login#elightwalk extension
1 note
·
View note
Link
This provides an incredibly flexible solution for creating a well-developed shipping policy in your store. Magento 2 Shipping Restriction Extension is used to restrict shipping method based on product SKU and product category.
0 notes
Text
Magento 2 Younited Pay
Sometimes, the customers may want to purchase the products from your online store, which might be out of their budget. In such cases, a credit-based payment method in your store can help.

Younited Pay is a leading European payment solution company that provides Buy Now Pay Later solutions to customers. It is a credit-based payment solution provider that provides customer-centric credit-based payment options.
Providing a credit-based payment method or Buy Now Pay Later on your Magento store is easier and safer than ever with Meetanshi’s Magento 2 Younited Pay extension. Encourage the customers to purchase their favorite products on your online store without worrying about the prices.
Younited Pay in Magento uses a credit-based payment system that fetches best offers based on the cart value and shows them to the customers. The customer can then choose to checkout using his/her preferred payment plan. This increases the customer engagement rate with the online store and thus can also improve the customer’s loyalty towards the store.
Offer your customers a flexible payment option and allow them to purchase products beyond their purchasing power using a credit-based payment method.
Features of Magento 2 Younited Pay by Meetanshi
● Offer a flexible and customer-centric payment method on your online store.
● Set a custom title for the Younited Pay, show or hide the logo, and custom description in the front end.
● Debug mode for the developers.
● Option to choose the default payment action from Authorize and Authorize & Capture.
● Set the default order status of the orders paid through Younited Pay from Processing and Suspected Fraud.
● Allow customers from only selected countries to pay using Younited Pay.
● Customers can check the order payment status from my orders section.
Enhance the customer experience and loyalty of your online store by using Younited Pay for Magento 2.Read more at: https://meetanshi.com/magento-2-younited-pay.html
0 notes
Video
youtube
Magento 2 Hide Price Extension allows admin to control price visibility. Hide product price & add to cart button based on customer groups & countries. Read more: https://www.vdcstore.com/magento-2-hide-price-extension.html
0 notes
Last Seen Blogs

solskindelaney
TD⁸

youre-the-sun-flower
•Pieces Of The Sun•

mrssmaryy
🖤👽🚀💚

kinterest
just another kin+fictive request blog!

girlinlavender
girl.in.lavender (but not in lavender rn)