#ITS SO FUN. i just do a white outline with a little gaussian blur then go to town on the starry background
Text
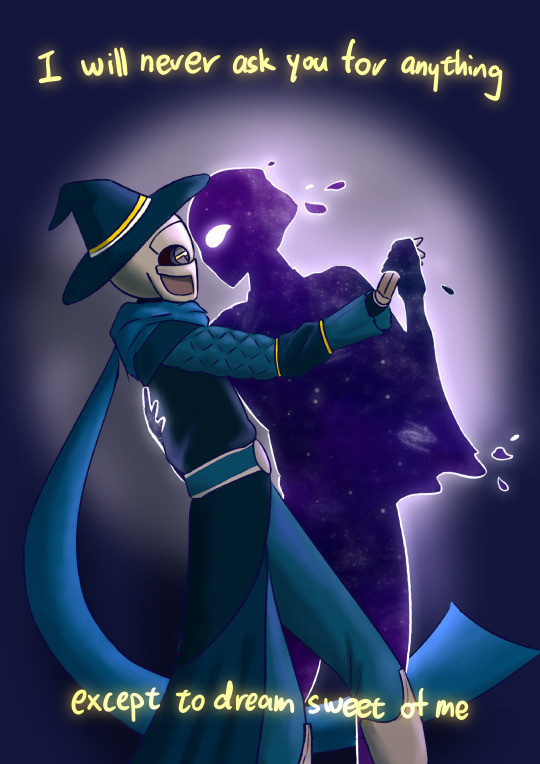
𝘚𝘤𝘢𝘳-𝘤𝘳𝘰𝘴𝘴𝘦𝘥 𝘭𝘰𝘷𝘦𝘳𝘴
#rolling with difficulty#vrla rwd#mrsn rwd#rwd starship#shoutout to fall out boy for writing lyrics that absolutely slap with no context i guess#get it. do you get it. cuz mechanites don't dream (starts sobbing)#something something the least mrsn could ask for is for vrla to remember him fondly and he can't even do that bc all his memories are gone#also yes it's a stylistic choice to draw mrsn as the starry apparition here but it's also absolutely bc the apparition is easier to draw#ITS SO FUN. i just do a white outline with a little gaussian blur then go to town on the starry background#between the astral sea and the mrsn ghost i just keep having to draw that kinda starry background and i have lots of custom brushes for it#and it's just. so much fun. just slapping colours and shinies on the canvas like a small child#the original idea i had in my head was significantly less... close contact but then i looked up couples dancing pose refs on pinterest#and got the fucking gayest reference image ever so here we are#WALAO TUMBLR MOBILE FUCKED UP THE RESOLUTION AGAIN NABEI#art I made
97 notes
·
View notes
Text
How to Create a Fun Fox and Coffee Photo Manipulation in Photoshop
What You'll Be Creating
What I love most about photo manipulations is that they allow you to create unreal scenes in a realistic way. In this tutorial, I'll show you how to create such a fun photo manipulation with miniature foxes invading a coffee table. You'll learn how to prepare photos for photo manipulation, how to place them all in one file, and how to blend them with the new environment by adding shadows, light, blur, and adjusting colors.
What You Will Need
In order to complete this project, you'll need the following resources:
Coffee on a table
Curled fox
Sleeping fox
Yawning fox
Fox standing upright
Yawning fox close-up
1. How to Prepare Assets for Photo Manipulation
Step 1
Open one of the fox photos in Photoshop. Use the Lasso Tool (L) to select the outline of the fox's body.
Step 2
Go to Select > Refine Edge. Check Smart Radius and drag the Radius a little. Then use the Refine Radius Tool to "draw" the fur that hasn't been selected. When you're done, click OK.
Step 3
Go to Select > Inverse and delete the selection.
Step 4
My fox doesn't have complete paws, but one of them looks correct. Copy the good paw and drag it to the other places, changing its shape with the Free Transform Tool (Control-T).
Step 5
Do the same with the other foxes. Place them all in one file, on separate layers.
Step 6
Because the foxes come from different photos, they all have different lighting. Let's fix it to make the foxes more similar. Select the layer with our first fox and add a Levels adjustment layer.
Step 7
Clip the layer (Control-Alt-G) and drag the markers to brighten the fox.
Step 8
The head looks a little too bright and desaturated. Add a Hue/Saturation adjustment layer...
... and drag the Saturation marker. Don't forget to clip the layer!
Step 9
Add a Layer Mask and fill it with black using the Paint Bucket Tool (G). Then use a soft brush and paint with white to reveal the adjustment on the head only.
If what I just said sounds confusing, learn more about Layer Masks here:
Adobe Photoshop
Quick Tip: Layer Mask vs. the Eraser Tool in Adobe Photoshop
Monika Zagrobelna
Step 10
Use this method to make all the foxes similarly bright and similarly colored.
2. How to Put a Miniature Fox on the Table
Step 1
Open the photo with the table. Copy one of the foxes and paste it into the file. Use the Free Transform Tool (Control-T) to resize the fox.
Step 2
The photo of the table has a different depth of field in different places. Because of this, the elements on the table have various degrees of blur. Go to Filter > Blur > Gaussian Blur and add some blur to the fox, adjusting it to its environment.
Step 3
But the depth of field changes in a gradual way, so one part of the fox's body could be blurrier than the other. To fix it, go into the Quick Mask Mode (Q) and paint over the planned blurry part with a soft, black brush. Then exit the mode (Q), go to Select > Inverse, and Control-H to hide the selection.
Step 4
Use the Gaussian Blur again, this time only in the selected area.
Step 5
A new place requires new shadows. Add a Hue/Saturation adjustment layer to the fox. Make it darker and slightly more saturated (because the shadows can be warmed by the reflection of the brown table).
Step 6
Use the Layer Mask to paint the shadows.
Step 7
There need to be some shadows under the fox, too. Add a Hue/Saturation adjustment layer to the background. Make it darker.
Step 8
Fill its Layer Mask with black and paint a subtle shadow under the fox.
Step 9
There's a bright shadow on the table visible in the lack of reflection. We can use it to make our fox more realistic. Go to Filter > Liquify and use the Forward Warp Tool (W) to drag a little of this shadow under the fox's paw.
Step 10
You can also add an extra Hue/Saturation adjustment layer to add deeper, darker shadows right in the crevices.
3. How to Add Other Foxes to the Scene
Step 1
Let's add the other foxes the same way. Copy and paste the curled fox, and resize it to place it on the newspaper, with its head resting on the phone.
Step 2
Add the Gaussian Blur to blur the fox. It's quite deep in the background, so you can add a strong blur here. It will greatly improve the realism of the whole scene.
Step 3
Add the shadows under the fox by painting on the masks of the adjustment layers that you've created earlier for the background.
Step 4
There's a red caption on the newspaper that gets reflected on the phone. We can reflect it on the fox's body, too. Add a Hue/Saturation adjustment layer, clip it, and check Colorize. Then make the fox reddish.
Step 5
Paint over the Layer Mask of this adjustment and keep the reflection only at the bottom.
Step 6
Let's add a fox inside the cup now. Paste and resize it.
Step 7
Its paws are not placed correctly, so go to Filter > Liquify and use the Forward Warp Tool (W) to drag the left paw to the edge of the cup. Press OK when you're done.
Step 8
Use a Layer Mask to erase the part of the fox that's supposed to be covered by the cup.
Step 9
Use the Gaussian Blur to adjust the blur to the environment.
Step 10
The farther edge of the cup looks blurrier, so we can make the back of the body blurrier as well. Select it with the Quick Mask Mode (Q) as previously.
Step 11
The cup is very reflective, and the fox is bright orange. Add a Hue/Saturation layer over the background and make it orange. Then paint on the mask to limit the adjustment to the area around the fox.
Step 12
Paint a thin shadow under the fox's paws.
Step 13
Finally, the last fox. Place it next to the cup.
Step 14
Add some Gaussian Blur to the fox.
Step 15
The depth of field changes quickly in this area, so a part of the fox must be blurred separately. Go to Filter > Blur > Iris Blur and keep the fox's head in the center of the circle. Then adjust the shape of the circle to make the rest gradually blurrier.
Step 16
Paint the shadows on the fox's body by adding a Hue/Saturation adjustment layer.
Step 17
Because the table is warmly colored, it should reflect some of its warm light into the shadows. Add a Color Balance adjustment layer to color the shadows.
Step 18
Paint the shadows under the fox.
Step 19
There's a reflective cup right next to the fox, and the lack of reflection might give our manipulation away. Copy and paste the yawning fox's head, placing it behind the sitting fox. Use the Free Transform Tool (Control-T) in Warp Mode to adjust its size and shape to the sitting fox's head.
Step 20
Lower the Opacity of the head.
Step 21
Blur the reflection slightly.
Step 22
Use a Layer Mask to make the reflection weaker as the head turns away from the cup.
Step 23
Additionally, you can add some bright light when necessary with a Hue/Saturation adjustment layer. For example, here I used it to add some subtle rim light.
4. How to Finish the Photo Manipulation
Step 1
Once all the foxes are in place, you can take a look at the scene as a whole and check if everything looks good. Now it's a good time to add some tiny corrections.
Step 2
If you're happy with everything, let's finish the artwork. Add a Photo Filter adjustment layer and play with the settings. The photo filter helps unify the whole scene by giving every element the same tint.
Step 3
Right-click the layers and select Flatten Image. Then go to Filter > Noise > Add Noise. This helps unify the image as well.
Step 4
Use the Crop Tool (C) to get a better frame of the scene.
Step 5
Finally, go to Image > Image Size and change the size to something more presentable online.
Good Job!
What a beautiful scene! Do you want to learn more about photo manipulation? Check out our other tutorials. And don't forget to visit Envato Elements if you need any photo resources for your work!
Adobe Photoshop
A Beginners Guide to Photo Manipulations in Adobe Photoshop
Melody Nieves
Photo Manipulation
Advanced Photo Manipulation Techniques: Introduction
Melody Nieves
Photo Manipulation
How to Create a Glowing, Fireflies Photo Manipulation in Adobe Photoshop
Melody Nieves
Photo Manipulation
How to Create a Surreal Water Photo Manipulation in Adobe Photoshop
Jenny Le
Photo Manipulation
How to Create a Dark Fallen Angel Scene With Adobe Photoshop
Jenny Le
from Envato Tuts+ Design & Illustration https://ift.tt/2UciYYr via http://www.webmasterforum.ws/rankwyz-discount-code-2015-coupons/
0 notes
Last Seen Blogs

im-just-a-mushroom
🍄🇵🇸🇺🇦

shoot-the-street
Shoot-the-Street. Photography by Karl Wood

wyrmspel-blog
Gratis casino på nätet

utterlyvapid
UtterlyVapid