#I love how the aspect ratios of these photos and the zoom is so different. same place and time but they zoomed way in on Patrick
Text

insp @littlequeenofthemangoes
#I don't know you but you get like half the credit for this bc it's like a borderline echolalia thing for me now skfjskfjs#I keep whispering ''my neighbor patito'' to myself hdfjdncksncns I needed to make a visual for some reason#fob#fall out boy#2ourdust#sure I'll maintag. we love dumb memes here :)#I love how the aspect ratios of these photos and the zoom is so different. same place and time but they zoomed way in on Patrick
17 notes
·
View notes
Photo

Life Detained.
The Mauritanian director Kevin Macdonald talks with Jack Moulton about researching Guantanamo Bay’s top secrets, Tahar Rahim’s method-acting techniques, the ingenuity of humanity during the pandemic, and his favorite Scottish films.
“You’ve got to understand that for a Muslim man like Tahar, this role has a much greater significance than it does for you or me.” —Kevin Macdonald
It’s not uncommon for a director to release two films in one year, but Academy-Award winning—for his 1999 documentary One Day in September—director Kevin Macdonald is guilty of this achievement multiple times. Ten years ago, he released his first crowd-sourced documentary Life in a Day and the period epic The Eagle within months of each other. A decade on, he’s done it again.
The Scottish director (and grandson of legendary filmmaker Emeric Pressburger) released both his Life in a Day follow-up and the legal drama The Mauritanian this month. The latter tells the story of Guantanamo Bay detainee Mohamedou Ould Slahi (sometimes written as Salahi), who was held and tortured in the notorious US detention center for fourteen years without a charge. The film, adapted from Slahi’s 2015 memoir Guantánamo Diary, features Jodie Foster and Shailene Woodley as his defense attorneys Nancy Hollander and Teri Duncan, with Benedict Cumberbatch, who also signed on as the film’s producer, playing prosecutor Lt. Stuart Couch.

Benedict Cumberbatch as prosecutor Lt. Stuart Couch in ‘The Mauritanian’.
The Mauritanian also introduces French star Tahar Rahim to a global audience, in the role of Slahi. “The ensemble is excellent across the board,” writes Zach Gilbert, “while Tahar Rahim is best in show overall, bringing honorable heart and humanity to his role [of] the titular mistreated prisoner.”
Much of the story is filmed as an office-based legal thriller involving thick files, intense conversations, and Jodie Foster’s very bright lipstick. Macdonald expertly employs aspect ratio to signify narrative shifts into scenes recreating Slahi’s vivid recollections of torture and his achingly brief conversations with unseen fellow detainees.
Qualifying for this year’s awards season due to extended deadlines, The Mauritanian has already earned Golden Globe nominations for Best Actor and Best Supporting Actress for Rahim and Foster respectively. Slahi remains unable to travel due to no-fly lists, but he was a valuable resource to the production, providing an accurate and rare depiction of a sympathetic Muslim character in an American film.
It was the eve of Life in a Day 2020’s Sundance Film Festival premiere when we Zoomed with Macdonald. Behind him, we spied a full set of the Italian posters for Michelangelo Antonioni’s classic Blow-Up. As it turns out, he’s not a fan of the film—only the posters—so we got him talking about his desert-island top ten after a few questions about his new film.
The attention to detail on Guantanamo Bay in The Mauritanian is impressive. There are procedures depicted that you rarely see on-screen. How did you conduct your research?
Obviously Guantanamo Bay is a place which the American government spends a great deal of effort keeping secret. It was important to Mohamedou and me that we depicted the reality of the procedures as accurately as we possibly could. That research came primarily from Mohamedou who has an incredible memory. He drew sketches and made videos of himself lying down in spaces and showing how he could stretch half his arm out [in his cell]. There are a lot of photographs on the internet of Guantanamo Bay which are [fake] and others are from a later period because the place developed a lot over the years since it started in 2002 and Mohamedou was able to [identify] which photos were rooms, courtyards and medical centers he had been in.

Director Kevin Macdonald on set with Jodie Foster.
How did you approach creating an honest representation of the graphic torture scenes, without putting the audience through it as well?
Whenever films about this period are [made] they’re always from the point of view of the Americans and this time we’re with Mohamedou. You can’t underestimate the fact that there have really been no mainstream American cinematic portrayals of Muslims at all, so in portraying a sympathetic Muslim character who’s also accused of terrorism, you’re pushing some hot buttons with people. It was important that those people who are uncomfortable with him understand why he confessed to what he confessed.
Everything you see in the film is what happened; the only difference is that they weren’t wearing masks of cats and Shrek-like creatures, they wore Star Wars masks of Yoda and Luke Skywalker in this very perverse fucked-up version of American pop culture. Obviously, we couldn’t get the rights to those. Actually, I don’t feel that it is graphic. There is more violence in your average Marvel movie. It’s psychologically disturbing because you’re experiencing this disorientating lighting, the [heavy-metal] music, and he’s being told his mother’s going to be raped and he’s flashing back to his childhood. To be empathizing with this character and then to see them to be so cruelly treated is so deeply disturbing.
How did you prepare Tahar Rahim for his convincing portrayal of such intense pain and suffering?
Tahar went through a great deal of discomfort in order to achieve it. He felt that to give a performance that had any chance of being truthful, he needed to experience a little bit of what Mohamedou had suffered, so throughout the movie he would insist on wearing real shackles which made his leg bleed and give him blisters. I would plead with him to put on rubber ones and he would say “no, I have to do this so I’m not just play-acting”.
He starved himself for about three weeks leading up to a torture sequence—he had lost an awful amount of weight and he was really unsteady on his legs. I was very worried about it and I got him nutritionists and doctors but he was determined to stick with that. You’ve got to understand that for a Muslim man like Tahar, this role has a much greater significance than it does for you or me. He felt a great weight of responsibility to do this correctly, not just for Mohamedou, but he was speaking for the whole Muslim world in a way.

Jodie Foster and Shailene Woodley as defense attorneys in ‘The Mauritanian’.
What compels you to study this period in time?
Mohamedou was released a couple of weeks before Trump came to power in 2016, so the story is still ongoing for him. He’s still being harassed by the American government and he’s not allowed to travel because he’s on these no-fly lists. I didn’t want to make a movie that was saying “George W. Bush is terrible”. We’ve been there, we’ve done that. This is looking back with a little bit of distance and saying “here’s the principles that we can learn from when you sidestep the rule of law”—what it takes to stand up like Lt. Stuart Couch did when everyone else around you is going along with something that’s really terrible.
You see that around Trump with the choices within the Republican Party to stand up and say they’re going to sacrifice their careers to do the right thing. It is a hard thing when there’s this mass hysteria in the air. The basic principles that the lawyer [characters] are representing is not about analyzing and replaying what happened after 9/11, they’re directly related in a bigger way to the world we all inhabit.
Did anything surprise you in how your subjects for Life in a Day 2020 addressed the pandemic?
One of the most affecting characters in the film is an American who lost his home and business because of the pandemic, so he’s living in his car. He seems very depressed when you meet him for the first time, then later he’s telling us there’s something that’s giving him joy in his life. He brings out all these drones with these cameras on them and puts on this VR headset and loses himself by flying through the trees. I thought that was such a great metaphor for the way that human ingenuity has enabled us to survive and thrive during the pandemic.
I get the feeling of resilience from [the film]. This is a more thoughtful film than the original one. I see this as a movie of [us] being beware of our susceptibility to disease and ultimately to death and mortality, [and] how we’ve found these consolations as human beings. To me, it’s a really profound thing. It also speaks to the main theme of the film which is how we’re all so similar, same as The Mauritanian. It’s confronting you with all these people and saying we fundamentally all share the basic things that underpin our lives and the differences between us are much less important than the things we have in common.
Let’s go from Life in a Day to your life in film. What’s a Scottish film that you love but you feel is very overlooked or underrated?
That’s really hard because there aren’t many Scottish films and there aren’t many good ones. Gregory’s Girl is the greatest Scottish film ever made—it’s the bible for life for me. That’s very well-known, so I would have to say Bill Forsyth’s previous film That Sinking Feeling, which was self-funded and made on 16mm black-and-white. It has some of the same actors and characters as Gregory’s Girl in it. Or my grandfather Emeric Pressberger’s film I Know Where I’m Going! which is a rare romantic comedy set in Scotland.

John Gordon Sinclair and Dee Hepburn in Bill Forsyth’s ‘Gregory’s Girl’ (1980).
Which film made you want to become a filmmaker?
I think it was Errol Morris’s The Thin Blue Line, which is one of the top five documentaries ever made and in my top ten desert-island movies.
What else is in your desert-island top ten?
Oh god, don’t! I knew you were going to ask me that. I’ll give a few. I would say there would have to be something by Preston Sturges—maybe The Lady Eve or The Palm Beach Story. There would have to be a film written by my grandfather, so probably The Life and Death of Colonel Blimp, which is the best British film ever made. There would have to be Singin’ in the Rain, which is the most purely joyful film I’ve ever seen. There would probably be The Battle of Algiers, which I rewatched recently and was an inspiration on The Mauritanian. Citizen Kane I also rewatched in anticipation of watching Mank, of which I was very disappointed. I thought it completely missed the point and was kind of boring.
Which was the best film released in 2020 for you?
I thought the Russian film Dear Comrades! was really stunning. It was made by a director [Andrei Konchalovsky] in his 80s who first worked with Andrei Tarkovsky back in the late 1950s. He co-scripted Ivan’s Childhood. I would love to make my masterpiece when I’m 86 too!
Related content
Films with Muslim characters
Movies that pass the Riz test
Scottish Cinema—a regularly updated list
Follow Jack on Letterboxd
‘The Mauritanian’ is in select US cinemas and virtual theaters now, and on SVOD from March 2. ‘Life in a Day 2020’ is available to stream free on YouTube, as is the original.
#kevin macdonald#michelangelo antonioni#scottish film#scottish director#emeric pressburger#the mauritanian#jodie foster#tahir rahim#tahar rahim#french actor#guantanamo bay#muslim representation#muslims on film#benedict cumberbatch#guantanamo diary#life in one day#life in one day 2020#life in one day film#letterboxd
8 notes
·
View notes
Text
How to Build Your Business with LinkedIn Stories
The most popular professionals on LinkedIn routinely speak to finest practices in the work environment, like employing the ideal people, tackling scheduling difficulties, or fundraising. Think about LinkedIn stories as simply another outlet to share your service difficulties, accomplishments, and everyday enjoyable tasks.

If you've been viewing others' stories on LinkedIn and wish to sign up with the party, we have actually got the information on:
What LinkedIn Stories are
How to develop a LinkedIn Story
Ideas for LinkedIn Stories
LinkedIn Story best practices
How do LinkedIn Stories work?
Like Snapchat, Facebook, and Instagram, LinkedIn Stories are pieces of material you can post to your profile that last 24 hr before vanishing.
The optimum length of time for a LinkedIn Story is 20 seconds. You can upload an image from your library or snap an image or video in real-time. And you can include several pictures or videos to your Story at a time for users to tap through.
To see your story, or others', just tap on the circular profile photos that appear in the top of the LinkedIn mobile app.
What are the LinkedIn Story specifications?
According to LinkedIn, below are the suggested sizes for adding images from your cam roll:
Videos
Resolution: 1080 (w) x 1920 (h) px
Frame: 30 FPS, square pixels
Supported file types: H264, MP4
Aspect Ratio: 9:16
Images
Resolution: 1080 (w) x 1920 (h) px,
Supported file type: PNG, JPG
Element Ratio: 9:16
How do I produce a LinkedIn Story?
You can just contribute to your (or your organization's) LinkedIn story from the mobile app. Just open the app, select your profile picture or your organization's, and enable LinkedIn to access your video camera and images.
What features are offered with LinkedIn Stories?
Like Instagram and Facebook Stories, you have a few different options for making your Story engaging and genuine.
Add sticker labels
You can easily include a sticker label or text to your picture or video if you want to get creative.
Post to "Today's Concern"
You can likewise engage your fans by asking the concern of the day. The answers your fans supply can assist you to collect insights, feedback, and other information so you can better connect with your audience.
Tag users in your LinkedIn Story
Keep in mind, just like any other social media platform, users respond best to human faces. Do not be shy to display your employees, partners, investors, and clients. You can tag them in the story utilizing their LinkedIn manage.
Include links to your LinkedIn Story
And the best part is that you don't even need to be confirmed to consist of a link in your story.
What should I post to my LinkedIn Story?
If you're anything like me, when planning a social calendar, you arrange content into different pails. Fun, light, casual content gets published on Facebook or Twitter, while more main news, content releases, and partnership-related events go onto LinkedIn.
LinkedIn stories are the platform's way of getting more friendly and casual, like Instagram or Twitter. Lean into it! Believe of it in this manner: if you are an organization selling to other services, your perfect audience is on LinkedIn. LinkedIn stories provide you another opportunity to show a new side of your brand name.
Highlight the action
I've stated it once (in this post), I've stated it a thousand times. People like to see other humans behind the brands they love. Show your workers having enjoyable producing awesome items. While that probably looks like a lot of people in Zoom conferences right now, think about creative ways to highlight your individuals.
Real-time updates
Sounds like the perfect type of content for a LinkedIn story. Provide your followers a tour of the occasion from your point of view.
Remember, real-time updates are * precisely * what stories are made for. Don't be shy to keep things unpolished in your stories. We want to see the faces behind the organization.
Idea leadership and AMA
While going live on Facebook, Instagram, Clubhouse, or any other platform is enjoyable, it's not necessarily the platforms your audience is searching. Once again, LinkedIn for the win.
LinkedIn posts everyday concerns that you can answer in your stories, but your team must feel empowered to compose and respond to concerns yourselves. What questions do you clients ask you? What quandaries have your team discovered the responses to?
Official news
Go ahead and give your big statements an additional push with an unique LinkedIn story devoted to presenting your news. This could be anything from product launches, brand-new collaborations, ending up a round of financing, or reaching a worker milestone.
Use LinkedIn Stories to reinforce your personal or service brand
Using personable content isn't simply for Instagram or Facebook. And while LinkedIn is known to be the more formal, expert platform, that doesn't indicate your Stories won't be reliable.
Contact SEO Services Bangalore for outsourcing your LinkedIn marketing
1 note
·
View note
Text
Free Video Editing Software For Mac 2015

Are you looking for the best free video editing software for Mac? You want it to help you create great videos for fun, entertainment, invitation, advertising or education? Well apart from the cool video footage, the selection of a correct tool is key to the success of a video. We’ve listed both the best free and premium video editing software programs for Mac users in this guide. Whether you are a beginner or a professional, you will find one that works for you.
Free Video Editing Software For Mac 2015 User
Free Video Editing Program For Mac
Best Video Editing Software Imac
Best Video Editing Software Mac
Free Video Editing Program Mac
Best Free Video Editing Software for Mac
iMovie
iMovie is what most people will think to use when they want a free video editing software for Mac. You don’t need to pay a penny for it. It is completely free to use with almost all of the features that we need for processing our video. There are tons of effects, transitions, sound effects, and text styles to help you make your own stylish videos. One of the best features is that its movie trailer themes offers you a lot of options to create amazing cinema-like trailers in just several minutes. The interface is really easy to use and intuitive. So you can start editing your video and quickly get the hang of the program.
ShotCut
Some video editors are free, but there's usually some kind of catch or disadvantage to these programs. (Image credit: Shotcut) Free vs paid video editing software. There are some free video editing solutions out there. Programs such as DaVinci Resolve and Shotcut are free downloads, and iMovie comes preloaded on every new Mac computer. Read about the best video editing apps for Mac here: Best video editing software for Mac myTuner Radio If you like to listen to radio stations try out the myTuner Radio app. Save your favourite.
ShotCut is a great video editing software for Mac, which can be used on Windows or Linux as well. Its interface isn’t really super intuitive but it is not hard to pick up where all of the tools are located. So you should be a little patient if you want to get great results with this program. It contains all the tools you know from Windows Movie Maker, plus a lot of extras. ShotCut’s biggest advantage is its video and audio filters, which can be fully customized, layered, and combined in all kinds of interesting ways. However, you cannot preview the effects before applying them. And although there are excellent export file formats, it has no profiles for different devices.
HitFilm Express
HitFilm Express is another free video editing software for Mac, which has professional tools but without the high price tag. Due to its unique set of features, you need to spend some time before you get the hang of it. There are various tutorials to help you master it using this program. HitFilm Express is not a tool to be used just to help you just cut off unwanted footages, adding color effects, or exporting to a new format, but one that has a full editing suite, such as audio and video filters, compositing tools, layers and masking, green screen effects, and 3D support. Its website puts emphasis on creating Hollywood-style movies, so it is also one of the best tools for YouTubers and vloggers.
Lightworks
Lightworks is another one of the best video editing software for Mac which is packed with pro-level tools. Its interface is a little different from other video editors you may have tried. So don’t expect to master it overnight but it worth the time and effort once you get used to it. Lightworks is very suitable for home users who want an advanced tool for post-production. It has advanced real-time effects, a color correction tool, a precise trimming tool, blurs and masks, which all help to make your video shine.
Best Full-featured Video Editing Software for Mac
If you are looking for a video editing software for Mac that has professional-quality tools but is beginner-friendly, BeeCut is a reliable option to try. It is compatible with both Mac and Windows. If you are going to be jumping between different systems, you can learn one piece of editing software and move around, back and forth. The interface is fairly intuitive and easy to use, but there are also a number of text tutorials on its website, as well as video tutorials on YouTube. So you can really get up to speed quickly. The only downside is the free version will leave a watermark on the video.
Main features:
Supports multiple video aspect ratios – 16:9, 4:3, 9:16, 1:1, and 3:4.
Supports almost all kinds of video formats, audio formats, and image formats.
Includes a complete classic video editing toolkit like trim, cut, split, and more.
Advanced video editing tools like Mosaic, Freeze frame, zoom, PIP, etc.
Double tracks for PIPs, Texts, Music, Filters and Overlays.
Provides hundreds of cool filters, texts, transitions, borders, overlays and animated elements.
Export video in popular formats or for different devices in HD quality.
Related posts:
Mac computers are aimed for professional graphic designing, video editing, and imaging needs. Most of the professionals use premium grade video editors and graphic designing software on their Mac computers to complete their projects.
However, the sad truth is that these professional video editors are really costly. You might have to give up thousands of dollars to buy a video editor for Mac loaded with premium features. These premium video editors are used in movies and TV shows.

If you want to edit your raw videos or working on a project and looking for a free video editing software for Mac then you are at the right place. I have created a list of 10 best free video editing software for Mac computers. These free video editors might not match with the features of premium video editors but they are equipped with the necessary tools and features of basic video editing.
Best Free Video Editing Software for Mac Computers
Some free video editors in this list are quite efficient and provide advanced video editing features while some of these free video editors for Mac provide basic features but are ideal for the newbies. Many contain premium features of video editing. Anyway, I am giving you the list of best free video editing software for Mac and you decide which one is best for you. These are worth a shot for free.
1. Shotcut Video Editor
Shotcut is an open source, cross platform video editing software. It is available for free for Linux, Mac and Windows 10/8/7. This software contains many impressive video editing features.
Shotcut video editor supports almost all the popular video, audio and image formats. There is a broad range of video effects, transitions, filters and compositions that you can use to edit videos in Mac computers. Although, the interface is quite friendly but users completely new to video editing might face a little difficulty. However, there are easy video editing tutorials on YouTube for help.
This one is a feature-rich video editing tool. There are various blending modes for a professional touch to your videos. You can set the color, contrast, brightness, overlays, add different audio effects, bass, treble, delays, etc. The best part I like about it is the highly configurable timeline. So, if you are looking for a free video editing software for Mac then I’d suggest giving Shotcut video editor your first try.
How to Use Shotcut Video editor to edit videos – Shotcut Tutorial
2. Movavi Video Editor
Another simple video editing software. Movavi video editor is available for both Windows and Mac users. You can download the free version of this software from the website. Most users love this tool for its simple and easy to use interface.
Import any video to the software’s timeline and start editing. You can improve the quality, remove noise, add background music or audio, titles, subtitles, font size, color, contrast, saturation, choose aspect ratio, etc. The video editor supports a wide range of formats. There are a lot of creative effects like filters, transitions, animated fades, trim or crop unwanted parts of the video, rotate & adjust, stabilize, preset tunes, etc.
What else? You can create an interesting photo slideshow and reverse a video. Here is a simple tutorial explaining how to work with Movavi video editor.
How to Edit Videos using Movai video editor on Mac | Tutorial
3. AVS Video Editor
The next efficient video editor in the list. AVS video editor is paid video editing software but it provides an unlimited free trial version which is enough for basic video editing requirements.
All popular audio, video and image formats are supported. You can flip, rotate, trim unwanted parts, cut and stabilize your video. There are multiple blending modes, delay, add subtitles, various menu styles, brightness, contrast, etc. There are more than 600 transitions and special effects to choose from. You can get an overview of each project from the storyboard.
This video editor fits the beginners or novice most. Transform your raw camera footage to a finished video easily. The software allows you to output the video to various online video sharing platforms like YouTube, Vimeo, etc.
How to use AVS Video editor | Tutorial
4. Da Vinci Resolve Video Editor for Mac
Da Vinci Resolve video editor is a powerful video editing software for Mac. It has been praised by many professionals and esteemed publications. You can turn to its multi-cam editing mode if you are working with footages from multiple cameras. I have used this video editor for a few of my video editing projects so I personally like it very much. It is quite handy.
The video editing software provides faster speed. You can edit your videos extremely quickly. Although the paid version of this software has more high-end features but even a professional can get most of his video editing work done through the free version. It contains all the basic and many premium grade video editing features.
You can edit the edited videos to YouTube, Vimeo, Dailymotion, etc.
How to use Da Vinci Resolve Video Editing software for Mac | Tutorial
5. Final cut Pro Video Editor for Mac
Final cut pro is a video editing software from Apple. This software is not free and costs about $300. So, what’s it doing in this list? Because, it offers a free trial for 30 days. Final cut pro is one of the best video editing software so if you are working on an important video editing project then you can avail the features for 30 days for free.
This video editing software fits well for the novice and for the professional video editors. It is loaded with basic and advanced video editing features. You can quickly import media to its magnetic timeline, add 3D titles, apply masks, color grading, color balance, effective previews and rendering, smooth transitions, jumps and cuts, effects, stabilization, etc.
This software is actively used by the video editors of movies and TV series.
How to Download and Use Final Cut Pro Free Trial
https://www.youtube.com/watch?v=hsadGq4hWYo
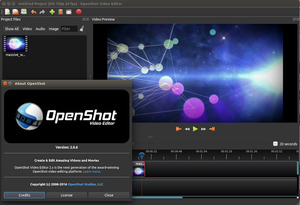
6. OpenShot Video Editor
Another great open source, cross-platform video editing software. OpenShot video editor is available for Windows, Linux and Mac users. The software is rich in features like unlimited audio/video tracks, multiple formats support, various transitions and special effects, stabilization, titles, subtitles, audio features, etc.
The interface is simple yet powerful. The advanced timeline makes it easier to drag, drop, zoom and snap. You can do trimming, rotation, snapping, cutting, scaling, masking, overlays, and add watermarks. This video editor has got multiple updates. The latest update was in August 2016.
How to use OpenShot Video Editor | Tutorial
7. Lightworks Video Editor
Lightworks video editor is a comprehensive non-linear video editing software. Video editing and trimming is relatively easier. It has been used by some movies like Pulp fiction, Heat, etc. for the video editing requirements in the past.
The video editing software is highly customizable and you can really get what you want out of it. Though its free but it contains many premium grade features. However, I found that it has restrictions in terms of project sharing. You can only share a video of up to 1080p in Vimeo and up to 720p output to YouTube.
How to use Lightworks Video Editor | Tutorial
8. Blender Video Editor
Free Video Editing Software For Mac 2015 User
Blender is a free to use, open source 3D creation tool. It providing efficient non-linear video editing features too. Blender is powerful but it takes a little time in getting used to.
By default, the software will show up 3D modelling mode. You will need to change the mode to video editing from menu. It contains all the basic video editing tools that other video editors have. Download it for free from the official website.
How to use Blender Video Editor | Tutorial
9. Avidemux Video Editor
Avidemux is another efficient video editing tool for Mac. Actually, it’s a free cross-platform video editor. It’s not a high end video editor but suits perfectly for basic video editing requirements. The interface is very simple and easy to use.
Free Video Editing Program For Mac
Below is a brief tutorial of Avidemux interface and working. You can get much out of it.
How to use Avidemux Video Editor | Tutorial
10. Jahshaka (CineFX)
Best Video Editing Software Imac
The last but not the least, Jahshaka video editor, my friends. This software provides many different tools to create amazing digital content. You can do video editing, 2D annd 3D animation, stabilization, flash animation, color correction, keying, tracking, composting, etc. There are many audio and video effects.
The developers keep on adding new features with every release.
Best Video Editing Software Mac
How to use Jahshaka (CineFX) Video Editor
These were some of the best video editing software for Mac users. You can get these software for free. These are best for those who are new to video editing or want to do some basic editing for short movie. The professional video editors like Adobe Premiere or Final Cut Pro cost are costly and you might not want to invest your money in these.
Free Video Editing Program Mac
However, if you want to try the professional premium video editing software for Mac then try the trial version first as most of them offer a trial version for a few weeks or month. Which one do you think is the best video editor for Mac?
0 notes
Text
Sony VPL-VW325ES 4K projector review: Epic home theater
New Post has been published on https://appradab.com/sony-vpl-vw325es-4k-projector-review-epic-home-theater/
Sony VPL-VW325ES 4K projector review: Epic home theater

I’ve reviewed a slew of home theater projectors in the last 18 months, and many of them were very good. The VPL-VW325ES, quite simply, blows them all away. And it’d better, because it also costs five times as much as most of those projectors.
Like
Stunning image
Stunning contrast ratio
Relatively quiet
Don’t Like
Pricey
Not very bright
Lacks the color of lasers
While there are many reasons the VPL-VW325ES performs as well as it does, the main one comes down to two simple words: contrast ratio. Using a trio of 4K SXRD liquid crystal on silicon chips, the VPL-VW325ES puts out a contrast ratio that’s 60 percent better than the next-best projector I’ve measured recently, and more than 10x better than most of the other projectors I’ve reviewed. That contrast allows the Sony to create an image that looks significantly more realistic, with more apparent depth, than anything that costs less.
And a lot of projectors cost less. You could buy a good used car for less than this projector. I know, I have. And despite the high price, this Sony is not particularly bright. A few years ago its 1,500 lumens would have been fine, but these days 2,500 is common and over 3,000 isn’t unheard of. Because of its excellent contrast ratio, however, the VPL-VW325ES still blows away brighter PJs like the Epson 5050UB, but you need total light control in your room. Otherwise its remarkable black level is wasted.
You can think of the VPL-VW325ES is the OLED TV of projectors. It looks stunning in every way, but it’s also very expensive and absolutely needs heavy curtains at least, blackout curtains ideally. For the select few who can afford it, and have a room that suits it, it’s fantastic.
Sony VPL-VW325ES: This is what a $5,500 projector looks like
See all photos
By the numbers
Resolution: 4,096×2,160 pixels
HDR-compatible: Yes
4K-compatible: yes
3D-compatible: No
Lumens spec: 1,500
Zoom: Motorized (x2.06)
Lens shift: Motorized
Lamp life (Normal mode): ???
The 325ES is a “true” 4K projector, in the digital cinema sense. It sports a resolution of 4,096×2,160, an extra 552,960 pixels over those wimpy Ultra HD projectors and their 3,840×2,160 resolution. However, unless you send the projector 4,096×2,160, it’s only using the 3,840×2,160 portion of the chip, with black bars on either side. However, the black level is so good you can’t really notice these bars unless you’re really looking for them.
And why is that black level so good? The 325ES uses a different technology than most projectors. Epson, for instance, uses LCD chips, similar to most TVs. Nearly all other projector manufacturers use DLP chips made by Texas Instruments to create an image. Sony uses SXRD, their own version of a tech called liquid crystal on silicon. This is a far more expensive technology and is only found in high-end projectors like Sony’s own and JVC with their D-ILA variant. However, LCoS is capable of significantly higher contrast ratios than the other two, which is by far the most important aspect of overall picture quality, as we’ll discuss in a moment.
Read more: DLP vs LCD vs LCoS: Projector tech pros and cons
The big bucks for the 325ES also get you a motorized lens with extensive shift and zoom options. You can move the image vertically +85% and -80%, and horizontally +/-31%. This means you can fit the 325ES in a wide variety of setups, including ceiling mount, shelf behind your sofa, and more. The 2x zoom range means you can fill a 2.35:1 screen for movie nights, then zoom down and just fill the center 16×9 portion for TV watching.
At first glance the lumen spec is not impressive. For $5,500 I’d have hoped for more light, and you can buy a far brighter projector for far less money. As we’ll discuss in the comparison section, this doesn’t matter as much as you’d think, but it does limit how large a screen you can have, and it means you absolutely must have total light control in your room.
Sony being Sony, they don’t reveal how long the lamp in the 325ES will last. This is… peculiar and rather baffling. My Sony projector, an older but more expensive model, had lost significant brightness after 3,000 hours, enough that I felt the need to replace its lamp. So feel free to use that as a rough estimate. At 4 hours a night, that’s about 2 years of use.

Geoffrey Morrison/CNET
Connect your movies
HDMI inputs: 2
PC input: No
USB port: 1 (0.5A power)
Audio input and output: No
Digital audio output: No
Internet: LAN (for control)
12v trigger: Yes
RS-232 remote port: Yes
Remote: Backlit
Befitting a projector designed for home theaters, the 325ES has a limited suite of connections but lots of control options. No legacy connections either, just HDMI. Honestly, this is fine. I’m always surprised to see analog connections on a projector these days.
What you do get is a variety of connections to control the projector with a home automation system, including RS-232, LAN, and even an IR input.
There is a USB connection, but it’s only capable of 0.5 amps, which won’t power most streaming sticks. Again, that’s fine as if you’re spending 5 grand on a projector I would hope you have something leftover in the budget for a receiver.

Geoffrey Morrison/CNET
Picture quality comparisons
There isn’t a lot of competition in this price range, but it’s worthwhile to compare the 325ES to some recent, cheaper, and quite good projectors like the Epson Home Cinema 5050UB and the LG HU810P. Even a passing glance can see the 325ES blows them away, but is it nearly twice as good as the price implies? We shall see. I connected all three via a Monoprice 1×4 distribution amplifier, and viewed all side by side by side on a 12-foot-wide, 1.0-gain screen.
The Sony is, as you’d hope, on a complete other level. Even at roughly half the brightness of the other two my eye kept coming back to it. The contrast ratio is just that intoxicating. Compared to the Epson, in that projector’s highest contrast mode, the Sony’s black levels are just a bit deeper, and its highlights just a bit brighter, so there’s noticeably more depth and realism to the image. The highlights just pop, yet the blacks are so deep as to seem to lack light. In the Epson’s higher brightness mode, it’s of course far brighter than the Sony could ever hope to be, but in that mode the black level is much higher, so black letterbox bars, for example, are far more noticeable. The Epson’s image is great, but the Sony’s is greater.
Contrast ratio is to projectors and TVs what speed is to a race car. Sure, it might have lovely curves and brighter lights, but when it comes down to it, the fastest car wins. This is why OLED TVs nearly always win multi-TV shootouts and endless editors’ choice awards. LCOS is the OLED of the projector world.
What surprised me is the detail. This is partly due to Sony’s elaborate image processing, which you can disable, and also the exceptional contrast and having 3,840×2,160 discrete pixels. The Sony looks more detailed than the Epson and even more than the extra-sharp LG. There is some motion blur, which the LG lacks, but even so it still looks very, very detailed. Where you notice it the most, like hairs and wrinkles on a face, the Sony does 4K detail more justice than the other two.
That powerful processing, similar to what’s found in its high-end TVs, also allows for far, far better HDR processing than most other projectors. All projectors that can support HDR have to modify that signal to work, since no projector has the brightness or dynamic range to fully handle HDR. There’s enough processing power in the 325ES to remap the HDR signal and create an image largely free of artifacts or severe clipping, both of which I’ve seen on lesser projectors.

Geoffrey Morrison/CNET
There is one aspect where the Sony is merely “really, really good” and LG comes out on top and that’s with color. The Sony is capable of exceptionally accurate and lifelike colors… with HD. It doesn’t have nearly the depth of color of the LG and its laser-powered rainbow of HDR flavors. Deeper crimsons, violets and greens are on tap with the LG. The Sony looks good, but less impressive for sure. Even the Epson, in its wider-gamut mode, can produce deeper colors than the Sony. However, I should be clear this is just with the wider colors available with HDR. The Sony is more accurate than either the LG or the Epson when it comes to non-HDR/WCG colors. Which is to say, with all content the Sony will look great, but with HDR/WCG content the colors will be better on Epson and LG. Not a huge deal, but a 325ES-like projector with a laser light engine would be incredible. Sony does make those, but they cost $20,000.
So is it possible to get a better-looking projector? Sure, but you’d need to spend even more money.
Theater in your home
Superlatives fail. The 325ES is far more cinema-like than any projector I’ve reviewed recently. Would I buy it? That’s the real question, right? $5,500 is a lot of money. That’s a decent used car, a chunk of a down payment on a house, or roughly three months of traveling anywhere in the world. The image quality you can get from the Epson 5050 is excellent, and that projector is not only $2,500 cheaper but also significantly brighter.
So as much as I love how incredible the 325ES looks, I don’t think I would spend my own money on it. But then, I’m just a lowly (Amazon bestselling) writer who spends his money on travel and cars he never drives. I’m sure there are plenty of you reading this who wouldn’t blink at spending $5,500 for the image quality possible with the 325ES. If you can afford it, this is the Porsche of the projector world — and man, is it sweet.
Geek Box
Test Result Score Black luminance (0%) 0.014 Good Peak white luminance (100%) 126.2 Average Derived lumens 1136 Average Avg. grayscale error (10-100%) 1.696 Good Dark gray error (20%) 0.861 Good Bright gray error (70%) 1.936 Good Avg. color error 1.666 Good Red error 3.109 Average Green error 1.387 Good Blue error 1.774 Good Cyan error 1.421 Good Magenta error 1.257 Good Yellow error 1.048 Good Avg. saturations error 1.45 Good Avg. color checker error 1.4 Good Input lag (Game mode) 36.4 Average
Measurement notes
There’s not much to say about the VPL-VW325ES, it’s just good in whatever mode you want to use. I found the Reference picture mode to be the most reference-like, and in this mode both the primary and secondary colors were spot on their Rec 709 targets. Easily the most accurate projector we’ve measured in recent years.
There wasn’t much variation in total light output across the different modes, so I stuck with Reference and measured 126.2 nits, or roughly 1,136 lumens. For comparison, in the Epson 5050UB’s most accurate mode, it was capable of 192.3 nits, or roughly 1,732 lumens. The Low lamp mode dropped the light output by roughly 30%. The Bright TV mode was about 10 nits brighter with slightly worse color accuracy.
Contrast ratio, of course, is this projector’s strength. In the same mode that puts out 126.2 nits, the black level is 0.014 for a contrast ratio of 9,014:1. Across its various modes, it averages 8,327:1. For comparison, the next closest projector in terms of contrast ratio is the Epson, which averaged 5,203:1. The average for all the projectors we’ve reviewed in the last year, not including the Sony and Epson, is 660:1. Though, admittedly, they are all significantly cheaper than the 325ES.
0 notes
Text
How To Edit iPhone Photos To Look Professional

How to edit iPhone photos to look professional
iPhone camera has earned good fame among people who are interested in photography. Using an iPhone one can capture photos professionally. But real beauty of a photography doesn’t in the photography only. It is the photo editing that decide how much attractive and professional your image going to look. So, photo editing is compulsory to bring a professional look in the picture. Do you know how to edit iPhone photos to look professional? If not, then you are just at the right place.
In a few minutes, you are going to learn the process of editing iPhone photos professionally. Read this article till the end and gain the knowledge. For sure, this is going to be an interesting process for every photography loving people.
So, lets get started.
Download Photo Editor
To edit a photo professionally in iPhone you have to download and install a powerful Photo editing software in your iPhone. Are you confused which photo editors to choose? I’m here to assist you in this case. Install SnapSpeed for your iPhone from here.
SnapSpeed will assist you for professional photo editing in iPhone.The best thing about this photo editor is it gives you accurate control on exposure.
Now let’s move into the process.
Correct Color and Exposure
To edit photos like professional, you have to make correction in the color and exposure. Go to the tool option from the SnapSpeed app. Choose the “Tune Image” option from top of the left. Inside this option you will find brightness, saturation, Contrast, Ambiance, Highlights, Shadows, Warmth etc. By changing these values, you can improve color and exposure of the photo in a great attractive way.
Now allow me to inform you how these change effect on your image. From brightness you can make the image look dark or bright. Contrast control the difference between light and dark. To change vibrant of the color saturation is used. If you want to control contrast and color saturation at the same time, then you should adjust Ambiance. Shadows gives you control over the dark area. Warmth adjustment bring a slightly orange like look. To adjust these features swipe left or right in your screen. At the top of your screen you will be able to see values.
To bring other tuning image options swipe up and down. When you are satisfied with your image, hit on the apply.
White Balance
After adjusting fine tuning, you have to go to the white balance option from the tool. In the white balance option, you will notice two types of adjustable option basically. The first one is temperature and the second one is tints option. Temperature control cooler and warmer balance of the picture. Tints is related with green and pink color of the picture. Proper use of white balance setting can bring a great look in your picture.
Edit Details
You will find an option named details beside the fine tuning. Go to this and you will find two types of option. First option is named as structure that provides a good result for details. The second one is sharpening. Sharpening bring a clear look in the picture but at the same time it also reduces the quality of the picture. Actually, it uses grain to remove noise. You can use this feature to bring a bright look in the picture. But use it in limitation. Otherwise, it will decrease the quality of your picture.let me give you a golden tip. Zoom in the picture when you are using the tool in details. Then you will give you precise idea about the picture quality. For zooming in put your two fingers on the screen and tweak outwards.
Non-Destructive Editing
Do you know that SnapSpeed offer non-destructive editing?At the top of the screen you will notice there is a button called edit history. From this option, you can undo and redo your editing history. All the steps of your editing are also available in the top. Here, you can go back to any previous steps directly. Basically, you can find three types of option from the list. Those three are Trash, sliders and brush.After finishing your work, hit on the back button to go back.
Improving Composition
Now, this is a crucial stage of editing iPhone photos to look professional. Without proper composition a photo never gets a professional look what so ever. Crop, perspective and rotating option can help you in this case.
Firstly, choose crop option from the editing menu and delete the edges of your photo from corners. This process is performed to remove unwanted object from the list. SnapSpeed also gives you the option to choose aspect ratio and crop your photo in the specific dimension.Don’t take this step lightly. Tough most of the beginners think that cropping is a simple step. Get the right idea of which portion to crop from which picture is really tough.
Without a straight horizon, photos never look professional what so ever.SnapSpeed assist you with its automatic rotating option by analyzing your image.It automatically rotate and straight photo. My recommendation is to do it manually.
Cause, a few times it failed to give accurate rotation.To do it manually, swipe your finger over the image and use grid line to get proper idea about composition. Make sure that you are not losing any important object from the picture. But still perspective may become a problem. We will fix it in this step.Using tilt option from the below to make the composition right. Stay alert about the blank area that generates in the sides.
Clean Up Photos
In this point, you will learn how to clean up photos using SnapSpeed. For cleaning up an image, the first tool that you can use is healing tool. With this tool, you can use delete or eraser unnecessary things from your image. It can enhance the beauty of your image at the same time you will get a crystal-clear look in your photo. Thinking about the accuracy of this tool?This is almost perfect for erasing small item, spots or mark.Especially, when you are working on a plain background you will get accurate result.
In SnapSpeed, an option is available called portrait. This is a great option for portrait photo editing. It automatically brightens face, make the skin smooth, correct eye color.
Selective Photo editing
Want to edit your photo separately based on various area? Then this section is only for you. In previous stages, our editing steps effect on the whole picture. For professional editing sometimes, you have edit photos separately.
Suppose, you want different types of brightness and color for individual section. Brush tool of SnapSpeed will assist you in this case. Mark the area with the brush tool that you want to modify.After that, you will be able to adjust selected area.Tap on the eye icon to see the changes that you have made. There are several types of brush options is available. Like dodge and burn brush. If you think that you have done any mistake and want to delete your editing Eraser option is available.
Selective Colors
This option allows you to pick color separately. In this way, you can change
Brightness and contrast based on the color. When someone is willing to modify a specific area with separate color, this is a great tool to use.
Mask tool
Do you want to be more specific and present your picture in details? Then you should go for mask tool. By selecting mask, you can precisely select an area. Then you can modify the area as like as you want. You can only apply your filter only in certain area.
That’s all for today. I hope at this point you have learned how to edit iPhone photos to look professional. For professional photo editing service don’t hesitate to contact with Clipping USA. Thanks for being with us.
The post How To Edit iPhone Photos To Look Professional
0 notes
Text
Samsung Galaxy Note20 Ultra Camera Review: Great Photos, Good Videos, Giant Zoom
Samsung recently announced the Galaxy Note20 Ultra, and it packs a very interesting camera system. It’s similar to what Samsung offered on the Galaxy S20 Ultra earlier this year, but with a few key differences. Since I’ve been using the company’s latest flagship for a few days, I wanted to share my experience shooting photos (primarily) and videos. So what’s new, what’s different? Is it better, is it worse? Let’s dive in.
Hardware
The Note20 Ultra’s giant camera pod protrudes about as much as the S20 Ultra’s (2mm) but with a marginally smaller footprint. It’s also a lot more elegant, thanks to each lens featuring a visually striking circular accent. Gone is the gaudy 100x stencil next to the telephoto lens — that 100x zoom is barely usable on the S20 Ultra. Samsung only claims 50x zoom capability for the Note20 Ultra and doesn’t flaunt it.
You’ll find three cameras on the back of the Note20 Ultra — a 108MP main shooter, a 12MP ultrawide camera, and a 12MP telephoto shooter. There’s also a 10MP punch-hole selfie camera in front. Samsung replaced the S20 Ultra’s fourth rear camera, a ToF (time-of-flight) sensor, with a laser autofocus module on the Note20 Ultra — presumably to improve AF (autofocus) performance, which was an issue on the S20 Ultra.
For the main shooter, the Note20 Ultra and S20 Ultra share Samsung’s massive (1/1.33-inch, 0.8-micron pixels) 108MP HM1 sensor, which is able to “bin” (combine) 3×3 groups of nine pixels into larger 2.4-micron pixels for better low-light performance. The resulting pictures are 12 megapixels, but each pixel is more light-sensitive. Both phones also share the same main f/1.8 lens with OIS (optical image stabilization) and phase-detection AF.
Note20 Ultra – click a photo to open the gallery.
The 12MP f/2.2 1.4-micron ultrawide camera is also identical on both handsets, with a 120-degree FoV (field-of-view), but no autofocus. Obviously, it’s ideal for wide-angle photography, but Samsung also uses this lens for its Super Steady Video mode. The Note20 Ultra’s 10MP f/2.2 1.22-micron front shooter features phase-detection AF and is identical to the selfie camera in the more affordable S20 and S20+.
Eagle-eyed readers will have noticed that instead of the S20 Ultra’s 48MP 4x telephoto shooter, the Note20 Ultra packs a 12MP 5x telephoto. Both are folded (periscope) lenses with OIS, but have different optical magnification and apertures (5x f/3.0 on the Note20 Ultra vs. 4x f/3.5 on the S20 Ultra). The Note20 Ultra also uses a 12MP 1.0-micron sensor instead of the S20 Ultra’s 48MP 0.8-micron setup.
That’s probably why the S20 Ultra can zoom up to 100x (not that you should) vs. 50x on the Note20 Ultra. Regardless, don’t let the numbers fool you. The S20 Ultra’s 48MP telephoto sensor outputs 12MP images by binning 4 pixels into one. It’s only at extreme digital magnifications that you’ll benefit from the additional pixels, and only when there’s enough light. Conversely, the Note20 Ultra’s faster f/3.0 lens gathers more light.
Overall, the extra optical magnification (5x vs. 4x) could give the Note20 Ultra’s telephoto camera the edge over the S20 Ultra’s — digital magnification just isn’t as viable. But otherwise, these are very similar camera systems that represent today’s state of the art.
Software and features
The Note20 Ultra’s camera app will be familiar to anyone who’s used a recent Android flagship or iPhone. It’s the same interface you’ll find on most Samsung phones with One UI, and the same feature set as the S20 Ultra — including night mode, manual (Pro) mode, super slow-motion, portrait (Live Focus) video, and hyperlapse. What’s exclusive to the Note20 Ultra is the new Pro Video mode — more on this later.
Single Take also carries over from the S20 series (and is now also available on the S10, Note 10, and Z Flip handsets). It captures several photos and videos over the span of 10 seconds (the duration is adjustable) and uses AI to pick the best shots and clips, apply filters, and create a montage. It’s clever — if somewhat gimmicky. While it’s not unique to the Note20 Ultra, it’s worth mentioning, since it’s exclusive to Samsung.
Photos
Let’s not mince words: the Note20 Ultra takes great pictures. Obviously, you’d expect nothing less from a $1300 flagship, but that doesn’t mean it’s perfect. The shooter on Google’s formidable $350 Pixel 4a generally captures more pleasing images, and still beats the Note20 Ultra in low light. That being said, I’m splitting hairs here. Samsung’s latest flagship is absolutely in the same league as Apple’s excellent iPhone 11 Pro.
Note20 Ultra telephoto (5x)
In daylight, the Note20 Ultra generally nails white balance and exposure both indoors and out, and it produces shots that look pleasantly saturated but still feel natural. There’s plenty of detail and dynamic range in these photos, without the oversharpening common to Samsung’s past handsets. By default, the main camera shoots at 12MP, but you can force it to take 108MP images if you want. It works well as long as there’s enough light.
Note20 Ultra zoom: ultrawide, main (1x, 2x), and telephoto (5x, 10x, 20x, 50x) – click a photo to open the gallery
The dedicated 5x 12MP telephoto is what sets the Note20 Ultra apart from most of the competition. I have access to several phones with folded (periscope) lenses, including Samsung’s S20 Ultra (4x 48MP), Huawei’s P40 Pro+ (10x 8MP), Oppo’s Find X2 Pro (5x 13MP), and Vivo’s X50 Pro (5x 8MP). Anything up to 10x zoom is going to look just fine with any of these cameras, but what happens beyond that?
Telephoto comparison: S20 Ultra vs. Note20 Ultra vs. P40 Pro+ at 10x, 20x, and 50x zoom – click a photo to open the gallery
I decided to put the Note20 Ultra up against Samsung’s own S20 Ultra and Huawei’s P40 Pro+. As you can see, the photos look pretty good at 10x and quite decent at 20x, but they start getting crunchy at 50x. Overall, Huawei wins here thanks to its 10x telephoto and Leica optics. The P40 Pro+’s 8MP sensor is definitely running out of pixels at 50x, though. What’s more interesting, however, is that the Note20 Ultra does a slightly better job than the S20 Ultra.
Low light comparison: ultrawide, main (1x), and telephoto (5x) using auto vs. night mode – click a photo to open the gallery
The Note20 Ultra also takes nice pictures in low-light — even in full auto mode. Clearly, the ultrawide, telephoto, and selfie cameras benefit from night mode the most since their smaller aperture lenses gather less light than the main shooter. It’s also interesting that you can’t zoom past 10x in night mode. Regardless, I’m glad that Samsung made night mode available for each sensor since that’s not a given with other Android flagships.
It’s the same story when it comes to selfies. Here again, the Note20 Ultra holds its own. I’m impressed with Samsung’s selfie portrait mode (called Live Focus). It does a fine job of blurring the background without too many artifacts. Unfortunately, it only works with human faces, not animals or other objects. Then again, Live Focus on the main shooter works with pretty much anything — so your pet photos are covered.
Selfie comparison: auto vs. portrait mode – click a photo to open the gallery
Since the Note20 Ultra lacks a dedicated macro camera or autofocus on its ultrawide lens (which is how phones like the OnePlus 8 Pro snap closeup images), you can use 2x zoom and pull back to get the same effect. This even works in night mode. It’s also worth mentioning that with such a large main sensor (1/1.33-inch), the DoF (depth-of-field) is extremely shallow, which means closeup shots will often be partially out of focus.
Note20 Ultra main camera (macro)
Videos
The Note20 Ultra records stabilized video with stereo audio up to 8k 24fps, 4k 60fps, and 1080p 60fps with the rear cameras, and up to 4k 60fps and 1080p 60fps with the front shooter. But this comes with a lot of fine print. For example, you can only capture 8k or 60fps video with the main sensor. Maximum zoom is 6x at 8k, 10x at 60fps, and 20x otherwise. And you can’t zoom when recording video using the selfie camera.
Super Steady Video is limited to 1080p 30fps and lacks autofocus since it’s using the ultrawide lens. It works incredibly well as long as there’s enough light. The new Pro Video mode is similar to what LG and Sony have offered on some of their flagships. It supports up to 8k 24fps recording, includes a 21:9 (cinema) aspect ratio, and provides manual controls for everything from focus, to exposure, to white balance, to audio levels.
Samsung flagships usually shine at video recording, and the Note20 Ultra is no exception. The results are very good, but still don’t quite match what Apple brings to the table. As such, the iPhone 11 Pro is still the one to beat for video, despite being almost one year old.
Sample photos – click a photo to open the gallery
Verdict
It’s clear that Samsung’s done a great job with the cameras on the Note20 Ultra. This is absolutely one of today’s best flagship in terms of imaging performance, besting even the company’s own S20 Ultra by a very thin margin — thanks mostly to faster autofocus, a better telephoto, and that Pro Video mode. It’s exclusive to the Note20 Ultra, and my YouTube creator friends are just gonna love it.
But here’s the thing, if you can live without that awesome telephoto, the iPhone 11 (non-Pro) matches (photos) or surpasses (videos) the Note20 Ultra for $700. That’s about half the price. And if you don’t care as much about video recording and don’t mind giving up that sweet ultrawide, Google’s $350 Pixel 4a shoots better images than the Note20 Ultra. While most people aren’t cross-shopping these handsets, it’s food for thought.
Source: Manufacturer supplied review sample
from Joseph Rushing https://geardiary.com/2020/08/18/samsung-galaxy-note20-ultra-camera-review-great-photos-good-videos-giant-zoom/
0 notes
Text
2021 Ford Bronco: A Big List Of Alleged Options And Specs Has Been ‘Decoded’
Press image thoroughly futz with in Photoshop by the author
Image: Ford
Truck YeahThe trucks are good!
The 2021 Ford Bronco is scheduled to drop Monday, July 13, 2020, but eager enthusiasts over at the Bronco6G forum have been discussing a huge alleged leak detailing specifications and options all week. It can’t be confirmed with 100 percent certainty, but it’s certainly interesting enough to discuss.
In a forum thread that was started on Tuesday by Bronco6G user 72roadster, you can see a very long list of Bronco features and buyable options that most folks on the forum seem to think is legit. Another user, Toccoa, added some context and helped “decode” the list of options from a few Ford codes into plain English.
Everything here pretty much does track with what makes sense for the Bronco and what we know about Ford options, so I’m inclined to think this list is accurate. Or, at least, was at one point.
So first, I’ll just copy over 72roadster’s top-level summary from the forum:
Engines
2.3L EcoBoost
2.7L EcoBoost
Transmissions
7-speed manual
10-speed automatic
Axle Ratios
3.73 Open Style Rear Axle Final Drive Ratio
4.27 Locking Rear Axle Final Drive Ratio
4.46 Rear Axle Final Drive Ratio
4.7 Electronic-locking Front and Rear Axle
Tire Sizes
P255/70R16 All-Season (A/S) Tires
LT315/70R17 BSW Mud-Terrain (M/T) Tires
P255/75R17 All-Terrain (A/T) Tires
LT265/70R17 All-Terrain (A/T) Tires
LT285/70R17 All-Terrain A/T Tires
LT285/70R17 Mud-Terrain (M/T) Tires
P255/70R18 All-Terrain A/T Tires
Colors
Black Onyx
Shadow Black
Oxford White
Rapid Red
Antimatter Blue
Iconic Silver
Area 51
Carbonized Gray
Cactus Gray
Race Red
Cyber Orange
Velocity Blue
*unknown name (PN3XX)
*unknown name (PN4JR)
*unknown name (PN4JT)
Trims/Packages
Base – Standard Package
Big Bend – Standard Package / Mid Package
Black Diamond – Standard Package / Mid Package
Outer Banks – Mid Package / High Package / Lux Package
Badlands – Standard Package / Mid Package / High Package / Lux Package
Wildtrak – Standard Package / High Package / Lux Package
First Edition – Hood and Bodyside Graphic Package
Special Packages
Towing Capability
Mid Package
High Package
Lux Package
Sasquatch Package
Tops
Top – First Row Soft Top Conversion for Hard Tops
Top – Bimini Soft Top
Top – Bimini Soft Top and Canvas Soft Top
Top – Bimini Soft Top and Mesh Shade Top
Top – Bimini Soft Top, Canvas Soft Top and Mesh Shade Top
Top – Mesh Shade Top
Top – Canvas Soft Top and Mesh Shade Top
Modular Hard Top, Body Color-Painted
Modular Hard Top, Shadow Black-Painted
Dual Tops – Modular Shadow Black-Painted Hard Top – Black Soft Top
Dual Tops – Modular Body Color-Painted Hard Top – Black Soft Top
Dual Tops – Modular Body Black-Painted Hard Top – Black Soft Top
Soft Top, Black Cloth
Hard Top, Carbonized Gray Molded-in-Color (MIC)
On Wednesday even more info came through the Bronco 6G thread, including some accessories, but let’s zoom in on the important specs from the original post and see how they might translate to real-world performance if this alleged option sheet proves to be accurate.
G/O Media may get a commission
Again, while I’m fairly confident there’s truth to the claimed specs here, Ford’s people officially declined to comment when I reached out so we can’t say it represents the Bronco’s final form for sure. And, of course, the company’s not looking to scoop its own big reveal party next week.
Engines Discussed
A 2.3-liter turbo four-cylinder and a 2.7-liter turbo six-cylinder make sense for the Bronco since those engines should both be compact enough to fit in a medium-sized SUV and are both already made by Ford. The 2.3-liter I4 EcoBoost makes 270 horsepower and 310 lb-ft of torque in the current Ranger, while the 2.7-liter V6 has been in the F-150 for a few years now and currently claims 325 HP and 400 lb-ft of torque.
So I think it’s fair to figure the base Bronco will have about 300 lb-ft of torque while the bigger-engined option will step to over 400 lb-ft. Of course, Ford already offers a more powerful tune for the small-engine Ranger, so it should have no issue getting bigger numbers from the 2.3-liter if it wants to. I guess it will depend on what kind of mpgs are being targeted.
Transmissions Discussed
The seven-speed manual, as bonkers as it sounds, has basically been confirmed by photos of a shift lever. Folks are figuring it will effectively be a six-speed with an ultra-low gear for crawling, which is exactly the kind of cool gimmick this truck’s going to need to stand out.
A 10-speed auto makes sense, as these are already ubiquitous in Ford’s truck lineup. I’m not a fan myself. It’s a clunky transmission in town in the Ranger, but should help get some gas mileage back on highway cruising.
Axle Ratios Discussed
So you don’t have to scroll back up: The Bronco6G forum said the 2021 truck will get four different final drive axle ratio options: 3.73, 4.27, 4,46, and 4.7.
Axle ratios don’t seem like a particularly sexy topic… until you understand just how important they are to a vehicle’s performance. It’s a very big deal in the off-road world, especially once you start messing with big tires and need to put down lot of power at low speeds.
My colleague David Tracy did a great writeup explaining crawl ratios and off-road gearing, so please give that a peek to understand the science here.
To lay it out a little more expediently, the axle ratios written like “X.XX” mean “X.XX:1,” which means the vehicle’s driveshaft turns X.XX times for every one turn of the wheels. Even simpler: The bigger the X number, the more powerful the vehicle feels. Of course, you pay for it by burning more fuel.
So if the axle ratios posted above for the Bronco are accurate, the “3.73 Open Style Rear Axle Final Drive Ratio” would be the base, more-efficient option while the “4.7 Electronic-locking Front and Rear Axle” would be the most capable. The 2020 Wrangler Rubicon has a 4.1 final drive ratio, so everything else being equal, it seems that the top-end Ford might be more aggressive than the top Jeep on its power-to-efficiency equation.
There’s more to it, including wheel size and of course HP, that will dictate which setup is objectively “better” though.
Tire Sizes Discussed
Hot dang, tires, my favorite topic! I love tires because they’re the one piece you can change on a vehicle and change every aspect of said vehicle’s performance. When it comes to 4x4s, you want something big for ground clearance, but not obscenely big if you want to hang on to daily drivability and efficiency.
This alleged spec sheet claims that the Bronco will have seven stock tire sizes. That would be a lot for a Honda Civic, but it makes sense for a mass-market 4×4. There are four LT (“light truck”) options, and three P (“passenger”) options. The significance there is basically that LT tires are chunkier, more ply, harder to pop, heavier, use more fuel and handle worse. P tires are lighter, so they’re better for road driving, but may puncture more easily. They can still be knobby and be decent on dirt, though.
As for the difference between all-terrain and mud-terrain tires, the MTs tend to be the most off-roady road-legal option available with really deep knobs for paddling through thick mud. All-terrain tires are a little more balanced. All-seasons, of course, are road tires.
Tire size are usually expressed as “letter, number, slash, number, R, wheel diameter” but discussed in terms of overall diameter, so I used the handy wheel size calculator at tiresize.com to translate the coded sizes into overall diameter for you here:
P255/70R16 All-Season: 30.1-inch overall diameter
LT315/70R17 BSW Mud-Terrain: 34.4-inch overall diameter
P255/75R17 All-Terrain: 32.1-inch overall diameter
LT265/70R17 All-Terrain: 31.6-inch overall diameter
LT285/70R17 All-Terrain: 32.7-inch overall diameter
LT285/70R17 Mud-Terrain: 32.7-inch overall diameter
P255/70R18 All-Terrain: 32.1-inch overall diameter
There will be some variance in those diameters due to inflation level and tread life remaining, but that’s the baseline. For those of you unfamiliar with the off-road scene, 34.4-inch tire is pretty darn big. In fact, LT315/70R17 is the same tire you’ll see on a stock Ford Raptor.
The 30.1-inch option will be most efficient, and the 33-inch options should provide a decent balance.
Colors, Trims, Special Packages Discussed
Who wants to guess what the Sasquatch Package is?
This would be a good crop of colors if it turns out to be real. Hopefully, there will be a green and tan in the mix, too.
Tops Discussed
I’m really into the idea of a “mesh shade top” but mostly I’m just excited about the prospect of variety. From the teaser images we’ve seen so far, it’s clear Ford’s committing to open-air off-roading, which is huge.
I’ll state one final time that the specs and options discussed here are conjecture, and unconfirmed by Ford. But it’s all plausible enough to warrant the discussion I’ve presented here. I’m confident the Bronco’s final form will be pretty close, at any rate.
Now we just need to see some honest images of the thing throwing sand, already!
%
from Job Search Tips https://jobsearchtips.net/2021-ford-bronco-a-big-list-of-alleged-options-and-specs-has-been-decoded/
0 notes
Text
Copy and paste objects in photos with the photo editor for PC
New photo editor for PC for experts to powerful crop a picture
Get this photo editor download for trainees and experienced with many useful functions or powerful photo editor for Computer to comfortable color mode or comfortable saturate images. Improve a photo is easy with the cool brand-new photo editor for PC for Computer. Download here free the photo editor for PC for prompt and simple edit a picture.
It is difficult to buy an excellent smart device photograph what was taken with a flashing light. Most of the moment, photographs take an image appearance overexposed, negatively modifying brightness and also making things look rinsed. Actually, also the cellular phone zoom is rumored to become some imperfections. Make the most of the origin of all-natural lightning you can locate, even in the night. That gives you an opportunity to attempt shadows, just as in the picture below, or create a shape with other surrounding sources of shining, just like sunshine and also bordering buildings. When you have actually make the picture, have fun with the exposure device in the favorite photo modifying program to made the image somewhat shinier. Photo editor for PC does possess a few of the functionalities is actually properly known for, which comes very helpful when you've decided on you've like to attempt your hand on one thing much more better than photo transparency as well as cutting out a part from the background. Photo editor for PC can likewise bring in freeze frames coming from online video clips, in addition to distinct files. And also when you're really feeling a little bit photo editor windows 10 idle or it is simply plain oblivious about how to utilize several of the tools, an assistant can assistance you to change the essentials just as lighting, concentration, color, and sharpening of photos. For those who like their photos in wide scale versions, the software program function assists you flawlessly assembled photographs to establish a gorgeous picture. And when it is actually a chance to print off your digital photography capabilities, you can easily select one of the photograph plan templates to immediately imprint them in a specific measurement. Download now this photo editor for PC download for amateurs and professionals with a lot of cool functions or practical photo editor for Computer to soften photos or uncomplicated batch processing. Intelligent cut photos with a photo editor for PC for pros to draw in a photo. Download photo editor for PC for professionals and edit a picture software to colorize a photo or photo correction.
Photo editor for PC
This photo editor is best for enthusiastic pupils with a large amount of attend their workflow to determine the too technical functions that will terrify extremely very first time image editing individuals. It likewise happen prepared along with a three-sixty scenic view program. Probably the shiniest treasure in the bundle would certainly be actually the lovely skin layer end result, which eliminates red locations as well as evens out your complexion. As there is actually no auto color solution option fairly necessary to solution the poor lighting up very most digital cameras file, there are actually still the general features of change color depth. Among the most well-known misconstrued parts of digital photography is what occurs after you make the photo shot in reality modifying your photos. We will cover some concepts for modifying your photos, from the fundamentals like noise reduction or brightening change, with much more complicated activities. The crop technique enables you to transform the dimension of your picture, as well as additionally to transform the element ratio. As an example, you can cut out a photo from a rectangle-shaped shape to a square form. There are lots of factors you would intend to cropping, including for publishing in various styles and also aspect proportions. Compared to the initial, I have cropped the image with photo editor to remove the lightning part of the left-hand side of the photo and also recomposed making use of the policy of quarters. This makes the darkness bolt more the emphasis of the shot. When taking the picture, you could question why I didn't just make up appropriately. So in this case, I was working on an extensive presence photo shot without needing a camera stand, so had actually the video camera stabilized on the side of the pier for security. That significantly limited my capacity to flawlessly frame the moment, so I simply photoshoot bigger, knowing I had to be able to crop the shot suitably as a result of the reality. In this both situations, cropping is extremely simple as well as it is simply involves you selecting the cropping technique and afterwards choosing the location you wish to maintain with your PC mouse. After that you use the changes as well as your new cropped picture is ready to go. Get more info to blur images with this photo editor free download and new photo editor for amateurs to functional soften photos. Improve a photo is uncomplicated with the photo editor. Free download photo editor for professionals and software to edit a photo to invert pictures and insert objects into photos.
Easy photo editor for PC
Discover more to cut an image with the photo editor free download or powerful photo editor for Computer to colorize photos. Photo editor to simple photos colorkey and very simple rotate images. Get this photo editor for PC for speedy and simple rotate an image. When the horizon contour in a pic is certainly not degree, a particular of my individual casual nuisances in digital photography is. Often if we are actually caught up in the moment, this fundamental guideline is failed to remember but fortunately is such editing and enhancing your images with the photo editor to make them degree is also really basic.
Balancing the camera on the side of the boat dock meant that the photo was uneven this is especially noticeable to the eye whenever the photo has a plainly defined horizon line, just like the lake.
The focusing tool becomes part of the cropping tool, as well as you can just turn the picture to suit. The grate will certainly appear to assist you get the arrangement correct whenever you utilize the photo editor for PC. Level a photo is a really simple job that will get just a couple of minutes, causing a much more aesthetically charming photograph.
Often while we take a photograph, parts of the image might wind up being actually darker than we really want. I describe the brighter areas of the image as darkness, and also the intense spots of the image as highlights. Compare is actually concerning accentuating the contrast in between the light as well as dark components of the picture. Boosting the comparison of a photograph can significantly enhance the aesthetic impact in which has, by making the limits between those dark as well as light areas more clear.
Color or texture change is one other vital component of the photo editor for PC. We can adjust photograph color or texture in all type of methods, starting with transforming the total charm of the image just like exactly how yellow or blue it looks, to separately transforming the tone and saturation of particular colorings inside of a photograph. I simply just intend to go over a few very basic color adjustments you may make use of to help to make your pictures simply a little a lot more visually amazing. The quickest solution to regulate the shade related to a photo is definitely with the color tone gadget of the photo editor for PC. That modifies the visual aspect related to every single color scheme in an image to generate it basically saturated.
Similar to lots of styles, the trick is to get a great balance excessive shading the pictures often tends to seem instead abnormal. Hue pictures may be actually pretty efficient, as well as certainly light and also black is a fantastic selection for all sort of situations, specifically, construction, and particular panorama views.
Free download photo editor for PC
Enhance a picture and image manipulation is useful with the photo editor for PC and edit a picture software free download
Smart photo editor for PC for amateurs to uncomplicated brighten photos. Additional info about sharpen a photo is easy with the photo editor. In some cases there certainly can be a thing within a photograph that you truly do just not intend to be there, like an annoying beauty spot on a person's nose. That is simple to erase in almost all the significant photo editor.
It is generally easy to erase any kind of objects directly out of an image however the photo editor for PC works great on unique, tiny things that are usually been around by the same color or textures. This is since the recover device needs to replace the location you desire to get rid of with something else, as well as this functions ideal when it has an area close by that looks comparable. For instance, bright spot on a face is bordered by a great deal of similarly tinted skin, so the recover tool can easily calculate what to replace the dark point based on the bordering area. That is actually for the photo editor has to change out the spot you desire to erase together with another thing besides, and also that does work ideal whenever it gets an area close by that seems very same.
Photo editor has ended up being really complicated and also effective and it is feasible to manipulate images therefore they end up being totally different out of the original. There are lots of photo editor and also plenty of means of creating the same or comparable final results.
The intent very most for many images I post procedure is definitely to help make all of them look as natural as feasible. I think this is an excellent position to start, even in case you intend to go on and produce even more unique looking photographs.
Tone array inside a photo is generally one of the primary priorities. Your eyes are able to typically see a wider range of hue than the cam can record. The meaning of picture editing is the act of modifying a photograph, put simply. However this is simplifying a problem that is more or less problematic.
You can generally implement basic picture editing methods like soften photo fairly easily and also quickly but complicated strategies and also electronic editing and enhancing may need photo editor and also more practice. Photo editor is a gadget which you can easily utilize to manipulate and also increase pictures. Since images come with a raising variety of uses, increased services are experiencing ways to reutilize images and utilize them on different media.
0 notes
Text
Brilliant photo editing software for Windows 10
Photo editing software for Windows 10 for experts for comfortable crop images or simple image size alteration
It's hard to discover a great smartphone image what is shoot with a zoom. All the time, people make a photo appearance bright, negatively modifying shining as well as topics turn out check over here rinsed. Once they've taken the picture, play with the direct exposure device in your favorite picture editing application to made the picture a little clearer. Photo editing software for Windows 10 carries out have some of the functionalities is actually popular for, which comes very useful when you've picked you've like to try your give on something more high end than color adjustments and write texts in photos.
Photo editing software for Windows 10 can easily likewise import screenshots from video, and also varied reports. As well as when you are actually experiencing a little bit idle or it is actually merely plain unaware about exactly how to usage a few of the resources, a helper can help you to change the basics just like lights, emphasis, color, and sharpening of photos. For those that love their pictures in widescreen editions, the program assists you perfectly developed images to create a panoramic image.
And also if it's time to printing off your digital photography skills, you may pick among the graphic bundle style templates to instantly print all of them in a specific size.
Photo editing software for Windows 10 download and edit pictures software to improve an image and gamma correction
This photo editing software for Windows 10 is well for eager students with a large amount of opportunity in their workflow to figure out the as well technical functionalities that would frighten incredibly first opportunity picture customizing consumers. It similarly happen got ready along with a full circle panorama system. Most likely the shiniest treasure in the deal would certainly be actually the wonderful skin influence, which deals with reddish locations and evens out the complexion.
Whereas there's no auto shade repair work option rather vital to solution the bad lighting up most digital cams catch, there are the conventional features of colorize photo. Either the most well-known misconstrued components of digital photography is what happens once you take the photograph in reality editing and enhancing your photos. We will cover some ideas for editing your pictures, from the essentials like merge photos and clone stamp, through extra challenging actions.
The crop device permits you to transform the size of your image, as well as additionally to alter the element ratio. For example, you can crop a picture from a rectangular form to a square shape. There are several factors you would desire to cut out, consisting of for posting in different formats and also aspect proportions. Contrasted to the original, I have chopped the picture with photo editing software for Windows 10 to get rid of the dark part of the right side of the photo shot and recomposed utilizing the rule of fourths. That makes the darkness bolt more the focus of photograph. You may wonder why I did not simply make up effectively when making the picture. So in this situation, I was actually organizing a lengthy exposure photo shot without any a camera stand, so had the cam stabilized on the side of the pier for stability. That very much limited my capacity to perfectly mount the moment, so I simply shot wider, recognizing I had the ability to crop the shot properly after the fact. In this both situations, cropping is very simple and it is just includes you choosing the crop appliance and after that picking the location you intend to maintain with your computer mouse. After that you use the modifications and also your brand-new chopped photo prepares to go.
Brand-new photo editing software for Windows 10
The simple to use photo editing software for Windows 10 for experts to photo black and white effect
When the horizon boundary in a picture is not level, a particular of my own casual annoyances in digital photography is. Often whenever we are captured up in the minute, this fundamental regulation is forgotten however fortunately is such modifying your pictures with the photo editing software for Windows 10 to make them grade is additionally very simple.
Balancing the cam on the side of the pier meant that the shot was uneven this is particularly visible to the eye if the image has a clearly defined horizon line, just like the seashore.
A leveling tool is part of the cropping item, and also you can easily simply revolve the picture to match. A grid will appear to assist you get the arrangement proper as soon as you use the photo editing software.
Focusing a picture is an actually basic job that will take just a number of seconds, causing a far more visually hitting the spot photograph.
Occasionally while we make a photo, sections of the shot might just wind up being normally gloomier than we really want. We describe the gloomy spots of the photo as darkness, as well as the colorful spots of the photo as high light.
Variance is actually regarding accentuating the variation between the light fixture as well as dark sections of the image. Increasing the contrast of a photo can considerably enhance the aesthetic impact that has, by making the boundaries in between those dark and light areas clearer.
Color change is yet another crucial part of the photo editing software. You can easily adjust photo shade in all type of methods, starting with altering the total charm of the photo like how blue and yellow it appears, to independently changing the tone as well as interpenetration of certain colorations contents of a photograph. We just desire to cover some very useful color scheme adjustments you can easily make use of to make your photography simply just a little more aesthetically effective. The best means in order to readjust the color or texture in regard to a photograph is actually with the shade gadget from the photo editing software for Windows 10. That transforms the visual aspect of each shade in a picture to generate it a lot more or less saturated.
Similar to lots of edits, the key is actually to get an ideal evenness way too much coloring the pictures have a tendency to seem instead not naturally made. Shading photos can easily be truly reliable, as well as of program bright white as well as black is an outstanding option for every type of scenarios, particularly, family portraits, as well as some panorama images.
Easy photo editing software for Windows 10 with a lot of essential options
From time to time there may be something in an image that you truly do definitely not wish to exist, such as an inconvenient acne breakout on anyone's nose. That is simple to get rid of in all of the main photo editing software.
It is generally easy to remove any sort of things taken away a photo yet the photo editing software performs well on distinct, smaller things that are probably been around by the same color tones. This is due to the fact that the recover tool has to change the location you want to erase with another thing, as well as this works ideal when it has an area close by that looks similar. So as an example, a red spot on a face is bordered by a whole lot of in a similar way colored skin, so the recover device can quickly calculate what to replace the dark point based on the surrounding area.
This is probably just because the photo editing software has to change out the spot you wish to take out along with something besides, and this does work most ideal when it has an area close by that looks very same.
Photo editing software for Windows 10 has actually ended up being truly intricate as well as effective and it is possible to adjust photos therefore they change into completely various out of the initial. There are lots of photo editing software as well as multitudes of techniques of attaining the same or similar final results. My objective most for the majority of photographs I publish process is actually to make all of them look as natural as you possibly can. I know this is a really good point to start off, also in case you intend to go on as well as produce more surreal appearing images.
Hue array on an image is just one of the key problems. The eyes are able to usually see a broader variety of hue than your video camera possibly shot.
The significance of image modifying is the act of modifying a photo, just simply put. Still this is oversimplifying a case which is more or less problematic. You can generally carry out basic photo editing and enhancing strategies just like photos sepia fairly conveniently as well as promptly but intricate techniques as well as digital editing and enhancing might require photo editing software and more practical experience.
Photo editing software is a tool which anyone able to make use of to manipulate and increase photos. Since photos have a boosting variety of uses, numerous firms are finding ways to reutilize photos as well as use them on plenty of networks. Get more info about improve an image and add symbols in photos with the photo editing software for Windows 10 download and powerful photo editing software for pros to uncomplicated scale an image. Photo editing software for experts and software to edit a photo to resize pictures or photos color adjustment. Free download photo editing software for professionals and edit photo software to resize photos and add symbols in photos.
0 notes
Text
Simple photo editing software for PC
Edit photos with this great photo editing software for Windows and aces
When we taking a photo in a default distance, it's alluring to zoom in on existent specific you're attempting to get. Instead, attempt get near to the subject, unless it's a wild animal, in that instance we would certainly advise keeping your range or do the image in a default radius, as well as plant it later on. Photo editing software performs possess a few of the functionalities is preferred for, which comes somewhat valuable when you've decided on you've like to try your hand on something a lot more upscale than edit a picture and insert people into photos.
Photo editing software may additionally bring in stills from video, besides various reports. As well as when you're feeling a bit careless or it is merely plain uninformed regarding how to make use of a number of the resources, a wizard may aid you adjust the fundamentals just as lights, concentration, shade, as well as turning of photos. For this people who love their pictures in wider screen editions, the tool app aids you effortlessly assembled photos to create a breathtaking photograph. And also if it is actually opportunity to series off your photography skill-sets, you can easily choice some of the image planning design layouts to immediately print them in a specific measurement.
Photo editing software for Windows or picture editor to edit a photo or photo color correction
Download free of charge this photo editing software for fast and easy edit an image
This photo editing software is actually most ideal for excited pupils along with a great deal of attend their manpower to calculate the too technical features that will terrify quite very first time photo modifying individuals. It furthermore happen prepared with a 360 degrees scenic view plan. Probably the shiniest jewel in the deal will be actually the lovely skin layer result, which gets rid of red spots and evens out your complexion.
While there's no auto color repair work choice somewhat crucial to repair service the lousy lighting most electronic cameras record, there are actually the simple attributes of edit photos.
One of the most well-known misunderstood components of digital photography is what occurs after you made the shot in fact editing your picture. That's the time where you edit the pictures you have taken, to develop the end product. Editing your photos is the equivalent of the room dark from the time long period of time earlier. We are going to be covering some concepts for editing your pictures, from the basics like print photo and also edit pics, through more difficult effects. The cropping device permits you to transform the size of your photo, as well as likewise to transform the aspect proportion. For instance, you can cut out a photo from a rectangular shape to a triangle form. There are several factors you would certainly want to cut out, including for posting in various layouts as well as element ratios. Compared to the initial, I have chopped the picture with photo editing software to get rid of the dark component of the middle of the photo as well as reassembled making use of the policy of quarters. It makes the coloring screw much more the emphasis of the shot. You might wonder why I did not just make up correctly when taking the shot. Well, in this case, I was actually arranging a long exposure shot without any a cam stand, so had actually the electronic camera balanced on the side of the pier for security. That significantly limited my capability to perfectly mount the moment, so I just shot larger, recognizing I had to be able to crop the image properly shortly after the truth. In both situations, chopping is extremely basic and also it is just entails you picking the cropping appliance and afterwards selecting the location you wish to keep with your mouse. You use the adjustments as well as your new cropped image is prepared to go.
Photo editing software
Top photo editing software with many awesome options
Whenever the perspective band in an image is not degree, a particular of my personal petty annoyances in digital photography is. Occasionally if we are taken up in the second, this simple guideline is failed to remember however the bright side is such editing your shots with the photo editing software to make them degree is also very simple.
Leveling the video camera at the side of the boat dock meant that the shot was uneven that is specifically easy to see to the vision when the image has a clearly identified horizon line, such as the sea. The degree technique belongs to the output method, and you can simply just rotate the pic to fit. The grid will appear to assist you get the position ideal if you make use of the photo editing software. Focusing a photo is a truly basic task this will get just a number of moments, resulting in a much extra visually pleasing photo. In certain cases if we take a picture, parts of the shot can wind up being less colored than we really want. We describe the gloomy areas of the image as shadows, as well as the colorful locations of the photo as high light.
Contrast is regarding emphasizing the distinction between the brightness and dark sections of the photo. Enhancing the variance of a photo can drastically boost the graphical effect that had, by creating the borders between these light and dark areas clearer.
Coloring change is one other significant piece of the photo editing software. We can easily adjust photograph coloring in each type of means, from transforming the whole warmness of the picture such as just how blue and green it appears, to separately transforming the shade and also concentration of certain shades contents of a picture.
I simply wish to go over some really easy color corrections you may utilize to help to make your images nothing but a bit a lot photo editing software more visually highly effective. The simplest technique to regulate the different colors related to a photo is definitely with the color tone technique of the photo editing software. This transforms the look related to any coloring within a picture to generate it more or even much less saturated. As with lots of styles, the solution is definitely to choose an ideal balance also much shading the pictures often tends to seem instead abnormal. Hue images can be actually pretty useful, as well as obviously black as well as white is a great selection for all type of scenarios, in certain, architecture, and certain landscape pictures.
Experts are searching in the web for the best photo editing software to edit a photo, but every person must know for themselves which is the best easy photo editing software for Computer
Edit pictures is simple with the powerful latest photo editing software
Often there certainly will be something within a photograph that you really do not wish to exist, like an undesirable white spot on anyone's forehead. That is very easy to remove in all the significant photo editing software.
It is generally no problem to clear away any kind of objects taken away a photo however the photo editing software performs great on distinctive, smaller things that are certainly covered by even colorations. This is because the heal tool needs to change the location you wish to remove with another thing, as well as this works best when it has an area close by that looks similar. So as an example, a red spot on a face is bordered by a lot of in a similar way colored skin, so the heal device can quickly determine what to replace the red point based upon the surrounding location. This specific is simply because the photo editing software needs to change out the area you will to get rid of together with something besides, and also that does work most ideal when it gets a sector near that looks similar.
Photo editing software has actually become quite complex as well as impressive and it is feasible to control photograph and so they change into absolutely various from the original. There certainly are lots of photo editing software and also multitudes of techniques of getting the same or comparable results.
The purpose very most when it comes to many pictures I post process is normally to produce all of them appear as natural as actually possible. I believe this is an ideal point to start, also when you wish to go on and produce even more unique seeming images. Tone array inside a photograph is just one of the most important problems. Your eyes have the ability to usually see a broader range of shade than your electronic camera possibly record.
The meaning of image modifying is the act of changing an image, put simply. Yet that is oversimplifying an issue that is rather difficult. You can commonly execute easy picture editing and enhancing techniques such as edit a photo fairly quickly as well as quickly yet complex methods as well as electronic editing and enhancing might need photo editing software and even more practical experience.
Photo editing software is a helper that anyone can work with to adjust and enhance images. Due to the fact that photos include a raising variety of usages, numerous firms are experiencing techniques to reutilize pictures as well as make use of them on several channels.
0 notes
Last Seen Blogs

fatqueerlove
Fat Queer Love

miyeps-blog
Miyeps Waffle House

xmtnews
XMT NEWS

anrkyplay92
Tru Trapt Anarchy

coddat
Untitled