#--to find a specific artist. They can find the art/asset within the game without having to do the extra steps.
Text
The 15 Best NFT Art Marketplace Websites
In the fast-evolving world of digital art and blockchain technology, Non-Fungible Tokens (NFTs) have emerged as a revolutionary force. NFTs have transformed the way we perceive and trade digital art, creating a lucrative market for artists and collectors alike. If you’re considering entering this exciting realm, understanding the best NFT art marketplace websites is essential. In this article, we’ll explore the top 15 NFT art marketplaces that can help you kickstart your NFT journey. Additionally, we’ll delve into the significance of NFT Marketplace Development, the role of NFT Marketplace Development Companies, and the range of services they offer.
1. OpenSea
OpenSea is often regarded as the kingpin of the NFT art marketplace world. Known for its user-friendly interface and massive collection of NFTs spanning various categories, OpenSea is a go-to platform for both artists and collectors. Whether you’re looking to buy, sell, or trade NFTs, OpenSea is a solid choice.
2. Rarible
Rarible is a decentralized NFT marketplace that empowers artists and creators by allowing them to mint and sell their NFTs without the need for intermediaries. This platform’s community-driven approach has made it a favorite among artists looking for more control over their work and earnings.
3. SuperRare
SuperRare focuses on high-quality, limited-edition digital art. This platform is known for its exclusivity, making it an ideal choice for artists aiming to establish their presence in the NFT art world. SuperRare’s curation process ensures that only top-tier art finds its way onto the marketplace.
“Read Our Blogs: How To Launch Your Own NFT Marketplace Website in Less Than 2 Days?”
4. Foundation
Foundation is another decentralized NFT marketplace that’s gaining traction. It emphasizes the connection between creators and their audiences, allowing for dynamic engagement through auctions and collaborative art creation.
5. Nifty Gateway
Nifty Gateway offers a unique twist on NFT ownership. It hosts “drops” that allow users to buy NFTs at specific times, creating a sense of urgency and exclusivity. This platform has also introduced a secondary marketplace for trading NFTs.
6. CryptoPunks
CryptoPunks are among the earliest and most iconic NFTs. These unique 10,000 algorithmically generated 24x24 pixel art characters have become highly sought after by collectors and enthusiasts.
7. NBA Top Shot
NBA Top Shot brings sports and NFTs together. It allows users to buy, sell, and trade officially licensed NBA collectible highlights. The platform has brought a new dimension to sports memorabilia.
8. Decentraland
Decentraland is a virtual world built on the Ethereum blockchain. It combines NFT ownership with virtual real estate, allowing users to buy, sell, and develop their parcels of land, creating unique experiences for visitors.
Read Our Blogs: How to Build an NFT Marketplace on Ethereum Blockchain?
9. Zora
Zora is a decentralized marketplace that enables artists to set their own pricing mechanisms. It uses bonding curves to determine the value of NFTs, offering a dynamic pricing model.
10. Mintable
Mintable simplifies the NFT creation process, making it accessible to a broader audience. Artists can mint NFTs without any coding knowledge, making it an ideal platform for newcomers.
11. KnownOrigin
KnownOrigin is dedicated to promoting digital artists. It features a diverse collection of digital art and supports artists through its profit-sharing model.
12. Enjin Marketplace
Enjin Marketplace is an NFT marketplace catering to the gaming community. Gamers can buy and trade in-game items and assets as NFTs, enhancing the gaming experience.
Read Also: Navigating the NFT Marketplace Landscape: Exploring the Best Platforms in 2023
13. AtomicMarket
AtomicMarket is the marketplace associated with the Wax blockchain. It specializes in blockchain-based trading cards and collectibles, providing a unique niche within the NFT world.
14. Mintbase
Mintbase empowers artists to create their NFT marketplaces. It’s a versatile platform for NFT marketplace development, giving artists control over their branding and monetization.
15. Cargo
Cargo is a portfolio-based platform for artists looking to display and sell their work as NFTs. It offers customization options and is suitable for both beginners and established artists.
When it comes to NFT solutions, look no further than SoluLab. They are renowned experts in NFT platform development, spanning various niches, from artwork and digital collectibles to gaming and asset tokenization. Their White Label NFT art marketplace development services offer a feature-rich and seamless platform for trading NFTs. Users can enjoy effortless bidding and purchasing experiences across multiple blockchains, all presented through an intuitive user interface.
SoluLab’s NFT marketplace development services are designed to cater to a global audience, prioritizing user satisfaction and speedy time-to-market. If you’re looking to engage in NFT trading and launch a cutting-edge white label marketplace, SoluLab’s proficient development services are the answer. To learn more or initiate a consultation, we invite interested parties to reach out to SoluLab without delay. Join the NFT revolution with SoluLab, your trusted partner in NFT marketplace development.
0 notes
Text
Skills

Cover photo: https://www.ipr.edu/blogs/audio-production/what-can-i-do-with-an-audio-production-degree/
As mentioned in the 'Industry Research' section of this blog, it isn't just the technical skills future employers will want to see. They want to see how your passion and art is fuelled also!! Sound design is more than just a series of sticking sounds together in a DAW. It's all about creating the other half of the story!
Core values & necessary skills
In my blog's branding section, I spoke about core values and those I deem to be top of my list. Core values make us who we are. It's what drives ambition and our creative thought process.
Accountability is high on my list of values/skills. Being accountable for the amount and quality of work we do is crucial. Often we dismiss our failures because we won't hold ourselves responsible. Though, at the other end of the spectrum, we more often than not, sing our praises. So holding yourself accountable as an individual or team unit, is just as crucial during the failures as it is during the success.
Whilst, teamwork is a very cliché term used with regards to employability, it remains a massive part of my core skill set. Being surrounded by team members is an excellent way to find a creative place in a project. I can then take those ideas and present for peer review. Having people to work with not only makes producing a big project easier. Still, it gives me a tremendous sense of satisfaction that like-minded creatives have come together to create something incredible.
Passion is a big part of what drives me. Music and composing is such a wonderful expression of artistry for me. Not just the music side of things, but I then took my love for music (and audio in general) regarding sound design. I began exploring the more intricate realms of audio. Each day my passions grow, but I NEVER wonder why I love what I do, not even on my worst days.
Respect is a skill I'm continually re-evaluating. I think it is undeniably essential to respect other people and their creative differences.
Continuous improvement is about always finding new and exciting ways to work. Technology changes exceptionally fast these days, and in audio production, the skillsets also have to change. Keeping up to date on industry techniques, skills, and methods will ensure I stay relevant to the expected work output. There are some general skills required to be a sound designer composer within the creative industries. However, some more specific skills are necessary if specialising in TV & film or games.
Basic skills:
Creating, maintaining and backing of own original sound libraries.
Digital signal processing
Producing sound maps/ storyboards from scripts.
Mixing inside Digital Audio Workstations
Work along with side other members of the audio post-production team
Sector-specific skills
TV/Film and Game skills:
Compose and engineer music
improving sound quality
Spot, arrange and edit audio into video, or other mediums.
Use visual logic systems such as Max MSP.
Use of game implementation systems, i.e. Unity, Unreal, Fmod and Wwise.
Layering sounds to have a desired/or specific effect.
I have begun creating and collating my sound libraries last year. At first, I had incredibly long titles for samples and one-shots but started finding it hard to achieve all of the sounds (both RAW and edited). That was until I came across the word 'metadata'. Having a logical and easily navigable database of sounds is crucial to making my workflow more efficiently. I'm starting my journey into audio metadata with a free app called Soundly. Soundly offers a free-plan with up to 2500 local file storage and access to free cloud-based sound effects. To start, this will be ideal, but I would like to look at other plans that will include Cloud storage backup in the future. Currently I backup all of my libraries onto an 8TB desktop drive, another external HDD and my google drive.
What is digital sound processing or DSP, you may ask? Digital sound processing is where audio converts from analogue to digital signal. A series of mathematical calculations are then applied before the signal returns to analogue before final output. As a producer/composer/sound designer, I use various plugins to manipulate the sounds inside my Digital Audio Workstation (DAW). Plugins come in many forms. VST is the most common form of an audio plugin and is Microsoft's Virtual Studio Technology. Avid uses its plugin file system called AAX (Avid Audio Extension), and Apple uses its own AU system (Audio Unit).
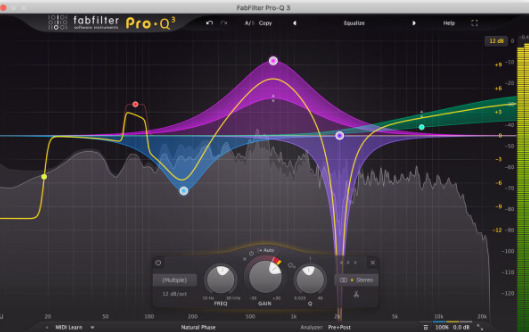
Below is a small list of plugins that I utilise during my time working on projects in the studio:
Fabfilter Pro-Q 3
Waves H delay

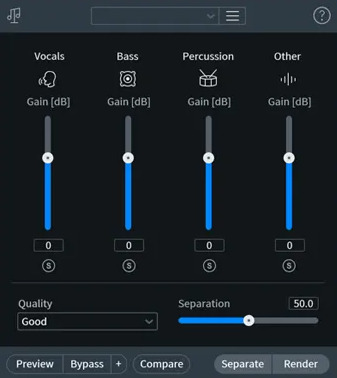
iZotope RX8 - Music Rebalance
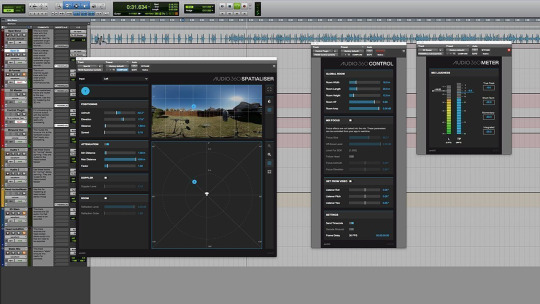
Facebook 360 Spatial Workstation AAX plugin (Pro Tools)
I use Logic Pro X as my music production/composition DAW of choice. I believe this offers a great deal of flexibility to music composers alike.

In contrast, I use Pro Tools as my post-production tool. Here, I produce final mixes of songs before proceeding onto the mastering process, which I also use Pro Tools. Pro Tools is also my DAW of choice for sound design work, purely because of its sheer power in dealing with raw audio.

During a mix-down phase of a musical composition, you should hear each instrument with clarity. Musical instruments all operate at different frequencies within the frequency spectrum. By respecting the base frequencies at which a particular instrument's audio outputs, I can make the final asset as audibly clear as possible, for maximum viewing pleasure.
When working on sound design projects, I will often improve the sound of my source audio captured when out in the field inside iZotope RX8. Here I will remove clicks, hissing, background hum, de-verb, and even isolate parts of dialogue to ensure that audio is optimal for project usage.

I do love writing music and producing sound effects! I like to create work for TV & film, animations, interactive media, audiobooks and more. I import video assets into my DAW (Logic Pro X or Pro Tools depending on projects final output).
This way, I have a visual in front of me from which to work. You can then lock the audio event in position with the video using SMTPE time code. This way, it keeps my music and sound effects in the exact place they need to be, without fear of being moved or adjusted in any way. Just don't forget to lock the positions!!

Max MSP is a powerful visual logic system for generating sound design and producing electronic music. I am new to this software and am learning new and exciting ways to integrate MAX MSP into my DAW workflow. I decided to explore the unique and intricate methods of composing music and designing sound for various media forms.
Examples of work
The best way to showcase both technical and artistic skill is quite obviously through social media platforms. Instagram has become a staple platform where businesses and creatives promote themselves and their craft. There are other platforms such as YouTube, SoundCloud, Twitter, Facebook (and don't forget LinkedIn!) to name but a few. With all of these beautiful places to promote me and work, I must consider the type of content I post to maintain maximum engagement with audiences and potential employers.
After many years of making and producing music at home, my interest in exploring the world of all thing's audio continued to grow. I purchased myself a simple, cheap portable recorder, some dirt-cheap microphones, and just went out and explored the world around me. At first, I made some novice mistakes in just aimlessly pointing and pressing the record button. Still, I soon learned that I merely heard things playback after recording. I never stopped to listen before I hit that big red button!
Slowly I got better (still, a long way to go), but most importantly I absolutely loved the process, and still am! I took great inspiration from reading the sound Effects Bible by Ric Viers (https://www.ricviers.com/sound-effects-bible) and Field Recording from Research To Wrap by Paul Virostek (https://www.creativefieldrecording.com/downloads/field-recording-from-research-to-wrap/). Both explain in great detail about how to get set up, get a recording and start collating my sound libraries.
With that said here's one of my first sound design projects. By this time, I had upgraded my audio recorder and had a few new microphone additions. Jez Riley French's D-Series Hydrophone, C – Series Contact mic, and his electromagnetic coil mic. Again, it was a learning curve starting with these new bits of kit, but I am genuinely pleased with how much this project turned out.
Without further ado, I present to you a lovely piece of animation by Polynoid, titled Mem. I create a gorgeous stereo cacophony of delicate sounds with Sci-Fi and electronic elements that lend itself well to the animation's energy.
ENJOY (with headphones is best!))
youtube
1 note
·
View note
Text
Which 2d Animation Software Is the Best?
Let's begin by looking at what animation is and answering the question, "What exactly is 2D animation?"
This type of animation is likely more familiar than you might think. This type involves creating two-dimensional characters within a flat space. Consider it this way: Everything you draw only has width and height. No depth.
How does one get flat objects or characters to move? This is where the artist would transfer the images from the page to 2D animation software.

Animations can display one drawing for every 2 frames of standard 24 frames per seconds (24fps). This means that each second there is 12 drawings. This may differ depending on the animation style. For example, in anime, "threes", rather than "twos", are the preferred frame rate. When creating 2D animations, think about what frame rate you prefer for the work you are doing.
These classic Disney movies are excellent examples of 2D animation that can be used on the big screen. However, this type work is not just available in cinema. Many people might be asking "Is 2D animating dead?" but this technique is still very popular in advertising, corporate marketing and gaming.
Examples of 2D Animation
Do you want to see the 2D animation at work in action? Here are a few examples.
While most Disney films and cartoons use 3D animation now, it was not the case for many of our favorite Disney classics.
The Pixar Computer-Animated Production System was introduced to The Little Mermaid in 1989. It replaced years of manual pencil 2D animation. The Walt Disney Company designed this 2D animation software specifically for post-production.
The Simpsons, America's longest-running animated series, has a distinctive look and feel. This is despite many improvements in animation tools and techniques.
Pencil Check Pro costs around $400 to download, making it not the most affordable option for beginners who want to learn 2D animation. This software is used to create 15 animated scenes that are based upon static storyboard ideas.
Learn the Basics Of Animation
2D Animation: Is it easy?
Animation, like all creative arts, can be as easy as or difficult as you'd like. 2D animation requires only a pencil with basic whiteboard animation software. To create beautiful animated cartoons, you should first master static drawing.
You should not overlook the ability to draw accurately and quickly if you are interested in a career working in 2D animation. A studio can charge a lot to rework 2D drawings when the creative direction changes. If you want to succeed, it is important to be able to draw and redraw the same object or character in thousands of different ways.
Technology has made 2D animation easier and faster for amateur and professional artists alike. Even if your first experience with animation software has been a challenge, there are many classes to help you make the first steps towards creating your own characters.
Animation can seem intimidating for beginners. Some people may confuse 2D animation with programming. It's not all about programming and solving complex math problems.
Top reasons to choose an animation company that does 2D animations for your video
Animated video is a powerful tool for communicating new ideas and information. It brings life to the animated characters.
Even if 2D Animation is new to you, you can still get started. This guide will show how to make your very first 2D animation video. It is a guide for all beginners.
Basic steps in 2D Animation
You can now dive into animation by keeping the 12 basic principles of animation in mind. These tips and techniques will help you get started animating.
1. Create a storyboard to set you up for success.
A storyboard is a visual representation of the animation project you are working with. Keep in mind that animation is not the same thing as graphic designing. While they go hand in hand, an animator or video graphics should use a graphic specialist to create the animation blueprints before moving on with the project. It will be more difficult to find the right principles for any animation if you don't have a plan or a script.
A storyboard acts as the visual framework for the project. Either search for storyboard templates online, or make your own. A good storyboard will include the video title and purpose. It also includes a place for the shot number and graphic orb-roll footage.
2. Choose your animation software.
Research is a good idea if you don't know which software you'll use to animated. Canva is a good place to learn the basics and get your teeth cut. You might use it to create a GIF animation or a short piece. Adobe After Effects is where the magic happens, if you intend to continue animating.
Learning either software can be slow. For help with specific animation techniques, use YouTube. Find the skill you want and search for a tutorial. Udemy provides professional guidance and more intensive animation classes.
3. Start each animation with still images.
After you have created your storyboard and a plan for animating it, it's now time to get started with the animation. After you've made the entire layout, save it as a still picture. The principle of solid drawing really applies here. Images must have depth and feel like they are moving, even if they're not on the page. This will make movement feel natural.
Graphic designers can help you if your skills aren't in-house. Sean said that "I couldn't do my job without a support network--my coworkers." If you're serious about animating, then you need to take art classes so you can create still images.
4. Keep your animations organised.
When you start the project, you will create assets such as backgrounds, characters and shapes. Then, you can animate them in groups. If you have the same zoom setting or push animation applied to each asset, group them together. This saves you time, improves efficiency, keeps things organized, and helps keep everything in order. Then, order the assets. Select the assets that you want to sequence first, and then pull them down the timeline. To create natural and realistic animation, it is important to ensure that everything falls in the right order.
5. All your resources should be used.
These tutorials are not the only ones available on YouTube or Udemy. You don’t have to find expensive resources. Anything that helps with shape and movement can be an invaluable help in animation. You don't have to spend a lot of time on them, since you can write, draw, and paint in the same way as animation. Your arm movement and wrist movement will translate to After Effects text and shape movements.
0 notes
Text
Is Virtual Photography the Next Great Artform?
https://ift.tt/eA8V8J
2020 saw the release of highly-anticipated games like The Last of Us Part II, Death Stranding on PC, Ghost of Tsushima, and Marvel’s Spider-Man: Miles Morales. What do all of these games have in common? Stellar in-game photo modes that allow a growing online community of virtual photographers to capture the beauty and complexity of these game worlds.
Fans have been taking screenshots of their favorite games for almost as long as they’ve been playing them. Photo modes themselves have existed at least as far back as 1999’s Metal Gear Solid: Integral, which featured a bare bones “photoshoot mode” as bonus content. And even back when most games didn’t have in-game photo modes, the most avid photographers created their own camera mods on PC or used third-party software like NVIDIA’s Ansel camera tool.
Photo modes have only grown more sophisticated since then, and a new generation of virtual photographers have honed their craft and are sharing their unique perspectives on social media to thousands of followers. You can now find dedicated virtual photography communities, hashtags, and aggregators on social media platforms as well as online magazines dedicated to the craft and even an app called Captis that’s pitching itself as the social home for the medium.
cnx.cmd.push(function() { cnx({ playerId: "106e33c0-3911-473c-b599-b1426db57530", }).render("0270c398a82f44f49c23c16122516796"); });
“I think the biggest benefit [of a photo mode] comes from having the ability to capture precious in-game moments that one can also share with others. It works as a sort of connection between the game world and the real world,” says Hiroaki Yoshiike, a lead level designer at Kojima Productions who worked on the stellar photo mode for Death Stranding, a game full of moody, detail-rich environments that serve as a particular paradise for photographers who love to capture stunning landscapes.
In fact, from the moment Kojima Productions decided to integrate a photo mode for the PC release, its main goal was to provide a user-friendly camera tool that also provided advanced features for more seasoned photographers. Yoshiike’s team worked alongside the Lighting and Cinematics teams on iterations of the mode.
“We created a prototype, but they told us it was too basic,” says Yoshiike of testing an early version of the photo mode with members of the team. “So we went back and started adding more features, adjusting until we arrived at the specs that you see in-game today. One part we got caught up on was figuring out how to provide the right tools for making pictures better, from lighting adjustments to stylized filters.”
These tools are very important to virtual photographers, who aren’t just taking pictures of “what looks cool” but are considering elements of real-world photography like composition, framing, and the rule of thirds. They’re thinking about depth of field, lighting, and filters. Virtual photographers take their craft seriously, and there’s a sense that their community of followers — many of which aren’t gamers at all — are doing so as well, following handles for the photographs themselves and not just because they’re fans of the subjects being captured. Could this mean that virtual photography is on the rise as the next great artform?
We talked to a group of photographers about their process, what they look for in a photo mode, and why they think virtual photography is becoming more popular.
Sindy JB
Sindy JB has photographed many games, but her haunting shots of Death Stranding on PC are among her best as they capture the phases of a long, Odyssean journey through a post-apocalyptic America. Shots of photorealistic mountainscapes and war-torn cities have earned her almost 20,000 followers across Twitter and Instagram, where she posts under the handle @mesopatmian_meow.
“Landscape pictures are probably my favorite subject to capture,” Sindy says of her technique. “I almost never plan my shots. I wait for the right place and moment. I don’t use filters a lot because I like my pictures to look as natural as possible.”
Rockstar’s award-winning Old West action game Red Dead Redemption 2 was the game that originally got her into virtual photography, and she’s gotten to know many photo modes since then. There are a few things she looks for when picking up a game’s camera component.
“The most important thing for me is the camera movements. Without free camera control it’s very hard for us to take the pictures we want to take. Some games restrict the camera with an orbital control only in their photo mode and it’s just terrible. I know I speak for many virtual photographers when I say it’s by far the most disappointing thing to see in a photo mode.”
Sindy’s following has grown quickly since her debut in 2018, and she posits that a lot of that has to do with the game makers themselves.
“I think there are many factors that led to the increased popularity of virtual photography, the first being the support we are getting from the game developers these days on social media sites. We often get likes, retweets, and comments from them, and it’s very encouraging.”
Berduu
Petri Levälahti, who goes by Berduu on Twitter, is one of the most popular virtual photographers in the community with over 40,000 followers. In fact, Levälahti has turned virtual photography into a career. He works as a Screen Capture Artist for Swedish game studio EA DICE, best known for the Battlefield and Star Wars Battlefront games.
Interestingly enough, the Battlefield 4 pictures taken by virtual photography legend Jim2point0 are what first enticed Levälahti to get involved with the community.
“Jim and other members of the screenshot community showed me the ropes. This was back when there really were no photo modes in games, outside of a few racing titles, so all the free cameras were created by fans. Most of the actually good game cameras are still created by fans, by people like Frans Bouma, for example.”
Levälahti does it all — portraits, landscapes, action shots. He needs to be multifaceted and have a keen eye for what will catch the viewer’s attention, a key element of his day job. At DICE, he takes marketing screenshots as well as the images you see on their games’ menus and loading screens.
“I get a request for a specific screenshot, let’s say an Action Shot in place X, with focus on Game Feature Y,” Levälahti says of his normal day-to-day at DICE. “Then I start to look for a good location or two and play around with ideas. I’ll do a handful of iterations before settling on one or two, consult an art director for notes, get approvals, do final captures, and ship it.”
Levälahti loves to shoot other games outside of DICE, too. Standouts include stylish portraits of characters from Control and Cyberpunk 2077 you could easily imagine as magazine covers. How does he do it?
“I always check that my shots work at small size — that there’s a clear subject, and that the shot is easy to read and you can tell what’s going on. I [also] check that my shots work at large size — are there ugly textures or assets shown too close and thus causing eyesore? Does the character’s leg clip through the floor, is there anything ruining the immersion? Awkward poses, non-existent shadows, aliasing? Always look for good light! Shadows and light make or break your shot.”
Soulsurrender
Soulsurrender, who also works as a freelance graphic designer and photographer in Sweden, got into virtual photography thanks to the seminal fantasy RPG The Elder Scrolls V: Skyrim, a game often celebrated for its beautiful vistas, lively settings, and cavernous depths.
“Mods made the game pretty and I just wanted to capture that. I didn’t really call it virtual photography or share any of my shots back then. That came much later, after realizing there was a whole amazing community out there.”
Soulsurrender has captured many subjects, including those within the worlds of Fallout 4, Mad Max, and Cyberpunk 2077, and she has a real eye for finding the majesty in dystopian settings. Her awe-inspiring shots of Mad Max’s endless deserts don’t even look like they’re from a video game despite the fact that she took up virtual photography after growing bored with shooting her real-world surroundings.
“I’m currently on a break after getting kind of burned out, getting frustrated with gear, and living in a small town of which nothing feels left to explore and shoot. Which naturally led me to find other ways to express my creativity: I started shooting virtual worlds instead, where the possibilities are nearly endless.”
Soulsurrender mainly likes to shoot vast landscapes, characters standing far off in the distance, colorful skies as backdrops. She says her approach to virtual photography is the same as in real-life: “go explore and find something interesting.”
Voldsby
“I’ve been a hobby photographer for a few years, so when I discovered that there was this feature where you can literally just stop the whole game to take pictures, that was when I became addicted to it.”
Danish photographer Voldsby has made a name for herself in the community with her portraits of The Last of Us Part II’s main characters. On her Twitter page, you’ll find pictures of Ellie and Abby, their faces half shrouded in thick shadow, as if to hide something in their expressions, while one eye looks straight at the camera. The gaze is so piercing it might make you cower.
“I like to really get close to my subjects and make them feel like they’re looking into the camera, [that] they’re aware that I’m taking the picture,” Voldsby says. “I know it sounds silly because it’s a video game, but it makes the photo come alive.”
Why has she spent so much time photographing TLOU2 specifically? Well, first off, she loves the series, but it also has a lot to do with the game’s incredible lighting. So much of the game takes place in creepy, enclosed areas like hallways and underground tunnels, and Voldsby finds it particularly exciting when she discovers “beautiful little light beams just sitting there in a window” to light her shots.
After Voldsby takes a picture, it goes through a “rigorous procedure” before she shares it online. She transfers the picture over as a PNG to a USB drive (pro tip: never use PlayStation’s Share function to upload your high quality photographs) and then she touches it up a little on Adobe Lightroom, mostly to add a bit more lighting or shadow to make sure things are popping. But when it comes to capturing the picture itself, Voldsby prefers a simple photo mode.
“It’s all about simplicity. Less is more, you know? I don’t really need any of those fancy features that a lot of photo modes have,” Voldsby says. “It’s just like real photography. Buying an expensive camera with loads of features doesn’t automatically make you a good photographer.”
Kayne
Kayne, whose Instagram handle @firstpersonshutter boasts almost 20,000 followers, dreamed of traveling the world as a freelance photographer for outlets like National Geographic, but soon found that he couldn’t afford it due to the cost of lenses and other equipment necessary for the job. But that hasn’t stopped him from practicing his craft in the video game world.
His favorite games to photograph are Insomniac’s Spider-Man series, and it’s easy to see why. Kayne can get a lot out of the high-flying web-swinging mechanics in the game as well as Spidey’s superheroic poses and myriad suits.
“In Spider-Man‘s case, arranging Spider-Man to where he’s looking at something that’s well-lit puts those reflections in the eye lenses so that you can actually get all those details on the face masks,” Kayne explains.
With photo mode, Kayne has found a new way to think about photography, and hopes that other artists will start to think of virtual photography as an artform, too. Will we one day see one of the pictures in this article hanging in a museum?
“I am very hopeful that it takes off into something bigger. And I feel like we’re on the ground floor.”
The post Is Virtual Photography the Next Great Artform? appeared first on Den of Geek.
from Den of Geek https://ift.tt/2LTkexm
1 note
·
View note
Text
Deku: The Heroic Freelancing Adventurer (Fantasy!Deku)

Overview:
NAME: Izuku Midoriya (traditionally kept secret)
ADVENTURER ALIAS: Deku, the Freelancing Adventurer
JOB CLASS: Freelancer, The ‘Jack-of-All-Trades’
OCCUPATION/ROLE: Adventurer
BIRTHDAY: July 15th
HOMELAND: Kime Village
PERSONALITY: humble, modest, helpful, polite, diligent, strong-willed, analytical/strategic, caring, keenly intellectual, intuitive
TENDENCIES: thinking aloud ("mutter-storming”); often brash & abrasive in combat in ‘need-to-win’ mindset (tries to keep it in check); taking risks for the sake of others; self-sacrificing himself; being recklessly selfless; unable to sit by idly not helping in any way
DEFAULT COMBAT STYLE: Close-Ranged Physical Combat (Swordsmanship); Adaptive Tactics
SECONDARY COMBAT CAPABILITIES: Archery; Magic Channeling; Scouting; Lightning Magic
ABILITIES OVERVIEW: keen observation & analysis; intuition & resourcefulness; high pain tolerance; prowess & physical parameters moderately above average; high levels of flexibility; average skills with other melee weapons & magic; proficiency in botany & astronomy; adept tactician, scout & scholar; average proficiency with all weapons
GEARS (main): Kime-branded Satchel (notebooks, pencils, medical supplies/herbs, food rations); Kime-branded Shortsword; Military Dagger; Canteen, Specially-Made Iron Soles, Gloves & Chainmail (underneath vest)
ADDITIONAL GEARS (travel): Yellow Rucksack (for storing sellable content & supplies); Kime-branded Longbow & Quiver; even more notebooks; sleeping bag; clay pots; wooden bowl & eating utensils; flint & steel; Kime-branded Owlbearer Whistle (silently calls upon Kime-raised delivery owls for small packages); Kime-branded Survival Knife
Bio:
A freelancer largely inspired by world-famous adventurer, All Might the Hero of Peace. He sets out on the road under the alias Deku in hopes of learning what his ‘true calling’ may be, travelling in order to expand his horizons, shed light to the truth, and fuel the hearts of all in need of a guiding light. He's often mistaken as a scholar, merchant or even a simple explorer, but the truth is that his travels are also driven by a spiritual journey of self-discovery to find what his people call a person's 'True Calling', or one’s profession & purpose in life. For Deku, his is one not bound by professions or skill. Like All Might, he bears the true calling of Heroism.
Despite having an average grasp in a variety of skills as a Freelancer, Deku bears high intelligence and keen sense of awareness that makes him an incredible asset on the field. His intuitions, resourcefulness and flexibility allow him to creatively think outside the box, and with his keen observational skills and quick-time analysis capabilities, this freelancer has the potential of being a brilliant tactician with a surprising ability of coming up with something from under his sleeves.
Backstory:
In the very beginning, Izuku was simply inspired to become a famous adventurer like his all-time favorite adventurer, All Might the Hero of Peace. Stories and fables about the man always revolved around the discoveries he made along his journey, along with inspiring tales of helping the unfortunate, and especially the world-famous legend where he fought an evil entity, saving mankind.
Although he always believed that he could replicate similar values as an official adventurer, Izuku was usually too hesitant if not discouraged to make that first step. He watched his peers find their ‘true callings’ one after another in the form of wizardry, knighthood and so on, yet he still remained a freelancer with average capabilities in about every class and profession he could try. Nothing seemed to truly resonate deeply within him. As a result, his opportunity to set out as an official adventurer remained stagnant learns of his 'true calling'.
It was during his first ever visit to the capital when Izuku experienced an inkling as to what his ‘true calling’ might be. Rumors of several questionable groups lurked within the shadows of the kingdom, and his natural tendency to reach out and meddle where help isn’t asked for resulted in him discovering one of these groups’ locations. It was a chaotic reveal, taboos being practiced in secret right underneath the capital. His meddling had the facility being demolished to hide all the evidence, but of all the creatures inside, he managed to save one. The incident left a burning imprint on his heart -- a sensation in which he knew was the key to discovering his ‘true calling’, as well as the final push to becoming a full-fledged adventurer.
It’s scarcely heard of in his village for adventurers to set off without first finding their ‘true callings’ in a class, but Izuku strongly believed that his was one which disregarded any bounds to profession or expertise. He adopted his Adventurer Alias ‘Deku’, a derogatory name given by bullies now claimed by him to make it his own power, and soon began his journey throughout the world as the first-ever Freelancer-class Adventurer from his own homeland.
Bonus:
Coming of Age Ceremony: Rites to Adventure
True Calling: Heroism
Deku’s Artifact: One for All
Fun Facts:
Kime ( 決め ) is the noun form of the verb kimeru ( きめる ), which (although it has a multitude of definitions in that website,) basically means ‘to decide/commit’.
Kime is also apparently a commonly used term in Japanese martial arts.
The overall concept of a Freelancer Job Class is literally based on the job class in video games Final Fantasy and Bravely Default -- majority of the influence coming from the latter.
In Final Fantasy, “The Freelancer is not an actual job class, it is simply a placeholder until the player acquires actual jobs. Though they lack any specific skills or strengths, this serves as their only real weakness, as otherwise Freelancers are well-rounded in all areas of combat. Also more often than not, Freelancers can equip mostly every piece of equipment on their respective games, and also being capable of using abilities from other jobs, which in essence makes them the most powerful "job" in their game.”
In Bravely Default, “The Freelancer is an overall balanced job with medium proficiency in all stats and equipment types. Its abilities are likewise balanced support skills and passive abilities. Though not an effective job in combat, the Freelancer's abilities can be useful when paired with other jobs.”
Despite being a ‘Jack-of-All-Trades’, Deku is actually most proficient in swordsmanship when it comes to self-defense, archery when it comes to hunting, and lightning magic essentially for weak self-buffs.
Deku is the first ever person from his village to make the Freelancer job class an ‘official’ category of its own since prior it was normally viewed as a ‘placeholder title’ until trainees find their ‘true calling’ (job class). Although it’s still believed that Freelancers aren’t necessarily a ‘true calling’ in itself, some have been viewing it as ‘the gateway of callings’.
Not only is he a Freelancing Adventurer, but also quite the scholar! In hopes of assisting his home’s knowledge of the world, Deku actually records/catalogs anything and everything he discovers throughout his travels. This explains why his bag is often loaded with used and unused notebooks, and also why he’s a surprisingly good sketch artist.
Deku carries 10 notebooks a set, which eventually gets delivered back to his village when they’re all used up.
Vital information is copied into a personal pocketbook, so at the very least he doesn’t regret sending off any notebooks he might need in the future.
#about deku#about fantasy!deku#fantasy!deku#v.traversetheunknown (fantasy)#deku: the heroic freelancing adventurer (fantasy!deku)#bio#blog info#verses#fantasy verse
11 notes
·
View notes
Text
Cardcaptor Hanna Update
As you know, there have been a few inconsistencies with how I draw the comic. For a while, I was drawing everything out of my sketchbook, and then I started drawing solely on the computer. The sketchbook versions had high details, and were faster to create, yet the picture quality was low and my handwriting looks terrible. It had a very unprofessional look to it. The computer drawn versions were much cleaner, and the words far more legible, yet they lack the extra detail and quite often would have issues with proportions. This bothers me a lot, so here’s the deal.
I am going back to drawing the updates in my sketchbook, but they will only be considered sketches. After the sketches have been transferred onto the computer, I will go over the line arts in GIMP to give them that crisp, finished look. I’ve been doing this for a while now with my art, and I really like how it looks. I’m thinking about uploading previews of the sketches to Tumblr to help show that yes, I am working on the comic.
Now, the real question is, how exactly do I set these up? The way I see it, there are three options available to me.
1) Draw one update at a time, post the sketch version, finish it in GIMP, and then repeat the process for the next update. This method will allow me to give you guys sneak peeks, but will mean that the story comes out a bit slower.
2) Finish the chapter in sketchbook form with text added in digitally. After the chapter is done, go back and update all of the artwork so that it has the digital lineart and a more professional quality to it. This would allow for faster updates, so that you guys can get the story a bit quicker, and then I can take my time making it look nice.
3) Hire someone to do the digital linework for me. Now that I have a second job, I have a little more money to play around with. I still wouldn’t be able to spend a lot of money, but if I could find someone willing to work with me,this would definitely be an option. However, I’m sure most artists would be outside of my price range, and I’m not exactly popular enough to be able to ask for volunteers. If someone were to step up and say “I’ll work with you and I don’t care about getting paid”, I’d probably pinch myself to make sure I wasn’t dreaming. That sort of thing only happens when someone REALLY likes your work and just wants to be part of the project. This is the least likely scenario, and not something I plan on holding my breath for.
What about colors, you might be asking? Colors are definitely something I’d like to add, but they’re more of a nicety that aren’t required to make a comic. However, I do want to color the comic, and even get back into making music videos with said colored images. One thing I miss is being able to make music videos with my artwork. There are some really old videos on one of my sub-channels that use artwork that I am either no longer happy with, or are no longer canon. ie, they depict scenes and characters that no longer exist within my current vision of the story, or show a much larger age gap between Hanna and her siblings. I’ll go over this a bit more in my YouTube Update post.
There is one other thing I would like to go over, and that is how to tell the story of what happens between the show, and the first chapter of Cardcaptor Hanna. I plan on referring to this as Cardcaptor Chronicles, even though I do consider Cardcaptor Hanna to be a part of Cardcaptor Chronicles. I loved a lot writing the original version of the fanfic, and while there are some things I would change or remove from the original, I’d still like to tell that story. Right now, Cardcaptor Chronicles is being told as flashbacks withing Cardcaptor Hanna, such as when Hanna was telling the audience about how her parents used to have magic, but then lost it just after everyone found out about it. This is fine for the context of Cardcaptor Hanna, but I really want to tell the full story of Cardcaptor Chronicles.
Once again, I have two options. The first being the most simple, just do another comic alongside Cardcaptor Hanna. The second however, is to use a different media form to tell the story. Though I can’t remember what it was about or who wrote it, I once came across a Persona 3 fanfic that was told through a unique Tumblr format. The story was told using character assets from the game to show the character’s expressions, and then have a line of dialogue underneath. This is very similar to a visual novel, but without the ability to make decisions and influence the story. It would be a very quick way of telling the story, with the hardest part being creating the character sprites. I could make it an actual visual novel with help from my boyfriend, but he’s already got his hands full making a Journey of the Heart VN. Plus, there is a very specific story I want to tell here.
So now is where I ask you guys for your opinions. Which options do you think I should take? Comments are enabled, so feel free to let me know through your choice of re-blogs, comments, or anonymous asks.
Master Post
0 notes
Text
A Treatise on McQuevian Hand-Painted Texturing Automation
Originally posted on the Big Robot blog, Gamasutra, Kotaku, and RockPaperShotgun.
What follows is an expanded take on what we touch on in that video. If that sounds good, read on!
Tölva’s world and tone are exciting for a number of reasons – lasers, exploding robots, unfathomable space mystery and the phrase “combat archaeology”, to mention but a few – but here we’re going to talk about how we crafted that rich, screenshot-friendly visual style. We will try and understand the majesty of Mr Ian McQue’s concept art, learn the fundamentals of ‘splattery precision’ and some other made up terminology, as well as comprehending the beauty of a clean normal map bake or efficient UV layout. You know you’re in deep when you can appreciate UVs. We intend to go deep(ish).
So… Defining the look of Tölva was a process of looking at our inspirations and influences and breaking them down into their constituent parts. This way we could take what made a certain look ‘work’, and begin to create a process that we could apply to a variety of assets while maintaining consistency with one another as well as looking appealing in isolation. This meant taking Ian McQue’s sketches and paintings and finding common shapes, colours, types of brush stroke, silhouettes, and starting to form a “McQuevian language”.
Often robots, vehicles, or ships, were chunky with lots of rectangular protrusions breaking up their silhouettes. Layering of details was important, with colour often going from darker to lighter as the layers got closer to the exterior. Angles were often a few degrees off being parallel with each other but still consisting of straight lines, rarely curved. The dumpier a spaceship, the thinner it’s aerials and wires: contrast from form.Often robots, vehicles, or ships, were chunky with lots of rectangular protrusions breaking up their silhouettes. Layering of details was important, with colour often going from darker to lighter as the layers got closer to the exterior. Angles were often a few degrees off being parallel with each other but still consisting of straight lines, rarely curved. The dumpier a spaceship, the thinner it’s aerials and wires: contrast from form.
We could use these style guidelines to judge how well something would fit in the world, and how close it was to the source. I’d sometimes create reference boards using a tool called Kuadro, a convenient way of laying out image files on the desktop and storing their scale and position in a file. I’d be conferring with Jim at various stages throughout an asset’s creation- he would direct the design, and mine his extensive and tasteful tumblr image library, or doodle thumbnails to illustrate specific requirements. Interpreting sketches from one angle and turning them into 3D geometry has been a particular challenge for me on this project, but following these guidelines, and practicing this approach has enabled me to get better at it through the course of the project.
The first step towards actually making something, once reference was set up, was blocking out a 3D form in Maya using simple primitives and keeping things low detail. Often if this stage went well the geometry could be reused for the final low polygon asset. Then I’d take this base mesh into zBrush and play with the shapes, maybe add things that were more awkward to create in Maya. If I was feeling really fancy, I might do a paintover.
Sculpting, Detailing, Baking
Once something is starting to feel like a strong design I can start to commit to adding details, again referring to the guidelines as I bevel edges, chamfer corners, and smooth any (rare) curved surfaces. Then come surface details that will be baked down into the normal map such as wires, nuts and bolts, screws, handles, cutlines. It’s easy and enjoyable to go overboard at this point and fill every surface with greebly goodness but any artist will tell you that the eye needs space to rest. Not only are you looking for space to rest within this asset, but often you will need to look at the game as a whole and decide whole assets need to act as rest points devoid of any noisy detail, in making up the composition of the world.
At this stage I’m also starting to break up edges with wear and tear and damage where seems appropriate, this is one of the most satisfying parts- chipping away and scratching up clean surfaces requires little moment to moment decision making and I can let this almost therapeutic activity absorb my attention. It’s important to split objects as I go into logical groupings based on their material types, I will use these later to bake a material ID map which is essential to the texturing process.
One of the of the recurring aspects of creating such a mechanical world is designing (relatively) convincing joints, paneling, and other robotic goodness. It was important to spend enough time look at machined parts or engines so that I could start to internalise where a cut line might occur, which panels needed screws, how a curved edge might be carved out of a larger piece. Manufacturing is often about starting with a form and reducing it from there, and the same approach works really well when sculpting.
Then comes a series of steps that are dull but very necessary to getting a clean bake but once that’s done I can move onto texturing. A tight UV layout, good smoothing groups on your low polygon model, and a precise cage mesh all aid in a clean bake.
Generating an Automated McQue Texture process
Or: How to Hand Paint Textures, Without Using Your Hands.
Good modelling is essential and a stunning texture won’t save a bad model, but texturing drives a lot of Tölva’s look and helps distinguish it from other games. It’s also what was most clearly imitable from the concepts. We were fortunate enough to be given access to the list of secret brushes that Mr McQue utilises most frequently and to such effect, and using these able to create an automated process that streamlined the texturing of hundreds of assets. We essentially created a system where I fed in my sculpts and a McQuevian texture was churned out for me to tweak and finesse. This worked by taking the right brushes in Photoshop and creating a tiling pattern with each, attempting to recreate a certain type of stroke or scribble that could be found in any given concept piece. With these ‘master strokes’ I could tile relatively convincing McQuvian patterns across a surface, tinting its colour, and using the pattern to break up the edges of masks in Photoshop. Daub, dash, splatter, speckle, spray, smear, squiggle, strokes, crosshatch, and grainy swirl would become my best friends over the next 2 years. Grainy swirl was great for organic or noisy surfaces like mud or concrete, while crosshatch had a natural galvanized metal flakes look. Each pattern came into its own as I built a library of reusable materials from these tiling patterns.
The tool tying all this together was the Quixel Suite’s dDo, a Photoshop based texturing tool aimed at primarily at creating PBR materials very quickly, which we had employed for our own nefarious aims. Feeding the sculpt data from the bake (tangent and object normals, ambient occlusion, material ID, gradient, sometimes a height map) dDo could tell me where edges were, crevices, what was at the top of the mesh, what was only facing down or upwards. The amount granularity in terms of how you define the masking of a material is very powerful, and once I’ve made decisions about where a material should be confined to I can apply that as a preset to any other asset. “Here’s my paintedMetalC material, it will have chips and scratches on the edges, sunbleach on the top, water damage on the undersides, and some lichen in the crevices.”
I found the simplest way to structure a texture was to have a form layer at the top that brightened upward facing surfaces, and conversely darkened downward facing surfaces, with an edge brightening layer to accentuate the objects natural shape. Our ambient light in-engine is a single colour and so baking in some subtle lighting data helped objects have some shape even when in total shadow. Next, a weathering layer that universally affects the asset. Things like dust, stains, and other environmental effects go here. Beneath this all the materials are applied to their corresponding material IDs from the high polygon sculpt bake.
From this point I’ll start to work in overlaid scanned details from the dDo library, these won’t affect the diffuse channel very much (deliberately), but will add some physically based detail and reflectance values. The materials that make up Tölva and it’s inhabitants are 90% diffuse covered and 10% specular, meaning they are largely matte looking surfaces with bits chipped away to reveal the metal beneath. McQue’s style has very little exposed steel, or polished chrome and there is no glossy plastic, so I tried hard to match that. More on the PBR side of things later.
Once materials are assigned to the whole texture there’ll be a lot of tweaking of the tiling pattern’s intensity, colour, size. Material specific details will also go on, like rust that only affects metals. Then in some cases I’ll add bespoke hand painted details like glyphs, diagrams, or bits of weathering that only appear where there’s a pipe or something and that can’t be defined by the automated process. But this is the only part of texturing where I’ll actually paint a specific detail onto a specific part of the texture, everything else is controlled by dDo and my masking.
The colours we use are often collections analogous colours making up 60% of an asset, then it might have a darker or more saturated variant covering another 30%, and then remaining 10% has a bright or rich accent colour. Usually the best way to get a decent start with this is to colour pick directly from a concept and go from there, can’t get more accurate than that. As we got further into the project certain palettes would mean different things to me about where they were in the world and who created them, making decisions about colour schemes much easier.
Once all this is done I can save individual materials as presets, or entire documents to be reused on similar assets, this is largely what facilitated us in getting the texturing done as a efficiently as possible.
Implementation: Make Everything Modular
Being able to cannibalise existing assets for reuse is an invaluable tool when you’re trying to squeeze as much variation into the world as possible without burdening your VRAM usage further. The mileage you can get from an asset is often surprising in terms of reimagining it for other purposes. If you model things with discrete watertight intersecting meshes rather than combining everything and deleting interior faces, you can at any point split these out and reassemble them into a new variation of that asset.
This is probably obvious to veteran game artists but was something I was often in two minds about at the start of production, modularity vs bespoke detail. The other thing to bear in mind with this approach is baking with your meshes well exploded so occlusion data doesn’t interfere with neighbouring meshes, preventing you from reusing that one piece in a prominent place because it has a massive shadow across one side of it. Meshes can be merged using boolean operations to merge intersecting meshes and create totally new shapes, which we did to create cliff faces comprising multiple rotated cliffs into one uber cliff.
Creating asset kits is a common technique in games utilised particularly well by the Bethesda teams. Tölva has less of a need for complicated interconnecting architecture but we were still able to get some use out of concrete piece kits that we made to build more industrial areas, and kits of damaged spaceship to decorate the space wreck debris that litters the world. Creating these kits for the environment team (er, Jim) took a sizeable amount of the art dev time. Another example of this kit-based approach are the weapons attachments, all modelled as separate items that could be rearranged and mixed together to create weapon variants.
Working in the sizeable world of Tölva meant pushing a lot of geometry onto the screen at any one time. Occlusion culling and culling regions far from the player helped alleviate some of this but ultimately we were going to have to create level of detail meshes for a lot of polygon heavy, or frequently used assets. This is a fairly simple process and its amazing what you can get away with when an object is at distance.
Expanding the look with Shaders
I have no programming skill or experience to speak of, but I found fairly quickly I was being limited by my ability to create simple shaders to achieve effects commonplace in games and desirable within our sci-fi aesthetic. Unity plugin Shader Forge became my go-to tool for solving these problems, it’s a node based shader writing solution that is approachable but still crammed with maths terminology most artists have never heard of. Using this I was able to assemble and visualise shaders that had pulsing lights, tinted a material based on ID maps, did weird things with transparency, or just layered textures based on normal direction. This saved me using up precious programmer time – Tom was full time on the project, and Dan part-time, so their brain cycles were at a premium! – and gave me control over very specific parts of the look. This kind of autonomy is very precious when you work remotely and there isn’t always someone on hand for you to pester with technical queries. Being a visual scripting system it does have the downside that when it breaks, I often had no idea why, or how to fix it. These issues weren’t insurmountable but did lead to a day of debugging from our resident shader expert, Tom Betts.
I would approach materials very differently if I was starting this project from scratch tomorrow. Coming from a CG background pretty much everything is given a specific texture that uses the full UV tile, and that was pretty much my only option to get the look we wanted at the time. As my understanding of Shader Forge evolved I was able to create a sort of shader version of how my textures were set up inside dDo. I was limited to 4 masks (RGBA channels of the ID texture) plus a base layer, and I could tile and tint some of the McQue patterns within those masks. Each McQue pattern had the diffuse pattern stored in the red channel, specular in the green, and gloss in the blue.This allowed me to get good resolution on textures for assets that were 5, 10, 100 metres long. The ID and normal maps were still limited by resolution but the tiling worked very well. It serves well as a halfway house between a 1:1 mapped texture and tiling materials, but lacks the subtlety and detail of a 1:1 or the variation and fidelity of having a library of materials applied to submeshes.
Terrain texturing
Our initial approach to terrain textures was to treat them as purely two dimensional, abstract patterns. As the style developed it became clear we were going to need something a bit fancier to fit the aesthetic, especially given the fact that terrain filled the majority of the frame a lot of the time. I began sculpting tiling terrain materials in zBrush, creating quick sculpts that could be exported to Unity quickly to test tiling, detail, and blending between layers. It was important to use detail meshes like small pebbles and shards of rock that already existed to tie the textures to actual 3D props sitting on the terrain. This was the first organic thing I’d had to sculpt that wasn’t a rock or cliff and the soft shapes weren’t fitting the style at all. The solution ended up being to reduce the polygon count of the sculpt using zBrush’s decimation tool to create a more faceted organic surface. Feeding this through dDo and using existing material presets was pretty straight forward. The height map was used by the RTP terrain setup to cleverly blend layers together based on depth, creating a much more pleasing blend that a simple fade.
Lighting/Rendering/Post Processing
PBR or physically based rendering has become a buzzword and marketing tool as it’s adoption has spread, symbolising a graphical upgrade over traditional game rendering. Mwoar detail mwoar realism mwoar immersion. Much as I love all those things it’s most important contribution from the artist’s perspective is having a controlled environment within which to work where you can create a material and have it react to light in a predictable manner, not only between scenes and lighting setups in the game engine, but also between software packages.
Having this predictability is even more useful when your game has a full day night cycle and is going to appear in all sorts of lighting conditions. Even if your game isn’t crammed with brushed metal and lacquered pine (highly reflective surfaces being a sure sign of a game trying very hard to get the most of its PBR) it can still massively benefit from a physical approach. Having a nice fresnel falloff on a largely diffuse material makes every object lit at a glancing angle look fantastic, materials are energy conserving so nothing washes out in a way that just appears like a white value being clamped.
McQue’s paintings have naturalistic quality to their lighting, this is ideal for PBR. His colour palettes have a fairly limited range, there are few bright whites or really dark blacks, much like real world albedo colour values. This allows a PBR lighting model to really shine without being overpowered or limited by overly saturated or contrasting texture colour values. PBR is not a style, it’s a tool. You can push your look in a number of directions with colour correction, lighting, and post processing- but you are starting from a well calibrated, stable, neutral position that is easy to control. Using PBR also means you can draw on nearly 200 years of photographic knowledge. Exposure, tone-mapping, HDR, colour correction, bloom, lens flare, chromatic aberration, depth of field, vignette: these are all techniques that have either been part of photography and film for a long time, or are simulating things that a lens does naturally. Also use linear colour space everyone, it has been VFX industry standard for forever, there’s no reason not to.
Having this linear colour space PBR setup means we are generating accurate colour values in the render that, after tonemapping, exceed the screen’s full brightness value. They are brighter than white, this is what makes the render high dynamic range. We use these values on our light emitting (emissive) materials particularly to trigger a bloom effect, but also to illuminate any dirt or scratches on the lens you’re viewing the game through.
Nothing says sci-fi like bright blinking lights!
2 notes
·
View notes
Text
Own the rights to your board game artwork
This is a special guest post by Zachary Strebeck, an board game attorney.
Sites like Kickstarter and The Game Crafter have prompted many game designers to make the leap into publishing their own games. Others are signing up with publishers to get their games into distribution. However, many of these designers are endangering their games by moving forward without owning the rights to their game artwork. Without the right contract in place (and the rights that go with it) you could be putting your game at a serious disadvantage or even be in breach of those publishing agreements. Here's why:
Copyright in tabletop game art - a quick primer
Under US copyright law, when an artist draws or paints something on paper or digitally, they automatically gain certain rights in that artwork. These rights include the right to make copies, to publicly perform, and to make derivative works from that artwork. Together, we refer to these rights as the "copyright" rights. They also include the right to exclude others from doing the same. If someone is an employee, and the artwork was created in the scope of their employment, then the employer is considered the "author" for copyright purposes. In the tabletop game industry, however, most artists are working as independent contractors. In those situations, an extra step is needed.
Independent Contractors and Copyright
As a game designer, if you've hired an artist solely for the purpose of creating a few pieces of artwork, they're most likely a contractor. Independent contractors are considered the "author" of the work, as far as copyright is concerned. This means that the contractor owns all of those copyright rights we discussed above. This also means that the designer (without a written agreement) only has a revocable license to use that artwork in their game. A license simply gives you permission to use the rights that the artist owns. In most cases, this isn't sufficient protection for the work in your game. This is because if the artist decides that they don't want you to use the art in the game anymore, they can revoke your license.
Why is this a problem?
Because the artwork that goes along with your game is often a big selling point. Consumers associate that artwork with the game and your overall brand. The artwork attracts people to buy your game. Losing these rights can be a big deal. If you try to get them back, you'll be in a poor negotiating position to continue using that artwork. This could lead to giving up more of the game's profits to the artist than you'd like. If you can't get the rights, you would need to pay for new artwork. This could easily lead to less sales and higher costs for the replacement artwork. Even worse, if a publisher wants to use the original artwork within the game (which isn't common, but it happens), this could be a serious issue. In most game publishing agreements, you are agreeing that you have the rights to all of the materials you are submitting to the publisher. The publisher should then confirm those rights and want to see the related agreements. Not having them available may kill the publishing deal, particularly if the artist isn't cooperating in signing them over to you after the fact. If the publisher doesn't demand those agreements, you could be in breach of contract if they later find out that you don't have the rights in place. You could be opening your personal assets up for liability under that breach, especially if you don't have a separate business entity. All of these situations can get extremely messy.
How do we fix this?
It's actually quite simple. If you have a contract with a "work-for-hire" clause in it, US copyright law allows you to be considered the "author" and owner of all rights in that artwork. The agreement needs to be in writing - no oral promises or handshake deals. This agreement should also include a number of other terms, such as payment, confidentiality, and specifications about the artwork. Once this agreement is signed, copyright in the agreed-upon deliverables will be owned by you, the designer. Alternatively, you can sign a license agreement broad enough to cover any of your uses. Generally, this includes the ability for you to sublicense to a publisher or anyone else you need to (foreign manufacturers/distributors, for instance). The term will need to be long enough (preferably "in perpetuity"), and the scope broad enough to allow you to publish the game properly. While a licensee is not the optimal situation (ownership is nearly always better), artists sometimes don't want to relinquish all rights to their work. However, "money talks." Pay the artist enough and you can often get those rights in full.
Grab a copy of my Game Art work-for-hire Contract
If you're looking for an agreement template that you can use with the artists for your game designs, look no further. I've designed a three-pack of contract templates that grant you, the designer, the appropriate rights described in this post. The package includes:
Three pdf contracts that reflect the most common ways to pay your artists: hourly, per service, and as a percentage of game profits
Other important contract terms, such as confidentiality provisions, arbitration, defining their status as an independent contractor, and binding promises by the artist that the artwork isn't infringing on anyone else's rights (among others)
A 30-day money back guarantee, no questions asked
7 notes
·
View notes
Text
I first discovered the process of animation when I was about 7 years old. My school gave my year group a lesson using a program called 2animate and at the end of the day, when everyone had left I was still in the classroom at the PC. I was just engrossed in the couple seconds worth of moving images that I had created and couldn't pull myself away from the screen. The teachers noticed this and my parents bought me a copy of the software which quickly started to consume all my time at home. Ever since then I've been fascinated by motion and the way things move and I was especially fond of animal run cycles. In recent years 3D animation has really caught my eye and more specifically photoreal CGI. Being convinced that something totally impossible was actually filmed and not just added with software in post truly fascinates me. In this video I'll be discussing lighting and compositing. These are a couple aspects of the VFX pipeline that I have only recently started to understand the importance of and some of the skills required to find a job in these areas of the industry. I also will use the techniques I learn about to try and create my own VFX composition.
The first job that I'd like to address is that of the VFX supervisor. One of the key roles of the VFX supervisor is to ensure that the filmmakers have an appropriate set up while recording the initial photography to save time and money or so that it won't require weeks of prep/paint afterwards in the rotoscoping or retouch departments before advancing further down the pipeline. What interests me most about this position though is the lighting reference they take care of. When filming a shot that will contain VFX a matte grey ball and a shiny chrome ball is commonly used. The grey ball is used to help the cgi artist understand the light direction, intensity, temperature and to gauge how harsh the shadows should be. To achieve this the artist would recreate the matte ball in cg and by comparing it with the image of the real one try to replicate the lighting conditions in the software with those that were present on set during filming. Once correct the light would then be applied to the model. The chrome ball however is used to understand how reflections are picked up on certain materials such as the shiny metal on a vehicle or something similar. It is also replicated in cg and is used to align what is known as an environment light or HDRI. This is basically a 360 degree photo that encompasses the 3D scene to give the models realistic reflection and lighting. The VFX supervisor decides where the balls should be placed and whether or not to move them during filming based on differences in light around the set. Some claim that it's old fashioned but from what I've seen many directors still prefer to use these quick and easy methods of lighting reference. A Macbeth chart usually accompanies the two spheres but this is used as reference for consistent colour correction rather than for lighting.
One of the best movies I can think of that shows brilliant use of lighting was the first Transformers movie. Scenes like this where you'll notice in the fog the light being blocked by Bumblebee, very cool stuff. Or how in this scene not only is the environment being reflected off Optimus but also Sam and Mikaela are reflected here. I couldn't find information on how they did this scene specifically but usually when you needa subject like people for example in a reflection they are usually filmed from the required angle or are actually modelled, textured and animated. This method can produce much better results if done well but is much more costly and time consuming. I also like how the animators matched the movement of Optimus's legs to move behind Sam exactly as he blocks the light. Little things like this are often planned by the vfx supervisors sometimes even at the time of filming to make things in post easier.
During my research I came across Erik Winquist, a VFX supervisor who I found particularly inspiring. He graduated Ringling College of Art and Design with a degree in computer animation and started his career in 1998 when he was hired as an assistant animator at Pacific Data Images. Fast forward a few years and he's working at Weta Digital and has been involved in the making of huge films such as The Lord of the Rings: The Two Towers, War for the Planet of the Apes, Peter Jackson's King Kong, Avatar and many more. He claims that every show is completely different from the last and as a result a lot of problem solving is required, especially when you have no idea how you're going to accomplish an end goal at the outset. Erik says he and his team are constantly jumping in and out of Maya and always have a Nuke session open for one thing or another. This brings me onto my next point, compositing.
Compositing in its simplest form is combining multiple assets that were created seperately into one scene to make it seem like it was all shot together. One of the challenges a compositor must deal with is the tracking of the clean plate. This is so that the digital camera within the animation software is moving around the model in a way that matches the tracker footage. There are a number of softwares that can be used to track a camera through 3D space, After Effects, SynthEyes and 3DEqualizer just to name a few. I'm going to focus primarily on Nuke though later in the video since it was mentioned by Erik Winquist and is easily accessible.
I was encouraged to try and utilise the knowledge and techniques that I've been researching and give 3D compositing a shot myself. If I take the necessary steps it should allow me to bridge the gap between 3d animation and the real world.
So first thing I did was take a simple video with as little shake or movement as I could manage so that Nuke would be able to track it easily. The software tracks specific points on the footage and uses the data to calculate a 3D space and the movements of a camera through this space.
This is a character I created who's supposed to be made from a material with similar properties to diamond or glass. I chose him to be my Guinea pig in this particular experiment because I thought his transparency would react with lights in interesting ways. Within Maya I created square lights above the model in the same formation as those within the room I filmed in to make the lighting as accurate as I could. Despite this you'll never really be able to perfectly replicate the lighting conditions without recreating the environment within Maya to simulate how the light actually bounces around the setting.
Unfortunately I wasn't able to capture a great quality environment light. HDRI stands for high dynamic range image and is basically an image that shows a greater range in luminance levels compared to a standard image by reducing the loss of detail in the highlights and shadows. This is often achieved by creating a blend of several images that were taken at different exposures. I only had my phone and an app I downloaded to help create the image so it didn't turn out great. Not that this matters much though since I'm just using this as an opportunity to learn more about VFX processes and on top of that I didn't know how to correctly apply the hdri image to the scene and I encountered quite a few render problems while trying to work around this. In the end I decided to just render out what I had and this is the result. Unfortunately as you can see the model doesn't look convincingly embedded with the image. I assume this is partly due to the absence of environment lighting or the lack of scratches and imperfections on the model that you would expect to see on a real object which would otherwise reflect light differently. I actually think biggest reason though is the noise levels of the plate versus that of the clean model. The contrast really ruins it for me. At the end of the day though I got to experiment with some new software and while I don't yet have access to all the necessary tools that are required to create the convincing VFX shots I'm after I still think it was a decent first attempt. I'm excited for next semester to learn more about compositing.
Now what to possibly do with all these newfound skills? While researching career paths I tried to stay away from the hugely successful, international companies like Weta Digital or ILM and look for smaller, more local and UK based companies. I came across a company called Milk which I'd never actually heard of but was suprised to discover that they're an award-winning independent vfx company based in London that have worked on TV shows and movies such as Doctor Who, The Martian and The Chronicles of Narnia to name a few. They are currently advertising a lot of available roles at the studio, one of which being compositors. Some of the qualifications they list to become a compositor include a good working knowledge of Nuke, a degree in related fields of film, communications and art, and ideally at least two years experience in feature films. Some interesting statistics about the industry include Closer to home still is the company...
I've often thought about how an independent career away from a studio might play out. There were several guest speakers who came in to talk to the animation department over the semester about possible roads to go down when searching a career. At the moment not many interested me but the one that stood out was James Beavers. He created a YouTube channel mainly focused on gaming with over 2.5 million subscribers. What's interesting though is he studied the animation course at Northumbria university as well and has gone on to create this really sucessful channel. Owning a popular YouTube channel has always been something I thought was pretty cool and it made me think of alternative career paths that I could go down. Another YouTube channel that I'm fond of is Corridor. They have actually taught me a considerable amount of what I know about VFX and they make videos like this, similar to what I could one day produce with the knowledge and skills I develop.
0 notes
Text
Serf for Turf Team Post-Mortem
Serf for Turf Team Post-Mortem
Dylan Bronstein
“Serf for Turf,” even as a digital prototype, was an interesting process to undergo – and I do call it a process more so than a game. It was an emotional roller coaster that was exhausting, taxing, and enlightening all at once. Above all other things, “Serf for Turf” was an illuminative undertaking – I very well may have learned nearly as much in the 4 weeks spent on it in terms of game design than I have in the near 27-years prior. To understand what the team underwent, and to understand what can be learned from “Serf for Turf,” it is firstly important to understand where the team started.
“Serf for Turf” was born as “Taft Tub,” what can at best (and most generously) be described as a 3D clone of Bally Midway’s “Rampage” on a smaller-scale – instead of a giant monster, you were to be William Taft stuck in a bathtub, and instead of destroying cities, you were to destroy the White House in search of your favorite rubber ducky. We quickly realized that this wasn’t a viable product for us going forward, granted, we did not realize this until almost a week had been sunk into “Taft Tub.” After a team meeting, we decided to pivot to “Serf for Turf,” an arena-styled action RPG which would be modular and easy to scale up as we completed tasks.
It made sense, on paper: 6 full-time developers on the team, 4 3D artists, a producer, and a full-time designer. We recognized work weighting would likely have to be skewed due to dependencies on code and art having more-than-10-hour (our agreed upon work weeks) task durations – some members might need to do 15 hours one week and 5 the next. None-the-less, design was discussed with the team, scoping concerns were addressed, and we decided to forage onwards.
The Problems
Things went wrong early on. Our producer had an emergency and had to be absent for our first team meeting on “Serf for Turf,” and without a producer, organization was immediately lacking. People were confused about tasks, data was organized in ways that people weren’t entirely comfortable with, and coordinating scene access became increasingly difficult. Code was breaking as quickly as it was being written.
In no small part, our producer being absent forced the team in a bit of a pickle: no one had capacity available to undertake production tasks with our producer absent, and so the cliché of game design being like herding cats became a reality for us. Our first attempt at stitching everyone’s pieces together resulted in a five-and-a-half-hour undertaking where we failed to meet nearly half of our milestones.
Organization was a colossal issue throughout the entire process. Whether it was naming conventions within the hierarchy, coding comments and naming conventions, or even just file organization within the project itself, things were simply everywhere. Finding the individual piece you needed at times required the person that put it into the project to guide you to where it ultimately wound up.
Communication remained an issue for us. Even once our producer returned, team members remained confused about what specifically they were supposed to do. Due dates for pieces began slipping, and as that happened, dependencies on those pieces had to either be reduced in scope or rushed in implementation. The frantic pacing often meant things were implemented below desired quality, even for a prototype. Even in terms of art, there was some degree of confusion – despite the team agreeing upon a chibi, cartoony, low-poly style, some photo-realistic assets were being pushed.
Though it’s a subsection of communication, assumptions were another large issue for the team. These ranged from assumptions about how code would be implemented (causing dependencies to sometimes be incorrectly developed due to having to be developed concurrently with their parent), how files would be organized, about experience levels, about familiarity with software. Even with the team being invited to ask questions and ask for help when it was needed, people often would make preventable mistakes simply because things were assumed. In one instance, over four hours of work were lost as a bad push to the repository managed to not only force all project members to have an over fifteen-minute pull but undid several hours of work by corrupting prefabs used within the scenes. It was a completely preventable error had instructions been followed and questions were asked. In another instance, a level was completed without colliders implemented at all. Assumptions plagued the team and left the product looking grossly underdeveloped for the number of hours that went into it.
The Successes
This is not to say all was bad with “Serf for Turf.” The team had a lot of successes along the way, the largest of which I would label as “adaptability.” Each week, as our organizational dysfunction forced milestones to slip, the team was more than willing to adjust to what was rapidly evolving design. Even in the final stretch of development on the game, the team still was willing to shift as was needed when time began ticking low on the clock.
The team also must be commended for its willingness to make things happen. In spite of the bugs, in spite of the miscommunications, the team did its best to not miss milestones. Yes, content didn’t make it into the game when it should have, yes, design had to be adjusted to account for the reality of our resource availability, but when it came time to grind things out for a milestone, the team gave it its all. It was all-hands-on-deck when it needed to be, and though our final product doesn’t necessarily reflect the effort that went into “Serf for Turf,” broadly speaking I am proud of the team for its Monday-night efforts.
Finally, the team’s ability to keep its composure and morale high is to be lauded. It is astounding to see anyone on a team able to still laugh and joke with each other after having to put in a fifteen-and-a-half-hour day, and yet, it happened. Whether it was completely pivoting our design or scrambling to stitch together broken code, the team managed to enjoy itself no matter how grim things got.
Conclusions
I do not think “Serf for Turf” is done. I think, in the earnest 3 weeks of active development the game had, something worth pursuing was discovered in “Serf for Turf.” I am eager to see what else the team can do with the project, should everyone want to continue. Even if not the entire team wants to move forward with it, it could be worth pursuing with those that are interested. We’ve had an opportunity to learn and grow a lot from “Serf for Turf,” and I look forward to applying those lessons going forward.
0 notes
Last Seen Blogs

shanicedalz
Shanice Dalz

absolutelyladywhistledown
Lady Whistledown
karenfordonte
Caring For Donte

reanthebean
me? gay
karenfordonte
Caring For Donte