
Last Seen Blogs

dbgtj14578
無標題

stuartbahn
Stuart Bahn
thewallsarespeaking
The Walls Are Speaking

cuco1369
Relocation Consultant
Text
Week 9 Progress
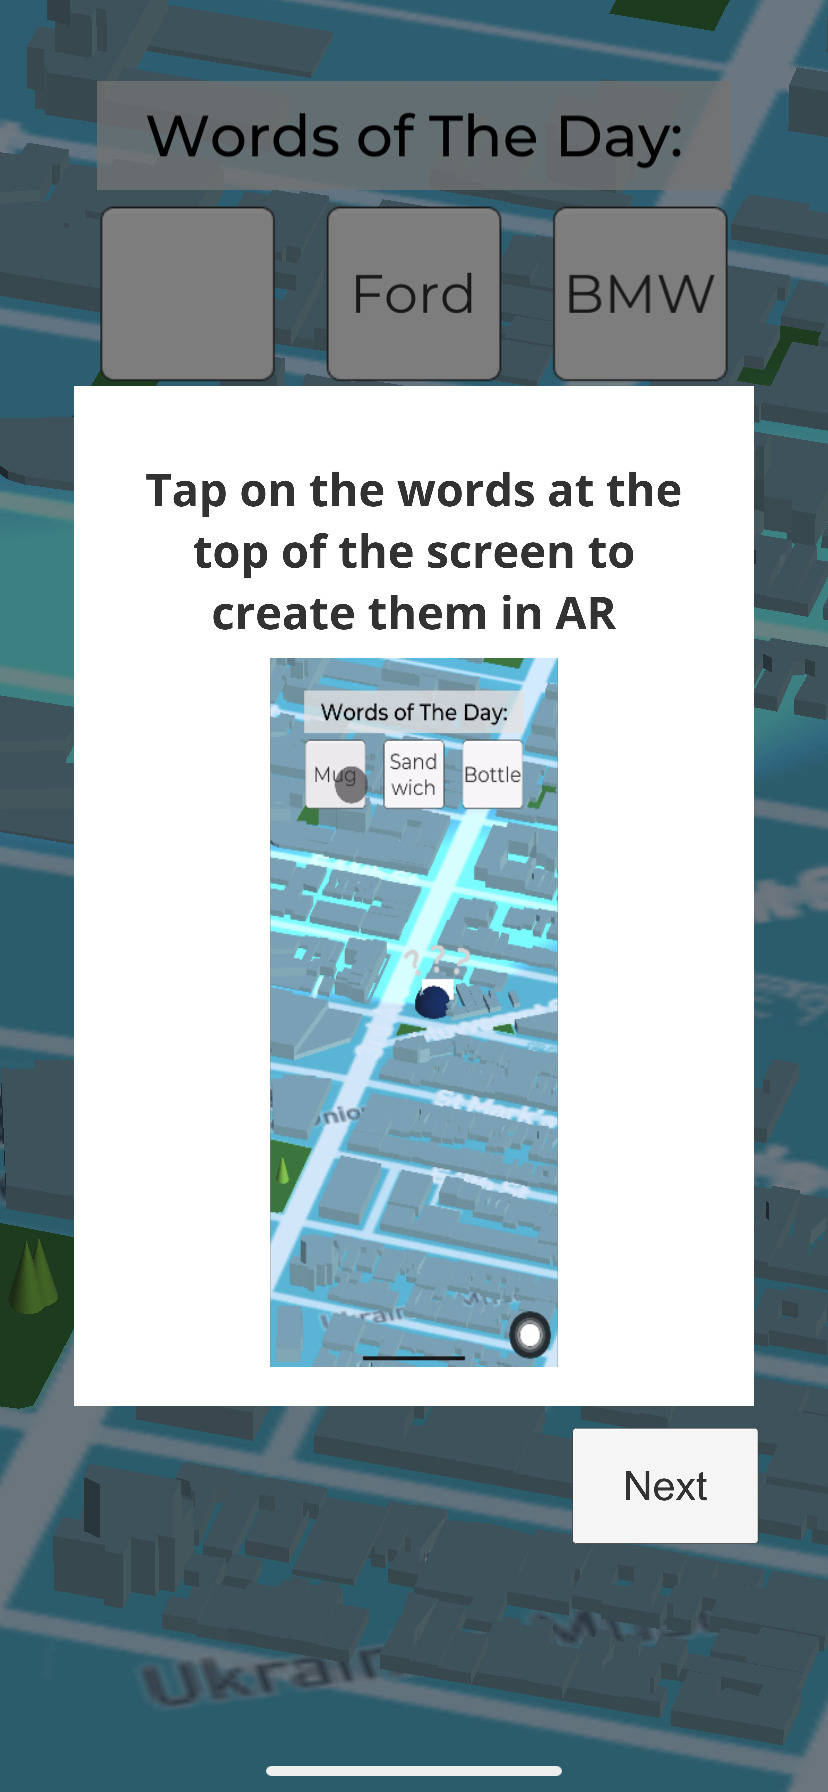
This week I finished deploying a build on TestFlight (I have asked my mentor for his Apple ID so I can send the app to his account, will do the same for my other panel members). I spent a lot of time making sure the build was just right, my time was spent fixing small issues that had been bothering me. I believe that this should be the final iteration of my capstone project. I added a tutorial walk through to the dashboard/map page of the application. I fixed an issue with registration when using the iOS build that I previously missed. I also changed the colors of the marker (as one of my user testers suggested) to allow it to stand out more from the map.
I have been working on gathering videos and screenshots for the video that I intend to make for presenting the project.

0 notes
Text
Week 8 Progress
This week I worked on fixing a bug related to uploading the 3D model to the database. Whenever I would create objects with over 50ish primitives/brush strokes, viewing that model later would be incomplete. I did some debugging and eventually realized that the my database was rejecting updates after many requests in a short time period. I changed the code to space out the time taken between uploading different primitives. Though the upload time is significantly longer, this was the only way I could figure out to guarantee that the model was completely uploaded due to network restrictions.
As written about during my solicited feedback assignment, I decided to create a tutorial walk through. I have made one for the creation mode and have linked to it below. It consists of GIFs showing the features in use and a little bit of text describing how it is used.
Lastly, I worked on deploying the application to TestFlight. The application took nearly half a day to get approved by Apple, and it is ready to be distributed. However, I will wait until sometime this weekend to start distributing it because I want to include the walk through tutorial before further distribution.
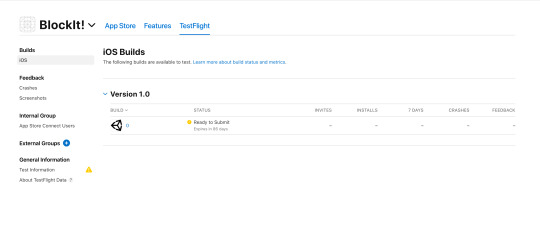
Application ready for TestFlight
youtube
Link to video: https://youtu.be/FirRHXEzH94
0 notes
Text
Week 7 Progress
This week I worked on trying to track down a bug with the application that made the marker seem like it was not moving on the map. I managed to figure out that some of the function calls I was making were slowing down the map interface because of the frequency of their calls. I reduced the number of calls but the map interface is still laggy. The only visual change to the application was the changing of the horizontal plane asset used to signify locations that you could “build” on. I changed it to a dotted mesh from a semi-opaque “mat” that was the default. I had scene this asset in other AR tutorial videos but was unsure of how to find it. I eventually found it in an old GitHub repository that Unity has for developing a basic AR application.
The most significant progress I made was prohibiting users from posting multiple times throughout the day. If the user had posted three times that day, they would be notified that they are out of objects they “can” post. I did this by adding a new field to the table, and now store the date when the object was posted to the database. I changed some of the PHP logic to ensure that the UI would be updated accordingly.
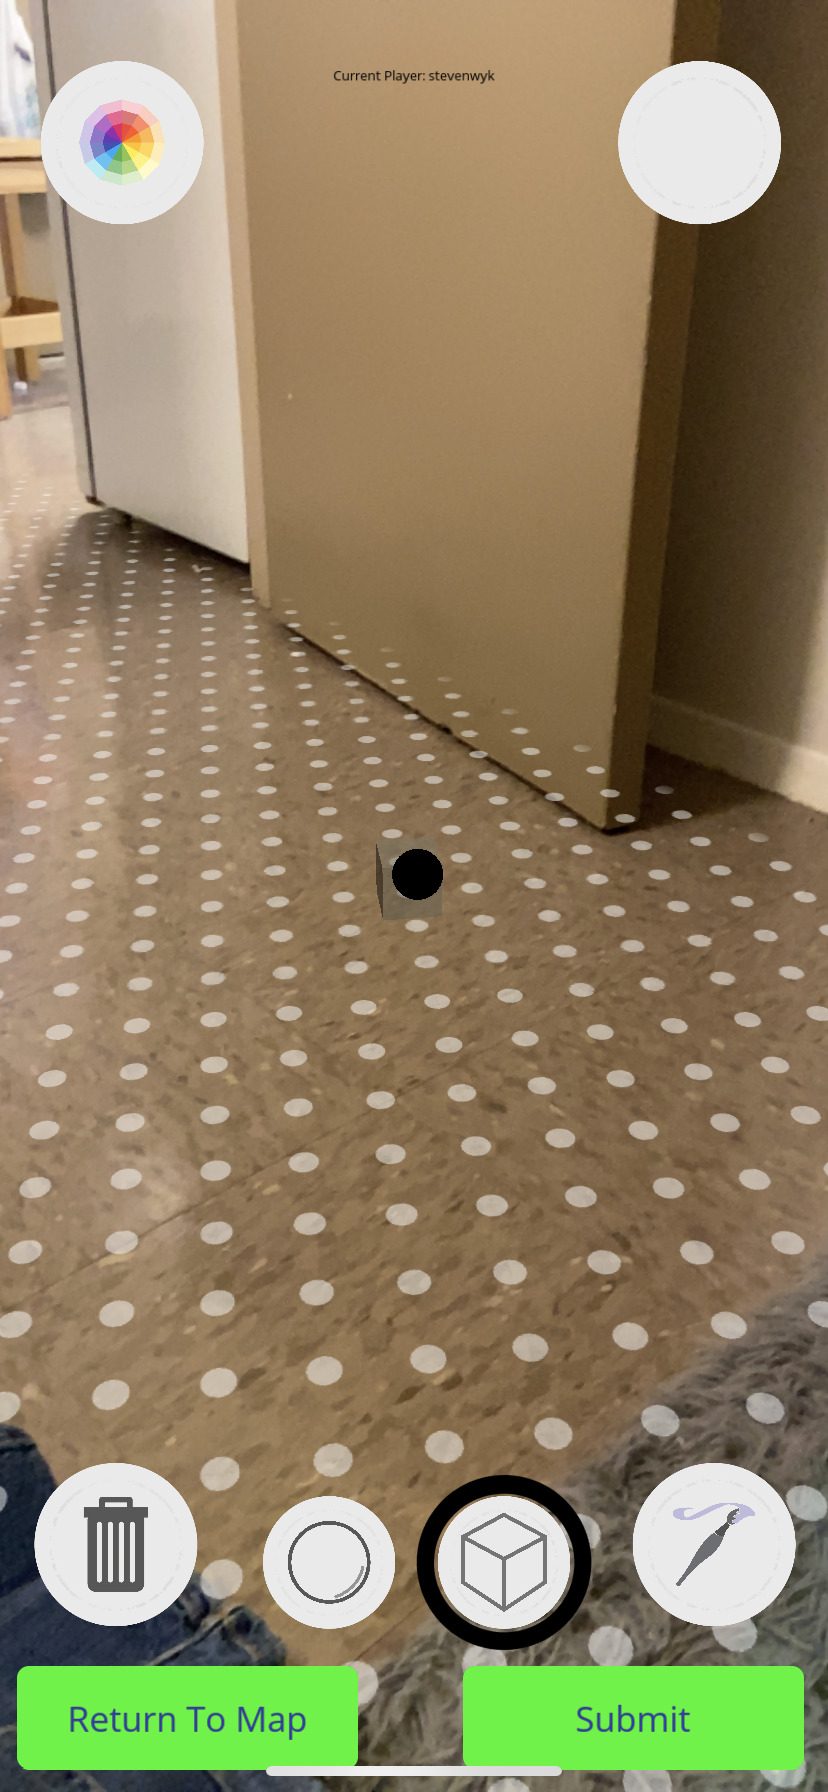
new plane material
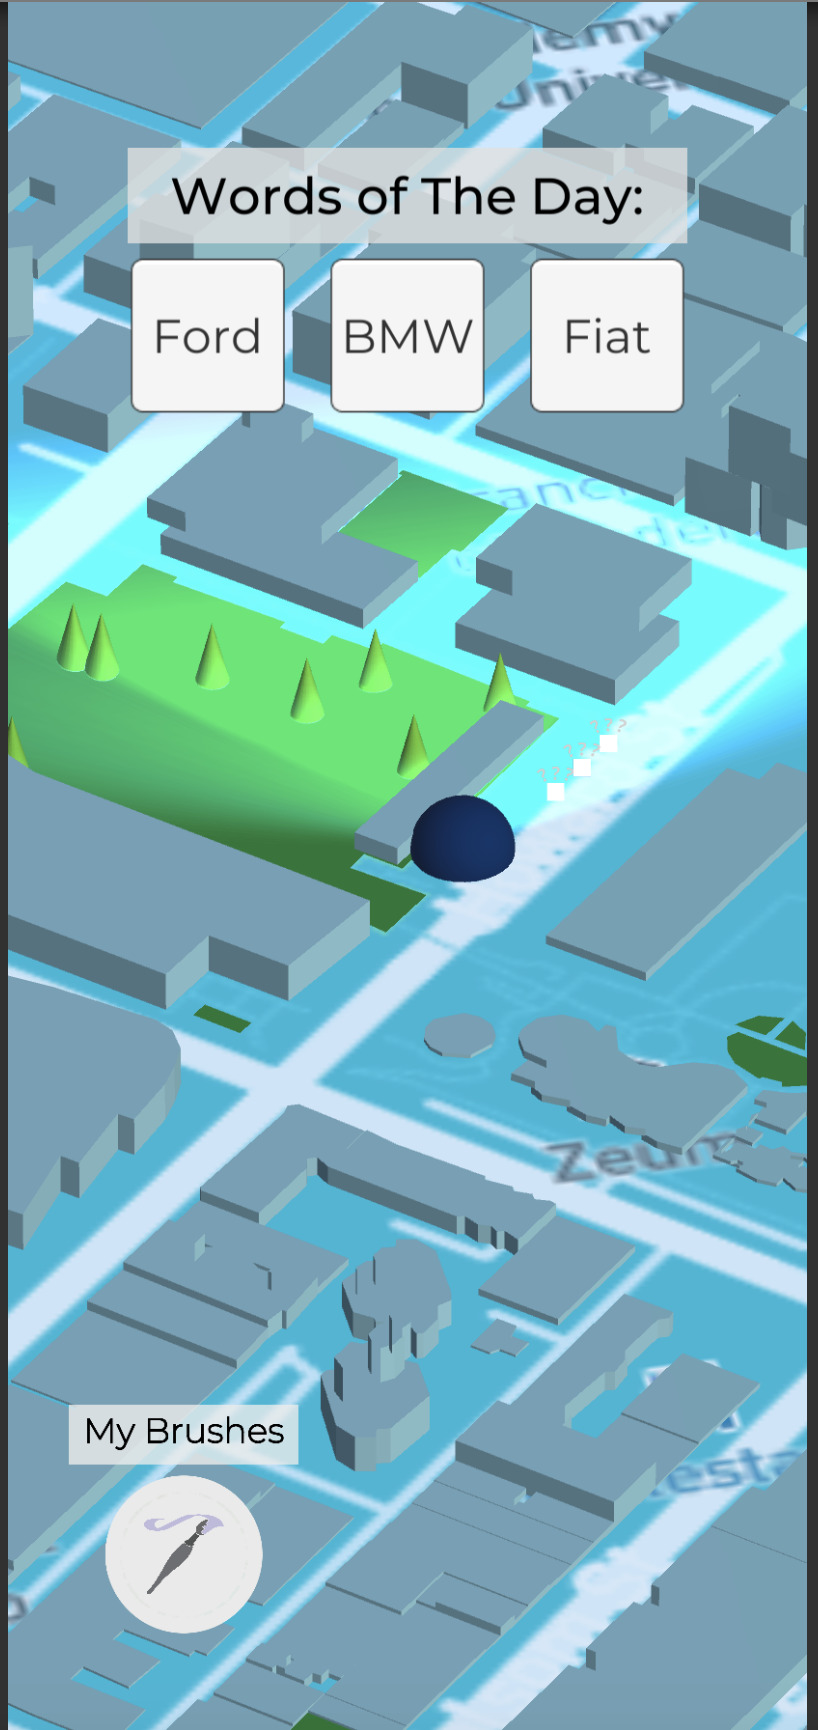
no objects posted that day (three available to post)

one object posted today (two left to post)
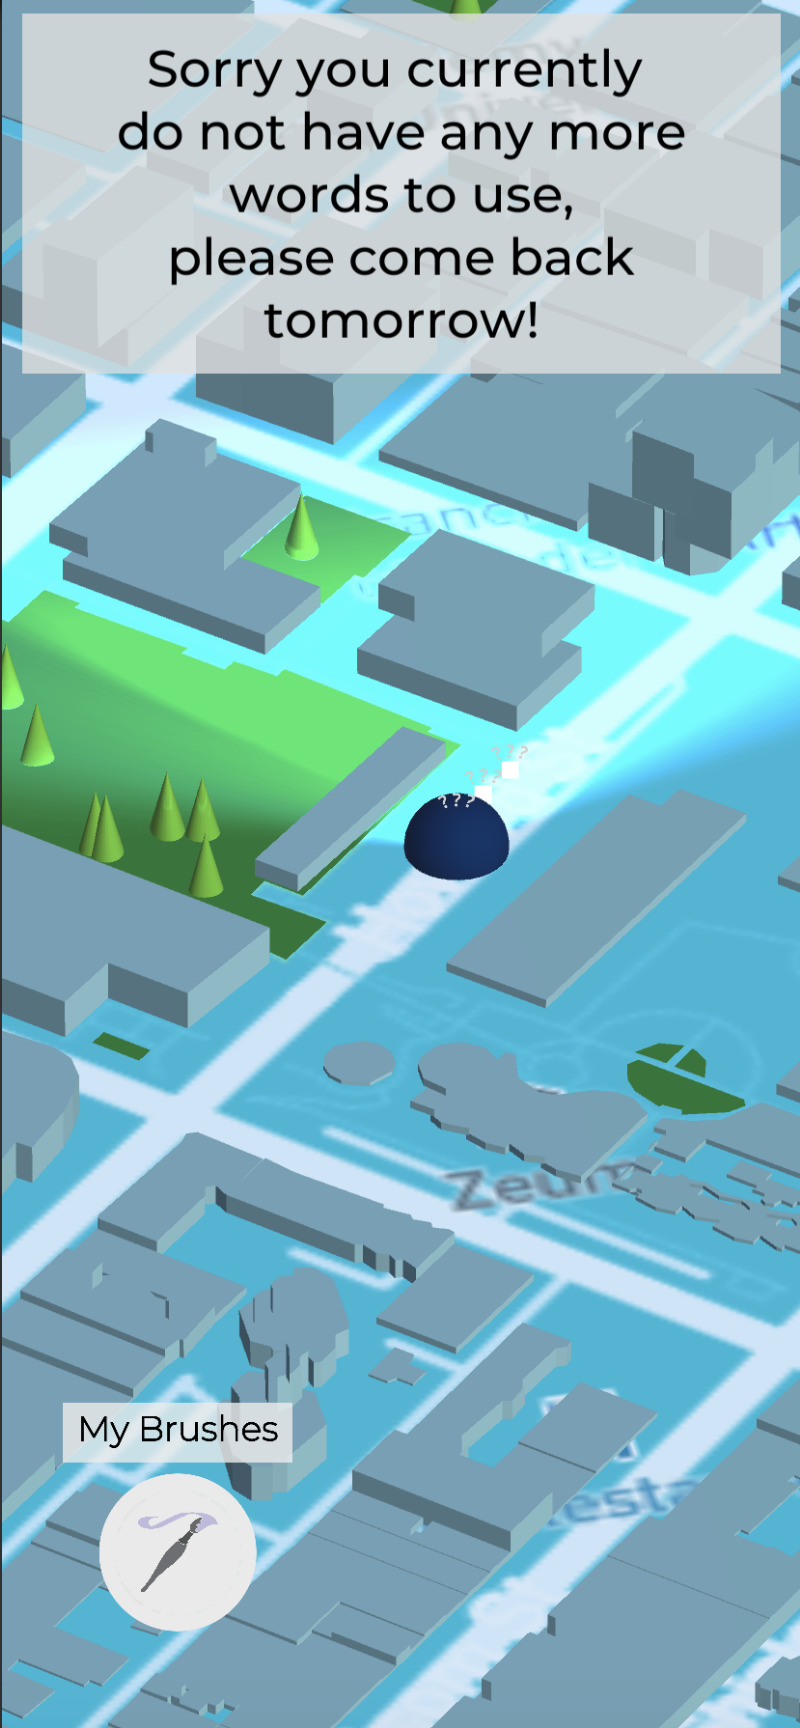
posted thrice that day (no more words to post)
0 notes
Text
Week Five Progress
This week I worked further on the ability to delete a word from an array. In the video shown below, I click on the word “Ford” and it takes me to the scene where I can create objects. I show the database with the final entry showing “BMW,Fiat,Ford.” After the submit button is clicked, the word “Ford” gets removed from that entry in the table through the use of a PHP script I wrote this week, becoming “BMW,Fiat.” I also worked on changing some of the asynchronous aspects of the application which I found challenging at first. In order to wait for the PHP scripts to return data from the database, I would write a return statement that waited x amount of seconds. Of course, this fixed time value is not effective due to differences in devices and network connection, so I had to change all of these to asynchronous functions that would wait for the data to be returned rather than executing successive lines of code after a certain time limit. Unfortunately, my work on this showed me an issue with the moving person marker. It was previously working but I am not sure what changed that prevents the person from moving. I spent some time working on trying to fix this over the weekend but have not found what the issue is.
Link to video: https://youtu.be/KHK_yLmF3aw
youtube
0 notes
Text
Week Four Progress
This week I worked on adding the guessing functionality. For now, when the user clicks on one of the markers they are able to see how many letters are in that word that they must guess. If the user successfully types in a correct letter at the right spot the image below the underscore changes from an “X” to a checkmark. When all the letters of the word are guessed correctly, a function that calls a PHP script is used to insert the guess to the database. I made a table called “guesses” which contains the ID for the word, the user who guessed it and the user who created this. The reason for this is to filter for markers/words that have already been successfully guessed by the user. If the user has already guessed a word posted by another player, they should not be able to access that marker/work on their map.
As it can be seen in the video, once the word is successfully guessed for the first marker, the marker disappears from the map once I return to it in the demo.
Finally, in the upper-left corner of the map several words can be seen that appear as interactable buttons. I added an array of words (for now it just has placeholders of BMW, Fiat and Ford) to the database that are the words the user can post objects of. When a user registers, the sequence of words is randomly shuffled so that the same words are not posted by the players as they join the game. By next week I hope to delete these available words from the database if a user creates an object with them.
Link to YouTube: https://youtu.be/bBc-Br7RYlc
youtube
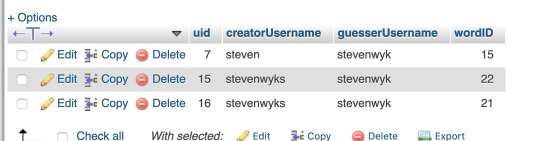
Image of schema for “guesses” table.
0 notes
Text
Week 3 Progress
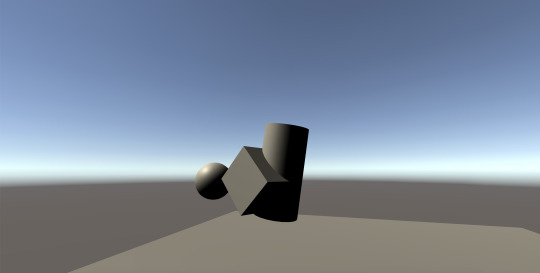
This week I added the positions of the trail that users could draw as well as the specific colors of the trails and shapes used. This took a lot of work digging through the Unity documentation on how to use the data associated with the Trail Renderer component in Unity. Luckily this could be read as an array of Vector 3 values. Pulling this string of data from the database was a bit of a challenge, luckily Unity’s JSON library allowed me to convert it back to Vector 3 and it all seems to work fine. As it can be seen in the screenshot, the distance between the camera and the shapes that the user created with is something that I need to figure out. The camera rig and/or the shapes themselves must be dynamically placed so that the entire object is within the camera view.
I also worked with managing the distance between the user and one of the markers. Ideally, the user should be within a certain distance by the marker before it can interact with it and I was able to program that into the project this week. I coded a short animation that would make a message saying that the user was “too far” appear briefly.

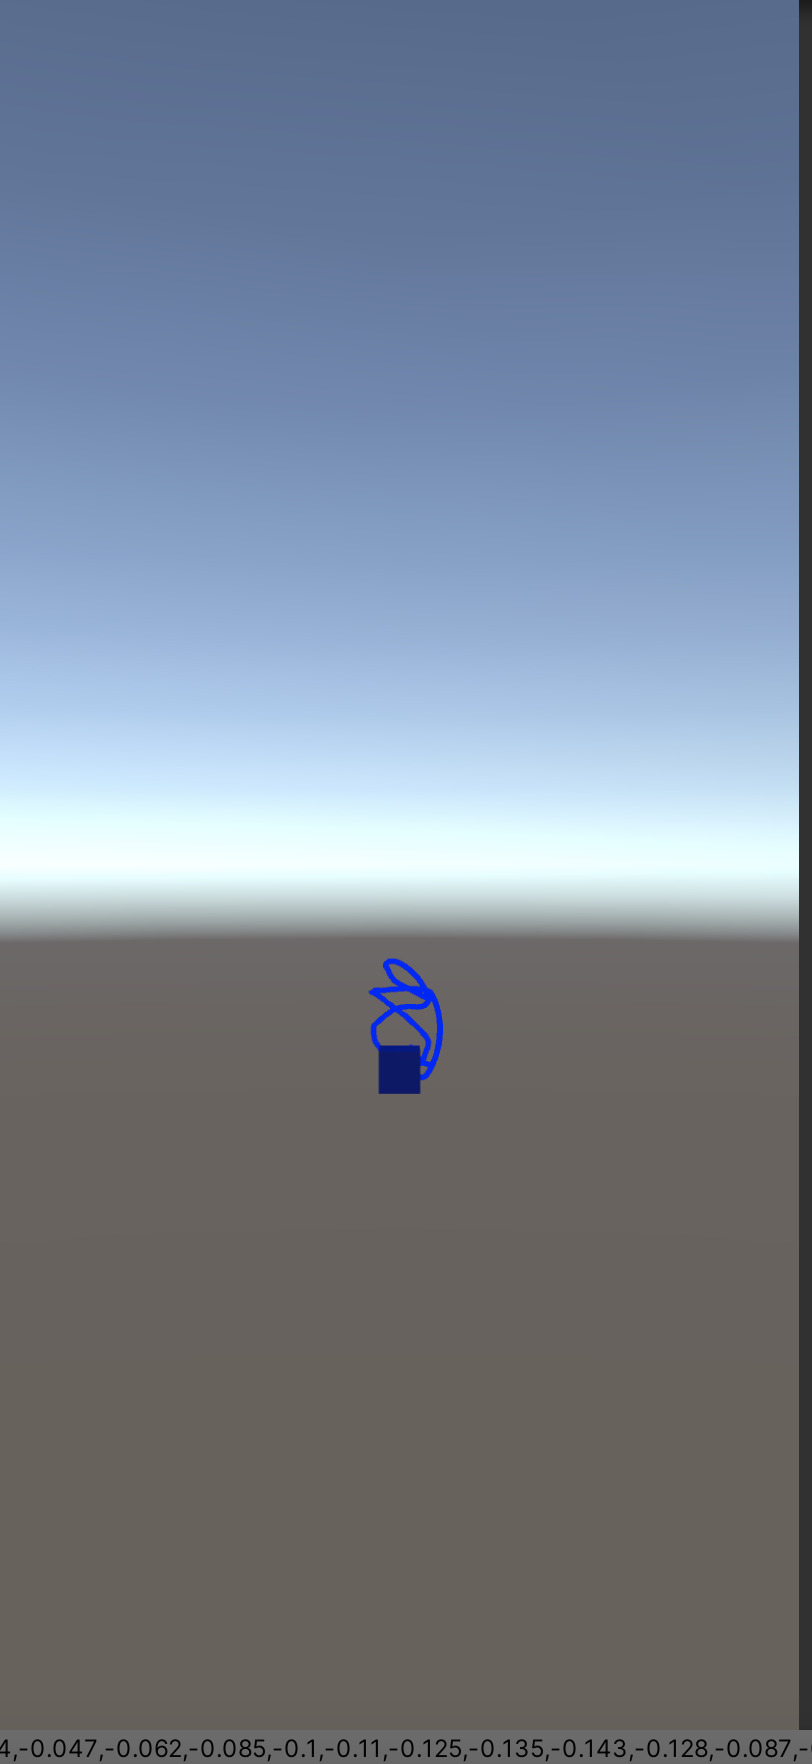
Pulling the posted position of a cube and some trails.
0 notes
Text
Week 2 Progress
This week I began working with Mapbox’s SDK for Unity with an example that came with the Unity package. This example would render an Astronaut that would correspond to the user’s current location and move around accordingly. With the longitude and latitude coordinates I was able to retrieve whenever a user would post a creation (shown in last blog post), these creations would in turn be rendered onto the map at the locations where they were made with a marker. When this marker is tapped, another screen loads that shows what the user created, taking the x, y and z positions of the cubes. All of this is done with Unity scripts that communicate with PHP scripts that I wrote on the server side. By next week I want to support the posting of the trail renderers (free drawing in the air). This will be more complicated as I need to store the position of each position of the renderer efficiently.
The video below was recorded on my Unity Editor rather than my smartphone in order to show that the data call is working properly. The stream of JSON data which is then converted into more “Unity friendly” data is shown on the bottom of the screen recording. The video shows that multiple markers are rendered and each click calls the database and pulls the positions of the cubes and renders them accordingly.
Link to a video: https://youtu.be/oX93UcruzCs
youtube
0 notes
Text
Week 1 Progress
This week I designed the table for the creations of the user (over the winter break it was the table for the users themselves with their login info). So far this includes the position of the shapes and the longitude and latitude coordinates of the user when they click the submit button. The challenge of this was allowing a unique identifier for each shape posted to the database while also maintaining a way for the database to recall which shapes belonged to which user creation. So I had to implement some PHP code to sort through the current IDs in the database and return a new ID to be assigned to all shapes in the new creation. This was challenging and another challenge was implementing this with the iOS build. I had to change a few things in the info.plist (one of the source code files) to be able to access the GPS of the phone with Unity’s game build.
Link to video demo:
https://youtu.be/gwcWE6WfxYg
youtube

Above is the picture of the schema for the posting of the cube and sphere. The longitude and latitude are my current location in New York and are the cube and sphere being seen created in the video demo.
0 notes
Text
Week 11 Prototyping
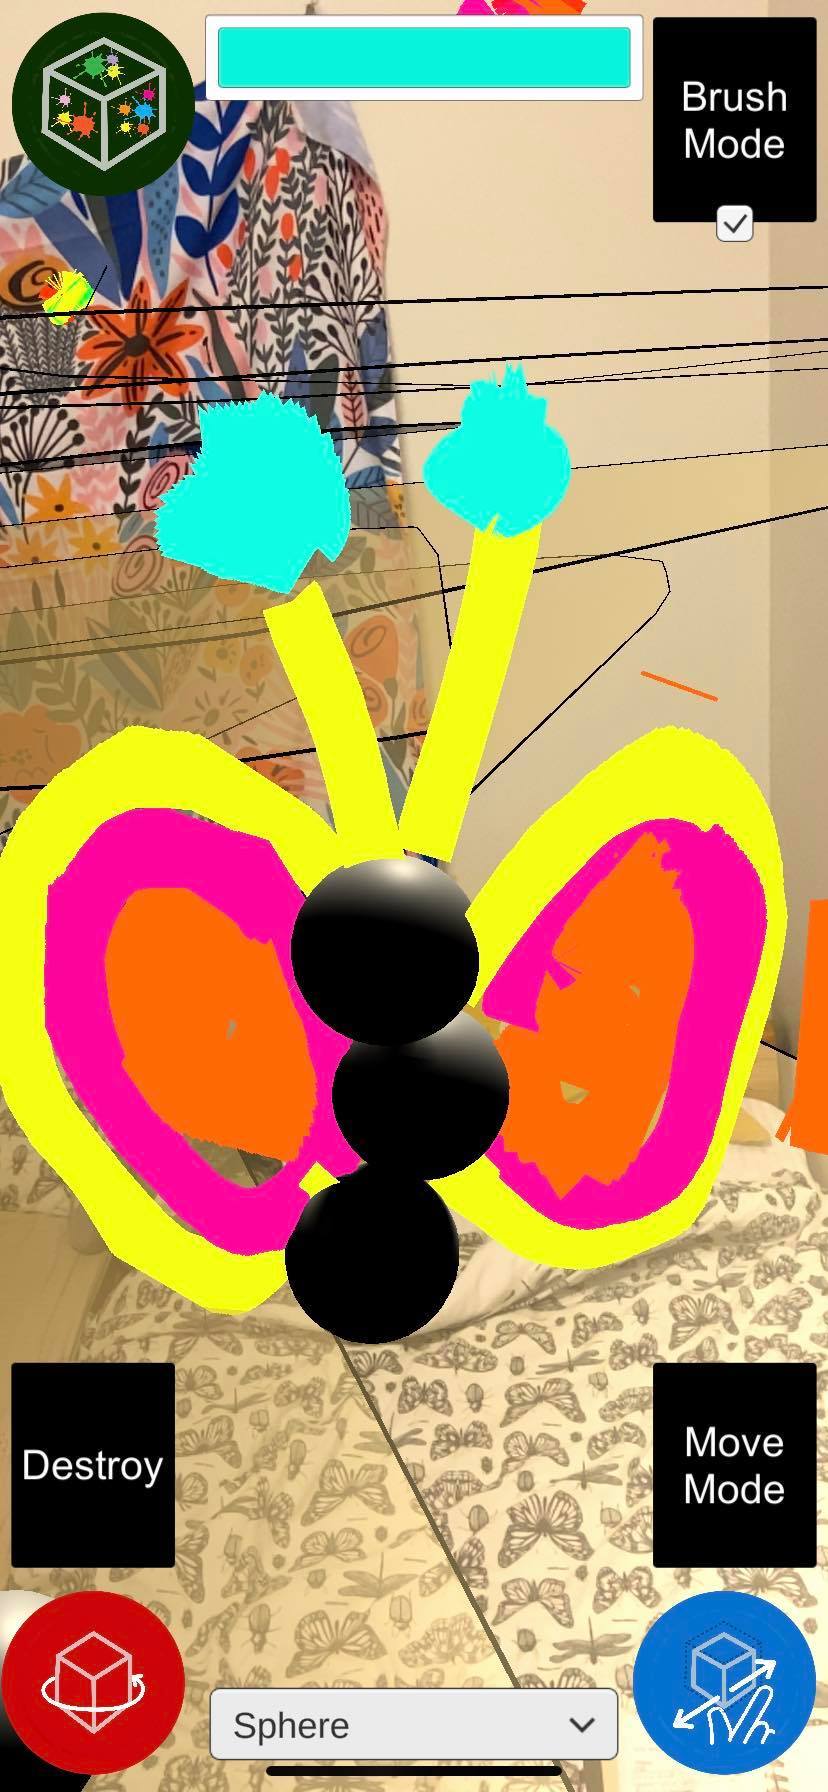
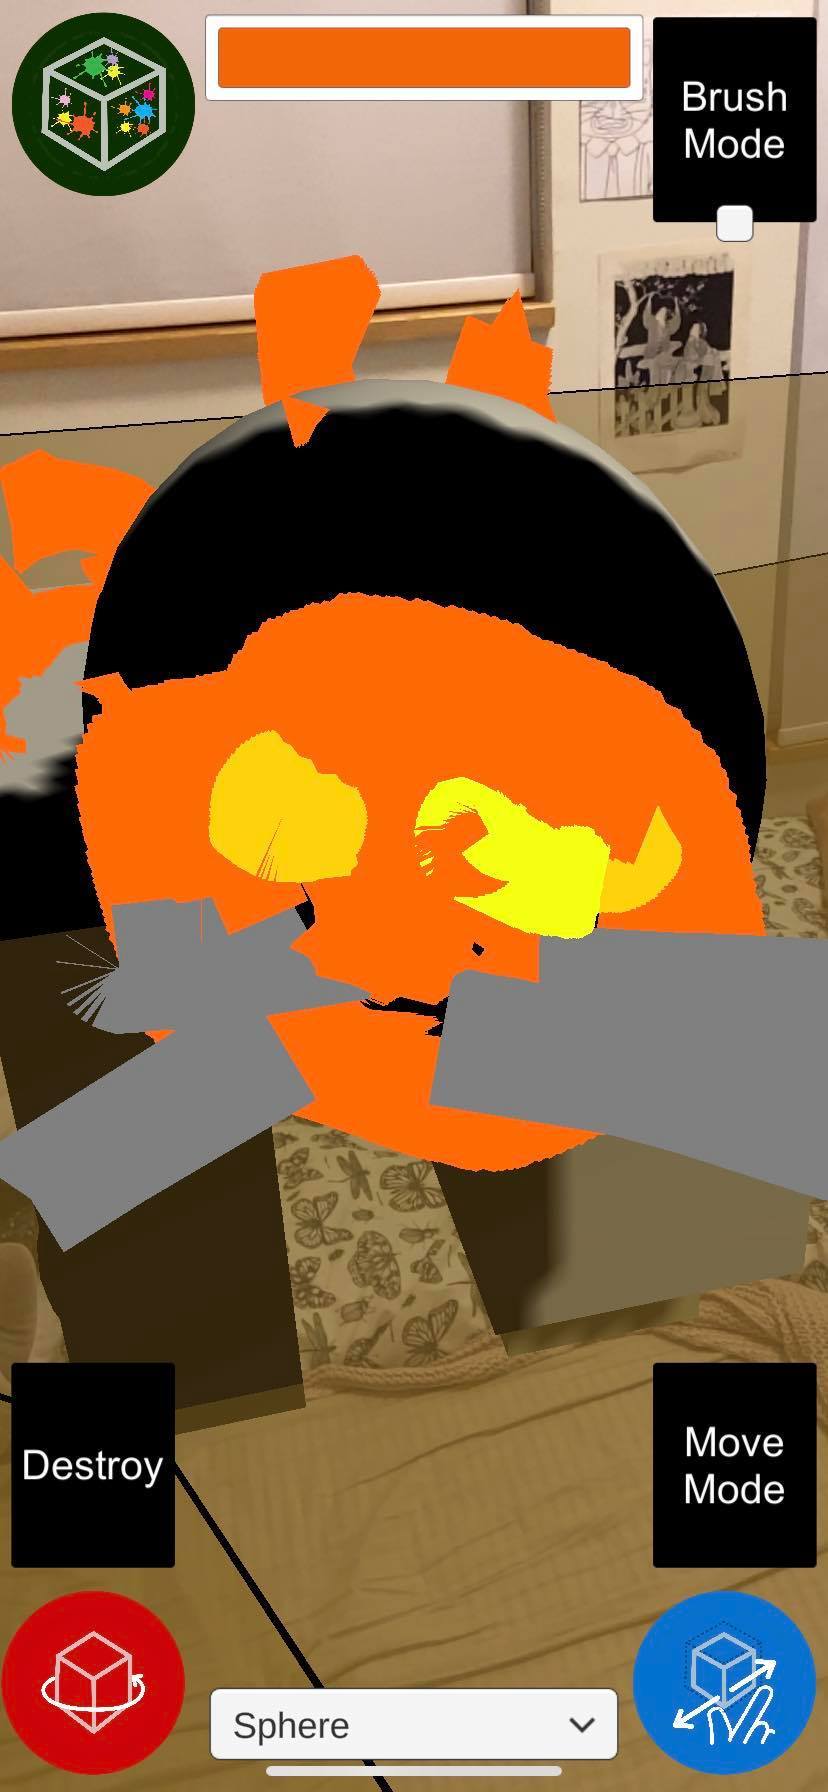
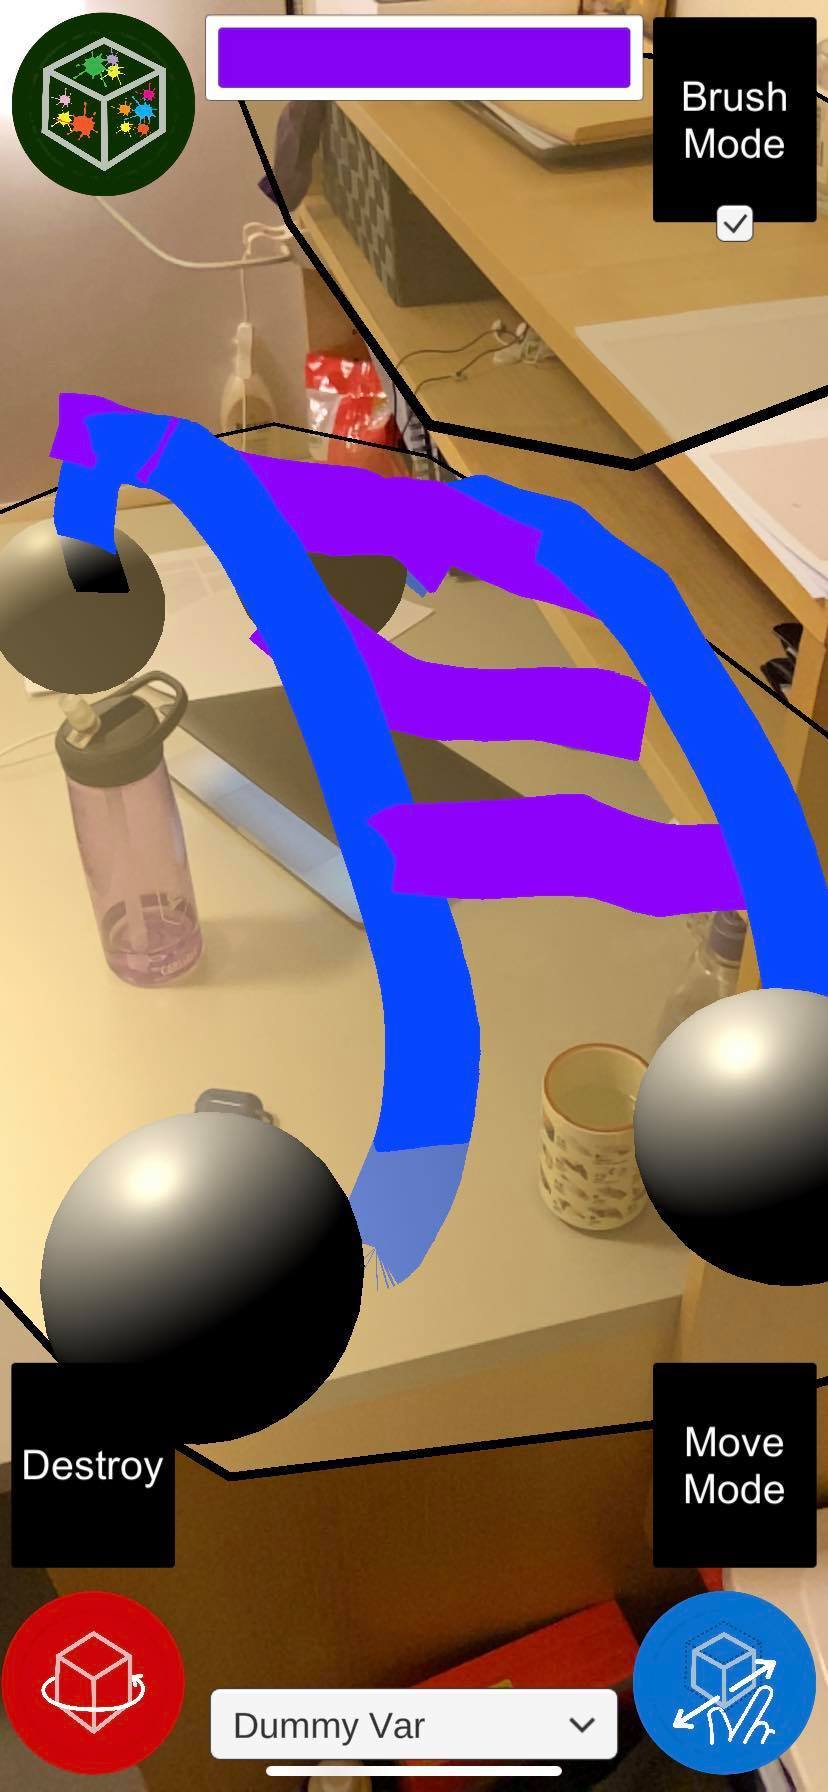
This week I ported the “brush” mode to the AR application and added a way for users to destroy objects they have already placed. After some playing around with the applications perceiving depth/distance from the camera is still difficult, so I also worked on developing a reticle that would display the raycast hit on the objects. Here is a bridge, tiger and butterfly created in the application.
0 notes
Text
Week 10 Prototyping
This week I ported the application to build on my phone. Some features still do not work but I hope to have this all ported fairly soon to begin user testing.
youtube
0 notes
Text
Week 9 Prototyping
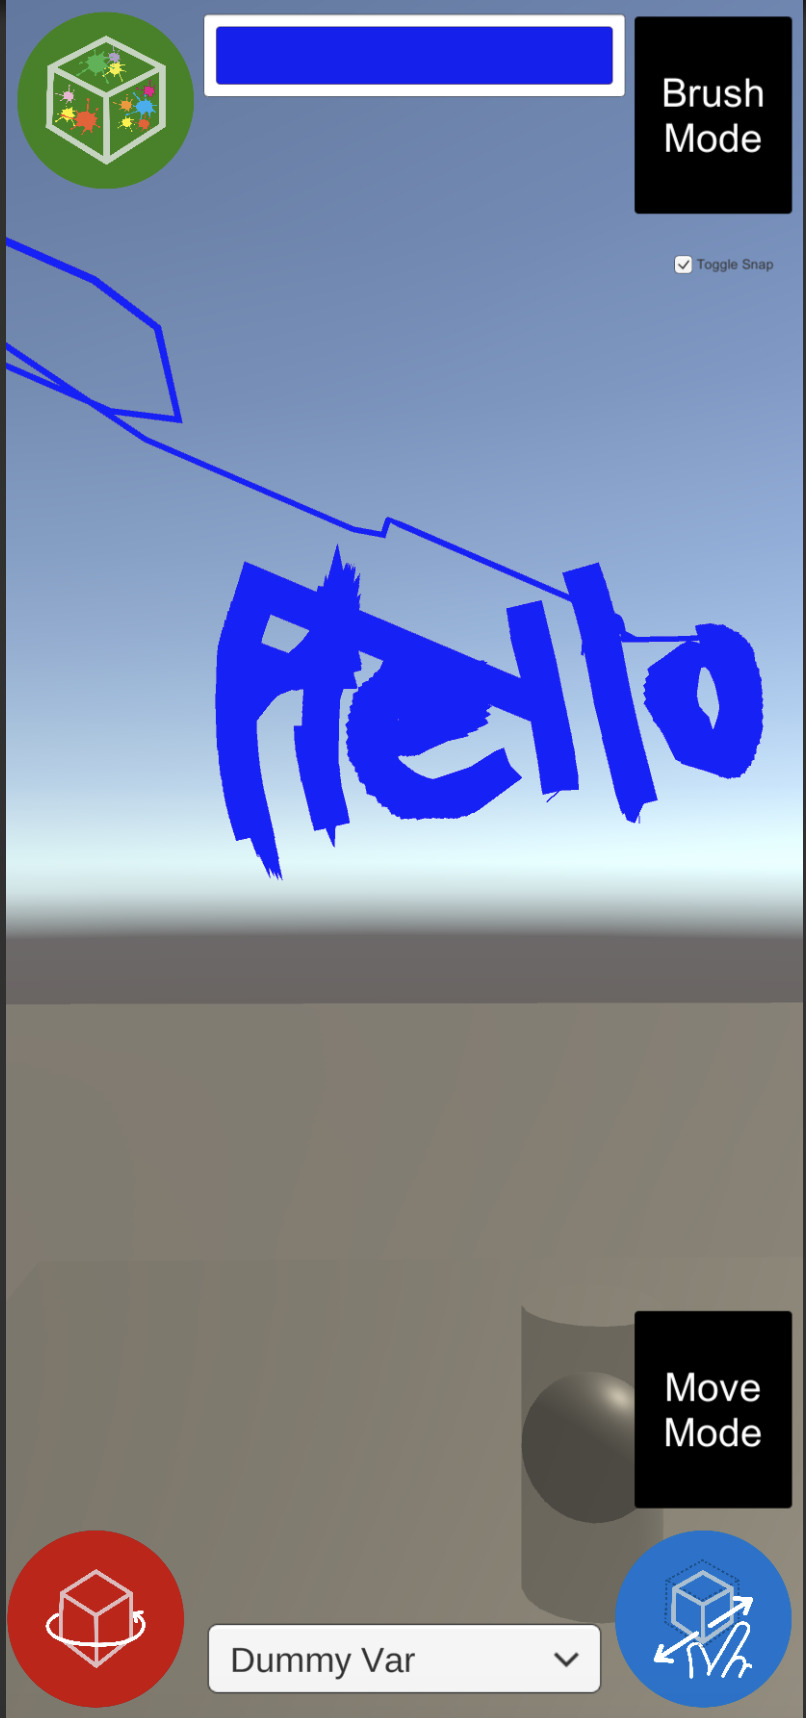
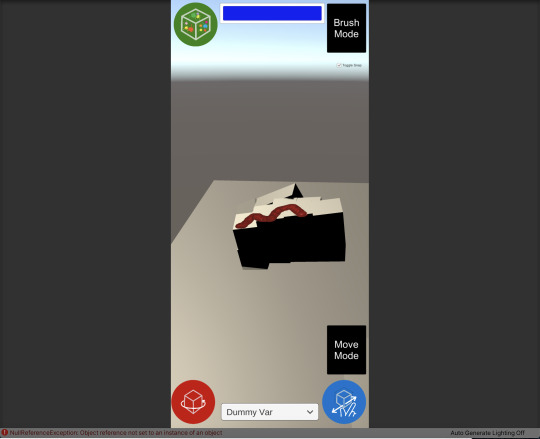
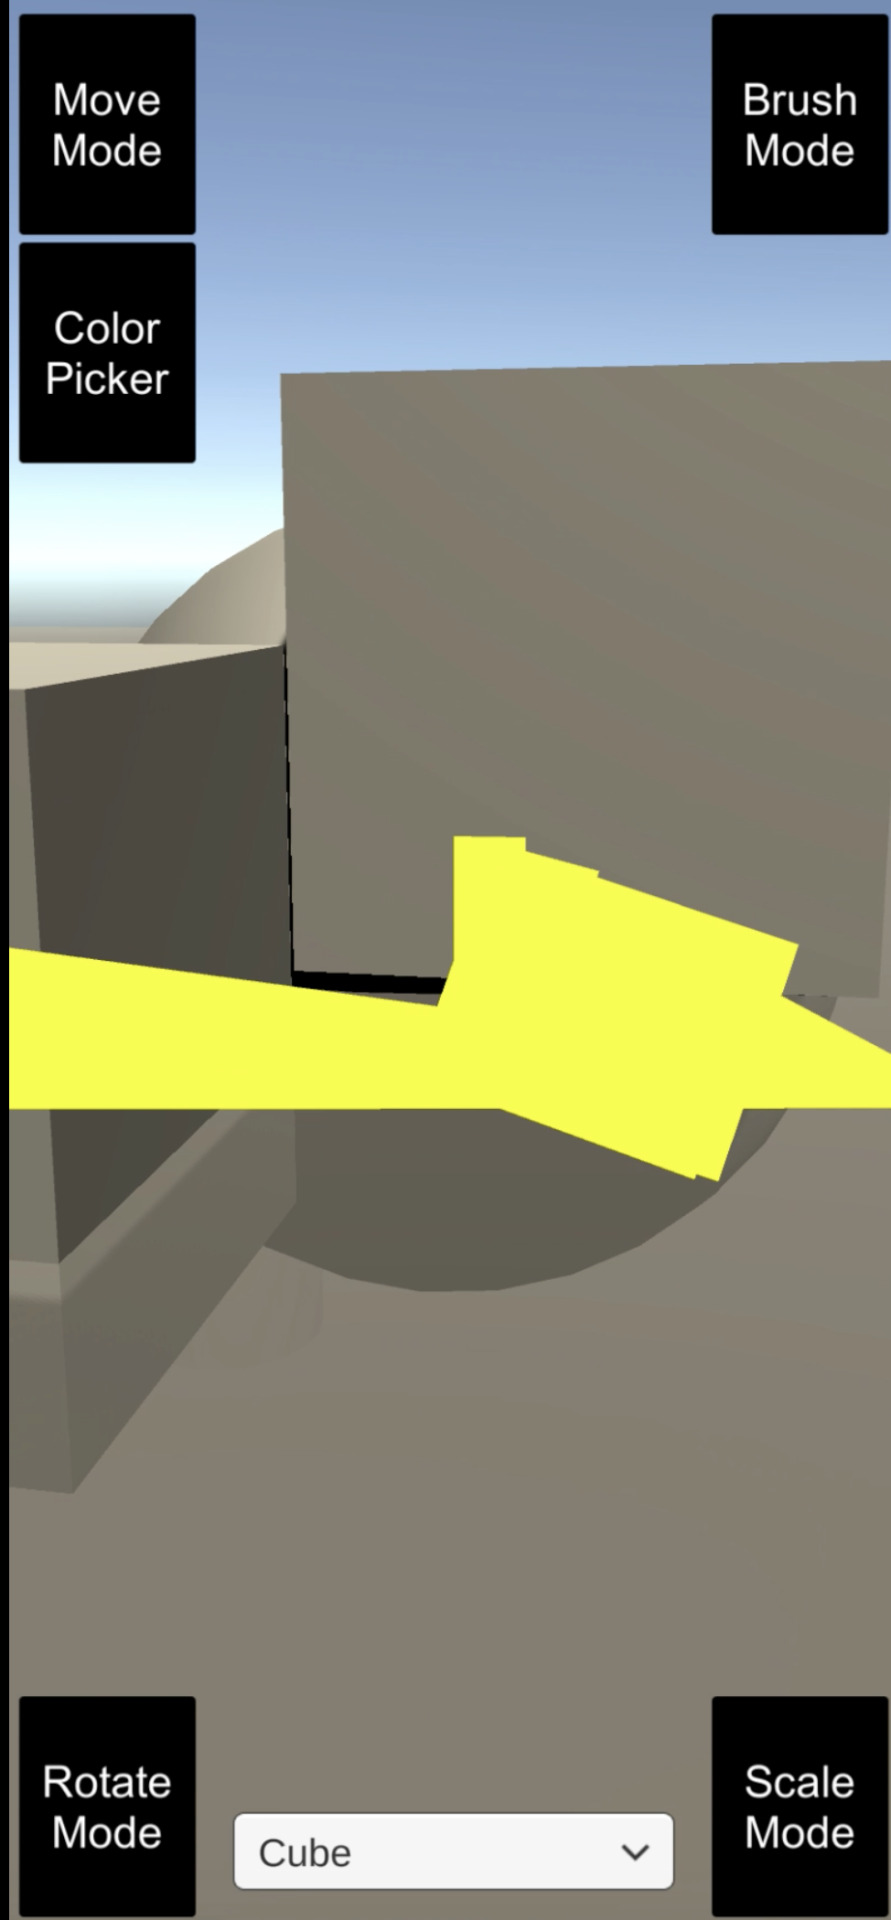
I changed the basic user interface to include a few more icons. There is also a color bar at the top added that toggles the presence of the color wheel. Being able to paint on objects has also been added but is not entirely functional, a lot more work needs to be done on making sure it looks good.

0 notes
Text
Midterm Progress Reflection
I am quite happy with the progress that I have made so far on the project. It has been a lot of fun developing this project and trying out different features in Unity. I received good ideas during the first two prototyping sessions, and I think that the best aspect it left me thinking about is the role augmented reality will play in this experience. Although I believe that AR will have a few pragmatic aspects (which I will discuss later), my project does not compellingly utilize the users direct environment. I have made a basic prototype of the experience with nearly all the features I envision in terms of the main functions of the game. However, it has so far been restrained to just using the Unity editor and using my mouse and keyboard. The UI of the prototype that I have so far does mimic that of the iPhone that I will be using for testing soon.
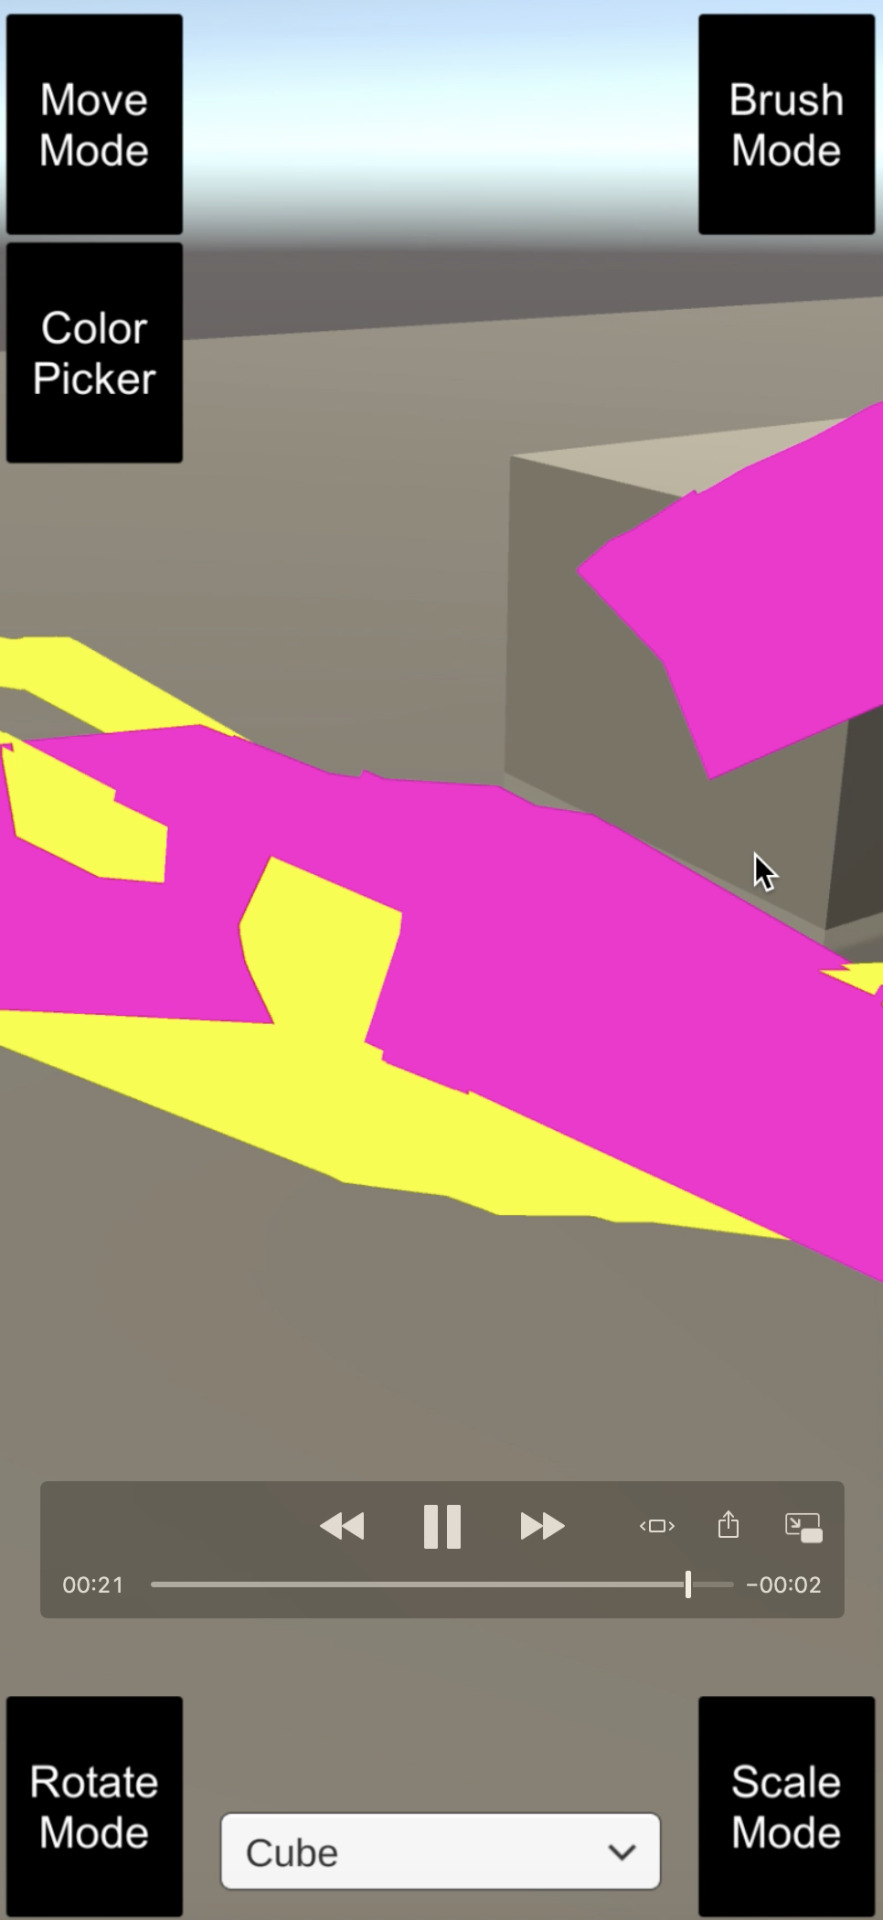
These are the modes I have made so far: “Create mode” allows the user to place shapes on the plane, “move mode” lets the user move placed shapes, “rotate mode” allows them to rotate the placed shapes, “scale mode” allows them to scale the placed shapes, “rig rotation” lets them rotate their creation around a pivot point, “paint mode” lets them paint the placed shapes, and “brush mode” allows them to “draw” color streams in the air. I also pulled an asset from the Unity store that allows a color to be chosen. At the moment this color can be used in the brush and paint modes.
I experimented with two modes so far: a mode intended to mimic AR and a mode that resembles that of strategy games (godlike point-of-view). The mode that mimics AR uses a plane object that is supposed to be (for testing purposes) a horizontal plane in the user’s world that they would use as an anchor. I started off with this as my main idea, experimented a bit with other interaction designs and have since come back to AR. This experimentation was with the “godlike” mode, allowing users to place their shapes on the plane below and pan the camera parallel to the plane. I added the ability to rotate the rig so users have to rotate their creations to view it in different perspectives to aid in their 3D modelling. However, I realized that it was very difficult to accurately design this way, depth was difficult to perceive so I have more or less scrapped this idea. I think I will stick to this being an AR experience as it is relatively easy to perceive depth in three-dimensions as the user has the “real-world” environment to gauge these locations. Furthermore, I want users to be able to draw in the air with the “brush mode” as this is a fun and intuitive way to design and it is very compatible with AR. The paint mode also works more effectively in AR as users can essentially walk around their designs and paint the shapes.
youtube
Experimenting with the “Godlike” point-of-view
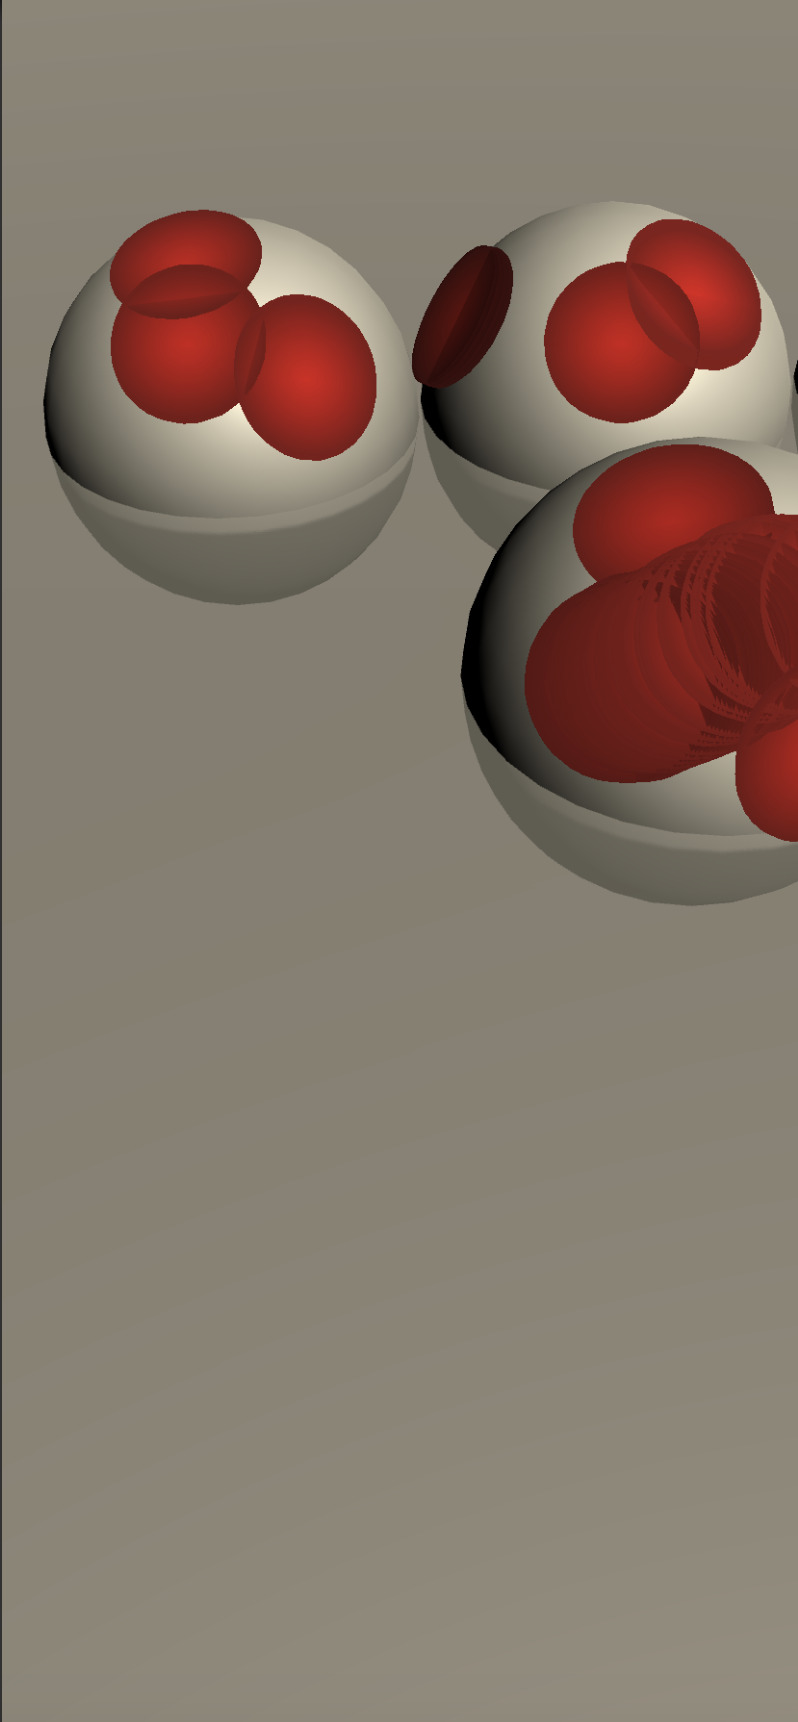
Experiments with painting on the surface of objects
0 notes
Text
Week Four Prototyping
This week I worked on adding a user interface to the application, instead of relying on key presses like I did when I was first prototyping with a mouse/keyboard. In terms of the physical placement of the buttons, this was designed to be as close to the wireframe I presented during week 1 as possible. I was able to find an asset for a color picker on the Unity asset store and was able to integrate this into the project but only with the use of the “pen” tool rather than actually manipulating the materials of the shapes. Nevertheless, changing the scripts to allow the colorpicker to change the color of meshes should not be too difficult at this point.
youtube
I also started prototyping another idea that I had, which is a stacking mechanism not based on the exact raycast hit on the object but one that places the object directly on the face. This is used in Minecraft. I am thinking a lot about how to balance allowing users to freely place object while also introducing a way to consistently place objects at a certain face/location in relation to the present shapes.
youtube
0 notes
Text
Bio/Artist Statement
Artist Statement:
I am an interactive media artist focused on the design and development of interactive systems exploring the relationship between humans and the world around them and how humans communicate with each other in the age of networked media. I am both fascinated and terrified by the development of new technologies and their current and future impacts on the way humans interact with each other and our environment. My work ranges across practical applications of new media as tools for visualizing information in engaging ways, more traditional forms of storytelling with interactive experiences, experiments in interaction design and abstract forms of representing deeper social, philosophical or political ideas through new media. My work explores the deeper implications of living in an age of interactive systems and my opinions on the double-edged nature of our relationship with technology. The work I have created in this domain explores the existential implications of our relationship with technology. How does technology govern our thoughts and how does this differentiate across different media, governments and platforms? How do our devices impact our relationship with the world around us and our shared reality?
Apart from the social and philosophical themes explored in my work, my work also explores the more pragmatic uses of technology as a means of creation and expression. My work in interaction design is motivated by my desire to explore new ways of using technologies whose principles of interaction are fluid and not defined by consistent practices. Interacting with information is constantly evolving as technology rapidly changes, even the ways that we interact with information on our smartphones and computers are at times not consistent across devices. With the development of relatively new technologies like virtual reality and augmented reality, conventions for interacting with these technologies have yet to be defined. I find thinking about how people use devices and how systems react to their decisions to be a fascinating subfield of interactive media and technology, and although my primary interest lies in development and programming, designing these systems is a large focus of my work. When simple things like the placement of a button, for example, impact how a person interacts with a system and how they perceive its ease of use, interaction design is an important part of technology as it can determine the success of different experiences and technologies. Ensuring that a user interface is easy to use and makes the experience as seamless as possible is a very fulfilling part of my work.
Bio:
Steven Wyks is a senior at New York University Abu Dhabi studying Interactive Media. Fascinated by technology and its pragmatic use both as a tool for communication as well as its use as a tool for self-expression, Steven’s work in the field of interactive media ranges across interactive installations, game design and development, web development, interactive performances and computational design. His work varies from abstract experiences exploring the implications of technology, to practical applications of interactive experiences as a way to visualize and sort information, and lastly, to using interactive media as a tool for immersive and engaging storytelling. He primarily works as a web developer, where he has professional experience working for The National in Abu Dhabi, the Dhakira Center for Heritage Studies and for the NGO SmallWorld. He has also worked for the Lab For Narrative Technologies and Spatial Installations at NYU Abu Dhabi as a creative coder where he developed visualizations of heritage locations around the UAE as well as interactive installations for a proposal of a redesign of the Dubai Coin Museum.
Steven was invited as an exhibiting artist to the Sehsüchte International Student Film Festival 2020 in Potsdam, Germany and has exhibited work at the Al Quoz Arts Festival 2020 in Dubai.
0 notes
Text
Week 3 Prototyping
Fixed some of the math for the rotation of the sphere that makes it react more smoothly to the panning of the mouse. I also have been working on adding a brush that allows the users to “paint” in the air in 3D. Lastly, I added the ability to scale the size of added shapes to be larger or smaller.
youtube
youtube
0 notes
Text
Week Two Prototyping
My classmates who I spoke to last week raised an important issue in my capstone idea: why AR? What does having a user’s environment do for this experience? Overall I think the feedback from my peers was positive and they thought that it could be a very fun experience. When I raised my concern about being able to effectively 3D model with just a smartphone they mentioned that it would be something I would have to test out. Because of this discussion I have decided to take a step back from prototyping in AR and instead focus on the main mechanics of the game and the hardest part in making my idea come to life: allowing users to create models while also making it as simple and user-friendly as possible. I am not sure if having this seamless user-experience is possible and that’s what I am primarily concerned about. If it was possible to 3D model with a smartphone wouldn’t someone have published similar applications before? I am a bit worried that it will not be a good user-experience and that is why I am rushing straight into prototyping interactions because I believe that this will be what will make or break my idea.
This week I built on my previous prototype of just the simple plane in 3D along with my mouse and keyboard, with the idea being that this would be similar to how people would place objects on planes using AR in their environment. I think this is the best way to prototype my idea as I am still able to make use of the one or two touch features of smartphones through my mouse, but I also do not have to worry about using AR libraries and dealing with the environment yet. I added functionality for adding and manipulating different shapes, namely cylinders, spheres, cubes and planes as well as an easy way for the user to see exactly where the added shape would go in their environment by showing a transparent outline with the raycast. I also added a very simple movement script to the camera as well as ways for the user to move the shapes and rotate them once they are already added into the environment. With the current prototype I have now, you can switch between different shapes while in “creation” mode with the number keys, and between creation, moving and rotating modes with various keys on the keyboard. The next step for me would be adding a mode to change the size of the shape and ideally start prototyping these core interactions with my phone without AR first, and then migrate the project over to working with AR.
youtube
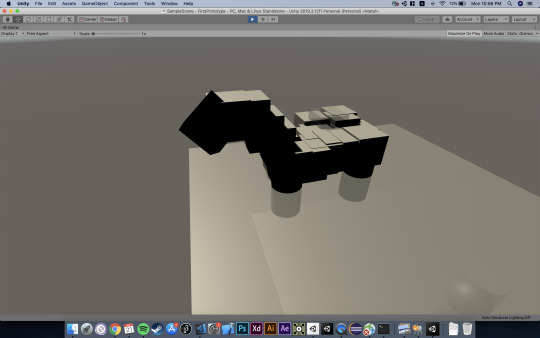
Horse Demo
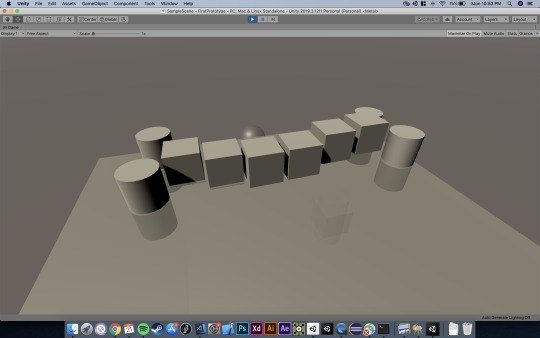
Bridge Demo :)
0 notes
Text
Prototype #1
For my prototype I wanted to explore plane detection with AR as well as placing and manipulating basic shapes augmented onto the real-world. In order to do this I watched some tutorials on AR development with Unity and used some of my experience with Unity to do this. The concept that I have for my capstone project is for it to be a game that allows user to create complex objects with smaller ones. The “game” aspect of this experience is that they are prompted to create certain things, while a partner is prompted to guess what they are creating by watching them create through their phone, almost like Pictionary but in 3D. Users can creatively use their environment to provide a context for the object they are trying to create. Though the game attempts to be competitive, pairing them with a partner for guessing, the real novelty of the game is for users to be as creative as possible with their creations. I also hope to have a feature for users to share their creations with other users.
Essentially, a user should be able to place simple 3D shapes (either to planes in their view, or in the air), delete them, change their size, orientation and paint on the surfaces of the shapes to add colors.
This very rough prototype allows me to add cubes to planes in my environment and enter an “edit” mode via a button element where I can make them bigger or smaller when I pinch the screen. Apart from adding the cubes to the planes around me, I can also stack or attach them to the cubes already in the scene.
Here is a video of the demo:
youtube
I also intially prototyped without AR, testing out the same idea of a horizontal plane to place objects onto and then placing objects on top of the other one. I think it will be very useful for me to prototype in a non-AR environment. Since I think the UX of this will be the most difficult thing to optimize, I do need to spend time designing for placing, manipulating, deleting objects in 3D with a phone and this is probably easier without the AR environment in mind.
youtube
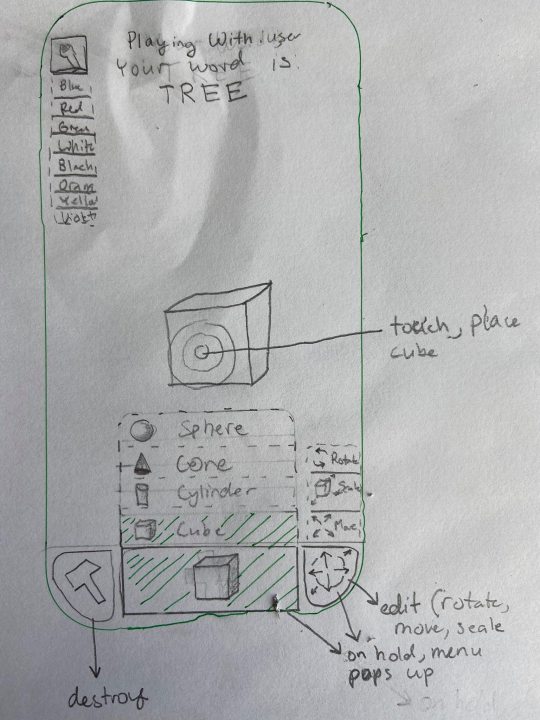
Finally, I also sketched out how I imagined the interface of the finished application to look. In this wireframe, buttons for coloring, placing, editing and deleting modes are added and further options can be accessed on hold (scaling, moving, rotating for editing, different shapes for the placing mode and different colors for the coloring). It will be clear to the user which mode they are currently in by changing the color of the button (in this case it is shaded green).
0 notes