sophiaannemarie2
Sophia Anne Marie
18+ NSFWAll photos of me unless otherwise stated. Message me 23 CD
215 posts
Don't wanna be here? Send us removal request.
Last Seen Blogs

levelgoose66
کمپرسور باد ایران پمپ

elo-quent
I'm part of the part which at the first was all

heyrockee
HeyRockee

n-h-johann
N. H. Johann


Text

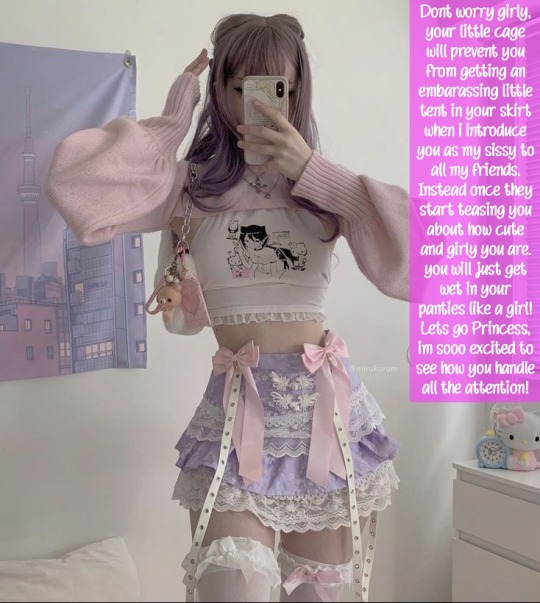
#sissy #crossdresser #sissyslut #transgender #love #losangeles #crossdress #sister #crossdressing #trans #sisters #paypig #family #makeup #footfetish #femdom #trap #tranny #mistress #panties #bdsmcommunity #sissification #instalove #findom #bdsm #worship #beautiful #pride #prettyfeet #dragqueen
1K notes
·
View notes


Text

Come see all of my posts, and even more, at my Patreon site.
www.patreon.com/EmbraceYourInnerSissy
Become a Patron!
585 notes
·
View notes


Text
What do you all think about me starting an only fans??
5 notes
·
View notes

Text
Abby’s Basic Make-up Routine

Last Updated: 5 June 2017
I update this post every so often, so if you’re reblogging this post or want see if I’ve changed anything, check out the source to this post (link to source post) for the most up-to-date version.
Over time I’ve had numerous requests to give people a run down of my basic make-up routine. So finally I decided to would be best to write my routine out here on tumblr to share with anyone who might find it useful.
This routine will only go over beard cover, foundation and some very basic bits on contouring (still learning this one). It’s going to be most useful to people who have heavy beard shadow, it involves a lot of heavy make-up. If beard shadow is less of an issue you might want to skip some of the heavy foundation in step 3. I may in future go over more on eye shadow, etc however, I just want to get basic starting routine in here.
I would like to point out that this routine is my own and is very much a work-in-progress. It is not necessarily the best routine or one that will work for you. However, after reading and watching countless tutorials and doing lots of my own experimenting it is where I currently am in my own development. There will certainly be future revisions and changes as I learn and find out more.
Hopefully though there maybe something in here you find useful and will help you get started on your own make-up routine.
1. Get to know your face and eye shape
Even before you get going with make-up it’s important to understand your own face and eye shapes. These are important as they will dictate which make-up techniques are going to work best for you. Unfortunately our faces and eyes are all different and mean not all routines are going to work for you. However, knowing these shapes will help you look up guides and tutorials that will best suit you and allow to achieve the best possible results.
2. Shower and shaving
It may sound obvious but it is best to apply make-up to clean skin. When I shower before dressing I exfoliate to remove any dead skin and use a body moisturiser to re-hydrate my skin.
Showering also helps to soften your beard stubble which will help to achieve a cleaner shave. I will usually shave in the shower or straight after coming out. The razor you use will be of personal preference but I use a new razor blade when shaving before dressing.
Shaving and stubble is one of the biggest problem areas I have, I will shave first with the gain of the stubble, then across and finally against the grain. However, as yet I still am left with stubble breaking the surface of my skin and my make-up, so this is still an area I need to work on.
I have heard of others using an epilator (not something I would recommend) or plucking all the hairs out. Personally I don’t feel these are an option but it may be something you could do some research into.
Finally I apply a moisturiser to my face to cool off my skin and re-hydrate. As I have sensitive skin I will generally shower and shave half an hour to an hour before I dress. I will then wash my face again to clean any shaving nicks and re-moisturise my face.
3. The routine!
Okay this is part of the post we all came to see ;) I’ve included the products I’m currently using, these are nothing special and mostly just what I’ve picked up as cheap over the counter cosmetics at the super market.
Step 1 - Preparing your face
Product: Rimmel - Lasting Finish Primer
Product: NYX - HD Finishing Powder
After shaving you should thoroughly moisturise your face and apply a primer. This will help when applying make-up and allow it to last longer. All foundations are different and ideally you should be using a primer which linked to your foundation for the best results.
As we’ll be putting a lot of make-up on, it’s a good idea to brush over a translucent powder. This is especially good for oily skin as it reduces the amount of oil that will come out through our make-up over time.
Step 2 - Beard cover and under eye dark circles
Product: Kryolan - Dermacolor Camouflage Creme
Product: NYX - HD Finishing Powder
To neutralise the blue in your stubble or if you suffer like me from dark circles under your eyes you’re going to need an orange or red concealer/lipstick. I simply apply the concealer with my finger over my beard shadow and under the eyes.
I then go over the colour corrector with a damp beauty sponge and make sure I have worked it well into my stubble and pours. I will also fade out the concealer away from the area I want to cover, for an even look.
Kryolan recommend using colour D 32 in combination with the TV Paint Stick below, for beard cover.
Then set the concealer with translucent powder, which I dab on with a brush.
Step 3 - Cover stick
Product: Kryolan - TV Paint Stick
Product: NYX - HD Finishing Powder
This is going to be most useful to those with heavy beard shadow, if beard shadow is less of an issue for you you might be able to skip this step.
Once I’ve applied the concealer I go over all my face with the TV Paint Stick which is slightly darker than my natural skin tone. I apply the stick directly on my skin and then work it in with a damp beauty sponge in a slight twisting motion. Making sure I work the product into the stubble and pours. If I feel the need I’d do two or even more layers over my beard.
It can be difficult to determine which colour of the stick is best for you, I have pale skin and gone for 4W. I used this guide from GlamUpGirls to judge which would best suit me.
I usually wait for 10-15 min to allow the stick to dry a little but if you’re in a rush you can set it with translucent powder.
Step 4 - Foundation
Product: L’Oreal - Infallible Foundation
I start by off by applying a layer of foundation over my beard shadow which is darker than my natural skin tone, I use Natural Rose (125) for this. I use a damp beauty sponge to apply the foundation, I apply it in a light downward dabbing action over my beard area, as well as around the edge of my face to frame it.
I also use the same foundation in the lighter colour Porcelaine (015) on my forehead, nose and under the eyes. I have to admit I might be wasting my time with this one as I in the next step I’ll be placing concealer over the same area.
Again I apply the foundation in a dabbing action to work in the foundation as I did with the darker foundation.
Note I tend to avoid putting any products (except primers) on my eye lids up and up to my brow. I find it much easier to apply eye shadow if the area I am going to work on had no product on it.
Again I wait 10-15 min to dry, you can move straight on the next stage again if you’re rushing. However, I find that if your foundation is too damp then when you apply your powder more of the blue from your stubble will show through your make-up.
Step 5 - Highlighting
Product: L'Oreal Paris Touche Magique Concealer
I don’t claim to be an expert at contouring and highlighting but I’ve learnt a few tricks that help to sculpt the face.
First I start by highlighting my forehead, bridge of my nose, below my eye and along the top of my cheekbone. I just go straight ahead and brush on the concealer over those areas I want to highlight, then I use a make-up sponge in a dabbing motion to even out the concealer.
I finish what you might call the liquid stage by dabbing a damp sponge over my whole face and neck blending, evening out and removing a little of the excess make-up.
Step 6 - Matte Powder
Product: L’Oreal - True Match Super-Blendable Powder
Product: L’Oreal - Infallible 24H Matte Powder
Product: Rimmel - Stay Matte Pressed
For this step I use first apply the True Match powder in Rose Ivory (1.R/1.C) over my face, using a powder puff. I use a lot of powder and apply it lightly at first then press it in firmly. matte powders the first is a close to my skin tone and the other is light rose tinted. The rose tint should help to further neutralise the any remaining blue coming from my beard shadow.
Next I apply the Rimmel Stay Matte Pressed over my beard area and around the edge of my face, framing it once again. This is the colour Warm Beige (006), I’m not really a fan of the powder but I can’t find a colour I like as much from the L’Oreal ranges. The L’Oreal powder as much silkier and nicer to work with, the Rimmel can be clumpy especially if you don’t apply the True Match first. Again I use a powder puff to apply the powder as before.
Finally I finish with the Infallible on the areas I want to highlight, this is in the colour Warm Vanilla (123), applying as previously.
I use a rather excessive amount of matte powder, as when I come to apply my eyeshadow, if any drops off on to my face it will fall on to the excess powder and can be brushed off.
Step 7 - Eyeshadow and eyeliner
Product: Maybelline - Master Precise Liquid Eyeliner
There are no real hard and fast rules to eyeshadow, it really is going to be down the look you want to create. However, my basic rules for eyeshadow are you want to work from a lighter shade/colour on the inner edge of the eye working to a medium to darker shade/colour on the outer edge. Work the dark shade/colour up and out from the outer corner of the eye to, but not reaching, the outer edge of your brow.
You then want to blend the eyeshadow together and soften the edges, generally you want to avoid hard edges.
I then apply an eyeliner along the top of my eye lid and if I am daring create a little flick for wings at the outer edge.
I really struggle with my eyes I don’t know if it age but when I look at tutorials everyone’s eyelids skin looks nice and tight. Mine is really loose and it makes applying eyeliner especially tough. The only trick I have found is to pull the outer edge of my eyelid out a little to tighten the skin.
To finish this step as mentioned already, I brush off the excess powder and any eyeshadow that has fallen on it.
Here is a great but simple eyeshadow tutorial from Wayne Goss.
Step 8 - Bronzer and Contouring
Product: Rimmel - Natural Bronzer
As I’ve mentioned I am no contouring expert so other a bit of concealer my only other nod to contouring is applying a bronzer.
Very simply I apply bronzer using a bronzer brush, before applying the bronzer I tap the brush to remove any excess. It’s very easy to add too much bronzer and making a mess of it, so add a little at time until you’re happy with the look. I usually find one or two layers of bronzer more than enough.
I apply the bronzer in a line from the top of my ear to two finger width from the corner of my mouth, brush again with grain of my stubble so as not rub off too much foundation. Pursing your lips will give you a crease as an easy line to follow.
I also apply the bronzer on and under jaw line to soften it up a little, as well as around the edge of my face along the hair line to frame my face.
I sometimes will brush over my face the light matte powder again to blend everything together and dull off a little of the bronzer if I think I’ve layered it on a little thick.
Oh in addition check out this great video from Nikki on how to contour your nose, fantastic stuff.
Step 9 - Blush
Product: Rimmel - Mono Blush
Product: NYX - HD Finishing Powder
Very simply I apply blusher to the top of my cheekbone, from under outside corner of eye back to the hair line, using a blusher brush.
I then apply the finishing powder over the areas I want to highlight, using a blusher brush.
Step 10 - Eyebrows
Product: Anastasia Beverly Hills - Dipbrow Pomade
When it comes to plucking my eyebrows I try not to over do it, while I want a nice shape for when I dress I still want my brows to look good in boy-mode too. So I simply start by removing the random hairs that don’t make up the main body of my brow. I then neaten up the edges giving the brow a little shape.
Finally I thin the outer half of the brow starting above my iris when looking straight forward, tapering the thinning as I move out along the brow. This helps to give a small arching effect to the brows without going over the top.
When it comes to colouring the brow, I use an angled brow brush to simply brush over the brow in the direction of the hair growth. When it comes to the tail of the brow I use the thin edge of the brush, to draw a line down from the top of the brow arch to the end of the tail.
Step 11 - Lips
Another area I really need to work on so my routine here is very basic once again. I simply will use a lipstick and leave it at that or apply a lip gloss in the same colour on top for a little more of a dramatic effect.
On occasion I might also use a lip liner which I’ll apply first around the edge of my lips, this is typically a darker tone of the lipstick I’m using.
Step 12 - Mascara
Product: Rimmel - Scandaleyes Rockin Curves Mascara
It’s a competition between lashes and my brows which as to which I feel are the best part of my look. I’ve even had women tell me they’d love to have my eyebrows and lashes ;)
Enough of my smugness, lashes are fairly simple I simply curl the lashes with a curler and brush the lashes with a lashes brush. This gives the lashes great shape and adds volume even before you add mascara. When I apply the mascara I put two coats on, complete one eye then the next before returning the first again and repeating. This gives the lashes a lot of volume and body, really helping your eyes to pop.
I usually leave the lower lashes until I have applied my setting spray, as sometimes the spray can wash some of the mascara off the lashed and under the eye. Not a good look!
Step 13 - Eyelashes
Product: Ardell - Lashes
Product: Duo Adhesives
I’ve struggled for a long time trying to find the nack for applying false eyelashes and I’m still not there. It’s more just hoping that a silent prayer will ensure they go on correctly.
However, I have had the most success after following this video from Hollie Wakeham.
Step 14 - Make-up Setting Spray
Product: NYX - Makeup Setting Spray Dewy
Very simple step this one, simply spray on a setting spray to fix your make-up and reduced some of the powdered caked on look.
Remember to apply mascara to your lower lashes if you haven’t already.
Step 15 - Step back and admire
We have gone through a lot of step to reach this point but hopefully it has been fun and time take is worth the results - be proud of yourself you’re beautiful :)
4. Additional tutorials
I have made a number of other tutorials, a little of index of them can be found here.
As of right now I have no plan to make a video tutorial of some of the basics to make-up, my face on video is a scary idea! However, when I first started I found these two videos very useful to help me get started #1 and #2. I also found this youtube channel had lots of helpful ideas.
I found drag routines to be some of the best, especially when it comes to shaping your face with contouring and beard cover. Don’t worry about it being drag make-up, just tone things down. Just make yours eyes less dramatic and the contouring less contrasting and more blended. Check out:
Miss Fame
Fendi Laken
Some other great general YouTube tutorial channels to follow are:
Wayne Goss
Joseph Harwood
NikkieTutorials
5. Wishing you all best in your make-up endeavours!
I hope this routine has been useful to you and if you are new to make-up gives you some very steps to follow using products you can cheaply and easily pick up from your local supermarket or drug-store. If there is anything else ask away but just remember, even if you can’t quite get the look you want right now keep it and most of all have fun!
4K notes
·
View notes