
shanyakulasekara-mga2019mi6015
Final exaction
43 posts
Don't wanna be here? Send us removal request.
Last Seen Blogs

mousefacethegreat
puddleshine novella when
silentspectres
I'm Not Calling You a Ghost

it-twisted-the-dimensions
A bizarre space where slow things move quickly

thestonecuttersguild
The Stonecutters Guild
Text
Compiling the animation
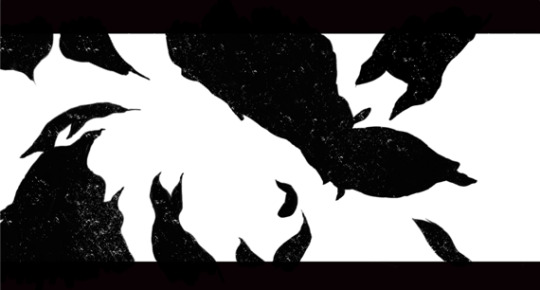
This is almost a magical moment where I can taste the finish line. So the final part of the animation process is the compiling of all the little shots into the big 'one and a half' minute animation. I did the same thing I did when compiling the animatic. I brought in all the exported frames as separate shots, then I had to make sure they are set to 12 fps. I had the rough animation as the base so that I know where and what to place. So the first step was for me to place all the shots in the correct order and place. I already had a look I wanted where on half of the animation was white and black to signify life and death. However when I tried to do this the whole animation started look demonic. Hence, I improvised, for some client projects, I had to get this dreamy look to some photographs and I used a video I saw on tik tok to get the look by making a duplicate of the layer and adding a blur and reducing the opacity. I tried this by taking all the shots form the second half of the animation and pre-composing them, then I duplicated it. Then added a blur filler to it, but not just any blur a directional blur to it which gave it such a good look and feel. I also learnt this other thing from tik tok where this person breaks down the color correction in the Netflix seris “sex education” using a Vr Chromatic Abreaction effect, which I knew would be a cool effect to this and it also feels like a new and improved version of what I tried to do when I did my first year first semester animation. One other detail I added to the shot of the death is this echo effect to give a sense of dizzy ness to the scene by having the frames lag a little
Finally, I had to add some dust and scratches so, I googled dust and scratches over layer to the videos area and found the perfect one I could use on my animation. I saved it as a video and then inverted it because the scratches were in white. I inverted it and then made it a multiply layer so that only the black scratches are visible. Here is the final look for the animation;
I was really loving the style it has become. I didn’t add the motion blur for the first half of the animation to really show the difference between life and death.
One last thing I needed to do was add motion blur. So I rendered the animation out however, I did remember there was something else I had to do before I can call this sound complete which was to add this guy’s voice and a little bit of his music I got from tik tok. Here is the link to his video
https://drive.google.com/file/d/1o38rHpVoTN_57C7Hyquhc_V3X0a8uTC3/view?usp=sharing
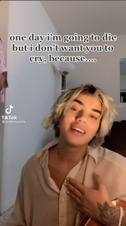
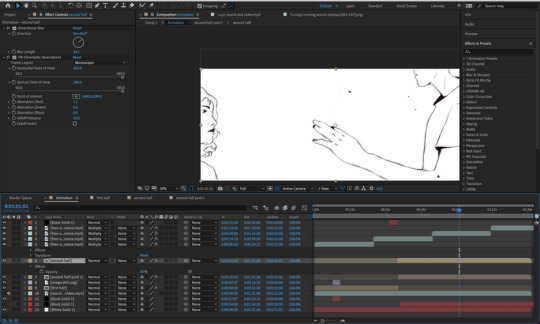
So I wanted to add his voice in some areas but before that, I had to split the voice and instrumental because, there is also sound in my animation. I knew the perfect place to add the first words “one day I am going to die but I don’t want you to cry, because…” the perfect place to add this would be right as my character falls to his death. Then I realized that the final area need something to really impact the animation. I did so I wanted the last vocals. I knew the best and easiest way to take the vocals out is by using this website with an AI that takes the vocals from the instruments in a matter of minutes and the finale outcome is usually almost perfect. It’s called https://www.lalal.ai I used this website to get the instrumentals out and then added the vocals to my original sound file with the animation. I then added the final vocal cut to the area where the two characters kiss before the guy fades off into flowers. This worked but got over powered by the rest of the original sound which I then faded off at that moment and to really bring in the full impact I added a reverb and the reverb called church halls to be exact and the sound was absolutely perfect. Here is a screen shot of the new audio, the new vocals are in purple. I also added in the sound of the ocean and birds in the first shot with the hard to give a sense of false calmness to the shot.
Now I can go back and start to add the pixel motion blur and the finale sound. This takes a long time to render. However, the pixelate motion really bought the whole animation together. For the final time here is the link to the video I want you to watch, the final animation, a year worth of work in one and a half minutes;
https://drive.google.com/file/d/1Jra4pGQEFNvr2BnNk4J2CX_TRrD9uggH/view?usp=sharing
0 notes
Text
The final bits
Finishing the Falling shot
Even though the shot is the next longest shot, I realized that it was much easier than I thought. The approach I had for this shot was to draw a little part of the drawing one by one. Although this method is easy, I did spend another five hours finishing this shot trying to get the details of the shadows and the shadows when falling correct. There weren’t extensive creative decisions made, just approached it head on and finished it that way. Here is the link to the finished shot;https://drive.google.com/file/d/19Pf2eWny7XqufwnGOnDl3zK9T6CyLoJ0/view?usp=sharing

Though this shot is something I did towards the end, I absolutely love it, and the way the fall feels sudden it really gives such a vibe.
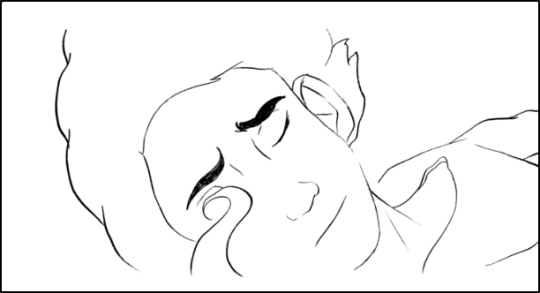
Facing death shot
Again just like the previous shot I just had to keep animating piece by piece until the final part. However this took way longer than I thought. I didn’t take into account the tiny details. This shot has from the eyes to the mouth and the little wrinkles on the body. But it was just one of those things you power through from 10pm till about 5am. It’s just a painful journey at this point. Here is the finished shot;
https://drive.google.com/file/d/1cZWSE5sCYt0c7KxGf1KU0sZGGvX4XDR_/view?usp=sharing
Finishing the jumping and turning into petals shot
This shot doesn’t have any creative decisions, I had to make except close the eyes because the open eyes didn’t look good at all. I redid the eyes for this shot, however these areas were just time consuming and not fun because I was starting to feel really exhausted at this point. Here is the finished animation for this shot; https://drive.google.com/file/d/1UmI3GOXpVUK7l-lTzBLnVILxE1_r-e5Y/view?usp=sharing

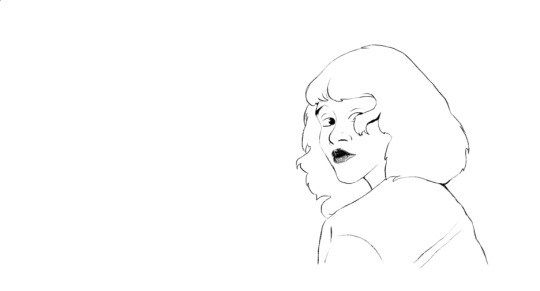
Finishing the turning shot
This shot is the shot that made me joyous as it took less than an hour to complete. It was just that simple to clean up there wasn’t any decisions I had to make. Just draw the frames at a stretch without getting board and the job will be done. This is the final video for this shot;
https://drive.google.com/file/d/1zW5LA5XV3vLu_UmbH8b2BdA1g_BQv1fI/view?usp=sharing

The final stretch
This shot has a lot of frames that look the same. The only challenge I would face is the receptiveness of the shot. However I have done about 1000 frames of animation. I don’t even feel it anymore with an hours. I fished this shot and got excited because now I just have the fun parts to do such as editing and sound. This is the final animation of this shot;
https://drive.google.com/file/d/1UmI3GOXpVUK7l-lTzBLnVILxE1_r-e5Y/view?usp=sharing

0 notes
Text
Going back to the top
The next shot I wanted to approach since I had already done with this one was the shot with the girl and her hair as her hair flows in the wind. The main reason I wanted to get this shot done was because it occurs a lot throughout the animation and I wanted to make sure the animation in it was perfect. So I went in knowing I would have trouble with the lips but I used my big brain for the lips. The reason I believed I might mess up the lips, is because I know the lips right now in the rough are perfect, so I took the lips from the rough to the cleaned up version by copying it out and the making it back and finally adding a little bit of detail from the brush I was using to do the clean-up. The rest was just basic animation that took a lot of time to do. Even the flowers took about an hour to do as there were so many tiny elements in it. The whole scene took me a total of 5 hours. Here is the link to the final version of this shot; https://drive.google.com/file/d/1p69EWQyyu5wC1C7gFGeMS3S7Sgq_7JAv/view?usp=sharing
Even though the face was static just to add some magic to the shot I drew in the highlight of the eyes on each shot to give it a slight shimmer.
Finishing the Falling shot
Even though the shot is the next longest shot, I realized that it was much easier than I thought. The approach I had for this shot was to draw a little part of the drawing one by one. Although this method is easy, I did spend another five hours finishing this shot trying to get the details of the shadows and the shadows when falling correct. There weren’t extensive creative decisions made, just approached it head on and finished it that way. Here is the link to the finished shot;https://drive.google.com/file/d/19Pf2eWny7XqufwnGOnDl3zK9T6CyLoJ0/view?usp=sharing
Though this shot is something I did towards the end, I absolutely love it, and the way the fall feels sudden it really gives such a vibe.
Facing death shot
Again just like the previous shot I just had to keep animating piece by piece until the final part. However this took way longer than I thought. I didn’t take into account the tiny details. This shot has from the eyes to the mouth and the little wrinkles on the body. But it was just one of those things you power through from 10pm till about 5am. It’s just a painful journey at this point. Here is the finished shot; https://drive.google.com/file/d/1cZWSE5sCYt0c7KxGf1KU0sZGGvX4XDR_/view?usp=sharing

Finishing the jumping and turning into petals shot
This shot doesn’t have any creative decisions, I had to make except close the eyes because the open eyes didn’t look good at all. I redid the eyes for this shot, however these areas were just time consuming and not fun because I was starting to feel really exhausted at this point. Here is the finished animation for this shot; https://drive.google.com/file/d/1UmI3GOXpVUK7l-lTzBLnVILxE1_r-e5Y/view?usp=sharing
Finishing the turning shot
This shot is the shot that made me joyous as it took less than an hour to complete. It was just that simple to clean up there wasn’t any decisions I had to make. Just draw the frames at a stretch without getting board and the job will be done. This is the final video for this shot;
https://drive.google.com/file/d/1zW5LA5XV3vLu_UmbH8b2BdA1g_BQv1fI/view?usp=sharing

The final stretch
This shot has a lot of frames that look the same. The only challenge I would face is the receptiveness of the shot. However I have done about 1000 frames of animation. I don’t even feel it anymore with an hours. I fished this shot and got excited because now I just have the fun parts to do such as editing and sound. This is the final animation of this shot;https://drive.google.com/file/d/1UmI3GOXpVUK7l-lTzBLnVILxE1_r-e5Y/view?usp=sharing
0 notes
Text
Decision making
After I completing the above shots completely I realized that the shots where they go one for more than ten seconds it would get really tedious and supper hard to focus and finish and I knew myself I would let something like this pass until the last minute hence with the experience of past mistakes, I decided to get the animation of the last two shots which are the most time consuming shots done before. I move onto drawing the other shots. The last two shots take up more than 1 third of the animation time. Therefore. I deiced to stop going shot by shot according to the numbers and decide to go and do the most time consuming shots first, basically the shots that have the most frames. So the new order for this phase of my animation is to start off by drawing the shot where the two character keep hitting the wall and then do the final shot where the main character fades into petals and then the shot where I am looking out at the horizon before falling into the abys.
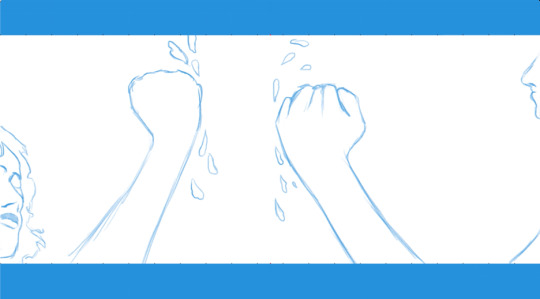
Finishing the hands shot
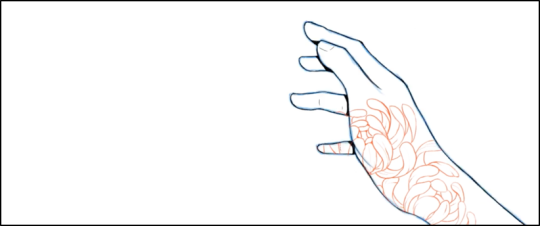
I wanted to make this shot more digestible to me because at first looking at doing 272 frames which is almost 300 frames seems to be a bit overwhelming. I decided to separate them into sections of 60 frames. Furthermore, if I have that many frames in one sketchbook file I would be facing some lagging on my end. I split the animation into three. The first section being 0-60 frames the next being 60-170 and the final to be 170-272 frames. Didn’t make any creative decisions because this clean-up was draining me mentally and physically. Due to pure desperation I animated each section in one sitting. Which is about spending 6 to 7 hours in one spot before taking a break for about an hour and then going back to it. These 272 frames literally took nothing but sheer will power and absolute brute force. Mind you at this moment of my animation I had to go to a neurologist due to the immense amount of pain I been feeling in my fingers and hands. One creative decision I did make was to get the petals on the hands to last longer and look less like water and more like petals. I just eye balled it after doing the whole animation.
After about two days of back to back work I was able to finish this shot. Here is the link to the video;https://drive.google.com/file/d/1S3vMW7RoTkiVMcPLvppWdCE32qmcb5O3/view?usp=sharing
Side note: The transition shot looks absolutely stunning with the textured brush I made and colored in.
The final shot
The final shot basically didn’t have any funky areas with the images glitching and stuff mainly because, I wanted the viewers to truly embrace this final scene. In my opinion it is the one that needed to have the most emotional impact out of all the other scenes. I used the same approach as the previous scene to make the shots more digestible and worked on it section by section. I broke it down to three sections 0-60, 60-120, 120-157. Even though the final 30ish frames are less, it had a lot of little petals I had to draw in detail. Which basically took way more time than the other two sections. The work process for these shots were also the same where I forced myself to sit and work in one place for hours without stopping and powering through the pain in my fingers, just to get to the end. One area I did change however, was the part with the petals flowing away. In order to create consistency. I decided to make the petals fade of into nothing rather than rushing of the scene which I felt didn’t look nice.
After a lot of painful hours spent. Here is the link to the cleaned up version of the final shot.
https://drive.google.com/file/d/1p69EWQyyu5wC1C7gFGeMS3S7Sgq_7JAv/view?usp=sharing
0 notes
Text
final clean up
Finishing the foot close up shot
The approach I took for the clean-up process here is the same as the approach I took for the clean-up process on the hand and the process isn’t too difficult. It’s just a lot of work to complete, which is the challenging aspect of all the clean-up I have to do. Only creative decision I took for this shot is to make the sole of the foot complete black like this
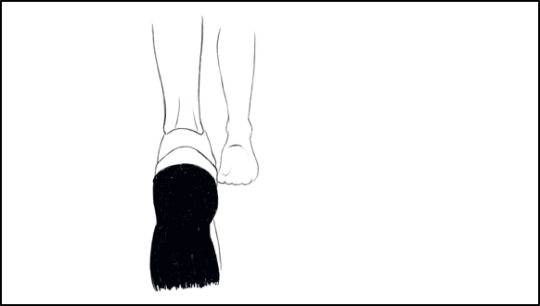
But everything else was the same as my initial rough drawing. It took me a few hours to finish this shot because clean-up is obviously, really time consuming as well as coloring in the black area of the shoe. After a few hours of work here is the final animation of the foot close up shot; https://drive.google.com/file/d/1z4cU5i7XZrChnnEvW7svmBQUcIAYGvdd/view?usp=sharing

Finishing the Running across screen shot
This shot had very few frames and the clean-up process was extremely time consuming because I was slowly getting the hang of it, again slightly making my process easier and faster. It also helped me get a better understanding of the brush the more I work with it. I didn’t have any creative decisions to make during this shot. I just went straight ahead and animated it. Here is the final cleaned up version of this shot;
https://drive.google.com/file/d/1ikgQG8UA9tl4O63DeausD9NqsCrwVNn2/view?usp=sharing
Finishing the running in one place shot
I have been calling this the running in one place shot. This shot is actually supposed to look like the character is running with the camera. One of the main things I decided to incorporate when it came to this shot was the tiny detail of the ambient shadows that I wanted. I went to the extent of having a shot that consist of only the shadows this was the main design decision I made for this scene.
The whole shot looks really nice and I was loving how it looks. It was completely work the multiple hours I spent on getting the lines and shadows to look still making it my favorite shot to work on. Here’s the link to the shot; https://drive.google.com/file/d/1BdHLb5PHG0mcFQqCgPBDyYKifj20Y-Dz/view?usp=sharing
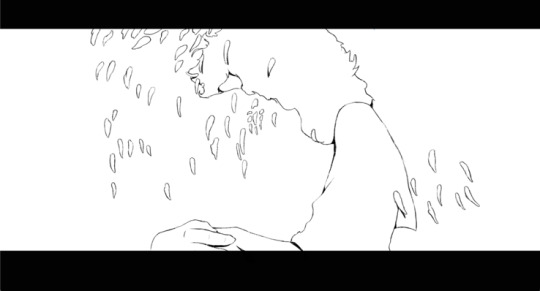
Running and coughing and getting up shot
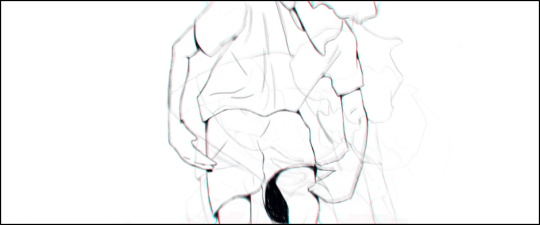
The animation for this scene needed a lot of work because as of now this is the longest clean-up process I have done. The process is the same but there are certain things I did do to really give the idea of death which is inspired by Albreto Miloge. Where I made a few frames look a little different to my original by having dark thick lines. Here are the frames I am talking about;


These shots look and feel really rough and somewhat uneasy which, is the impact I wanted. I added faint scull and dark patches to really give it that suspenseful feel I wanted to add. This is based in the general drawing that I left off or kept both the roughs in order for me to keep the idea of the multiple frame concept going for the audience. This is the fully cleaned up version of the coughing shot which took me about 12 hours to complete due to the sheer amount of frames I had to clean up. https://drive.google.com/file/d/1UV5RHl5UdNAeGjCF75ejzftHrSYVXaU-/view?usp=sharing
0 notes
Text
Starting off with the cleaning up of the frames
The cleanup process is basically where I redraw each frame all over again with cleaner lines. Before getting started I needed to figure out my game plan here because, I don’t have tons of time remaining for me to complete the whole animation. So I started off by getting organized. This helped me to grasp a good understanding on how I should approach the cleaning up process. I started off by exporting each and every shot into different folders so that when I animate it will be easy for me to approach the process without being overwhelmed by the idea that I had over one thousand frames to do. This is what the organized folder looked like;

I also named the shots with the names I have been calling them in my head all these days. Then I also added the number in which order they play in the animation. Inside each folder is a folder called reference or image which contained all the rough animation for the scene. The basic workflow here consisted of me opening a new sketchbook with the image-sequence. That is the rough animation in the mid ground layer so, that I can draw in the clean-up lines in the foreground layer above it.Here is a screen shot of my Autodesk right before I started my clean up.
Now all I got to do is just draw over these lines without stopping if I even plan on getting them done in time.
0 notes
Video
The rough animation was looking perfect and has all the elements I was hoping it has and it really made me realize how much effort it takes to animate. I dreaded the idea that I have to go through all of these frames again with the cleaned-up lines before I could call my animation finished.
0 notes
Text
Rough animation compilation
Now that I have finished all the rough animation I could finally see what my animation feels like. I did however get rid of two shots that I was going to do during the animatic stage, mainly because it didn’t add enough to the story I was going for and it felt repetitive but not in a good way, which is why I decided to scrap the other two shots. I did replace those shots with shots of the girl appearing multiple times more to really bring home the concept of what the guy is running for. I exported each and every shot I talked about earlier as an mp4 ast 12 fps and then brought it onto my aftereffects with the original animatic as the base template. So that I can place everything onto it. Then I added each shot one by one. I realized that my animation didn’t work with the sound which was predicable because, I did extend the scene where I am falling which created a slight domino effect. So I went onto my trusty adobe Audtion to try and fix this issue I went in and tried to sync in the areas to itself. Basically here is what I did;

I took the main areas that I mixed in together and tried to blend them in and make them longer. The first section you see here is the first part before the sound goes dead. What I did was to extend it slightly so that the shot ends exactly where my character stands up from coughing himself to the ground. The next section I tried to make it so that the it starts earlier by taking copies of the sound and putting it on top of itself to blend in so that the missing space of my character falling that I didn’t want to add is blacked out over all. The sound at the end worked and finally took the rendered video and the finished sound to after effects and complied the video to create this;
https://drive.google.com/file/d/1AIDMgVeAoiAKMY1oPCq9CGASufCwXb22/view?usp=sharing
0 notes
Text
The final rough shot
Again due to Corona I was unable to shoot the shots I wanted for the next shot, where I wanted the girl to go for a hug and the guy to turn into petals to be a crucial aspect of my animation as it was the consistent theme throughout my animation. Because of Corona I couldn't see my girlfriend to get the footage. But what I did have, were videos of us together and realized I could use one of those. There were more than 100 of the videos. What I wanted to focus on was a video where she hugs me. In order to get it close to my original idea, after some searching I found the perfect video. But the video did have some issues such as it being filmed vertically on an iPhone where part of her hand gets cut out and there is a lot of getting cut out in this video. Here is the video link https://drive.google.com/file/d/1QTumqBMAXrxCnuRxr1T2_3vxwY0yitCZ/view?usp=sharing

I wanted to make this video work because the footage is absolutely perfect for my animation, so I added it to aftereffects and made it so that it was much bigger. Then it’s basically a close up of the two of us and I was able to get the shot to work. I did however timed the shot so that we kiss at the very moment the music ends giving silence to the moment where I fade of into petals to really bring the emotion out for the scene. I then added the usual grid and fully exported the animation into a new folder. Here is the link to the folder with all the frames I had to draw;
https://drive.google.com/drive/folders/1wXvUjQSAMhOKc5KxVUCAILnA-HWDXBvJ?usp=sharing
The animating process for this was absolutely the most time consuming aspect to the whole animation. I really thought it was going to be the previous shot with the hands. When I realized most of that shot was hands however, this whole animation was two characters in the same scene. I also wanted to change the hair of the girl because when the footage was shot many months ago my girlfriend just woke up from a nap making her hair go all frizzy in order to give it better resemblance to the other shots, I gave her bangs and made the top of her hair flatter. This was also one of the challenging aspects to the animation that I really have a lot of trouble trying to keep consistent throughout the shot. However with a little bit of going back and forth, I was able to get the result that I wanted. The next most challenging part was the petals. How I changed from a human to petals. What I basically looked for was how my face and hair can be broken up and realized I need to give the hint of petals forming before completely turning into petals so, that’s what I did. The process was insanely hard and took me hours to figure out. With about 200% effort I was able to power through the character changing into flowers. I also made it feel like the idea of him is still there by making him white completely, while making it look like she is hugging nothing and something at the same time.
After getting multiple wrist and nerve issues I was able to get the result I wanted. Here is the folder link to all my attempts on getting the animation to work; https://drive.google.com/drive/folders/1-VZHGWh0QEwfKsPKylrp9QWThtY-nJJE?usp=sharing
And here is the link to the final rough animation
https://drive.google.com/file/d/15mhWVLKKhWIwsdlY5wt-8PTrKh4f7rg8/view?usp=sharing

0 notes
Text
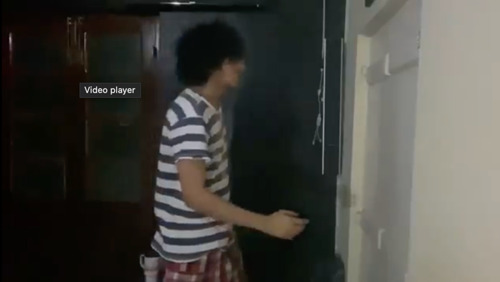
Corona
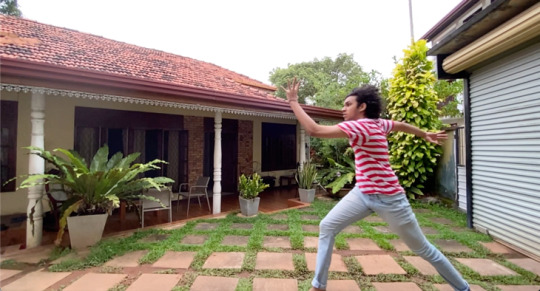
Yep corona actually effected my work. The reason being that the last few shots, if you looked at the animation was basically camera movements while two people are holding each other and are face to face. However, it had to be me and my girlfriend as the reference and someone else would have to shoot it. The problem here was that I couldn’t see my girlfriend for about six months and actually I still haven’t seen her. I literally could not shoot the stuff I wanted to for my animation that I planned. However I realized I would have to improvise and using my new found power of animating anything, I would have to completely re think the next two scenes. The next two scene in my animatic was the scene where I hit the barrier multiple times to the beat. And then the barrier breaks and we see each other until she comes to hug me and I turn into petals. This is what happens in the animatic. But how do I do this now. I had one idea and then another and these ideas came to be like a blessing. So basically what I am going to do is to scrap the shot of me hitting the barrier and change it into a shot where me and my girlfriend hit the barrier with both of us on either side of the screen hitting an invisible force. I didn’t have a lot of time to fine tune the idea just thought that this shot will be really poetic when it get completely done. So sticking to hitting something invisible to the beat, I decided to curse myself by making sure there are two people hitting it giving a lot of animation for this scene. The scene that is almost the longest in my animation. So for the shot I wanted it to seem like I am slowing down from all the running and noticing the invisible wall and then when the beat hit, I start hitting the wall. On the other side I would have the girl starting to hit the wall as well to the beat. I told my girlfriend to find a cupboard and start hitting it recording herself. She sent me some from snapchat and I chose the one that looked the best, then saved it onto my phone. I also had to reshoot the footage so, I placed the tripod on my bed and decided to hit the wall to the beat it also took me multiple attempts to get right but at the end I was able to get the shot I wanted. Here is the folder with both of our videos;
https://drive.google.com/drive/folders/1WNq56fTgtKijguBb6K-Vgx0m4XXQBi72?usp=sharing
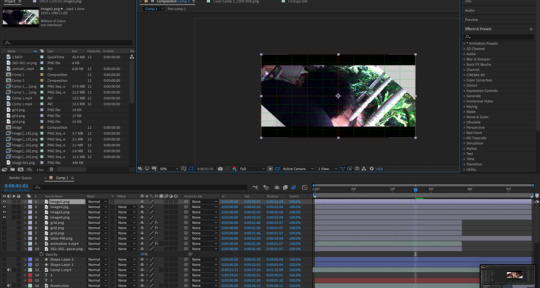
I then took both of them to aftereffects to do some final editing to the video in order to make it look like they are the same video. I decided to use aftereffects to crop out areas so that it looks like the two people are hitting the same wall.
Then I made the two a pre-composition and I started off by animating the movement of the camera as the guy falls into place and while they hit, the camera slowly zooms into the hand. That’s the edit I created and then I added the reference grid and exported the video as png sequence. This is what all the images looked like;
https://drive.google.com/drive/folders/1V-I-3R9tuOwl72zAveDW4ZFVV-Ie_-lz?usp=sharing

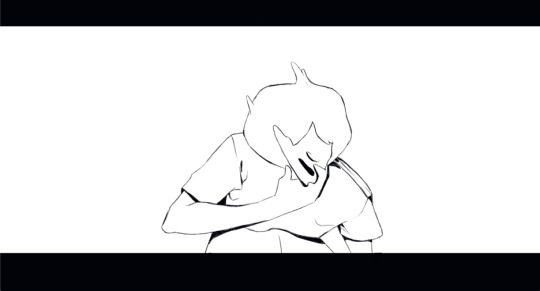
After I got the reference images sorted I had to start animating the shot. It was a total of 22 seconds long which is basically 264 individual drawings that consisted of two people. This shot took me about three days to get done. I also added some petals flowing off as the hands hit the wall to give it a better effect. I then had to make the transition between this shot and the final shot. So I deiced that instead of breaking the screen for the animation, I should do a more meataphiric one where there is a burst of petals covering the screen as it transition. I wanted it to foreshadow the main character turning into petals as well as the idea that they did actually break the barrier between each other. Here is the link to the 22 seconds of one of the most time consuming and energy draining animation I have done my whole life;https://drive.google.com/file/d/1PKOLDdsfouCaufGABmhc6PR8iBE1giN7/view?usp=sharing
0 notes
Text
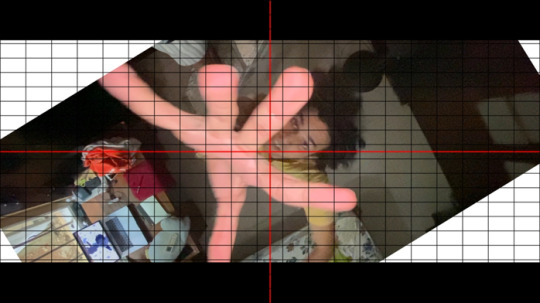
Zoom out of the hand shot
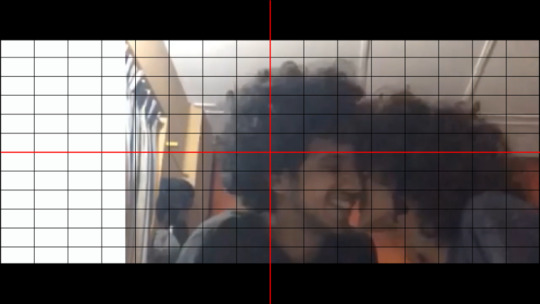
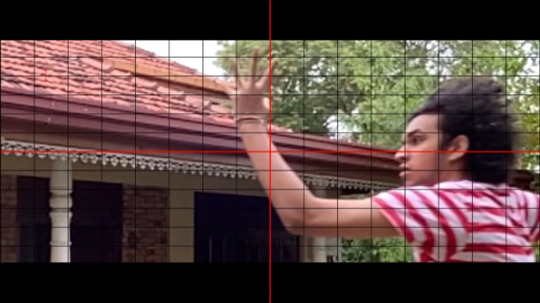
This is also one of those shots that I knew would be magnitudes better if I re-shoot it and get the footage I needed and then use that as the reference, with the new grid method I created. Re-shooting time. This shot is very tricky compared to the other because the idea here is the hand moves into frame and slowly zooms out to show the character running. This meant I had to figure out how to make the hand zoom out look smooth and not like something someone shot. For my luck, I realized that I have a wide angle camera and that gives me a lot more flexibility when it comes to editing my footage to look the way I want. However the tripod was to short for this shot, so I chose my sister again as the tripod! At first I tried to get her to do the zoom out manually hoping to get the result I wanted. But I realized that it’ll be much easier if I go ahead and do all that on aftereffects.
The challenging aspects of the shot was to get the right hand into the frame at first, because the whole shot revolves around the zoom out of the hand. And I had a lot of trouble trying to get this to work. I wasn’t necessarily sure why but it always messed up the shot. It took me about 38 videos to get it right which had about three takes per video almost ninety takes to get this shot right mainly because I had a lot of trouble trying to make my right hand appear in the screen properly. One other thing I made my sister do while filming was to film it in slow-motion, so basically 120 frames per second. The reason I did this is because I didn’t want any motion blur on my fingers when I used the footage, I also knew that I can make it faster when I put it onto aftereffects. Here is the folder with all the videos I took; https://drive.google.com/drive/folders/1TZkWl-SSiaoZMS3q8DC04BEW44nazxgk?usp=sharing
And this is the link of the video that I decided to use for my final reference; https://drive.google.com/file/d/1G21lvAvPNohgs-pPkSG71NOJTiuIxYd0/view?usp=sharing
I then had to edit this shot on aftereffects. What I had to do was get the footage to zoom in on the main hand and then slowly zoom out to reveal the whole body. I dint want to make the footage much faster because the timing on this is perfect and works absolutely well. After I added the gird on top of this and then proceeded to export it onto a folder so that I can use it for my animation reference here is the whole folder with the guided reference shots;
https://drive.google.com/drive/folders/1G5VdsxeeXPaDn6O3c3svKK2HCz4RuZ16?usp=sharing
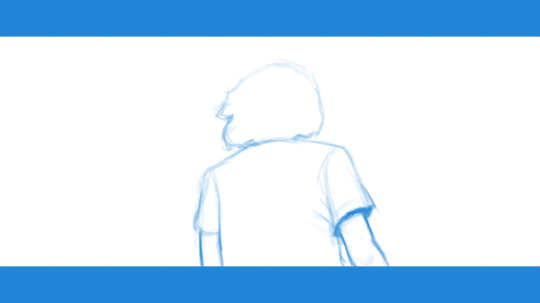
I then opened an Autodesk sketchbook sequence and started to animate in these details. On this, I changed from the footage to the animation was the fact that I didn’t want my eyes to be opened anyways because the animation is in slow-motion. I realized that the changes between each frame is subtle making it harder for me to animate this scene any faster. However after spending a lot of time on it I was able to get the cleanest rough pass of the animation I could get making me really happy with the final result. Here is the link to the rough animation;
https://drive.google.com/drive/folders/1G5VdsxeeXPaDn6O3c3svKK2HCz4RuZ16?usp=sharing
0 notes
Text
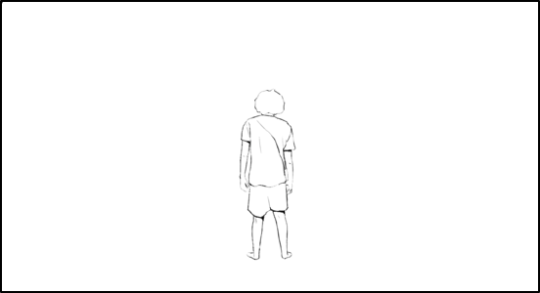
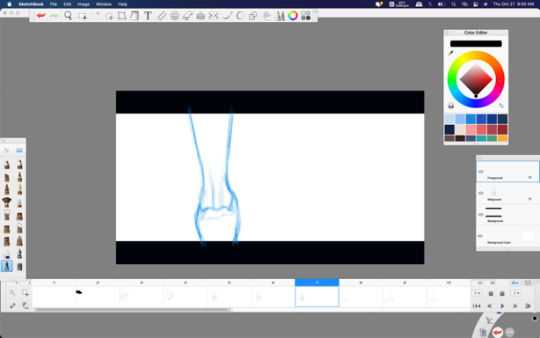
Animating the turning shot
This is the shot where I run away from the camera while the camera turns anti clockwise. I already had the footage for this shot, I just had to add the grid to it and then start animating. This shot is honestly the only easy shot to animate as the detail and the frames in are very little so, I went onto aftereffects and opened the same file with the grid and then added the footage to it. Here is the after effects file;
I then exported this footage as a png sequence and added it to a new folder. Here are the files https://drive.google.com/drive/folders/1qnjfugQB7cP0jcDwowUWMZjAieKXrFsG?usp=sharing
I then had to draw these frames in a new Autodesk sketchbook file where I made sure the pants didn’t look shot and the T shirt felt longer. I also tried to experiment by adding a blur to it. I did this by using a low opacity on the blur brush in sketchbook until the first frame where the blue increases. Here is the final output of this animation which took me about an hour to fully draw and complete; https://drive.google.com/file/d/1Eq_JDGe-nXy32xdBimYmCbOG_np_usmY/view?usp=sharing
0 notes
Text
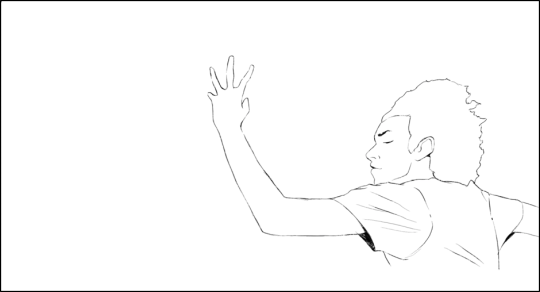
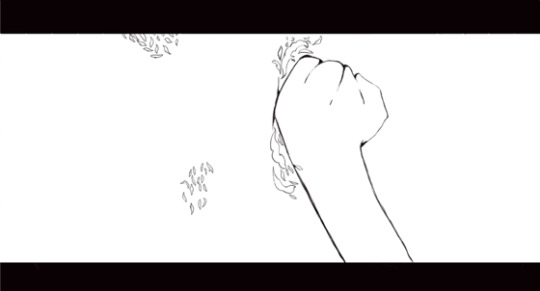
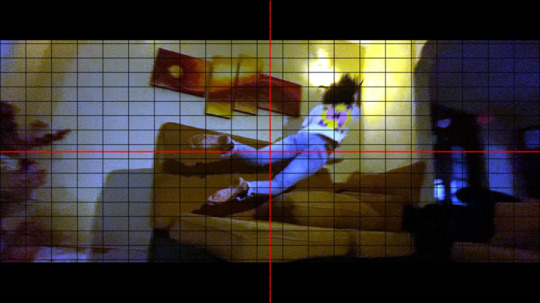
Re-shoot time
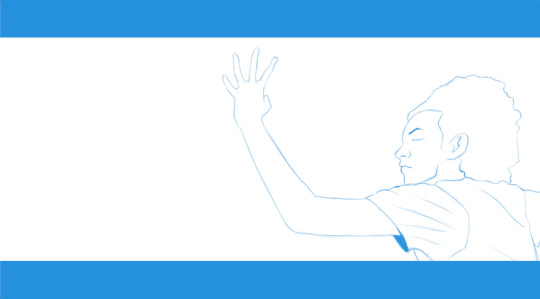
The idea of having the ability to animate anything in the world gives the privilege to re-shoot shots to get better and more accurate animation. The next two shots consisted of the character jumping up to reach the person he loves while being dead and then realizing that he can’t and then tries to run for her and his attempts fail as he turns into petals. Re-shooting these two shots weren’t easy because the shot consisted of a lot of tiny details that I can’t get right by myself. So I got my sister to help. For the first part of this shot, I had to jump up and had to reach out to the camera. To get this shot, I knew I needed to put the camera high. So I got the ladder in my house and brought it into my room then told my sister to get on top of the ladder as high as she can and then keep her hands up as high as possible. To make sure the camera is steady, I told her to hold the phone with both her hands. I then made sure the phone is using its wide angle camera, so that the effect looks pretty cool when something approaches it giving it an almost orthographic perspective. I then did a few test jumps and went straight for it by jumping a few times as she videoed. Here is the link to the collection of jumping attempts; https://drive.google.com/drive/folders/1F3mKDJeBm0Fa0sV3wVyY5-87gfNNSNRH?usp=sharing
This is the link of the footage that I decided to use for my animation as reference
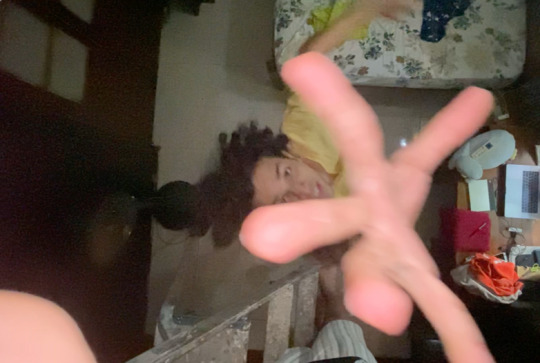
The funny part about this reference video is that when I jumped I fell down onto the ladder almost dropping my sister from about 8 feet height, and more importantly my dropping new phone! Luckily no one was harmed.
In the process of creating this video it was just me who was really tired of jumping. After realizing this footage was the best to use for my animation, I decided that the next step is to create the footage for me to run and jump and turn into petals. This one was really tricky because the angle I had in my animatic is really hard to replicate. I had no professional equipment just a professional brain to use to get the shot. For the re-shoot, I realized my room wasn’t big enough, So I went outside to the living area where I turned on all the lights. I had to make sure the shot has as much light as it can and then moved multiple cushions onto the sofa on to which I planned to jump. Finally creating some space for me to run before jumping. The shot too needed multiple takes because the reference shot from the animatic was hard to replicate as it consisted of a smooth angle change instead of the camera being static. To get this smooth change I realized the only thing I can do is make my sister sit on the ground and move her body to follow me as I run and jump. It took me a total of 60 videos which also have multiple takes inside of them altogether about 100 attempts of me jumping to get it right. As usual the mistakes are human such as; me not jumping the way I should and a some consist of me trying to rematch the footage and realizing the angle doesn’t work then making my sister do the jumping, so I can get the camera movement right for my sister to do when I do the jumping. For the final one I wore a T shirt and jeans to match the rest of the animation and decided to jump a few more times till the perfect footage was finally there. I also told my sister to take the video with the wide angle camera because then I can zoom in when needed. The final video was absolutely perfect and here is the link to the folder with all videos I shot.
https://drive.google.com/drive/folders/1wdCVdqLsLoJauMeHSxSVwB4Zgl3_oi7g?usp=sharing This is the video I decided to finally choose for the main reference of the animation.https://drive.google.com/file/d/1v93jMWn6NpMrQCheyS06lipHV2qWAJR9/view?usp=sharing

After I got both videos done it needed some editing on aftereffects. The first video of me jumping up was perfect but in order for me to give it more effect, I wanted the camera to turn slowly as I fell down. So I went onto aftereffect and an animation to the rotation, I did have to come up with a certain piece of my hand when I have to animate. However the end result was good. Just to make my life easier I added the guides as well so that I can directly export the frames as a png sequence and use them for my animation. Here is the link to the folder with all the frames with the guides. https://drive.google.com/drive/folders/1nOC_iYtQK40mRtiD-J3qUfZyihx4FHTU?usp=sharing
The other shot I just added in the zoom that I didn’t want my sister to do manually. I scaled in the footage and then I zoomed out the footage by scaling the footage to make it smaller. The trick is to make it bigger in the first part and then scale it down to fit the screen and bam! the footage looks nice and professional. I then added the grid the same way I did for the previous shot and exported the animation so that I can start animating the frames in this shot with the guides that are in the same file as the one from earlier
Animating… the animation process wasn’t difficult for the first shot because there wasn’t a lot to do besides just copy the reference on to my Autodesk frames. However I did have to make myself turn into flowers for the next shot. Which I referenced my animatic and added in the in-betweens for it. This task was very time consuming because there are tiny little petals and it took me almost five hours to complete this entire shot. I worked on both these shots at the same time as I wanted them to feel like the same shot. Here is the completed rough version of this shot;
https://drive.google.com/file/d/1MoTB640gDYLgkPvQlqScHc8C2EVJjpVU/view?usp=sharing
The part where I turn into flowers is my most favorite part form this shot. Its super satisficing and slightly unpredictable. Anyways this scene was done and dusted for now. The whole animation thing is really starting to get to me, I can totally feel my carpel tunnel acting up at this moment.
0 notes
Text
Decision making and animating
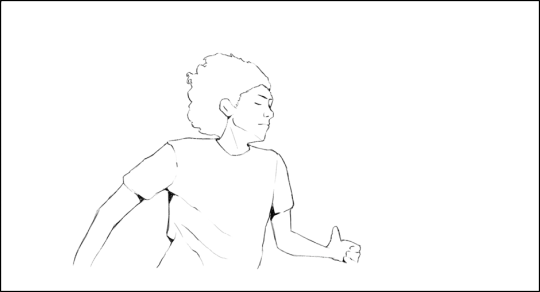
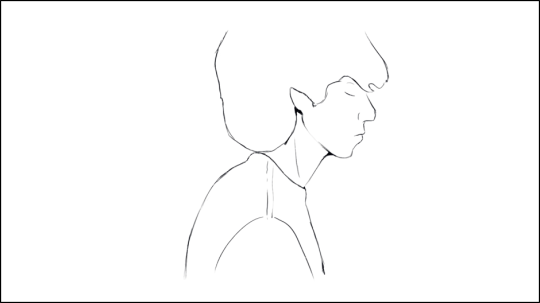
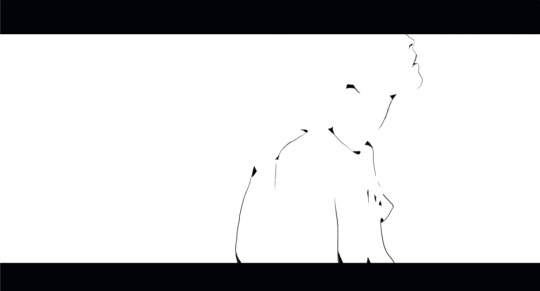
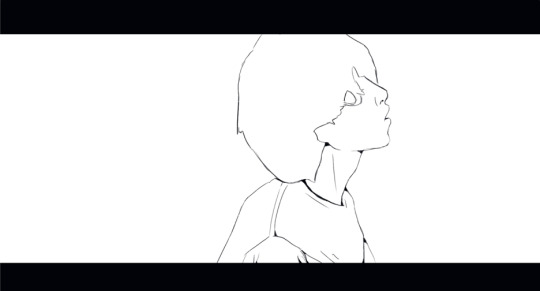
The next two shots are the shots of my character falling down. The initial one I had where the character is facing the camera as he falls was something I wasn’t necessarily sure about and when I showed it to my lecturers they thought it was a girl, which made me scrap that part of the animation completely off, so that I can just focus on the other shot. The falling to his death shot took more time on the black screen after trying not be too long. This is the decision I made based on feedback from my lecturers. I then had the next shot which is the guy falling with a close up of his face and then turning around. This shot had just a few in-betweens to add and one shot was the same shot that doubled to give it that slow-motion effect. It took the regular amount of time any five second shot would take. However, the shot didn’t have too many issues when it came to doing the animation, I just had to makes sure the face the body and hair looks exactly like the previous frames. Here is the rough animation for this shot;
https://drive.google.com/file/d/1GMFT9MaB_NexNNA_DFbCC6AJl5VdnCDl/view?usp=sharing

This shot did have the most flow in it which I love about it. Because the previous shot isn’t there, this shot feels much more natural and fits perfectly with all the other shots I drew.
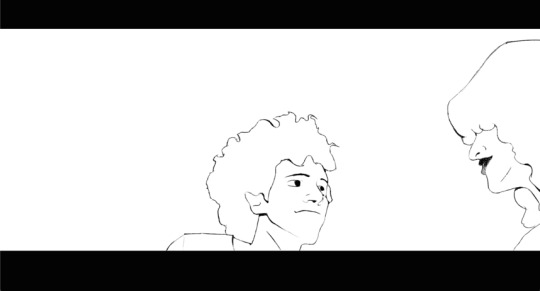
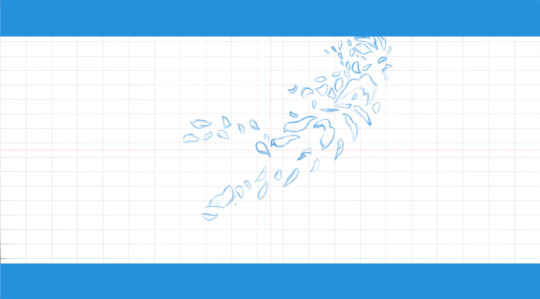
Hair flowing in the wind, with flowers
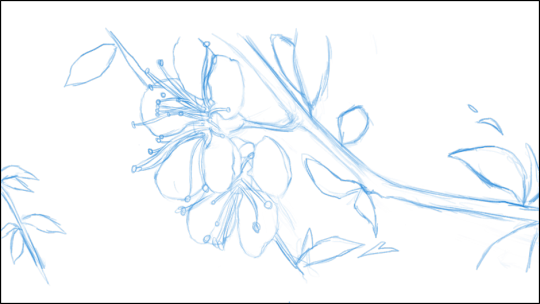
This shot has the very a very basic nature to it when it comes to the girl because her face stays the same as her hair flows through the shots. There wasn’t any challenging aspects to this drawing because the animatic already had the key frames that just needed some in-betweens. However, the issue I did face was the flowers. The flower on the other hand had some work to be done because the initial cherry blossom chosen didn’t look good composition wise and the fact that there were multiple flowers in the shot made it much harder for me to animate.
My goal was to find a simpler shot with more appeal to it. So I went back to the multiple hours of flowers blooming video where I remember there being another shot of cherry blossoms in the video that I think I can use for the animation. Here is the shot of the cherry-blossom I chose;
https://drive.google.com/file/d/1clQiPMrVuahLAy3oFSk3sd5MulYm9ZIT/view?usp=sharing
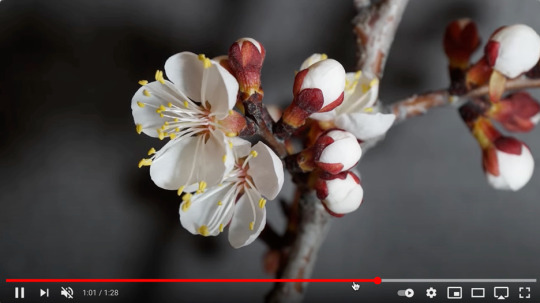
The scene had multiple of these cherry blossoms bloom however I wanted to just focus on two because the story is about two people and only them. Furthermore, the composition of the shot would be much better. When it comes to think about the animation of the shot, I wanted to make the animation similar to the style of the girl where there is one specific part that moves and the rest don’t. So here I wanted to make it look like the petals move and nothing else. Besides the camera zooming in or zooming out like I planned during the animatic. On the other hand, the animation needed the two flowers and nothing else. I realized having these other buds wouldn’t make the animation look good and it would also take away from the blooming petals of the flower. So I decided to keep the flowers but change the background. I didn’t have to do ay research. I just drew what felt right and gave some nice leaves the fill in the empty area. This is what the flower shot looked like at the end of this stage;
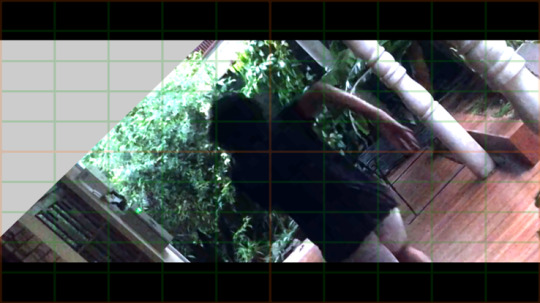
The reason I kept the flowers in the same position was because then I can use the grid method to animate the flowers which is exactly what I did. I added the flower video reference to aftereffects with the guides from when I did the shot of my character falling down. However the black and red wasn’t as visible on this so I added a blue color to the grid on after effects using a hue saturation filer to it and getting this finale result. Here is the link to the folder with all the flower references;
https://drive.google.com/drive/folders/1qVjFQBGeIrvndO6pfO7UBMwjtDdmHYYy?usp=sharing

The next thing I had to do was to animate the flower petals. What I did was, I drew everything except the flowers in the mid ground layer and then drew the flowers in the foreground layers and then used my reference as a guide and added the subtle changes to it. I did face some issues because the movement of the flower petals from the first frame to the last one was very little making it harder for me to draw the frames, and the guide was also kind of hard as the amount of squares in it was greater than what I usually go for. But with a lot of time drawing each petal one by one I was able to get the results I wanted. Because of the animatic drawing the hair on the girl was easier than I expected hence being done with this shot much faster than before. It then exported these shots separately so that I can do the zoom in and zoom out animation. Which was very subtle and basic. Here is the final result of that whole shot;
https://drive.google.com/file/d/1C0ILb1ml_IIDYo7at5S0bFqEKKOJLxvf/view?usp=sharing

Even though some aspects of this animation are static with the whole shot fully complete the overall look of this animation was incredibly dynamic and the hair flowing in the wind looks really satisfying.
0 notes
Video
I was afraid someone would assume I rotoscoped the animation hence while I did a screen recording of me drawing the shot while referencing my reference shot with the grid. furthermore, this is two frames and it took me about ten minutes to draw. I wish I could do more screen recordings however my laptop gets really laggy and starts heating up when I try to record for too long
0 notes