
Last Seen Blogs

cydrhos
War's long done. We're all just folk now.

awin-s1975
Untitled

paigenr1995
Paige Riemer

sunlitsorrows
Heavy In Your Arms

i-mproper
calm down
Text
More Ellington Gems
The Pittsburgh Jazz Festival organized on June 20, 1965 a "Jazz Piano Workshop" which was luckily recorded and issued on CD by Mosaic Records: https://www.discogs.com/Various-The-Jazz-Piano/release/5260834. Here is a picture of the "cast" on that day: https://collection.cmoa.org/objects/cfcdaea2-de64-4f61-92cf-8f4e6d9db60f
Ellington plays two numbers (in addition to a duo with Earl Hines): a spirited version of "Take the A Train", with bass and drum accompaniment, and another piece "The Second Portrait of the Lion", an homage to Willie "The Lion" Smith, who was also performing that day. This is the outstanding piece on the album.
The first "Portrait of the Lion" was originally recorded in 1939 with the full band. This second portrait has little in common with the first. There are a few other performances of The Second Portrait recorded in concert (Paris, Italy and Denamark, 1967), but in shorter versions. This one is 4 minutes long, and really fascinating.
Ellington starts off with a few introductory chords that hint to a melody, as if he had just sat down to compose. Humming along (as The Lion often did), he jumps into a very "classical" stride theme, which he then proceeds to "deconstruct" only to jump back into the same stride theme a second time, to "deconstruct" it once again but this time moving into a slower solo (at 1:40) that lasts for over a minute and a half (up to 3:00). In this long interlude, Ellington is exploring: he hints back to the stride theme at various points, leads us into different melodies, constantly changing, as if he were composing "live" (this was certainly improvised) - everything is in motion. The stride theme is then played a third time, but this time ends in a series of chords (at 3:15) that sets us up for another slow ending, more coherent, poised, and in which the stride theme seems (to me) perfectly merged into the slow melody, as if to say that the pianist had succeeded in this transformation and found his inspiration and peace.
This is a brilliant homage of Ellington to the pianists that inspired him in his youth, with a perfect balance between classical and modern, that transcends any categories. As with anything published by Mosaic Records, the sound quality is good !
0 notes
Text
Job seekers and especially new comers to Canada BEWARE !!
They supposedly work in clean/green energy.
All 1-star reviews on the sites are 100% true, and everything above 2-star reviews are fake reviews entered by top management. Terrible culture and people you have to work with, please stay away. They don't respect people. They specifically target newcomers to Canada because Grasshopper knows it's easy to make fools of them and get them to join in and treat them like anything. Please find a casual job that you will enjoy more than working here. Trust me, flipping burgers at Tim Hortons and McDonald's is better than being prime minister here. At Tim Hortons & McDonald, you will at least be respected as a person.
Please close this company as quickly as possible before you get into "real" trouble
0 notes
Text
What is Accurate Sound?
I see this question asked often on audio forums and there are many varying answers depending on one’s viewpoint. Viewpoints range from being able to recreate the performance, to its just entertainment folks, and everything in between.
For this article, the context for what is accurate sound is the closeness to which our systems reproduce the incoming signal. To qualify the context even further, I am discussing the last component in the sound reproduction chain: loudspeakers in rooms. The intent of this article is to be educational.
Digital Signal Processing (DSP) in audio has come a long ways over the years and today we have sophisticated DSP software tools at our disposal that allow us to model the “ideal” loudspeaker. We can use this model as a “reference” and compare the model to what happens in the “real” world. I.e. comparing the incoming signal to the loudspeaker and the result arriving at our ears at the listening position.
It is possible to accurately reproduce the incoming signal to our ears at the listening position without any frequency or time domain distortion. In addition to objective measurements, the subjective listening section characterizes, in detail, what accurate sound reproduction should “sound” like. Again, this is from the viewpoint of loudspeakers in rooms.
I link to the subjective listening section for folks who want to skip over the technical part. I have tried to keep the technical explanations as simple as possible to convey the intent, but I also provide links to references and further research for those who are interested in more detail.
More on what is accurate sound
One way of describing accurate sound is that the music arriving at our ears matches as closely as possible to the content on the recording. To put it into context, we can only reproduce what is on the recording.
Another way of describing accurate sound is that there are no frequency or timing response distortions arriving at our ears at the listening position. This means that loudspeakers in rooms distort the acoustic signal arriving at our ears in both the frequency and time domains.
Both descriptions infer that whatever is on the recording is arriving at our ears without any frequency or timing response anomalies. We are used to measuring/hearing flat frequency responses with no phase shifts as the norm in the digital audio and electronics world. When it comes to loudspeakers in rooms, the signal arriving at our ears is far from being the ideal response both in the frequency and time domains. This is the norm.
What is an “ideal” loudspeaker?
The ideal loudspeaker would have a frequency response that is ruler flat from 20 Hz to 20 kHz, spec’d within a small ± 1 dB tolerance. Multi-driver loudspeakers would be time aligned. Phase and group delay would be flat. Basically no frequency or time domain distortions. In engineering terms, a perfect transfer function.
Using software DSP designer tools, we can model the ideal loudspeaker response based on our specifications. Here is a frequency response of an ideal loudspeaker:
In the real world, loudspeakers don’t go down to 0 Hz, so we assume the ideal loudspeaker starts to roll off at 20 Hz. The filter modeled above is a minimum phase, 2nd order high pass Butterworth filter with a corner frequency of 10 Hz. If the filter went to 0 Hz, it would be a completely flat line. But since loudspeakers frequency response doesn’t go down to DC, this is why we see a bit of a rise of the phase response in the low frequencies when we switch from the frequency response view to the phase response view of the same signal:
Loudspeakers are minimum phase systems. That means the phase response tracks the frequency response and vice versa. This is important to note as we will revisit this key concept later as it is important relative to room acoustics and the non-minimum phase behavior that occurs in rooms at low frequencies.
Group delay should be flat and again following the low frequency roll off:
Finally, the step (or timing) response:
All of these views are of the same signal that provide different viewpoints of the transfer function.
I thought I would put a “how to read this chart” legend as the other charts are easier to read (i.e. mostly we want a straight line ☺ There is a concept of preringing with linear phase filters, so we want to watch for this type of distortion, even though in listening tests I have conducted, large amounts are hard to audibly detect. The tell-tale sign is a ramp up or oscillation of the signal before the actual signal. Most noticeable on sparse music transients, like a kick drum for example, where it sounds “reversed” in the extreme case. Most modern DSP correction software have preringing compensation as it is well understood mathematically, so this is no longer an issue.
See the vertical step itself starting at time 0 milliseconds? One can think of the vertical amplitude as the frequency scale with 20 Hz starting at the bottom and 20 kHz at the top, as this is what we specified in our ideal loudspeaker design. If I designed for flat to 30 kHz, then the vertical spike would be higher. If the drivers were not time aligned, then we would see horizontal offsets away from 0 ms of the straight vertical line representing parts of the frequency spectrum arriving at our ears at different times, and different between channels too. This is very important to keep in mind, the point being our ideal loudspeaker has all direct sound frequencies arriving at the same time for both channels, i.e. at 0 ms.
The slope of the roll off, or shape of the tail, after the initial vertical step and to where it crosses the 0 ms horizontal time axis, is based on the loudspeakers low frequency roll off and cabinet alignment (i.e. slope of roll off). A roll off at a higher frequency would push the “cross the 0 time” threshold towards the left and a lower than 10 Hz roll off will push the 0 crossing point to the right, say at 15ms or even 20ms, depending on loudspeaker design (e.g. subs or no subs) and size of room.
Other than the low frequency roll-off, these charts might as well be measurements for a DAC, or pre-amplifier or amplifier measurements. Right? No frequency or timing distortions. Accurate sound, at least relative to frequency and timing response.
Consider this a representative baseline example of how an ideal loudspeaker would measure. I am simplifying the details to hide some of the complexity. For example, research shows that both on and off axis frequency response is important to be smooth for a “good sounding” loudspeaker in a room. I agree, and if one looks through some of my articles here on AudiophileStyle, those research links are there, which have culminated into a “Standard Method of Measurement for In-Home Loudspeakers (ANSI/CTA-2034-A R-2020).”
Note, the standard is a free download. If you’re so inclined, it is a very interesting read on the state of the art of measuring loudspeakers that correlates to scientific research on what makes for a good sounding loudspeaker in a “typical” listening room, i.e. the estimated or predicted in-room frequency response is one of the report outputs from the standard. See Figure 11 on page 37:
We can see how accurate and precise the predicted in-room response is based on anechoic measurement data compared to the actual in-room measurement of the loudspeaker. The frequency response is virtually identical which validates the anechoic measurement methodology and processing algorithms used to estimate the in-room frequency response. Of course, there are low frequency room effects, but that is one of the points of this article and how to mitigate them to restore the response to ideal.
This is a huge improvement for “loudspeaker measurements” for consumers as the report can accurately and precisely estimate how the tonal response of the loudspeaker will sound in a typical listening room. As we will see further into the article, flat in-room response is not the target, but we do know what a neutral in-room response measures. Point being, if shopping for new loudspeakers, try and find a set that a) were measured using this standard methodology and b) offers a predicted in room response report.
Of course, even under anechoic conditions, most loudspeakers don’t measure ruler flat, many have crossover issues, directivity issues, driver time misalignment, cabinet diffractions, cabinet resonances, difficult impedance loads, and on it goes. Then we place the loudspeaker in a room. This further distorts the signal most significantly in the room’s low frequency modal region. And if the room is overly reflective or damped also has an impact on accurate sound quality. In other words, both the frequency and timing responses are further impacted by placing loudspeakers in rooms.
Now that we have an ideal loudspeaker, and with many more caveats than I described in the last paragraph, let’s have a look at what happens in the real world.
Loudspeakers in rooms in the real world
Thanks to John ( @Olesno ) Jonczyk for volunteering his system to show the effects of loudspeakers in rooms. John’s system consists of:
Tekton Ulfberht speakers
Don Sachs tube amp and preamp
Lampizator GA TRP tube DAC
Oppo UDP-205 player
Roon Nucleus+
Lumin U1 Mini (upgraded to U1)
Puritan Audio Labs PSM156 power purifier.
Let’s look at the in-room frequency response measured at the listening position:
As we can see, John’s loudspeakers have excellent in-room frequency response down to 16 Hz and high frequency extension to 20 kHz with natural high frequency roll off beyond 10 kHz due to air absorption.
I included both channels to not only show there is variation in each channel, but also between channels. The latter is very important for proper stereo decoding so that both channels are as close to identical as possible, both in the frequency and time domains. A solid phantom center image depends on this level of accuracy and precision, as does the placement of instruments and/or vocals in the stereo image, which also includes depth of sound field. Note: John’s room measurements are “typical” for any given room. I.e. uneven frequency response, even between channels. We all have this issue to one degree or another. I will explain why a bit later.
When it comes to loudspeakers in rooms, if the room’s broadband decay time is within a 300 millisecond to 600ms range, and smooth across the frequency band, our area of interest is now focused on the low frequencies. This is because at a certain frequency in a room, as related to its dimensions and especially room ratio, the room transitions from ray acoustics to wave acoustics into what is called the modal region. In John’s room, that is about 200 Hz and below. I have marked up the chart a bit to show there is some 15 to 20 dB of peak to peak amplitude variation in the low frequency response:
Here we are looking at the frequency range from 10 Hz to 200 Hz where the room has its way with the low frequency response. Note the variation in amplitude representing the largest peak to peak variation, which is over 20 dB as shown in the chart. To our ears, we perceive that 20 dB difference as being 4 times as loud or quiet depending on which end of the variation the bass note lands. In addition, there are level variations between the two channels which disrupts the stereo image and phantom center. Note: John’s low frequency room response is “typical” of virtually all of our listening rooms in which I will explain why a bit later.
Let’s take a short detour to better understand what is going on here and why this is important. Unless one has a proper acoustically designed room, or lucked out with a preferred room ratio, the odds are that the vast majority of our rooms will have this amount of low frequency variation, i.e. 15 to 20 dB or more.
Before I explain, perhaps follow along with a little subjective listening exercise to tune one’s ears into the issue. Find some music that has a variety of bass notes. The more variety, the more low frequencies we are testing, just by listening to music.
Here I have chosen the song “Spanish Harlem” from Rebecca Pidgeon’s The Raven, which has a very nice acoustic bass in the key of G that uses the classic 1, 4, 5 progression. In addition to the excellent recording by Bob Katz and Rebecca’s heavenly voice, here are the bass fundamental frequencies that go with the progression:
49 62 73 65 82 98 73 93 110
What exactly are you listening for? Turn up the volume to your preferred listening level. If you have a sound pressure level (SPL) meter or one on your phone, turn up the volume until the average level is around 77 to 83 dB SPL C weighting at the listening position.
Get comfortable, close your eyes and focus in on the bass line and the bass notes being played. For each bass note played, do they all sound the same level in your room? Are some bass notes lower in level? Some higher in level? Is there one bass note that stands out above all others?
It is not an easy listening exercise because we are so used to listening to uneven bass response we may not have heard equal loudness bass notes before to compare to. To understand more about why we hear what we hear in small room acoustics, I refer folks to James (JJ) Johnston’s excellent presentation on the, “Acoustic and Psychoacoustic Issues in Room Correction.” The first 31 slides are worth the read.
So it may take a bit of time to “tune” into the bass line in the mix and focus on its level variation. This can be further complicated by the rest of the instruments and vocals playing at the same time.
This is why finding a song that has significant bass note variation makes it easier to identify which notes are louder and which ones are softer. In some cases, it helps if the music is sparse, like in “Spanish Harlem.” Other times, it helps if the bass notes are loud and sustained like in Madonna’s “The Power of Goodbye.” Once you tune in, it becomes easier to hear.
Why do we have uneven bass response in our listening rooms?
The answer is primarily due to the physical dimensions of a listening room and its room ratio. Room construction and acoustical treatments play a role, but at these long wavelengths, it is more about the room ratio. This article on, “Room dimensions on small listening rooms” gives us insight as to why room ratios affect the quality of the bass sound in one’s room.
We can also enlist one of the many online Room Mode Calculators like this one: AMROC Room Mode Calculator to examine our existing listening rooms. Type your room dimensions into the calculator and read the various panels about your room modes.
It is highly educational if your browser is hooked up to your sound system so when you hover the mouse over a graphical room mode, you can hear what it sounds like in your room (careful to keep the volume down). It is an ear opening experience. Give it a try as there is nothing like hearing the problem with your own ears. Try walking around the room while hovering over a mode. There may be locations where it is really low in level and other locations where it sounds like blowing on a Coke bottle, but at a much lower frequency. Use the Room 3D view to show you where the modes are located in your room.
The unfortunate reality is that few of us have properly designed listening rooms with appropriate room ratios to evenly distribute the low frequency room modes, aside from not having enough of them to begin with. So, we end up with rooms that have the wrong modal density with virtually no modes down low and with others bunched up together. Sometimes this occurs at the most inappropriate frequency, like the usually recommended subwoofer crossover frequency of 80 Hz. Pro tip: cross subs between room modes to your mains.
Further, below a room’s transition frequency, also called the Schroeder frequency, room modes, standing waves, room resonances dominate the sound, so much that the room is in control of the low frequency response, not our loudspeakers. Yes, you read that correctly. Below the transition frequency, your loudspeakers are no longer in control of the low frequency response, rather the room is.
Here is a typical size listening room where a measurement mic has been placed at the listening position and the loudspeaker has been moved to three different locations within a two foot radius:
As one can see, below the room’s transition frequency of about 300 Hz in this example, the bass response varies significantly, not only by location, but also in each location! Above 300 Hz the loudspeaker is in control of the frequency response that we perceive. Alternatively, the room has substantially less influence on what we hear above 300 Hz. With careful loudspeaker and listener placement one can get lucky and be in-between the worst of the peaks and dips. But more often than not, it is simply shifting the frequencies and timing of the room modes, but they are still there.
The chart above is from Floyd Toole’s excellent article on Audio- the science in service of the Art. As Floyd says, “In the investigation of many rooms over the years, I would estimate that something like 80% have serious bass coloration.” Further, Floyd’s research shows that bass subjectively accounts for 30% of how we judge speakers sound quality. And “ANY loudspeaker can sound better after room EQ, so long as it competently addresses the bass frequencies - this is not a guarantee, but really is not difficult for at least the prime listener.” I am in total agreement.
Getting back to John’s speakers… Let’s look at the phase response:
Behaves well beyond 2.5 kHz but we can see the phase “wrap” at just over 400 Hz and if we “unwrapped” it, we would see a negative phase or downward phase response with more anomalies below 100 Hz.
What about group delay?
Above 300 Hz, no issues. Below 100 Hz we see some peaks and dips. For the very narrow dips our ears/brain don’t really notice anything missing. The bandwidth is too narrow for our ears to pick up. Remember JJ’s presentation, it is the peaks we can hear (as delayed bass in the group delay view) and the gap in the left channel at 30 Hz is approaching our ability to notice.
What about the step (timing) response?
We can see in the vertical step at time 100ms (think of that as the 0 ms marker from our ideal loudspeaker example) that there are two amplitude spikes, not one. We will get to that detail in the next chart which shows a zoomed in version on the time scale to show the time misalignment.
What I want to focus on is that roll off or “tail” of the low frequency response over time, like over 100ms as shown in the chart. We can see that there is quite the difference between channels, in addition to not following the ideal step response shown earlier. This is because of the multitude of room reflections at numerous angles, thus the timing response at low frequencies is also altered. This is due to the fact that portions of the low frequency response are no longer minimum phase response. This is why applying just “frequency correction” using certain room eq products or Parametric EQ’s (PEQ) doesn’t solve this problem. But that discussion is for another article on “how” room correction works.
We can see for the right speaker a reflection that is almost the same amplitude as the tweeter, but around 135ms later. Sound travels roughly 1ft per millisecond. So the bass response has built up to a peak 135ms later. This is why the bass response in most rooms sounds muddy or boomy or not distinct - just some of the subjective words tied to a bass response that is (literally) all over the place in the room.
Let’s zoom in on the time alignment of the drivers:
As mentioned above, we see two vertical spikes that are offset in time. First to arrive at our ears are the tweeters and then the woofers.
So the step response has shown us two issues, one being driver time misalignment so all direct sound is not arriving at our ears at the same time. The other being low frequency room variations, not only for each channel, but between channels as well.
Is any of this timing distortion audible? To my ears it is. Here is an experiment where I set up my system with virtually identical frequency responses and only changed the timing response. To my ears, it increases the sound stage depth to be in line with an improved stereo image, in addition to the bass sounding even, solid, transient and crystal clear.
Can we restore the ideal sound with no frequency or timing response distortion?
Yes, we can using specialized loudspeaker and room correction DSP software designed to solve these problems. I have written numerous articles about it, including a book, but in this article, we are only interested in “what” it can do and not “how” it does it. The latter is for another article as this type of highly specialized DSP is mostly misunderstood. Further, very few DSP products provide the needed time domain correction capability. Finally, the “effectiveness” of so-called Digital Room Correction (DRC) products vary wildly. The top two or three DSP software products in this category far outpace other products by a wide margin based on my experience evaluating just about all of them over a ten year period.
So let’s jump right to the results of applying SOTA DSP loudspeaker and room correction to John’s already excellent loudspeakers. Remember what the DSP is accomplishing is restoring the ideal loudspeaker response arriving at our ears with no frequency or timing distortion.
Before:
After:
The grey line is the “target” response that was “designed” in the DSP filter designer software. As we can see, John’s speakers track almost perfectly within a ±3 dB (studio control room) tolerance from 16 Hz to 20 kHz with the top octave left alone to roll off naturally due to air absorption. Not only is each channel smooth, both channels are virtually identical. Both are equally important attributes to what constitutes accurate sound.
Note the tilted frequency response is based on years of scientific research from Floyd Toole and Sean Olive on what a good in-room measured frequency response correlates to what sounds good to one’s ears in a typical living room environment:
There are a couple of interesting points to note. Look at the un-equalized loudspeaker frequency response in the chart. Again, typical of in-room frequency response due to room effects. If you dig into Sean’s presentation on slide 24, it is interesting to note that a measured, tilted in-room frequency response is perceived by our ears/brain as a “flat” or neutral frequency response:
See the most preferred tilt at the top (in red on chart background) is actually perceived by our ears as flat or neutral (the bright red overlay). If we “eq’d” the loudspeakers to flat at the listening position, it would be perceived by our ears as too bright sounding, with not enough bass. This is not the preferred target.
What about the phase response:
Before:
After:
Here again the target is in grey and John’s loudspeakers do a great job of tracking to the minimum phase target response, with both the natural rise in the low frequencies and roll off at the very top. Virtually ideal, and in the real world, this as good as it gets folks!
Same goes for the group delay:
Before:
After:
As described earlier, our ears do not perceive narrow dips in frequency response, and so any narrow dips in group delay we do not hear either. From JJ’s presentation, our ears follow the “envelope” of the curve and are more sensitive to peaks than dips. The point here is that the restored group delay response is consistently flatter across the low frequency range (i.e. no low frequency delay).
Step response:
Before:
After:
That’s a remarkable difference with the restored step response following the target (black line) over time, perfectly time aligned and looking like the “ideal” loudspeakers timing response. Talk about “deblurring!”
As one can see not only does all the direct sound arrive at ones ears as the same time, but also the low frequency reflections in the room are aligned towards the ideal minimum phase response. And finally both speakers are in perfect sync with each other over a long time period. Hearing the bass transient response on this system would be incredibly impressive, in addition that the bass response will remain perfectly centered even as the room decays. How would I know? My system measures virtually the same as John’s…
Let’s have a look again at John’s room to help put this level of performance into perspective:
If you will note the speaker setup from the previous pic, while perfectly symmetrical from a listening position perspective, John’s setup and room are not. Yet, we are able to restore virtually the ideal response at the listening position in both the frequency and time domain.
Side note: Much has been said and written over “microphones are not ears,” “only at one measurement location, move the mic 6 inches and it is totally different,” “the simulations are different than the measurements,” etc. Folks can read how SOTA DSP software achieves this not “just” at one listening position, but over a large listening area. Not only in my articles here on AudiophileStyle, but I also wrote a chapter in my book validating that the DSP simulations produced are within a 0.25 dB of the actual measurements. This is consistent with over hundreds of simulations and measurement verifications. I go into detail taking 14 in-room measurements across a 6ft x 2ft grid area that show both the frequency and timing response remain consistent across this large sweet spot, based on a single analysis measurement.
From John’s listening perspective, it is as if the room were perfectly symmetrical, listening to the ideal loudspeaker in a room where the room modes are evenly distributed. This describes most pro control rooms used for recording, mixing and mastering as they are acoustically designed that way. We can achieve similar if not a virtual replica of what has been recorded, mixed, and mastered arriving at our ears in the comfort of our listening rooms, without major room reconstruction or cost.
This is a good segue into the question: “So, what does accurate sound ‘sound’ like?”
Subjective description of listening to accurate sound
“It is possible to reproduce a stereo recording in an ordinary living room such that listeners have the illusion that the two loudspeakers have disappeared. When they close their eyes, they can easily imagine to be present at the recording space, as they listen to the phantom audio scene in front of them.” Siegfried Linkwitz
I totally believe that as I hear it every day from my accurate system. The reason I love listening to music is to be blown away. I am always looking for ways to get the most of what is on the recording. I want to hear the full expression of the performance. Being able to reproduce the music (i.e. signal) faithfully (with no frequency or time domain distortion arriving at our ears) gets us there. Let talk about these two technical parameters from a subjective perspective as to what accurate sound “sounds” like.
Frequency response:
With a smooth on and off axis frequency response we get the tonal representation as recorded on the digital media. For sure, there is a wide range of recordings with varying frequency responses, but I have found more often than not that there is a sweet spot. For example, like the Harman target mentioned earlier where almost every recording I have sounds good, some better than others, but all good. Neutral frequency response meaning no one frequency stands out over the other. The balance sounds not too bright, not too dull, but just right with the right amount of bass that sounds even, solid, transient, and crystal clear.
What is often overlooked is how well each channels frequency response match each other. This is absolutely key for a rock solid stereo center phantom image and overall stereo image. See John’s original frequency response where both channels don’t match and are frequency dependent. This is what blurs the phantom center image and/or what we call phantom wander or a weak phantom center image. Some frequencies sound centered, others sound coming from more one side of the stereo image than the other and even vice versa in another range of frequencies. This not only destroys the phantom center image, but also the stereo image itself. And further exacerbated if one’s setup and/or room is asymmetrical.
When I listen to a mono recording on an accurate system, the image is crystal clear and dead center. I mean like a virtual point source “dot” emanating from the very center, eye height. There is no phantom drift towards one speaker or the other, just dead center, over the entire frequency range. Given that very few of us have symmetrical setups in symmetrical rooms where one half is a mirror image of the other half, the only way to match the channels frequency response to this level of accuracy and precision is by using DSP.
Timing response:
There are two aspects to timing response and how we subjectively perceive them when listening to music. One is the low frequency “evenness” of the sound. Remembering JJ”s presentation, for low frequencies, our ears hear a combination of both the direct sound and room sound. The room sound occurs over time. Aside from the frequency correction providing that smooth response of the direct sound, we want that smooth response over time too, following the ideal response as it if was all coming from the loudspeaker with no room contribution. This is for low frequencies typically below the room’s transition frequency.
The subjective listening experience with the smooth bass, both the direct sound and over time, provides crystal clear sounding bass with no “overhang.” Feeling solid and dead center without any wandering from center over time. For many, it is the first time one actually hears how clear and even sounding the bass coming from one’s system can be.
The 2nd aspect is time alignment where all of the direct sound is arriving at your ears at the same time. Note only between each individual speaker driver, but between stereo channels as well. Subjectively, to my ears, the transient impact, even with subs, is immediate. A plucked acoustic guitar string has that snap you hear as if the real guitar was in the room. I have performed that experiment and it is remarkable how close it sounds to the real thing.
The stereo image benefits as both channels are also arriving at your ears at precisely the same time, along with all speaker transducers being time aligned. To my ears, the soundstage or imaging really focuses and the image width and height go beyond the physical dimensions of the loudspeakers. The location of instruments and vocals within the 2D image are solid, precise, and don’t vary with frequency.
The other area I feel time alignment really improves the listening experience is the depth of field in the recording. Or put another way, I can hear deeper/longer into the recording than ever before. The stereo image height and width restoration now has an equivalent depth of field restoration and extends as if there was no front wall, just like through the looking glass…
Conclusion:
I hope folks found the article educational. The links point to excellent research, some of it an accumulation of decades of comparing subjective listening experiments with objective measurements. That research has developed into meaningful, modern standards for measuring loudspeakers and improving their designs, with the benefit going to the consumer. This is especially true when using the CTA 2034A measurement standard as it also provides a reasonable estimation of what the loudspeaker will sound like in one’s living room, at least from a tonal response perspective.
With sophisticated DSP filter designers and powerful computers, one can easily model the “ideal” loudspeaker. We can also compare the ideal loudspeaker to the real world of loudspeakers in rooms where we listen to wonderful musical performances. We measure (and hear!) distortions in both the frequency and time domain with loudspeakers in rooms. Through sophisticated DSP filtering, we are able to restore the signal to the “ideal." Of course, some prefer a bit more bass or more treble, but there is a standard distribution based on my research and having measured dozens of different systems in rooms from all over the world.
The frequency and timing response are not all of the attributes that make up for what is accurate sound. What about total harmonic distortion (THD), for example? Well, unless you are hearing audible loudspeaker distortion because the loudspeakers are too small and/or inefficient to drive to “reference level” without hearing distortion in one’s listening room, I am a bit, “What, me worry?” I am just giving the caveat for folks that may get the impression that I don’t feel there are other parameters that impact accurate sound. There are. But in the big scheme of things, and relative to all of the other digital and electronic devices upstream, loudspeakers in rooms make for the biggest divergence away from the ideal relative to any other component in the system.
I would like to give the final word to John, who was generous enough to let me use his system as an example, and most importantly, has heard the difference in his system first hand:
First of all, thank you for featuring my system and my room in your very thorough and very technical article describing the benefits of using well designed and executed DSP software in order to achieve the best possible sound in anybody’s room. Of course a collection of good equipment that’s carefully set up in any room should almost guarantee great sound. That is true if you have a room designed for perfect acoustics. Looking at my pictures, this definitely is not the case. Still, as happy as I was with the outcome, I thought that the influence of my room's layout was detrimental to the overall sound. A well designed DSP filter based on my room’s readings would bring it up to another level.
Since I mostly listen to music streaming from Tidal or Qobuz via Roon, I decided to use that platform and Audiolense, a powerful software DSP tool, to fine tune the sound. Did it work? Yes, I can positively say that it made a big difference in how the music sounds in my room now. In a nutshell, the instruments and vocals are much better focused and spaced around the stage now. The frequency spectrum is now much more evenly spread without any noticeable peaks and valleys. The bass, the mids and the highs sound just right now and on well-recorded material, you feel like you are there. Finally, as good as all the electronics are, I think the speakers, their design and execution made the biggest difference. After all, they produce the sound, and it is glorious. I think I finally arrived at a point where I can say, THAT’S IT!
0 notes
Text
The Value Proposition in Computer Audio: Entering Multichannel at the Ground Floor
THE VALUE PROPOSITION IN COMPUTER AUDIO
Entering Multichannel at the Ground Floor
“Mommy, where does stereo come from?”
Every audiophile should start each day with a thank-you to Harvey Fletcher and his dummy (whose name was Oscar and who had a microphone in each ear). Fletcher is widely known as the father of stereophonic sound. He first described what he called “auditory perspective” in sound in the early 1930s, later coining the term “stereo”. He won a posthumous Grammy in 2016 for his technical contributions to the recording arts. It was Fletcher, along with his collaborator Wilden Munson, who published the 1933 paper Loudness, its definition, measurement and calculation in the Journal of the Acoustical Society of America that established and quantified the concept of frequency-dependent hearing sensitivity in humans (and spawned the “loudness” button, but don’t blame Fletcher for that).
As Director of Research at Bell Labs, he opened the eyes and ears of the world to the potential of recorded music to unfold before the listener, by using multiple sound sources in separate channels to create sonic images with spatial location and directionality. He partnered with Leopold Stokowski and the Philadelphia Orchestra to prove his concepts and demonstrate their value. As part of this effort, he was responsible for the first direct stereo transmission (by phone lines from Philly to DC) in 1933 and the first stereo recording in 1940. His Bell Labs research team installed recording equipment of their own design in the basement of Philly’s Academy of Music. Fletcher oversaw over 100 stereo recordings and developed groundbreaking equipment to “enhance” recorded sound during playback.
IS MORE ALWAYS BETTER?
We audiophiles all enjoy Fletcher’s genius every time we drop the needle, put a disc in the tray, click the icon, or ask Alexa to tell our favorite streaming service to play a tune. And for most of us (including me, until I decided to write this article), two channels is enough. Given what many of us have traditionally spent on our stereo rigs, the idea of a 3 to 4 fold increase in spend and space requirements was simply not a consideration.
The only multichannel audio experience most audiophiles have had until recently has been through home theater, and most HT systems have historically not been well respected for serious audio. Twenty years ago in Stereophile, Chip Stern expressed the question that many of us were already asking:
“In a rollout of new technologies more or less driven by the expectations of the home-theater crowd, what's in it for us music-lovers?”
And in his review of the Toshiba SD9200 DVD player, he summed it up clearly:
“The Toshiba SD-9200 performed admirably, and offered a good level of audiophile two-channel performance for the price [emphasis added by me]; I trust that what it offers in the way of multichannel panache might put it over the top for some viewer-listeners, but I'll have to leave that conclusion to those colleagues of mine blessed with true surround-sound setups.”
His laissez faire attitude notwithstanding, he damned the audio performance of home theater equipment with the faint praise of “for the price” but did not describe the performance sacrifices made to have more channels for the money. I’ll try to be more specific in this work.
[ENTER THOSE EXPERTS, SOUNDSTAGE LEFT REAR]
It was only through the ears and pen of early devotees like @Kal Rubinson that we were exposed to the potential of multichannel audio for audiophiles. He wrote this about Willie Nelson’s instrumental version of Night and Day in his own review of the same Toshiba SD9200:
“I'll spare you the stereo/surround comparison...Right from the first notes, the multichannel version sounds incredibly live...I sense the ambiance instantly, and every sound is realistic and credible”.
And here’s his summary of the MC Buena Vista Social Club (World Circuit/Nonesuch 79478-9) from the same review:
“Listening to the DVD-A's stereo track... was...satisfying, but when I switched over to the Surround track (not a simple task, under the circumstances), I wanted never to go back.”
His reviews of the day also documented the rigors of MC audio, e.g. “The user interfaces (read: controls and menus) of multichannel components are complex and, um, idiosyncratic”. Worse, source material was not common and came in multiple formats each of which was more expensive than the last. I’ll spare you a complete history of multichannel audio and leave these links for your use if you want to learn a bit more: MC history , mp3 5.1 (!) , MC history according to Dolby , and Surround Sound: the Audio Side of Home Theater.
I’ll also spare you the history of MC equipment for audio. To date, the good stuff has come dear. Almost all of the affordable home theater systems from major electronics producers have been classic, mass market, consumer-level products designed and best suited for watching football games and movies. There are a few HT gems worth the effort it will take to find them, and there are now some excellent and affordable HT receivers that do audio very well. HT is one source of value in MC audio, and if you’re careful and selective in your choices of equipment you can get some fine MC sound for very little money. More about that in a bit.
THE WINDS OF CHANGE
What’s gone is gone and what’s done is done. MC audio just ain’t your father’s home theater any more. I’ve had a HT setup for almost 20 years, with a ceiling mounted projector and a series of receivers and speakers in the house. I started with one of those $200 loss leader HT systems that included a receiver and a small 5.1 speaker setup, just to see what it was all about. We loved the 8’-plus image, but the audio was just not suitable for serious listening. I upgraded each time my projector bulb died, because it was almost as cheap to buy a new projector as it was to replace the bulb back then. And, of course, what’s a better projector without better sound? So I ended up with a pretty nice Pioneer Elite 7.1 receiver with decent DACs (24/192, Burr Brown as I recall) that sound quite fine.
While researching my next pieces on Raspberry Pi and other SBCs, I discovered a 6 in / 8 out DAC HAT for the Pi for $58 that screamed “BUY ME!”. So I thought I’d get one for inclusion in an article on advanced stuff that audiophiles can make and do with a Pi, and I put it in the queue. After getting the article on modifying the Pi for higher performance to Chris, I started working on the next piece. After building a DAW on a rodded 4 gig Pi 4, a few Pi based NASes with different software, a freestanding wireless hub, and an active crossover, I started working with the Octo and had such a great time with MC on the cheap that I decided it deserved its own article. So you’ll read about the other projects in a future article.
FOR ME, MORE IS BETTER ONLY IF WELL AND PROPERLY DONE
When I fired up the first track on the first MC system I set up as part of my research and testing for this article, I had the same experience Kal described: right from the first notes, the multichannel version sounds incredibly live. It was truly eye opening to hear a Mozart Violin Concerto (24/96 flac) played by Marianne Thorsen in 6 channels on decent equipment. I don’t wanna go back to stereo, Mom!
Good MC really is that good. I don’t think I’d have gone for it when it meant doubling or trebling my investment in hardware, even if I’d had the same epiphany 20 years ago. The really good news is that you no longer have to spend your retirement fund to achieve it. There’s now a value based approach to multichannel that converted me in a fraction of a second, once I got it up and running – and that’s what this article is about. The heart of my value-based MC system is a Raspberry Pi, but there are options.
It should be obvious that a truly top quality 4 channel system will be close to twice the cost of a stereo rig of equal quality. For MC, you need as many speakers as you have channels plus enough amplification to power them all and cabling to connect everything. You also need either a MC DAC or a MC digital “splitter” (e.g. the MiniDSP U-DIO8) plus a pair of 2 channel DACs. If you like your current speakers, you’ll need at least 2 more just like them, along with an equal number of amplification channels as good as your stereo rig. And if you’re using a planned upgrade of your current stereo system to expensive stuff as a reason to look at MC, you really want to be sure you love it enough to double or triple up.
So here’s an entry level approach to multichannel audio for the cautious, the curious, the impecunious, the miserly, the skeptical, and/or the value minded audiophile. We’re not talking about state of the art MC audio here. We’re talking about decent sound quality from good basic components that most of us could enjoy in a second or third system, and that more than a few might even use as their only one. This approach will give you a good idea of the capability of MC and whether or not it’s for you. If you decide it’s not, you’ll have a few good and inexpensive little components to resell or repurpose. You can also add a MC interface (e.g. MiniDSP UDIO-8), another DAC and some good inexpensive powered speakers to your current 2 channel system to experience the power and beauty of MC before committing to more expense. Ideas for all of these components will be discussed in a little while.
Instead of a splitter and multiple DACs or a MC DAC, you can use a 4+ out digital audio interface sold for musicians and recording. Earlier DAIs with USB connectivity had duplex USB audio, too – but the current generation is different. On most current models, USB connectivity is limited to power and data exchange with the host computer, and digital I/O is limited to S/PDIF, AES and ADAT. This makes a DAI a less desirable option for many and unusable with a Raspberry Pi unless you add a HAT or other device to provide usable output to the DAI. The other practical limitation on value-based MC is resolution – I haven’t found an entry level MC DAC or DAI that would let you go above 24/192. Many of us listen at or below 24/192 anyway, and it’s certainly good enough to demo the MC concept for you. Doing high res MC requires equipment far more costly than a Pi and an Octo HAT, although improvements in basic SQ of the equipment (independent of source material and format) are often not as dramatic as the associated increase in cost might suggest they should be.
You can get MC sound quality fine enough to please most of us, and certainly fine enough to give skeptics an idea of the potential of MC in a 4 or 5.1 system, for under $1000 complete. Those who love the concept but want better stuff after hearing what you can do for under $1k can easily go as far upscale as desired. Having spent less on a “demo” system than they did for a connecting or power cable, they can use the mule as an extra system, sell it, or give it to a friend or relative with less money and/or less critical taste. So let’s get into the alternatives for what to play, what to play it with, and what to play it through.
SOURCE MATERIAL
MC audio most often used to mean synthesized ambience, because there simply wasn’t much well recorded, high quality program material in native MC formats. But high quality source material from most genres is readily available now in formats we all use daily. You can buy MC from half a dozen fine online vendors as 24/48 and 24/96 flacs, DSD, SACD etc. The gimmicky “surround sound” formats of the past no longer plague us, and MC is just a vehicle to more realistic presentation. Past formats either manipulated 2 channel recordings or used multiple recorded channels to dazzle the listener with sounds that bounced around the room. Audiophiles had no use for these gimmicks.
Today’s synthesized MC is done in your player software and is much much better than the old approaches. Good players like JRiver Media Center and Roon offer multiple output formats for 2 channel sources, and they sound pretty fine. You can get similar flexibility from some of the open source players too, although many require a bit more work to set the output format if you’re running Linux, by making you edit one or more configuration files. Still, instructions and guides are readily available on the web. As with any anonymous advice and (especially) code or command lines, make sure that any advice you take from the web has an authoritative source. I play it safe by first trying things on a canary in the mine – a development computer with no network or internet connection at all.
There are also many fairly high quality videos of great live performances in all genres, available in a number of proprietary formats (some of which require decoders). The most readily available video sound evolved from early Dolby 4 channel in ‘82 to 5.1 in ‘83, Pro Logic in ‘87, DTS in ‘93, 7.1 in ‘07, then Atmos with speakers in the ceiling and finally to 9.1 and beyond. How many channels you “need” is up to you, and MC experts may disagree - but I think that 4 (plus a sub if your main systems don’t sufficiently shiver your timbers) is enough to understand what MC can do for your music. You can also extract audio from videos with a variety of software, e.g. VLC (easy and excellent).
Good music management software like JRiver, Roon etc lets you select your output format from many alternatives. It lets you do a decent job of converting input formats to your desired output format, including 2 channel sources to 4, 5, 6 or more. And several of the open source players rival this flexibility in much simpler packages. If used on an SBC like a Pi, there are functional limits set by processing power, bus speeds, available I/O routes, limited RAM etc. But you can tweak your resource allocation to play MC flacs as long as you don’t also add heavy demands with DSP, GUI, and system tasks & processes that are not associated with audio. We’ll discuss optimizing your SBC for this in a while. I’m listening to an excellent 6 channel 24/96 file right now from a Pi 3B+ with full JRiver Media Center GUI up and running, and the little bugger’s not even breaking a sweat. Below and to the right is the real time performance readout. As you can see, the CPU’s just breezin’ along with the breeze at a very comfortable 41.9C and the music is playing without a pop, crackle, stutter or audible anomaly of any kind. Even the JRiver GUI is working smoothly, if a bit slower than ideal, when browsing the library while listening. This is pretty impressive performance from a $50 device!
THE MUSIC PLAYER
Players that do MC are readily available. Almost all of us already use at least one player that will do it if asked politely. As this series focuses on value in audio (like the crusty old retired audiophile writing it), I’m only discussing open source software and inexpensive proprietary products that deliver the most bang for the buck.
For those of you who already have Roon & / or JRiver Media Center, they both do MC very well out of the box - either is a great choice. I’ve had some trouble with Roon through the OctoPi, which is the renderer / player / DAC I built for $100 around a Raspberry Pi 3B+ and an Octo ADC/DAC HAT. It’s the featured project in this article, to be discussed in a bit. With Roon driving the Octo, I can’t get sound from channels 3-8, no matter what I’ve tried so far. As my Roon plays MC fine from other players on multiple platforms and by HDMI to my 7.1 receiver, I must have set something wrong to cause the problem. JRiver plays MC perfectly through the same OctoPi, and all output formats are correctly enabled and played.
If you don’t want to spend $ for a music management system like Roon or JRiver, you have many excellent choices of open source software that will play MC music for you. On Linux, you can’t go wrong with DeaDBeeF – it plays MC in many formats, sounds great on properly set up machines, and does a decent job of tagging, library management, and display.
THE HARDWARE
THE SoC APPROACH
I’ve been looking for a path to MC for music playback with acceptable SQ at a reasonable cost for many years. For most of us, the biggest barrier to entry into the world of many channels has been the cost of the equipment, which (for a “component” digital system) is roughly proportional to the number of channels. But finally, in addition to a few HT-based approaches that let you experience MC audio with HT hardware you may already have, there’s a pretty good value-based approach using a 6 in-8 out Pi HAT DAC (called the Octo) of which most - including me, until a few months ago- have never heard. When I started this project, the Pi 4 was not ready for plug and play use with an Octo, so this article is based on use of a Pi3B+. I finally got full function with the Octo on a 4, and it does more, better and faster than the 3B+. It doesn’t sound any better until processing demands exceed the limits of a 3B+. The SQ of the 3B+ degrades at performance levels far below the 4’s limit.
Both the Zero and the 3B+ support 5.1 / 7.1 PCM to 96kHz, and 4.0 PCM to 192kHz. I wouldn’t expect too much from a Zero beyond stereo 24/192 flacs. And if you want the best SQ from a Zero, especially at greater than Redbook resolution, it can’t be doing anything except playing your sound files to a DAC via OTG USB while on your WLAN to access them from NAS. I suppose you could also get on your network with a USB adapter and use Wifi to stream, but this seems a bit excessive when the object of your affection and interest is a $10 SBC with finite limits on its performance. It’s possible to boot a Zero from USB / OTG using any of a number of tricks you can find on the web. But the USB bus has a limited bandwidth and SQ will suffer if you try to run everything through it in both directions at the same time. You can use a Zero for MC via HDMI – Roon bridge does MC well this way (more on this a bit further down the page).
Neither a Zero nor a 3B+ will bitstream or pass-through Dolby HD or DTS HD. A 4B will play 192k 7.1 PCM. You can decode Dolby HD and DTS HD to these limits. Other MC formats are also supported but most require downsampling. The Pis do support lossy DD/DTS bitstreaming, but DD+ needs to be decoded to PCM or transcoded to DD. Asking any Pi but a 4B to play HD video with a high res multichannel HD soundtrack is pushing your luck.
So the bulk of this project centers around a fan cooled Pi 3B+ with heat sinks and zram, set to its maximum CPU rate and minimum GPU RAM usage (set memory split to minimum under advanced options / memory split in raspi-config). It boots and runs from a USB SSD (240 gig Inland Pro in a Savent housing), which I recommend for most audiophiles. Boot and general response are much faster than from an SD card, and it really helps the JRiver GUI behave like it does on a “real” computer (but don’t tell your Pi I said that – they’re tired of being picked on because of their size!).
Inland is the “house brand” at Microcenter and readily available from others like Amazon. I’ve avoided their prior products because they had measurable performance handicaps when compared to the slightly more expensive brand name alternatives. But the Pro series of SSDs was both cheap enough and well enough reviewed to justify a deeper look. These are apparently made by Phison, a 20 year old Taiwanese company that makes the innards of more than a few well respected brands (which are actually rebrands). Tucked into a $10 USB3 adapter case, this is a great way to get your feet wet with a serious Pi project (or anything else that requires a small SSD). I’m running one on the USB port of my ASUSTOR NAS for the ROON database, & it’s been excellent in continuous use for several months.
THE DAC
Enter the Octo, a 6 in / 8 out Pi HAT ADC/DAC that plays up to 24/96, and costs $58. That’s not a typo and you read it right - FIFTY EIGHT DOLLARS for a 6 in / 8 out 24/96 ADC/DAC complete with separate RCA breakout boards for ins and outs. It’s a Raspberry Pi HAT (Hardware Attached on Top) that connects via the large (40 pin) GPIO on top.
A WORD TO THE TECHNICALLY TIMID: At first glance, it looks as though there is zero support for this device when you buy it. There is absolutely nothing in the package except the board, the standoffs, the breakout boards, and the small ribbon cables that connect them to the main board. There is no contact information. There are no markings on the boxes. Multiple Amazon reviews complain about a lack of support and being on your own if you have a problem. THIS IS SIMPLY NOT THE CASE – you just have to do a little web searching to find both community support and the person behind Octo.
The creator of the Octo is a very nice, knowledgeable and responsive guy named Matt Flax (screen name Flatmax), who lives in Sydney. He’s interested in, supportive of, and responsive to input from users of his creations (Octo’s not his only product). This is his github page and this is his DIYAudio forum. It seems clear that he’s either not trying to build a business around his inventions or he’s woefully inept at marketing and branding…..or both. But he’s definitely there for you if you reach out to him – he just hasn’t provided any channels for customer relationship management.
But support it he does – in spades. For example, it wasn’t obvious to me in what order he had the RCA jacks set up, and there are a few “standards” around the world for channel order (e.g. SMPTE 5.1 is L-R-C-SUB-LR-RR and FILM 5.1 is L-C-R-SUB-LR-RR). So I contacted him with a PM through DIYAudio, and he got back to me within hours. He explained that even though installation seems to configure ALSA for you, it still leaves all options to configure the I/O order as you wish.
SO – ON TO MAKING A MULTICHANNEL MUSIC MACHINE FROM A Pi AND AN OCTO
The first decision is how to house the thing. If you choose not to use a cooled case for the Pi, you can just insert the Octo directly into the GPIO receptacle and use the provided standoffs to support the free end of the board. You can use this assembly exactly as pictured below, if you’re willing to live with a pile of pieces held together by wires. I’d put some insulating feet at the bottom corners if you do this. And with all the conductive spots exposed, an errant wire or metal object could fry everything.
I was unable to find any commercial case that would hold the Pi with its HAT on, except for flimsy Pi bottoms that don’t really protect any part of it from any practical dangers. If you want a case, you’ll have to make one like I did. You can build a single container from scratch to hold the Pi, the Octo, and the connector boards. Or you can build a separate case for the Octo and breakouts, connecting it to the Pi in a cooled case with a ribbon extender. If you go this route, you can power the case fan(s) from the appropriate pins on the GPIO (second and third from the left in the outer row seen in the picture above) by extending the fan wires to be as long as the GPIO ribbon jumper.
Unless you plan to leave the OctoPi in a protected area and never fiddle with it, you should at least cobble up some kind of case or mounting system for the breakout boards if you want to be able to use this like any other audio component. I strongly doubt that there will ever be a commercially available case for the thing because demand can’t possibly be strong enough.
A WORD TO THE WISE: do not assume that the GPIO ribbon cable will automatically connect pin 1 to pin 1. It is not keyed to the header on the Pi and it is not keyed to the pins on the Octo, so you can connect it backwards at either end. Doing so puts a voltage drop across pins that connect to parts unable to handle it, resulting in smoke, smell, and shame – and ya’ gotta buy another Octo :(
If you use it as pictured above, it’s physically supported by the GPIO header plus a pair of nylon standoffs that come with it. I was unable to find a fan cooled case that would hold it this way, and I wanted to be able to use it on multiple SBCs without having to disassemble everything each time. I also wanted a permanent mounting place for the 14 RCA jacks through which it passes analog audio in and out, to facilitate experimenting with DACs, Bluetooth, analytical tools etc. And a case looks right.
So I “borrowed” my wife’s old acrylic recipe box, made a few modifications, and connected the two boards with a 40 pin ribbon cable long enough to let me keep the Pi on top of the breakout box.
Again, I did this project first with a 3B+ because when I began it there were several web reports of failure when used with a 4. I felt obligated to duplicate this out of a sense of duty to the AS community, and my first attempts were indeed met with failure. I also used the 32 bit version of Raspberry Pi OS, because the earliest versions of the 64 bit version were not completely & properly configured for audio and were not easily updated and completed. Updates have been made since the first version, but it’s still not fully functional and ready for audiophiles. So this project is built on the 32 bit Raspberry Pi OS on both 3 and 4. I’ll have a go at the 64 bit version again in a few months.
Although assembly is easy, it takes a little effort to get this up and running. It’s not difficult if you follow the clear instructions found HERE (https://github.com/Audio-Injector/Octo). The procedure is simple:
Download this package to your Pi:
Install the Octo card from the command line with this:
Remove PulseAudio because it can interfere with Octo function; enter this into the terminal:
Reboot and the Octo should show up with all 6 in and all 8 out available to any audio program
You can configure channel lineup at the RCA outs in ALSA, but the defaults work fine for me with JRiver Media Center.
https://github.com/Audio-Injector/Octo/raw/master/audioinjector.octo.setup_0.4_all.deb
sudo dpkg -i Downloads/audioinjector.octo.setup_0.4_all.deb
sudo apt remove pulseaudio
I’ve used every output format option from 2 channel to 7.1 with success
Once it’s installed, just connect the appropriate RCA outputs to your DAC, powered monitors etc and listen away. I’ve had great success with JRiver Media Center, VLC, and a few other such players. Interestingly, I can only get Roon Bridge to work on this with 2 channel output into RCAs 1 and 2. When I go to any MC output format in Roon, there’s either silence or electrical noise from all the RCAs except 1 and 2. I’ve tried everything from editing asoundrc or asound.conf to using card-specific configuration in /usr/share/alsa/cards/<card_name>.conf – and I’ve failed each time. If I figure this out, I’ll post the solution. Searching the Roon database and the community forum finds nothing. This and this are two web pages on configuring ALSA for multichannel use. Neither helped with this.
SO HOW DOES IT SOUND???
All the following observations were made running JRiver Media Center on the Pi, further verified with VLC and Kodi on the same Pi. Remember that the Octo will only go to 24/96, does not do DSD etc, and is a primitive device compared to the current state of the art.
In two words, it sounds very good. It’s a better DAC than almost any I’ve encountered on a consumer mobo or SoC. As I’ll detail below, it’s not quite up to my iFi Nano DSD or my Emotiva Stealth in head to head SQ comparison. But it sounds good enough to serve most of us in a second system or system in a second location. I’ve been using it for a few days at a time over the last 2 months or so for daily 2 channel listening, and I’d have few serious regrets if I had to use it as my only system.
Brian Bronmberg’s bass on Wood is tight enough, although it’s not quite as rich and punchy as it is from a Pi 4 into my iFi. Marianne Thorsen’s Mozart Violin Concerto #4 (5.1 24/96 FLAC) sounds excellent, with only a bit of “haze” flattening its impact a tiny bit compared to my better DACs. Her violin is properly left of center fronting classically positioned and spatially (as well as tonally) accurate sections in a surprisingly intimate playback. This is an outstanding recording that I highly recommend – and I‘m not alone. Kal Rubinson named this an album to die for in the February 2008 Stereophile.
Christian Grøvlen’s piano version of Bach’s Chromatic Fantasia and Fugue in D Minor is a fine example of what 5.1 does for solo piano. The Octopi presents a well sized piano image with balanced tone and a realistically unfocused distribution of highs and lows. When you listen to a real piano in person, you don’t get the left hand from the left speaker and the right hand from the right. Whether open, partially open, or closed, there’s little frequency specific directionality and the piano doesn’t sound like it’s exactly as wide as the space between your speakers. This is even true when you face the pianist’s back, which is almost never done in real life regardless of the genre or venue.
The Octopi puts Grøvlen’s piano in front of and normal to you, as it would be in concert. You’re surrounded by the sonic ambience of a real Steinway grand in a small church. Mixing it down to 2 channels and comparing it to my reference system, I find the sound quality to be a bit behind my SMSL SU-8 v2 driven by Roon Bridge on a Pi 4 playing through my Prima Luna power amp and Focal towers. As I found with Bromberg’s bass, the bottom’s not quite as big and moving as it is on better 2 channel DACs. The sound stage lacks a little depth in comparison, and subtleties like delicate cymbal and brush work are a bit less clear and distinct (especially with the volume way down). But this is a wonderful recording that’s offered up intact by the OctoPi – it’s a joy to hear.
I’ve listened to many 2 channel files as well, to see how comfortable I am with the OctoPi as an everyday player. I like Joni Mitchell’s Hissing of Summer Lawns both as music and as a test of audio fidelity. Critics have panned it as unimaginative, bland, formulaic, etc – but I disagree. Listen to Robben Ford’s dobro playing on Don’t Interrupt the Sorrow and you have to appreciate how sweet the little Octo can play.
Joni’s voice is equal parts rich, inspiring, and depressing….as it’s supposed to be. The background singers are right there as well, even though I’m not convinced I could identify them all from blind listening with any DAC. For the record, you’re hearing James Taylor, David Crosby and Graham Nash! The Octo lets you hear the amazing close harmonies in Joni’s unorthodox, personal guitar tuning alterations. And Max Bennett’s beautifully tight, barky bass is clean and punchy on In France They Kiss on Main Street.
String sections have a bit of grain compared to better DACs. Reeds are closer to excellent, with only a little more reedy roughness than was there live in players like Paul Desmond and Art Pepper. Percussion is clean and solid, with lifelike fading of sizzle and crash cymbals, a palpable chunk chunk from the hi hat, and excellent delineation of different components of the set, e.g. 9x13 mounted toms from 16x16 floor toms. Snares have the right snap and brushes are not lost in the mix, especially the wiping shhhh of a good left hand during a ballad. You’ll also be bowled over by the combo of Joni playing Moog along withThe Warrior Drums of Burundi on The Jungle Line. With Jriver’s upmix to 5.1, this track is so big and alive it’s almost intimidating.
Further, although I never thought I’d go to the trouble of setting up a second system just for MC, the OctoPi now lives in my living room, sharing a shelf with my “good stuff”. It’s my dedicated MC front end, driving my Prima Luna power amp and Focal towers as front L&R (thanks to DACs with good remote control and multiple inputs). But more importantly, it’s good enough to bring you multichannel audio that lets you appreciate its charms. The first time I fired it up, I remembered Kal Rubinson’s statement from his Toshiba SD9200 review (quoted above): “Right from the first notes, the multichannel version sounds incredibly live... I sense the ambiance instantly, and every sound is realistic and credible”. Yes indeed!
LIMITATIONS
The Octo was designed and created to work with the 32 bit Raspberry Pi OS on a 3B+ or earlier Pi. It was not written for, tested on, or intended for use on a 4. With only a little work, I was able to eliminate the SD card and get it to boot and play on a 3B+ from a USB SSD (which I highly recommend). I have it working well on a 4 running from a 64G microSD card, but I still haven’t successfully moved the entire file system to an SSD and booted up a fully functional Octo4 without a card.
Once you install the Octo card on a Pi, most other functions are inaccessible. HDMI audio output cannot be used because the Octo configuration files limit any and all audio output to the Octo. Even if you disconnect the Octo card and want to use the Pi for anything else, you’ll have to reboot it with an OS and file system on a card or drive that’s not configured for the Octo. This is a simple matter of unplugging a USB SDD or removing the Octo-configured SD card and substituting the Pi OS image you want to run instead. But it’s one more step that many nontinkering audiophiles will find annoying.
I suspect it’s possible to make the Octo work with some of the audio software that comes with embedded JEOSs, eg Volumio, piCorePlayer (Tiny Core Linux), etc. I did not take the time to try to figure out how to make that happen, because I’d have to learn in detail what’s in each of those distros, how to load the Octo drivers, which conf files to edit and how, etc. If I find the time, I’ll try to get it to work with piCorePlayer and Volumio. But for now, I can only confirm how well it works on the latest 32 bit Raspberry Pi OS as of September 2, 2020.
Interestingly, it emits a mild click/pop when starting play from idle if directly wired to the output stage. At least in my setup, this is not loud enough to damage anything or be a major annoyance. But I suggest keeping your volume down the first time you start a track, as it may be sensitive to equipment. Interestingly, when I hooked it up to a pair of low latency BT transmitters for wireless 4 channel, that transient disappeared! And speaking of wireless MC……...
DIP YOUR TOES INTO WIRELESS MC WITH OCTOPI & THE LATEST BLUETOOTH
This is another topic on which I’m preparing a full review and discussion. But I can’t resist throwing it into this piece because it’s ideal for the OctoPi and it’s truly cool!
BT has a bad name among audiophiles, and historic experience suggests that it’s justified for most listening more critical than plain vanilla background music. But Bluetooth has come a long way, and the latest Qualcomm AptX codecs in the latest chips work really well within their design parameters. The limit on resolution in currently available devices is “only” 24/48, but the basic specs are impressive: THDN = -80dB, SNR=129 dB, and PEAQ = -0.05. If you’re unfamiliar with PEAQ, I’m working on a review of value-based audio quality measurement and assessment tools & methods, of which PEAQ is starting to appear in promotional material like Qualcomm’s AptX website. For now, I’ll just describe the 4 channel system I set up with the OctoPi and two pairs of adaptive low latency / HD BT transceivers. The HD codec does make a readily audible difference in clarity, definition, background silence, and dynamics – it’s clearly better and well worth buying new stuff to get it.
The critical piece of info here is that you have to be running the same codecs in both the transmitter and receiver to get the desired functions, e.g. low latency, HD. If they don’t match, you get the same old SBC Bluetooth codec that connects your phone to your earbuds. As I found out the hard way because the info was not provided by the manufacturer of the first pair I bought, very few of even the latest BT speakers use the most up to date codecs. You can’t split MC into stereo BT pairs with the latency of a standard BT system because it’s not consistent enough to avoid a subtle random “reverb” effect. Even the latency of the standard HD codec (lower than a standard BT at about 80 ms) is definitely audible if you hard wire the fronts and use BT for the rears, but the latency is sufficiently consistent from device to device in the same room with no barriers between transmitters and receivers to do fully BT MC from an Octo card into multiple DACs. This works OK with my iFi, Emotiva, SMSL, and M-Audio, although I cans ee how different DAC technology might affect synch in playback.
Here are the RainyB long range transceivers I bought to use as transmitters.
All of these units look pretty much alike regardless of manufacturer, and they may all come out of the same factory for all I know. I picked these because the specs are all the same, the Amazon reviews were very good, and they were only $42 compared to some that get close to $100. For the receiving end, I got a pair of $20 HD / LL transceivers that are much smaller because they have internal antennae (pictured below). Again, there are several similar products in that price range with the same specs. All the latest generation BT transceivers have optical I/O as well as line level analog via 1/8” TRS jacks. Most include a hair thin optical cable along with a pair of male RCA-to-male TRS 1/8” cables and a 1’ USB-C to USB-A cable for charging.
Pairing is no different from any other BT you’ve used, except that there’s no GUI to guide you – so it’s possible that you’ll pair one with another BT device within range if it’s also in pairing mode. To prevent this, I sat the two next to each other and activated pairing for both of them simultaneously. Because they have internal batteries, you can do this before moving one or both to the locations in which you want them to live. They also work with the charging cable plugged in, which is good because I hate having to remember to recharge audio device batteries.
Once paired, I used analog lines into the transmitters and optical out of the receivers to Edifier 1280s (which do have integral BT, but it’s not low latency). I was pleasantly surprised at the SQ, which is good enough to demonstrate the endearing qualities of MC and more than fine for casual listening in 2 channels or more. The analog link between DAC and BT transmitter is the weak one here – it’s not going to win Product of the Year in anybody’s book. Using low latency, with line of sight between BT device pairs, there’s no audible time shift between front and rear channels. I also set it up with optical into my SMSL SU-8 DAC driving a Prima Luna power amp and Focal towers in front and the Edifiers in the rear. With LL, there’s no audible delay and the sound is good enough to listen to (and maybe even to write home about).
I find a consistent flattening or slight dulling of the music through BT compared to directly connecting the DAC(s) to the analog inputs. It’s just not as alive, e.g. transients seem a bit slow. The latest AptX low latency and HD codecs both seem to reduce this effect a lot, making it tolerable for extended listening (which I don’t like to do on my old fashioned SBC BT headphones or with a Rocketfish BT receiver I bought years ago). I like the 4 channel setup enough to leave it assembled and ready for use, so I can listen to MC if I’m in the mood.
I haven’t tried using both long range transceivers to send and receive 2 channels to my best rig (Prima Luna / Focal) because I don’t have a computer or even a good DAC with an optical output, and using analog into the BT transmitter limits SQ enough to make it a nonstarter in my main systems.
THE BOTTOM LINE ON THE OCTO
It’s not going to become a Stereophile Class A pick. But mounted on a good Raspberry Pi, the Octo sound card will let you listen to pretty fine multichannel reproduction for a total outlay of about $100 for the entire front end. You’ll have 8 RCA line outputs to drive your amplifiers or powered speakers, so it’s easy to assemble your entry level MC system at very low cost.
You can even start with analog endpoints you may already have, although matched channels are obviously better. I put a series of patchwork systems together to see how they sounded. I mixed and matched Edifier R1280DBs, JBL LSR305s, and passive speakers (Rogers LS3/5a and Focal 726 Towers) powered by various electronics, to see how much the mismatch affected SQ. When upmixing 2 channel to MC formats, mismatched front and rear systems really doesn’t detract much from SQ if both are of high quality. On the best program material recorded as MC (e.g. the Marianne Thorsen Mozart Violin Concerti), better rears do make a difference in image stability, detail, and coherence of transients. But only with MC programs that were created for dramatic surround presentation does it really make a huge difference if the rears are identical or closely matched to the fronts. As most MC music is not intended to dazzle artificially, I’m living happily with my towers up front and the Edifiers bringing up the rear.
The Octo is a great way to get into MC for peanuts. I recommend this project highly for those to whom it appeals. But if the results I describe for this do not seem worth the effort and the Rube Goldberg nature of the equipment, read on – there are other paths to value in MC audio.
CONSIDER THE HOME THEATER RECEIVER FOR MULTICHANNEL AUDIO
I’m a big boy, so I’ll provoke a few flames and take the heat:
DISCLAIMER: I did not buy any new receivers for this project. I spent a fair amount of time listening to them, mostly at Best Buy. The BB we usually use has a big Magnolia “boutique” plus their standard stock. In addition to files on a USB drive, I brought my NuForce iCanDo so I could stream my own files over the web and have a digital source to drive the receivers.
BEGINNING WITH YOUR OLD HOME THEATER RECEIVER
If you’re sitting on a HT receiver that you no longer use, the path to MC begins in the closet where you store it. My trusty 10 year old Pioneer Elite VSX-30 receiver has been out of service for the almost 5 years since we retired and moved from our house to an apartment. We put a big, smart Samsung on the living room wall because I can’t mount our projector in the stressed concrete ceiling of our condo. I forgot all about the Elite until I was beginning my quest for MC knowledge and realized I had a decent receiver with which to experiment.
The down side of older and lower end current HT receivers is that I haven’t found one that would decode anything but wavs, mp3s, and wma files from its USB port. My Elite simply ignores FLACs, dsf, and other “good” files on a USB stick or drive, as does every other older model I could find in friends’ closets and other out of the way places. Another drawback is that many have marginal analog electronics. Their power amps have grossly inflated ratings and are simply nowhere near as powerful or clean as they’d like you to believe. And none that I could find has line level outputs for MC use. Even my Elite, which is far from a bargain basement piece, only has 2 channel line outs (“DVR” and 2nd zone), both of which are fixed level.
The up side is that the better ones actually sound very good. Many (like mine) have decent DAC chips in them and will play up to 24/192 very nicely when fed by a capable source through HDMI, coax, or optical inputs. This makes them ideally suited for use with a SBC (for which I prefer a Raspberry Pi to any other) or any streamer with optical or coax RCA outputs. And you can do MC audio nicely with any of these. You can also play DSD files if you convert to a format the internal DAC will play. Having a full feature remote is icing on the cake, and most of them do. Here’s my Elite playing a dsf file from JRMC on my Pi, downsampled to 32/192 (which I didn’t think the receiver would decode!):
You can buy a decent used VSX30 or similar model from Marantz, Denon, Sony, Yamaha etc for about $100-150. This is great value for a starter MC audio system – you can add a Raspberry Pi for $75, use an open source player like VLC, and have yourself a really nice system with the addition of as many passive speakers as you want and a sub. Start with something like Edifier P12s for $80 / pair (list price) and add a 100W Yamaha 8” sub for another $150. This totals under $500 for a 4 channel + sub system and about $660 for a full 7.1 that will make most of us pretty happy as an entrée into MC – and you can set it up for HT as well, if you’re so inclined. There are a lot of excellent HD music videos.
SQ is really good, especially for the price. And the magic of MC really does what Kal describes – it sounds incredibly live and lets you sense the ambiance instantly. Every sound is a bit more realistic and credible. By the time you get over the joy enough to listen for flaws in SQ, you’ll either love it as a second system used only for MC or be motivated to get good stuff and upgrade your main system to MC.
STARTING FROM SCRATCH WITH A HOME THEATER RECEIVER
A good, inexpensive new HT receiver is another path to multichannel value. Most entry level MC receivers are mass market fodder not well suited for audiophile use. The least expensive (~$300 & under) current models from Yamaha, Denon, Sony, Onkyo, Pioneer etc are marginal performers for pure audio, both in SQ and utility. So they have little appeal for us, e.g. many don’t play FLACs and they don’t do DSD. The nicest thing you can say about some of them is that they come with a polishing cloth. The entry level models also “only” play up to 6 channel (5.1) and do not decode theater MC schema like Atmos. This is irrelevant to most audiophiles, except that JRiver Media Center (and some other programs) will upmix your output to as many as 32 channels if you really want to do that. I don’t.
Because these devices are designed and sold for home theater use, the low hanging fruit on the feature tree is most attractive to video users. As the price goes above true entry level, the first things added are video enhancement (e.g. more HDMI inputs) and HT related features (e.g. more output power plus Atmos and other audio processing). For example, the entry level Sony MC receiver (STRDH590) features 145WPC in “5.2” format (2 RCA sub outs), decodes Dolby Pro Logic II, DTS 96/24, and Dolby Digital, and has 6 DSP modes with auto room correction. It does audiophile formats including DSD (although I couldn’t get a spec for the highest resolution and didn’t bring a DSD4 file with me). The one-step-above Sony (STRDH790) is a 145WPC 5.1.2 receiver with the same inputs. But this one processes DTS, DTS-HD Master Audio, DTS:X, Dolby Atmos, Dolby Digital, and Dolby TrueHD. It has one optical and one coax audio input, and will play from USB storage or your network. But the 2 added audio channels are in the ceiling and are only for Dolby Atmos – it’s still a 5.1 for audio.
If you go a wee bit upscale from the bottom tier, you can find a few fine sounding units for another $100-150. The Yamaha RXV-485 is an example of a decent $400 performer that will play 24/192 flacs and DSD4. It sounds very good, has some DSP, and is easy to use. With network connectivity, USB, BT, and a host of analog & digital I/O ports, it’ll digest whatever you can throw into it from a Rapsberry Pi to a serious network streamer. But you don’t even have to use a front end device with most HT receivers over $400 – you can stream to them from your NAS or plug in a USB drive and play your own files (once you’ve confirmed that the model of interest to you will recognize and play the formats of your choice).
You can also stream internet radio and streaming services on most HT receivers sold today above the $400 price point. You may have to spend $500 depending on the brand and model you like – but you can stream internet radio and streaming services and play MC along with all your usual 2 channel listening very nicely for the price of the receiver plus however many passive speakers yo need for your desired format. Be aware that you won’t find MC preamp outs at this level – that feature requires a bit more outlay, e.g. the $1000 Denon AVR-X3600H. And to be honest, it’s probably not an approach most of us would consider for a value driven MC audio system because you can get a decent 8 channel DAC for far less than that if you’re not satisfied with SQ from an OctoPi or need more flexibility than it can provide. I wouldn’t spend more than $500 on a new HT receiver for MC audio unless you also plan to use it for video or will use other functions. Some of the I/O and switching schema are quite impressive on the better receivers, with at least 4 HDMI inputs plus multiple coax, optical, and USB ports.
Another feature of value in a surprising number of HT receivers from cheap to costly is automatic room correction DSP. Many of these come with a calibrated mic and do an excellent job of normalizing in-room frequency response and phasing if you activate it. I haven’t seen any in which it was automatic or even default – you have to activate it if you want it. Even my 10 year old Elite has this feature, and it works pretty well.
OTHER ALTERNATIVES FOR VALUE BASED MC AUDIO
MC DACs
A MC DAC is no longer a dream and no longer priced out of reach for most of us. As you’ve now learned, the OctoPi is a true 6-in/8-out ADC/DAC with good SQ that brings the total cost of a MC front end to a whopping $100 with a 4 gig Pi 4. If you spring for an 8 gig Pi 4 because you’ll need that much RAM and don’t want to run from a USB SSD with ZRAM, you’re talking about $125. If you run from a small USB SSD, add another $30-$50. But, as I’ve already described, this is not highly flexible for playback – it does what it does, can only be used with a Pi, and limits other functions on that Pi while configured for the Octo. Fortunately, there are value based alternatives besides HT receivers if you don’t like or want to be bothered with an Octo and a Pi.
If you don’t want an HT receiver, the next step up from a Pi with an Octo card would have been a MiniDSP UDAC-8, a device well reviewed by many. Sadly, it was recently discontinued before I (or you) could buy one. However, the slack is being picked up rapidly. Consider the ESI Gigaport EX, a 24/192 8-out USB DAC for $125 that sounds so fine that I’m adding one to my own systems. It’s a really cool little piece about which I can learn nothing beyond its specs. I don’t know what’s inside, e.g. DAC chips, I haven’t bought one yet, and my wife says I should stop disassembling friends’ stuff without their permission. Soon I’ll have my own, but not soon enough to get a more thorough evaluation into this article. The ESI looks good and feels pretty solid even though it’s not metal. The case is made of what feels like pretty solid plastic material, and the connectors are typical board-mounted generic jacks with the same feel as a million other low to mid level electronic devices. Its use is growing rapidly both for live performance and in recording studios by many musicians and small studio owners who only need a few channels and can’t afford or don’t see the need for high dollar stuff. With a USB-C input, it’ll do up to 7.1 and is great for JRiver Media Center, Roon, and every other MC player I’ve tried. Just keep its 24/192 limitations in mind and you’ll be fine with it if it fits your plans.
Many of you know how much I love Emotiva products. With excellent quality, sound, and customer relations, they’ve always been one of my go-tos for anything they offer in my price range that I need. Their MC700 is an 8 channel DAC and control center for $700 list (and they have great sales from time to time). It offers 6 in / 2 out HDMI, plus coax, optical, and analog inputs. There is a USB3 port, but it’s only for their BT dongle (required for BT audio input). I haven’t heard this product, but after owning 2 prior Emotiva DACs and having a Stealth DC-1 now, I can confidently say that I really like the quality and neutrality of the Emotiva sonic signature in DACs. As I have no need for one, I won’t be buying an MC700 – but I encourage any of you to whom its feature set appeals to try one. Emotiva has a 30 day return policy that I’ve never had to use. But if their service is as good on that as it’s been when I needed them for other things, they’ll handle it promptly and gracefully.
There are other MC DACs and front ends at various price points, both internal and external with multiple connection options. You can choose from several designed for musicians, recording, gamers, and/or computer-based HT sound. For example, the $120 Creative Sound Baster X3 is a USB 7.1 DAC that goes to 32/192 & sounds very fine. It has unbalanced TRS 1/8” line out jacks, but it’s quiet (if you practice sound cable hygiene) and it acquits itself very well in a value-driven MC system. I personally think it’s a wee bit clearer, more alive, and more articulate than the Octo card when driven by the same Raspberry Pi. I do not find the 1/8” jacks to be a problem and could happily live with them – YMMV.
RECYCLING OTHER MULTICHANNEL AUDIO PROCESSORS
Devices like the Oppo 105 can be excellent MC DACs or complete front ends. The 105 and similar products contain network streamers and do internet radio & streaming very well. They’re no longer state of the art, but they’re still pretty good for dipping your toes into MC – and many of us could live happily with one of these as a front end in a second system dedicated to MC & HT. If your 105’s been gathering dust since you set up that new streamer, dig it out and try MC with it. With discrete line level outputs for 7.1, I think it sounds better than the OctoPi – it’s very clear, clean, articulate, and accurate.
Be careful about planned repurposing. Not all devices allow access to functions you’d think would be integral. For example, the Oppo BDP-95 (a predecessor to the 105 and a very nice device) does not provide direct access to the DAC. So you can’t use it as a stand-alone processor. But if your legacy device is usable as a MC DAC, you can use it to start exploring the joys of MC on the cheap.
AND LAST BUT NOT LEAST….MAKING MC RECORDINGS WITH THE OCTOPI
I’m preparing another article on Pi projects, featuring my mini-DAW. It’s based on a fully rodded and fan cooled Pi 3B+ because the Octo card wouldn’t work with the 4 when I first got it. And it’s amazingly capable, both with Audacity and with Ardour. Because real time monitoring requires the CPU to process the existing tracks for playback while processing the track(s) being added for recording, the 3B+ is not up to simultaneous monitoring and recording. The degradation in SQ is grossly apparent, with dropouts, crackling, and assorted pseudo-biologic noises on playback that suggest serious indigestion of the processing tract. As long as mic levels are set properly and you’ve done a thorough sound check before the program starts, real time monitoring (although the best way to assure the quality of the recording) is not strictly necessary. You do need to monitor the meters closely to be sure you’re not overloading any inputs when recording live music.
Sadly, the club in which we play is (like most other southeastern Pennsylvania clubs) still closed. So I couldn’t make any full length recordings to demo for you how well the little rig performs live. But I’ve made many MC recordings on it by laying down one track at a time in my home studio, using a click track to keep me on time because of the described inability to play recorded tracks in real time while adding more.
As I’ve posted on AS many times, I love ART equipment. They make wonderful products at great prices, and they represent true value for the audiophile as well as the musician and the recording engineer with a tight budget. That little tube preamp has XLR balanced I/O and sounds most excellent! Although crude, the bench version of my OctoPi DAW is fully functional and will do its job faithfully. Here’s the uncased DAW sitting on the iPad with inputs on the left and outputs on the right:
Here’s a shot of an Ardour MC session with 2 tracks recorded and #3 going in. You can see that the CPU is working fairly hard at 62% (the red usage widget in the lower right corner). But the temp is only 66 degrees and everything’s going perfectly well.
You can set Ardour preferences to route monitoring internally through the computer or through external hardware. Using internal processing is what makes the Pi choke. But using the latter setting and monitoring the track being recorded from its input, there’s no problem with SQ and latency is compensated by the recording program. Ardour and Audacity both do this very well, although it takes a bit of work to set Audacity up for this. Here are the instructions for latency correction in Audacity, to give you an idea of how easy or difficult you might find working with this program. Once it’s set for a given computer, it’s done and does not need to be changed unless you change hardware or software.
RIPPING WITH THE DAW
Remember that the Octo is an ADC as well as a DAC. So you can record directly into the RCA jacks from preamp out or any other line level analog sources. Although you could use any recording program you like, I prefer Audacity for ripping vinyl and CDs. It runs extremely well on a Pi 3B+ or 4. It’s an excellent program that rips to wav files. It lets you export and work with your recordings in any format and resolution you prefer (as long as the processor can handle it), which is not at all a problem for saving as Redbook files, even for MC rips. It won’t export to DSD or other serious formats, but you can capture the wav file at up to 384k. When exporting, you can convert to about 20 lossless formats, set FLAC bit depth and compression level, etc.
Here’s a minute of my rip of Dave Grusin’s Discovered Again (Sheffield Direct to Disc original vinyl, 1976, typical review HERE). This was ripped from my Thorens TD125 with fixed shell SME 3009, Audioquest cartridge, and Parasound Zphono USB directly to the OctoPi.
WAV File
FLAC File
If you’re interested in serious recording with a Pi, there’s also a balanced Octo card that’s either about to come out or already available (it was still beta when I last looked).
SUMMARY
Multichannel audio is cool, fun, and well worth exploring even if you have no desire or intent to adopt it. Many of you think you don’t want it but will change your minds within seconds of a first listen. The really great news is that you can apply what I’ve written here to set up an inexpensive MC system with sufficient SQ to amuse, amaze, and attract you into its lair. You can probably use some or all of what you have now. You can mix and match old and new components, and you can probably use the player(s) you love for MC formats.
I can’t believe how exciting good MC audio can be, and I urge you all to at least give it a whirl. The education alone is worth the effort – and I’ll bet that at least half of you get hooked firmly enough to keep a MC setup in use.
Stay safe and enjoy!!
0 notes
Text
Editing File Tags The Easy Way With Mp3tag for Mac
Editing file tags is still a thing in 2021. I thought I'd have a flying car at the turn of the century, and I thought editing file tags would be a thing of the past by now. However, we're far from anything resembling the extinction of tag editing. In fact, it's still critical on every platform I use, and I use almost all of them from Aurender, Lumin, Naim, Roon, and many more. Yes, tags are even important in Roon, an app that for the most part doesn't use tags.
Released today from indie software developer Florian Heidenreich, is the new Mp3tag for Mac app. Don't let the name fool you. The app really has nothing to do with MP3 files. MP3 is just one of many file formats that Mp3tag can edit. I've tested the app several times on several platforms and really love how well it works and it's simplicity.
Here's how I use Mp3tag for Mac. I think a light will illuminate in many people's minds as they see how easy and beneficial the app really is. Audiophiles using apps such as JRiver or Audirvana on their Mac, already have built-in tag editing. Mp3tag is magical for everyone else, especially those using UPnP/DLNA servers and high end music servers.
This week I received the physical CD for Congo Blue, a direct to disc recording from Disk Union in Japan, and a download for David Chesky's forthcoming Songs for a Broken World album. I used Mp3tag on both releases and it couldn't be happier about the experience.
The Chesky album's files had absolutely zero tags, but I didn't notice this until I had copied them to my QNAP NAS and Aurender N20. Roon did an OK job of naming the albums from the folder structure and extracting names from the files names, but the album was listed under Various Artists. Roon has no clue who, what, when, where, etc... without file tags because no information is available about this release from its online sources.
I opened Mp3tag, and just dragged the album's tracks from my NAS to the Mp3tag window, through macOS finder. Note, the files remain on the NAS. I added all the tags I needed and high resolution album art through Mp3tag, clicked Save changes to files. That's it, all the tags were updated/added to the files on my NAS and Roon automatically changed Various Artists to David Chesky and used my high resolution art.
The same goes for my Aurender N20. I navigated to the N20 through finder, the same way I copied files to the music server initially. I dragged the album's folder into Mp3tag, again the files remained on the N20, and edited everything I needed to edit. I updated my Aurender library through the Conductor app and all was right in the world.
I absolutely love that Mp3tag can edit local files and network / music server files without moving them. The bigger picture here is that Mp3tag can be used on any number of albums, sitting on a NAS or music server or even locally, that people have collected over the years and just haven't felt like editing. One reason why I use Mp3tag over an app like Audirvana or JRiver for tagging, is because it's so easy. The only thing Mp3tag for Mac does is edit/add file tags. There is nothing to remember when opening the app after a long day at the office. Just open it and off you go.
I could repeat this entire story again for the Congo Blue CD I received and ripped, but I'll mention one additional reason why I like Mp3tag. It isn't a different feature, but it's a human thing. Attached to my NAS I have a 16TB USB drive. I haven't setup auto backup to this drive yet. The drive currently has an exact copy of everything stored on the NAS RAID array. This means that everything I copy to the NAS also gets copied to the backup USB drive. I do this over the network because it's easiest, rather than QNAP's file manager.
I opened the Congo Blue ripped CD on my backup USB drive and edited it the same way I edited the main version on the NAS. Drag, drop, edit, save, done. Editing the backup copy reminded me of all the times I've made adjustments to my main music source on the NAS or Aurender, and never changed the same info on my backup copy. Call it laziness, forgetfulness, or being too busy, I didn't get it done. Using Mp3tag, I can easily go through my backup drive and make quick changes that I'd neglected when I made the change previously on the main source.
Note 1: At first I couldn't figure out how to remove the files from the Mp3tag window after editing them. I was hesitant to click the Remove option after selecting the files and right-clicking. I eventually clicked around and found out. Just select the files, right-click, and select Remove (NOT Remove Tag). The files are removed from the window, not the source.
Note 2: By default upon opening the app Mp3tag opens the last files that were open when the app was closed. This can be changed in the app's preferences next to Startup Folder. See the image below.
This app is so easy and works very well. It's one of those apps you don't know you need until you try it. I'm never removing it. It's an indispensable $20 tool in my digital toolbox.
Windows users likely know this already, but MP3TAG has been a go-to editor on that platform for years. Mac users can now enjoy it on both Intel Macs and natively on Apple Silicon based Macs.
Highly recommended. Spend the $20, you won't regret it. I don't make a penny off the sale of this app, I just like it so much that want to share it with the Audiophile Style Community.
More information available from - https://mp3tag.app
Purchase from the Mac App Store - https://apps.apple.com/app/id1532597159
0 notes
Text
How To Backup Aurender Music Servers
I've used various Aurender servers for roughly ten years, going back the the original S10 in 2011. In that time Aurender has continued to offer larger hard drives to accommodate expanding libraries. One item that remains outside the scope of music storage and playback at the highest levels is backing up these libraries. At first blush it seems like one's ripped and downloaded music is the valuable asset that drives this need for backup. However, there's nothing more valuable than one's time. The time it would take one to re-rip and re-download an entire music collection, followed by properly tagging and gathering the album art, is what really drives this need for backup. If readers are like me, they have hundreds of Mobile Fidelity, AudioWave, XRCD, XRCD24, Three Blind Mice, Ampex, DSD rips, etc... that all require oodles attention during the ripping process and none of them are available for download purchase or streaming. These items alone should be reason enough for readers to consider and implement a proper backup of their music servers.
During my decade of Aurender music server use, I've received many emails, texts, and phone calls about backing up Aurender servers. My answer has been the same since day one for every model Aurender has ever made, use a NAS.
My goal with this backup method is to leave the Aurender 100% unaffected by the process. In other words, make it so the Aurender has no idea it's being backed up, don't mess with anything on the actual music server or the Aurender Conductor app configuration, and above all, don't change the sound quality.
Here are my detailed instructions for backing up any Aurender server to either a QNAP or Synology NAS.
Hardware
Nearly any QNAP or Synology NAS will work perfect for backing up an Aurender, as long as it has enough storage for the backup. CPU and RAM performance isn't an issue on either platform. Spinning hard drives are fine and 1 gigabit network interfaces are just fine. If money isn't an issue, filling a NAS with SSDs would be nice, but again, it isn't necessary.
In this article I'm using a QNAP TVS-872XT with four Seagate 6TB IronWolf NAS drives (ST6000VN0033), and an old Synology DS1812+ (current model is DS1821+), also with Seagate 6TB IronWolf NAS drives (ST6000VN0033).*
*Using our links gives us a tiny kickback and doesn't cost you anything. We're experimenting with this, so please no phone calls, facsimiles, or telegrams just yet.
Click either logo to go directly to that system's configuration.
QNAP
1. Create shared folder called ABackup from the QNAP Control Panel
2. Install or open HBS 3 Hybrid Backup Sync
3. Go to Sync on the left side, click the down arrow on the Sync Now button, and select Active Sync Job.
4. Select Remote CIFS/SMB Server in the Create Sync Job window.
5. Name the server Aurender, enter the IP address or name of your Aurender (Note: the IP address may change, so I use the name of the Aurender on my network. This usually is something like w20.local.).
Enter the username and password that's listed on the Aurender File Share tab in the Aurender Conductor application for iOS.
For Destination folder, enter the name of the main folder on the Aurender. Mine is Music1, as can be seen by browsing to the Folder tab at the top of the Aurender Conductor tab in iOS, and looking at the listed folders.
Click Create
6. This should add the Aurender in the bottom of the following window. Make sure it's selected and click the Select button.
7. Name the sync job Aurender Backup.
Select the folder on your QNAP NAS that will contain the backed up data, but clicking the plus sign under the name of the NAS, then select the ABackup folder created in the first step. See second image below.
Select the folder on the Aurender to be backed up to the QNAP by clicking the plus sign on the right. If you want to backup the entire Aurender, I suggest you do, just select Aurender at the top of the next window, as seen in the third image below.
With both the source and destination listed (see fourth image below), select Next.
8. This is where I schedule the sync to run once per day, by clicking scheduler and clicking the plus sign to setup the schedule. On the next window I select the Daily tab, and use 3:00AM as my sync time. Then click OK, and Next.
9. ON the Rules page, click o Policies on the left and check the box to Remove additional files in destination folder. This will delete files that you've deleted from the Aurender. This option isn't required, but I use it so the sync copy is identical to the Aurender copy. Click Next.
10. On the last Summary page, click Create.
11. On the main Sync page of HBS 3, click Sync now to run the synchronization now, if you don't want to wait until the scheduled time. I do this just to make sure it's going to work without any unforeseen issues.
That's it. The Aurender will now be synchronized with a folder on the QNAP, without touching the Aurender configuration or having anything not audio related running on the Aurender.
Synology
1. Create a shared folder called ABackup from the Synology Control Panel.
2. Install Active Backup for Business in the Synology Package Center.
3. Open Active Backup and select File Server on the left side of the window, then select Select Add Server.
4. Make sure SMB Server is selected, then click Next.
5. Add ether the IP address of the Aurender or its name for Server Address. Leave the port at 445.
Enter the username and password that's listed on the Aurender File Share tab in the Aurender Conductor application for iOS.
Click Apply and Yes to the popup.
6. On the Backup mode page, select Incremental then select Next.
7. Select the Aurender folder(s) you wish to backup. I selected the top level folder, to backup everything. Click Next.
8. Name the task Aurender Backup, click browse to select the ABackup folder previously created, enable schedule, select the time you'd like it to backup, click Next, then Apply.
9. You can backup now, or on the schedule. To see the status of the backup, look at the following screen.
That's it for backing up Aurender Music Servers to either a QNAP or a Synology NAS. This same method can be used for other music servers. If you'd like to see instructions for other servers, let me know in the comments below.
0 notes
Text
Mixing it up; Woodgrain, Leather, Digital, Analog, DSP, and more.

It has been a great pleasure learning about Heavenly Soundworks from the founders Kevin and Jonathan Couch, a father and son team of music lovers. The passion and attention to detail that both of these gentlemen have moved them from lifetime music lovers to DIY speaker construction and finally to their creation of Heavenly Soundworks. Bootstrapping themselves into this business is a testament to their innate skills, love of music, and tenacity.
Kevin and Jonathan started with passive speakers and the meticulous process of passive crossover design and driver selection. Across a decade and many designs and iterations, they recognized that passive techniques would not meet their desire for their goal of "Perfect Sound." The journey to active speaker design had begun.
Active speaker design brings new challenges. Yes, the passive crossover goes away, but we add so much more to consider.
What do you design, buy, build? Do you jump on, say, the WiSA bandwagon? Each system has different DSP programming methods. The mechanical considerations of fitment, heat, serviceability, and quality require new skills! In the end, Kevin and Jonathan selected Hypex and their NCORE system.
One of the next big problems is driver selection. During the early years of their work, they found multiple issues with bad drivers that did not meet specifications and worse. It is a constant battle to keep the suppliers on track and validate each driver received! In the FIVE17 speaker, there are three drivers and two side-firing passive radiators. Sourcing, matching and, testing drivers could be a whole department! Avoiding the hype requires another department.
But, wait, there is more:
The Hypex DSP system is a blank slate. From the factory, it will not make any sounds. Fire up the HFD software on your PC, and you have a screen full of decisions, filters to design, and much more. There are many edges and limitations. Now the speaker designer must program, listen, iterate, and, at some point, stop and SHIP!
Do not forget the knowledge and skills needed to design and manufacture speaker cabinets. These speakers are hand-crafted at two US locations; they have a leather inlay and woodgrain veneer. The stands reflect the same esthetic.
I want to take to heart that all of the above have multiple vectors of influence. From the slide rule to software, from material and component selection to the brand look and feel, these two founders have accomplished something extraordinary!
__________
** Perfect Sound **
"First off, 'perfect sound’ to us at Heavenly Soundworks means that you can't tell the difference between the original music or instruments, and the recording of the same played back through our speakers. There are times listeners will have to relearn, so to speak, what sounds right. The reason being that we all adapt to the speakers that we listen to all the time. We may believe that is what an artist or instrument sounds like, until we hear it live in person. This is one of the biggest reasons we offer a 30-day in-home trial. I would also suggest (though it may be difficult in the time we're living to do so) that during the trial period, our customers would go somewhere and hear a live performance for comparison to our speakers, or anybody's for that matter.
In other words, you should not be able to perceive the difference between that trumpet, vocal, or drum to the same sounds coming out of our speakers. We aim never to have a sound signature, just pure reproduction. "
- Kevin Couch
__________
Now comes the hard part of a speaker review. Translating what I and those around me observe, feel and hear into something coherent, so you, the reader, grock the experience!
I have tried to articulate the goal of simplifying my music system. I am pretty close to that goal. The media side is 90% digital. Roon is my music player of choice, giving me access to Tidal and Qobuz streaming, my local library of about 70,000 tracks, and Internet radio.
The two main variables I am still solving for are the DAC and Speakers for my living room.
Late last year, I spent three months on the Buchardt A500 system. I also have the Dutch and Dutch 8C speakers in the mix.
I am unfair if I do not point out that the A500 system is less than half of the price of the FIVE17's. Those extra dollars spent are only part of the equation. The other comparisons are the Dutch and Dutch 8C speakers at about 50% more retail cost over the FIVE17's.
During this review, I have transitioned to the new server, and I have been evaluating DACs. The FIVE17 speakers came fully broken in, so I was able to get right down to listening. I started using the AURALiC Altair G1 DAC and my previous Roon server with an XLR Audioquest Water cable set. The same Sound Anchor adjustable stands individually supported the speakers.
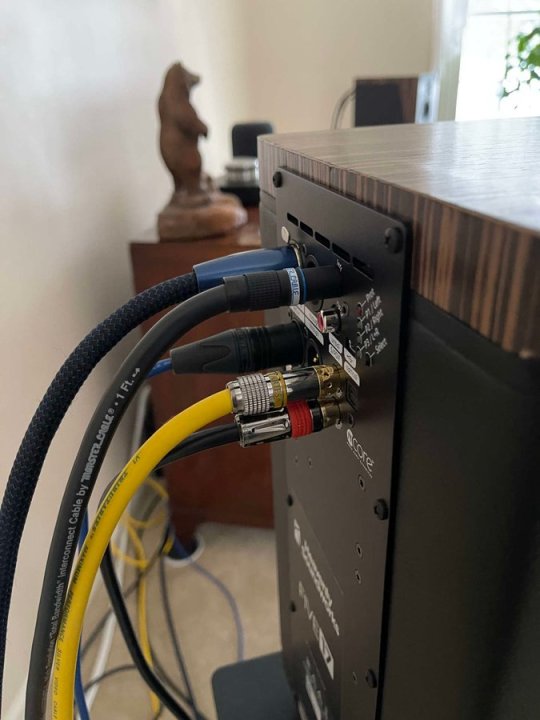
Before I talk about sound quality, I want to talk about design.
The FIVE17 is my automatic switching A/D/pre-amp/amp/speaker. The DAC connects to the XLR analog input. The turntable to the RCA analog input. The Mutec MC-3+USB DDC connects via AES, and finally, the Bluesound Node 2i connects to SPDIF/Coax. Switching inputs is simple, pause what is playing, wait 15 seconds for the speaker to go back into input scanning, then press play on whatever you want!
Oh, I also added a Chromecast Audio to the TOSlink input just for Soundcloud!
With the DAC and the DDC having a USB connection to the Roon server, it is easy to swap zones and compare the differences. I want to see if there is a flavor difference between the digital and analog inputs on the FIVE17.
The first comparisons
The A500 is a three-way design and the smallest of the three with two inputs, WiSA and XLR analog. The WiSA hub provides additional inputs and features. The amplifiers in the speakers and the Hub are a standard WiSA platform design. The Hansong Hub is the weak point for me. Multiple software components did not fit my needs. The electronics in the A500’s get hotter than I would like.
The Dutch and Dutch 8c speakers are a more elaborate design, with AES and XLR analog inputs. The front of the speaker is a large waveguide. There is an open baffle design where the main woofer chamber's rear is open to the room. Finally, there are two rear-firing drivers to create a cardioid dispersion pattern. I do not know what the amplification and processing platform is. The speakers have a small fan and vents on the bottom to cool the electronics. Finally, they are the largest of the three speakers and weigh in at close to 60 lbs. each. They overwhelmed the front of my living room.
The 8c provides a web-app for operation. They currently do not use the network interface for digital input. They have AES and balanced XLR inputs. Recently the firmware has been updated to work with REW to help correct some room acoustics.
__________
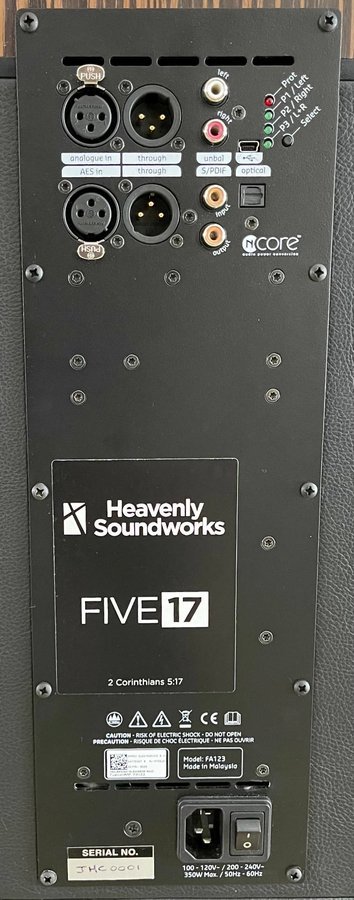
The FIVE17 three-way design is a bit larger than the A500. The left speaker is the master for digital inputs, and it controls the right speaker using SPDIF and transmitting the right channel data over that link. They have AES, XLR, RCA, TOSlink, SPDIF inputs along with XLR and AES pass-through. There is an IR remote control for volume and DSP control, and a bit more.
Jonathan Couch brought the speakers up to me, and the first afternoon that the FIVE17 speakers were in-house, we did an extended listening session moving between all the speakers to get each's flavor. Following that, I have spent a couple of days with each speaker to improve my memory. A three way A/B/C of speakers is a lot of work. For this comparison I have been using XLR and the Hugo 2 DAC. My family has spent time, and one of my trusted listeners spent an afternoon.
The FIVE17's like to have a bit more air around them, needing more space behind them than the others. Getting the toe-in just right locks in the soundstage. The A500s sit in the same place very nicely and have a bit less need for precise placement. The 8c's like to be closer to the wall, and their DSP setting compensates for location.
The mid-bass on the 8c does not have the presence and the detail of the FIVE17. The A500s fall in the upper registers. There are essential missing details in the music—the 8c's exhibit much of that detail but not the layer separation that the FIVE17 have.
I wrote about how much I liked the vocals in my A500 review. The FIVE17 is a different beast with vocals. JUST WOW! I do not get any of the same feelings from voices with the 8c's. NOTE others have suggested I try the AES inputs on the 8C's. They are gone, so that will not happen.
The A500 speakers have automated correction at lower volume levels to compensate for human hearing. The FIVE17 speakers take a different tack; they have three DSP settings for different sound pressure levels. The FIVE17 has the most natural presentation I have ever had in my home. Sitting in the living room reading with music at the background level is extremely pleasant. There is a natural organic presence I love.
Many of the speakers I have listened to provide an “Impressionist Painting” view of the music. The FIVE17 speakers present a high resolution photograph.
All three of these speakers have attractive response curves in the lower registers. They each work very hard to reach down. The larger drivers in the 8c's can move a lot of air, and their dispersion pattern produces a robust lower register. The tiny little A500 with the dual front and rear-facing drivers tick this box pretty darn well. My room may be a bit large for them, but still, they have a comfortable presence there.
I am still trying to find the right descriptive language to express what I feel from the FIVE17 low registers. There is a depth there you have to hear to understand. By the end of this review, I hope to work out the right words to describe my amazement at what I hear.
__________
During the second phase, I have been using my Hugo 2 as the DAC in the system. The Hugo 2 output is singled-ended, so I use RCA-XLR cables to an isolation transformer and then through the Audioquest cables to the speakers XLR input. This was not ideal, but workable.
I listened to see if I could hear sound quality anomalies between the digital and analog inputs. There are subtle differences, but I cannot attribute this to double-DACing or the like. The audio/digital paths external to the speakers vary. The Hypex NCORE system performs very well. I cannot wait till I get balanced output DAC to try in the system.
__________
Phase Three
I have just now been able to finish up my listening sessions comparing the Kii Three speakers and the FIVE17s. The Kii Threes have been in my living room for a while. I had set them aside for the second part of my listening. Three speakers in a test are almost too much, and four would be impossible. Also, note that I did not have the BXT modules available in the final part of this test.
The Kii Threes' retail cost plus the Kii Control is about 60% higher than the FIVE17. There is a functional difference between the Kii Three and the FIVE17. The Kii speakers require manual operation to change inputs. You cannot have both AES and XLR Analog as you have to go into the settings and change the input type.
The setup is the same. The Sound Anchor stands for support. My new music server and the Mutec DDC to the AES inputs on both systems.
I started with the Kii Threes playing to refresh my memory. Next, I ran through a subset of my "test tracks." I swapped in the FIVE17s and let them play for a bit, and re-ran through the "test tracks." I have been switching back and forth between the speakers to firm up my observations.
The Kii Threes present a very clean and open soundstage. There is a lot of detail in the music, and they have a useful bass extension. In comparing them to the FIVE17, the Kii Threes are dry and somewhat analytical. The FIVE17 speakers are more "organic," have more PRAT, and a more comfortable listening experience. The bass extension is significantly lower.
The Album "Live in Paris and Toronto" by Loreena McKennitt demonstrates this rather dramatically. The Kii Threes reproduce the music in great detail; the FIVE17 covey the experience, the instruments, the audience, the rooms, and Loreena's voice. It is fun to listen to her later recordings to hear how her voice and style have progressed. Listen to her album: "Nights from the Alhambra," to give you a taste of the changes about a decade can make.
I have only had the FIVE17 speakers for about three weeks, and I am still learning what they have to teach me. Some days I feel like a slow learner.
One of the initial findings with FIVE17 speakers is that they need careful placement for the best staging. For this, I set out 2ft x 2ft MDF on the floor. Using Herbie's Audio Lab gliders under the spikes I can move the speakers around till I find just the right spot! I then remove the MDF and plop the stands down in the "right" place. I could never get away with the MDF long term!
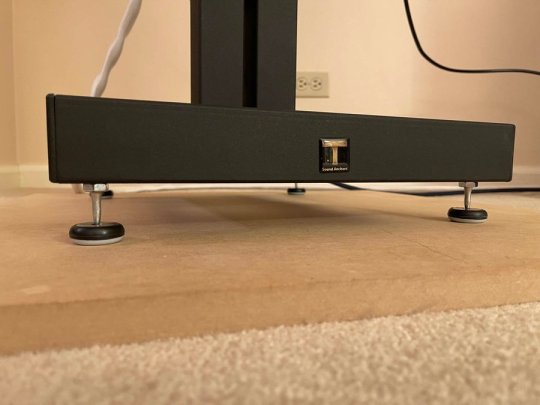

__________
In my experience, speakers in my living room benefit from mechanical isolation. I have used Isoacoustics isolators in most designs. For floor standing speakers, I use the GAIA bases, on the tabletop, the ISO-Pucks. I have tried the GAIA bases on speaker stands with less than stellar results. Over the last three months, I have been listening to the OREA Series under the speakers. I have been delighted with the results by placing the OREA's under the FIVE17s improved sound stage, clarity, and more. I will re-test when I get the factory stands for them.

I use the OREA isolators under the electronics in my cabinets. The OREA isolators are very specific on their load range, so choose wisely.
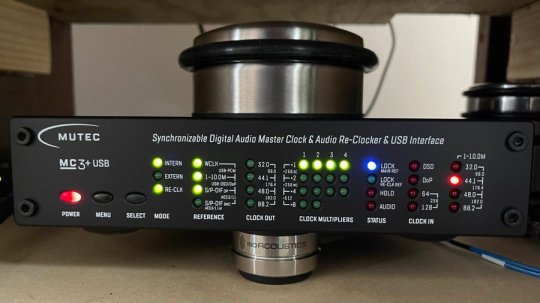
__________
In my living room, we listen to music in three different fashions. One is filling the first floor with MUSIC! The second is background while reading and relaxing. The third and most important to me is sitting down and listening to my choice of musical performances! The FIVE17 speakers fill all three roles with great aplomb! I am delighted with the DSP setting for different sound levels.
I am trying very hard not to overemphasize my feelings here. The puzzle pieces are fitting together for me, fifty years on with this avocation!
The sound quality fits what my ears want to hear. The simple remote for the Hypex module works nicely. Looking for downsides, the only one that I see is providing room correction for all the inputs. I can use Roon for that side, but not for the Turntable, etc.
I am looking forward to seeing what comes next while happily listening to the FIVE17!
I am still at a loss to describe what I hear in the low end of the FIVE17 speakers. Do they move the room? Design, DSP engineering, and driver selection magic?
I am in the process of purchasing the review samples and ordering the matching stands. I have settled on two of the three needed items for my system. DAC next!
1 note
·
View note