
Last Seen Blogs

playfulsite
Untitled

darveycrazey
Little Monster By Core

zephyrblu
get in loser we're healing our trauma

sleepless-nekko
Sleepless Nekko

drinknotru
DrinkNot.ru
Text
Top 3 Fridge Maintenance Mistakes to Avoid
The wildest dream in the present time would be a broken refrigerator. The best way to deal with such instances is to get your home appliances maintained from time to time. Timely maintenance also ensures a long life for your appliances. Some of this maintenance requires a professional while you can take care of other smaller issues by yourself. So, if you resort to starting by troubleshooting the problem by yourself, read along the blog to learn more about the most common maintenance mistakes that you should avoid. If you still face any issues, feel free to contact a fridge repair service near me.

3 Fridge Maintenance Mistakes to Avoid
Overstocking the Fridge
Less do you notice, but overstocking your refrigerator can eventually lead to its breakdown. This is because the excessive containers inside your fridge might block the vents, placing an extra burden on the fridge to keep it cool. So make sure you fill it enough to allow enough room for cold air to circulate and cool the entire cabinet. Organize the items properly and avoid piling them too high, to ensure that they do not block the vents.
Trying to Fix Electrical Problems by Yourself
The worst you can do for your electrical appliances is try to fix the electrical problems by yourself. This can instead lead to major problems such as electrocution, fire damage, and costly repairs. So, if you witness any sign of potential electrical malfunction in your refrigerator, reach out to a professional fridge repair near me. These signs might include the fridge not cooling down enough, continued cycle, loud buzzing noise, issues with the fridge lights, or when the fridge keeps tripping the circuit breaker. Also, do not delay fixing your fridge, as this might also limit your chance of a successful repair.
Not Taking Care of the Coils
Coils are the backbone of any electronic unit. So, taking proper care of the coils can result in the long-term sustenance of your refrigerator. This can also limit the trips of repair service providers to your home. So, make sure you clean the coils of any accumulated debris, which would make it easier for the coils to dissipate the heat. This would also protect the compressor from overwork, decelerating the depreciation of your appliance. Also, look for any damaged coils and replace them, as they would save you from the costly replacement of your refrigerating unit.
Hire a Fridge Repair Service in Jaipur Now
Thus, the blog unravels the various mistakes to avoid at the time of maintenance of your refrigerator. If you still face any issues contact a fridge repair near me, at the professional service of Bharat Services. It works on the principle of customer satisfaction. So, get rid of all your fridge issues by contacting the best services for fridge repair at Bharat Services now. You can also contact the service provider for other home appliances such as AC units and TV.
0 notes
Text
How to Extend the Lifespan of Your Air Conditioner
To maintain your AC unit for prolonged longevity and effortless cooling, it is essential to follow some regular maintenance tips. Just by following some routine repair and maintenance steps, you can avoid major wear and tear on your AC unit and ensure its longevity and increased lifespan. Ensure regular cleaning, temperature control and seasonal inspections from AC Repair Service Jaipur, you can do some basic things and enjoy the cool air from the AC for a long time. In this blog, we will discuss some basic tips and tricks such as duct cleaning and upgrading to more energy-efficient systems to ensure functionality and reduce energy costs of your AC unit.

5 Tips to Extend the Lifespan of Your Air Conditioner
1. Establish a Cleaning Routine
An AC unit for an increased lifespan needs to be regularly cleaned. It will remove dust, and debris, and will help you identify leakage issues if any. Having a cleaning routine can help you save a lot of cost on repair and maintenance as well as on electricity bills. It also helps in keeping the AC unit new and increases the efficiency and lifespan of an AC unit.
2. Keep the Filters Clean
For an AC unit to perform effectively and to maintain the right airflow without dust, it becomes essential to clean the AC filters. If the filters are uncleaned, they will increase the load on the AC to perform. You can get help from a professional AC Repair Service Near Me to get your AC’s filters clean.
3. Temperature Matters
The work of AC is to provide required cooling by consuming minimum electricity. If you keep your thermostat and temperature updated and maintained, you will be able to keep the temperature settings right. Change the settings according to the weather, to reduce the pressure on the thermostat and temperature controller.
4. Schedule Frequent Checkups
It is essential to get help from the AC servicing Near Me services to get regular repair and maintenance, especially after a season change. For example, if winter is over and summer is approaching, you need to get your AC unit checked for any damage during the winter season. To ensure its peak performance, get it checked before the peak usage season.
5. Avoid Direct Sunlight
If an indoor AC unit comes in direct contact with sunlight, it increases the load of the AC unit and reduces its performance. You must ensure at the time of installation that no direct sunlight touches the AC unit, reducing its performance.
Ensure the Optimized and Long-Lasting Performance of Your AC Unit!
If you follow these simple tips and tricks, you will be able to ensure optimized and long-lasting performance of your AC unit. It is essential to care for your electronic items as wear and tear on them can cost you a lot of money and energy. Moreover, ensuring that there are no jams around the outdoor unit stimulates proper airflow and enhances its lifespan. Get recommendations and help from AC Repair Service Near Me for the right support and guidance!
0 notes
Text
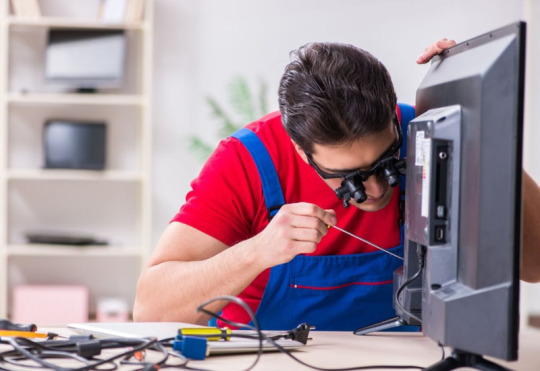
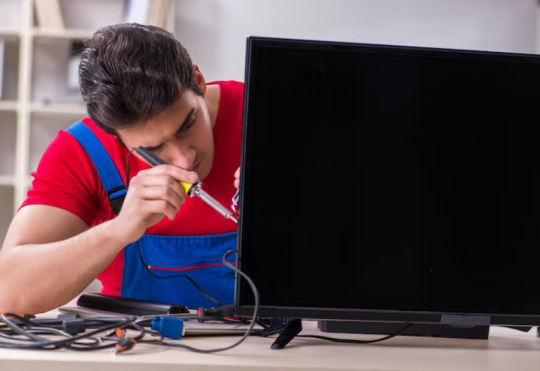
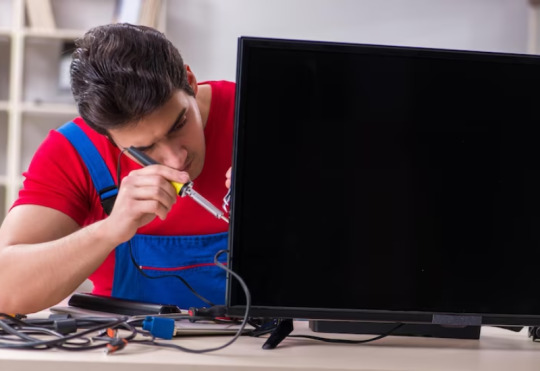
Understanding Different TV Screen Types and Their Repairs
In the growing world of technology, television screens have changed drastically from thick to thin and even transparent. Brands have been constantly improving and innovating with TV screens making it tough to find issues with different models. This is where you require the help of a professional TV Repair Service Near Me to help you find the issue with your TV screen and get it repaired before any major loss. However, as a modern TV enthusiast, you must understand about different TV screens and basic DIY repair techniques and if you don’t, this blog is for you.
4 Different TV Screen Types and Their Repairs
1. LCD (Liquid Crystal Display) Screens:
LCD is one of the most common forms of modern TVs where they use light through liquid crystals to generate images. This type of TV commonly faces issues such as dead pixels, backlight problems, and cracked or damaged screens. To repair the dead pixels, you often need to replace the whole screen panel whereas to repair the backlight issue, you need to replace the backlight array or the panel. Repairing of cracked panels only can be solved by replacing them.
2. LED (Light Emitting Diode) Screens:
LED TVs are one of a kind of LCDs where they use LED backlights to operate. Where many of the issues that LED screens might face are as common as LCD but some of the other LED Backlight issues are LED backlight issues and burn-in. To repair LED backlight issues involves replacing faulty LED strips or modules. Whereas to repair the burn-in, you may need to replace the affected panel. If you find it tough to DIY, you can book an appointment with a TV repair near me for better service.
3. OLED (Organic Light Emitting Diode) Screens:
OLED TV screens are the premium category TV screen which has better quality pictures and contrast compared to LCD and LED screens. The common issues that this screen faces are pixel degradation and screen burn-in. It might get tough to repair OLED pixels but you can use the help of a professional by calling TV Repair Service Near Me for pixel refresh techniques or panel replacement if required.
4. Plasma Screens (Less Common):
Plasma screens are out of the trend and from most of the homes after the innovation of LCD and OLED, however, if you still have the plasma screen at your home, it might face issues like image retention, and panel failure. You can repair image retention issues by running screen-wiping routines or adjusting settings. You can repair panel failures by component-level troubleshooting or panel replacement.
Don’t Let the Entertainment Stop!
You cannot get your TV screen repaired correctly without the right information about your TV screen and what potential issues it might face. For the right diagnosis and repair, you can book an appointment with a professional TV repair near me services as skilled technicians can provide reliable solutions to keep customers' TVs running smoothly.
0 notes
Text
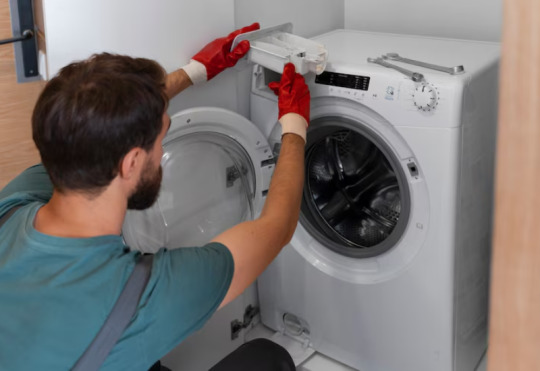
Replacing Common Washing Machine Parts: What You Need to Know
Washing machines are an inseparable part of our lives. In our busy schedule, they save us from the burden of heavy laundry. But what if one fine day your washing machine itself breaks down? While it is always recommended to call a washing machine repair service near me, in such a case, you can also address some minor issues at your end, without the help of a professional. You can find the detailed steps to replace the various parts of your washing machine on the internet. We are here to guide you about the major considerations to keep in mind while replacing the common washing machine parts.
Required Supplies
· Bearings
· Bearing grease
· Shock absorbers
· Belt
· Different colored LED tapes 5 mm
· Different colored LEDs 3/5 mm
· Resistors
· Pulse transformer
· Wire, connectors
· Plastic nylon straps (screeds)
· Thermotubes
· Silicone sealant
· Rust removal lubricant
· Citric acid
· Hammer
· Socket wrenches
· Hot glue gun & glue
· Soldering gun & solder
· Multimeter
· Clamp meter
· Screwdrivers, pliers, cutting pliers, and other tools can be found in any home workshop.
Tips to Follow
Disconnect the Washing Machine
Before starting any kind of repair make sure you properly disconnect the washing machine. Start by disconnecting the washing machine from the water supply and the mains. Then disconnect the hose that is attached at the back.
Check the Filter
Make sure you take care of small issues while troubleshooting the problem. The condition of the filter is one such issue. Carefully remove the filter and check its condition. If it is dirty, it can be put aside for descaling. You can simplify the task, by simply replacing it with another new filter.
Take Pictures and Mark the Components
In order not to confuse wires with connectors during reassembly, you can simply photograph them. You can also choose to mark the components with a marker. A combination of both techniques can also be utilized.
Tips to Remove the Motor
· Before disconnecting the motor, you need to remove the belt as well as all electrical wires (connectors).
· Secondly, you need to unscrew the shock absorbers using a socket wrench. The tank is now ready to be pulled out along with the drum.
· Before disassembling the washing machine tank, you first need to separate the motor from its body.
· In order to remove the pulley smoothly, first block it. This can be done using a regular wrench.
· The nut is unscrewed counterclockwise.
Disassembly of the Tank
· In order to separate the parts of a tank, you need to remove the metal fasteners.
· There is a rubber gasket between the two halves of the tank. It is better to replace it with a new one after reassembling the tank.
· Use a hammer to pull out the stainless steel drum, and a metal pipe to fit the axle diameter.
· It is better to use a special press to remove the drum.
Bearing Replacement
· The first and foremost thing required for bearing replacement is to buy the right bearing.
· This can be accurately done by checking for the designation codes on old bearings.
· Also, make sure to replace the seal along with the bearing. These are provided with a pair of new bearings.
· Purchase the special water-repellent white grease. Lubricate the steel axle of the drum with grease in order to prevent it from rusting in the future.
· You can now insert the drum into the bearings of the tub of the washing machine.
Hire a Washing Machine Repair Service Now
Thus, the blog presents a wholesome discussion about the things to keep in mind while replacing some of the important parts of the washing machine by yourself. However, if you find the task challenging, contact a washing machine repair professional. So, be mindful the next time your washing machine breaks down. Also, be sure you choose the right service provider to ensure the optimal performance and longevity of your devices. Bharat Services is one such washing machine repair service provider in Jaipur that works on the principle of customer satisfaction. So, get rid of all your washing machine issues by contacting the best services for washing machine repair at Serve Bharat now.
0 notes
Text
Safeguarding Your Space: Important Washing Machine Safety Tips for Homeowners
We all use washing machines for laundry and it has become an important part of our lifestyle. However, sometimes in a hurry, we ignore the right way to do things and thus end up in certain accidents or spoiling the washing machines. Some of the resulting washing machine problems are easy to repair while others require professional aid. So, in case you are not confident about the issue or the ways to troubleshoot it, do not hesitate to contact a washing machine repair service near me. Also, make sure to read the blog to know about the various safety considerations for the effective utilization of the washing machine.

Periodic Check
Providing that precaution is better than cure, it is always advisable to ensure periodic checks and annual maintenance of your electronics. While the annual maintenance requires a professional's assistance you can conduct the routine periodic checks at home. This requires looking for the problems if any in the basic components of the washing machine. This includes:
· Checking for plastic dryer ducts. These are more prone to fire hazards. The risk of this hazard can be minimized by replacing the plastic dryer ducts with straight or flexible metal ducts.
· Be sure that you provide enough space for your dryer, ascertaining proper air circulation. It is important to keep your dryer cool and the area around it clutter-free.
· Check the output of the dryer vent for blockages, such as leaves or bird nests. If you notice dryer lint all over the laundry room, make sure the dryer vent and exhaust duct are securely attached. It is advisable to clean the dryer vent every three months.
· Take note of the washing machine base. Connect the drain of the machine to some pan, to avoid any water damage due to the leaks. This is especially important if your washer is located on the upper floor of your home.
· Replace the washing machine supply lines every three to five years, to ensure their smooth functioning. Also consider replacing your rubber hose with a reinforced braided washer hose to avoid leaks, cracks, and tears.
Prevent the Dryer from Overheating
The primary reason for an overheated washer and dryer is disrupted airflow. When hot air cannot escape from inside the dryer, it can quickly raise the temperature, and lint or clothing particles may catch fire. The other reasons can be a malfunction or wear and tear of dryer components – such as the thermostat, heating element, or drum seal.
The overheating can be avoided by following a few simple steps:
· Do not overload the dryer.
· Ensure the dryer vent is unclogged and provides for proper ventilation. Also, ensure to clean the dryer vent regularly.
· Schedule maintenance for the unit, by a professional if it continues to overheat.
Be Mindful of the Strange Functioning of the Washer and Dryer
If you notice anything unusual about your washing machine or clothes dryer, such as odd smells, sounds, or the way it operates, seek professional assistance immediately. These could be a sign of an unbalanced washing machine, unevenly distributed load, worn out suspension springs, bearings, or other moving parts, faulty wiring, an electrical short circuit, and other malfunctioning components and more. Some of these issues could be serious enough to cause major hazards such as electrical shock and fire.
The problems can be avoided by avoiding the use of extension cords, instead directly plugging the machine into the wall socket. Also, ensure the regular cleaning and inspection of the machine. If the problems persist, call a professional washing machine repair service provider near me.
Hire a Washing Machine Repair Near Me Now
Thus, the blog presents a wholesome discussion on the various tips to use a washing machine more efficiently and safely. So, be mindful the next time you use or attempt a repair for your washing machine. Also, be sure you choose the right service provider to ensure the optimal performance and longevity of your devices. Bharat Services is one such washing machine repair service provider in Jaipur that works on the principle of customer satisfaction. So, get rid of all your washing machine issues by contacting the best services for washing machine repair at Bharat Services now.
0 notes
Text
Do's and Don't while repairing your AC at home
Summers have started and we are all now highly dependent on our ACs and coolers to save our comfort in the scorching heat. Imagine a hot summer afternoon when your AC suddenly breaks down. Even the thought is haunting in this weather when the temperature is touching its new high every other day. To save yourself from any potential discomfort make sure you always have the contact number of an AC repair service near me handy. You can also try and troubleshoot the problem and even try a few fixes by yourself, but always make sure to abide by certain rules to avoid any further discomfort. So, here we are to discuss some of the dos and don’ts to keep in mind while trying to repair the AC all by yourself.
Do's and Don't while Repairing Your AC by Yourself
AC Repair Do’s
Check the Filter
One of the major reasons for the malfunctioning of your AC could be the accumulation of dirt and debris in your unit's filter. A routine cleaning of the same can save you from many future issues such as ice buildup in your AC. You can also change the filter to keep the air cool and clean, and you are not specifically required to call for a professional to address the issue. In fact, keeping a check on the filter and replacing it timely yields you long-term benefits at affordable cost.
Unblock the Vents
Make sure the air vents of your unit are not blocked by any of your possessions, such as furniture, carpets, or boxes. This might take it longer for your AC to cool the room than usual, requiring it to overwork and then finally break down. Blocked vents could also interfere with the functioning of the thermostat making it difficult for the same to function properly, sometimes ending up spoiling it.
Clean the AC Ducts
The AC ducts are responsible for filtering the air and thus might at times contain various unwanted particles such as dust, hair, pollen, mold, or other bacteria. This leads to clogging, forcing your AC to compensate for the lack of airflow. This burdens the AC unit leading to a deteriorated performance over time. Thus, ensuring the timely cleaning of the air ducts of your AC might go a long way to keep it running smoothly for years.
Don’ts
Install or Replace an AC Unit
You might have an urge to set up a new AC unit or replace an old one all by yourself. However, the process is complex and requires a professional's expertise. Further, in case you somehow end up setting it inappropriately, your AC might malfunction. In certain cases, it might also require expensive early repairs.
Do Not Open the AC Unit
This should be your priority when your AC is in its warranty period. Once you set your hands on the unit, you are more likely to void the warranty terms and conditions. This would mean you paying for the expensive repair all by your pocket. Also, as you are not an expert you might end up further contributing to the problem and adding up to the repair bills.
Attempt any Repairs
Repairing an AC is a more complex task than you think and thus requires years of experience. The AC repair process involves working with high voltage, delicate parts, and hard-to-reach areas, a minor mishandling of which would result in major problems. Thus, strictly refrain yourself from attempting any repair, rather also be careful even while wiping down any external components.
Hire an AC Repair Service in Jaipur Now
So now that you know the various dos and don'ts of AC repair make sure to stick by them, the next time you face any issue with your AC. If you still face any issues, contact a professional AC servicing near me. One such best professional AC repair service provider is Bharat Services. It is an AC repair service in Jaipur that works on the principle of customer satisfaction. So, get rid of all your AC issues by contacting the best services for AC repair at Bharat Services now.
0 notes
Text
How to Fix a Noisy Washing Machine: Tips and Tricks
Having a faulty appliance at home that can increase noise can break the peace of a home. From squeaks to thuds, there can be different sounds that can be concerning and come out from a washing machine. However, these sounds can easily be solved by using some simple troubleshooting tips and tricks. Therefore, in this blog, we got you common reasons why a washing machine makes noise and solutions to fix them. To save yourself from trouble, you can book an appointment with a Washing Machine Repair Service Near Me.
Identify the Problem
It is essential to know what kind of sound is coming out from the washing machine before implementing any fixes. Is it a high-pitched squeal, a rhythmic banging, or a constant rumble? Knowing the kind of sound can ease up the process of knowing possible causes.
Common Causes and Solutions
1. Unbalanced Load
If you are hearing a thump or bang during the spin cycle, it must be caused because of unbalanced load. To solve that, you can stop the machine, rearrange the laundry, and restart. It is essential to distribute the load evenly to avoid any disruptions.
2. Loose or Worn Belts
If you are hearing squeal or screech sound during wash or spin, that must be an issue with loose or worn belts. To solve this, you can either replace worn belts or tighten loose ones according to the manufacturer's instructions.
3. Worn Bearings or Bushings
If you are hearing grind or rumble sound during the spin cycle then this must be an issue with bearings and bushes. They are damaged and you can get help from Washing machine Repair Near Me services to repair them.
4. Faulty Shock Absorbers
If you are hearing vibrations and bangs while washing then this must be an issue with shock absorbers. Check if it is damaged or worn and replace them to minimize vibration and noise.
5. Loose Parts
If your machine is making rattling or clicking noises while agitating and spinning, it must be due to loose screws, bolts, or other components. You can check motor mounts, drum bolts, and other critical areas.
Preventive Maintenance Tips
Regular Cleaning
You need to ensure that you clean the drum, gasket, and detergent dispenser regularly to remove dirt, lint, and soap residue, which may cause noise and malfunctions.
Leveling
Make sure that your washing machine is placed at the right place that is balanced. An improperly leveled machine reduces vibration and noise during operation.
Proper Loading
Avoid overloading or imbalanced loading of the machine that can cause noise during operations. You can check the instructor's manual for load size and distribution.
Professional Servicing
If you still see the issue even after trying everything from the above list and issue is still the same as booking an appointment with Washing machine Repair Near Me services to repair them.
Keep Your Machine Noise Free!
Irritating noises coming out from the washing machine can cause irritations in a household as well as being an indication of future issues. Once you understand the issues and their probable causes, it becomes easier to resolve them. You can book an appointment with a Washing Machine Repair Service Near Me to resolve any issues or for regular repair and maintenance.
0 notes
Text
Fixing Your TV Woes: Practical Advice for Smooth Viewing Experience
We can’t imagine our lives without TV anymore as it is an essential part of our lives for relaxation and entertainment and helps break monotonous lives. But just like any other electronics, your TV can also act up and you can face cloudy, uncooperative signs of distress on the TV screen. However, these issues are common and can be fixed easily at the convenience of your home. You can get help from the TV Repair Service Near Me to stop bidding early farewell to your favorite TV.

5 Common TV Screen Problems and Fixes
There are five types of common issues that you might face with your TV screen and you fix them using the following tips.
1. Distorted Picture
One of the most common issues that you can face with your TV is a distorted picture. You can witness things such as the screen looking squeezed, cropped, or disappearing past the edge of the screen and the common reason behind that is a selection of the wrong aspect ratio and TV signals are geometrically reflected on the screen.
You can easily fix it by going to TV settings and going to options such as Picture Size, Aspect Ratio, Zoom, Wide, or even Picture. You can set it to Direct or just fit option or choose 16:9 or 4:3 aspect ratio options.
2. Unnatural Screen Movement
If you are seeing some unusual screen movements on the TV, there is a high chance that your TV is going through a soap opera effect. Usually, movies and shows are displayed in either 24FPS or 30FPS, and modern TVs can display up to 120FPS. This is to make your viewing experience smoother but sometimes it can give a jarring effect while watching normal movies and TV shows on the TV.
To fix this issue, you can turn off the motion smoothing option or select modes such as TV in Cinema or Movie mode, and if the problem remains the same get help from TV repair near me services.
3. Color Correction
Sometimes the colors of your TV might seem off such as it can be overtone to blue, green, or even yellow. You can switch to different modes such as movie-focused picture mode that you will find named Calibrated, Cinema, or Movie option. If the issue remains the same you need to balance the whites of your TV from Cool, Warm, and Normal.
If the issue remains the same we suggest you book an appointment with an expert.
4. Audio Delay
If your audio and video of the TV are not synced with each other, it would be real torture to watch TV like this. If you want to feel free from such distress, you need to go to the sound option in settings and choose Advanced Settings or Expert Settings, and fix it from the A/V Sync or Audio Delay option. If the issue remains the same, TV Repair Service Near Me can help you fix that.
5. Lines Appearing On Screen
If you see horizontal or vertical lines appearing on your TV screen, unplug and re-plug the wire firmly. If the issue remains the same, you can change the HDMI cable and see if the issue is resolved and if not, there must be an issue with your screen.
Replacing the whole screen can cost you a lot but we suggest you take advice from trusted TV repair and management services.
Don’t Let Entertainment Stop!
You need to make sure that your TV runs smoothly and that nothing can ruin your viewing experience. You can book an appointment with TV Repair Service Near Me for regular maintenance and repair. It will save you from the high cost of repair and replacements. Don’t let the flow of entertainment stop!
0 notes
Text
How to Resolve Screen Flickering on Your TV
Imagine the experience of a 55-inch smart TV that presents a flickering screen. This is for sure frustrating after a long day when you finally want to enjoy your favorite show. The good news is you can troubleshoot the same with just a couple of efforts and enjoy watching TV as if the problem has never occurred. However, if the problem persists after all your efforts, remember you can never go wrong by calling a TV repair service near me. But, before directly jumping for a professional’s help read along the blog for some quick fixes.
Ways to Troubleshoot the Screen Flickering Issue
Check for the Cables
The first thing to do in case of a malfunction of any of your electronics is to check for the cables and connections. Especially, for televisions half of the screen problems can be resolved by simply addressing the issue of loose cords and cables. So you can address the issue in seconds by making sure that the cables are plugged in properly. Simply unplug your television, wipe the cables clean, and plug them into your TV. Another issue can be a damaged cable which can be replaced saving you the charges of a technician.
Check the Signal Information
This can be as simple as disconnecting and reconnecting the antenna connection, just like we did for the cables. In case your TV uses a separate, over-the-air antenna, check for the signal strength information to adjust the antenna for increased signal strength and improved HD channel reception.
If you own a digital TV, check the digital channel signal strength. If the number of antenna signals is less than 4 or the SNR is less than 20, the broadcasting signal is weak. In such a case you are to approach your cable broadcasting company and not a TV repair service provider.
The signal strength can be checked by following the below-mentioned steps:
· Go to Home -> Settings
· Then select Support -> Device Care.
· Proceed with Self-diagnosis.
· Select Signal Information in the menu.
However, this function is only available for digital channels. Also, there are chances the function may not be supported in your geographical area.
Refresh Rate Issue
Another reason for the screen flickering might be issues with your refresh rate. Refresh rate is defined as the rate of change of picture on the screen. Thus, a higher refresh rate would mean more number of pictures on your screen. Setting this to the ideal value can solve the issue.
This can be done by setting the refresh rate most commonly from the Display Settings or Picture Options. However, the availability of this option will differ from brand to brand.
Thus we have discussed the three most common causes of a flickering TV screen, along with the ways to solve them. Still, if the issue keeps on popping up now and then it is time to reach out for the TV repair near me.
Hire a TV Repair Service Now
Thus, the blog guides you with quick tips to solve your TV screen flickering issues. However, if you are still looking for a professional’s help, contact Bharat Services now. Bharat Services is a professional TV repair service provider in Jaipur that works on the principle of customer satisfaction. So, get rid of all your TV screen flickering issues by contacting the best services for TV repair near you at Bharat Services now.
0 notes
Text
Tips for Seamless Connectivity in Your Television Setup
Television is one of the most important parts of our lives these days and has evolved a lot from broadcasting a few channels to a completely smart setup for streaming through online platforms. With the growing number of set-up devices such as gaming set-ups, streaming devices, music set-ups, and smart home devices, TV’s work has become much more of a central hub for entertainment and connectivity. To enhance your viewing experience and seamless connectivity, this guide has brought you a few tips and tricks. You can get help from the TV Repair Service Near Me for seamless TV connectivity.
5 Tips for Seamless Connectivity in Your TV Setup
1. Focus on Cables
You need to make sure that you use high-quality cables for the set-up of your television to protect it from any faulty wiring and seamless connectivity. You can choose high-quality HDMI cables for audio and video. To improve the longevity of the cables, invest in cable protection software such as cable clips, zip ties, or cable sleeves to keep your setup tidy and organised.
2. Utilise Wireless Connectivity
Make sure you utilise wireless technology for the television connection as you can ignore the mess of wiring. With the help of wireless adapters, you can connect multiple devices at a time to your television without using more wires than required. You can get help from an expert to set up wireless connectivity and call for TV repair near me.
3. Update Software and Firmware
Smart TV comes with smart responsibilities as you need to make sure that you keep your TV software update and firmware strong to protect your TV from malware or viruses. As well as updated software brings updates to address bugs, improve stability, and introduce new functionality.
4. Utilise Network Setting
You need to make sure that you get a seamless internet connection for your smart TV to work and in the case of a set-top box as well you need to make sure that it gets the desired satellite networks for smooth operations and seamless connectivity. You need to make sure that the range of set-top boxes or WI-Fi adopters is in the range of TVs for high-speed connectivity. You can get help from the TV Repair Service Near Me.
5. Calibrate Display Settings
You need to make sure that you set your display at optimised settings for better colours and high resolution for a seamless viewing experience. If you have an HD setup, you need to make sure that all colours, graphics, and notions are set to the optimal calibration services for precise adjustments to brightness, contrast, colour temperature, and other parameters.
Let the Entertainment Flow Smoothly!
Now that you know what settings are must-haves for seamless connectivity and experience in a TV, you need to ensure that you get the most out of your viewing experience. Let the entertainment role by getting help in TV set-up from TV repair near me services. Get your popcorn and enjoy your favourite movies and shows without any interference.
0 notes
Text
Decoding Frequent AC Cycling: Causes, Fixes, and Expert Tips
AC is one of the most important appliances when it comes to cooling your home in the scorching heat of summer. However, sometimes it might start functioning short-cycles which could happen due to various reasons. The frequent on and off of the AC can be frustrating and annoying and it is a sign of some underlying issue within the AC that is harming the productivity of lifespan. In this blog, we got you common causes and solutions to keep your AC smoothly operating after consulting with the AC Repair Service Near Me.

Causes of Frequent AC Cycling
Factors such as incorrect sizing, thermostat issues, refrigerant leaks, dirty air filters, blocked condenser units, and faulty compressors or capacitors cause major issues with the short cycling of an AC unit.
Due to the wrong sizing of the AC, it can short cycle for example if your AC unit is bigger than the area it is supposed to cool, it will cycle fast and shut down as soon as it reaches the desired temperature and vice-versa with smaller units.
Another reason that can cause frequent cycling is a broken thermostat. It can misread the temperature resulting in fast on-off of the AC unit. It can also be caused by incorrect thermostat placement or faulty sensors.
More reasons such as broken refrigerant can cause a leak of gas, dirty air filters can restrict the airflow and overheat the unit, outdoor condenser units blocked by debris or foliage cause trouble to the unit by overheating, and a broken compressor or capacitor can cause the AC unit to short cycle, turning on and off rapidly. If you find any of the following issues with your AC unit, contact AC Repair Service Jaipur as soon as you can.
Fixes and Expert Tips
After taking advice from our expert technicians of AC servicing Near Me, we brought you some expert tips and advice to fix the frequent AC cycling.
To resolve the frequent AC cycling issues, you need to ensure that you are buying the right size of an AC unit to prevent rapid or slow cycling.
For the proper functioning of the thermostat ensure that it is placed at the right place and is away from any kind of heat sources that can mess up its readings.
You can book an appointment with AC servicing Near Me to get your AC unit checked for refrigerant leaks. It can be hazardous to handle refrigerant leaks on your own, so you better consult with a specialist quickly.
It is important to maintain cleanliness inside and outside of the AC unit to ensure proper airflow. A dirty air filter can cause heat in the unit but if you are cleaning it regularly, optimal airflow and cycling can be ensured. The same goes with outdoor condensers as you need to clean them for debris to remove leaves, branches, or any other obstructions.
If you are having trouble with your capacitor or compressor, to get it repaired or replaced call AC Repair Service Jaipur for diagnosis and repair. We suggest you ensure regular inspection of your unit by a professional to avoid frequent AC cycling issues.
Keep Your Home Cool in the Summers of Jaipur!
Understand that frequent AC cycling is not a good sign for your unit and it is underlying some serious issues that can cause significant malfunctions in your unit leading to quick wear and tear of the AC unit. It is always advisable that you regularly clean and maintain your AC unit for optimal performance and if it still creates trouble for you, call AC Repair Service Near Me for expert diagnosis and assistance.
0 notes
Text
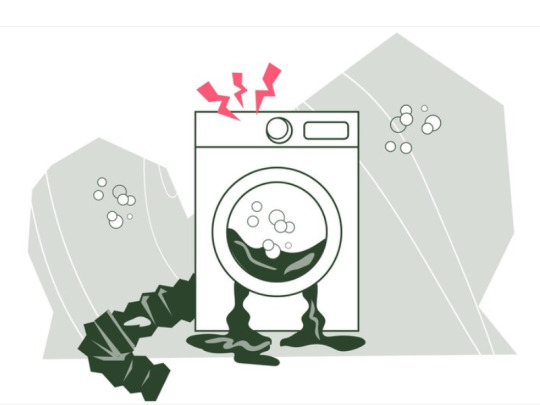
Why Washing Machine Smells: Troubleshooting Steps to Fix this Issue
A washing machine is one of the most essential and convenient appliances for any modern household today. However, if you are experiencing any kind of foul smell could ruin the freshness of your clothes. The causes behind this foul smell could be mould, bacteria buildup, or mildew inside the washing machine. That is why we brought you this blog to tell you the reason behind odour in washing machines and how you can troubleshoot them. However, the easiest way is to call the Washing Machine Repair Service Near Me to resolve the issue for you.
Understanding the Cause
There could be different reasons why your washing machine is smelling bad. A few of those reasons are-
1. Moist Environment: A moist and warm environment within the washing machine can start breeding mould and mildew causing smell.
2. Residual Detergent: Detergent residuals can pile up over time and can cause odour and bacterial growth.
3. Improper Ventilation: No space from the ground and washing machine surface causes poor ventilation leading to hindering the washing and drying process. It will cause moisture and will contribute to odour formation.
4. Infrequent Cleaning: Irregularity with cleaning and maintenance can cause bacteria and mould to grow causing a bad smell inside the machine.
If any of the above reasons fit true, then try the troubleshooting steps mentioned below or just book an appointment with Washing Machine Repair Near Me.
Troubleshooting Steps
1. Clean the Drum: To clean the drum, you can add some hot water, vinegar, or baking powder and run down the cycle. It will work as a natural cleaner and will clean the drums and every hole to eliminate odour.
2. Inspect the Gasket: The most common area for mould and bacteria to build up the rubber gasket around the door. Regularly clean them with a hot towel, vinegar, or baking powder to prevent buildup.
3. Clean the Dispenser Tray: Detergent and fabric softener dispenser tray need to be cleaned thoroughly after usage with warm water. Make sure that there are no detergent clogs left behind causing odour.
4. Check the Drain Pump Filter: If your washing machine’s drain pump is jammed with debris, it can cause odour. It can be a technical task to clean the drain pump so just call an expert from the Washing Machine Repair Service Near Me to clean it for you.
5. Maintain Proper Ventilation: You need to ensure that the washing machine is well lifted from the grounds and far from the walls for proper ventilation. Also once, you are done using the machine, leave the door open for some time to allow moisture to evaporate.
Save Your Clothes from Unpleasant Odours!
A smelly washing machine can cause a smell to your washed clothes. However, with the right troubleshooting steps, you can remove the unpleasant odour and ensure the smooth working of the washing machine. You need to make regular cleaning and maintenance a habit to ensure an odour-free laundry experience for a long time. Taking help from a washing machine expert can save you from odour and unpleasant laundry experience. Just search Washing Machine Repair Near Me online and you will find the best one to help you remove odour and ensure the smooth operation of your washing machine.
0 notes
Text
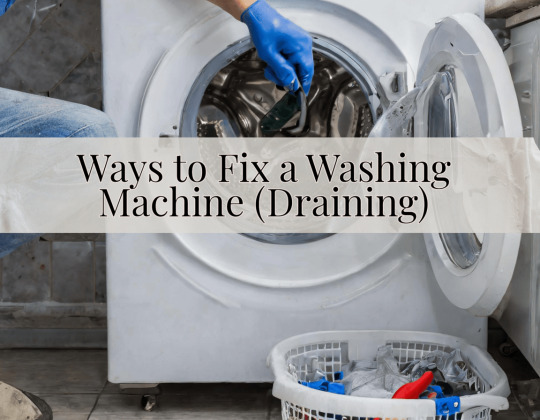
Ways to Fix a Washing Machine that is Not Draining
Do you ever find yourself stuck in draining out the water out of your washing machine after finishing off the tiring pile of laundry? This further adds up to your chores and costs you time and effort on an already busy day. The problem can be effectively addressed by reaching out to a washing machine repair service near you. However, it is not always feasible to call for professional help at the exact moment. You do not need to worry if you are already stuck. The blog aims to discuss the process of effectively draining out the water from your broken washing machine. So read along to know more about the same.
Ways to Drain Out the Washing Machine Manually
Bail Out the Water Using a Bucket
This is the easiest and hence the most common way to drain out the water from your washing machine. However, it is time-consuming, tedious, and hard on your back, which makes the method inefficient.
Drain Out the Water Using a Hose
The other and comparatively efficient way to drain out water from the washing machine is draining it out using a hose. The process requires a bucket, a screwdriver, needle-nose pliers, and a clamp. Also, remember to have a sponge or towel in case the water spills.
The draining of water using a hose involves the following steps-
Start by making sure that the power is turned off. It is mandatory to ensure that the washer does not have any source of power attached to it, be it the circuit breaker and fuse box or hot and cold water connections to the washing machine.
Check for the condition of the drain hose of your washing machine, at its backside. Chances are that the drain hose is bent or has a kink, resulting in blocking the water flow. So the problem can be resolved by simply straightening the pipe.
In case the hose is not bent and does not have a kink, remove it from the washer’s drain, or unscrew the hose with a clamp attached, if required. Keep the hose a level higher than the tub to empty the water. Then use the hose manually to drain out the water.
If the water is still not draining, then the filter is at fault. Ensure you clear it before proceeding further, to remove the blockages (if any) in the filter.
Once the water has fully drained out, check the drain hose for any debris, clothing, or soap blockages. This can be done by loosening up the clamp connecting the hose to the bottom of the tub. This would make it more accessible for a closer inspection.
If the blockages are still not visible it is time to reach out to a professional washing machine repair near you, to clear the deeper clogs.
You can also search for any blockages in the washer’s drain pump, that might have resulted from a broken belt or impeller (if you have a top-load machine), or a leak. The location of the drain pump differs according to the model and might require you to read the instruction manual for their exact determination. You are always free to reach out for professional help in case you are lazy or are short of time.
Usually, the washer demonstrates an issue with the water pump with the help of an unusual sound of water leaking from the machine (at the time when it is used). If you can, try to replace the pump by yourself or simply reach out to a washing machine repair service provider.
One other culprit for your problem might be the lid switch. The issue can be diagnosed by pressing the lid switch, to figure out if it clicks. If the switch does not click on being depressed, it represents the switch is broken and needs replacement.
Hire a Washing Machine Repair Service Now
Thus, the blog guides you with quick tips to solve your washing machine's water-draining issues. However, if the problem persists, call for a professional’s help. Also, be sure you choose the right service provider to ensure the optimal performance and longevity of your devices. Bharat Services is one such washing machine repair service provider in Jaipur that works on the principle of customer satisfaction. So, get rid of all your washing machine issues by contacting the best services for washing machine repair at Bharat Services now.
#washing machine repairing#washing machine repair#washing machine repair service in jaipur#washing machine repair in jaipur
0 notes
Text
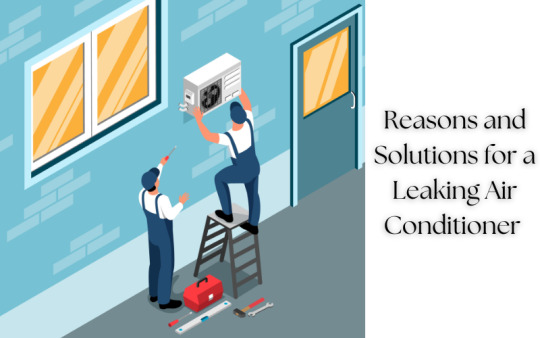
Reasons for a Leaking Air Conditioner and Ways to Resolve It
One of the major problems during summer is the leaking of the air conditioner inside the room. Imagine the embarrassment of a leaking air conditioner while you are hosting guests. Think about the inconvenience caused by shifting the furniture to save it from the dripping water, and the lost aesthesis of your home, by the dispersed look of the furniture. So, here we are to discuss some of the major reasons for the leak and the ways to resolve them. If the problem persists, contact the AC service nearby.
Common Causes of the Leaking AC with Respective Solutions
Clogged Condensate Drain Line
One of the primary reasons for the leaking AC unit is the condensate drain line due to dust, dirt, sludge, or mold. This leads to the collection of water in the unit, which eventually drains out. Thus, some of the modern ACs have a cutoff switch that shuts down the unit on account of any detection of clogging.
The best part is as the problem the solution is also very simple, just use a wet/dry vac to clean the condensate line. You can also try scrubbing it gently to remove any gunk. Also, check the drain pan of the AC for any water collection, and empty it. Of course, a professional would do it better, so contact a nearby AC repair service, occasionally for better results.
Rusted/ Damaged Drain Pan
This is often a sign of long-term wear and tear on your AC. A damaged drain pan can be securely sealed by using a good quality water-resistant sealant to fill in any cracks that may be present. Pour water to verify accurate sealing. It is best to completely replace the drain pan.
Broken Condensate Pump or Float Switch
The condensate pump is responsible for removing water from the air conditioning system. When the water level in the pump rises, the float switch is turned on which triggers the water out of the system. Thus, in case of a problem either of them will not let water out, leading to its collection and ultimate leakage.
Though the problem is easy to understand, it is complicated to solve it all by yourself. So, reach out to an AC repair service near you, and let the technician do his job.
Hire an AC Repair Service Near You Now
Thus, the blog guides you with quick tips to solve your leaking AC issues. However, if the problem persists call for a professional’s help. Also, be sure you choose the right service provider to ensure the optimal performance and longevity of your devices. Bharat Services is one such AC repair service in Jaipur that works on the principle of customer satisfaction. So, get rid of all your AC issues by contacting Bharat Services now.
#Ac Repair Service Jaipur#Ac Repair Service Near Me#acrepairnearme#acrepairjaipur#ac repairing#ac servicing#jaipur
0 notes
Text
5 Common TV Screen Problems and Ways to Fix Them
Television is the prime source of entertainment in all households. They are preferred by people of all ages and cater to their different needs. The smart TVs available nowadays are capable of extending the scope of content to more than displayed by the cable provider. This has led to the widespread adoption of electronic entities in space even outside houses such as corporations, cafes restaurants, and more. However, what if the major element i.e. the screen of your TV becomes dysfunctional? Try the below-given steps before reaching out for a TV repair service near you.

TV Issues and Ways to Solve Them
Distorted Picture
This happens when the elements on your screen appear a bit squeezed, cropped, or disappearing past the edge of the screen. This is primarily when the aspect ratio is not aligned or the TV signal is being geometrically reflected on the screen.
The issue can be resolved by aligning the picture size, aspect ratio, zoom, wide, or picture options in your TV settings. From any of the previous menus select Direct or Just Fit. For the aspect ratio, choose an aspect ratio in figures instead of the last two options, or choose 16:9 or 4:3 aspect ratio options.
Unnatural Screen Movement
The issue is an indication that your TV is running through the Soap Opera effect. The modern TVs have a refresh rate of 120Hz or 120FPS. This is aimed at displaying a smoother frame for watching sports or playing games, however, it can lead to jarring while watching normal shows.
This can be corrected by turning off the Motion Smoothing option by flipping the switch from Settings. If you are not getting the option for your unit, choose the TV in Cinema or Movie mode, in the mode option instead.
Color Correction
Has your TV lost the color, and the display is appearing blue, green, or yellow? This can be corrected by selecting the Calibrated, Cinema, or Movie option, in the TV’s movie-focused picture mode. If the problem persists, there may be a problem with the White Balance of your TV.
This can be resolved by visiting the Settings ->Picture menu -> Color temperature or White Balance -> Warm. This will fetch the most accurate color results.
If the problem persists, chase a TV repair service provider. He will be your last resort.
Audio Delay
Are you watching your shows with the audio not syncing with the video? We can relate that you are not enjoying the voiceover. This can be addressed by visiting Settings -> Sound -> A/V Sync or Audio Delay -> Advanced Settings or Expert Settings.
Lines Appearing on Screen
If you are getting horizontal or vertical lines on your TV screen, unplug the cable and re-plug it firmly. If the problem persists try replacing the HDMI cable. If the issue is still not resolved, there might be a problem with the screen.
Hire a TV Repair Near You Now
Thus, the blog guides you with quick tips to solve your TV display issues. However, if the problem persists, call for a professional’s help. Also, be sure you choose the right service provider to ensure the optimal performance and longevity of your devices. Bharat Services is one such TV repair service provider in Jaipur that works on the principle of customer satisfaction. So, get rid of all your TV issues by contacting the best services for TV repair near you at Bharat Services now.
0 notes
Text
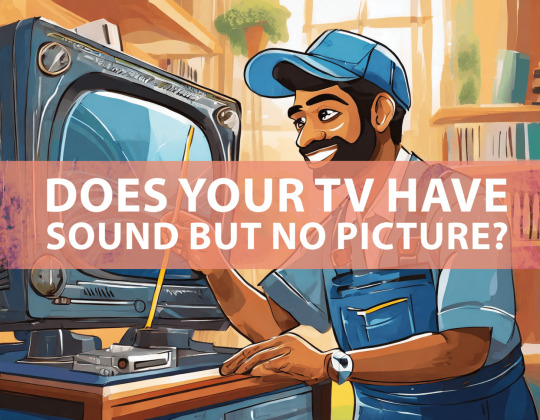
Does your TV have Sound but No Picture? Let's fix this issue
Televisions have been a vital part of home electronics. In fact, at present times they have made their way to a variety of professional spaces and public places including cafes and restaurants and more. However, machines are bound to depreciate over time affecting their overall performance and even a complete breakdown. It should be noted that not all the problems require you to contact the nearby TV repair service, rather some can be addressed by following some basic troubleshooting techniques, saving you bucks. The blog aims to discuss one such common problem, which is when you can hear the audio of your television, but the display is distorted. So, read along the blog to know some quick ways to address the issue.
Reasons for a Blank TV Display and the Respective Troubleshooting Techniques
HDMI Connectivity Fault
The most common reason for the sound without a picture could be improper connections. It can be addressed by checking that all the cable boxes and firesticks are properly connected. Also, particularly check for the HDMI connection.
An improper HDMI connection interrupts the video signals while allowing the audio to function properly. HDMI connection failure can occur at the input socket or the cables.
The problem can be addressed by removing and reconnecting the cables both on the end including the TV and the connected device. If the problem persists there are chances that the connection cable is faulty, so you can try replacing the same to solve the issue.
Swapping ports can also work. This will solve the issue as now the connection will be made to the active port. However, some devices automatically look for the active source. Also, make sure you use certified HDMI cables, as they are less likely to be faulty and allow you to check for faults in the TV settings.
Issues with the Display Settings
Sometimes a change in the display settings might also be an issue, allowing for the normal functioning of audio while demonstrating errors in the video. This can be addressed by altering the display settings for your TV by visiting the display settings or picture settings in the settings menu. Edit the brightness, contrast, or resolution as per the need.
Most of the time the issue occurs when the settings are adjusted to levels that are not supported by the model of your TV. Thus, resetting the display settings or factory settings to default might solve the issue.
Issues with TV Inputs
Your TV majorly consists of two inputs namely component input and AV input. An issue with any of the two inputs might lead to display errors. Thus, if you are using component cable make sure your TV is set to component input mode. This is controlled by the input or source button on your TV’s remote.
In case you are using AV/composite cables, make sure your TV is set to the AV input mode. This is also edited using the input or source button on your TV’s remote.
Hire a TV Repair Service Near You Now
Thus, the blog guides you with quick tips to solve your TV display issues. However, if the problem persists call for a professional’s help. Also, be sure you choose the right service provider to ensure the optimal performance and longevity of your devices. Bharat Services is one such washing machine repair service provider in Jaipur that works on the principle of customer satisfaction. So, get rid of all your TV issues by contacting the best services for TV repair near you at Bharat Services now.
0 notes
Text
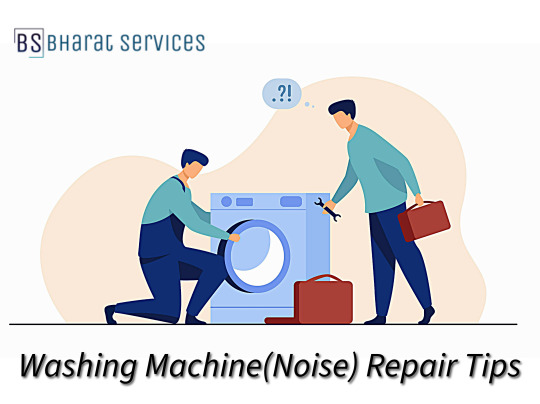
Tips to Repair Strange Noises Coming from Your Washing Machine
The sound of a washing machine in an Indian household works as a morning alarm and it is fine as soon as it is a usual sound. However, if someday your washing machine starts making weird and strange noises, it sure is a concern for your essential appliance. But don’t worry because in the blog we have brought you solutions and tips to repair strange noises coming from your washing machine, however, if you are not able to resolve it on your own, you can always search for a Washing Machine Repair Service Near Me.
5 Tips to Repair Strange Noises Coming from Your Washing Machine
1. Identify the Noise
It is important to address the type of noise the washing machine is making from thump to bang or a high-pitched squeal. These noises can help you identify distinct issues with your washing machine and will pinpoint the problem source to resolve.
2. Leveling Your Machine
It is possible that many times your washing machine is not leveled up and balanced on an even surface. It can easily cause noise while operating so make sure that all feet are placed on a level surface. You can use bubble level to measure the balance in all the sides. With a simple level-up, you can get rid of vibration noises and jarring sounds while the machine is working.
3. Inspect for Loose Objects
You might have left objects like coins, buttons, or broken debris in the washing machine. It can go into a drum or pimp and can make a cacophony of sounds during the washing process. You need to inspect your washing machine while unloading any of these objects because they can cause a huge disturbance in the smooth operations of the machine. If you still fail to resolve the noise issue, you can call for Washing machine Repair Near Me for professional assistance.
4. Check the Drum Bearings
There might be an issue with the drum bearing that can make weird thumping or grinding noises. This can happen due to component deterioration. Noise can be caused due to high friction in the washing machine due to increased wear and tear of the components. You can either replace the bearings or take help from an expert for better results.
5. Service the Motor
The motor is the key component of any washing machine and if it is worn out for any reason, it will make weird noises. You can check if your machine’s motor is losing any parts or broken. However, we suggest you find and book an appointment with a Washing Machine Repair Service Near Me for better assistance.
Ensure the Peace of Your Morning by Maintaining the Washing Machine!
For a hassle-free laundry experience, it is important to ensure that your washing machine is working fine and smoothly. Weird noises can be a sign of severe issues with your washing machine that need to be addressed quickly. You can always find a Washing machine Repair Near Me service for expert check and problem resolution at the convenience of your home. They are experts in resolving complex issues in simple steps at the most affordable prices.
1 note
·
View note