
robbiejohnsonyr2ax2011
Robbie Johnson Animation Year 2 (AX2011 ) Skill development & so
25 posts
Don't wanna be here? Send us removal request.
Last Seen Blogs

skillrorganics
Skillrorganics

gourmetcandle
GourmetCandle

plumfsh
, , Comics

gotraavonlinebooking
Gotraav Online Booking
sunnythanalan
Always Sunny
Text
AX2011 – University – Second year blog beginning
From this post onwards, any posts that begin with “AX2011” is work relating to my second year at university. Any posts you may find below my timeline or as “AX1011” is in relation to my first-year work. The first few posts of this new “AX2011” section of my blog, may include summer work to begin with. But will eventually include none summer related work moving forward, to start I will put the words “(Summer Project)” in the title of any posts which relate to my summer work, to distinguish it from the rest.
0 notes
Text
University – E4 Project – Project Reflection
This post will cover my thoughts on my progress throughout the E4 sting project, as well as my thoughts on the final project. But before I delve into the reflection, I wanted to quickly update my situation regarding rendering my work.
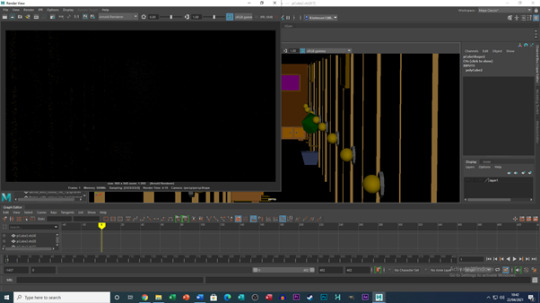
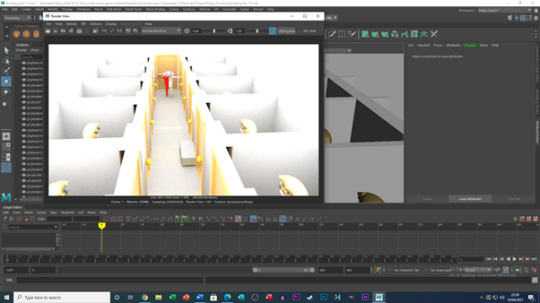
As I mentioned in my previous post, I wanted to double check/ learn how to render my work correctly and it turns out from my research, what I was attempting to do was correct. However, what I also feared was true being the render time for each frame. The time it takes for one frame to fully render is roughly between 35 to 45 minutes, meaning that rendering my work would take multiple weeks to fully render (I calculated it to be roughly 23 and a half days). Once I realised this in my call with my tutor, regarding the rendering time and the deadline, he explained not to worry about the deadline. As of making this post the first scene is halfway through rendering and I will keep the rendering on going everyday until each scene has been fully rendered (So consider this post as a prefinished reflection of the project).
How I feel at the end of this project
Going into this project, I knew it was going to be tough, I had never used Maya before and knew nothing regarding modelling, animating, creating joints, etc. But at the same time, this was what drew me to choose, to make my project in Maya in the first place, as this is the first year of the course the time to learn is now and I wanted to create at least one project in 2D, 3D and Stop Motion throughout my time in year one. This meant for me learning how to use Maya, was like learning how to animate in Toon Boom or learning the core principles of drawing again from the start of the year. The work may not be perfect or as up to the same standard as my other current work, but it is a learning experience for the future if Maya is brought up again in a future project.
Learning how to use Maya, felt like I was accomplishing something new every time I opened the software, from learning how to construct props, to using the tools provided to us by the software. Not everything went so smoothly however, as whenever I came across a scenario or an issue I did not know how to fix or overcome, I would spend a large amount of time trying to fix the issue (sometime ranging up to 5 plus hours). Luckily, my tutor was available via Teams to give me a hand when needed, for me personally I tried to balance figuring out the issue and asking for help evenly, as earlier on this year with other projects, I would ask constantly for help and sometimes not realise the answer was right in front of me possibly wasting my tutors time and with this goal I felt like I have improved myself with that goal.

Unlike previous projects, where I have explained how I felt like I had learned and improved upon different aspects of using a piece of software, hardware, or skill from my work. I find it hard to highlight a key thing I had learned from this project due to it all being brand new to me and feeling like I had learned so much each lesson whether it was from my tutor or self-experimentation/ research. If I do have to be specific, I would say I have learned how to use Maya and will be willing to learn more about Maya going forward.
Learning in my own time/ learning from mistakes
As mentioned in my other blogs, there are always aspects from my work I would like to practice in my own time, for Maya I will try to learn more about the software in general in my own time. Instead of focusing on creating a multitude of characters, props, and settings, which coincide with each other. I would spend my time on focusing on each of these aspects separately.
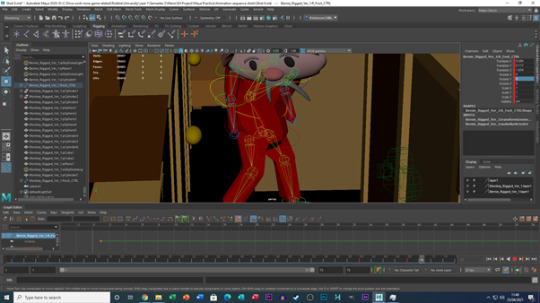
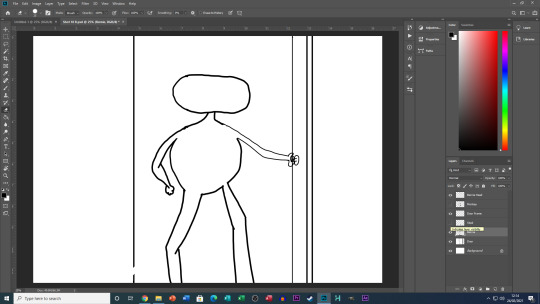
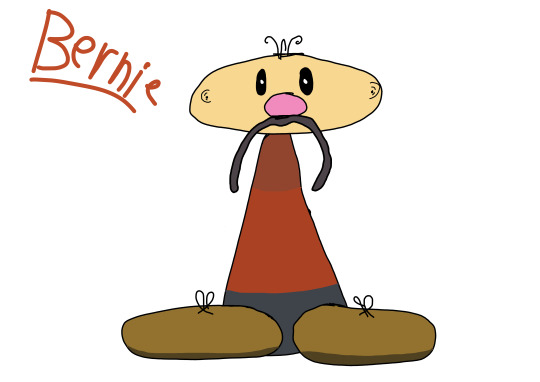
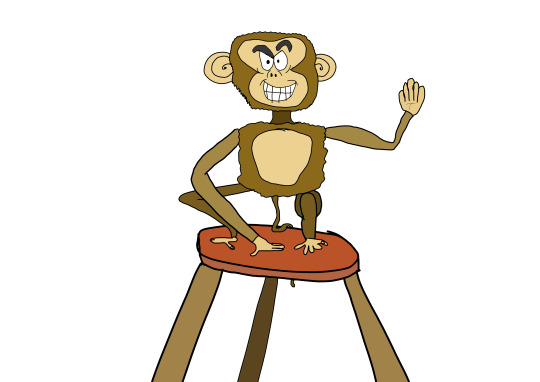
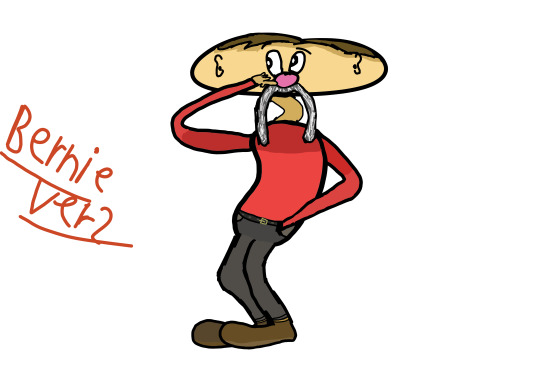
An example of this is learning how create better body proportions for my characters. One of the biggest issues I had whilst animating my rigged models where, the arms and legs not being long enough, for example, when Bernie scratches his head when he first enters the hallway, his arm could not reach his head, so to mask this error, I had Bernie tilt his head back and forth to make it look like he could reach his head. But if he were to fold his arms, then he would not be able to do so, all this also applies to the Monkey character model. So, in my spare time I’d try to learn what arm and leg lengths are best suited for characters with varying shapes and sizes.
Another aspect I would need to improve upon is set sizing. Overall, I felt the premise of my set was not too bad, but the size of the hallway had to be altered and manipulated in every scene as the width of the hallway was not wide enough to open doors. Realising and learning from this issue is important as this could prove to be a big problem in future projects, so understanding the dimensions of character models, as well as props will be the key thing for me to learn before making another set, instead of trying to create the set first and creating everything else afterwards.
Conclusion
Overall, at the end of this project I am feeling fulfilled and happy with what I have learned, but I also understand there is still quite a lot to learn. I am glad that I made the decision to lean Maya now as this will cause me less issues/ errors in the future and I can feel a bit more comfortable with software in the future.
The E4 sting itself maybe quite basic in its approach and design, but that was the goal of the project to me, create a simple animated piece to understand how the software works, whilst trying my best to meet the criteria from the brief. I now also understand how long it can take for my work to render which is nice to know now, instead of possibly panicking in the future.
As of now, I do not know what our next project is going to be, but if it involves us using Maya, I can safely say I feel more comfortable with using the software for whatever comes next.
0 notes
Text
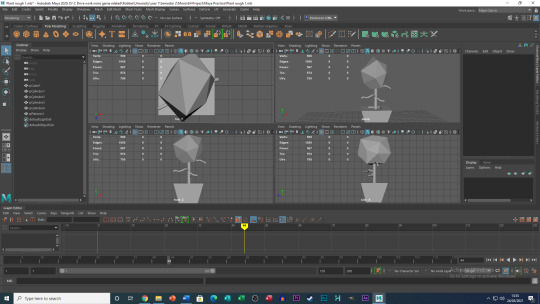
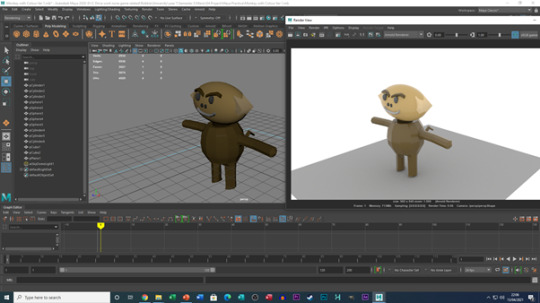
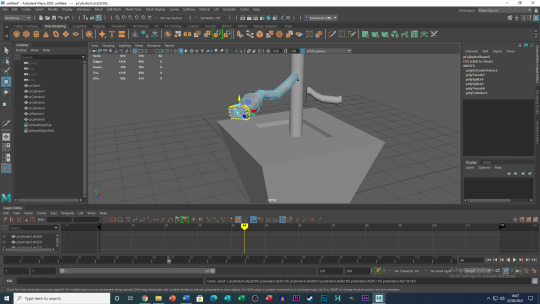
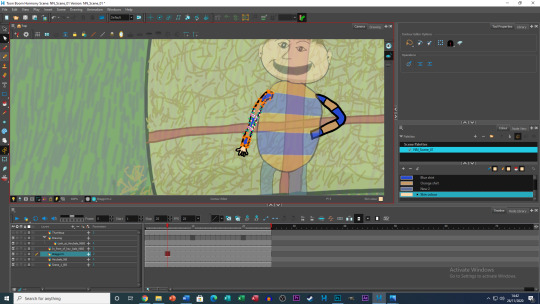
University – E4 Project – Animating and Learning to Render
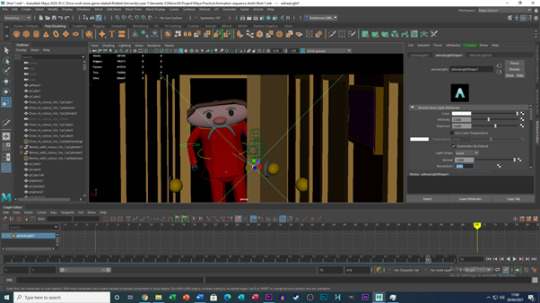
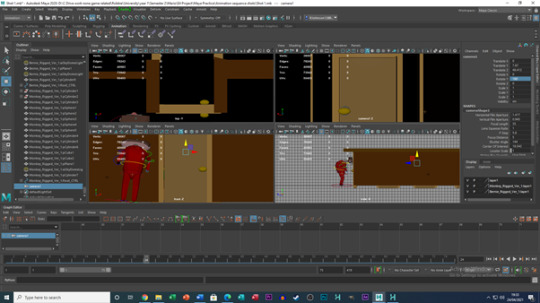
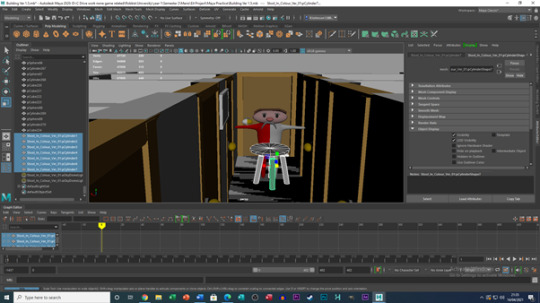
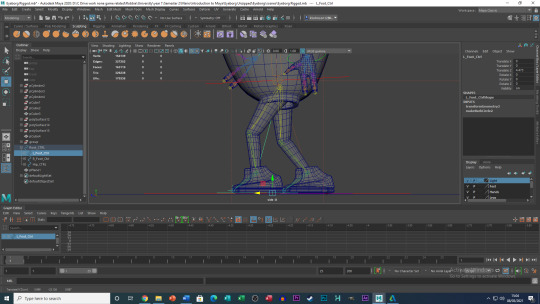
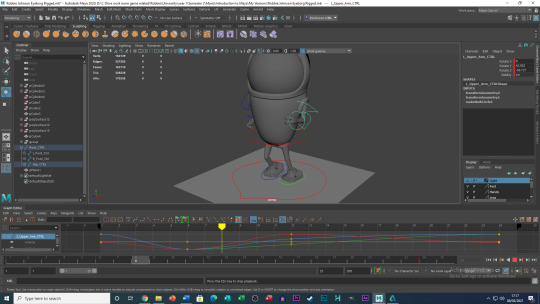
As we are now in our final week of the E4 Projects, there are only a few things left to finish before handing in my work. Now with my models fully rigged and taught how to implement lighting in my setting, I began animating.
Setting up before animating.
When starting the animation process, I referred to my storyboard I created towards the start of the project, which helped me stick to times I set for each shot, as well as keeping as close to 30 seconds as possible (Our exact duration for our stings). With this info in mind, I changed all the settings in my second version of my set (such as setting the frame rate to 25 frames per second) to the correct settings and then created multiple versions of this file and renamed them to each shot number for my sting.

Once this was set up, I gave myself a rough timetable, in total there was 12 shots that I needed to animate, and I tried to complete 5 shots each day, in order to juggle this project with my other projects. In the original storyboard there was 15 shots and now there is 12, this was due to me realising some shots were unnecessary, such as repeating shots of Bernie approaching a door. To fix this some shots were spliced together or made shorter to meeting production time, as well as duration limit of the sting.
Animating in Maya
Animating in Maya was an interesting departure from what I am used to, I had previously animated a jumping robot and a walk cycle for an “Eyeborg”, which were useful resources when animating my E4 sting, but took some time to get used to again due to the length of time from doing those animations to now. After a while, I began to pick up steam and was able to reach my set production targets for each day I set myself.
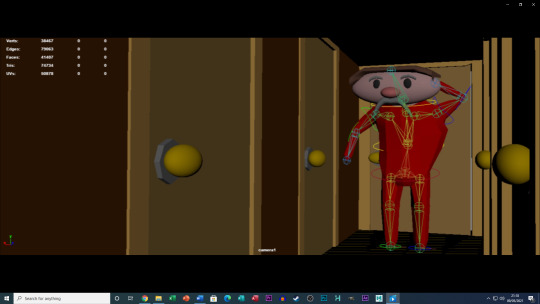
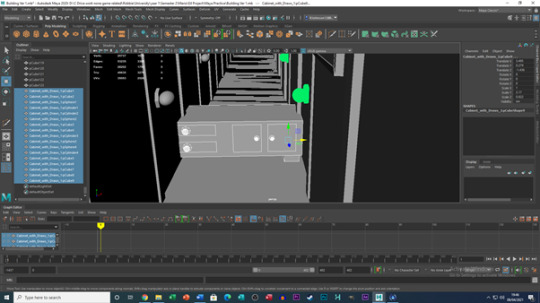
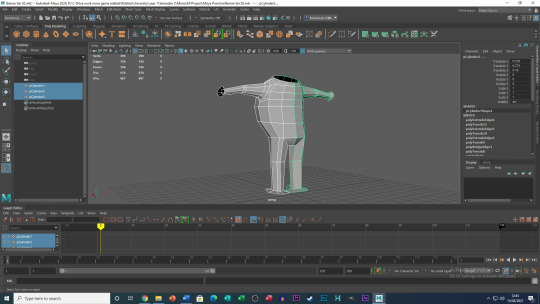
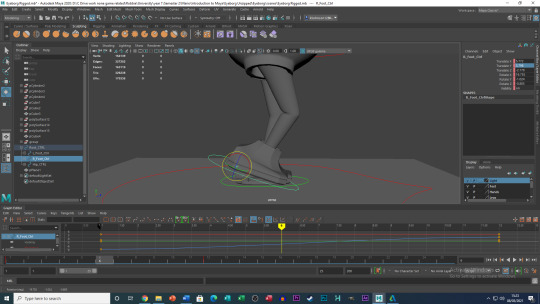
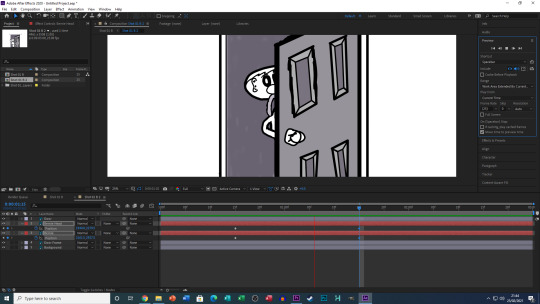
Whilst animating, there were quite a few issues along the way, but they were also interesting to resolve, for example, when Bernie opens the E4 door, the logo would scramble into a mess of shapes. By rearranging each part of the logo and pressing S in the animation timeline, I was able to make the logo appear correctly when the door was both open and closed. Another issue was Bernie’s walk cycle, as due to his legs being slightly hunched, it was hard to keep him stuck to the floor when walking, as his model would have a habit of levitating/ floating in the air. To resolve this, I would inspect each frame within a walk cycle and inspect if and when the model would start to float and then correct this within the timeline. The results may not be perfect, but they are much better than what it could have been, and I feel that I have achieved this the best I currently can (I am still learning this software).

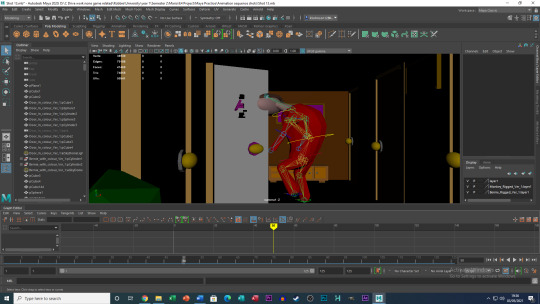
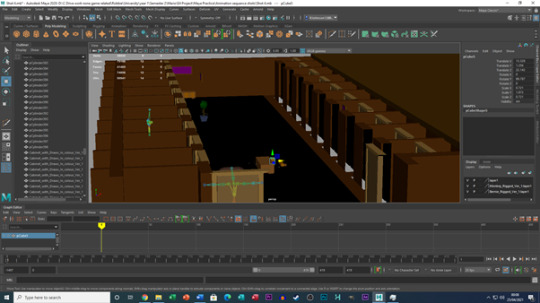
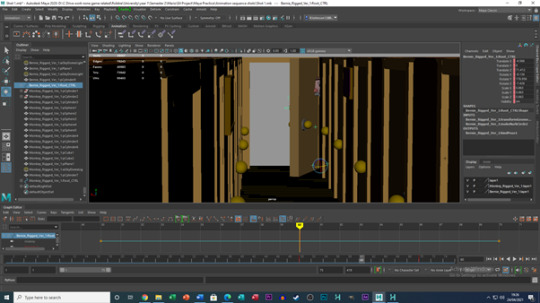
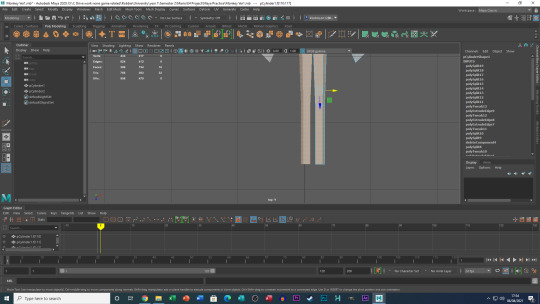
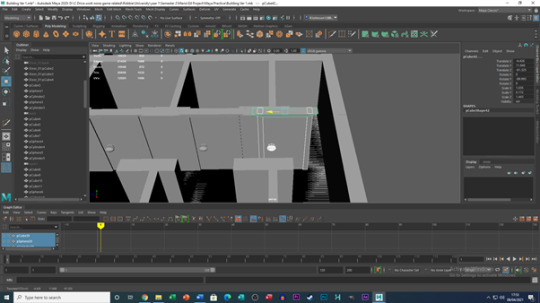
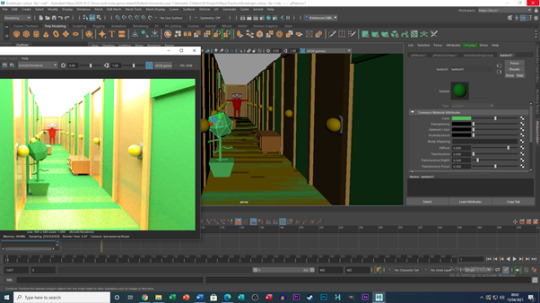
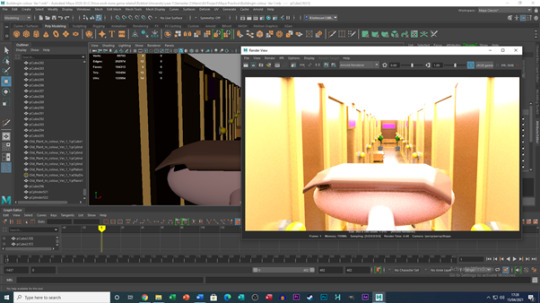
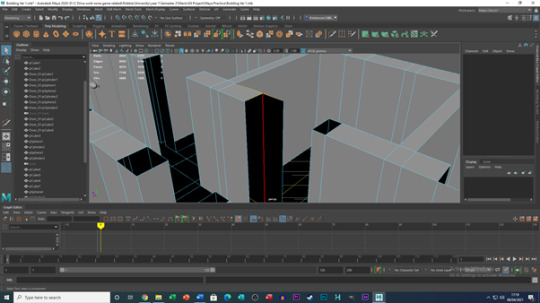
One final example of an issue I came across was the size of my set, although the main design of the set never changes, the size and positions of objects do both on and off camera. This is due to the central hallway being too narrow to support both Bernie moving and opening doors and placing the camera within the same area. To fix this, the hallway would become wider in shots that involve Bernie moving or opening doors. As well as Props and walls being shifted back by using the move tool and the cut tool, to cut the hallway in half and allowing me to stretch the side of the building in needed to for each shot.

One key thing I had remembered going into the animation stage from my previous work in Maya, was setting more keyframes close or next to each other can risk the animation looking quite static in its execution. So, I tried to keep frames which were on top of each other to a minimum in order to prevent these issues happening again and for the most part I think it worked out OK.
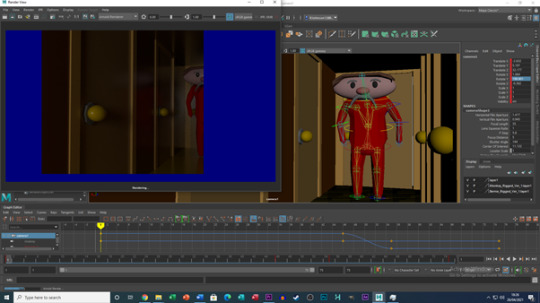
Learning Lighting
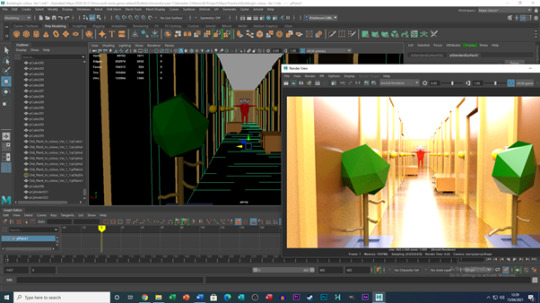
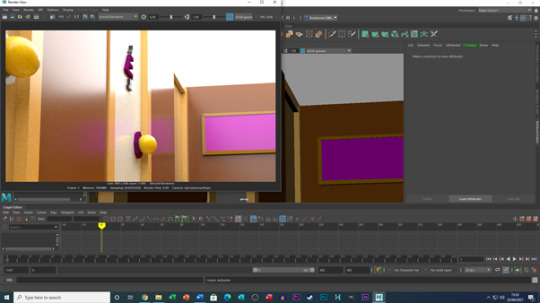
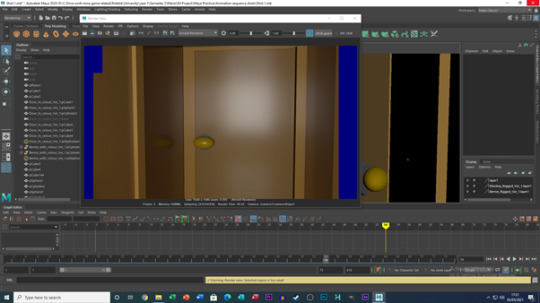
On Monday I had a one-to-one session with my tutor who taught me how to implement lighting into my set, as when I viewed my work in the render window, it would appear almost non existent (Black screen). I was taught how to implement both “Area lighting” and “Mesh lighting”, in order to light up my set. For some shots, these lights proved a challenge to implement such as the long shot in the hallway only lighting up a small portion of the shot. I attempted to fix this unfortunately to no avail, so I decided to place one area light behind my character to light up the area close to the camera and make the end of the hallway look quite ominous.
For the most part, I tried to stick with Area lighting as it was the simplest one to set up and still had a useful outcome when implemented. Whilst this session was useful, my tutor then informed me that most students would be granted a free extension until next Monday without our grades being affected in anyway, although I was determined to have my work handed in on time, I still took this information on board.
Putting everything together
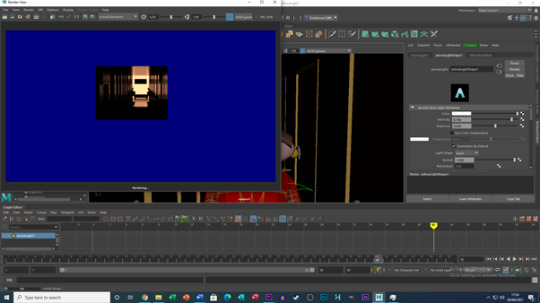
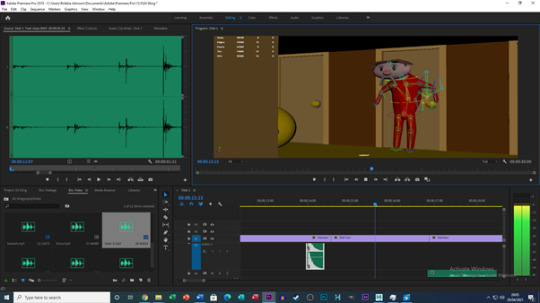
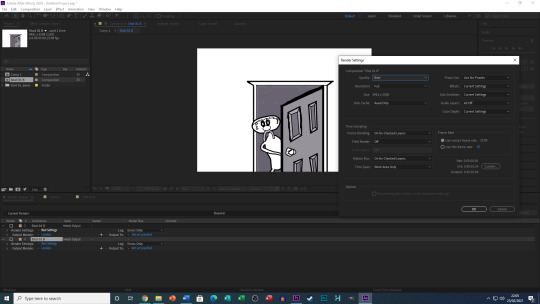
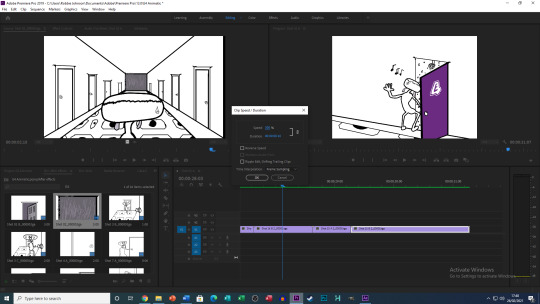
Once all the animations where complete, I ran into a bit of a problem, although I could view my work in the “Render View” I was not sure how to export the animation as the rendered Arnold settings. After a few hours of investigating Maya, checking the Arnold settings and researching online, I was unable to find a suitable or correct answer/ instruction as to how to export this. So, I decided to export my Sting as a “Blast Play” output. Not only was this currently my only method of exporting my work but it did not feature the lighting I had implemented, but I had to hand something in as evidence for my work, so this would have to do for now.
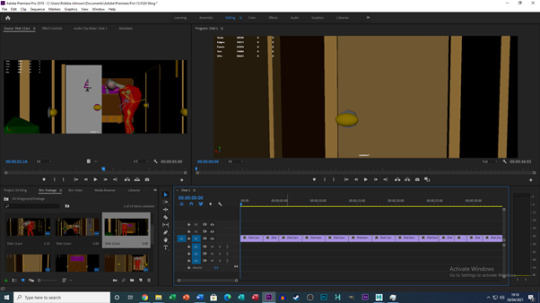
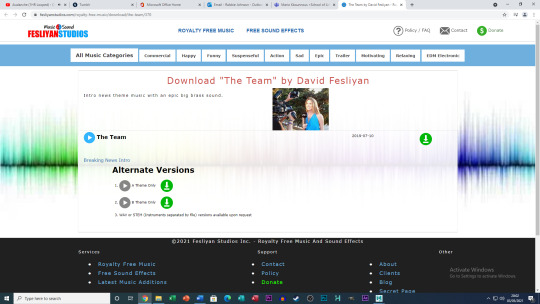
All the footage was exported and then placed in “Adobe Premiere Pro”, where at first the total duration of my Sting was 36 seconds long. After trimming down some shots and re-arranging others, I was able to make my sting exactly 30 seconds long. The final stage was to implement the Foley of which I already had most of it gathered on PC, as I would use the same ones from my animatic. However, the final piece of Foley had to be changed as I was unsure, whether it would be copyright claimed. I asked my tutor whether I should still risk including the audio or not, in response, he sent me a link to a website called “FesliyanStudios” a website full of copyright free music and sound effects to use. After searching through the website, I found a short piece of music that matched both the relaxed welcoming vibe and disco/ techno music I was looking for.
Once all the Foley was implemented the file was exported and placed in my work area. However, one thing remains, the rendered work. I have kept researching trying to find a method of rendering my work into an animation format and not a singular image. At this rate I may not have the rendered version of my work finished on time. If this is the case I will re-upload the “Blast Play” version of my work, this time without the on-screen details as I will try to disable them.
Additional Images not used above

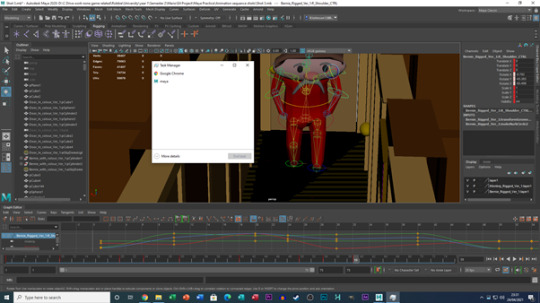
Context for the above Image: Whilst animating Maya would crash quite a few times whilst animating, this would also cause my PC to freeze. Whilst animating I kept Task Manger open to forcibly close down the software each time this happened, instead of shutting down my PC every time this happened.
0 notes
Text
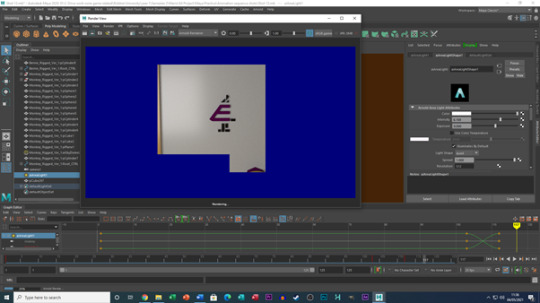
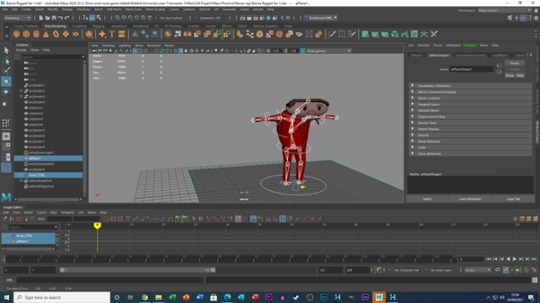
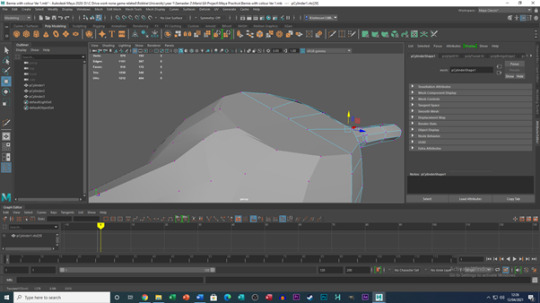
University – E4 Sting – Learning to Rig, using the cameras and more
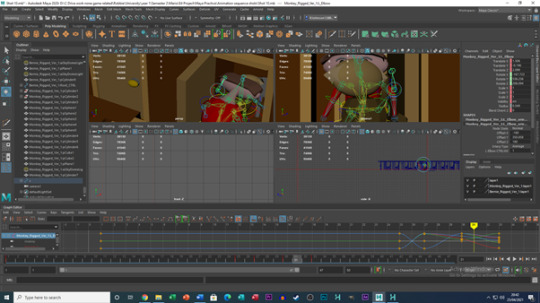
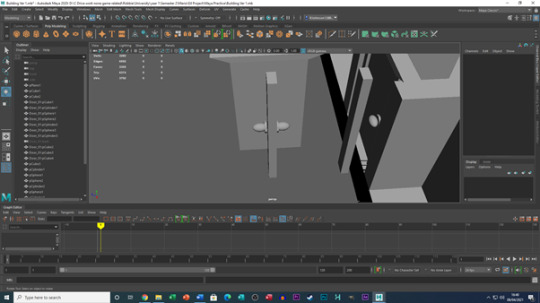
Since my previous post, I have been learning how to Rig my character models within Maya. This includes creating a skeleton for the models by connecting joints and create individual joints for the arms and legs. But before I delve into the Rigging, I need to explain something I had created, but forgot to mention in my previous post.
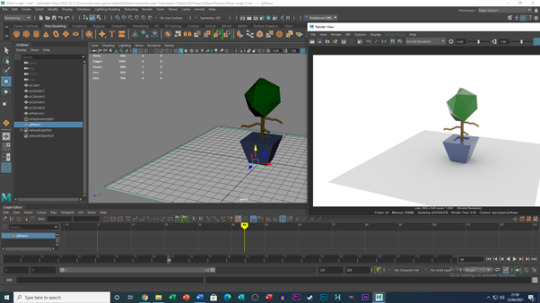
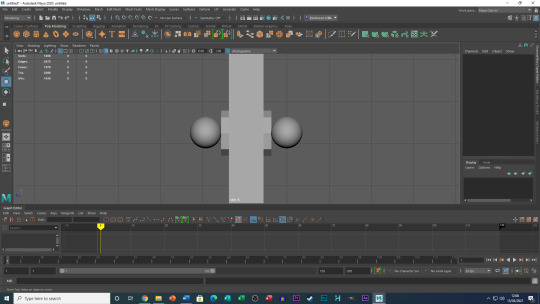
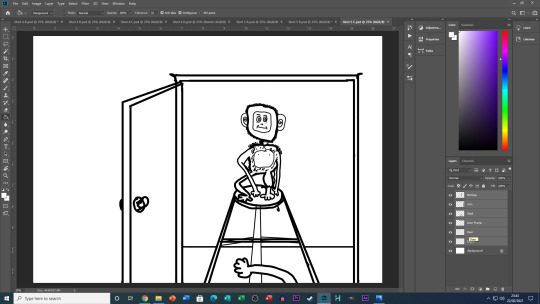
Making the Monkey
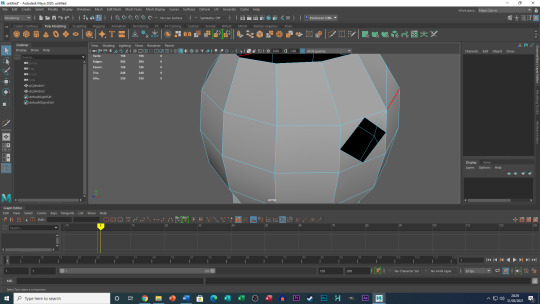
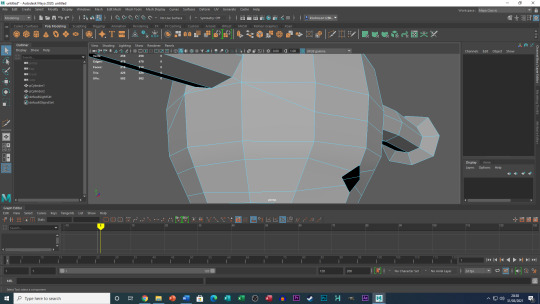
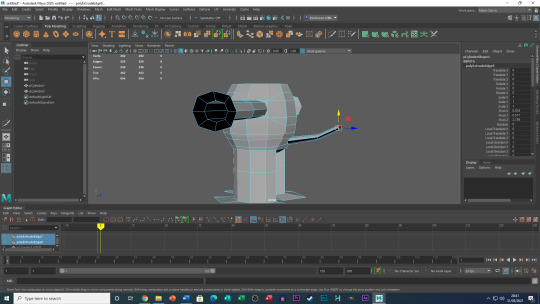
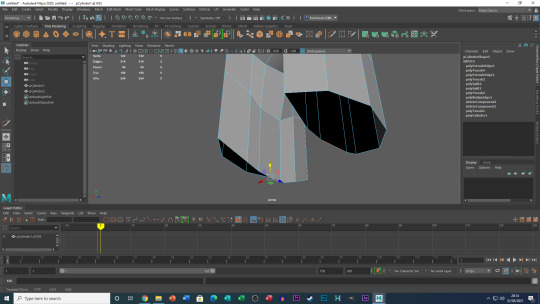
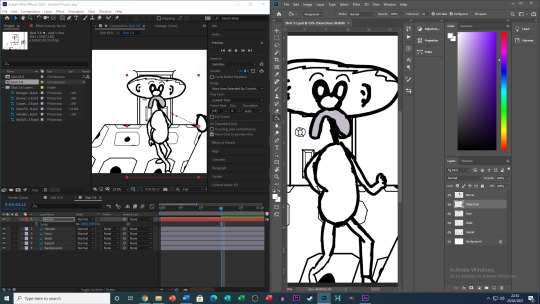
In my previous post, I explained the process of creating and colouring Bernie within Maya. However, I forgot to mention that I also created the monkey. The process was very similar between the two, which might explain why I forgot to include it in my previous post, but it was not all entirely the same. One of the biggest features of the monkey that I had to try and figure out was how to implement its tail. To achieve this goal, I used the cut tool and cut out a circular shape at the hips on the character’s backside, this was done similarly to the process of creating the characters arms and shoulders by cutting holes into the body, then extruding the shape outwards by holding shift whilst using the move tool. Facial features were created with separate shapes and morphed into their final look (E.g., squares being used as ears and the spheres being stretched to look like eyeballs, etc).

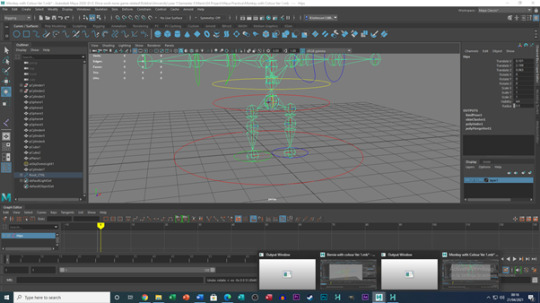
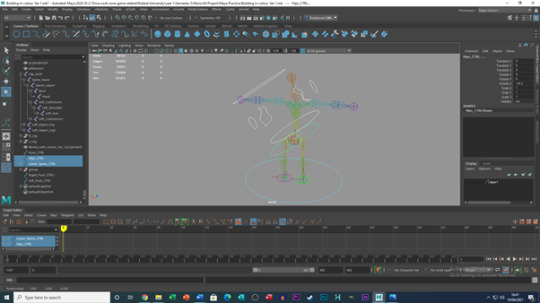
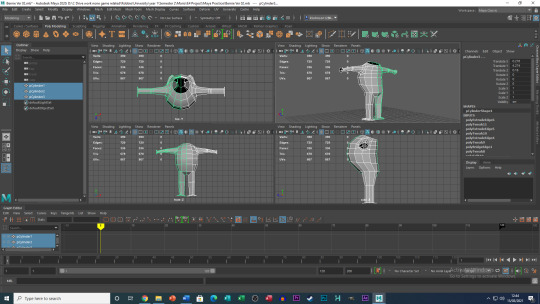
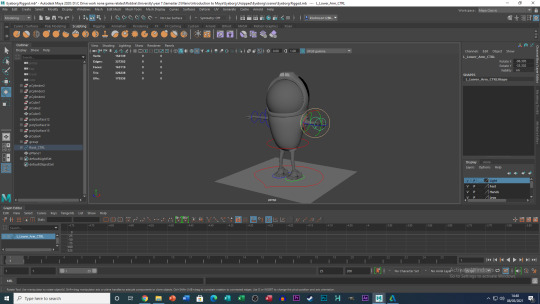
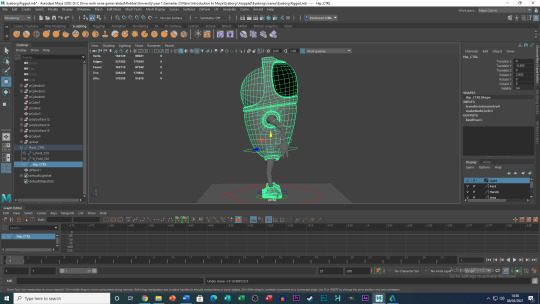
Learning to Rig
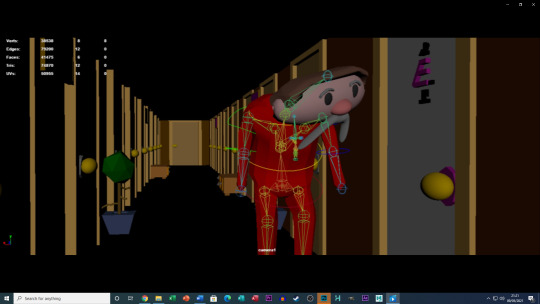
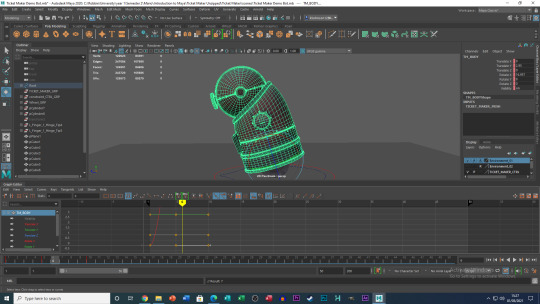
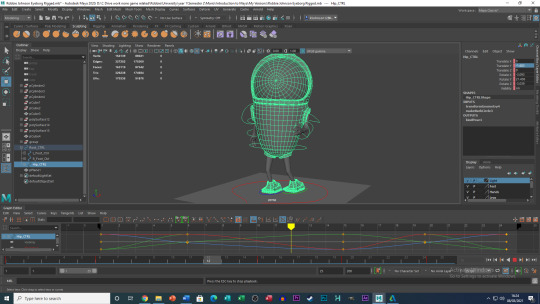
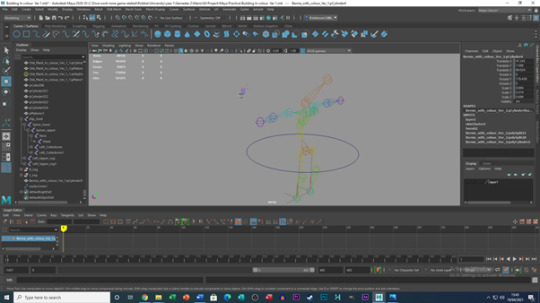
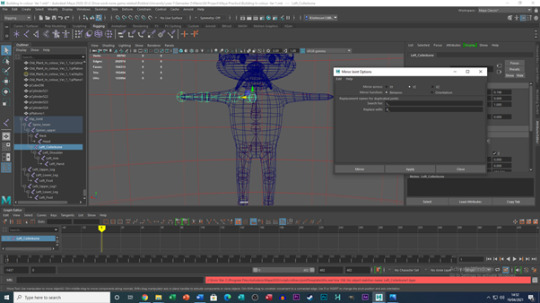
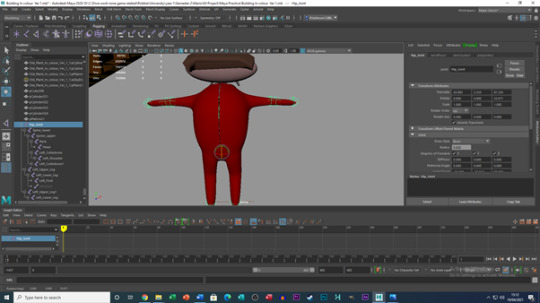
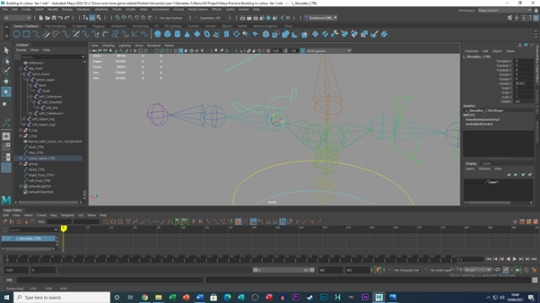
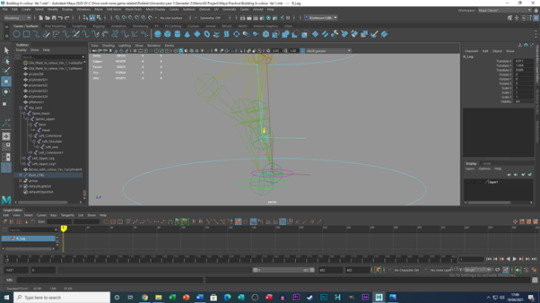
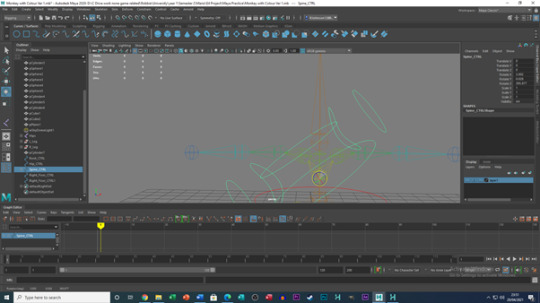
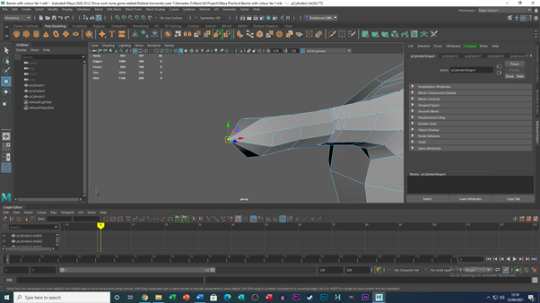
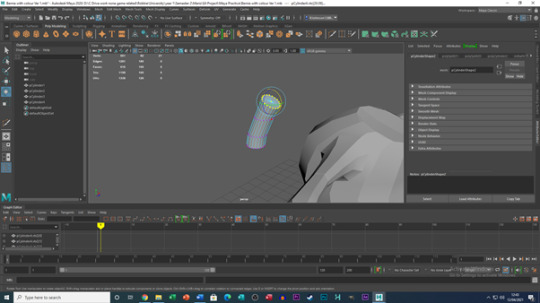
With the set coloured, characters and props coloured it was time to learn how to Rig my characters. My tutor had sent me a half hour long video explain the process of rigging. This included creating joints with the joint tool and organising each joint to the body correctly to prevent any errors from occurring. After all the joints were created, named, and organised correctly, I then moved onto the section of the video explain how to create “CTRL” rings.
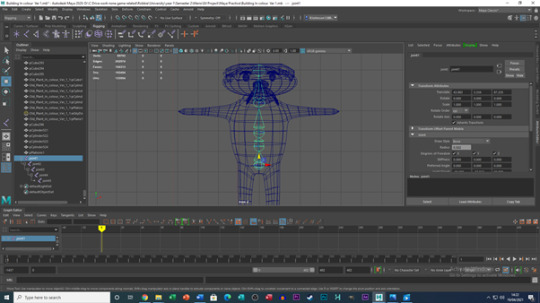
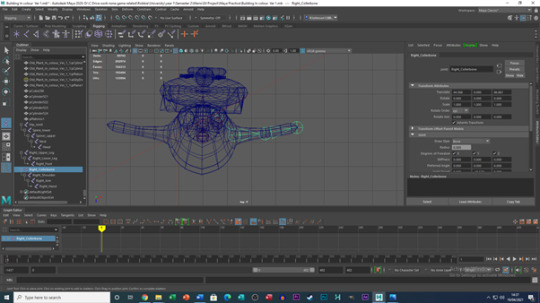
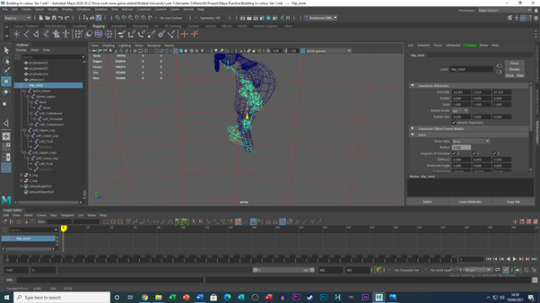
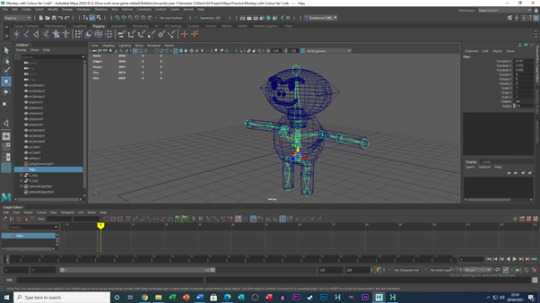

The CTRL rings took a while for me to get used too at first, but after watching the video multiple times and using shortcut tools, such as holding down shift and the centre mouse button for the CTRL rings to snap into place, I was feeling good about my progress. This was until the very end, where I tested the model’s skeleton by rotating the root CTRL ring, which caused the body to snap and cave in on itself, something was very wrong. I went through the video again making sure the leg joints functioned correctly, that I had used freeze transform on the CTRL rings and more, to the point where I restarted four times over with the same issues occurring.
The one thing I knew for sure was, this same issue was happening to both models as I was working on both of them at the same time, so theoretically if I can find the faults in one of the models, I should be able to identify it with the other model. I contacted my tutor, as well as sending a copy of the model files if he wanted to inspect them himself, he contacted me later that week with both models fixed and explained that he would talk me through the issue come our next session on Monday.
UPDATE: It turns out for some reason, the CTRL rings did not get affected by the freeze transform, as well as the CTRL rings and joints being parented incorrectly. From what I can gather I parented each CTRL ring to their respected joints, but, then did not link each of the CTRL rings together. I was also aware of the method of how to fix my model’s faces from dropping but was unsure how to use the tool the way I needed too. Turns out all I had to do was hold down CTRL as I clicked (I did feel rather foolish after learning this one)).

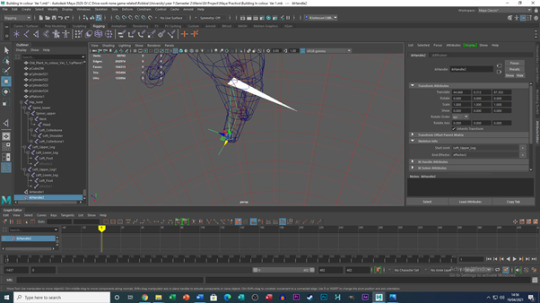
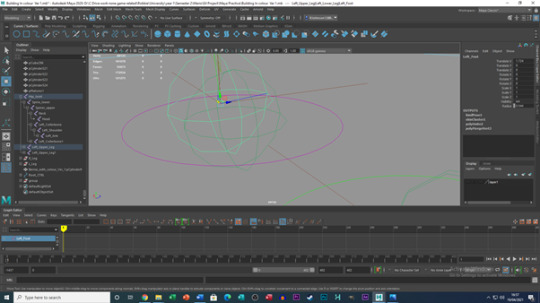
Learning to use the camera
Not only did my tutor fix the models for me, but he also explained to me how to use the Maya’s camera system in another tutorial video. Luckily, the camera system was very simple for me to come to learn how to use. The video explained how to use a regular camera and a “Camera and Aim” camera, which focuses the camera on an assigned point whilst moving. However, for the simplicity of my project I only used the regular camera with some small movement between frames.
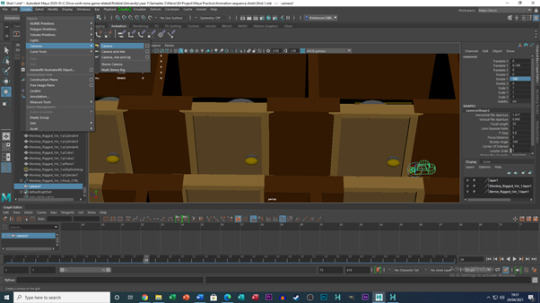
Using the camera was kind of reassuring for me in a way, as I was expecting it to be trickier than what it turned out to be. It was also crucial for me to know when it was effective to move the camera and when it was not as originally, I did try to implement more camera movement than what is present in the final product.
What is next?
This is still very close to wire for completion as we are now only three days away from our hand in, but with everything now sorted, I have a plan/schedule when it comes to animating that should hopefully mean that my project will be finished for the day it needs to be handed in. I will explain this and if my plan/ schedule worked in my next post.
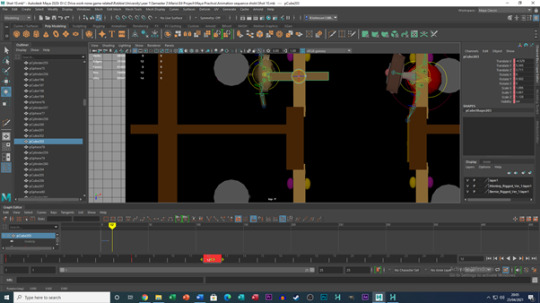
Additional images not used above

0 notes
Text
University - E4 Project - Over Easter progression and adding colour
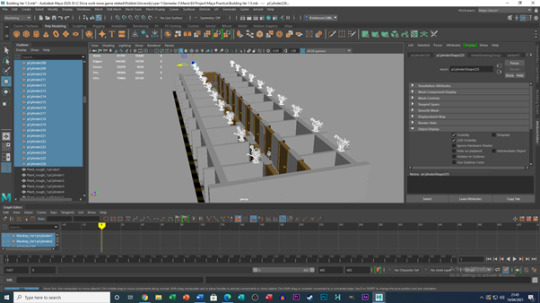
Over the Easter period, I have been working on all my currently on going projects, however, I gave a particular focus on my E4 Sting. Prior to Easter, I was shown how to build my set, where my sting will take place.
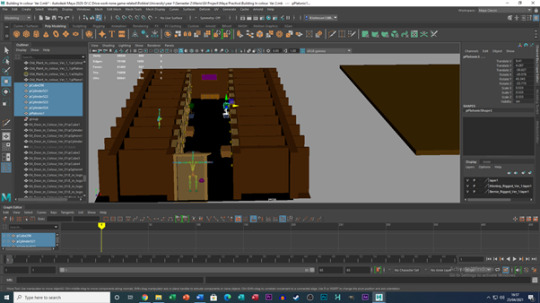
Building My Set
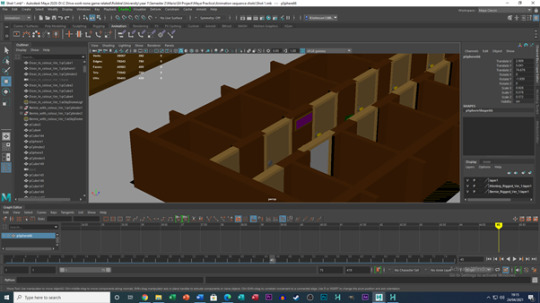
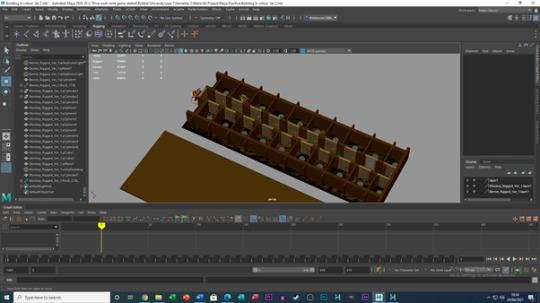
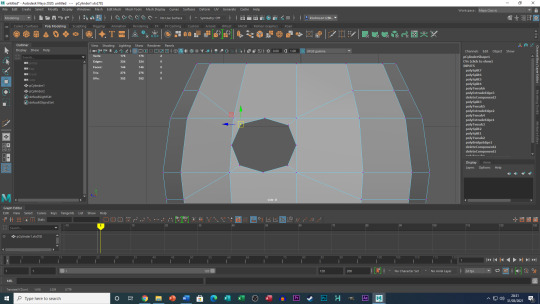
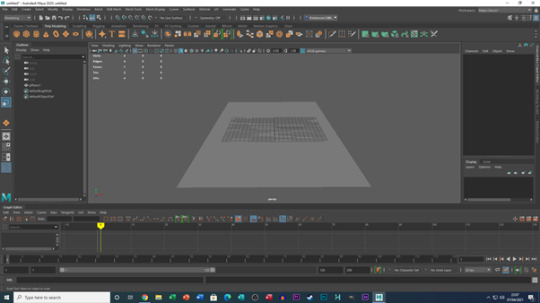
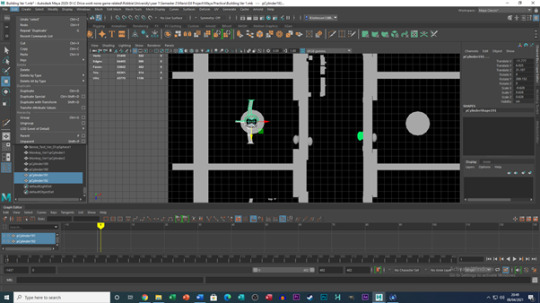
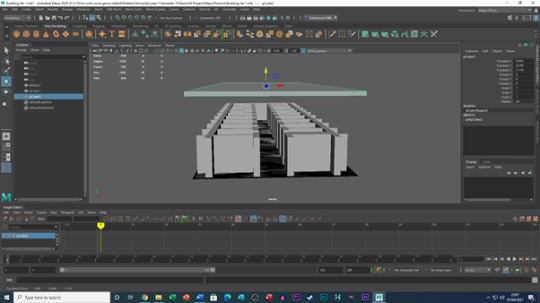
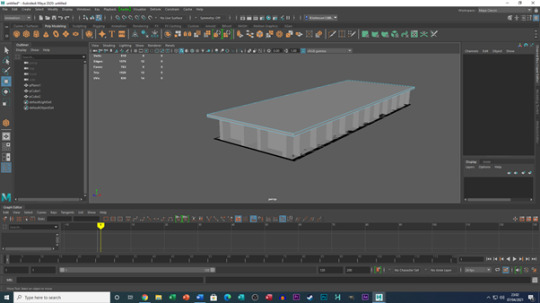
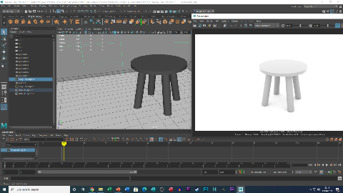
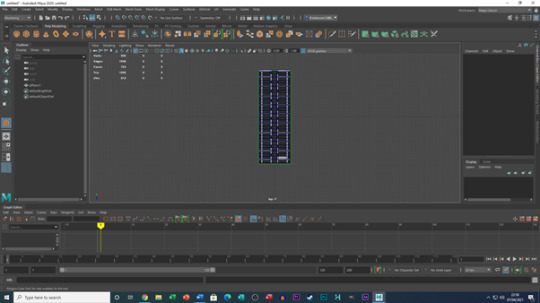
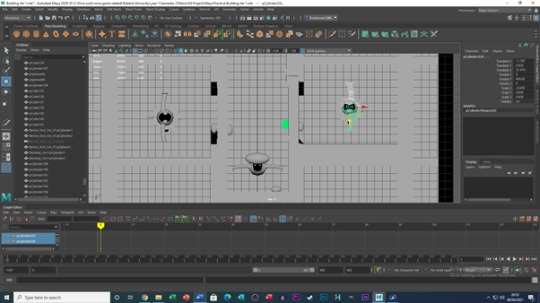
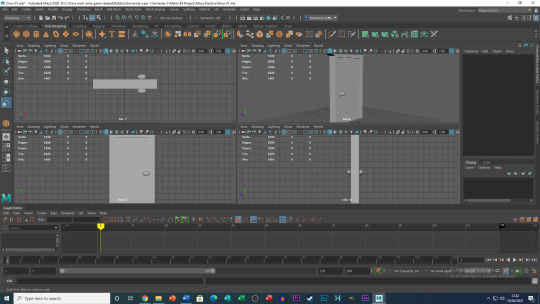
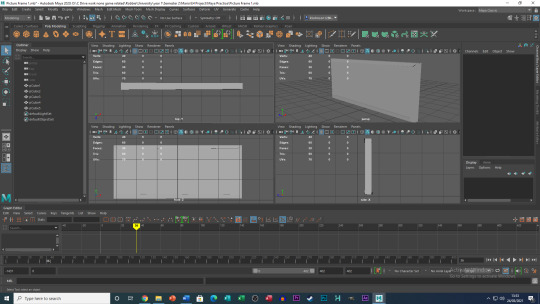
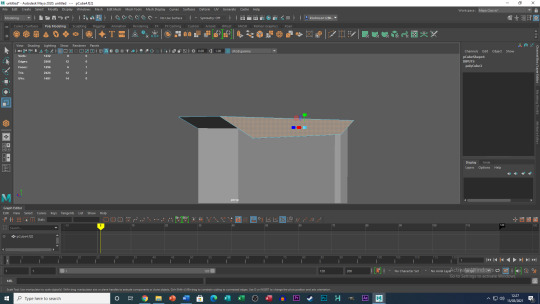
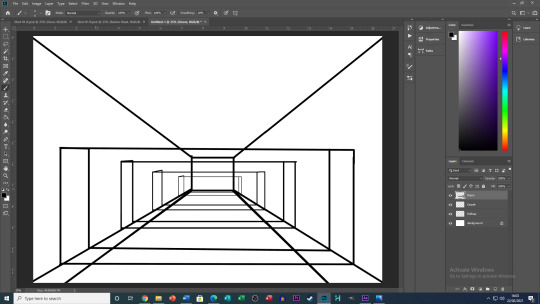
Building the set was priority number one of my things to do over the Easter period and I had a multitude of steps to follow. I began by creating a rectangular plane and proceeded to use the cut tool to mark out where doors would go, wall edges and the overall length & width of the hallway.
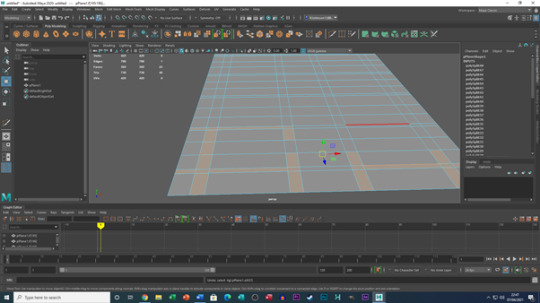
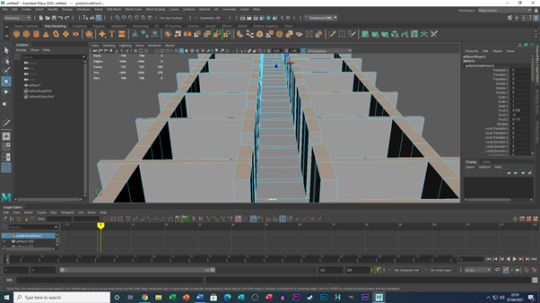
Once this was done is selected each wall and used the extended tool to raise up all the walls and worked on adding each prop into the set. Props had to be re organised a changed to help me form a sort of pattern and cleanliness to the set, without trying to be too messy/ un organised and crowded. The biggest hurdle to this process was rescaling and rotating props from their original size and position, which was mainly due to the fact that the pieces would come apart to the point where it looks like it had exploded. This resulted in me needing to recreate/ repair each prop and character within the set file.
A lot of pieces such as the doors, stools and the Monkey where duplicated a majority of times to fill in each room and doorframe. They weren’t duplicated special though, this was due to watch of them again breaking whenever this was applied. Regular duplication did not cause this issue, so a large majority of set pieces where made this way. Lastly a small rectangular block was placed on top of the set as a roof.
After Easter
Fixing Arnold
An issue I had been experiencing for awhile now was not being able to install and use Arnold, a plug in for Maya which allows you to see what you are creating in a rendered view, as well as providing textures and colour to your work. I was experiencing a strange issue where, I had Arnold installed and placed into my Maya documents, however, Arnold wouldn’t appear on my task bar along the top of the screen.
After some investigating in my folders, I still couldn’t understand why Arnold wasn’t functioning. This wasn’t until I found “System/Preferences” in the windows tab along the top of Maya. Within there I was able to activate Arnold and everything began functioning properly (as long as I kept activating Arnold within preferences within each new file). With this I was able to learn how to add textures.
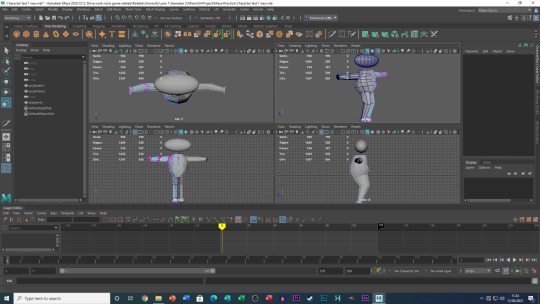
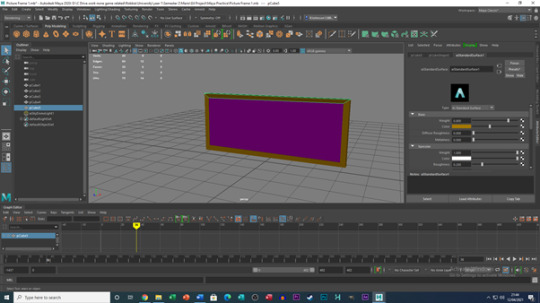
Designs, Textures and Colours
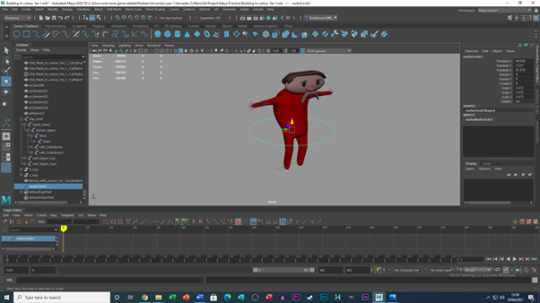
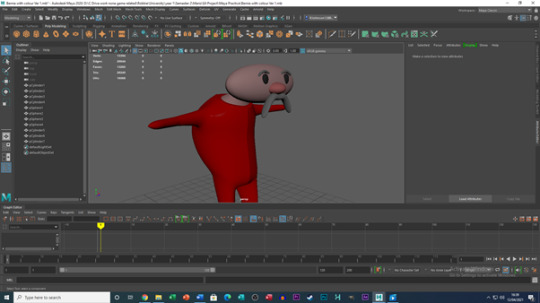
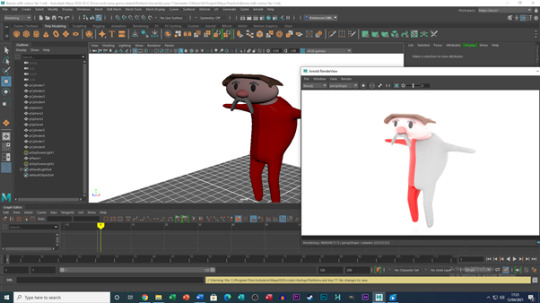
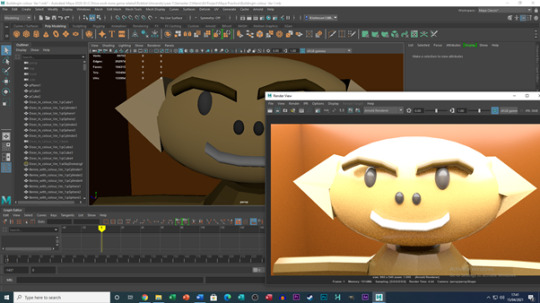
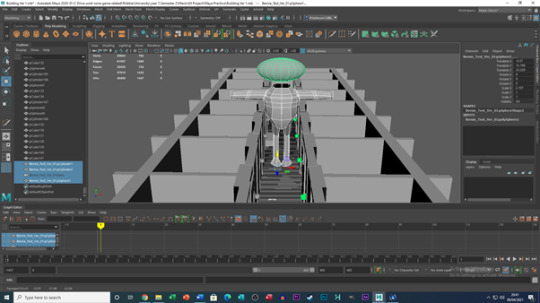
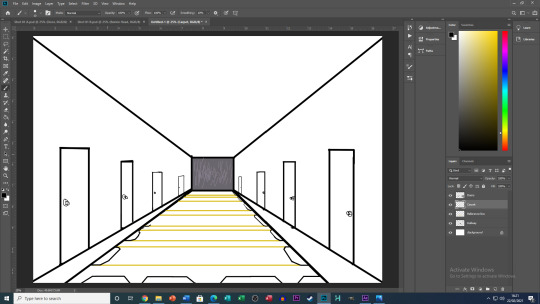
With Arnold functioning I was able to add colour to my props and characters. My tutor explained the process and how to add colour to my models, however there where some key points he explained about my project going forward. The first being that since this was my first animated piece of work in Maya, it maybe be best to keep the models as simple as possible by not including features such as hands and feet and leaving them as stumps. At first I wasn’t sure if this would work, then quickly realised how nonsensical and goofy my Sting was that this would actual work out well.
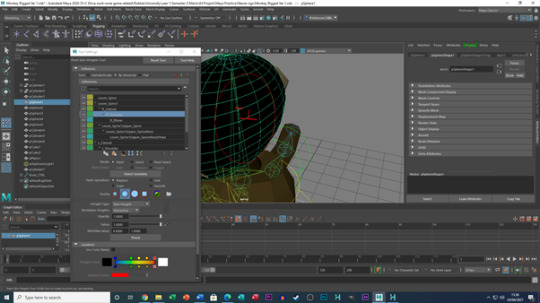
When selecting a piece of the characters body or a piece of a prop, I would right click and select “Assign New Material”. From there I would select “Arnold” and then “ai.StandardSurface”, this would allow me in the Attribute Editor to add colour to the models.
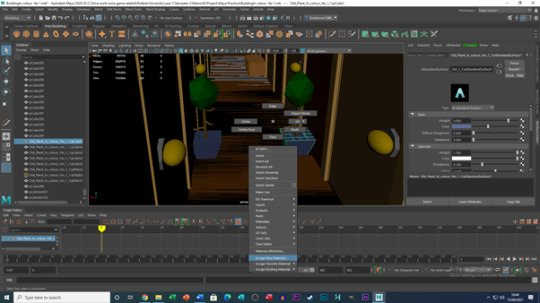
Once I added colour to my characters and props, I imported them into the set, however, like before the models had to be re-sized, adjusted and fixed again, it felt like I had to start the set over again for the third time. But I got it done, albeit with some strange glitches along the way, such as colours not appear when assigned to and object or character, but for the most part I was very happy about this.
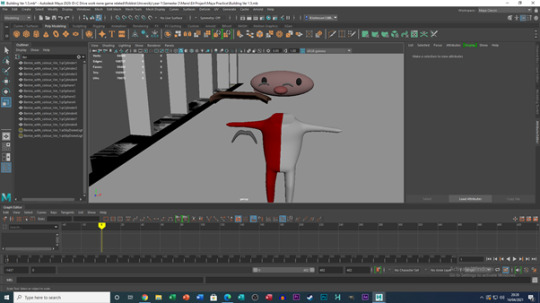
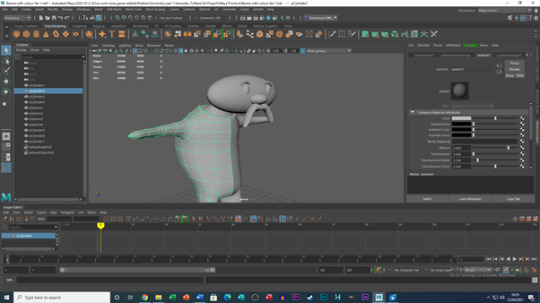
As a quick final note, I had to experiment with teaching myself how to add a head and neck to Bernie and the monkey. I feel like I have done an alright job with this by manipulating the sphere and cylinder tools to create the models (The cylinder tool was cut into sections to create the mouths, eyebrows and Bernie’s moustache & stretched Spheres for the eyes and the Monkey’s mouth).
As of this post, I haven’t received feedback on these yet, but I will update this blog if any changes are needed to them.
Moving forward
Although I am glad of the progress I have made, I am very aware of the looming deadline just under two weeks away from now. My tutor has informed me that he will show me, how rig my models and then all that is left is to animate the work and add Foley (Easier said than done I know, but, I’m trying to stay optimistic about this). This will defiantly be cutting it close to the hand in date so as soon as I am informed about the rigging, I’ll hit the ground running for the animation segment of the work.
Rendered Characters, Props and Set images


Additional images not used above

0 notes
Text
University - E4 Project - Model and Project Progression
It’s been a little while since I have updated my progress on my E4 Project and in this post, I will explain why that is as well as actual project progress.
Why has it been so long?
When presented with opportunity to make my project in 3D, I was thrilled and jumped at the option, but this also means I would have to work hard to achieve the out come I am hoping for. What i mean by this, is understand Maya when compared to other software I have been using so far. Maya, is very different from Toon Boom in more ways than one and most of the time between now and my last post about the project is me learning how the software works.
I have always kept the same plan on how to tackle the project and what order to do things, but I had to feel comfortable and at least a little confident with what I was making. I would repeatedly refer back to a previous lesson where we were taught how to sculpt/ create a character, only for errors in the software to occur that i would have to research how to fix, such as no bridging options available when making the legs ( short version - it had something to do with options wheel). So overall it was a mixture of learning the fundamentals and fixing errors I had never seen or encountered before.
I am happy to report that after all this time and help from my tutor, I now feeling more confident on what I aim to achieve and have been working constantly to make up for time lost, whilst learning the software.
What Progress has been made?
After four attempts at creating Bernie, it appears fourth time was the charm and I have have created a version of Bernie I am happy with. I also created loosely as you can probably tell there are no hands, feet, neck or head. This is because, i have not been informed yet how to create these and connect them together. But this isn’t entirely bad though, as the moment we are informed, i have the model ready to go to add these features, it honestly feels like its been quite thee journey to get to this point.

(First finished attempt of creating Bernie)

(Current updated version of Bernie)
After creating Bernie, I moved straight into prop making, now depending how you see it, prop creation has either been fast or slow in its creation time. Due to me juggling this project with other ones from other tutors, I have only been able to work on these within Monday lesson times. However, I have been able to create at least three different props within each of those lessons.
Props created so far:
Door
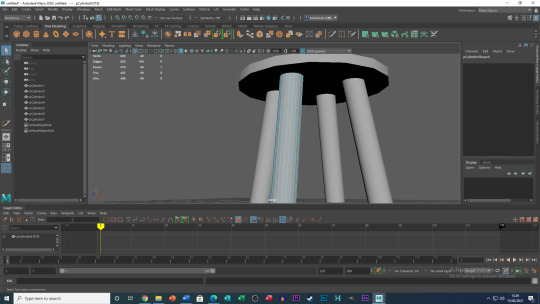
Stool
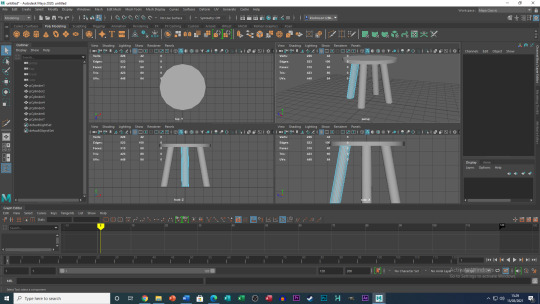
Cabinet with Draws

Picture Frame
Dead/ old plant (Early Ver)
Unless something happens or something really sticks out to me, these are all the props I will use for the project. Originally I had plans to include more props such as mirrors and a radiator, but my tutor recommended I don’t create too many props and after evaluating the setting/ environment, I decided to pull some of these ideas. However, if I feel a prop feels out of place from what i have created, I will go back and tweak it for it to better fit the environment (hence why most of them are referred to as “Ver 1″).
What I will do over Easter
Over the Easter period, I plan to finish creating the final to key models for the project, that being the monkey and the set itself. In our last lesson my tutor had a one to one discussion with me as to how to create a set and recorded it for me to look back on, so I feel comfortable trying to create the set.

This is crucial as not only, dose this complete my creation list, but means I can hopefully hit the ground running when we return after Easter.
What is there left to do?
In regards to what i still have to learn, I need to learn how to apply the previously mentioned hands, feet, neck and head, as well as how to apply texture and colour to my characters, props and environment.
After this I will need to start animating, which I feel a little more comfortable with doing after our walk and jump cycle animations (More details on that work in the link at the end of the post). My main concern at the moment is again time, as I can get everything I want to get done over the Easter period done, but that still leaves quite a bit outstanding for me to come to grips with after we return, as well as it being roughly a two week period before the hand in date when we return. Overall I think it could be a close one.
Conclusion
Overall, these past few weeks have been very busy with its ups and downs, but I feel like I am finally gaining traction on this project and feeling good that progress is now being made.
Link to Maya Animation Post
https://robbiejohnsonyr1ax1011.tumblr.com/post/646542676459683840/university-learning-maya-learning-to-animate
Additional/ unused Screenshots


0 notes
Text
University - Learning Maya - Learning to animate a character in Maya
For the past two weeks we have been learning how to animate within Maya, as well as continuing our E4 projects. Since I decided to try and make my E4 sting in Maya to begin with, this side project would prove especially useful for me going on forward with the E4 project.
We were given two characters from my tutor, one from his short film “The Ticket Maker” and a character he created, appropriately titled “Eyeborg”. With both of these characters downloaded and ready to go I began each piece of animated work.
Ticket Maker - Jumping animation/ Learning the Software
I began with the jumping animation with the Ticket Maker robot, before beginning to animate. I tried to make myself familiar with the model itself, as our tutor was pointing out cool features the model had, such as its arms extending out from flaps on its side. It was this exploration that I gained a better understanding as to how important it is to construct a character, it’s not just about making a character look the way you want, its how they move/ function which is crucial in the animation stages of development, for example having the wheels rotate whenever the character moves forward or backwards to save time on animation.

I also came to learn that animating in Maya, when compared to using software like Toon Boom or stop motion animation, is very different in its structure. Whereas so far, we have been animating frame by frame and making adjustments along the way, Animating in Maya focuses primarily on creating pegs, each part of the model’s Skelton must work in coordination with one another, so you can image I was surprised the whole model moved, when I was adjusting the body on it’s Y axis (Whereas previously we had to move each object we were animating on at a time).

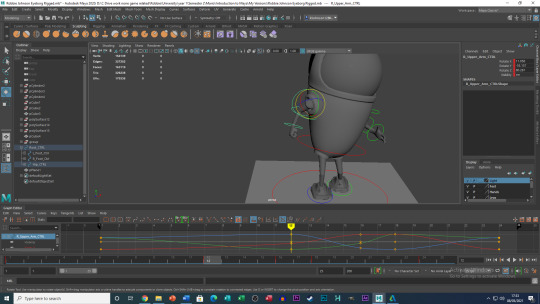
After fully adjusting to these changes I began working on the model animation and understanding the timeline. I find it slightly strange that in the timeline you can see frames such as frame number -10, but I’m sure along the way I will find out why such a frame exists. The key thing I had to remember when working in the timeline was to remember to press keys such as S when I had finished adjusting the model and to check all body parts are inline with each in the timeline. Once everything was animated, I tried to smoothen it/ fine tune it the best I could, this is when I learned about the Graph editor. I realised that a lot of my Peg lines where straight and diagonal and needed to be curved, I dragged the Graph editor above my timeline and tweaked the Peg paths to a point where I was happy with how they looked in action.

As for animating the model itself, the concept of moving the model up then down at vary speeds to create the look of jumping was interesting, it was wondering what else could be added was the interesting part. At the same time, I didn’t want to jump the gun and give myself too many problems, so I tried to keep it simple. When the Ticket maker gets ready to jump, it bends down slightly covering its wheels, it’s head and eye also rotates downwards, to give the impression of it bending down. When it jumps, I tried to extended its wheels and legs down to give it a springy feeling as it jumps up, as well as rotating the head and eye backwards (upwards) to emphasize its take off. I also nudged the legs and wheels forward slightly to give a small sense of other movement aside from it being only straight up (I thought it made the character feel a little less static). When it lands, it bends forward as well as the head and eye, before returning to its starting position. It’s a minor tweak, but when the robot first makes contact with the ground and its head rolls forward, I had the eye come slightly forward outwards, as if the impact with the ground caused it to come loose, it sticks out until it rolls it’s head back up straight where the eye slots back into place.

A final additional feature I added was the robot’s arm flaps opening and closing as it jumps up and down, as if the gravity of the jump is causing them to open and close slightly. Overall, I felt happy with his as a first piece of Maya animation and came away learning a lot

Eyeborg - Walk cycle Animation
After finishing the jumping animation, it was then time to move onto the Eyeborg walk cycle animation. Before starting this project, I ran into an error, which is very evident when you see the images between the Ticket Maker robot and the Eyeborg, there isn’t any colour. Maya had an update causing the provided files colour and textures to not function correctly, so we had to download an add on for a software called Arnold. After downloading it and placing it within the Maya folder, the add on hasn’t fixed the issue. After informing my tutor of this (after completing the Eyeborg) he reassured me that the no textures should affect my grade too much as long as I was able to animate the model.
When starting the Eyeborg animation, I decided to take aspects of the character into consideration first and for most. from what i could tell, he wasn’t human so characteristics may not be natural, his clothing looks metal and heavy possibly causing a lot of weight in the body affecting its movement. Lastly the leg holes in his costume look small, so when animating the legs, I had to be careful not to cause the legs to phase through them.

(This is a screenshot of the tutorial video of the Eyeborg, which I used for reference when planning)
With all this in mind, I began animating, I started with the legs, which I felt I should keep basic as this was my first walk cycle and had them move in an arc motion. The arms I felt would be the key to presenting characteristics of the character. Focusing on the feeling of weight and alien-esc aspects of the character I decided to give him both a fast and wide range for his arm movements. I made the left arm moving in a wide fast arc, to give the sense of the body twisting and power needing to be used to move forward. the right arm was kept to a more traditional fast up and down movement to represent him quickly trying to keep balance after the left arm swing as his suit would cause him to fall over.

Body twisting was added to give greater emphasis on these movements, giving a more irregular look to them. Before adding these two different arm movement types, I thought the Eyeborg look like it was dancing whilst it walked which didn’t seem to fit for me, which was another key reason the arms were created this way. I also played around with hands and fingers a bit too making them relaxed and open on the pull back, then clenched into a fist on the swing to again emphasize the struggle of him walking extruding his body arms forward (think of it as if it looks like he was trudging trough mud). Final additional tweaks where made to the legs in the graph editor to ensure the legs weren’t phasing through the legs holes and smoothening the arm movements.
Overall this was a little tougher, probably due to me trying to add a little bit of character to the walk cycle, but overall, I again feel like I have learned a lot from this walk cycle work, this work in particular will be a crucial learning experience to help me with my E4 Project.
Additional/ unused Screenshots


0 notes
Text
University - E4 Project - Creating the Animatic
After creating my script, character designs, additional designs and storyboard, the last part of my pre production I needed to create was the animatic. I felt a little more comfortable starting this animatic in comparison to my previous one for the Nik Nak project, as I had a better idea of what to expect whilst creating the animatic, as well as potential issues I my face.
This post will be split into three sections highlighting each stage of development for the Animatic for each software I had to use.
Section 1 - Creating each shot and more (Photoshop)
To begin, I had both a plan and a rough structure as to creating each shot. I would constantly refer back to my details and descriptions for each shot from my storyboard, as I completed each shot, these details where a big factor when deciding how movement would be executed.

Learning from my Nik Nak animatic, not all shots require movement within after effects and can be translated through a variety of images. So simple and very short movements were created as a small multitude of images rather than being animated in After effects (on top of that I couldn’t find a way to animate something rotating such as arms in After effects).
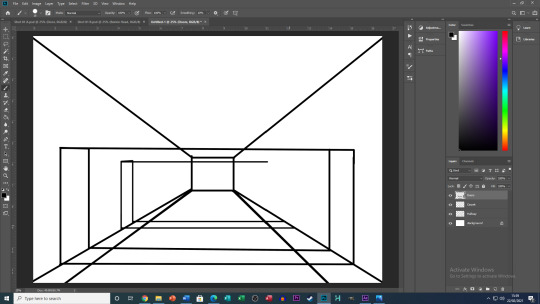
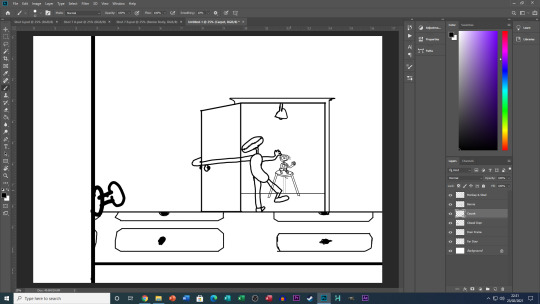
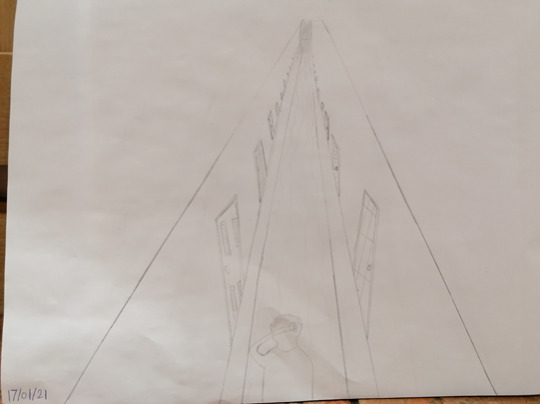
A new issue I had to face was creating 3D images. Since my E4 Sting will be 3D, I felt it was suitable give a sense of 3D in some shots and tried to utilise what I had learned about perspective drawings from throughout the year so far. This is why a few shots aren’t flat and more angular. This also applies to the objects, mainly being doors, as to create a sense of depth to each door. I tried to make the front of the door whilst opening thicker, as well as giving each door a frame to go around it each varying in size from the distance of each door within each shot.
The biggest experimental shot to create was the second shot, when Bernie fist sees the endless hallway. I have never drawn in 3D depth without reference on a computer prior to now, so I had to figure out how best to present the hallway, without giving off the wrong effect. I first decided to place a grey wall at the end of the hallway, this is to represent a fog of sorts implying that the hallway is so long you can’t see the end. I also wanted each opposite door in the hallway to be symmetrical in height and depth from each other. To do this, I tried simply drawing lines from the bottom of each door and connecting the two with lines. When the lines reached the other side of the room, this would create marking as to where I need to draw (Like a dot to dot). The same approach was used on the floor as I was trying to keep a sense of consistency with the floor design.
Section 2 - Creating movement (After Effects)
After creating each shot and deciding which ones would be made out of a selection of images and which needed to be created in After effects, I moved onto the next stage being After effects.
In total half of the shots from the first section had made it to the After effects stage, these shots mostly featured movement from Bernie and the Monkey. I had to refresh myself with the ins and outs of After effects as it had been awhile since I had last used the software, but once I got into the swing of things, this stage didn’t take too long.
The most complex shot to create was the slide show shot with Bernie and the Monkey. The goal was to present a re-occurring scenario in a very short period of time, to do this I wanted each slide to enter from the top of the screen, with each having their own little movement. However I came to realising that the layering of each section of the shot and the animated features (such as the monkey slap) became a bit of a confusing juggling act. To make things easier for myself, I created the first/ left shot as its own After effects file, then placed movements for the centre and right slides/ shots together, then reorganised the layers for each section.
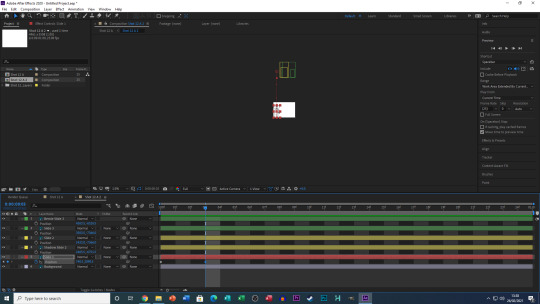

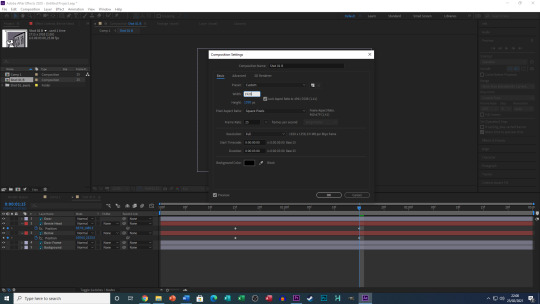
There was only one issue I couldn’t resolve which has carried over from the Nik Nak project When creating my composition I would make the pre-set “HDTV 1080 25″ and would make the height and width of the shot 1920px by 1080px. But when I would render the final composition the sizes would change to something different, when re-entering the composition and re-entering the height and width, the two would change as I was typing. This resulted in some shots coming out correctly and others needing to be sized in Premier pro.
Section 3 - Weaving it all together + SFX (Premier Pro)
With all shots complete and all After effects shots finished it was time to put everything together in Premier pro. I solely focused on placing all the footage together before beginning to add Foley to each clip. When adding everything together, the duration of the Sting was 50 seconds, I was then able to whittle it down to 36 seconds, then 31 and then 30. This was achieved by shortening and cutting up clips, including chop0ping up the pause sections of the after effects shots, some shots where also slightly sped up or slowed down to better fit the pace of the animatic and remain in the time limit.
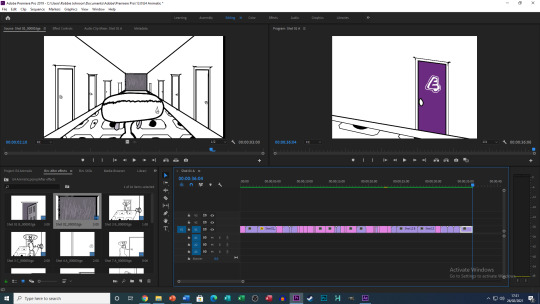
When it comes to Foley I decided to create a mixture of sounds myself and took some off the internet. Most of the sounds I created with a small pocket Mic I received recently so foot steps, door knobs turning ,some squeaking noises and slaps/ bangs where taken from my Mic. Other sounds such as the Monkey, door slams, Disco music and Swoosh where received over the internet.
To help with identification and form of sorting Foley I colour coded each sound to match with each action, for example anything to do with Monkey such as screams and slaps where Brown and Doors opening and slamming where orange.
Conclusion
Overall after creating my Animatic, I finally feel like I have a firm grip of my project from the identity crisis I had with it a few weeks prior. I feel like I have a solid approach on how to tackle the rest of the project, all that is left to do now is create it.
Photos throughout Development/ Images not used above
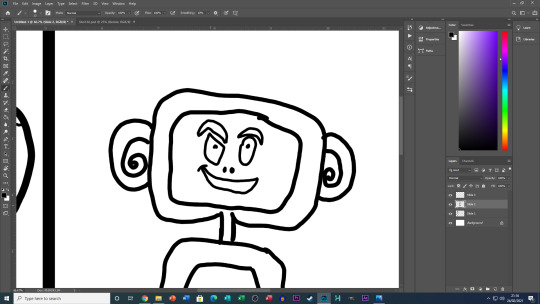
(Some facial features of the monkey where inspired by food such a it’s cinnamon roil ears and banana mouth).
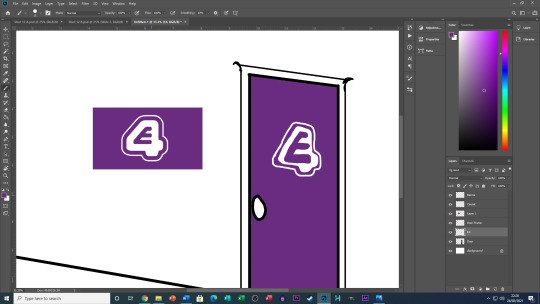
(An image of the E4 Logo was used to help with accuracy with colours and shaping the logo).
0 notes
Text
University - E4 Project - Imagining character slaps
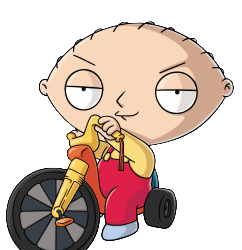
Whilst doing work for my other Tutors, I was thinking about the physics for Bernie, particularly his face/ head. If he were to be hit with such a force to cause him to flinch or even stumble what would it look like? I then tried to think of other cartoon characters with abnormally shaped heads and how they may move when slapped (Note - as I was working at this time, I didn’t look up the characters actually being hit, it was all my imagination).

Characters with heads similar to Bernie's such as Stewie Griffin from “Family Guy” , Arnold Shortman from “Hey Arnold” and Captain Olimar from the “Pikmin” franchise. These characters heads would likely twist around and due to their head being larger than most of their other body parts, would likely to cause the body to swing along with head possibly causing them to fall. The main emphasis of the movement, likely being a form of body twist from the head, leading to the body and then the legs.
Stewie Griffin “Family Guy”
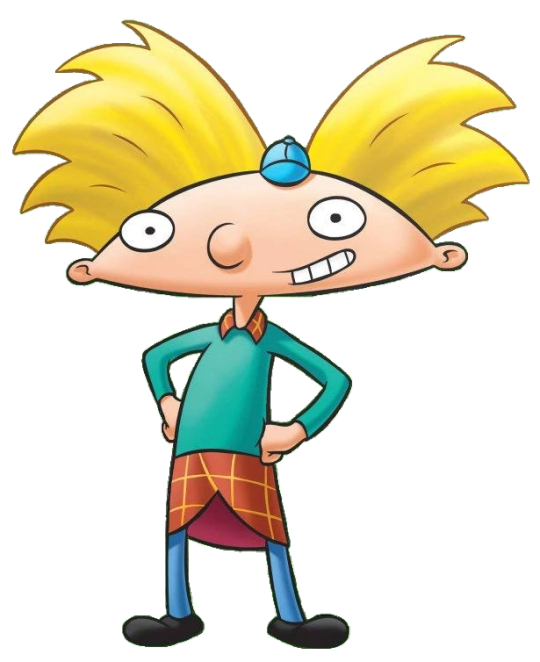
Arnold Shortman “Hey Arnold”
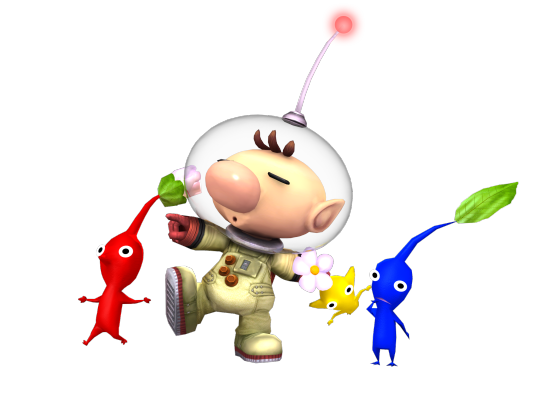
Captain Olimar “Pikmin” Franchise
I then tried to think of characters with top heavy heads and how they might move/ react. Characters I thought off include: the Brain from “Pinky and the Brain”, Megamind form “Megamind”, Dr Neo Cortex from the “Crash Bandicoot” franchise and Dwayne from “Futurama”. These characters defining aspect is their large head, whilst maintaining somewhat of a regular strcture face. If these characters were to be hit in the face, I’d imagine that their heads would pull their body in the direction they have been hit. For example the head may bend/ flop backwards, pulling the body along with it and possibly causing the character to fall due to the weight in their head.
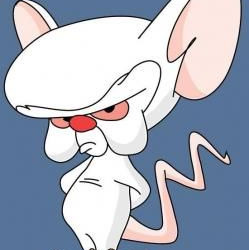
The Brain From “Pinky and the Brain”
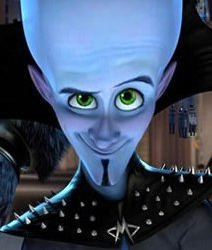
Megamind from “Megamind”
Dr Neo Cortex from the “Crash Bandicoot” Franchise
Dwayne from “Futurama”
The important take away from this thought process, is although I can’t imagine Bernie stumbling on the floor when being slapped by the Monkey, major head movements are key. Instead of an entire body twisting due to the slap, it maybe best for just the head, neck and body to twist, but no need for the legs top move. That said, for variety in the slaps I may include Bernie tilting his head backwards in a similar sense to that of characters with large heads and regular faces.
0 notes
Text
University - E4 Project - Too many Ideas and self reflection (The project so far)
Whilst pitching my E4 sting ideas to our class in our presentations, my tutor offered me the chance to learn how to animate one of them in 3D. With this new direction, I had to rethink a lot of aspects of the project, including the look and designs of the overall project as in the planning stages I only anticipated them to be 2D.
I first began by creating the script of the sting and sent in for submission, whilst waiting for feed back, I decided to brainstorm on how the character would look. Since I was making the jump from 2D to 3D, I tried to make sure I wasn’t doing anything that I felt may have been too complex. So when creating the main character, I tried to construct his body with simple shape features including two shoes and no legs, a tear drop for a body and a comically sized head. I decided to give my character an improvised name as one of my biggest grips with the previous project (our Nik Nak Sting project), was I was referring to my characters as person A and person B, which caused confusion in the planning stages. So I decided to call the main character of this Sting Bernie.
Shortly after receiving feedback from my tutor that the script was OK for me to use, I had started to make a storyboard for the project including Bernie and the Monkey. However one of my other tutors when informed about my idea, gave me his feedback on what he thought would be good for the sting. He explained how the hallway should be shaped in the E4 logo and instead of a Monkey behind every door, there would be different things such as ghosts, shotgun and more. This idea would not give the same effect I was looking to make, but also reflect all the genres involved with the E4 channel.
So I scrapped the first storyboard and tried to come up with different ideas as too what would be behind each door, this brainstorming lasted just over a week, when I had a realisation. The ideas presented to me were good, but at my current skill being a complete beginner with 3D animation, would this actually be achievable? I felt that I had jumped the gun a bit and was entering territory that was expecting too much from me, not knowing anything going into it, making me become a little to ambitious. So I scrapped the the ideas and went back too the original plan.
The next day, I had an introduction into how the 3D animation software “Maya” worked, encouraging us to experiment with simple shapes to create characters, everything was going well until one aspect was mentioned. We were informed that it would be easier, if we were to create arms and legs for our characters and that heads and necks would be explained to us in the future, my current design of Bernie didn’t have arms or legs or even a neck. With this new information, I went back to the drawing board again re-designed Bernie, giving arms, legs, shoes a neck as well as change the body shape from a tear drop to a bean.
With this new design I re-attempted to create a storyboard, however due to pileing work and close deadlines, I had to briefly put this E4 Sting project on the back burner, to focus on the current and more closer hand in dated work for the other tutors. Whilst doing their work, I was thinking about the physics with Bernie particularly his face/ head. If he were to be hit with such a force to cause him to flinch or even stumble what would it look like? (There will be a separate blog post to highlight this aspect in the future).
Once I was fully up to date with all the work I had outstanding, I went back to my storyboard and realised that what I had wrote down didn’t feel very ambitious, but more rushed and not 100% making sense, likely due to me still coming to grips with the animation software. So I decided to scrap the second storyboard and start over for the third time.
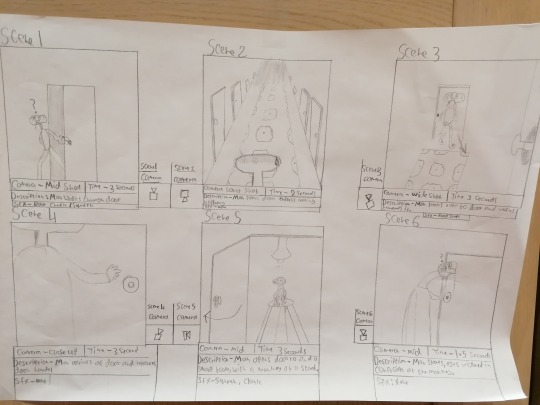
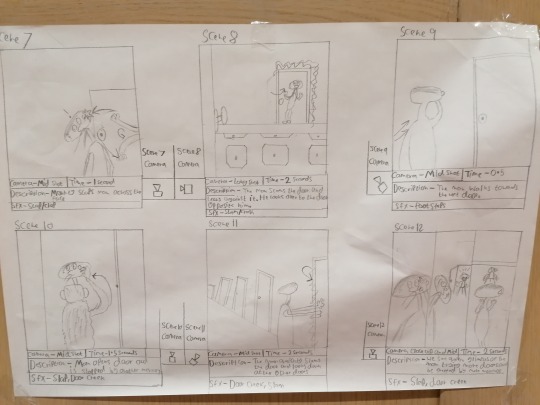
After looking at Bernie’s current design as well as the comparison to other characters being hit in the face, I imagined the project from start to finish, including what camera angles would work and what wouldn’t as well as character interaction ad more. I have finally completed a storyboard I am happy with and can see clearly.

This brings us to today, the storyboards have been sent and awaiting feedback, we are also currently on a reflection week, so during this week, I will prioritise learning Maya, as I have only had little bursts of time with software prior to now, so learning the fundamentals is key. Anything else after that (from what I am aware of) is awaiting the feedback from tutor about the storyboard and how to improve it.
0 notes
Text
University - E4 Project - Presentation and new direction
In our previous lesson, we presented our three ideas for our E4 sting project. After having ten ideas, I managed to whittle it down to three of them, these ideas included the following as well as a rough sketch for each (Rough working titles).
The Right Room
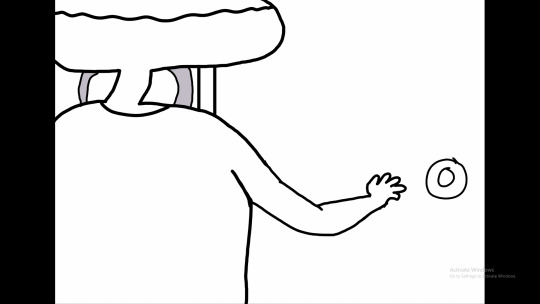
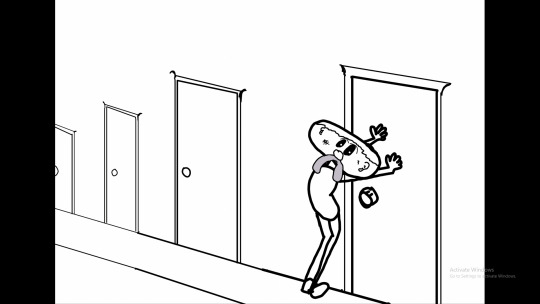
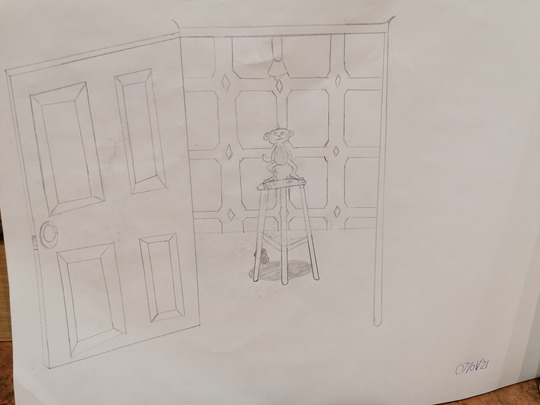
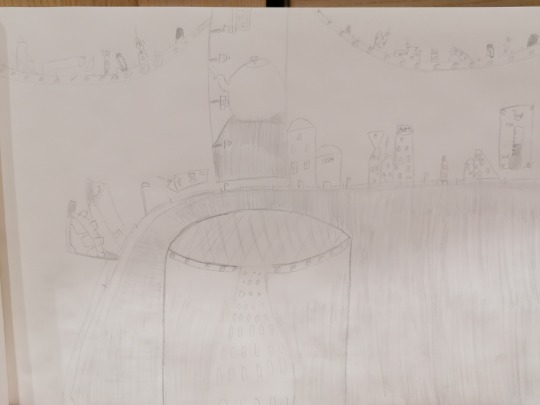
A man lost in an endless hallway and presented with doors mirroring each other along the hallway. The man opens the door to be greeted by a monkey on a stool which slaps him in the face, he tries the next door and is greeted by another monkey who also slaps him in the face. This happens repeatedly until he opens a door with the E4 logo on where there is a party inside the man walks in and the sting ends.
Sandcastle Clash
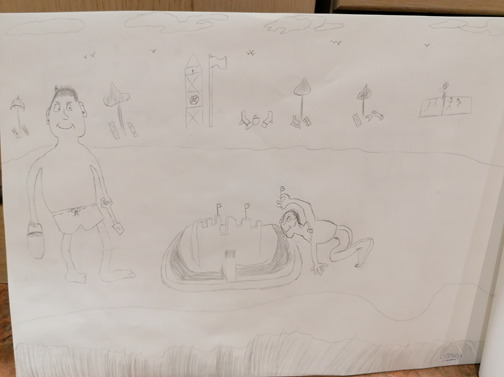
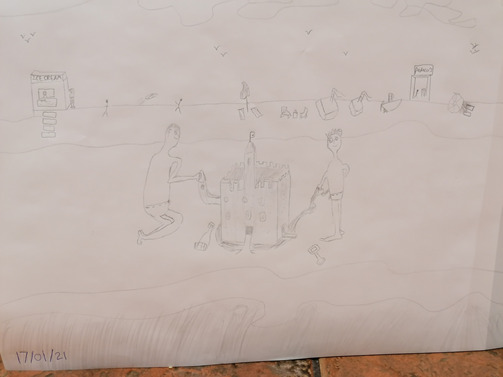
We are on a beach and watch two children building a sandcastle, next to them are two teenagers building a bigger and better sandcastle and next to the teenagers is a woman who’s sandcastle looks more like an architecture. Suddenly a shadow casts over all three of them and they look up in shock as a giant wave crashes down, destroying all their sandcastle, the merged remains of the sandcastles form the E4 logo.
Dream Escapist
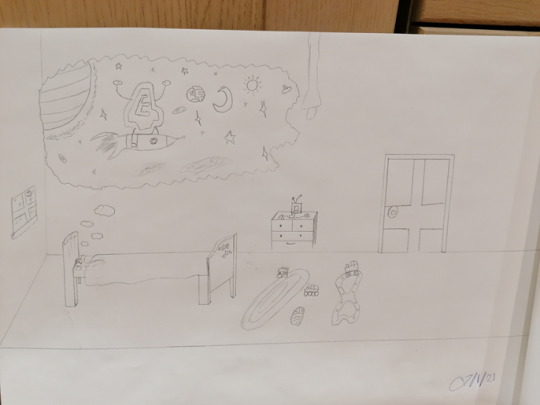
A child is in bed dreaming at night, all is calm and we see a dream bubble form above the child's head. We see E4 riding a rocket through space, passing planets and solar systems, suddenly E4 looks around and decides its had enough. E4 stretches over to the corner of the dream bubble and pulls itself out of the dream into the child's room and walks out of the bedroom door.
After the presentation, I felt the idea that would be best to do was the Dream Escapist idea, as it took place in one location, had only one camera angle and seemed the most unique (to me). The plan was set and I was about to start on the project, when I recalled in a very short Q and A section at the end of the presentation, where my tutor had mentioned that The Right Room idea could be done as a 3D animated piece.
The decision now wasn’t which idea I liked more, but what style of animation would I like to do. After a few days of debating I decided to go with The Right Room idea, as I felt learning how to animate in 3D would help me out in future for future course work.
0 notes
Text
University - Semester 2 - E4 Project Introduction
Today, we have been informed about what our project will be for semester 2 of the first year. The project is to create a thirty seconds long animated short for the television station E4.
We have been asked to not include and dialogue in our short, as the a commentator would be talking over the skit to talk about the next TV program that is about to start.
Over the Christmas period we were asked to try and formulate some ideas for this thirty second animation, I have had quite a few , now I will just need to narrow those ideas down to three of them.
Moving forwards, future posts will be about the E4 Project.
0 notes
Text
University - Visual Library Part 1 - Reflection
Today is the final hand in date for our “Visual Library Part 1″ project and I feel like I have come away learning quite a lot from this project, from different standpoints.
Drawing Techniques learned
The duration of this project has been since I started the course back in September and as I have been learning during each lesson, I feel this project helped with some aspects, particularly in the drawing. In the past I haven’t been involved in anything Artistic or Illustrator based, so coming in without this knowledge was going to be a challenge.
But I feel this project has boosted my knowledge when it comes to drawing a scene or a character, from the VR journey I went on, exploring the globe and take pictures, I feel I have gained a better understanding of creating depth and distance. After observing the angles of which certain images where taken (E>g. a building) I noticed that more often then not, lines weren’t straight and the colour variation changed, creating the effect of distance, I was then able to add this to some of my sketches.
Refining my Film knowledge
Although I may not have had any experience with art, I had come to college finishing a two year film course and some of the things I learned from that course, I feel have been improved or refined. Realising how many films use a four act structure was one thing, but it was interesting seeing how different film pull off the effect.

Other film trope such as the characteristics of the protagonist and relating characters to readers/ viewers was an interesting almost psychological experience. I will be definitely keeping a sharper eye out for these in the future and try to utilise this knowledge in my future work.
How I feel I could have improved
For a project like this, it’s hard to say what I would need to improve on as everything was in my hands since the beginning, I feel I have taken in a lot from the previously mentioned, but there is one thing I would definitely do differently.
That being the amount of blog posts I have done and my explanations behind them. One of my biggest flaws (in my opinion), is I like detailed explanations and putting forward everything I know/ have learned. This usually results in two to three big blog posts (This post itself is a key example of this), where I feel five or six shorter posts would be more welcome. In future project, I will try to keep a lid on things and split blog posts up into multiple amounts, instead of giant detailed ones.
0 notes
Text
University - Visual Library Part 1 - Methods of story telling
As part of project “Visual Library Part 1” one of the aspects, I’d like to cover is the methods of which stories are told. Whether it be a book, novel or motion picture, there are many methods and techniques that present and tell stories. I have been fortunate enough to have covered my impressions on some story telling from my time at the “Manchester, Animation, Festival” (MAF), posts of which can be found at in links at the end of this post. But the point of this post is to elaborate on what I have picked up on when it comes to these types of story telling and I will be highlighting each throughout this post.
Crafting the world in the readers mind.
Crafting a world in the readers mind, is undoubtedly one of the most important aspects to any story told in text. The story needs to incorporate a description of which the characters in the story find themselves in, this can vary depending on what stage of the story you are in. For example, the beginning of a book will likely set the scene in its first few pages, describing the environment in ways, which might give the reader an idea of any culture, time period or characteristics of their environment. This could also be taken a step further with the book describing one of the five sense, For example a line such as:
“I could smell a toxic fog as the van’s engine crackled and revved in front of me, it’s fog lights blinding me as the warm fumes of the engine engulfed my body.”
This sentence describes the vehicles design and size being a van, the sort of smells from the gas from the van being described as “toxic fog”, the sorts of sounds coming from the vehicle’s being the crackling and revving of the engine, the feeling of something warm again coming from the engine and lastly the sight of the character being blinding because of the vans fog lights being on. Al this is described and imagined in readers head in two lines.
The same method can be done with character descriptions in their appearance and characteristics such as describing a character’s body language or characteristics through clothing and movement.
The four-act structure
This isn’t anything technically new and I have come across this structure before, but the more and more stories I have seen and viewed, this structure is evident and is very effective.
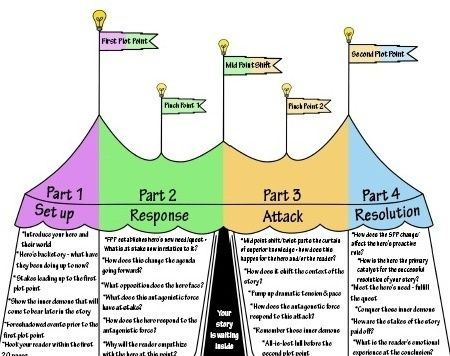
The four-act structure is a method of storytelling throughout the entirety of story which most films follow. We begin with the “Set-up” where we are introduced to the world our story takes place in and the characters we are going to be following throughout, this identifies the world for the viewer/ reader making the familiar in this new world they find themselves in.
Depending on the genre of the story, this second act may vary, but for me I like to refer to the second act as the “Establishing the goal”. What I mean by this is that this act of story defines or represents key events in the story which defines the wanted results from our stories characters, or key events that lead our characters into through the remainder of the story. For example, a line such as:
“After seeing what they had done... what they stole… what they wanted… what they took from me, as I stare at the rubble remains of my former home, I knew what I had to do.”
From this line, we are told that something terrible has happened to our character’s house, this event is something very abnormal for our character, to the point where they show emotions of anger and acceptance with a threat of sorts at the end. This line also establishes a motive for our character, being vengeance for what has happened and leading into acts three and four.
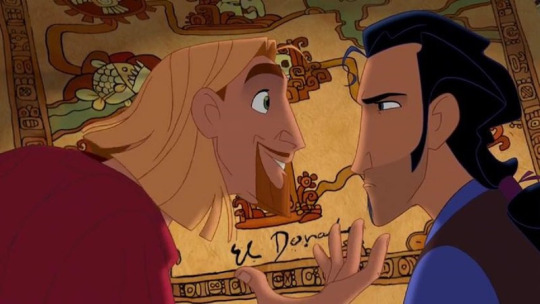
The link below is to a clip from the film “The Road to El Dorado” where the second act begins with the wager of a mysterious map.
https://www.youtube.com/watch?v=h3AqOR2Ru1s
We move onto act three being the “Attack”, this act revolves around the characters achieving what they have set out to do, or are about to achieve the thing they set out to do. This act depending on the genre could either be serious or fulfilling, from giant climatic battles, to answers being solved and more. The main point of act three is the journey is coming to an end with an obstacle or two left in the way. For example, a line such as:
“With each of you together in this room, the clues we have gathered and your statements, I can say with certainty, the murder is in this very room.”
From a line like this, it states that that the question lasting throughout the story is about to be resolved, a climax of sorts to the characters main goal throughout the story. The point is to not only build tension, but to give the viewer/ reader the realisation that this is it, the moment we have been waiting for.
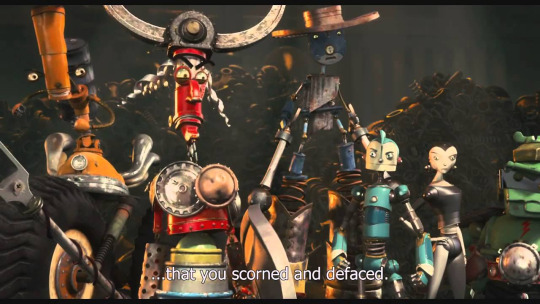
The Link below leads to a scene from the the movie “Robots” which is an example of the beginning of an third act.
https://www.youtube.com/watch?v=IthAv1JkF-0
Lastly is act four called the “Resolution”, where our main characters have now fully achieved what they have set out to do and the story begins to wrap up (this is usually the case unless the story ends with “To be continued”) and return to how things once was or are much better for our characters. For example, a line such as:
“Toby barked with excitement and jumped on Lucy’s lap as they returned home in the car from the vets.”
This line represents a form of conclusion, our characters have been to the vets for a check up and are now going home. Depending on the scale of the story and what has happened throughout the story from act one to now, will likely vary the type of tone the ending will take. It is this four-act structure which takes us the viewer/ reader on a journey that covers all the basis on getting the viewer/ reader a 100% invested in the world which has been told and is still used to this day.
The link below leads to the end scene from the film “Fantastic Mr Fox” where the fourth act is represented through a better way of life.
https://www.youtube.com/watch?v=LOELUjnwM4M
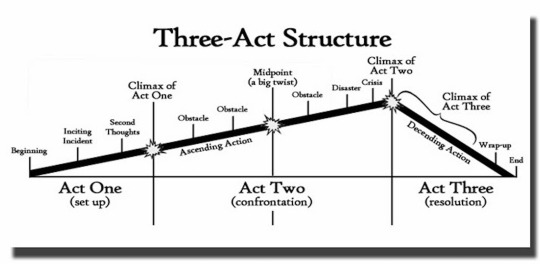
(It’s worth noting that there is also a “Three act structure”. the main difference between the two is acts 2 and 3 grouped togher, the diagram below is an example of this structure.)
Getting into the character’s heads/ relatability
Lastly is getting into character’s heads also known as being relatable, as I why they are doing what they are doing and how you can relate or disagree to their actions. The purpose of this aspect of story telling is to build a type of bond between character and reader/ viewer, keeping them invested in the story and what’s to come.
Not only is this a method of making characters likeable but can also encourage viewers/ readers to root for the characters and feel happy when they achieve something or sad is something bad happens to them. It’s a goal nearly all stories try to achieve with varying degrees of success in their execution.
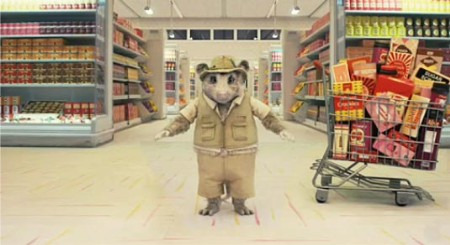
This method can be complex and detailed, or bare bones and simple, an example of this is the Link below to the PIXAR short “Knick Knack”, where we see a snow man trapped in a snow globe and wants to be with his friends and a nice lady. Now whether you like the short or not, I feel like we can all relate in the fact that if we were trapped inside and couldn’t be with our friends enjoying themselves, we would try to escape too. It’s the way that the rest of the story is executed that both keeps viewers guessing and both laughing and understanding the reasoning behind each attempt to escape.
Link to “Knick Knack” via YouTube.
https://www.youtube.com/watch?v=dbkG9PpHuQk
Link to Manchester Animation Festival Day 1 post
https://robbiejohnsonyr1ax1000.tumblr.com/post/636692630941630464/university-manchester-animation-festival-day-1
0 notes
Text
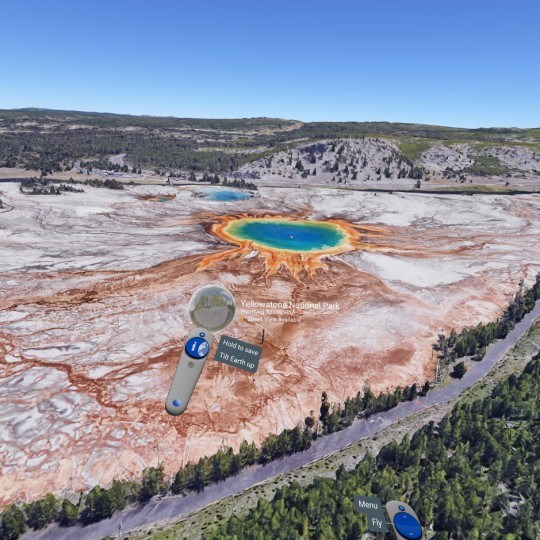
University - Visual Library Part 1 project - Exploration with Virtual Reality.
Since the starting September, we were set the project of creating a Visual Library and showing what we have done over the time of the course. We were suggested to take photos of places, watch movies, read books and more. We were also told that we could try Google Maps to find an interesting location or landscapes and over the half-term period I decided to take things a step further by using Google Maps in Virtual Reality (VR).
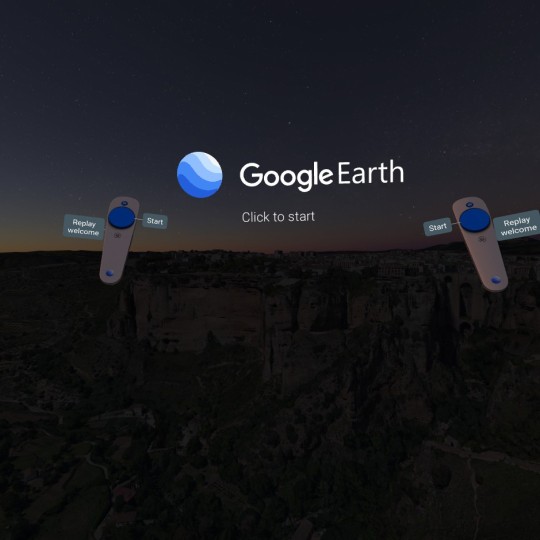
It seemed fitting with the current state that using Google Maps in VR, would give me the ability to explore outside, that thought process was what gave me this idea. Before starting, I needed to plan out what I was aiming to find, what was the end goal. I decided to focus on vast detailed views, natural sites and man made structure (any with history to them was an added bonus).
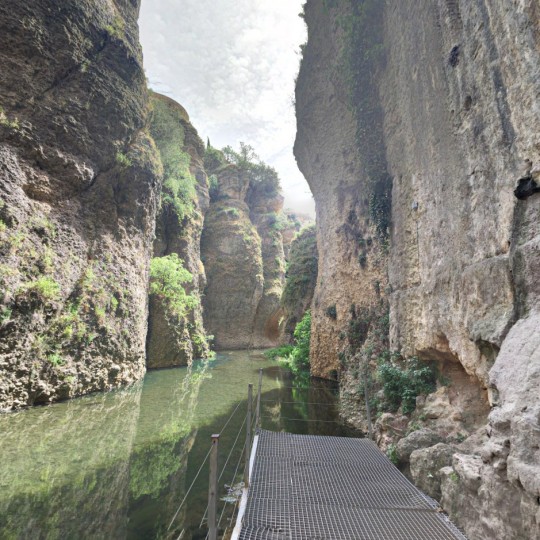
After my little globe trotting journey, I discovered land marks I had never seen or heard of before all of which where unique in their own way such as the “Praque Gulliver” play ground in Valencia, Spain, or the very high up town of Ronda with its spectacular bridge in Southern Spain. After exploring, I feel I have gained the knowledge of a lot of these places and how beautiful they are
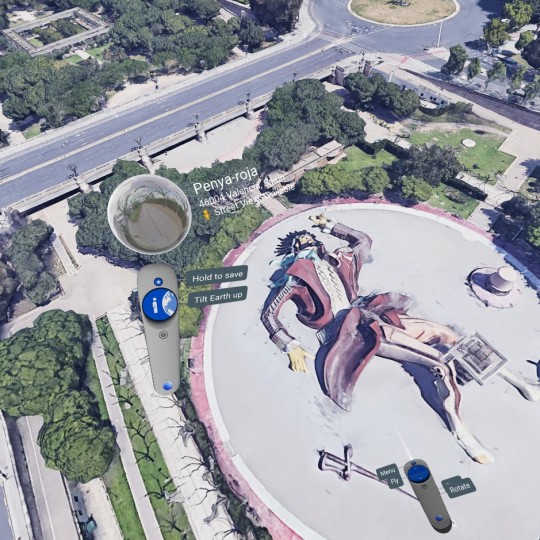
But there was another reason I wanted to use VR specifically over regular Google Maps and that was a sense of scale. Scrolling the wheel on a mouse to look up and down is one thing, but to move your head up and down (and your whole body for that matter). is another. This for me creates the illusion of depth and scale and it’s those two factors what helped me take in more of my surroundings and sites I came across. I also felt a little bit like a photographer finding sites on foot and taking pictures.
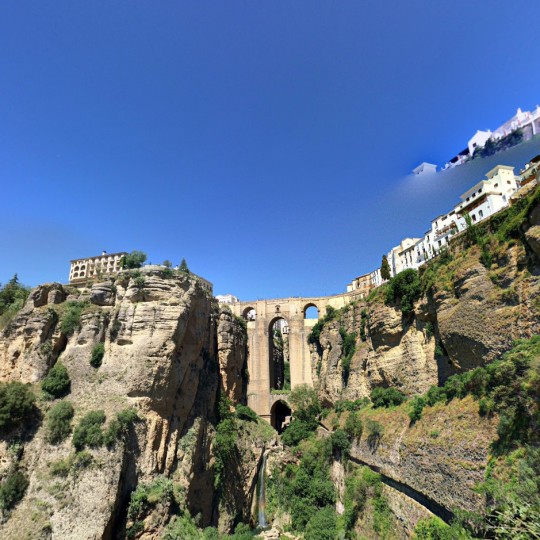
The other advantages of using VR is when zoomed out, instead of a flat map image, the world becomes a diorama of sorts, making it easier to spot interesting sites as well as providing a different perspective at other locations. Another advantage is when in street view and taking a picture, I can adjust the angle of my head and the lighting (Via adjusting the time of day) to take stylized photographs at different angles instead of flat shots.
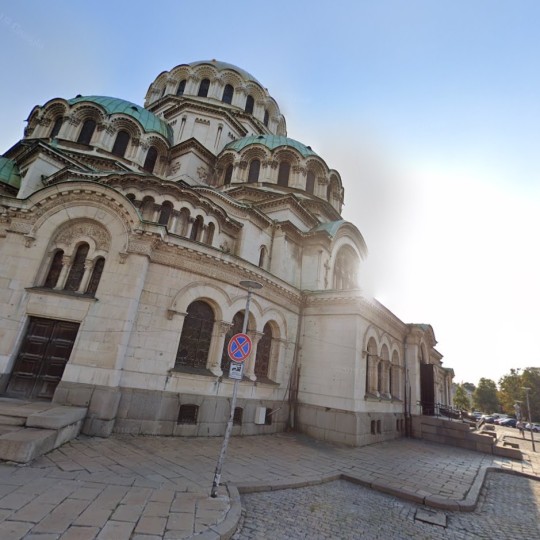
Overall this was an interesting method of gathering images and exploring, one of which was fun and that I feel I have benefited from.
0 notes
Text
University - Nik Nak Project - Changes and choices during development
During the development of my Nik Nak project, there has been some changes and cut features from the final product. This post will cover these changes and why they where changed during development.
Changing perspective
During the storyboarding and animatic stages of development, I had planned to keep the entire project at a flat 2D perspective, this was due to two reasons. The first was my own ability to draw, as someone who isn’t too experienced in drawing, I didn’t want to try anything too risky that could ruin the look of the project. The other reason was that it was the format that I felt most comfortable working with (a sense of familiarity).
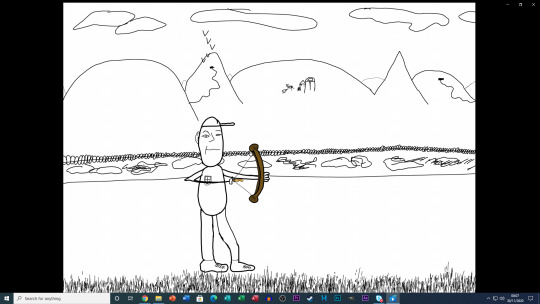
However, during development, I thought entirely flat scenes seemed a bit bland, especially when referring back to the animatic work. So I decided to experiment with a slightly different look whilst staying with the original idea, so I changed the camera angle in two scenes. The beginning scene had a more refined over the shoulder shot of character A (AKA Roy) and the third shot had a camera angle of Roy firing the Nik Nak near the camera. To pull this off I had to experiment with different character angles and sizing of props and limbs. Roy’s arm gets smaller as he fires the Nik Nak to give a sense of distance, the same is also applied to the Nik Nak as it gets small then large on the pull back and firing stages of the scene.

Scrap the birds
During the story boarding and animatic stages of development, I had planned for their to be a flock of birds in the background. They would begin in the third shot as the the bow is being shot and they would re-appear during the “Eat The Freak” section in the final scene. I felt that the birds would give a sense of speed and progression throughout the short as well as possibly adding character to the short and fill the background. The birds became the bird, as I created a fully designed one during the creation stage of the props. Two birds where made, one with its wings up and the other with its wing down, the idea was to overlay the two images, so in the animation stage, it would appear as if the bird was flapping its wings as it flew through the air.
The bird was cut however due to two main reasons. The first being that in each scene I already had multiple clouds moving in each scene, of which already fill in the role the bird would have had. The second reason was that I was worried that by adding the bird, along with the previously mentioned clouds as well as the Nik Nak and more, I felt that I would have been over cramming each scene with too many moving objects, diverting attention to the main action on screen, so the bird was cut.
0 notes
Text
University - Nik Nak Project - Software selection
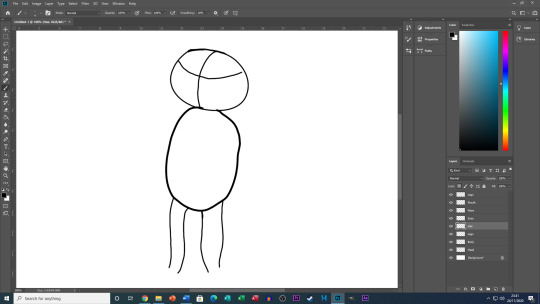
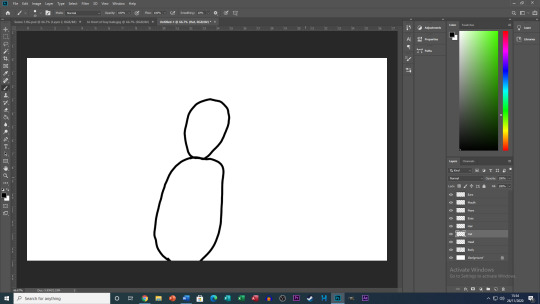
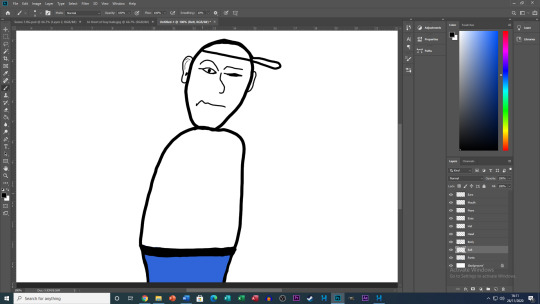
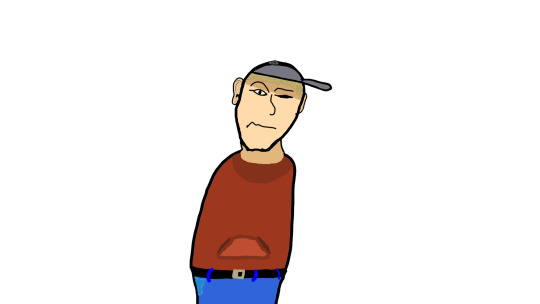
Throughout this project, I have been creating a variety of props and backgrounds. However, when it came to creating characters, I was unsure whether to create them within the software I was using (”Toom Boom Harmony”), or to carry on using the software I have been using for the props and backgrounds (Adobe Photoshop).
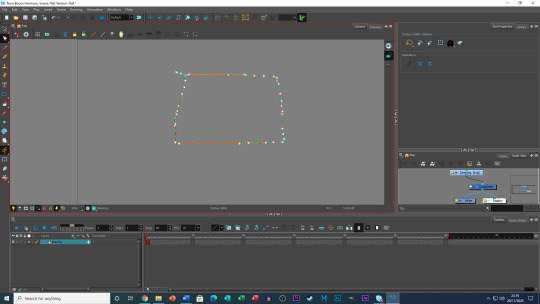
The main reason for my indecisiveness was due to one of Toon Booms tools not functioning properly. The “Contour editor” was a fundamental tool that I have been using for my other work with “Toon Boom”, this tool allows you to configure and bend the layer you have selected within your animation’s timeline. However, when exporting images from Photoshop, the tool would not give me the option to use it. The easy solution is to draw in Toon Boom right?

So I tried just that, I drew an image (A sketched square) and tried to use the contour tool, instead of the four points to manipulate each corner of the square, I was presented with lots of points. This caused me to realise that, one tiny adjustment would change everything about the original sketch, as well as it being very time consuming to adjust each individual point.
After asking my tutor if he had a preference, he explained to me that it doesn’t really matter which I chose, as long as I was comfortable with using said software. It was in that moment where the answer finally came to me.
Why not use both?
I decided that that none moving parts of my characters bodies, would be created in Photoshop, and parts that do, will be created in Toon Boom. As long as I had each body part in the correct order in the timeline in Toon Boom, both images in each software would create one full picture (two half's making a whole).
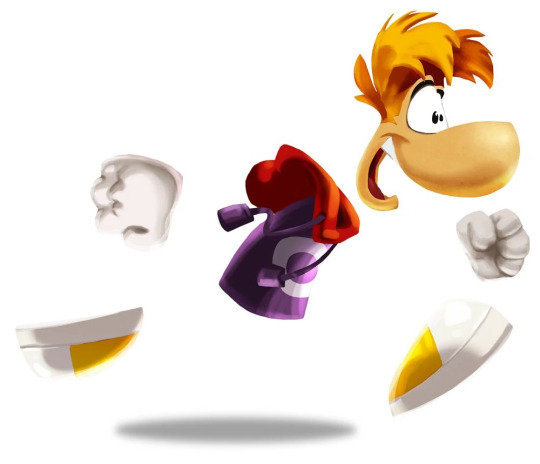
When creating the characters in Photoshop I created them with their none moving parts only, which meant drawing bodies with no limbs. The idea for this came from the character design of “Rayman” from “Ubisoft”, Rayman has no arms or legs, but a base body, head, hands and shoes. With the exception of the hands, this is what caused me to think carefully what limbs would be moving in each scene and what too/ not to draw in Photoshop.
The images below are some of character shots whilst in development up to their final look (From Photoshop, through to Toon Boom).
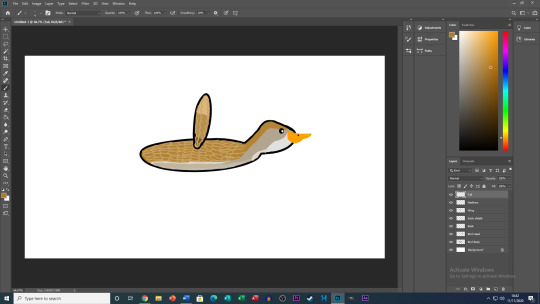
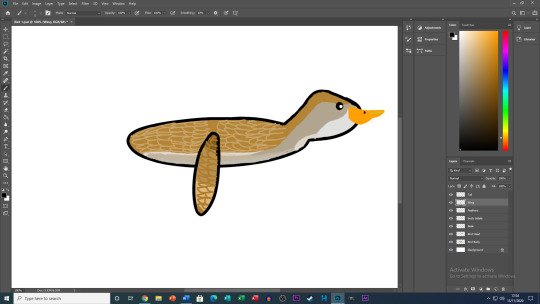
Scene 1 - Character B (Greg)
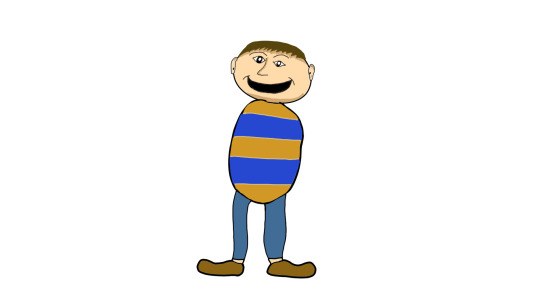
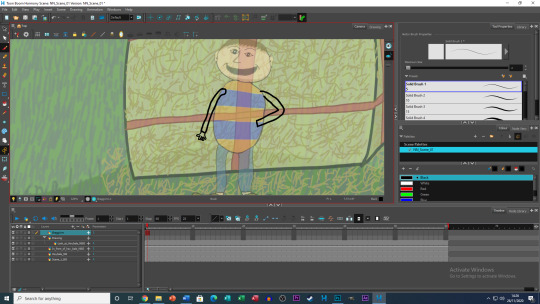
Scene 3 - Character A (Roy)
0 notes