Last Seen Blogs
randomfangirl97
MadmadL

killinjoy
Afrobratt

remnant-town-musicians
Team CLCO

kunalrawatposts-blog
Untitled
Video
vimeo
little clip .. a tracked gallery footage with added elements ..
One of the workarounds getting a 3D track when After Effects’ camera tracker didn't work well was to get a pretty usable 3D camera within After Effects based on 2D Mocha Ae track masks.
Added elements made within After Effects, C4D Lite and Photoshop
#3d#tracking#after effects#cinema 4d lite#cinema 4d#mocha ae#mocha#gallery#camera tracking#photoshop
4 notes
·
View notes
Video
Snowy C4D bday greeting, tracked and composited in After Effects.
footage from Pixabay by invisiblepower
1 note
·
View note
Video
vimeo
Acorn dude Tõru
I made this to practice C4D. I like how his eyes and ears turned out :)
0 notes
Photo
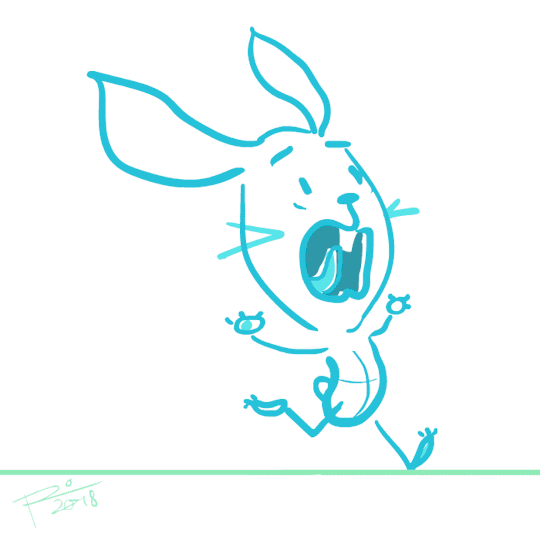
another gif.. scared rabbit run :P
#animation#gif#rabbit#run#sketch#animated gif#bunny#runcycle#scared run#scared runcycle#animate cc#escape#runaway
1 note
·
View note
Video
reupload w/o characters
2 notes
·
View notes
Photo
My little gif for the Gifastic recent Love themed challenge. Really fun little weekend project, Ive wanted to take part for some time but always had something else I had to do <3
#gifastic#love#gifastic challenge#gifastic love#after effects#photoshop#animate#animated gif#territory#take care#toxic#heart
8 notes
·
View notes
Video
vimeo
Animation Showreel 2018
I have freshly graduated DJCAD MSc Animation and VFX and have put together this little reel containing some of my best work so far.
Music: Yasuaki Shimizu - Suiren
Hope you enjoy
3 notes
·
View notes
Video
Take a look at this ‘making of’ reel of my film The Swim (and soothe your nerves with the wavy soundtrack). The film itself is currently on at DJCAD Masters show in the Animation and VFX Cinema room.
#making of reel#final film#the swim#making of#progression reel#reel#animation student#3d animation#2d animation#animation#break down#break down reel
2 notes
·
View notes
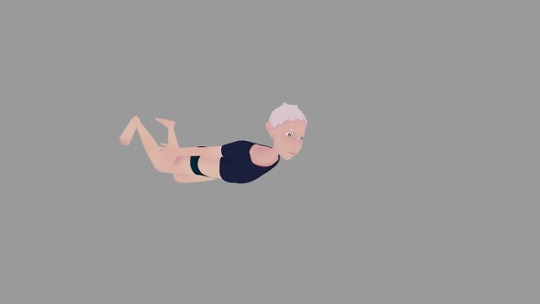
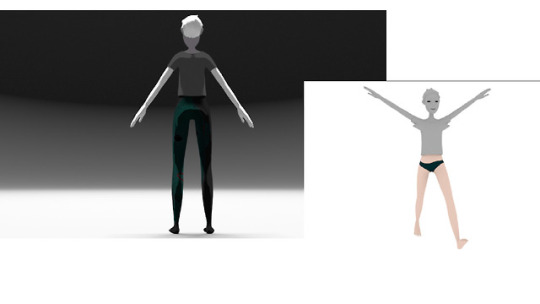
Photo


Testrender from the fifth schot with some lights and the water plane. Toonshader gets easily noisy when using applied textures instead of just flat colours. I have had to balance the shaders base colour tonemaps out a bit too to mach the environment. The animation in the playblast uses the previous cycle as a base but I have animated the movement to turn and glide over the camera to the next scene.
#ulvi#swim#animation student#maya#animation#3d animation#final film#render#test render#playblast#shot 5
4 notes
·
View notes
Photo

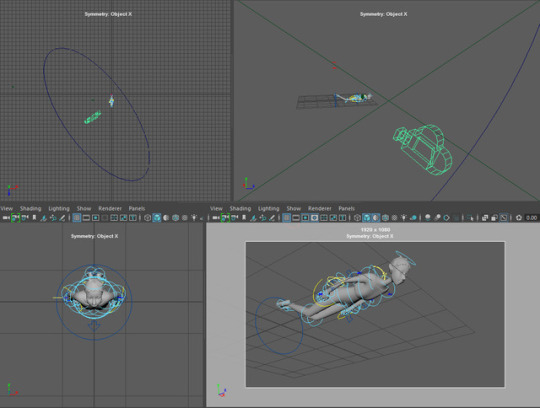
Playblast of the basic swimcycle, Some of the movements need to be softened and it is missing facial animation and adjustments with blendshapes. I have also just started blocking in the 3D scenes and adding cameras.
#maya#ulvi#animation student#swim#dolphin kick#swim cycle#final film#3d animation#3d cameras#animation#animation process#playblast
4 notes
·
View notes
Photo

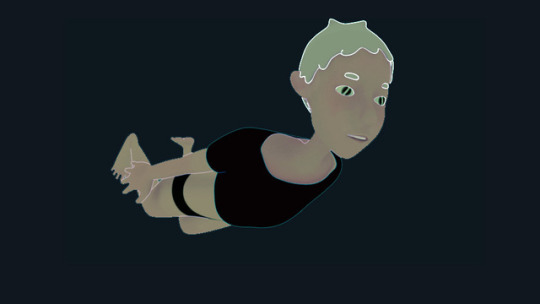


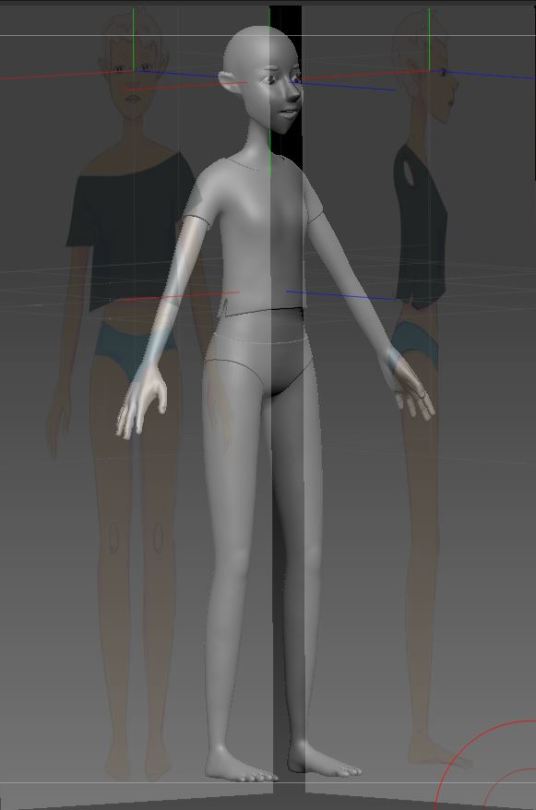
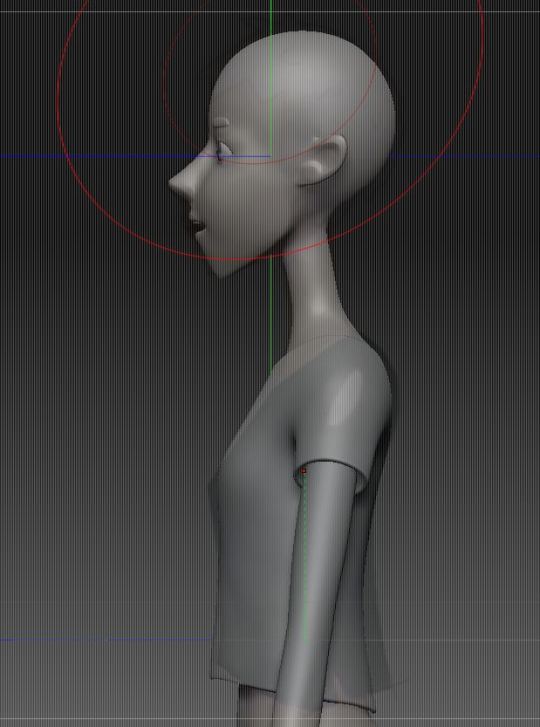
Finished shading and edge try outs. The lower image shows on the left the arnold toon shaders default look and the character on the right is the result of adjusting to get a more cel shaded look. I really liked the soft 3dimensional look that aitoon initially has but for the film I will try to achieve a drawn look so flatter is better. I added a contour aov and tried to see how it looks with different edges, these options can potentially enhance the way she integrates with the drawn environment.
I have changed the outfit colours to be darker to work with the changes I have made (her shirt shape is a blend shape! ). Her hair colour is a bit open at the moment since she needs some contrast on top of her head with these dark clothes. I will keep it pastel and assume that outline will balance things out/ change it if that is not the case. It is one of the most fun stages but I will come back to this after I have some animated scenes.
#aitoon#arnold#maya#shading#ulvi#final film#rendering#edges#contour aov#animation student#toon shader#photoshop
7 notes
·
View notes
Photo

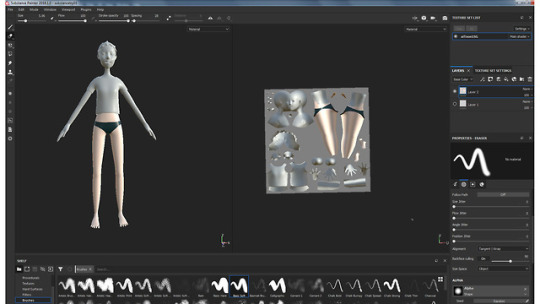

Some creative fixes to the rigging stage challenges. Part of her clothing was difficult to weight to the body. Copying the skin weights was not much help probably because the body and bikini mesh was different. I figured that if I am using a cel shaded look then I should be able to draw on skintight clothing without it being an issue. The first image shows the result of trying the first picture I had in hand (screenshot of her uvs) as the base colour for the aitoon shader. Then I went on and did a quick trial texture in substance and it seemed to do the trick.
Advanced skeleton is super quick to set up - but only when not deviating from the set path from start to finish. For instance, even though my model was referenced in to the scene, when I changed the referenced file, the mesh became unworkable. So when I discovered that I needed to make changes to the geometry I had to either start from the beginning or come up with something else. Exporting the skin weights was not an option either, and just gave similar errors when I tried to save some of the work Ive done. I think I tried to solve a bit too much with weight painting as it either altered the facial weights when done after all the rigging or distorted the body weights when done before the facial rig.
Looking back I would reduce some layered geometry and spend less time on weight painting and instead make more blendshapes. Advanced skeleton has a handy corrective shapes option and Maya own blendhsapes are so friendly to work with.
#advanced skeleton#rigging#weight painting#maya#ulvi#final film#aitoon#texturing#substance painter#animation student#skin weights
2 notes
·
View notes
Photo


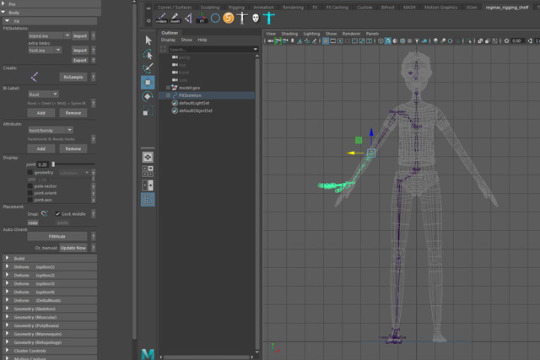
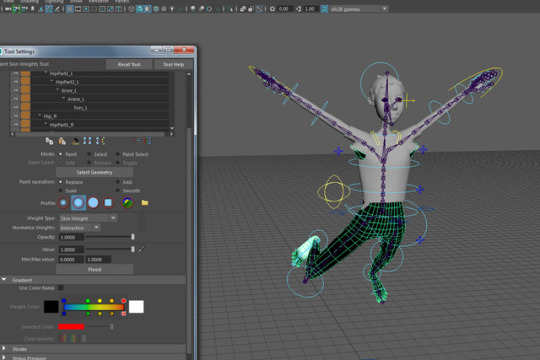
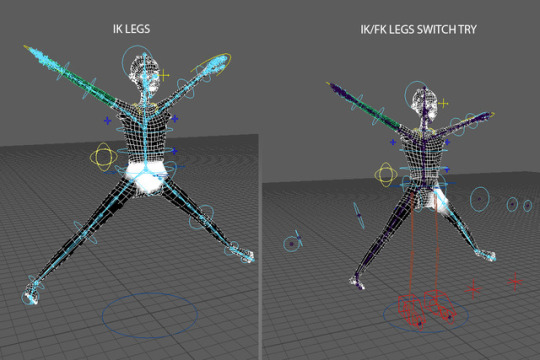
Rigging update and demonic looking images from the skin painting process. I have decided to use Advanced Skeleton and so far this seems to work very well. I have chosen to go with ik legs instead of the common fk option as my character would move most of the time in water. At first I tried to have the switch with both options but when I started to skin the rig got left behind very easily and it seemed too fragile and easy to break. I would loose some built in options that come with fk legs but that shouldnt be too much of a problem.
#animation student#3d modelling#rigging#skin weight painting#skin weights#advanced skeleton#wip#ulvi
1 note
·
View note
Photo


Trying displacement maps and toonshading. The bloated displacement map is a common issue but still managed to worry me for a bit when I did the first render.
Top image shows a dark ai toon shader on areas with no displacement map and ai standard surface with displacement maps on head, hair and body.
I didnt include here any of the renders of the combination that I am looking to work with as it might be too mucha of a tinkering thing that I will leave it for later. I am looking to add displacement maps to the ai toon shader, and it works fine, just the face seems troublesome and not really that good looking with harsh shadows ( with or without displacement maps, it just looks so much better without the toonshader). It is good to have tried and to know the maps and shaders generally work as they should :)
#original character#animation student#ulvi#wip#texturing#maya#3d modelling#displacement map#shading#aitoon#ai standard surface
1 note
·
View note
Photo

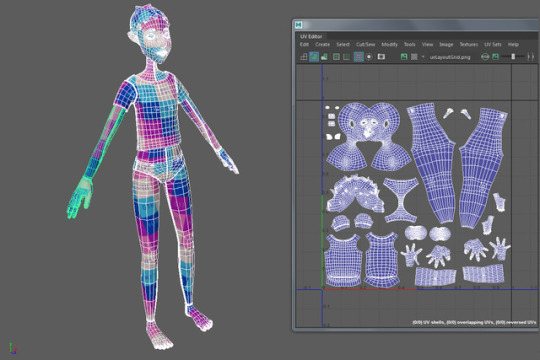
Some pictures of the retopologised Ulvi UVing process in Maya
#animation student#uv mapping#maya#3d modelling#wip#original character#final film#ulvi#uv#texturing#topology
1 note
·
View note
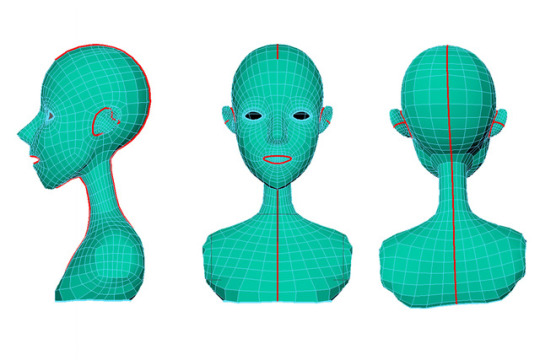
Photo

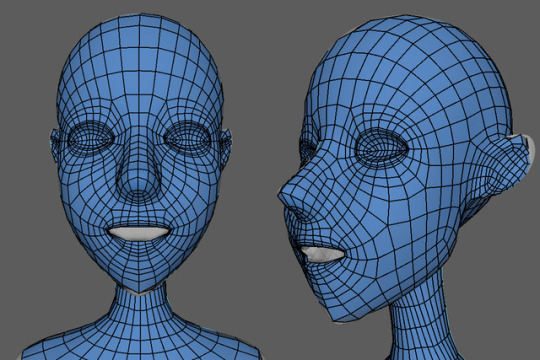
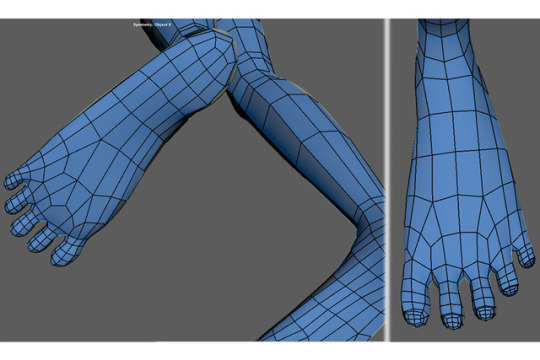


Retopology process update of Ulvi. Sang Yu told i can remove faces from the geometry that won’t be seen but the topology should be good for animating. So that is good! + rest of the retopology is less particular and has gone quickly too.
but I’ve been trying to get around some glitches including some crazyness that happens in Maya smooth preview, actually at the moment only piece of low poly geometry that smoothes as it should is the eyebrow. Hopefully I can solve this with not too much redrawing and stuff.
#ulvi#swim#retopology#final film#animation student#maya#3d modelling#face topology#body topology#topology#feet topology#wip
2 notes
·
View notes
Photo

Ulvi Zbrush progress. Everything but the arms need to be retopologised. I will start with this early and do the hair after I have the body and head retopologised -- just to see how much detail I will be preserving, and just to have a little more time to think how to do the hair. I will try not to project any details if I can, the teddybear texture maps were a trouble when rendering Beano project and I feel I need to get more familiar with the modelling basics anyway.
#animation student#ulvi#swim#final film#zbrush#wip#3d sculpting#3d modelling#original character#character design
3 notes
·
View notes