
partiallyartistic
Artistic Inspiratiionn, I guesss
307 posts
Don't wanna be here? Send us removal request.
Last Seen Blogs

nicolebluech
Nicole Blue
nicolebluech
Nicole Blue

chasingthebeatofmyheart-blog
Life Is A Song So SING IT!!

kikokus
do we really know the way the wind blows?

Photo


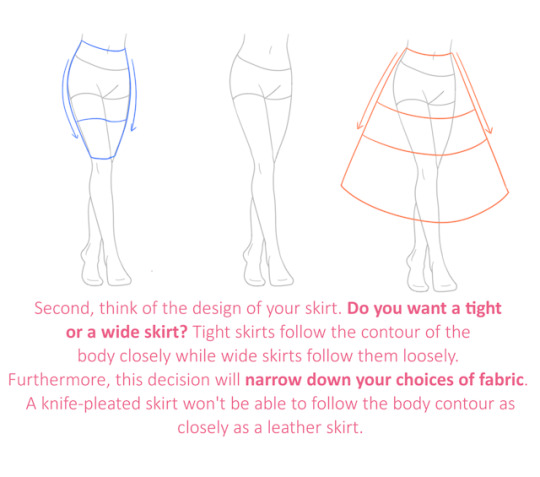


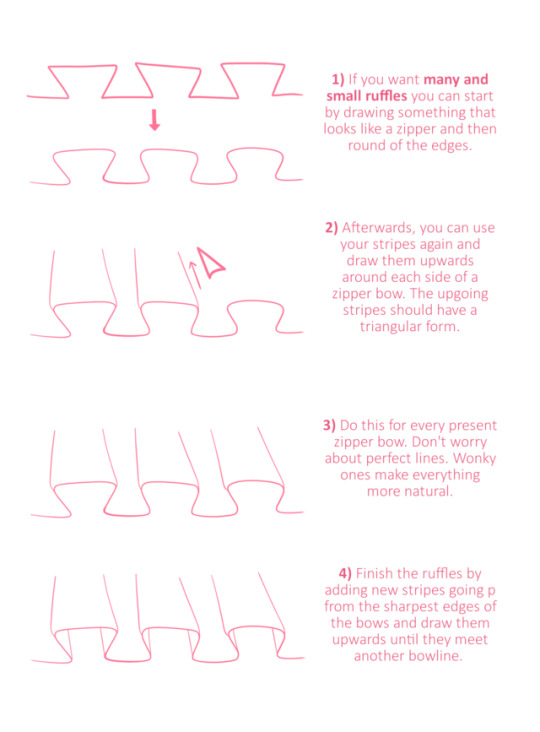
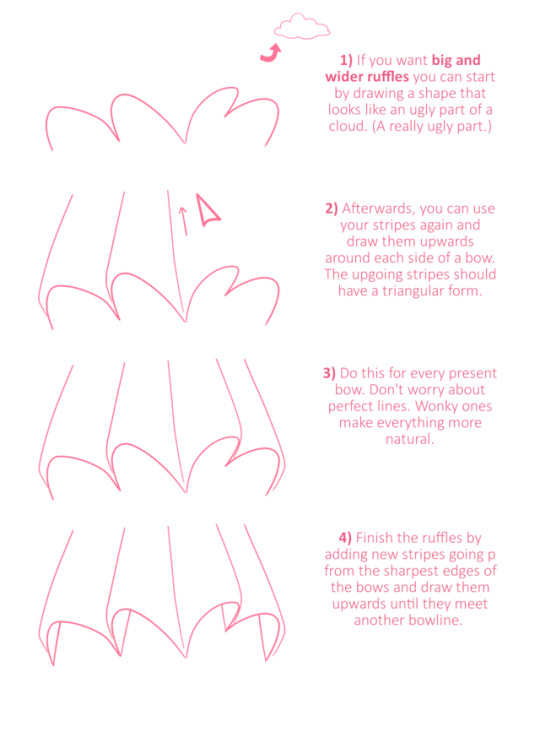


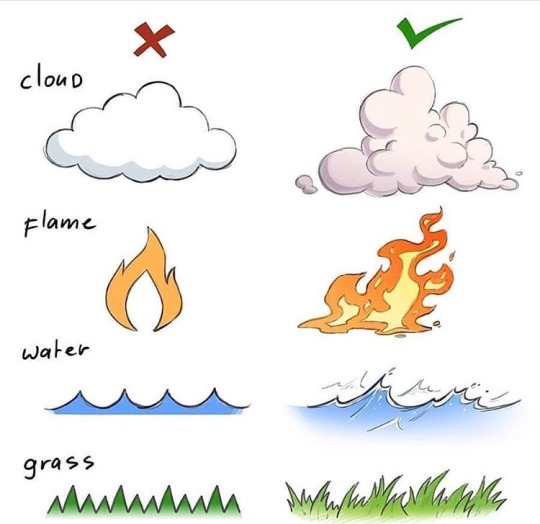
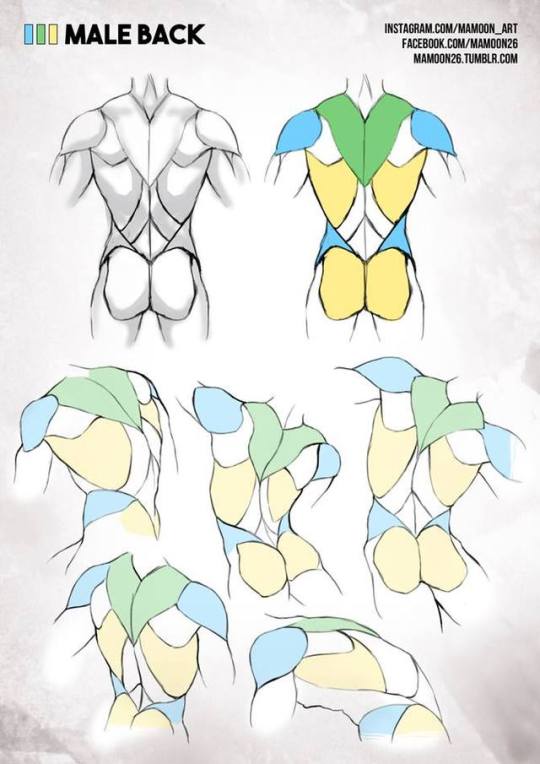
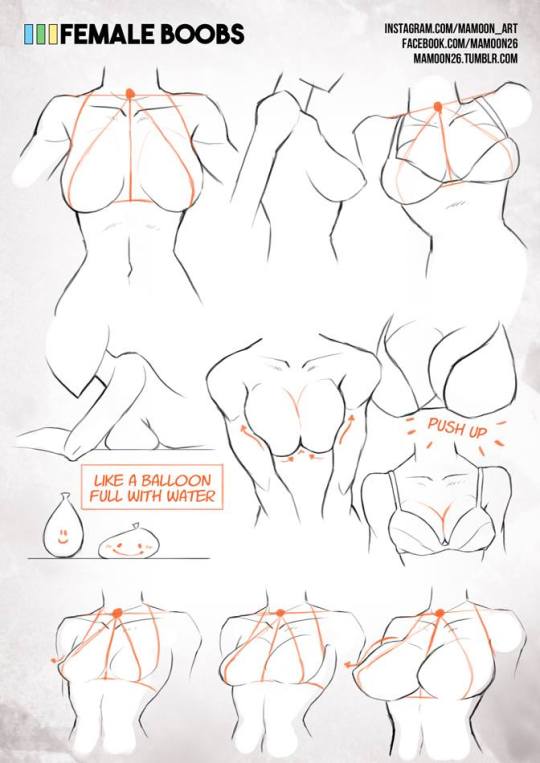
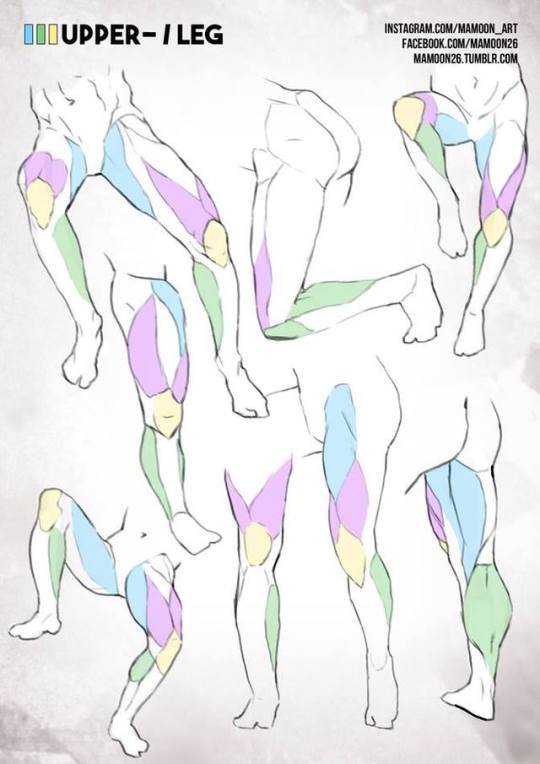
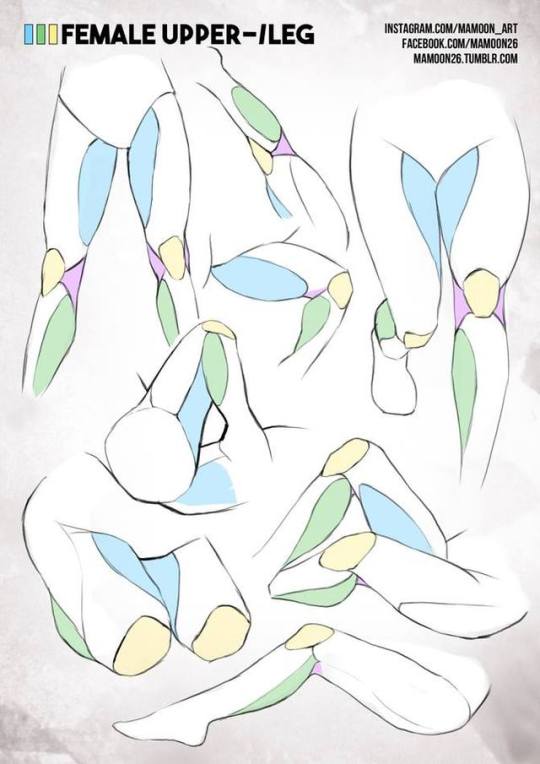
I am sorry for the delay! I hope this will be helpful!
30K notes
·
View notes
Photo


Some drawing tips previously posted on twitter.
More drawing tips on my patreon.
Hope some of these can be helpful.
81K notes
·
View notes


Photo


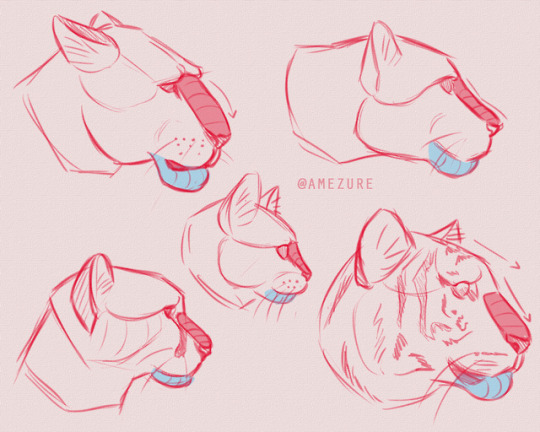
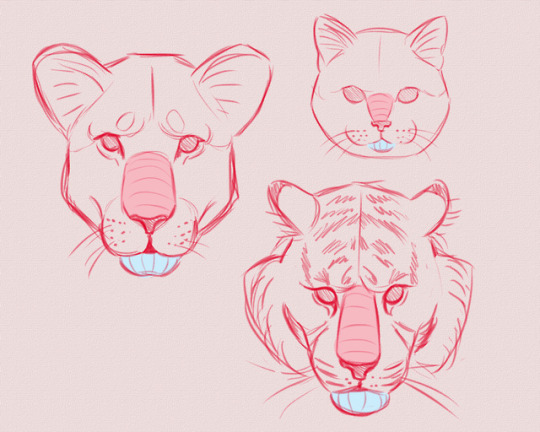
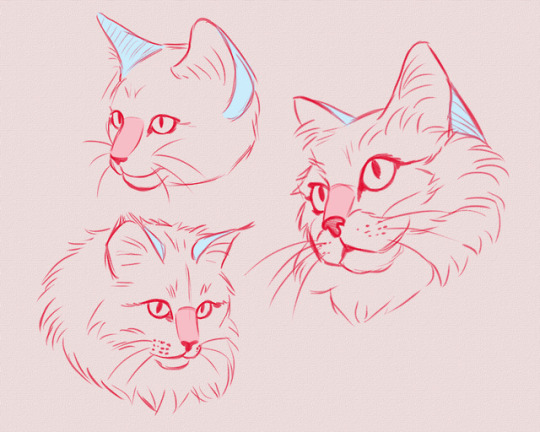
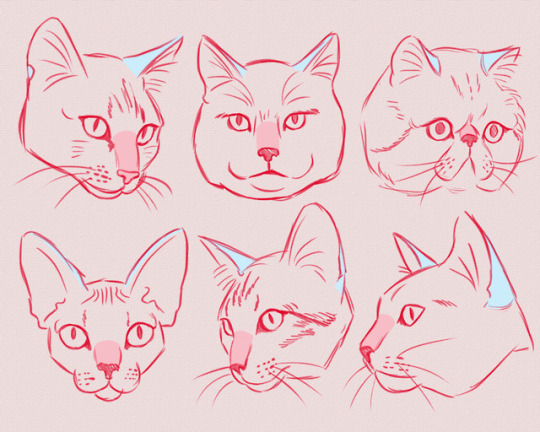
sometimes if i’m having trouble drawing certain head/body shapes of animals i practice by drawing over photos of them…..
i never share them though because i think it’s kind of silly….
39K notes
·
View notes

Photo


some puppies studies ( ͡° ͜ʖ ͡°) 🐶 | Instagram
(Edited) + more studies lkdafña
17K notes
·
View notes

Photo
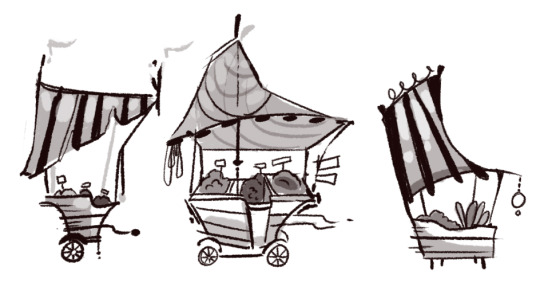


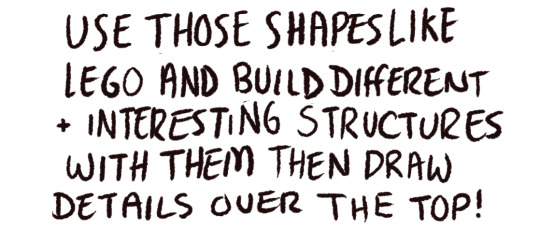
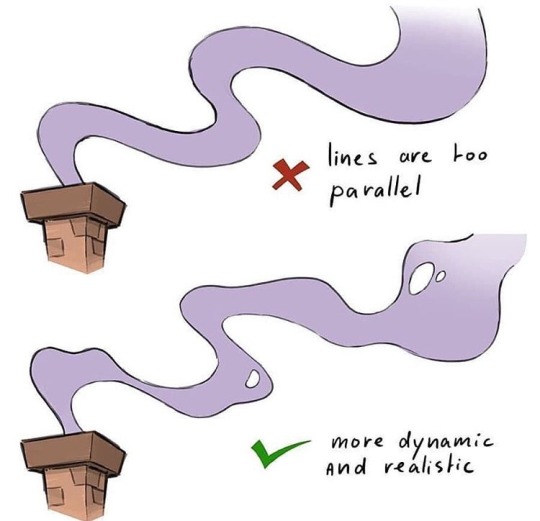
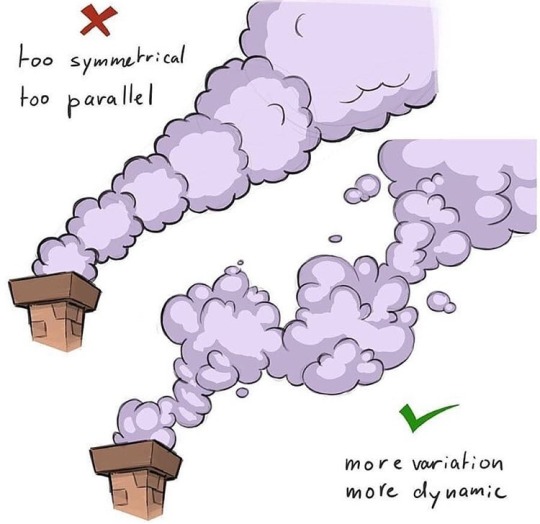
Much like my leaf/tree tutorial this is another crazy simple guide but it might help a few of you! I love to get a lot of thumbnail type ideas down first before I settle on something final so I like to use this quick method as a way of exploration, basic research into what I’m trying to achieve and a means of creating variety in my work (I hope!) On the flip-side I know a lot of people struggle with creating environments in general, this could be a good way to ease yourself into drawing them without getting too bogged down in details and technicalities, just blasting your ideas down onto a canvas!
30K notes
·
View notes
Photo

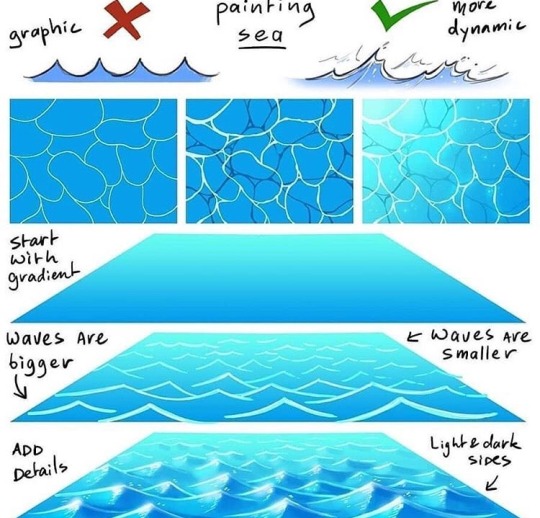
Tutorial: Graphic Shapes
Artist: Takumer Homma
873 notes
·
View notes
Note
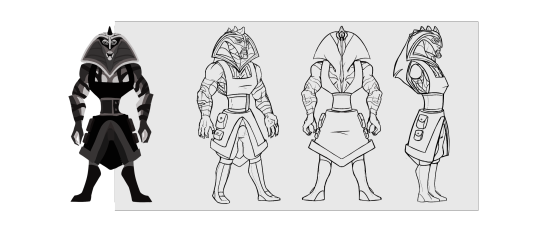
do you guys have anything to help doing character turnarounds? im currently drawing one and im really struggling with keeping intact proportions
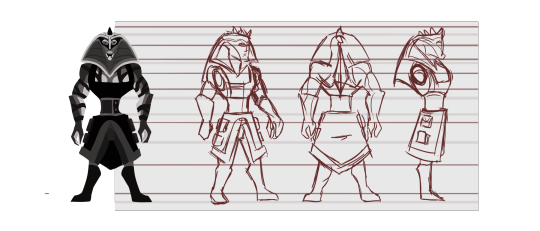
I’d daresay drawing a turn-around is one of the most difficult tasks in technical terms, when it comes to character design. The amount of precision and patience required to get everything just right can be a bother. But there are a few ways to go around it that might make it -less- of a drawl.

Step one, of course, is lying out your design. From rough drafts to finished design. However you do this is not all too relevant for the turn-around, but what is important is that you wind up with a draft that depicts the character as CLEARLY as possible.

When drawing your first image ( which will serve as a reference for your turn-around ), you might actually get away with splitting your character down the middle and flipping one of the halves. Just make absolutely sure that your facial features, such as nose, lips and eyes align perfectly with the facial structure, and that you’ve ironed out any anatomical kinks before flipping. This trick should be used with care, as it’s easy to dip into the uncanny valley. A way to help yourself is to only flip the shape of the body and main head structure, and draw the facial features manually.
Stick your first figure onto a canvas that will accommodate the number of models you ‘ll draw out. I’m going to be drawing four figures. In which one of them, the front figure, will be traced on top of the first image.
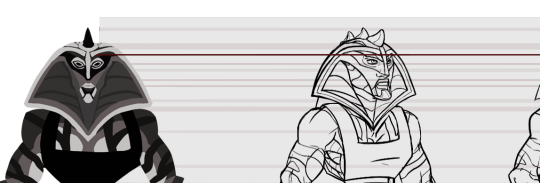
Before we start sketching, we need to map out pointers that can help us place details and structures correctly between the models/figures. We can do this by three sets of guidelines. Consisting of horizontal, straight lines.

^Primary guides
These lines map out the main physique of the character. Such as the top of the head, the jawline, the bottom of the ribcage, the peak breadth of the abdomen/hip, etc. These lines are drawn the thickest just for the sake of keeping everything distinguished. Do NOT dabble into details such as facial features, marks, or minute dents and ditches during this stage. Keep it simple and blocky.
^Secondary guides
You can start adding -slight- details here, but you’re still subsectioning your design into bite-sized chunks, so don’t do anything small and fidgety. The most key facial features such as eyes, the tip of the nose and mouth can be mapped out in this phase. These lines are of medium thickness.

^Tertiary guides
This is when you get to get all finnicy with your design. The tertiary guides can be used for anything that your secondary or primary guides have yet to map out. Sometimes you might have to divide your tertiary guides into two subgroups or more if your design is really detailed. Just remember to draw them the thinnest so you can tell them apart from the primary and secondary guides.
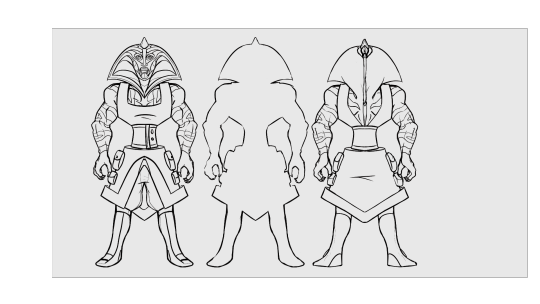
Mirroring is a common practice when doing turnarounds. Mirroring preserves precision and can be used to flip models and cut down the workload, as well as minimize small flaws in the turnaround. The front and the back is one of the most obvious models to mirror. As its our silhouette looks exactly the same from the front, as it does from the back when looked at without any kind of perspective going on. Duplicate your front-model and erase all the lines within the silhouette line. You now have a suitable outline for your back-model.
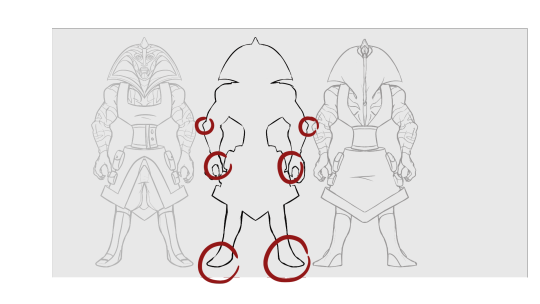
there are however some key features you still need to change in order to maintain consistency. Some parts of our body do not look the same from the back as they do from the front. Areas that stick out in 3D space, such as our feet, hands and elbows, needs to be redrawn so that they fit the new angle. This can be a bit of a fidgety job if you’re not all too comfortable making turnarounds yet, but in its essense, you are basically doing everything “ opposite” from the front model you drew.
When you’ve tinkered enough with your turnaround, you can remove the guidelines. During the process, always remember that you can add or remove lines as you please. But be careful with moving any guidelines, as it can disorientate you and cause inconsistencies in case you weren’t done using a specific guideline to implement a feature on all of your models.

Katla is property of Wackart
- Mod wackart ( ko-fi )
644 notes
·
View notes
Note
I’ve been wanting to do anatomy studies for a while now, but I don’t really know how or where to start. Do you have any advice or suggestions?
You could always find a generator of random poses online, stock photo or whatever and justm draw what they give you. Here are some links to different examples: X , X , X , X , X – and these were just the first five suggestions on google! There’s a lot of similar websites out there!
Another suggestion, one that I highly recommend, buy an anatomical book. My friend gifted this one to me and it’s great:

It’s got a whole bunch of content in it, just a glimpse at the table of contents:

They go step by step through each part of the body, give you the scientific break down and technical terms while also giving great advice on what to remember while drawing said thingThey;ve got a whole bunch great little images that really help you understand the movement of the body and the different ways it can be portrayed


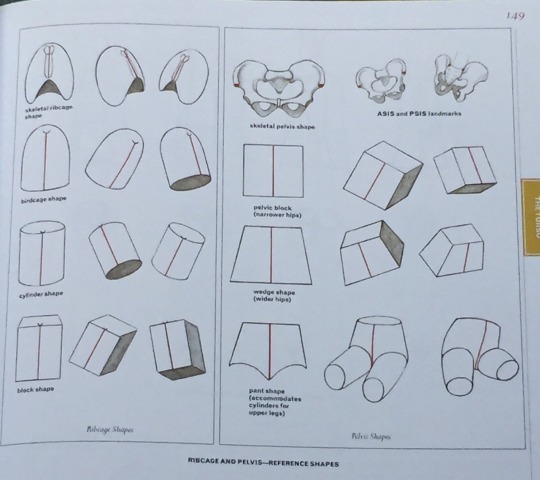

There’s 200+ pages of this type of stuff, I didn’t even put in a whole bunch of the text they’ve got written up besides all of these inforgraphics. You don’t have to get specifically this book, but this and books like these are definitely a good step in the right direction when you don’t have an actual person to study or just want to practice one thing a lot.
-Mod Blue
858 notes
·
View notes

Photo
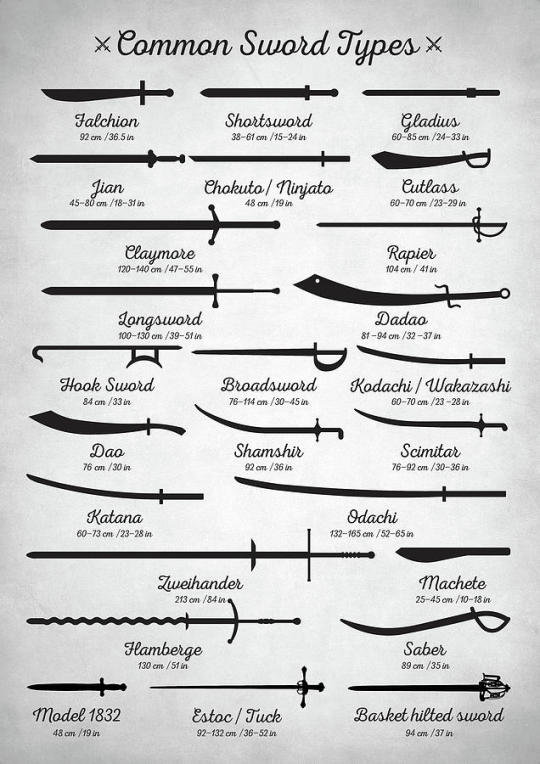
For all my writers struggling with weaponry of the sword variety.
78K notes
·
View notes
