Last Seen Blogs

femalefitnesshubb
Female Fitness Hub
diiavola
SHE // DEVIL

wowfoolsite
Untitled

detective-konon
Untitled
diiavola
SHE // DEVIL
Text
Assignment 3
Link to video: https://www.youtube.com/watch?v=wpcNiFcvBPQ&ab_channel=organizedchoassss
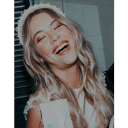
Rest in Peace Moni
Today, December 4th, marks the fifth anniversary of my sister Moni’s death. Moni was not only my sister, but my best friend. When she passed away I was completely heartbroken and didn’t know how to cope. I visited her grave all the time, hoping for some sort of closure, but it never seemed to help. Slowly as the years pass, I am learning to accept her death and see her in the beauty of nature. I decided to dedicate this assignment as a memoir to her and create a visualization of a poem that brings me comfort.
This video was created using Adobe Premiere Pro and explored the use of blend modes to combine a variety of video clips and audio files into one to create a metamedium. The video consists of me reading the poem “Do not stand at my grave and weep,” by Mary Elizabeth Fyre, played over two other audio files and several video clips. A few of these media files were my own and the others were sourced through the creative commons platform, Pexels. The audio clips were gradually faded into the video through the use of key frames. The video clips were transitioned into each other through applying keyframes to the opacity, gaussian blur effect, scale, and the cross dissolve effect.
Works Cited
Asko. Movement of Clouds Under Blue Sky. https://www.pexels.com/video/movement-of-clouds-under-blue-sky-in-timelapse-4754160/ Accessed 4 December, 2020.
Fyre, Elizabeth. Do Not Stand at My Grave and Weep. 1932. https://en.wikipedia.org/wiki/Do_Not_Stand_at_My_Grave_and_Weep Accessed 4 December, 2020.
Jonsa, Alex. Golden Wheat Growing in a Field. https://www.pexels.com/video/golden-wheat-growing-in-a-field-4312409/ Accessed 4 December, 2020.
Lacy, Kelly. A Group of Wild Ducks. https://www.pexels.com/video/a-group-of-wilds-ducks-paddling-at-a-lake-in-early-morning-3151436/ Accessed 4 December, 2020.
Miksanskiy, Ruvim. Drone View of a Winter Landscape. https://www.pexels.com/video/drone-view-of-a-winter-landscape-2081238/ Accessed 4 December, 2020.
Pujadó, Marc Corominas. Inner Reflection. https://stock.adobe.com/ca/Member/LicenseHistory Accessed 4 December, 2020.
Sanges, Honey. Shallow Focus of a Person in White Shirt. https://www.pexels.com/video/shallow-focus-of-a-person-in-white-shirt-raising-her-both-arms-5593371/ Accessed 4 December, 2020.
Varennikov, Dmitry. Stargazing on a Clear Starry Night. https://www.pexels.com/video/star-gazing-on-a-clear-starry-night-5382333/ Accessed 4 December, 2020.
0 notes
Text
Activity 8
Alpha Channel: this is any channel that doesn’t define colour values for pixels, but rather a specific area of an image/media file - so it is the fourth channel besides RGB. An alpha channel can be used to define transparency and edit elements in layers. These channels allow you to merge pixels together depending on how much of the background you wish to show through. Alpha compositing occurs when image elements are rendered in layers and then combined into a one image which can then be defined as the composite (Grey, “What is an Alpha Channel”).
Masking: refers to restricting editing/rendering of a particular area of an image/media file so that when edits are applied to the entire image, they aren’t applied to that particular area. Mask compositing allows you to combine mask layers into one layer and define which areas of the image are visible and which aren’t (“Mask Composite”).
Blend modes: are options available in digital editing software that control how layers are blended with each other. There are a variety of blend modes available allowing you to edit certain elements of one or many of the layers. With these blend modes you are able to apply different effects such as darkening, lightening, blurring, dissolving, colour burning and so much more (“Blending Modes”).
Keying: is an interesting compositing effect that allows you to make part of a video transparent. The part chosen to be made transparent is chosen based on colour or luminance; often the colour green is chosen to key because the green channel is the strongest channel and thus is the simplest for the software to process (“What is Keying”). Hence the term ‘green screen’. By keying you are essentially compositing two full frame elements into one by separating the visual information into values of colour and light (“Keying).
Link to Video Demonstrating Compositing Methods: https://www.youtube.com/watch?v=LgkW74o5atU&ab_channel=organizedchoassss
Works Cited
“Blending Modes.” Adobe, https://helpx.adobe.com/ca/photoshop/using/blending-modes.html. Accessed 29 November 2020.
Grey, Tim. “What is an Alpha Channel?” AskGreyTim, http://asktimgrey.com/2017/11/27/what-is-an-alpha-channel/. Accessed 29 November 2020.
“Keying.” Graphics.Fandom, https://graphics.fandom.com/wiki/Keying. Accessed 29 November 2020.
“Mask-Composite.” Tympanus, https://tympanus.net/codrops/css_reference/mask-composite/. Accessed 29 November 2020.
“What is Keying?” Lynda, https://www.lynda.com/After-Effects-tutorials/What-keying/490768/531675-4.html#:~:text=Keying%20is%20when%20a%20special,luminance%2C%20or%20even%20a%20mask. Accessed 29 November 2020.
0 notes
Text
Activity 7
Link to video: https://www.youtube.com/watch?v=bJ1MxCH4pyk&ab_channel=organizedchoassss
With this video I wanted to play around with repetition and arrangement. I ordered the frames so that every second would alternate from a frame with a person to a frame with the panda. Also, I reversed the order of the panda clips, so while I left the human clips in chronological order, with the panda clips I placed them in a reversed order; placing the last panda clip first in between the human clips and the first panda clip last. I think the final result is entertaining and a fun take on video experimentation and recutting.
0 notes
Text
Activity 6
Deep remixability is the ability to rework or remix media by using a variety of techniques, methods, content and ways of expression. The combination of these techniques creates a new metamedium that is unique from any other in the sense that it is now a hybridization of different ‘languages’ (Manovich 6).
Variable form refers to the visual, temporal, spatial, and interactive data as a set of variables; for instance when a new object is added to a frame it will appear in an animation software as a long list of variables. These variables may include colour, geometric position, etc., and are assigned their own channel - allowing users to manipulate the different variables (Manovich 10).
Continuity turn describes the shift from constants to continuously changing variables. It is the idea of creating a repeatedly transforming visual form through software based representations (Manovich 13).
Metamedium is the result of combining any number of different mediums together to create one single medium. The result of this new metamedium may use various methods from each of the mediums. With the different mediums combined into the metamedium, we are able to see that they interact in unpredictable manners (Manovich 7).
Example of digital media that fits: Kali Uchis - After The Storm music video: https://www.youtube.com/watch?v=9f5zD7ZSNpQ&ab_channel=KaliUchisVEVO
This music video displays variable form in the sense that in some frames only certain aspects of the scene are altered such as the colour, or transparency. Also, the moving graphic on the cereal box at the start of the video is an example of a metamedium as it has combined cartoon imagery with realism to create a new medium. The video as a whole is an example of deep remixability as it uses a variety of expression forms and media techniques to produce one final work.
Works Cited
Manovich, Lev. "Understanding hybrid media." Hertz (Ed.), Animated Paintings. San Diego: San Diego Museum of Art (2007). https://learn.uwaterloo.ca/d2l/le/content/596232/viewContent/3159116/View Accessed 16 November 2020.
Uchis, Kali. “Kali Uchis - After The Storm ft. Tyler, The Creator, Bootsy Collins (Official Video).” Youtube. https://www.youtube.com/watch?v=9f5zD7ZSNpQ&ab_channel=KaliUchisVEVO. Accessed 16 November 2020.
0 notes
Text
Assignment 2
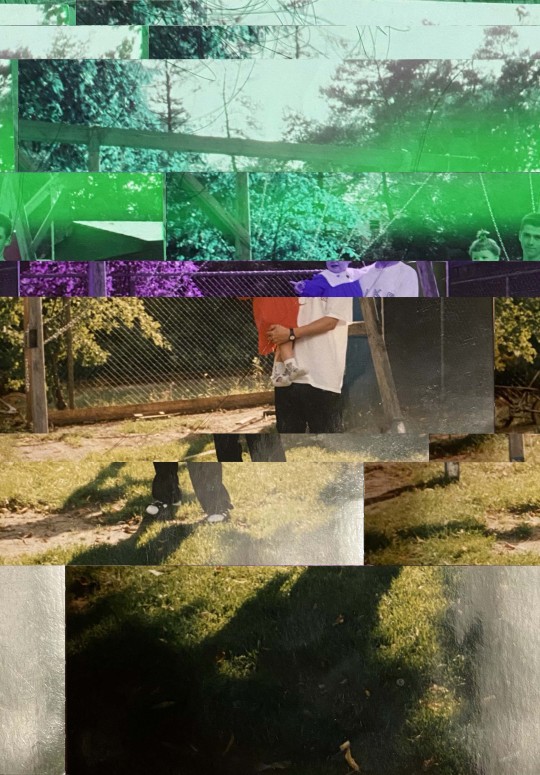
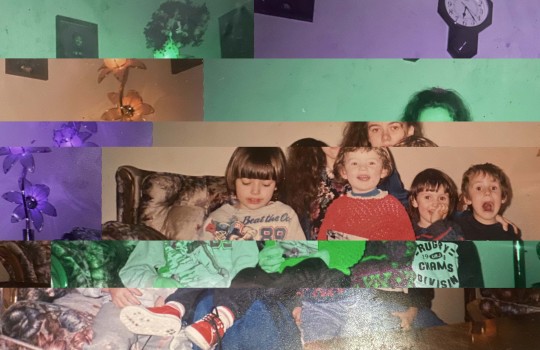
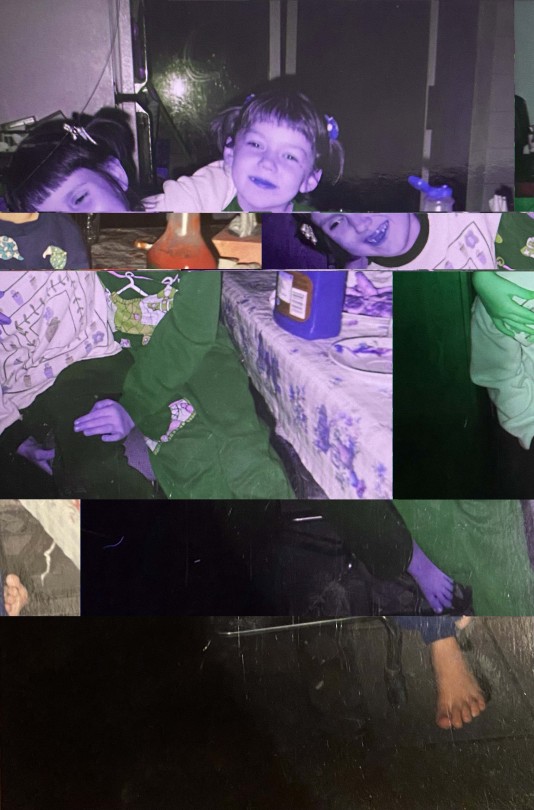
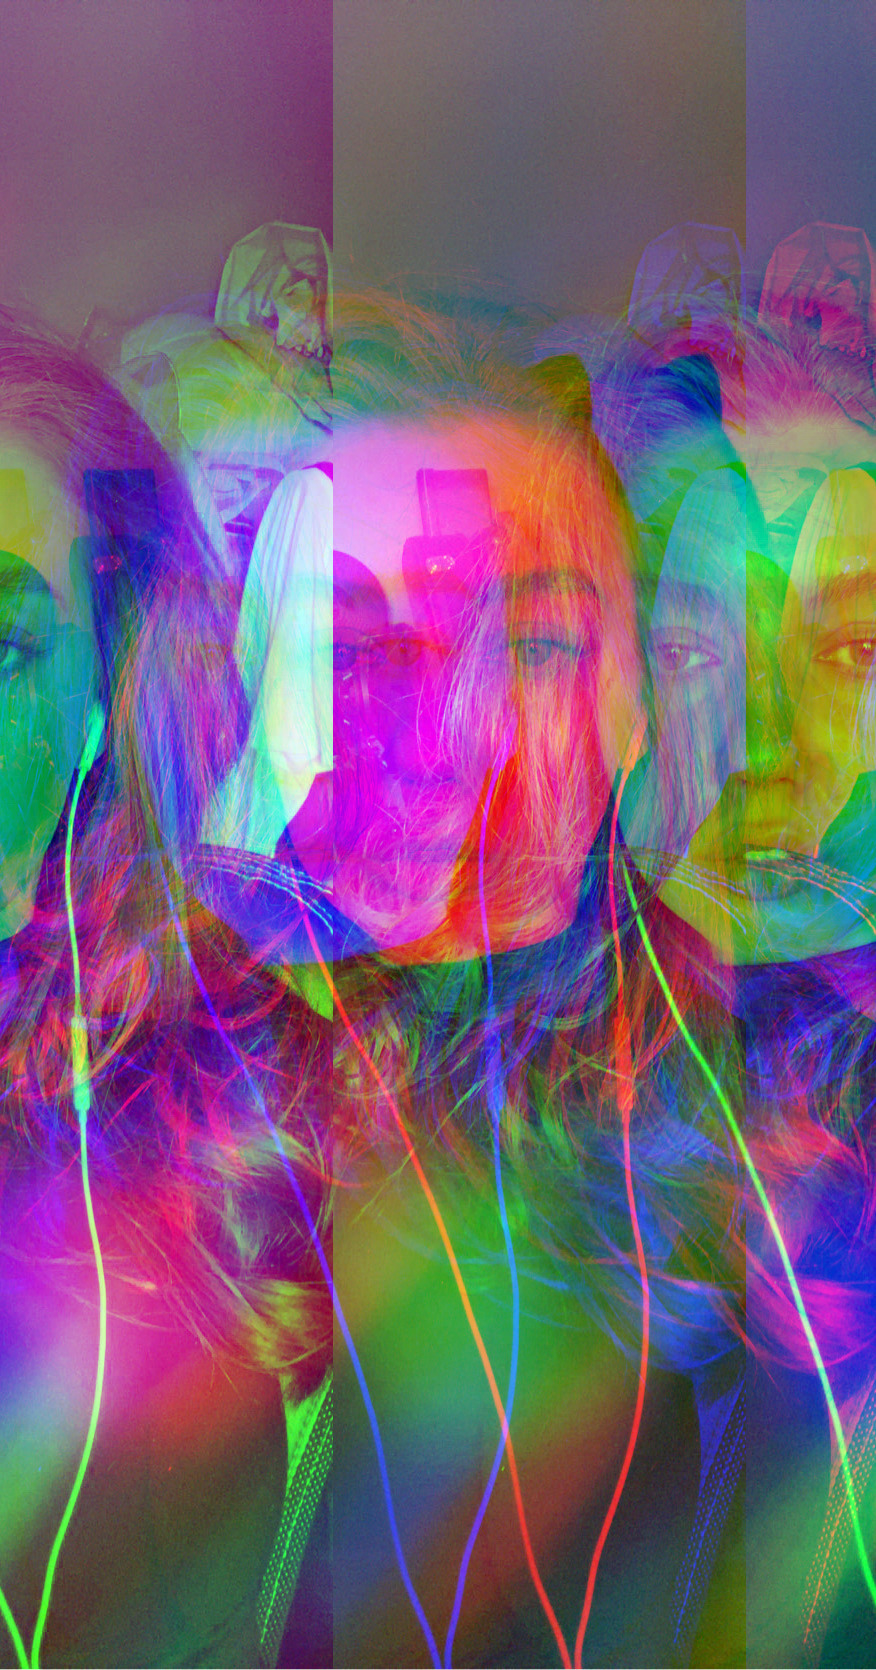
A Distorted Childhood
I was born into a large family of twelve siblings of which I was the twelfth child, ie. the second youngest child, and the youngest daughter. My childhood was pleasant and happy at times, but for the most part when I think back onto my childhood, I recall memories that are rather dark and depressing. As one of thirteen children, I recall feeling extremely lonely, forgotten, and unimportant growing up. Despite these feelings, I always put on a happy face so as to not bring any disappointment or worry onto my parents.
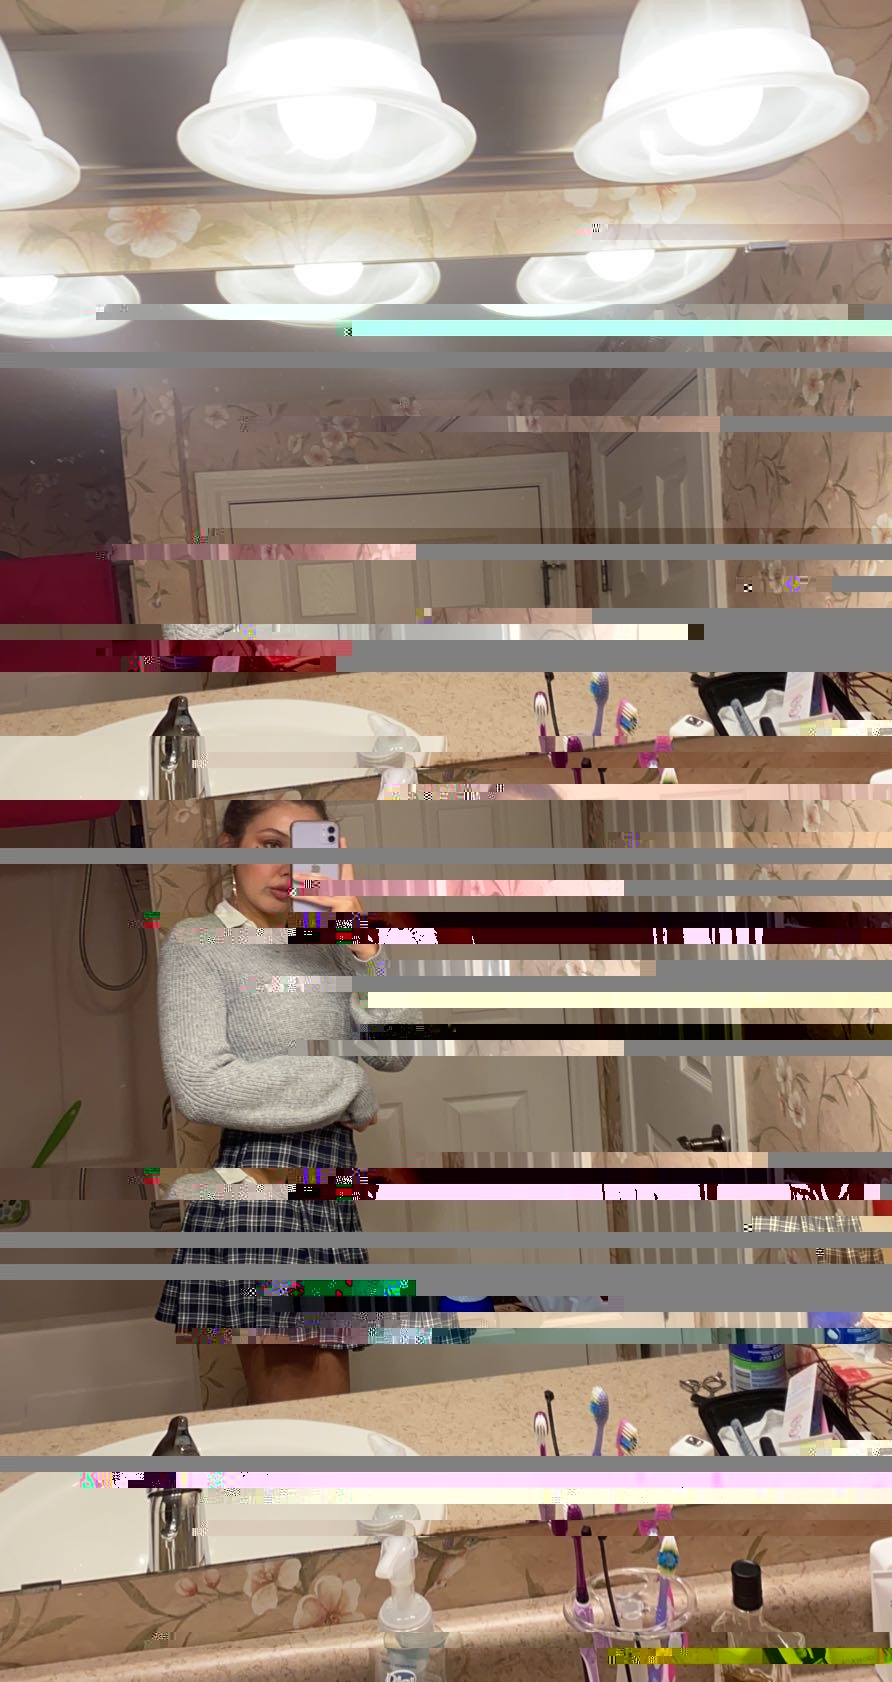
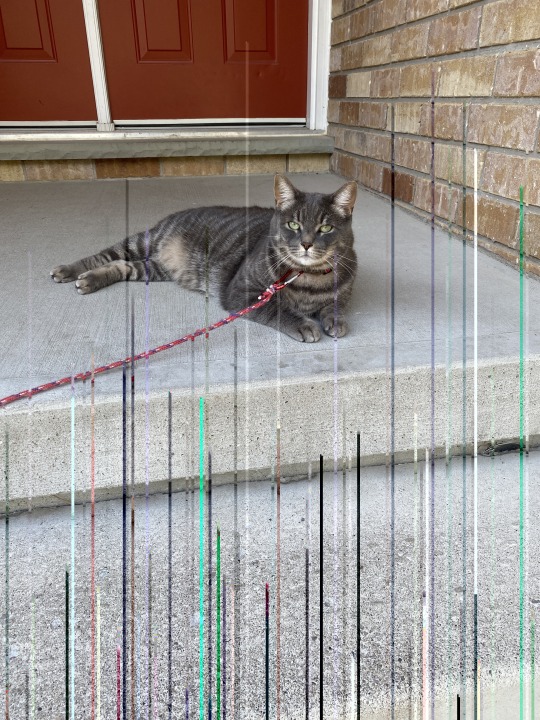
This series consists of three of my childhood photos that have been glitched using symbolic methods. The images I chose capture a few of my favourite childhood memories with my siblings. I glitched these images to display distortion and chaos of seemingly innocent childhood images. Each of the photos is glitched by inserting a different famous poem about a somber childhood into the text format of the image. Each of the poems are inserted twelve times into each image, representing my twelve siblings, and that I am my parents twelfth child. The poems I chose reflect how I felt growing up in a large family. Further, I replaced the number twelve with the number zero in the text format; this is to represent the notion that I often felt invisible as the twelfth child. Although the photos were glitched using different poems, the final products work as a trio as they all display similar glitched colour and chopping patterns.
Method:
1. Open the image with TextEdit and insert the poem randomly into the text by inserting it into random sections of the text, also by replacing large portions of the text with the poem.
2. Repeat Step 1 until you have inserted the poem a total of 12 times. Save the file each time after you have inserted the poem and open the image file on your desktop to ensure that you have not broken the file.
3. Press Command + F to open up the find and replace toolbar. In the Find column enter 13, and in the Replace column enter 0, and press Enter on your keyboard.
Poems:
1. Merrill, James. The World and the Child. 1926. http://thevillanelle.blogspot.com/2009/05/world-and-child.html. Accessed 6 November, 2020.
2. Atwood, Margaret. A Sad Child. 2003. http://famouspoetsandpoems.com/poets/margaret_atwood/poems/347.html. Accessed 6 November, 2020.
3. Vaughan, Henry. The Retreat. 1622. https://interestingliterature.com/2016/10/a-short-analysis-of-henry-vaughans-the-retreat/. Accessed 6 November, 2020.
0 notes
Text
Activity 5
1. Alterity: Alterity refers to a state of other or being different - anything that goes beyond a subject’s grasp (“Alterity”). In postmodernism cultural theory, alterity can be defined as something that is radically distinct. In existentialist discourse, it can be defined as a sense of alienation from other people (“Alterity”). Essentially, alterity refers to anything that does not fit with traditions or conventions.
Indexicality (in relation to Digital images): Charles Peirce describes indexicality as the connection between photographs and reality (Seung-hoon, “Para-Indexicality of the Cinematic Image”). Peirce argues that paintings are different from photographs because a photo’s indexicality proves that the subject matter in the photo was indeed real. CGI and other visual manipulation softwares often seek to re-embody this form of indexicality (Seung-hoon, “Para-Indexicality of the Cinematic Image”).
Symbolism: This is the act of using visuals or words to describe an idea. For instance colours have different symbolic meanings depending on the the culture, ie. The colour black in North American societies symbolizes death or formality. Symbols are often used in art, literature, and films to hint at or imply abstract ideas.
Identity: This is the way in which someone or something is defined by. Identity can be made up of attributes, qualities, beliefs, sexual orientation, social status, etc. It is unique to each object and individual and can be interpreted differently by each person. For instance, the way in which I describe my identity will differ from the way in which you would identify me as.
3. I followed Meena’s tutorial on RGB Channel Shifting with a twist.
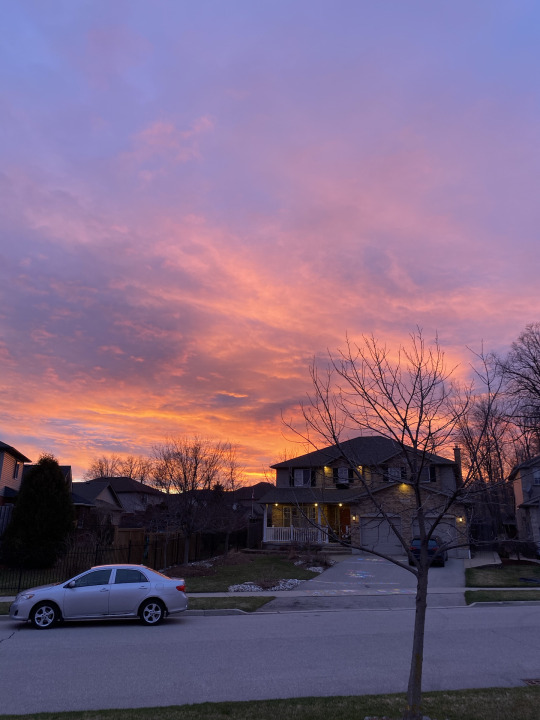
Original Image:
Glitched Image:
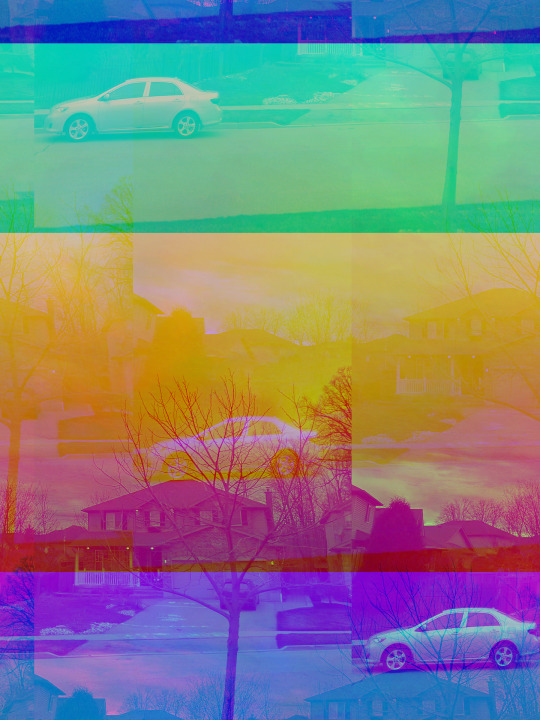
4. Now that the image is glitched it demonstrates complete alterity. In the original image, the emphasis was on the vivid sunset, however, in the glitched image, we can hardly notice the sunset. The focus is rather on the blocky colour patterns. The car clones placed throughout the image enforce the indexicality of a suburban landscape scene. The repetitive subject matter along with the colour gradients could symbolize the rhythm of life, progressing from one stage to another. The glitched image is no longer identified as a pretty sunset photo, but rather an interesting colourful suburban scene displaying movement and rhythm.
Works Cited
“Alterity.” Oxford Handbooks Online, 4 July 2019, www.oxfordhandbooks.com/view/10.1093/oxfordhb/9780198803157.001.0001/oxfordhb-9780198803157-e-43. Accessed 30 October, 2020.
Jeong, Seung-hoon. “The Para-Indexicality of the Cinematic Image.” Rivista Di Estetica, Lexis Sas, 30 Nov. 2015, journals.openedition.org/estetica/1640. Accessed 30 October, 2020.
0 notes
Text
Activity 4
Method 1: MAC, Using Text Edit - Reference: Nick Briz, Glitch Codec Tutorial
Steps:
1. Save an image in the form of a jpeg onto your desktop.
2. Duplicate this image to have a copy.
3. Click to open the jpeg, it should open in Preview.
4. Open the jpeg using TextEdit by right-clicking and selecting Open With. Once open you should see a bunch of text open in the notepad.
5. Alter this text by removing characters, adding characters, and copy-and-pasting characters.
6. Save the file in TextEdit in its original format (jpeg).
7. Click on the jpeg file that’s open in Preview to view your glitched method.
8. Repeat steps 5-7 until you achieve the desired glitched affect.
Method 2 : MAC, Using Hex Fiend - Reference: https://www.youtube.com/watch?v=tKWvv92W7lc
Steps:
1. Save an image in the form of a .jpeg onto your desktop.
2. Duplicate this image to have a copy.
3. Click to open the jpeg, it should open in Preview.
4. Open the jpeg in the Hex Fiend by clicking and dragging the .jpeg file directly on top of the Hex Fiend application and releasing the mouse. The hex-editor should open up the jpeg in code format. So you should see several columns with numbers and letters.
5. Edit the code in the hex-editor by pressing Command + F on your keyboard to open up the find and replace toolbar. In the Find column enter B, and in the Replace column enter A, finally press Enter on your keyboard.
6. Go up to the top toolbar and click File and then Save.
7. Click on the jpeg file that’s open in Preview to view your glitched image.

Method 3: MAC, Using Audacity - Reference: https://www.youtube.com/watch?v=ypcV1UHRyP0&ab_channel=SinixDesign
Steps:
1. Save a video in the form of a mov. file onto your desktop.
2. Duplicate this video to have a copy.
3. Open the .mov file in Audacity by clicking File, Import, Raw Data. Select your video and click Open. An Import Raw Data window should open. Change the Encoding to A-Law, Byte order to Big-endian, and Channels to 1 Channel (Mono) and then click Import.
4. Place your mouse at the start of the video and drag to about 1.5.
5. Go up to the top toolbar and select Effect, then Echo. An Echo window should open. Change the Delay time (seconds) to 0.6 and click OK.
6. Export your video by clicking File, then Export As WAV. Change the File type to Other uncompressed files, the Header to RAW (header-less), and the Encoding to A-Law. Edit the Save As to read as the name of your video followed by .mov and click Save.
7. Click Yes or Continue to all the windows that pop up afterwards.
Link to glitched video below:
https://vimeo.com/user125144758/review/468624746/967d8d0de0
Method 4 (this method didn’t work for me): MAC, Using Audacity - Reference: https://www.youtube.com/watch?v=ypcV1UHRyP0&ab_channel=SinixDesign
Steps:
1. Repeat steps 1-5 from Method 3.
2. Import an audio file into Audacity by clicking File, Import, Raw Data. Select your audio file and click Open. An Import Raw Data window should open. Change the Encoding to A-Law, Byte order to Big-endian, and Channels to 1 Channel (Mono) and then click Import.
3. Place your mouse at the start of the audio and drag to about 1.5.
4. Go up to the top toolbar and select Effect, then Amplify. An Amplify window should open. Move the Amplification slider down to the left to about -25.0 then click OK.
5. Go up to the top toolbar and select Tracks, then Mix and Render.
6. Export your video by clicking File, then Export As WAV. Change the File type to Other uncompressed files, the Header to RAW (header-less), and the Encoding to A-Law. Edit the Save As to read as the name of your video followed by .mov and click Save.
7. Click Yes and/or Continue to all the windows that pop up afterwards.
Method 5: MAC, Using Audacity - Reference: https://www.youtube.com/watch?v=ypcV1UHRyP0&ab_channel=SinixDesign
Steps:
1. Repeat steps 1-3 from Method 3 except import a jpeg file rather than a mov file.
2. Place your mouse at the start of the blue bar and drag to select a section of the video.
3. Go up to the top toolbar and select Effect, then Echo. An Echo window should open. Change the Delay time (seconds) to 85 and click OK.
4. Place your mouse at a different part on the blue bar and drag to select a section.
5. Go up to the top toolbar and select Effect, then Change Pitch. Change the number next to D#/Eb to 8 then click OK.
6. Export your image by clicking File, then Export As WAV. Change the File type to Other uncompressed files, the Header to RAW (header-less), and the Encoding to A-Law. Edit the Save As to read as the name of your image followed by .jpeg and click Save.
7. Click Yes and/or Continue to all the windows that pop up afterwards.

Method 6 (this method didn’t work for me): MAC, Using Audacity - Reference: https://www.youtube.com/watch?v=z3lzL2QjbUE&ab_channel=PVAGlue
Steps:
1. Repeat steps 1-2 from Method 5.
2. Go up to the top toolbar and select Effect, then Echo. An Echo window should open. Change the Delay time (seconds) to 6 and click OK.
3. Place your mouse at a different part on the blue bar and drag to select a section.
4. Go up to the top toolbar and select Effect, then Fade Out.
5. Import a second image into audacity and repeat steps 1-4.
6. Go up to the top toolbar and select Tracks, then Mix and Render.
7. Export your image by clicking File, then Export As WAV. Change the File type to Other uncompressed files, the Header to RAW (header-less), and the Encoding to A-Law. Edit the Save As to read as the name of your image followed by .jpeg and click Save.
8. Click Yes and/or Continue to all the windows that pop up afterwards.
Method 7: MAC, Using Photoshop- Reference: https://www.youtube.com/watch?v=ypcV1UHRyP0&ab_channel=SinixDesign
Steps:
1. Save an audio file in the form of a raw file onto your desktop by renaming the file to end in .raw rather than it's original format.
2. Open this file in Photoshop. A grey pixelated image should appear - this is what your audio file looks like in the form of an image.
5. Add a new Text layer and enter some large text on top of your image.
6. Save your photoshop file in the format of a .bmp on your desktop. Click OK on the following window that appears.
7. Change the file format from .bmp to .mp3 by renaming the file on your desktop to end in .mp3.
Link to audio file below.
https://soundcloud.com/user18421925/fine-229-activity-4-glitch-7
Method 8: MAC, Using Audacity and TextEdit. Reference: https://www.youtube.com/watch?v=z3lzL2QjbUE&ab_channel=PVAGlue
Steps:
1. Save an image in the form of a .bmp onto your desktop.
2. Duplicate this image to have a copy.
3. Import this bmp file into Audacity by clicking File, Import, Raw Data. Select your image file and click Open. An Import Raw Data window should open. Change the Encoding to A-Law, Byte order to No-endianness, and Channels to 1 Channel (Mono) and then click Import.
4. Export your image to your desktop by clicking File, then Export As WAV. Change the File type to Other uncompressed files, the Header to RAW (header-less), and the Encoding to A-Law.
5. Open the .raw file you saved on your desktop using TextEdit by clicking Open With, Other, and then TextEdit.
6. In TextEdit, scroll to about the middle of the text and insert a few lines of characters.
7. Save the file.
8. Import this raw file into a new Audacity file by repeating step 3.
9. Export your file by clicking File, then Export As WAV. Change the File type to Other uncompressed files, the Header to RAW (header-less), and the Encoding to A-Law. Edit the Save As to read as the name of your image followed by .bmp and click Save.
10. Click Yes and/or Continue to all the windows that pop up afterwards.
Method 9: MAC, Using Processing. Reference: http://datamoshing.com/2016/06/29/how-to-glitch-images-using-rgb-channel-shifting/?fbclid=IwAR1xnI350eZNn8aVsRj3eKEY1qUziH5X4zvTa8Kzh9RHzJKbAKgR3XkSpro
Steps:
1. Install the Processing application onto your computer.
2. Download the channel shifting script from the reference link above, you will input this script into Processing.
3. Save a .jpeg file in the same location as the downloaded script file.
4. Open Processing and load the downloaded script by going up to the top toolbar and clicking File, Open and then navigate to the ChannelShiftGlitch.pde.
5. Change line 17 and 18 of the script to point to the .jpeg file you saved in the same location as the downloaded script file.
6. Click on the circular play button near the top left of the window, it should say Run. A window should appear with the glitched image if the script run was successful.
7. Navigate to where you saved your original .jpeg file and you should see a new file in the form of a .png. This is your glitched image.
Method 10: MAC, Using Processing. Reference: http://datamoshing.com/2016/06/16/how-to-glitch-images-using-processing-scripts/
Steps:
1. Repeat Method 9 except with the script from the reference link above.
Method 11: MAC, Using Processing. Reference: http://datamoshing.com/2016/06/16/how-to-glitch-images-using-pixel-sorting/
Steps:
1. Repeat Method 9 except with the script from the reference link above.
Method 12: MAC, Using Photoshop and TextEdit. Reference: https://learn.uwaterloo.ca/d2l/le/content/596232/viewContent/3159125/View
Steps:
1. Save an image in the form of a .jpeg onto your desktop.
2. Duplicate this image to have a copy.
3. Open your image in Photoshop.
4. Save the image in the form of a TIFF onto your desktop.
5. Open this .tif file in TextEdit and edit the text by cutting and pasting in random sections, and adding and removing characters.
6. Save the file in TextEdit.
7. Reopen this saved file in Photoshop. A few error windows may appear, bypass these by clicking OK.
8. You should now be able to see your glitched image. Export this as a .jpeg onto your desktop.

0 notes
Text
Activity 3
1. Datamoshing involves editing and manipulating the data of video, audio or other media files to alter the visual and auditory result when it's file is decoded (“How to Datamosh Videos”). The effect created when this process is applied to a video file results in moving images being moshed together. Datamoshing is used to create glitch effects through either corrupting, removing or replacing I-frames so P-frames can be applied to the ‘wrong’ picture (“What is Datamoshing”). The datamosh effect is popular in the music culture as scene in Drake’s “Hotline Bling”, music video.
2. Data-bending/ image bending is the process of altering the data of a file in a software application that it is not originally intended for (Briz, “Databending 101”). This is easily achieved by altering the data of an image file in a text editor to create glitches in the image file. Data-bending or image-bending is a relatively simple method to create glitch art.
3. Glitch-a-like vs. “Natural glitch” A natural glitch occurs as the result of a human error causing a computer to unexpectedly malfunction (Moradi, “GTLCH Aesthetics”). These ‘pure’ or ‘natural’ glitches occur accidentally and are often perceived as mistakes or errors in the file. Glitch-a-likes produce similar results as natural glitches; however, they are intentionally created by glitch artists and do not occur by accident. Glitch-a-likes are created to resemble the visual effect of pure glitches. They are deliberate, designed and artificial whereas natural glitches are accidental, found, and real (Moradi, “GTLCH Aesthetics”).
4. Pixel Sorting is the process of altering the positions of pixels in an image to create a glitched image (“How to Glitch Images”). This method involves taking a horizontal or vertical line of pixels and sorting the positions of the pixels. The pixels may be sorted based on different factors such as luminosity or hue. Pixel sorting is most commonly achieved through computer scripting or programming (“How to Glitch Images”).
5. Hardware-Bending also known as circuit-bending, is the process of short-circuiting the hardware of an item to cause it to malfunction and result in a glitch (Hammer, “Crafting Malfunction”). This is commonly done to battery-powered toys, sound mixing software, video cameras etc. This method of creating glitches allows the artist to have creative control with the object at hand.
Works Cited
Briz, Nick. “Databending: the Foundations of Glitch Art.” Databending: Raw Data, nickbriz.com/databending101/databending.html. Accessed 13 October 2020.
Hammer, Steven. “Crafting Malfunction: Rhetoric and Circuit-Bending.” Harlot, www.harlotofthearts.com/index.php/harlot/article/view/261/173. Accessed 13 October 2020.
“DataMoshing: Learn How to Create This Viral Effect.” RocketStock, 30 June 2017, www.rocketstock.com/blog/datamoshing-learn-create-viral-effect/. Accessed 13 October 2020.
“How to Datamosh Videos with Data Corruption.” Datamoshing, 12 Feb. 2017, datamoshing.com/. Accessed 13 October 2020.
“How to Glitch Images Using Pixel Sorting.” Datamoshing, 16 June 2016, http://datamoshing.com/2016/06/16/how-to-glitch-images-using-pixel-sorting/ Accessed 13 October 2020.
Moradi, Iman. “GLTCH Aesthetics.” School of Design Technology, 2004. http://www.organised.info/wp-content/uploads/2016/08/Moradi-Iman-2004-Glitch-Aesthetics.pdf Accessed 13 October 2020.
1 note
·
View note
Text
Assignment 1
Christina Rusu
20577730
FINE 229
Assignment 1
October 2, 2020
A City at What Cost
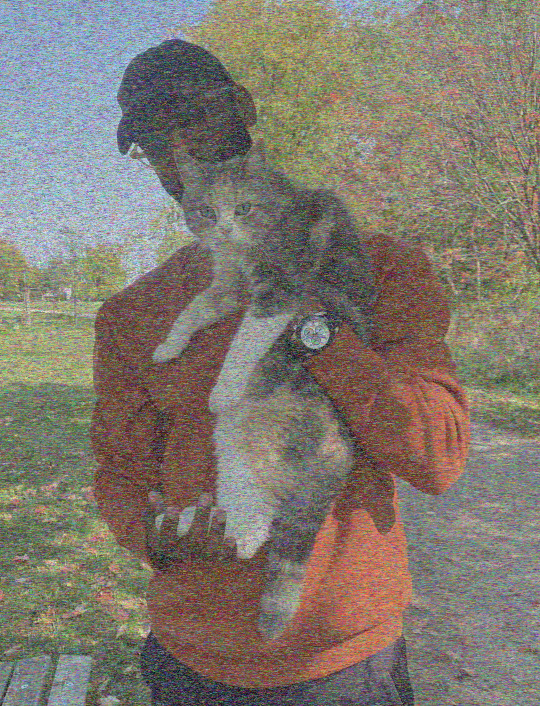
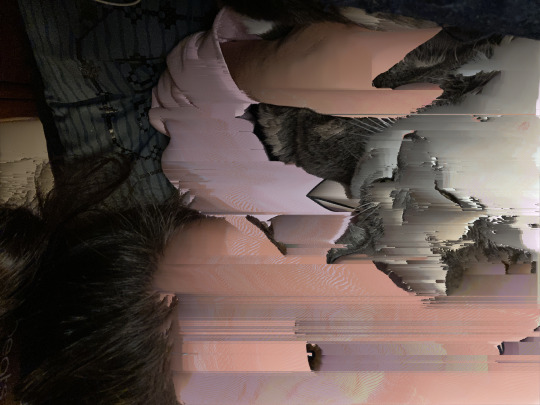
Urbanization comes with the price of environmental degradation. It’s easy to admire a city’s structure and forget the natural landscape that was destroyed in the city’s creation process. While infrastructure is necessary to accommodate for population and economic growth, it’s also important to preserve the natural environment at all costs. As you visit cities, consider the number of trees, fields, and ecosystems that were sacrificed for the buildings you see before you. The architecture of these buildings may be beautiful and the buildings themselves may hold great value for the success of the city, but at what point will we consider the environmental exploitation that needed to take place in order for these buildings to stand.
These two gifs are linked conceptually and display the relationship between urbanization and nature. The gifs were created using techniques learned in Activity 2 of Module 1. The photographic gif is created in the form of a wigglegram to emphasize the scale and size of the buildings and how they dominate this particular intersection in Uptown Waterloo. The images for this gif were taken at an elevated angle to capture the variety of stores seen in these corner buildings. The location of Uptown Waterloo was chosen for these images as this is often considered one of the most aesthetically pleasing places to visit in Waterloo in terms of urban design. The illustrated gif is created in the form of a walk cycle to display the repetitive tree-cutting action. This gif was animated with soft brush tools and muted colours as to draw emphasis to the action rather than the illustrative details.
0 notes