
Last Seen Blogs

cwtennriku
CWTennRiku
cwtennriku
CWTennRiku

ultimctegamer-blog
╳┊A BRIGHTER FUTURE

redlipassassin
Redlipassassin
redlipassassin
Redlipassassin
Photo

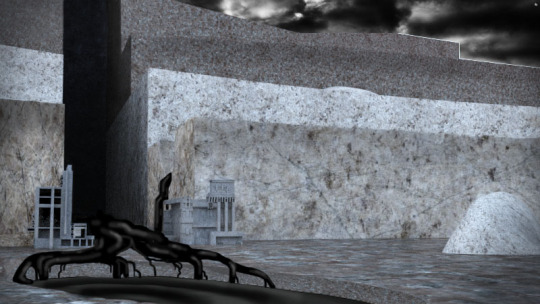
Vignette Perspective
I didn't have access to V-Ray for this project, but I’m quite happy with the final result of this vignette. I used collaging techniques in Photoshop and my goal was to highlight the rugged landscape and natural stone landscape. I was particularly happy with the background sky. The yellow gave a warmth to the entire photo and was overlayed with the rock to create a convincing warm tone.
5 notes
·
View notes
Photo


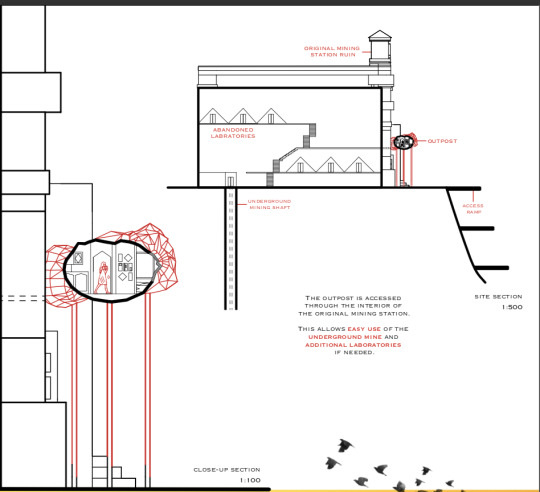
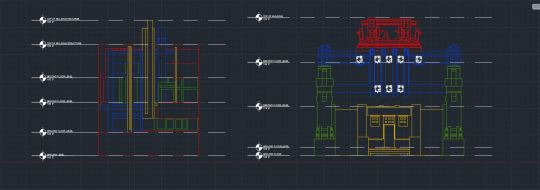
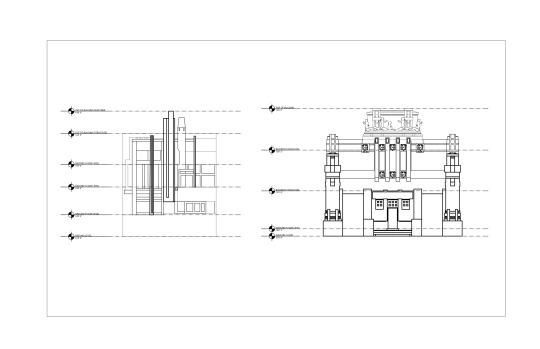
Lastly, the additional required line drawings:
- Site Plan of the outpost with all pertinent information
- Interior Plan of the outpost
- 2 sections at 1:500 and 1:100
Provided 2 different scales for a section drawing helped the outpost make more sense it its setting. At 1:100 we can see details the field agent would notice, while at 1:500 the greater context of the underground mine, abandoned ruin and meteorite depression are noticeable.
0 notes
Photo
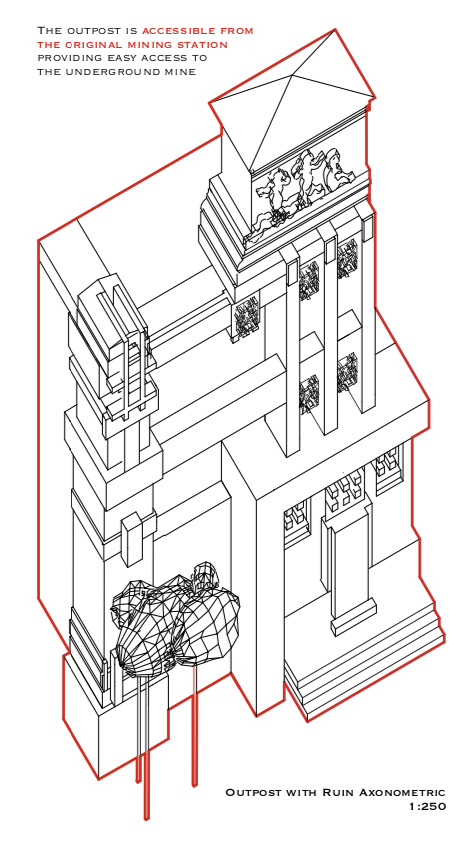

Axonometric Drawings looking at the outpost in relation to the Ruin as well as the structural makeup of the outpost. The outpost is accessible from the the interior of the abandoned mining station and is comprised of 3 main layers; a capsule, exoskeleton and outer structure.
0 notes
Photo


Close up photos of:
- Thee Regional Map (plan view)
- Timeline accompanied by a Regional Section.
The red accents in the Regional Map emphasize how the site is situated around a meteorite depression. The red gas escaping from the mining station in the Regional Section marks the day of the radioactive gas leak forcing the mining settlement to be abandoned.
0 notes
Photo

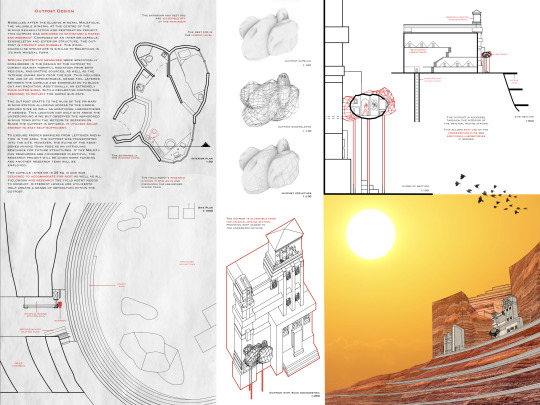
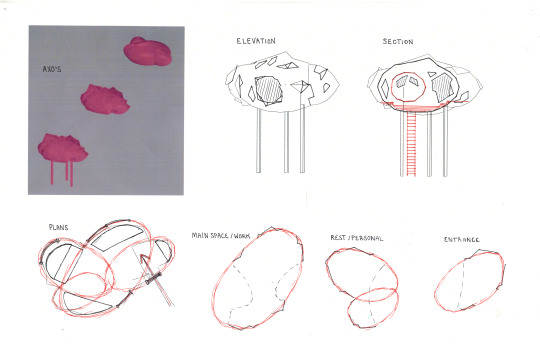
Final Assignment - Option 2
Above is my final manual exploring Operation Maleficus - A Mining Rehabilitation and Restoration Project. The first image is of side one, focusing on context and mapping. The second image is of side two, focusing on outpost documentation. My workflow included the softwares; Rhino, Illustrator, Photoshop and Indesign.
3 notes
·
View notes
Text
Physical Model - Alternative Submission
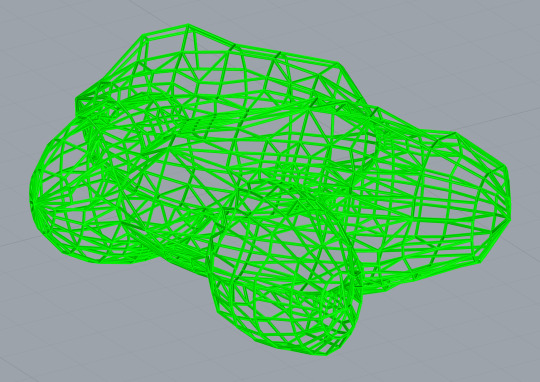
To support my narrative and provide more context alongside my manual, I had planned to create a detail model documenting the structure and technologies intended for my outpost. The narrative behind my landscape and outpost design was centred around the rehabilitation of an environment that had previously been abused for it resources resulting in an uninhabitable landscape. Specifically, the outpost was meant to be placed on the outskirts of an abandoned mining town, constructed out of scavenged materials from the remaining structures and be resilient within a harsh environment. The outpost was designed to resemble unrefined ore, the very resource motivating the rehabilitation project. It takes on an angular form and was designed to be covered in a reflective skin to minimize the effects of the harsh sun rays.
When considering my physical model, I deciding depicting the structure of my outpost would be the most essential component to develop. I felt my narrative would already be explained on my manual and therefore a detailed model of the structure would be the most beneficial element to further explore. I planned on using the digital fabrication methods of 3-D printing and laser cutting to accomplish this. Before I lost access to the school’s lab, I was able to mostly finish the 3-D model replicating the outpost’s exterior framework. It was this framework that gave the outpost its form and allowed the exterior cladding, reflective barrier and solar panels (for energy efficiency) to be secured. I had created this framework in Rhino by modelling the desired shape for the outpost, converting the collective forms to a mesh and subsequently mesh to NURB. I then duplicated the edge and used the command “pipe” to create a net linework (in this step I also selected the appropriate thickness). By creating the framework in this manner it produced an object as one item which would make it easy to 3-D print later. For the second component of my physical model, I planned to laser cut wood panels to resemble the layers of cladding and solar panels meant to be secured to the framework. I did not get a chance to draw the digital file needed to laser cut these pieces. I intended to cut enough panels needed to cover at least half the framework so I could demonstrate what the structure looked like alone as well as with all the intended layers. I planned on attached these components by hand and potentially adding reflective paper to reiterate the concept behind my outpost. Although I did not get the chance to physically make this model, I did learn a lot in the process of digitally modelling the files. I hope to be able to finish the digital fabrication at some point to fully complete the process.
0 notes
Photo


Documentation of Progress Work for Physical Model Alternative Submission:
- Example of Hybrid Workflow
- Progression of Rhino Modelling to produce Framework for 3-D Print
- Intended 3D Print Model depicting Outpost Structural Framework
- Close-up View of Framework
- Intention for Laser-Cut Model
- Outpost Structural Precedent
0 notes

Quote
Architecture is the art of taming constraints, poetizing contradictions.
Jean Nouvel
0 notes
Photo

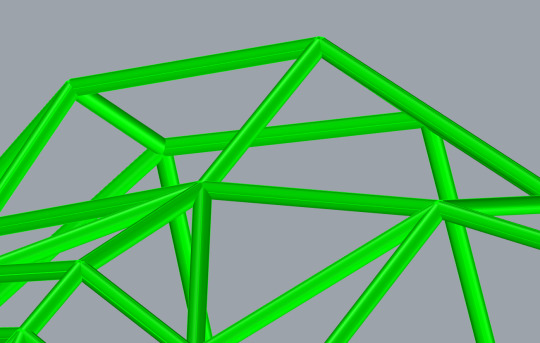
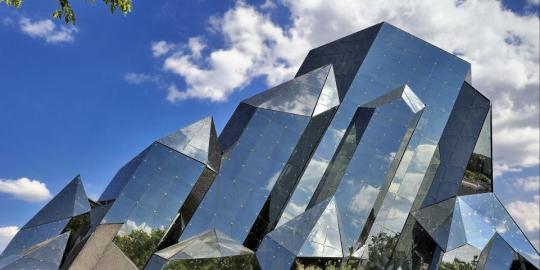
Precedent For Outpost - Futurscope, Parc du Futurscope, France (1987)
- I was inspired by the futuristic aesthetic, reflectiveness, correlation to the shape of ore
0 notes


Text


Task 6: Ruination
Perspective Views of the 2 Ruins in Rhino along with the VRay Settings
- Having finished this task, I am quite happy with the way my ruins turned out, however I had to spread my ruins out in my topography so that they were in my previous views. Moving forward, I think I’m going to have to reorient and add to existing landscape so that my ruins fit in better.
0 notes


Photo
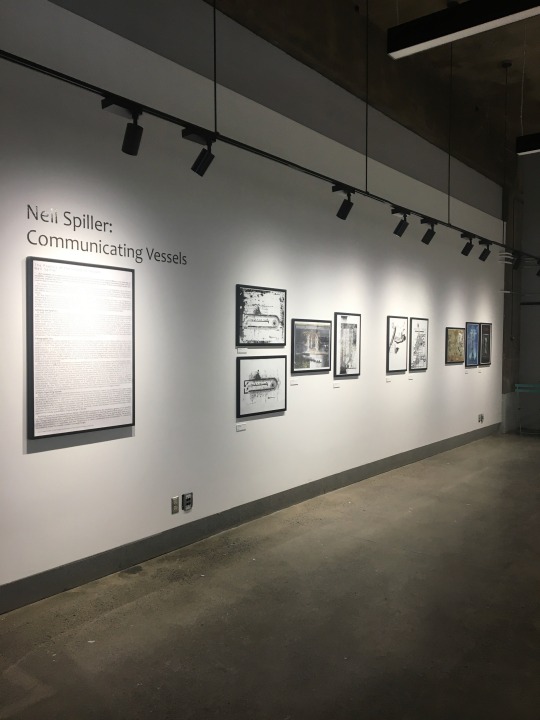


I found Neil Spillers exhibit quite captivating. It was clear from his lecture he is very passionate about his work. At one point in his lecture he said “My drawings upset people and I loved it.”. This statement really resonated with me because it emphasizes how throughout his career Spiller didn't confine himself with societal standards of what art and ideas are “acceptable”. He talked about building architecture up element by element focusing on what each component has to offer. His work is very sculptural and artistic with clear surrealist inspirations from Salvador Dali and Francis Bacon. I also found Spiller’s strict use of tone, limiting his drawings to the grayscale contributed to his narrative as well. The stark contrast of tone helps project his eccentric ideas into his drawings. Spiller’s dedication to his craft, creating hundreds of drawings over several years to fully examine his concept is inspiring.
0 notes
Text
Task 5 - Tiny World Prototypes - Reflection
This week focused on digital fabrication techniques. We learned about uses and methods of Laser Cutting, CNC Milling and 3D Printing. We were asked to prepare files for two different types of fabrication. Since my topography from Task 4 has more landscape manipulations compared to additive structures, I decided Laser Cutting and CNC Milling made the most sense.
I started by creating the laser cutting file in Rhino to later transfer over to Illustrator. I found creating the laser cutting file to be pretty straightforward. The tutorial spent the majority of the time on laser cutting and the poster in the lab helped reaffirm the requirements. One issue I had was when I made my components 2D in Rhino the lines got a little broken up, which I went back and fixed, however it created several overlapping lines. I made sure to get rid of these to avoid burn marks and extra costs when using the machine.
For the CNC model, the process seemed pretty straightforward. My topography was not that tall so it fit within the height requirements of 150mm x 150mm x 150mm. I ended up creating two versions of the model because I was not sure if the excess material needed to clamp the model down needed to be the same height as the tallest part of the model. After talking to my peers and doing some deductive reasoning I think it makes sense if it was the same height. I creating the surrounding pieces (1 inch outside my model) and then used boolean union to join each piece. Lastly I checked for naked edges and I was finished.
0 notes