
madelyncilne
useless rph
+ellie. sometimes a gif maker (?)
#gifsociety • #usercline
6212 posts
Don't wanna be here? Send us removal request.
Last Seen Blogs
justawaykitty
The left boob of Kitakichan
consilio-cameos
Clay

nulghost
NulGhost
rowdy-senju
Madness and optimism

hollandroos
welcome home;
Text

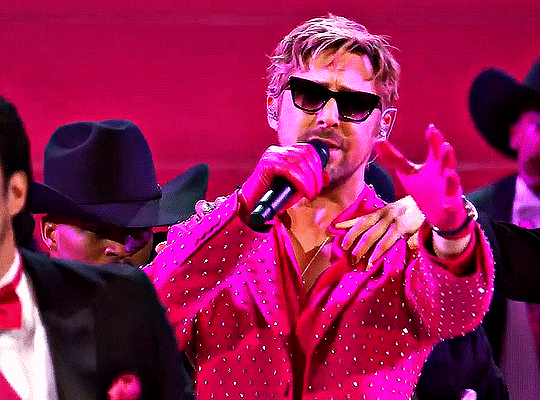


RYAN GOSLING
performing "I'm Just Ken" at the 96th Annual Academy Awards (March 10, 2024)
2K notes
·
View notes
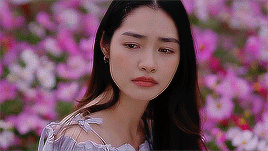
Text


— ⁺ 𝐋𝐔𝐊𝐈𝐓𝐀 𝐌𝐀𝐗𝐖𝐄𝐋𝐋 , 2002 [ #250 GIFS ] SHRINKING S1 / lukita maxwell is chinese, indonesian & white, please cast accordingly and use appropriately. all of the gifs have been created from scratch by me. to access the gifs please click the source link. do not edit, claim as your own or add into your own packs! time and effort were spent into making these gifs, a like or a reblog would be much appreciated!
[ ! ] commission work: to view commission info, click here
23 notes
·
View notes
Text

Someone asked me how I created the fade transition in this gifset which I’ll try to explain in the most comprehensive way that I can. If you've never done something like this before, I suggest reading through the full tutorial before attempting it so you know what you'll need to plan for.
To follow, you should have:
basic knowledge of how to make gifs in photoshop
some familiarity with the concept of how keyframes work
patience
Difficulty level: Moderate/advanced
Prep + overview
First and foremost, make the two gifs you'll be using. Both will need to have about the same amount of frames.
For ref the gif in my example is 540x540.
I recommend around 60-70 frames max total for a big gif, which can be pushing it if both are in color, then I would aim for 50-60. My gif has a total of 74 frames which I finessed using lossy and this will be explained in Part 4.
⚠️ IMPORTANT: when overlaying two or more gifs and when using key frames, you MUST set your frame delay to 0.03 fps for each gif, which can be changed to 0.05 fps or anything else that you want after converting the combined canvas back into frames. But both gifs have to be set to 0.03 before you convert them to timeline to avoid duplicated frames that don't match up, resulting in an unpleasantly choppy finish.
Part 1: Getting Started
Drag one of your gifs onto the other so they're both on the same canvas.
The gif that your canvas is fading FROM (Gif 1) should be on top of the gif it is fading INTO (Gif 2).

And here's a visual of the order in which your layers should appear by the end of this tutorial, so you know what you're working toward achieving:

Part 2: Creating the grid
Go to: View > Guides > New guide layout
I chose 5 columns and 5 rows to get the result of 25 squares.

The more rows and columns you choose, the more work you'll have to do, and the faster your squares will have to fade out so keep that in mind. I wouldn't recommend any more than 25 squares for this type of transition.

To save time, duplicate the line you've created 3 more times, or as many times as needed (key shortcut: CMD +J) and move each one to align with the guides both horizontally and vertically. You won't need to recreate the lines on the edges of the canvas, only the ones that will show.
After you complete this step, you will no longer need the guides so you can go back in and clear them.

Follow the same duplicating process for the squares with the rectangle tool using the lines you've created.
Align the squares inside the grid lines. The squares should not overlap the lines but fit precisely inside them.
This might take a few tries for each because although to the eye, the squares look all exactly the same size, you'll notice that if you try to use the same duplicated square for every single one without alterations, many of them will be a few pixels off and you'll have to transform the paths to fit.
To do this go to edit > transform path and hold down the command key with the control key as you move one edge to fill the space.
Once you're done, put all the squares in their separate group, which needs to be sandwiched between Gif 1 and Gif 2.

Right click Gif 1 and choose "create clipping mask" from the drop down to mask it to the squares group. This step is super important.
After this point, I also took the opacity of the line groups down to about 40% so the lines wouldn't be so bold. Doing this revealed some squares that needed fixing so even if you aren't going dim the lines, I recommend clicking off the visibility of the lines for a moment to make sure everything is covered properly.

Part 3A: Prep For Key framing
I wanted my squares to fade out in a random-like fashion and if you want the same effect, you will have to decide which squares you want to fade out first, or reversely, which parts of Gif 2 you want to be revealed first.
In order to see what's going on underneath, I made Gif 1 invisible and turned down the opacity of the squares group.

If you want text underneath to be revealed when the squares fade away, I would add that now, and place the text group above Gif 2, but under the squares group.

Make a mental note that where your text is placed and the order in which it will be revealed is also something you will have to plan for.
With the move tool, click on the first square you want to fade out. Every time you click on a square, it will reveal itself in your layers.
I chose A3 to be the first square to fade and I'm gonna move this one to the very top of all the other square layers.
So if I click on D2 next, that layer would need to be moved under the A3 layer and so on. You'll go back and forth between doing this and adding key frames to each one. As you go along, it's crucial that you put them in order from top to bottom and highly suggested that you rename the layers (numerically for example) which will make it easier to see where you've left off as your dragging the layers into place.

Part 3B: Adding the Keyframes
This is where we enter the gates of hell things become tedious.
Open up the squares group in the timeline panel so you can see all the clips.
Here is my example of the general pattern that's followed and its corresponding layers of what you want to achieve when you're finished:

So let’s try it!
Expand the control time magnification all the way to the right so you can see every frame per second.

As shown in Part 3A, select your first chosen square.
Where you place the time-indicator on the panel will indicate the placement of the keyframe. Click on the clock next to opacity to place your first keyframe.

Move the time-indicator over 3 frames and place the next key frame.

Things to consider before moving forward:
Where you place your very first keyframe will be detrimental. If you're using a lot of squares like I did, you may have to start the transition sooner than preferred.
If you're doing 25 squares, the key frames will have to be more condensed which means more overlapping because more frames are required to finish the transition, verses if you're only using a 9-squared grid. See Part 4 for more detailed examples of this.
The opacity will remain at 100% for every initial key frame, and the second one will be at 0%.

Instead of creating two keyframes like this and changing the opacities for every single clip, you can copy the keyframes and paste them onto the other clips by click-dragging your mouse over both of them and they'll both turn yellow. Then right click one of the keyframes and hit copy.
Now drop down to your next clip, move your time-indicator if necessary to the spot where the first keyframe will start and click the clock to create one. Then right click it and hit "paste".


Tip: When you have both keyframes selected, you can also move them side to side by click-dragging one of them while both are highlighted.
Your full repetitive process in steps will go as follows:
click on square of choice on the canvas
drag that square layer to the top under the last renamed
in timeline panel: drop down to next clip, move time-indicator tick to your chosen spot for the next keyframe
create new keyframe
right click new keyframe & paste copied keyframes
repeat until you've done this with every square in the group
Now you can change the opacity of your squares layer group back to 100% and turn on the visibility of Gif 1. Then hit play to see the magic happen.
PART 4: Finished examples
Example 1

the transition starts too soon
Cause: initial keyframe was placed at frame 0
the squares fade away too quickly
Cause: overlapping keyframes, seen below.
(this may be the ideal way to go with more squares, but for only 9, it's too fast)

Example 2

more frame time for first gif
transition wraps up at a good point
Cause: in this instance, the first keyframe was placed 9 frames in, and the keyframes are not overlapping. The sequential pair starts where the last pair ended, creating a slower fade of each square.


Part 5: Final Tips and Saving
You can dl my save action here which will convert everything back into frames, change the frame rate to 0.05 and open the export window so you can see the size of the gif immediately.
If it's over 10gb, one way to finesse this is by use of lossy. By definition, lossy “compresses by removing background data” and therefore quality can be lost when pushed too far. But for most gifs, I have not noticed a deterioration in quality at all when saving with lossy until you start getting into 15-20 or higher, then it will start eating away at your gif so keep it minimal.

If you've done this and your gif is losing a noticeable amount of quality and you still haven’t gotten it below 10gb, you will have no choice but to start deleting frames.
When it comes to transitions like this one, sometimes you can't spare a single frame and if this is the case, you will have to return to the timeline state in your history and condense the key frames to fade out quicker so you can shorten the gif. You should always save a history point before converting so you have a bookmark to go back to in case this happens.
That's pretty much it, free to shoot me an ask on here or on @jugheadjones with any questions.
222 notes
·
View notes
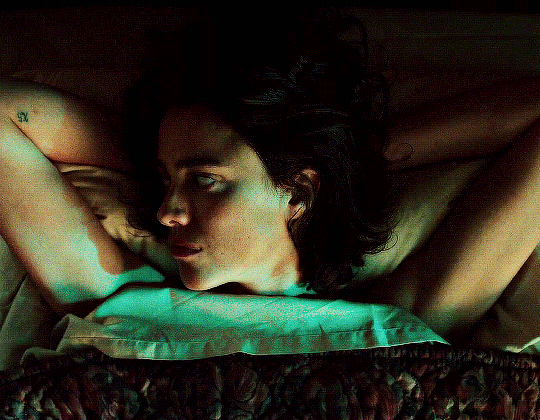
Photo
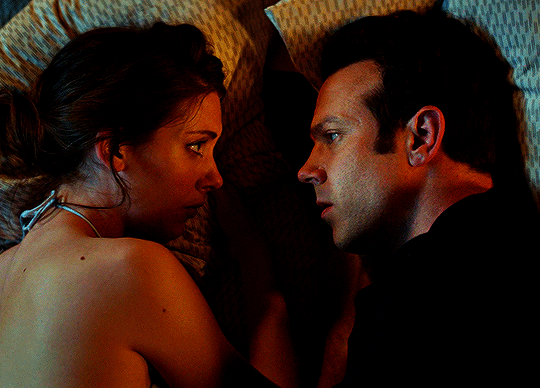
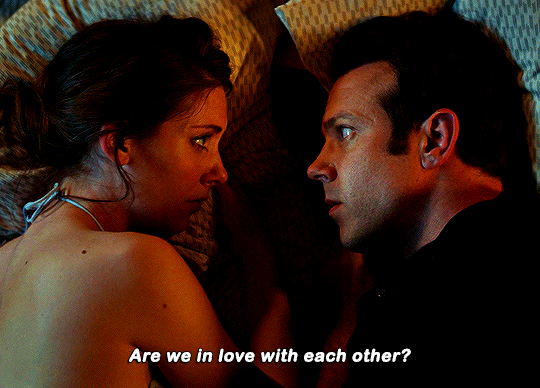
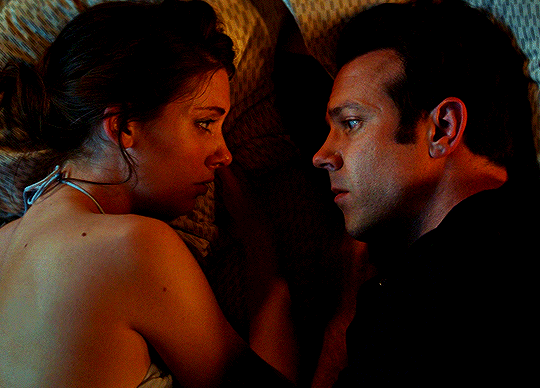
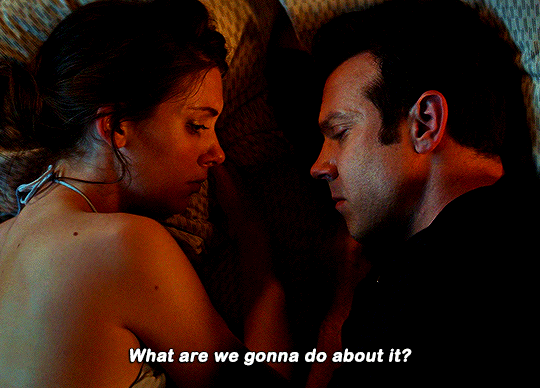
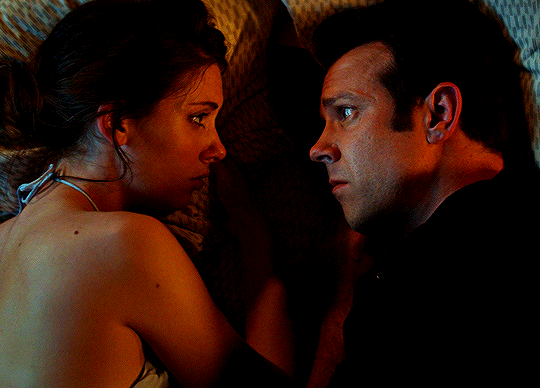

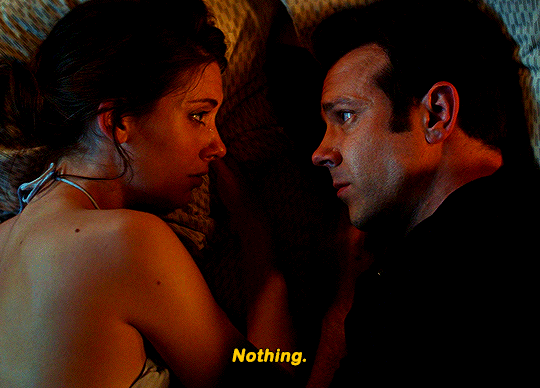
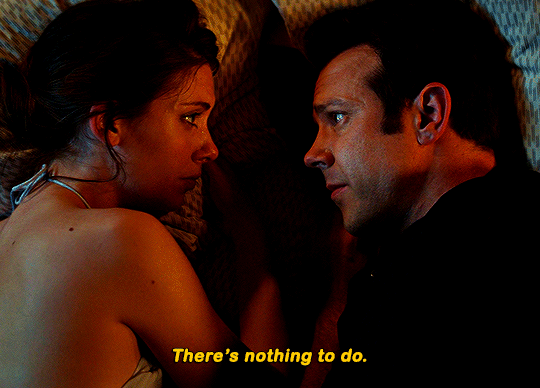
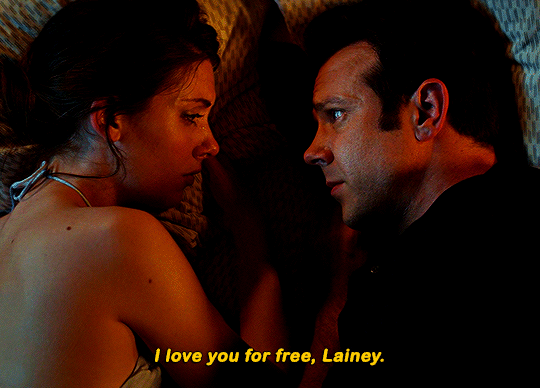
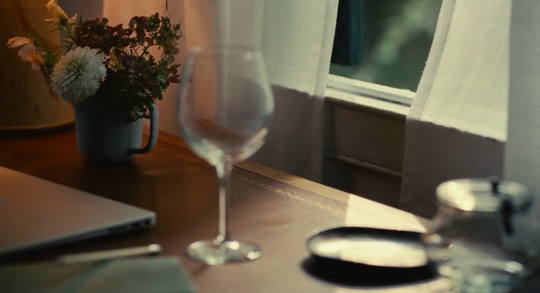
Sleeping with Other People (2015) dir. Leslye Headland
2K notes
·
View notes
Text

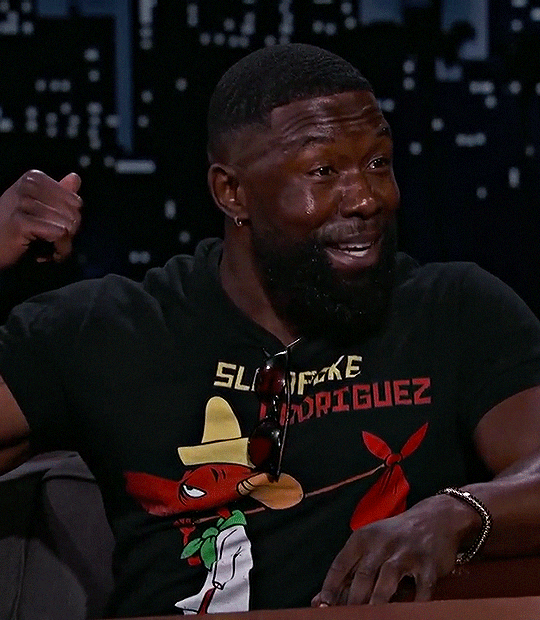
TREVANTE RHODES
on Jimmy Kimmel Live!
424 notes
·
View notes
Text

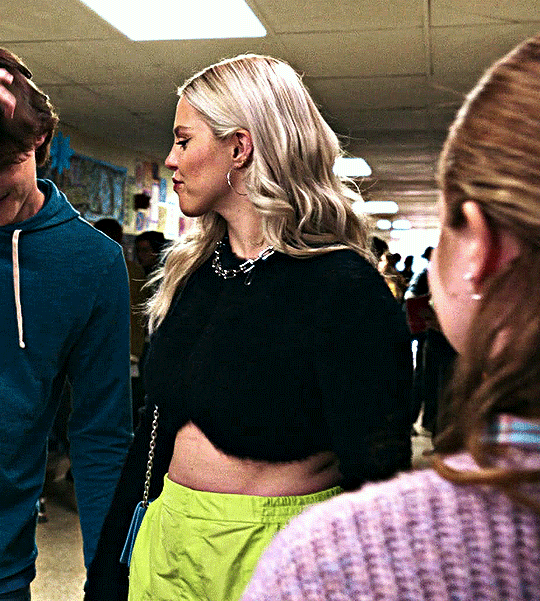
RENEÉ RAPP as REGINA GEORGE
MEAN GIRLS (2024) dir. Samantha Jayne & Arturo Perez Jr.
762 notes
·
View notes
Text


isabela merced via instagram
147 notes
·
View notes
Text
#340 gifs of MINT RANCHRAWEE in 'tricky in love (2023),' can be accessed by joining my discord server, or sending me a message off anon. mint is of thai descent and was born in 1998, so cast accordingly. please like and reblog if you found these useful.
tw: violence, kissing
please read my rules before using. all gifs were made by me, so do not redistribute or claim as your own.

73 notes
·
View notes
Text


Simay Barlas
for Trendyol
March 2024
31 notes
·
View notes
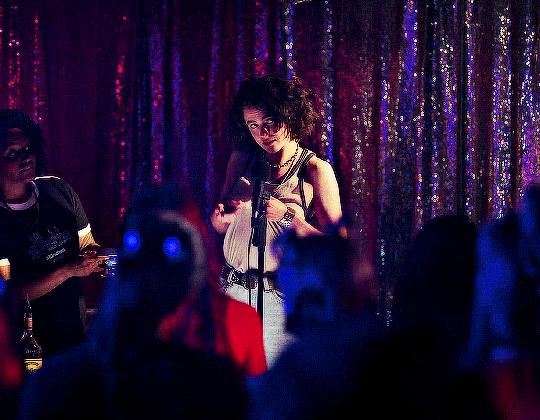
Text
when lazy kissing gets intense with that deep breath and hip pull
827 notes
·
View notes
Text

𝖿𝗋𝗈𝗆: 𝗌𝗍𝗋𝗂𝖿𝖾𝘀𝗼𝘂𝗿𝗰𝗲 𐄂 𝗌𝗎𝖻𝗃𝖾𝖼𝗍: you've unlocked strawberry.

✦ 𝗳𝗼𝗻𝘁𝘀𝗎𝗌𝖾𝖽 . . . vcr osd mono and billus
join my discord server to download.
✦ 𝗱𝗶𝗳𝗳𝗶𝗰𝘂𝗹𝘁𝘆: easy
✦ please like ( ♡ ) & reblog ( ↻ ) if you found this useful. if you’d like to support me further consider buying me a ko-fi.
𐄂 a brief overview of my [ 𝗍𝖾𝗋𝗆𝗌 𝖺𝗇𝖽 𝗰𝗼𝗻𝗱𝗶𝘁𝗶𝗼𝗻𝘀 ] is as underneath the cut. it is 𝗿𝗲𝗾𝘂𝗶𝗿𝗲𝗱 to review them prior to using my resources ♡
BRIEF SUMMARY OF MY GUIDELINES: you can review my full rules by visiting my blog.
my rules are simple , straight forward therefore i have a NO NONSENSE policy meaning , if you break my rules ONCE: you're blocked.
DO NOT:
★ REPOST OR REDISTRBUTE.
★ CLAIM AS YOUR OWN.
★ IF YOU HAVE BEEN BLOCKED YOU ARE BANNED FROM USING MY RESOURCES. THIS INCLUDES BEING BLOCKED FROM MY PERSONAL ACCOUNT HIIRATO.
★ PUT IN OTHER PSDS, TEMPLATES, OR IN PAID CONTENT WITHOUT CONSULTING ME BEFOREHAND. THIS INCLUDES PUTTING IT IN THE PREVIEW OF YOUR WORK BUT **NOT** IN THE DOWNLOAD.
THE FOLLOWING ARE BANNED FROM USING / SHARING MY RESOURCES ( THIS EXTENDS TO FANFIC WRITERS & PLATFORMS OUTSIDE OF TUMBLR ):
★ K-ROLEPLAYERS.
★ TABOO ROLEPLAYERS, M/S THEMES INCLUDED.
★ NSFW / SMUT ROLEPLAYERS.
★ IRL CELEB ROLEPLAYERS.
★ PROSHIPPERS.
★ RPERS / RPS WITHOUT DIVERISTY ( AND/OR ) RULES.
!! YOU WILL BE BLOCKED & REPORTED IF YOU BREAK MY RULES !!
118 notes
·
View notes
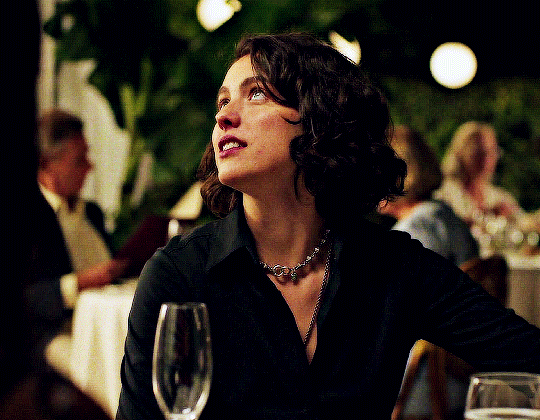
Text
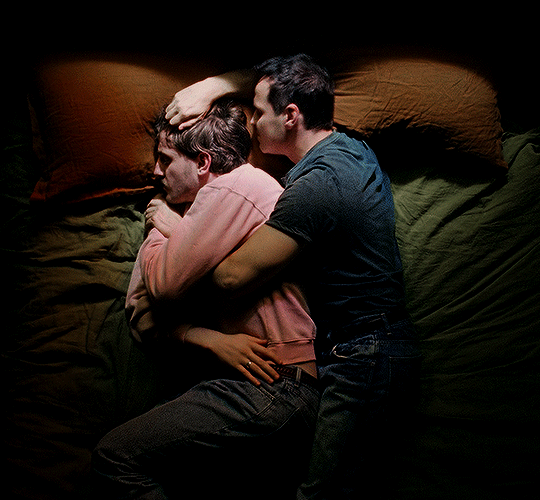


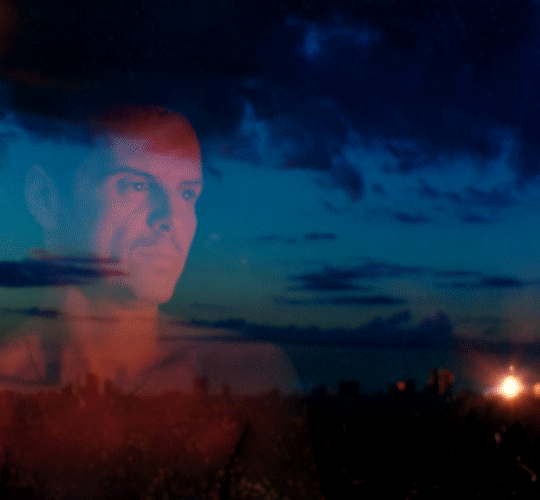
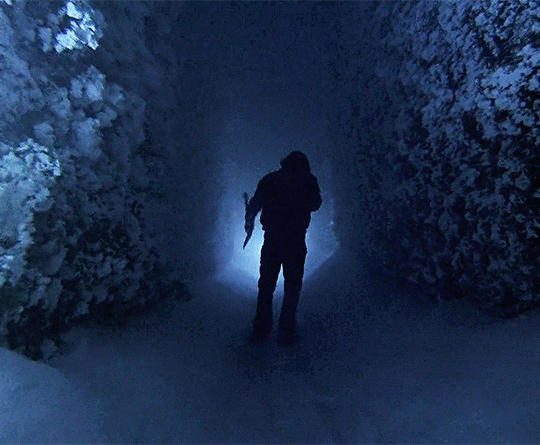
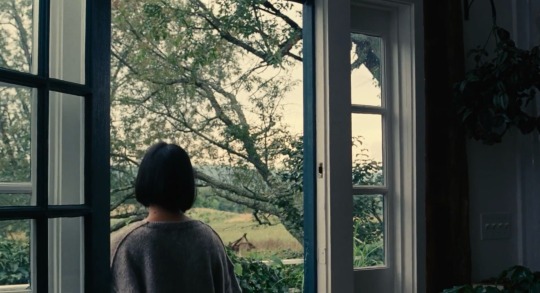
ALL OF US STRANGERS (2023) dir. Andrew Haigh
2K notes
·
View notes
Text


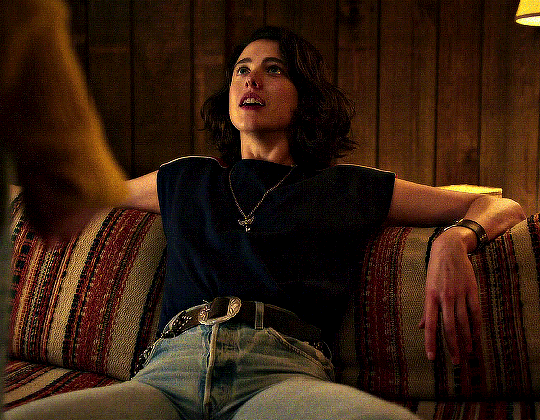
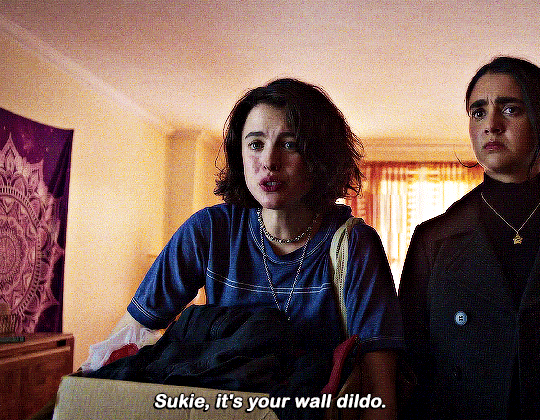

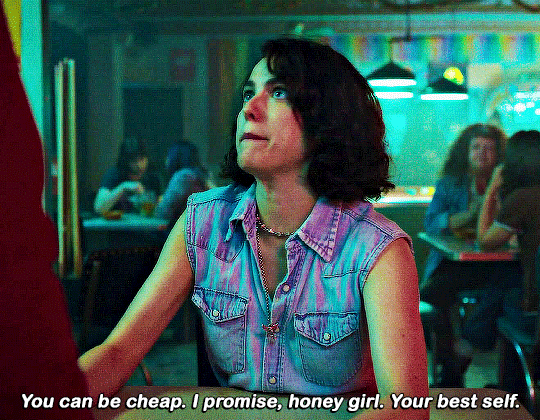


This is gonna be F-U-N-N fun, girl!
MARGARET QUALLEY as JAMIE in DRIVE-AWAY DOLLS (2024) dir. Ethan Coen
2K notes
·
View notes
Text


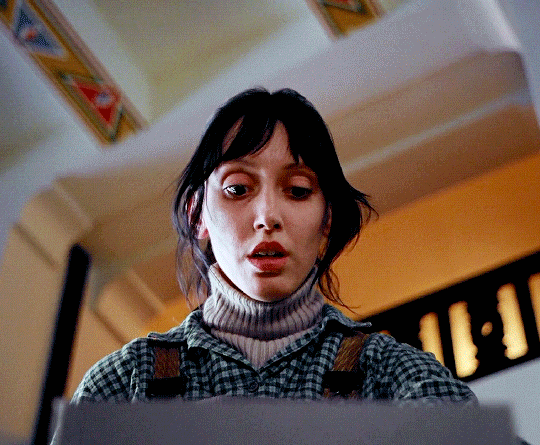
The Shining
dir. Stanley Kubrick | 1980
2K notes
·
View notes
Text


RENEÉ RAPP
via josephmaine on Instagram
236 notes
·
View notes
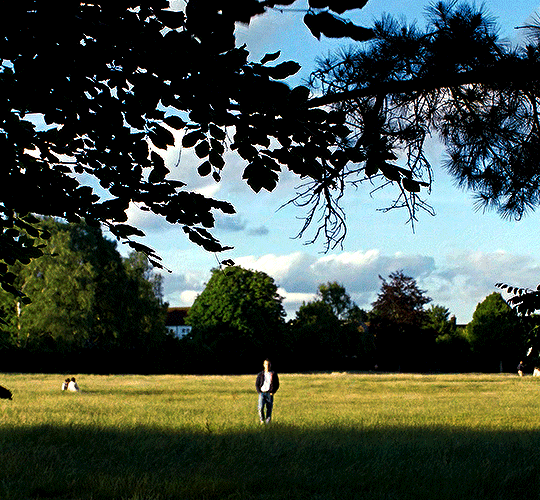
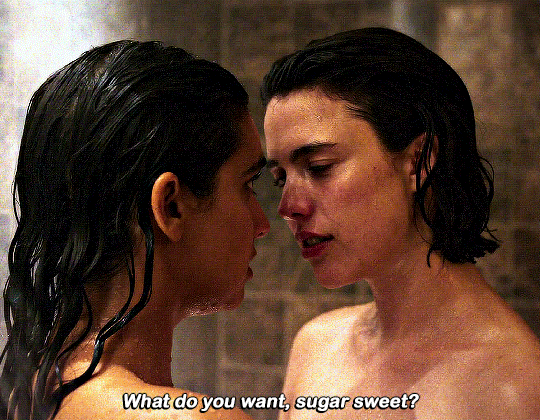
Text

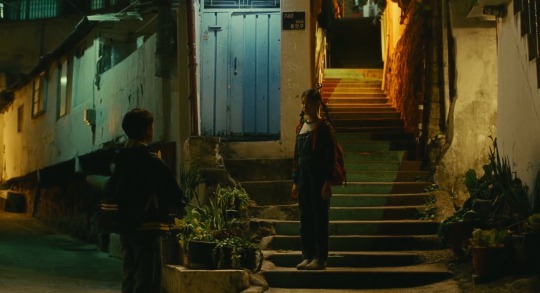


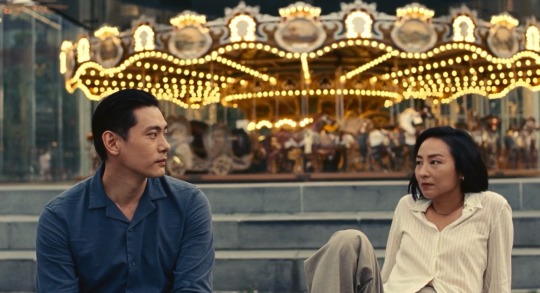
Past Lives (2023) dir. Celine Song
If you had never left Seoul, would I still have looked for you?
228 notes
·
View notes