kelliecottle-blog
Kellie Cottle
Design blog | Victoria University | Wellington
75 posts
Don't wanna be here? Send us removal request.
Last Seen Blogs

temp2997
Untitled

self-devlopement
self-developement

wack-ashimself
No BS with Wack

positivefumo
Junko

mxmogsblog
Mx Mog


Text
follow up
after concluding the testing and what not, it was apparent that I needed a larger servo to power the weight of the timber boards. It was also apparent that each ring would also need to be larger to accommodate the new servos and I would need to figure out a way to stop the board from bowing in the middle. I would also need to figure out a way to accommodate for the LED lights and directions on the board as well as the paint/ marble drop spots
0 notes
Photo

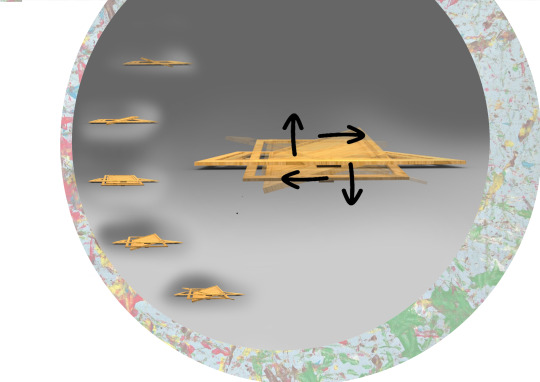
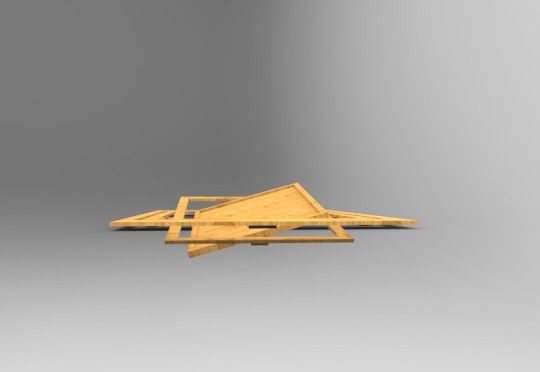
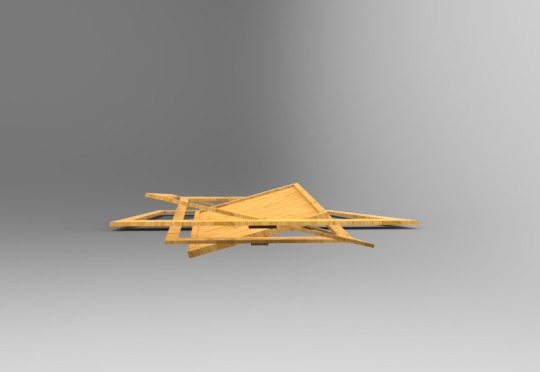
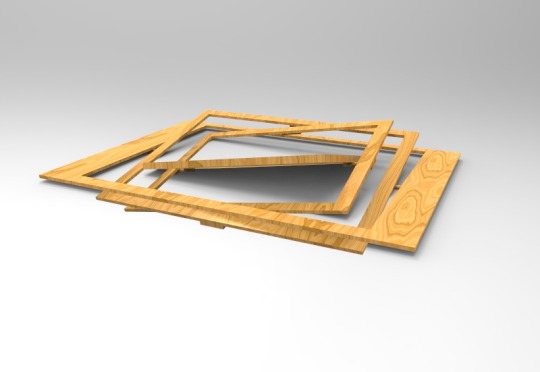
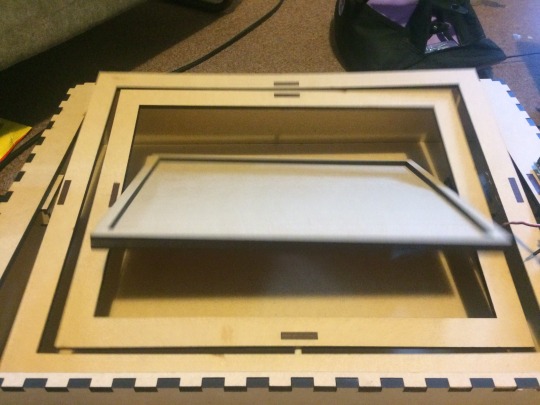
The plan:
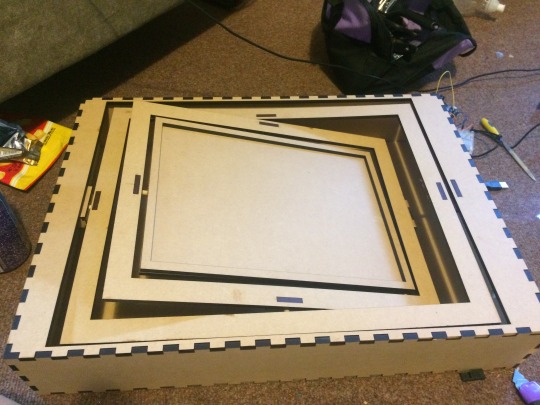
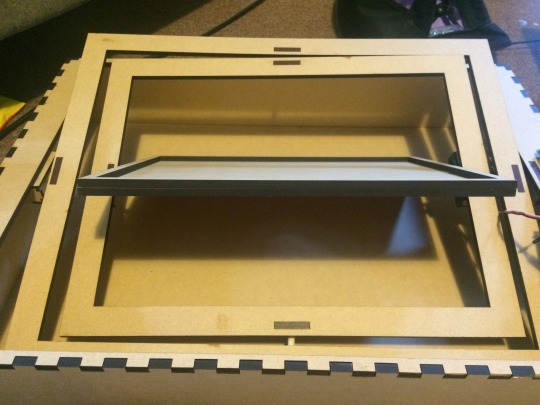
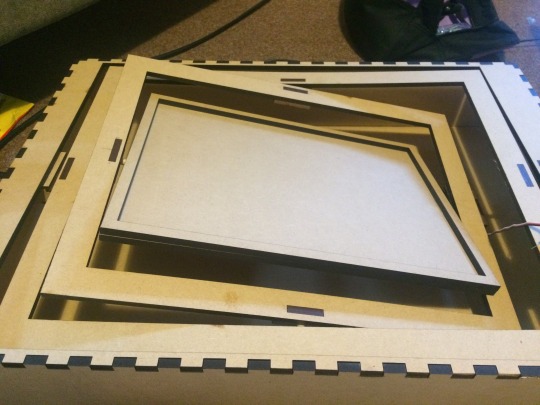
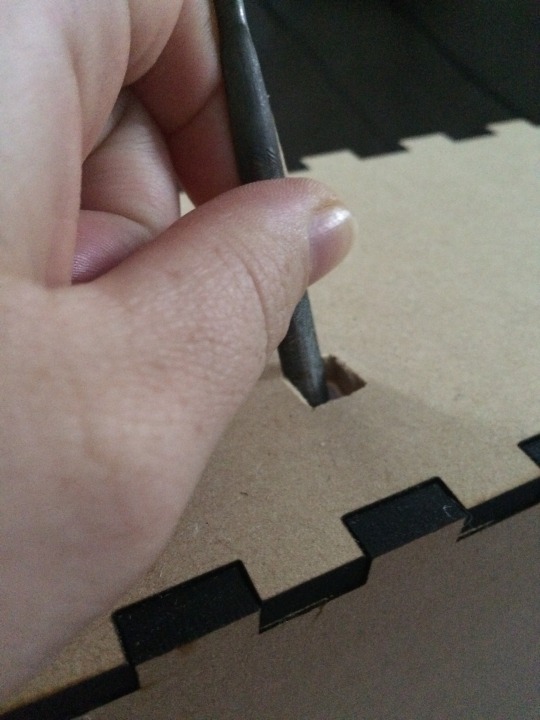
My plan is to laser cut each of the rings and the box (made out of timber as natural materials are better for children than man-made products such as plastic). These will first need to be drawn up on illustrator.
After laser cutting all the pieces need to be fitted together and some elements 3d printed to hold the servos. For this project I have only used 1 servo to show the movement. It the actual design there will need to be 4 servos to move in all directions.
I will then need to code the Arduino so that the microphone pics up the clapping sound and send it to the servo so that it can move in the appropriate way.
Testing! I will then need to test that the marble stays on the board.
note: in the image above, it gives rough estimates on the size of the object, on average size is about 600mm x 400mm
0 notes
Text
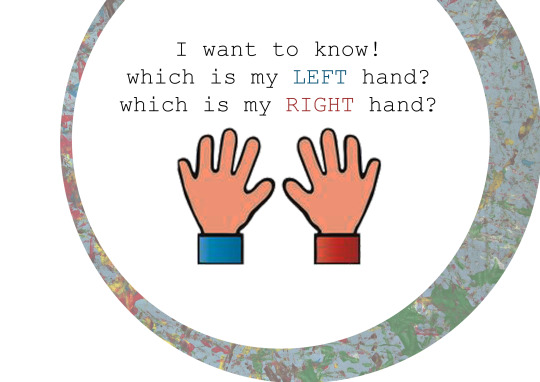
Elevator pitch/ research
After revising my design plan and talking to multiple people/various health services, I have decided to change my idea slightly to help educate young children on simple directions (left, right, up, down). Studies show that children by the age of 7-8years generally know the difference between left, right, up and down. Some however that have Left-right confusion may be related to certain learning and attention issues, difficulty understanding “left” and “right” can also affect math, reading, writing and motor skills.
According to www.understood.com for learning and attention issues
“Most children develop a firm grasp of “left” and “right” by age 7 or 8. As they get older, they can do more complex tasks that involve telling left from right. For some people, though, it never becomes second nature. In fact, a study of college-age students showed that 26 percent still struggled to some degree with the concept.
“Left-right confusion” can be an isolated disorder. But it’s often related to certain learning or attention issues. These include dyslexia, dyscalculia, nonverbal learning disabilities and visual processing issues.”
Having a machine of sorts that gives a reward for learning these direction would give young children motivation to complete the task to see the outcome.
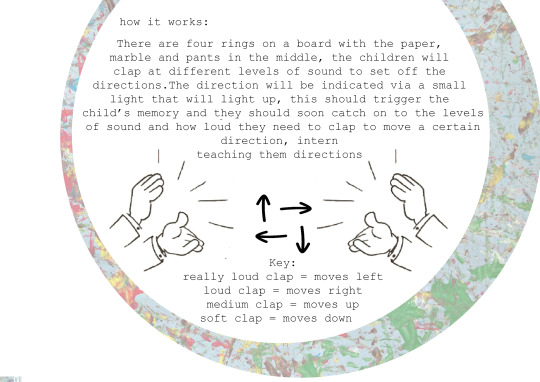
“The Marble effect” is an idea that involves young children learning directions via clapping.
There are four rings on a board with the paper, marble and pants in the middle, the children will clap at different levels of sound to set off the directions. ie. A loud clap with tilt the tray left, a medium clap will move the tray right, etc. The direction will be indicated via a small light that will light up, this should trigger the child’s memory and they should soon catch on to the levels of sound and how loud they need to clap to move a certain direction, intern teaching them directions
0 notes
Text
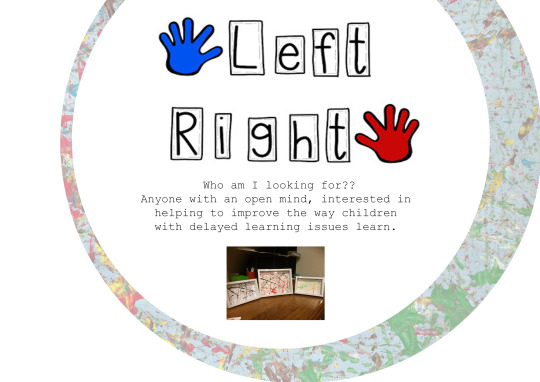
Project 3- introduction and tutor feedback on Project 2
for project 3 we were asked to design/ build a proof of concept model. To be able to complete this task I first had to get tutor feed back about the previous project and slightly redesign/re construct my idea more in depth.
I talked/ interviewed Helen the tutor to see what her thoughts were on the project as she did a study on children with autism and she thought with the output being as it is and not in order it may frustrate the child and cause some distress so she suggested looking into children with delayed learning issues. From here and after some research I discovered that left and right confusion was a big issue among young children.
0 notes
Photo
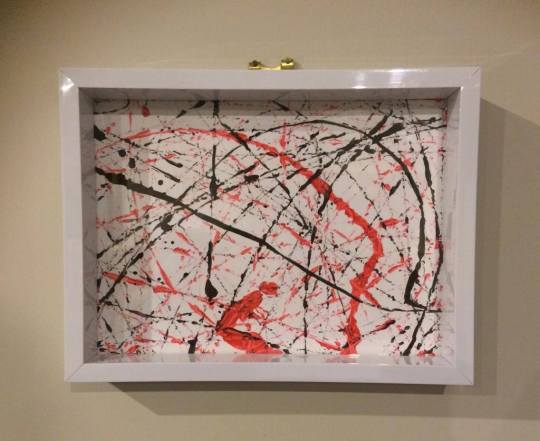

Outcome of testing
The final product would potentially look like this if the designed machine works. As the final product need to relate to the user (children or adults with disabilities) the outcome needs to be visually stimulating, many of the children (especially those with physical or learning disabilities) may not be able to comprehend over complicated product outcomes, so keeping it simple but still fun was the main objective. The machine would simply produce a flat object that can manipulated by the user to cater for there specific wants or needs. Images to hang on the wall, fridge magnets and coasters are some simple fun ways to display the art work.
0 notes
Photo
As you can see here I used a marble and the lid of a container.
0 notes

Text
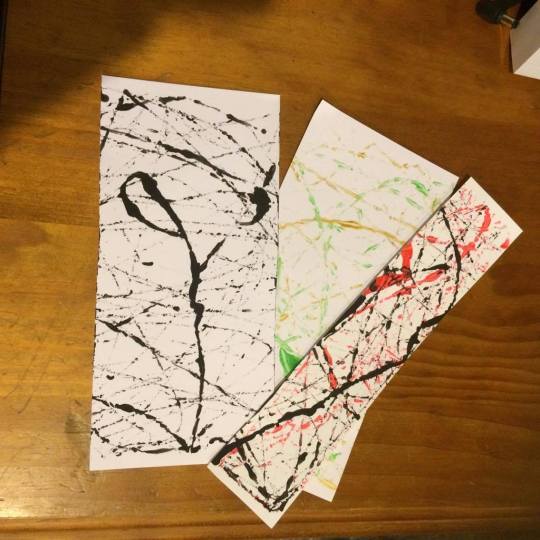
Experiment conclusion
from all three experiments I was able to determine that Ultra White 250gm + Ultra White 300gm with the paint and water combination worked the best. to test this again I will make some test pieces that will be a example of the finished product (manually tested).
0 notes
Photo
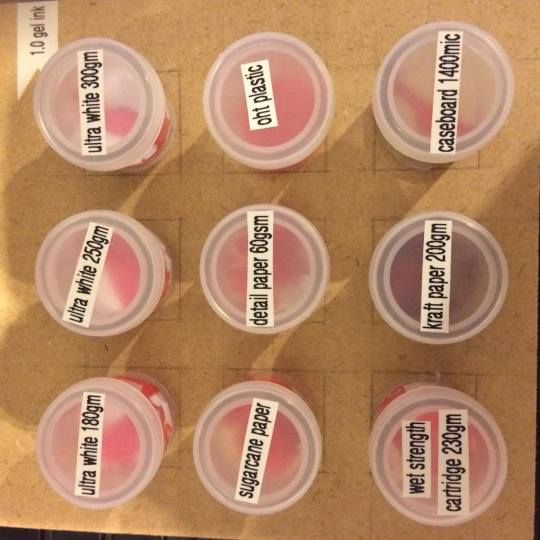
Experiment results for 1.0 gel ink (red):
ultra white 180gm- bleed and is still wet
ultra white 250gm- hasnt dried and has bleed
ultra white 300gm- bleed a little but is still wet to touch
sugarcane paper- has not dried yet, paper is also damp, liquid bleed and the entire piece of paper was coloured, not just the controlled amount.
detail paper 60gm- still wet after 2 days, paper soaked up liquid and it became very britle
OHT plastic- not dry at all underneath it is still very wet
wet strength cartridge 230gm- damp to the touch, bleed
kraft paper 200gm- bleed heaps and is still damp to the touch paper soaked liquid fast
caseboard 1400mic- ran off card
0 notes
Photo
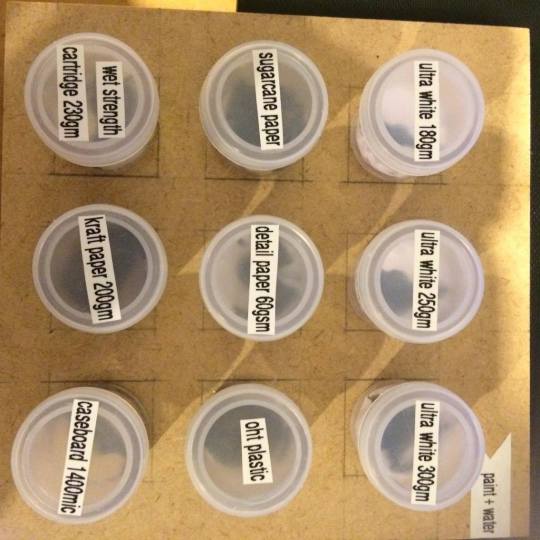
Experiment results for Paint + Water:
ultra white 180gm- dried fast and did not bleed. spread evenly
ultra white 250gm- dried fast and spread evenly material density remaind the same
ultra white 300gm- dried very fast and spread evenly
sugarcane paper- dried in a short amount of time however, the liquid bleed and the entire piece of paper was coloured, not just the controlled amount.
detail paper 60gm- still wet after 2 days, paper soaked up liquid and it became very britle
OHT plastic- not dry at all and did not sticksmall amount dried on the plastic but underneath it is still very wet
wet strength cartridge 230gm- dried fast but bleed a little
kraft paper 200gm- bleed heaps as was drying, paper soaked liquid fast
caseboard 1400mic- ran off card but dried quickly
0 notes
Photo

Experiment results for Paint:
ultra white 180gm- paint took a long time to dry, aslo dried in clumps.
ultra white 250gm- paint feels very powdery, some parts have dried in clumps whereas others have bleed through the paper.
ultra white 300gm- very clumpy and took along time to dry, not much different to the 180gm paper.
sugarcane paper- paint is still wet after 2 days, paper has sucked up moisture and is now wet.
detail paper 60gm- taking a long time to dry, some parts are still wet after 2 days.
OHT plastic- not dry at all and did not stick
wet strength cartridge 230gm- took some time to dry, dried clumpy
kraft paper 200gm- took some time to dry, dried clumpy and is still soft to the touch.
caseboard 1400mic- dried fast and cracked.
0 notes
Photo
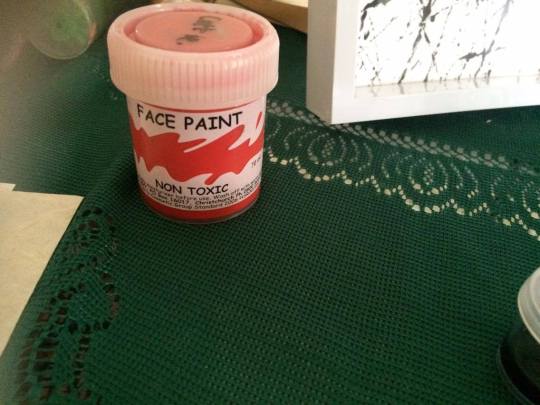
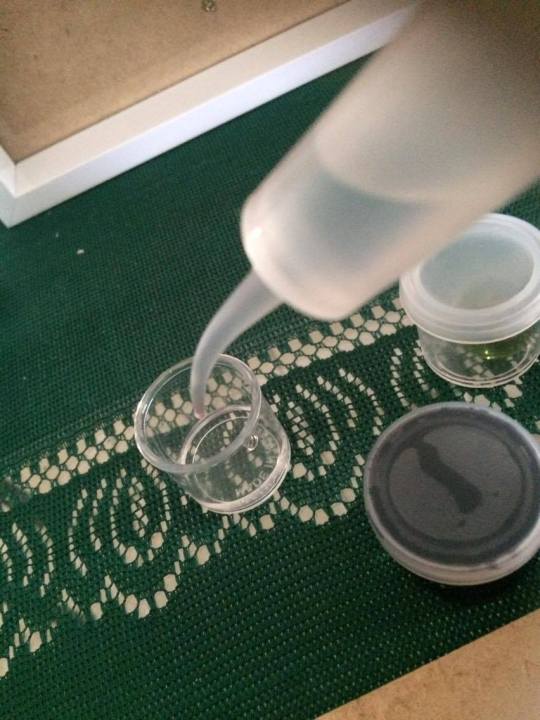
mixing materials
For one of the liquids, I had to mix my own. it is 80% paint + 20% water, as you can see from the image above i ended up changing my paint type to face paint as it mixed better and dried on the materials faster. it would also be more cost efficient as you dont need very much.
0 notes
Photo
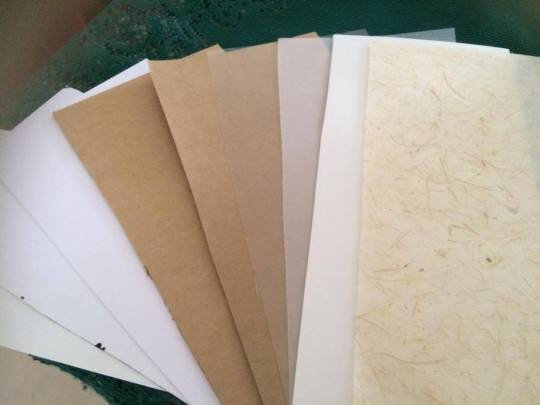
Above image = Paper/Card/Plastic selection
Note: Each liquid that was selected will test 9 materials. these will be displayed on abase board with 9 pottles attached. Each pottle with have a small portion of paper/card/plastic. I will then (using a syringe) drop even amounts of the liquid into each pottle. I will leave them to sit for an hour to see the results and then record these.
Selection of paper/card/plastic materials:
Ultra White card 180gm
Ultra White card 250gm
Ultra White card 300gm
Sugarcane Paper
Detail Paper 60gsm
OHT plastic
Wet Strength Cartridge paper 230gm
kraft paper 200gm
Caseboard 1400mic
Selection of liquids:
1.0 gel ink (red)
paint(non toxic, poster paint)
paint (as above) + water (20%)
0 notes