
Last Seen Blogs

msnaynay-blog
Nay.

bewitchedoracle
carpe diem ☀︎︎
spaceswitch666
Fre҉y҉a҉
crimesandcuriosities
Crimes & Curiosities

youknowihavenochingu
You know I have no chingu!
Text
Development Project 3 : Part 3

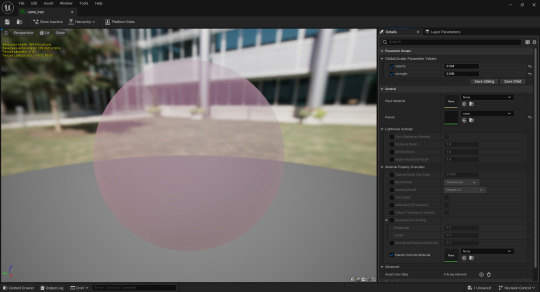
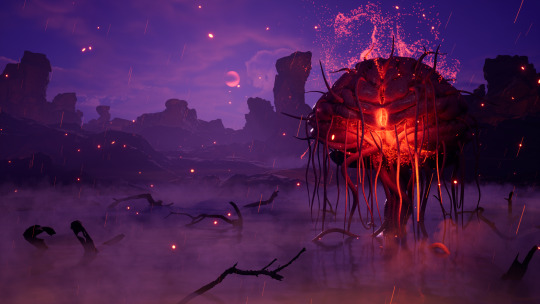
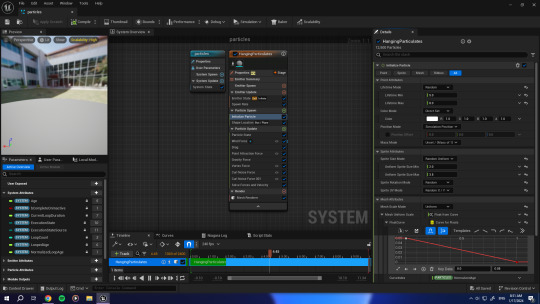
I chose to make the rain somewhat glowy to differentiate it from real-life rain. The only problem was that the default emissive material in Unreal was not well scalable. That's why I created my own material which implemented constants and variables for better control. I also generated an instance of this material which I allocated to the rain system and gradually controlled until I reached the desired intensity.
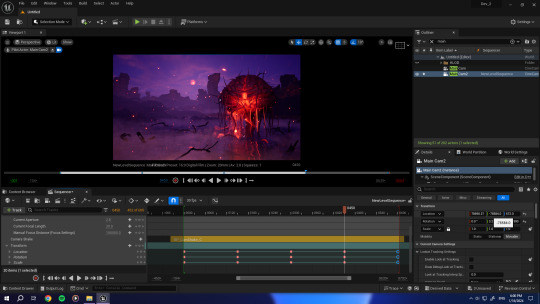
The next step was to create a camera and adjust its settings. After adding a level sequence, I dropped the cinematic camera into it and created a simple idle animation. The keyframes I added for Transform movements going left and right.
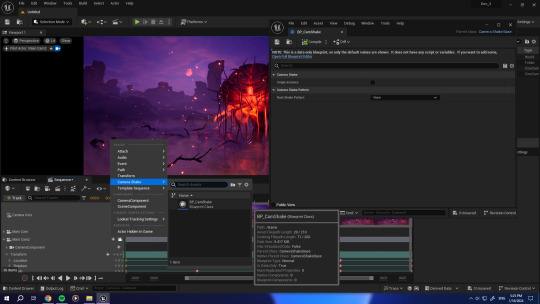
The camera angle looked very stiff and inanimate, so, I figured I could add a shaking effect to it. I was not sure how to do it so I referred to Aziel Arts' video on YouTube which explains this process (https://youtu.be/-urRuL3jmUw). I followed his instructions to get a better understanding of the way it is done, but I ended up implementing the technique in my own way.
The main steps entailed creating a "Camera Shake" blueprint class and changing the pattern and intensity of the camera shake as well as whether it includes rotational or positional movement. I then set the duration value to "0" to loop the shaking, and added the camera shake as a track property for the camera.
The last step was to render everything and combine the frames inside Adobe After Effects to get the final footage.
Sources:
Aziel Arts (2023). Easy Handheld Camera Shake Effect in Unreal Engine 5 Tutorial. YouTube. [online video] Available at: https://youtu.be/-urRuL3jmUw
0 notes
Text
Development Project 2 : Part 2
Back when I worked on the initial assignment, I created a dynamic fog shader that I applied onto a plane which I placed above the water. I felt like the effect looked pretty flat at the time, and it also gave me some trouble when rendering as the shader would not change from one frame to the other. To solve this issue, I wanted to create a new Niagara system to replace the old fog.
To begin, I went through almost the same process as the first particle system. There were only a few differences such as the fact that the material had to be set to Unreal Engine's default fog material according to the YouTube channel CodeLikeMe (https://youtu.be/C_soSQb11fc). The main issue was that I was getting a different type of effect in my case than the one shown in the tutorial.
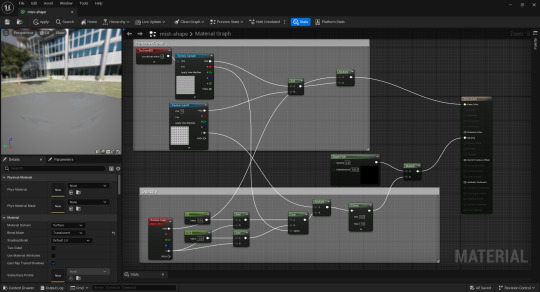
In fact, I ended up creating a copy of this default fog material and editing it, as it was super emissive and glowy. Instead of linking the "Multiply" function to the "Emissive color" node, I linked it to the "Base color". To be able to control the opacity level of the mist/fog, I had to add a "Depth Fade" function which I linked to a "Multiply Function" alongside the existing "Clamp". This allowed me to input my own opacity value and simulate a lightness level for the mist clouds.
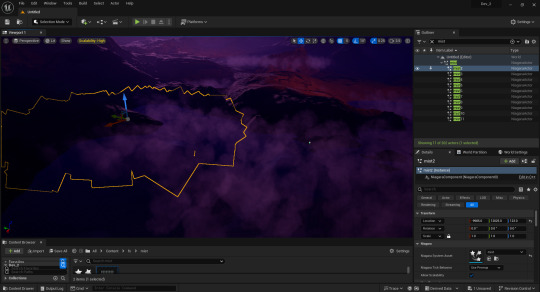
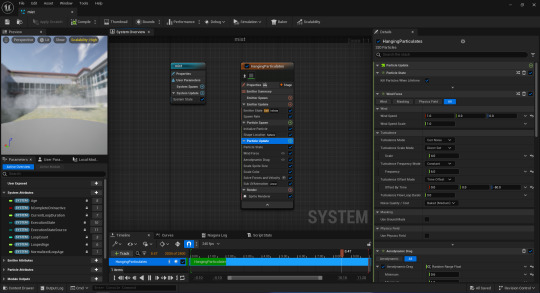
In the following step, I scattered multiple fog instances around on different level altitudes and started by building a different Niagara system to make rain. This system is also similar to the previous one except that I had to add linear velocity alongside gravity to make the rain droplets fall at a specific angle and speed. By following another tutorial by the same channel, I created a collision system (https://youtu.be/qmZCW7eQ6rc) as well which initiates another particle effect responsible for the water splash effect on-trigger.
Sources:
CodeLikeMe (2021). Unreal Engine Rain Particle with Splashes using Niagara FX System. Youtube. [online video] Available at: https://youtu.be/qmZCW7eQ6rc
CodeLikeMe (2022). Unreal Engine 5 Mist Particle System. Youtube. [online video] Available at: https://youtu.be/C_soSQb11fc
0 notes
Text
Development Project 2 : Part 1
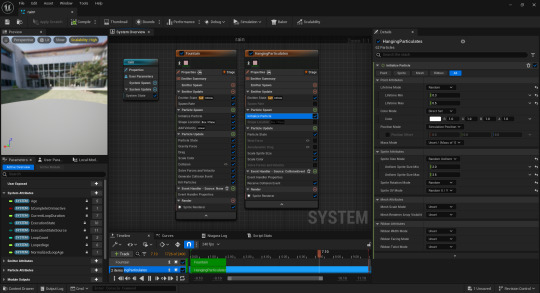
For my second development project, I decided to enhance the "Places of the Mind" assignment, all the while learning Visual effects in Unreal Engine 5. I really wanted to experiment with Niagara Particle systems as I had seen other artists use them many times before, but I had not gotten the chance to do so myself. This was the perfect opportunity to broaden my skillset in the world of environment design and learn how to use real-time VFX to produce game environments that are more dynamic.
Since this project was based on improvisation, I could not follow specific references for it. Instead, I had to test things out and try to see what looked better in my case. One thing I knew for sure is that throughout working on it, I intended to give the existing environment a mysterious and magical mood while keeping it somewhat intriguing.
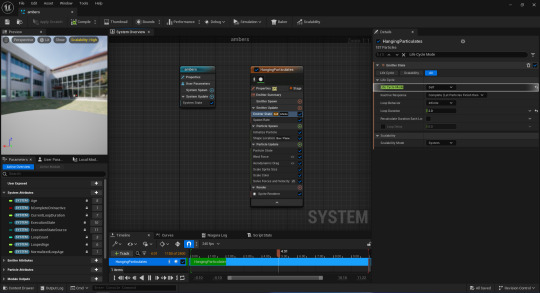
Nonetheless, I began by browsing the internet for some kind of inspiration and came across the simplest tutorial I could find, made by the YouTube channel "Royal Skies" (https://youtu.be/1n1q4kQ9Ehg). The video helped clarify a system that I thought would be intimidating in a matter of minutes and simplified it for me. It is from that origin that I started adjusting, on my own, the parameters of elements that were added procedurally to the system. That's how I started familiarising myself with the different components of Niagara systems until I ended up with a bunch of embers floating around, which is the effect that I felt matched the ambience I wanted to achieve.
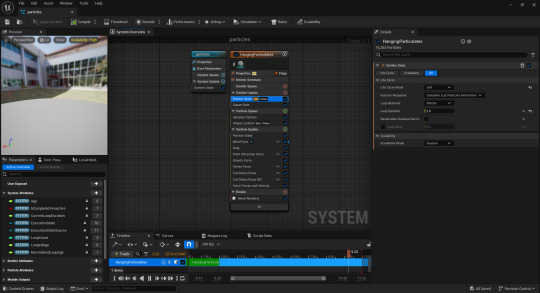
Next, I wanted to create a more dynamic particle system that flies around the brain, acting like an integral part of the living organism. The first few attempts resulted in a failure, since the particles would just go around in a flat disc shape when I applied a vortex force to them. Another YouTube video demonstrated to me how the "Wind Force" element and "Drag" elements can help me realize my desired effect (https://youtu.be/ziwNVtOyKSU). Altering the wind force made the particles flow in an air-like movement, while increasing the drag value created an attraction between the particles which made them stick together like a flock of birds. Through this system, I also learned how to use curves to add input for the particle size.
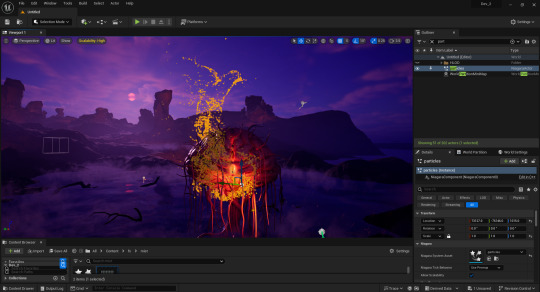
After I was done tweaking the simulation mechanism, I applied the default emissive material that is built into Unreal to the particles to give them a glowy look.
References:
Royal Skies (2023). Unreal5 Niagra VFX: Floating Ember/Dust Particles. YouTube. [online video] Available at: https://youtu.be/1n1q4kQ9Ehg
sem schreuder (2020). Let’s build this Unreal Niagara particle sim within 6 minutes. Youtube. [online video] Available at: https://youtu.be/ziwNVtOyKSU.
0 notes
Text
Development Project 1: Part 4
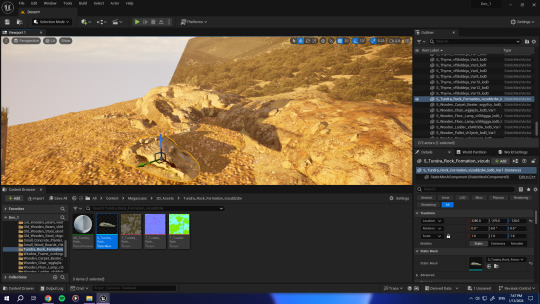
The next part of my work consisted of creating a landscape background to simulate the typical view of Lebanese mountains. First, I generated terrain in landscape mode by importing a height map that I found at motionforgepictures.com. Then, I applied a Quixel texture to the landscape, and I began adding some rock Megascan assets closer to the windows to create an illusion of depth in the background.
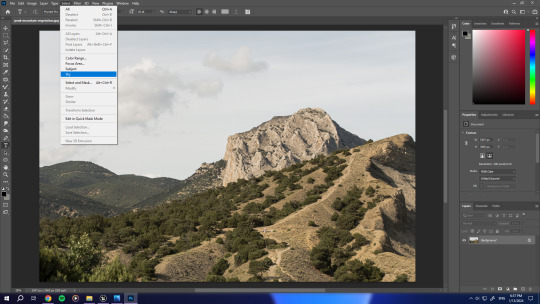
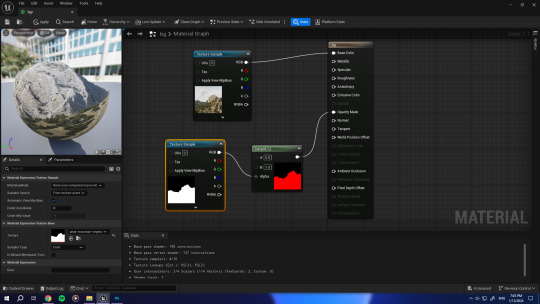
For the background image that I used, I downloaded it from Freepik (https://www.freepik.com/free-photo/peak-mountain-vegetation_7777838.htm) and took it into Adobe Photoshop to generate an opacity map out of it. For that, I made a second version of the image by selecting the sky and painting it in black and white to mask it out.

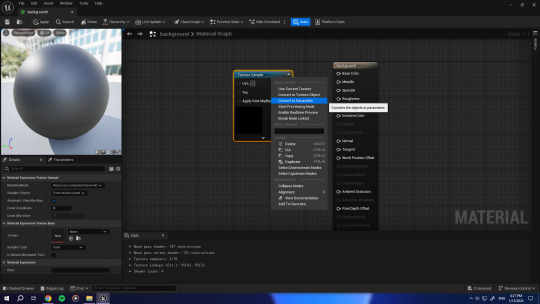
I imported both maps into Unreal and tried linking the black and white map to the "Opacity Mask" node of the material automatically, which did not work. After some digging up, I bumped across the "Lerp" blueprint element on the official Unreal Engine website (https://docs.unrealengine.com/4.26/en-US/BlueprintAPI/Math/Float/Lerp/). Once I connected it to my maps and used it as an intermediate, I was able to see the change in the viewport and the portion of the sky in the image was no longer visible.
The creation of this background introduced me to light channels in Unreal. I had to set up a different lighting system for the plane which acted as the backdrop, since it was catching shadows from the other assets in the scene, like the house for example.
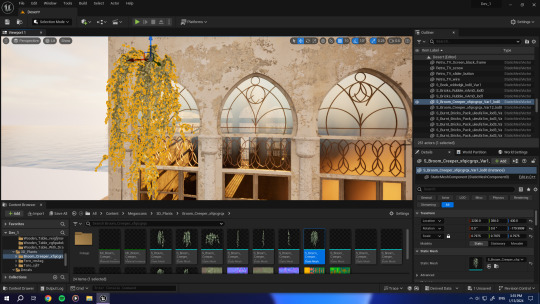
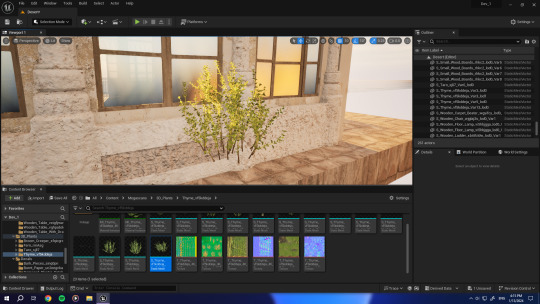
To incorporate natural elements into the scene, I used Quixel Megascan foliage elements and spread them across the interior and exterior of the environment. One plant in particular that I used is the thyme plant which is a very common native species that could be found in the Lebanese wilderness.
As for the opposite side of the house, I placed a plane across the view and applied to it a standard water material which is integrated into Unreal's system.
References:
Mitchell, C.J. (2023). Landscape Heightmap 16k Free Download. [online] Motion Forge Pictures. Available at: https://www.motionforgepictures.com/landscape-heightmap-16k-free-download/
0 notes
Text
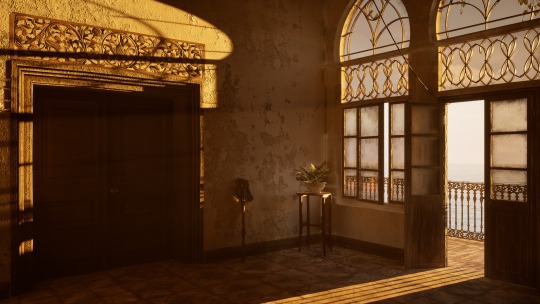
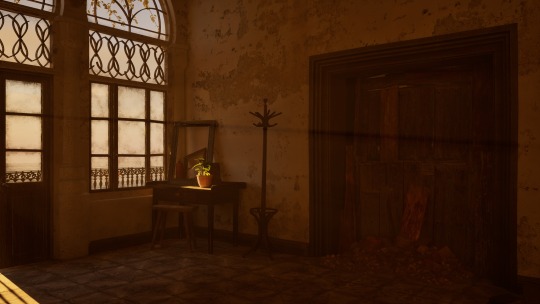
Development Project 1: Part 3
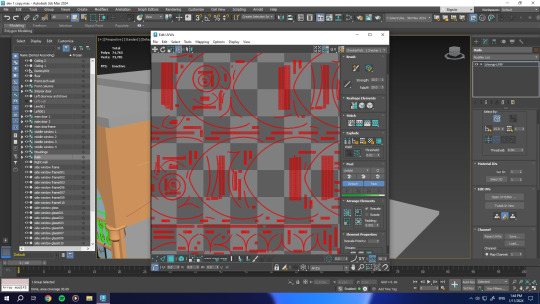
In this stage, I imported the FBX file containing all my 3D assets into Substance 3D Painter. I realised as soon as they were imported that the objects were divided into texture sets like I wanted. Texture maps were baked onto the unwrapped models by using the "bake low as high" feature since I did not have a high-poly version.

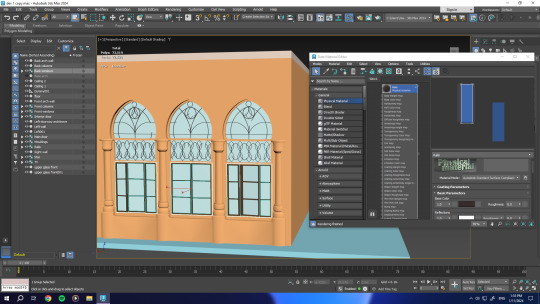
For the texturing of the windows and glass pieces of the door, I learned a technique of making translucent glass materials in Substance from a YouTube video by the channel '' Tutor". (https://youtu.be/lfufwfE1rA0?si=YiJSB6KbC8CbRoVl) To make the material refractive, I had to add an opacity channel by changing the type of shader that was running to one that supports opacity. I also continued by hand-painting dirt details on the surface using alpha brushes and controlling roughness levels to generate a higher level of realism.
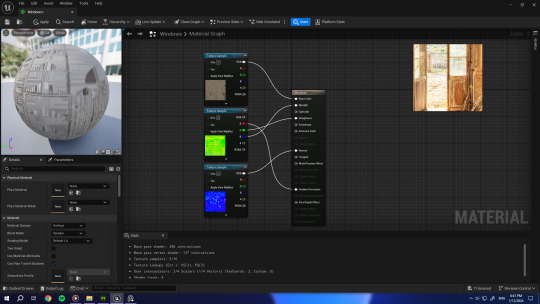
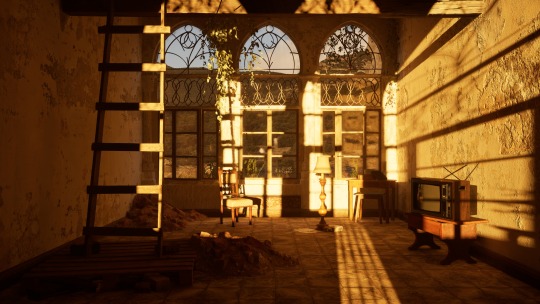
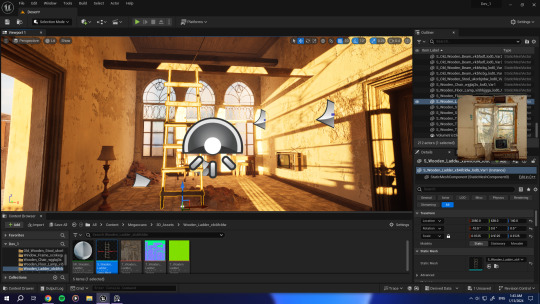
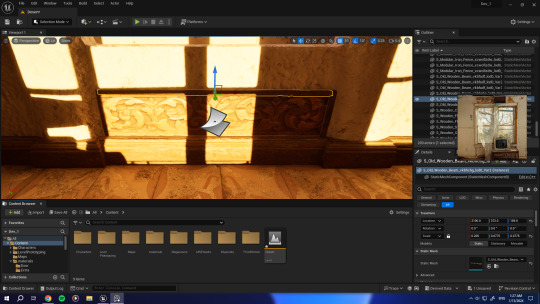
After I exported the texture maps from Substance Painter, I imported them as well as my models into Unreal 5 and started creating the different materials by connecting the maps to the nodes and enabling translucency mode for the ones that needed it. I did not forget to add the TV which I had previously made, since it represents a main part of my project, adding a personal touch to the cultural aspect of the environment. I used some Quixel Megascans surfaces for some of my assets as well ( walls, arches, columns, ceiling and floor) since they looked ideal for the mood of the space I made.
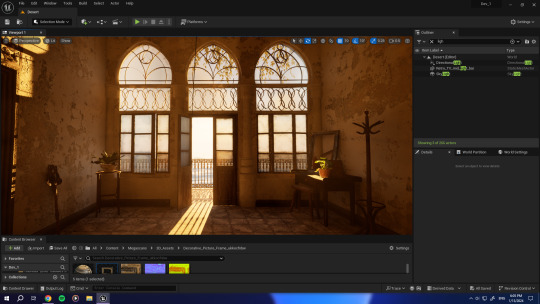
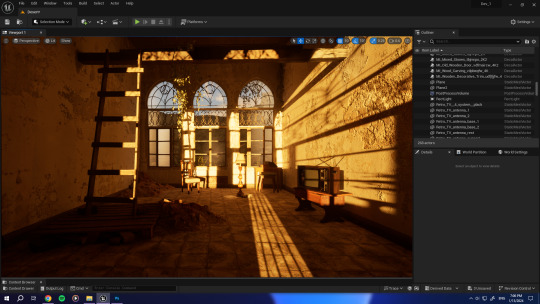
The following thing I did was set up the lighting conditions of my scene, so I began by creating all elements (directional light, volumetric fog, clouds, sky sphere, etc...). I adjusted the settings and parameters to generate a god ray effect and some bloom and glare to naturalize the camera view.

To control the exposure and prevent the screen from going dark when looking away from light sources, I used a PostProcess volume effect and set it to infinite, and unbound so that it covers the entire level. I then set the exposure to "Manual" and adjusted the value until I was satisfied with the brightness.
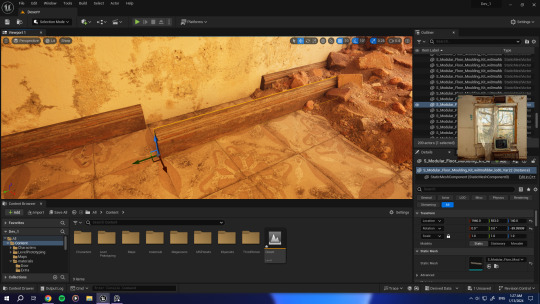
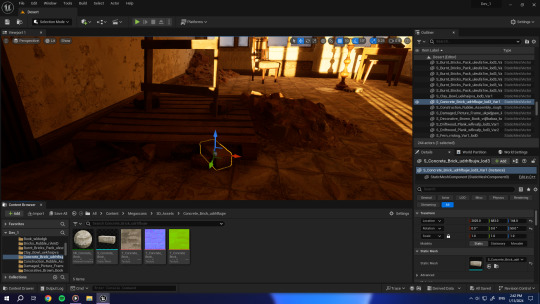
I continued by populating the level further and adding some Megascan 3D Assets. Some objects looked unnatural combined with the existing ones I had created, so I used multiple decals for texture variation and added imperfections to boost the realism.
I also included some decals to give the scene more character and make the space more recognisable as a Lebanese house. It was my first time using them so I got curious and did some research on how they are actually implemented in the creation of game environments, which helped me understand their role in the scope of optimisation.
References:
Tutor (2020). Substance Glass Shader. YouTube. [online video] Available at: https://youtu.be/lfufwfE1rA0?si=YiJSB6KbC8CbRoVl
0 notes
Text
Development Project 1: Part 2
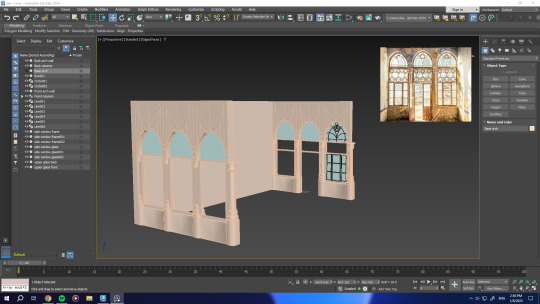
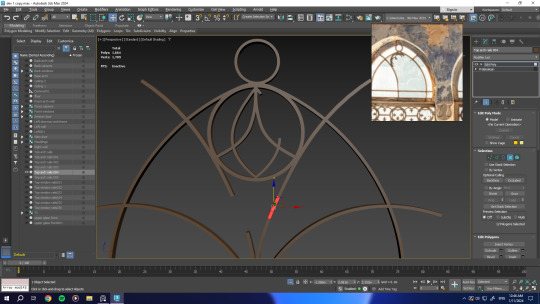
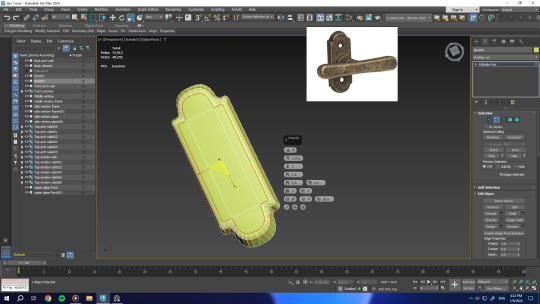
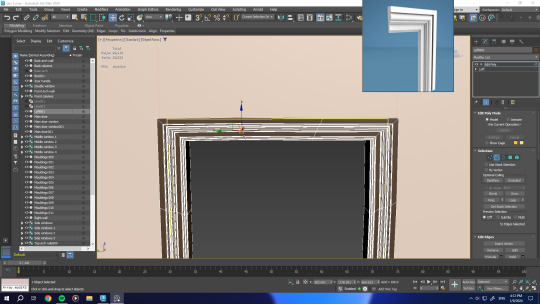
The first thing to do was to create my assets in 3dsMAX. I started by modelling main infrastructure of my environment which is the walls, ceiling and floor. Making the arches was a bit difficult at first, but after some research I found that the best way for mew to model them would be by using splines and extruding the objects from the shapes created.
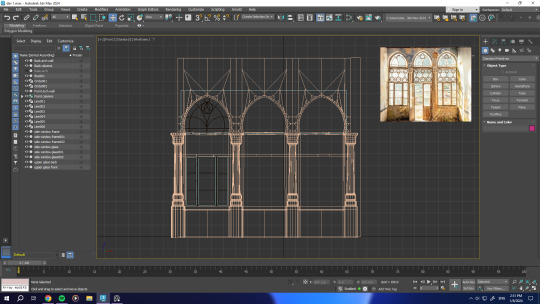
I did the same for the other props in my scene while making sure to keep in mind segment loops and topology so that I don't run into UV problems later on. Optimization was taken into consideration the whole time I was working on the assets as I needed to keep in mind that the environment I was creating could hypothetically be used for a video game.
After I was done with the modelling process, I chose which objects I wanted to unwrap and texture together. For this reason, I grouped the objects into several materials which were applied to the meshes.
In the end, I made sure I did not have any flipped normals or unwelded vertices that could complicate the texturing process. The objects with common materials were selected together, and I UV unwrapped them in 3dsMAX before exporting them in FBX format.
0 notes
Text
Development Project 1: Part 1
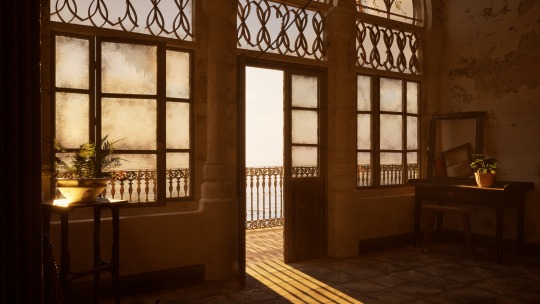
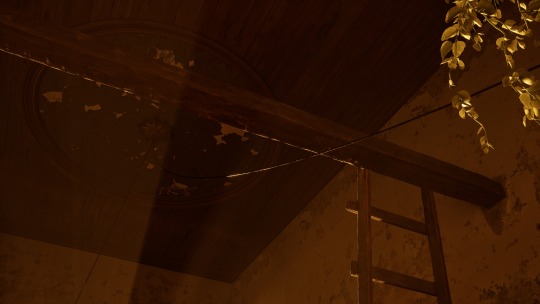
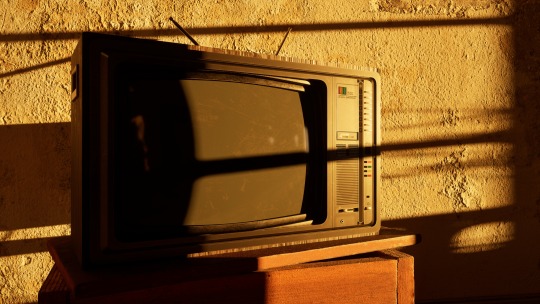
This is my first development project for this semester. I chose to develop the "Nostalgia and Memories" assignment and push it further. In the initial project, I had created an old TV that we used to have in our family's mountain house. The TV symbolises more than just an object to me, which is why I had chosen it as a living representation of my past and memories. For this project, I wanted to represent my sense of nostalgia as well by creating an environment that could embody the TV asset I had made earlier. For this reason, I decided I wanted to create a version of home away from home inside of Unreal Engine 5 that could potentially be a game environment. I really wished to represent my country and heritage in some way through my art, so I chose to put my TV asset in the environment of a typical Lebanese house similar the the one my family used to spend the summer in.
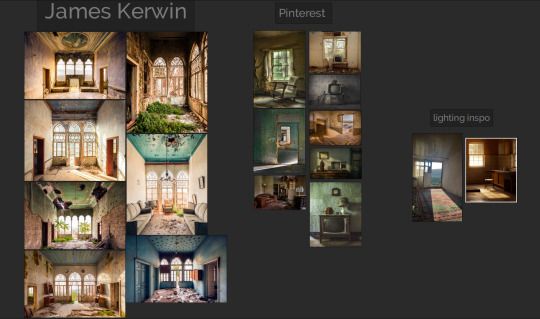
I first began by searching for reference images online that would help me materialise my concept. I came across the work of James Kerwin, a photographer who has a project called Lebanon; A Paradise Lost, which is dedicated to capturing the beauty of abandoned places of heritage in Lebanon (https://jameskerwinphotographic.com/portfolio-series/lebanon-a-paradise-lost/). I chose photographs that I felt reflect Lebanese architecture the best, notably the ones that show the triple arch, a typical architectural staple in Lebanon.
As for the other references that I ended up using, I found them on Pinterest. These images helped me visualise things like wall and floor textures as well as arbitrary object composition that is present in abandoned places.
For the lighting, I found two pictures on Pinterest as well, which I thought were very appropriate for the mood I was going for: I wanted the ray of sunshine to enter windows and hit the interior of my scene in that same manner. I kept them open while lighting the scene to use them as guides.
Sources:
jameskerwinphotographic.com. (2020). LEBANON; A PARADISE LOST - James Kerwin Photographic. [online] Available at: https://jameskerwinphotographic.com/portfolio-series/lebanon-a-paradise-lost/.
0 notes
Text
Assignment 6: Part 5
Results
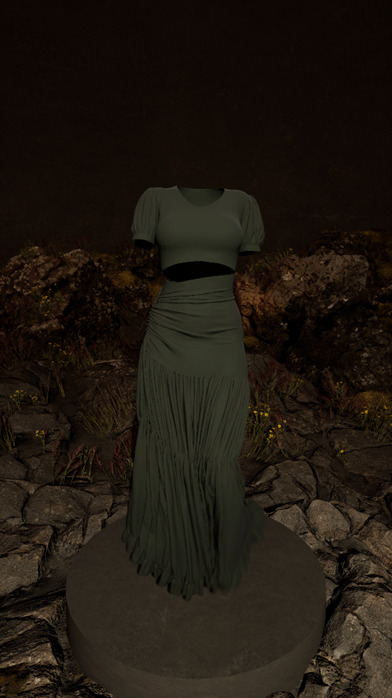
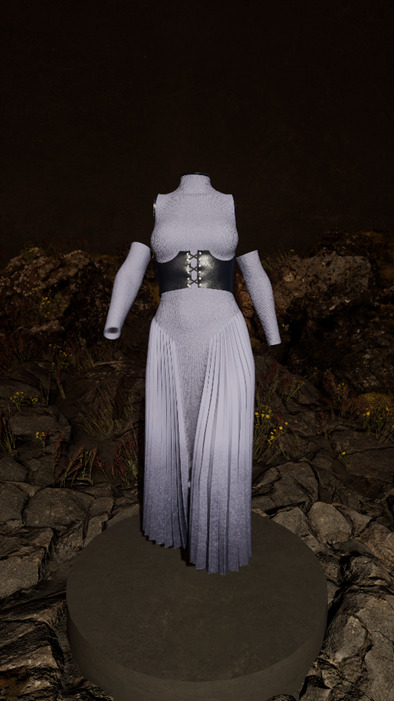
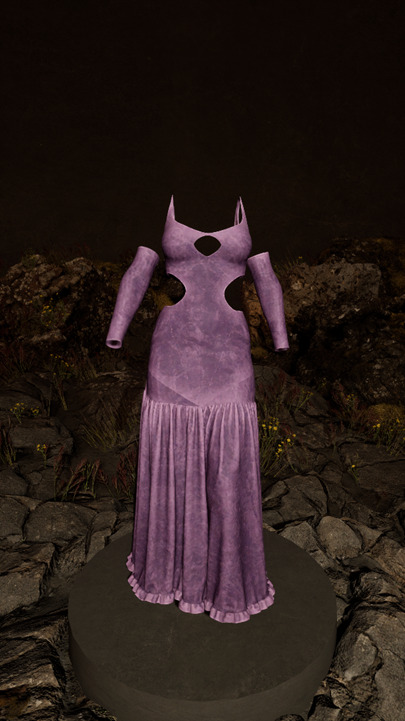
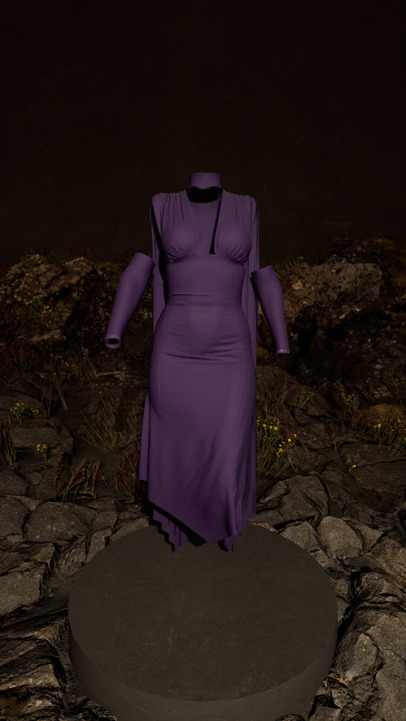
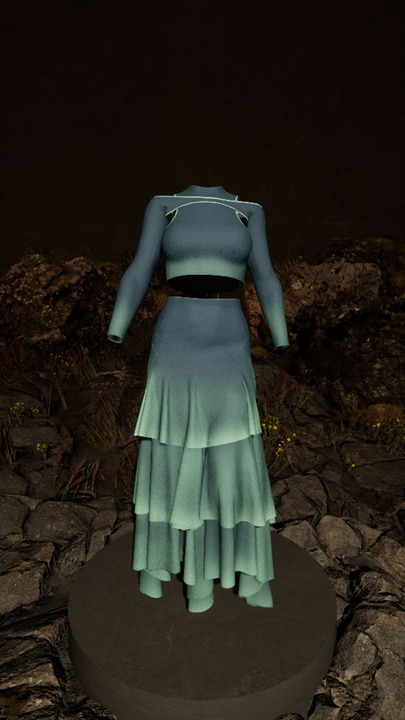
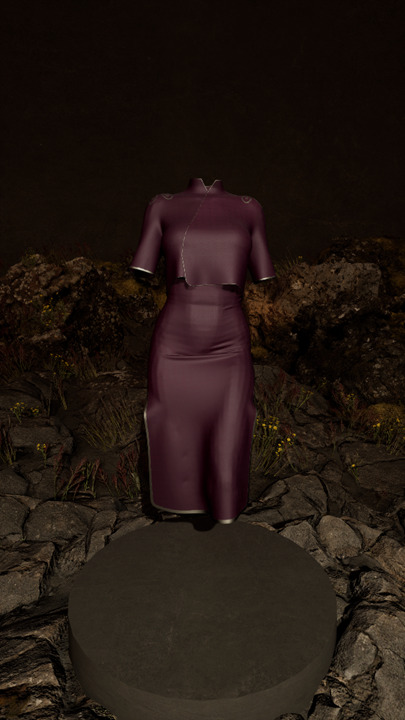
The results of my research are a set of digital garments fully integrated into the Unreal Engine 5 and versatile enough to be used in other instances too.
Conclusion
As digital fashion is a new phenomenon that hasn’t been here for long, I have found that there is a very limited amount of resources to refer to. The workflow that I have developed serves the specific purpose of my project as it offers a good pipeline for people who are looking into creating 3D digital garments for the purpose of exhibition and display. This method can be used for cutscenes and cinematics in video games as well, but I don’t believe it is ready or optimised enough for real-time gameplay. The general methods that are in use today for video games are: either skinning the clothes as part of the character for situations where the clothes are bodytight, or rigging the clothes as an entity of their own where dynamic and organic movements are needed for flowy garments.
I aim to make digital garment creation more accessible for CG artists that have a talent for fashion. Just like I did, talented 3D artists are able to follow my workflow and alter it to fit their needs in order to create mesmerizing pieces of digital garments that redefine fashion in the contemporary times that we live in.
0 notes
Text
Assignment 6: Part 4
UV enhancement
This is a quick and simple step where I import each garment into 3ds Max, select the mesh, apply the Unwrap UVW modifier to it, open the UV editor, and Pack UVs. Doing this is important to make sure the UVs are properly packed and that there aren’t any pieces overlapping. It also exposes many UVs that were previously not shown.
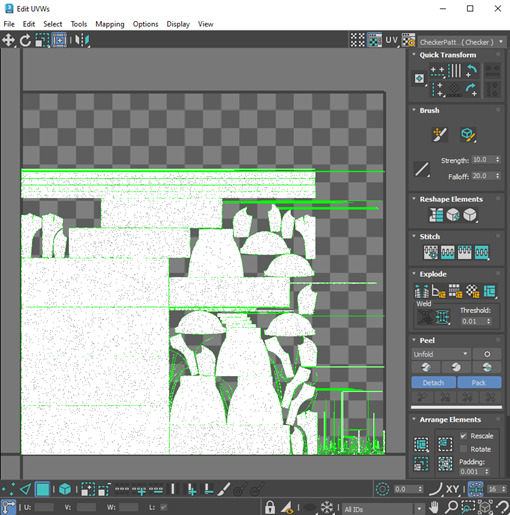
Figure 12 - 3ds MAX UV editing PACK UVs
I then select everything and export the clothes as an Alembic file once again. (Do this step for both low and high-poly versions of the models)
Texturing
In the beginning, I import the garments into Substance 3D Painter and click on Edit > Bake. Once the baking panel shows up, I adjust the settings like in figure 13 with a 4K resolution and an antialiasing of 4*4 to maintain a high level of detail.
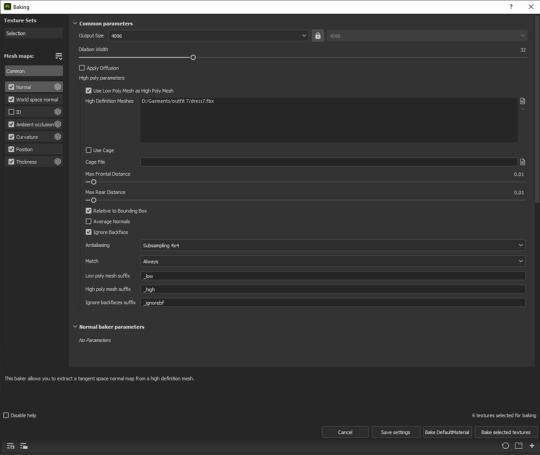
Figure 13 - Substance Painter Bake Settings
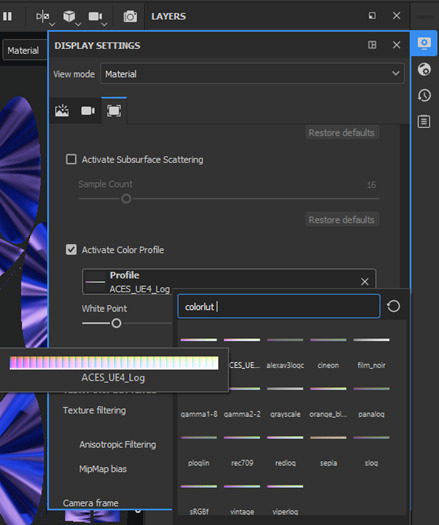
The next thing I do is setup the ACES LUT plugin that matches the lighting and color tone of UE inside of Substance Painter. This is crucial in order to make sure the textures will look the same once you use them inside of Unreal. The steps that are demonstrated in the images are: setting an HDRI for the environment, activating post effects, tone mapping, and color profile inside of the display settings, as well as, selecting the UE4 color profile that comes with the ACES plugin.
1 2
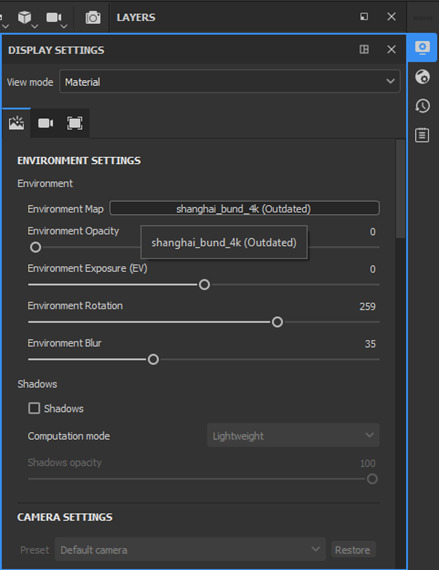
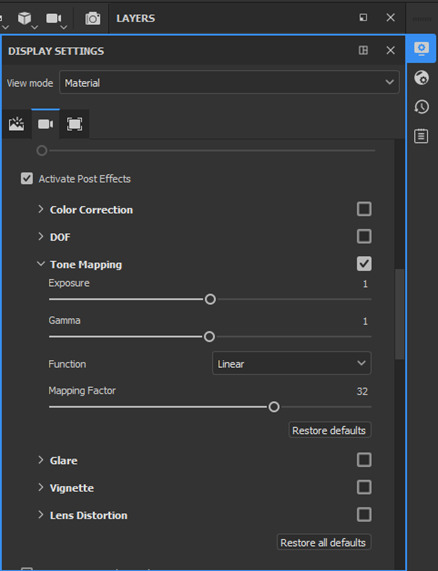
Figure 14 - ACES LUT and environment setup
Then comes the texturing process where I create all textures by mixing materials and using masks, the brush tool, and alphas to paint on the garments.
3
After I’m all done, I export the textures in 4K in the Unreal engine 4 (packed) template for a better integration. The settings are shown in figure 15.
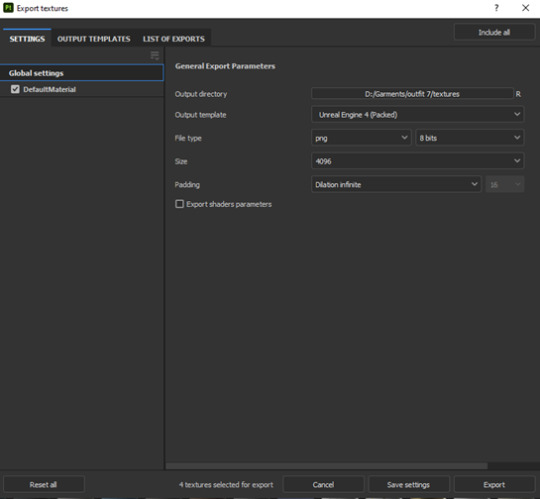
Figure 15 - Texture export settings Substance Painter
Unreal engine
Step 1 is setting up the scene and the environment. I start by downloading Quixel Bridge Megascan assets and directly dropping them in my scene. I also use foliage inside of Unreal Engine five to scatter some plant scans around using a paint tool.
Step 2 is Importing my personal assets into the content browser (all the garment alembic files with their respective texture maps)
Step 3 is setting up the lighting in the scene and adding a camera. For that, I need to add the HDRI I previously used in Substance Painter, as the Cubemap of the skylight. I also set the intensity of the skylight to a low value as it does not act as my main light in the scene but sets the color tone and temperature of the environment instead. As for the camera, I personally prefer tom use the Cinecamera actor.
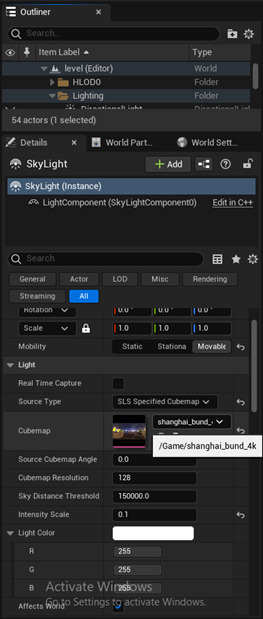
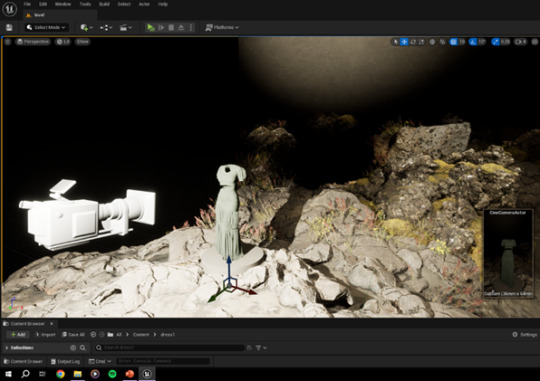
Figure 16 - Unreal Engine 5 lighting and camera
Step 4 is creating the materials inside Unreal using the textures I exported from Substance Painter. It is a process of linking the texture maps to their correct descriptions inside the Material Graph. Figure 17 demonstrates this process in detail.
Step 5 is creating a new level sequence and doing all the necessary animations before rendering everything as a sequence of images.
These last 2 steps are shown in the figures on the next pages.
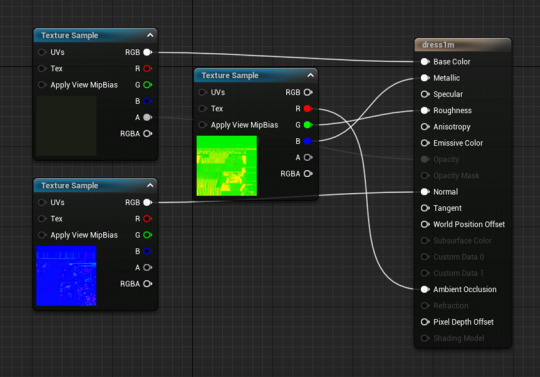
Figure 17 - Unreal Engine Material Graph
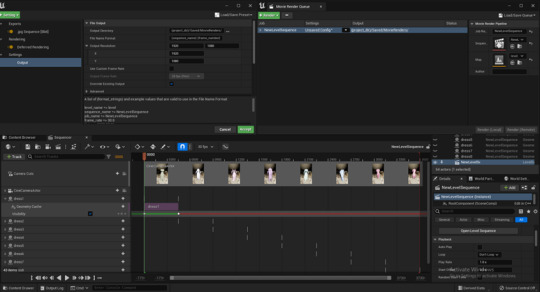
Figure 18 - Unreal Engine Level Sequence and Rendering
It is important to make sure that the aspect ratio is the same in both camera and render.
0 notes
Text
Assignment 6: Part 3
Garment Creation and Simulation
The first step is to import the T pose non animated FBX file into Marvelous Designer.
Patternmaking:
During this first stage is when I create all the pattern pieces for my digital clothes. I draw all pieces of the outfit in the 2D view panel, align them correctly in the 3D view panel, and sew them accordingly using the many tools that the software offers. It is always important to flip normals when pattern pieces appear to be darker in the 3D view.

Figure 7 - Marvelous Designer Patternmaking
2. Simulating:
The second stage is to simulate the garments on the static character while constantly adjusting the fabric properties and settings. Once satisfied with the way the clothes look, I decrease the particle distance value to 5 to add more details and I set the thickness to my desired value. (If the pattern pieces have no thickness set them to “double sided” for the texture to show on both sides).
I then open a new Marvelous Designer file and import the Alembic animated character into the scene. I go to frame 0 and save it as a pose.
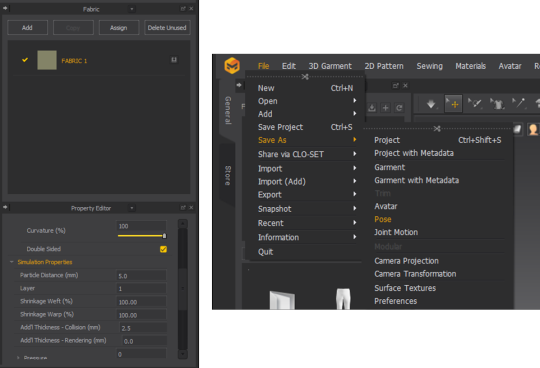
Figure 8 - Marvelous Designer Fabric Properties
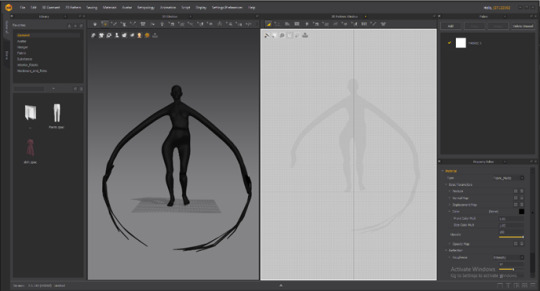
I reopen the previous Marvelous Designer file, start simulating and then apply the pose from the library where I saved it (what this does is prepare the clothes in the pose of the animated character without having to reset everything and readjust the pattern pieces). After that, I import the animated Alembic character file and transform the topology of the clothes into quads (right click > Quadrangulate). I then set the simulation quality to 5 instead of 1 to prevent simulation errors, and I press on record to bake the animation on the garments. If this is not done, you might get results like in the next photo.
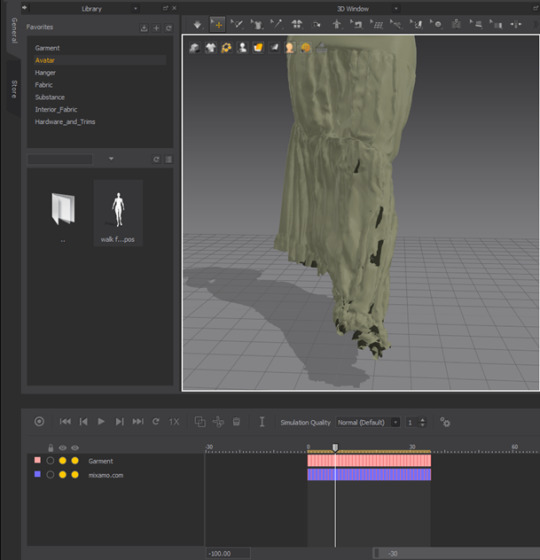
Figure 9 - Simulation errors
3. UV fitting:
When the animation baking is over, I open the UV panel and fit all UVs into one tile so that they don’t get separated on export. I also make sure no UVs are overlapping to prevent issues in the texturing stage.
Finally, I select all pattern pieces and export them as an Alembic file with the settings shown in figure 11.
For the purpose of optimization, it is important to simulate and export two versions of the same clothes with two different “particle distance” values (resolutions). The version with the lower particle distance value will act as a low-poly mesh, and the one with the higher particle distance value will act as the high-poly mesh.
This is useful to be able to bake the details of the high-poly garment on the low-poly one when texturing inside of Substance Painter. In that manner, you can use the low-poly version inside of Unreal while preserving the details without having to increase the size of the Alembic asset files created.
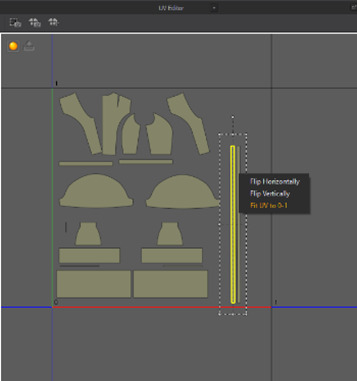
Figure 10 - UV fitting Marvelous Designer
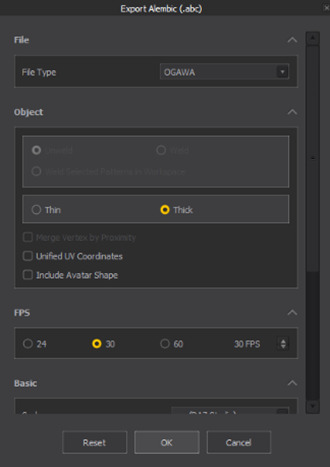
Figure 11- Marvelous export settings
0 notes
Text
Assignment 6: Part 2
Character and Animation
Daz Studio 3D:
In this first step, I create or prepare a character that I will use as my mannequin model to simulate the garments on. For that, I use the Genesis 8 female base model available in Daz Studio 3D. Once you insert the base model into the 3D scene, the software allows you to manipulate some parameters to customize it to your preferences.
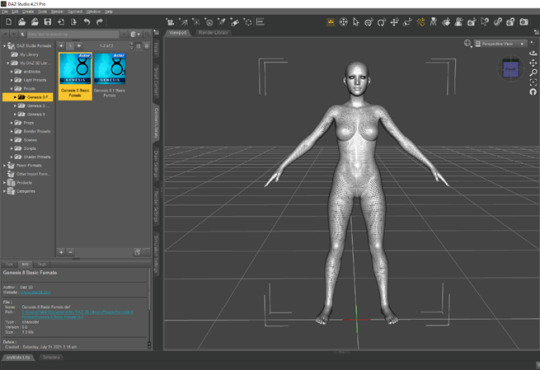
Figure 3 - Daz Studio 3D Genesis 8
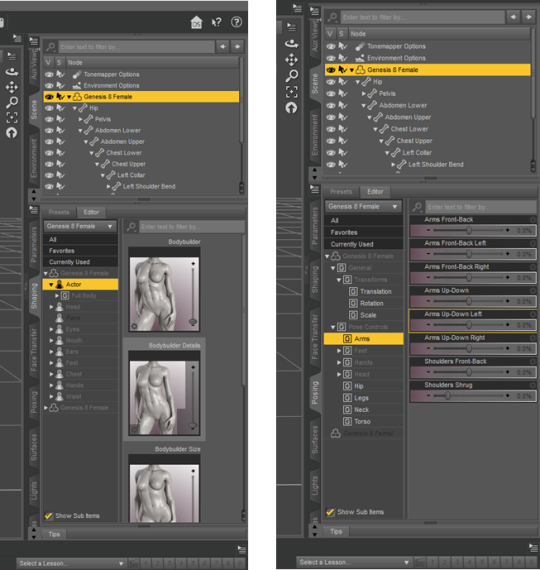
The most important step is to give the character a T pose in order to apply the motion capture animation properly in the later stages. After posing, I export my posed character as a file in FBX format.
2. Mixamo:
The second step is applying an animation to the character. I use the online tool Mixamo just for that: First, I upload my FBX character file on the website and use the auto-rigger tool to rig my character and create a skeleton for it. The process is simple, all I have to do is select the places where the joints of the character are (knees, elbows, wrists, neck, etc…) and Mixamo will do the rigging for me.
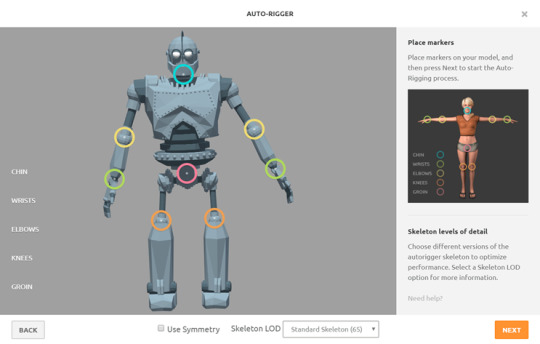
Figure 4 - Mixamo Auto - Rigger
After the rigging is done, I browse through the motion capture library that Mixamo offers, and I apply the animation to my character. After I am satisfied with the result, I make sure to tick the box of the “In Place” option to make sure the character has no positional or rotational movement and set the “Arm Space” to a higher value than default (60 for example) to prevent the fabric from getting twisted and overlapped in the armpit area when simulating in later stages.

Figure 5 - Mixamo animation
Once all these steps are done, I download my character in FBX Binary format with a framerate of 30fps.
3. 3ds MAX:
The third step is to import the animated female model into 3ds MAX to extend the animation as it is only 100 frames by default. To do that, I select everything related to the character and open the curve editor. I then click on Edit > Controllers > “Out of Range Types” and choose “Cycle” to loop the walk cycle animation to infinity without having to manually add keyframes.
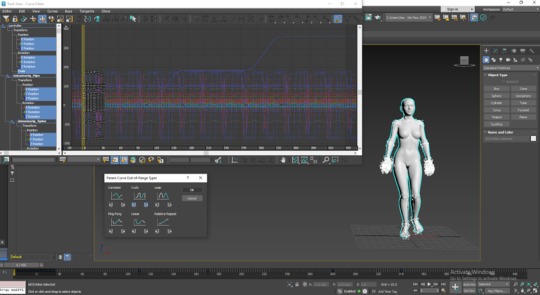
Figure 6 - 3ds MAX character animation
After that, I create a dummy and parent everything to it, I then animate the dummy’s rotation over time to show all sides of the character.
In the end, I export everything in Alembic (.abc) format or else the character will not be well integrated into Marvelous Designer and the character mesh will not display properly like shown in the picture here.
0 notes
Text
Assignment 6: Part 1
Introduction
My name is Joe Abdel Sater, and I am a master’s student at the University of Hertfordshire. I recently started my studies in games art and design after graduating with a bachelor’s degree in computer science back in July 2023. Before moving to the UK, I was studying at Notre Dame University – Louaize, while working as a freelance 3D Generalist for local companies in Lebanon. I decided to pursue a master’s degree as I was much more interested in the artistic side of game-making and wanted to improve my skills in creating assets and environments while exploring Unreal Engine 5.
Project Idea
In order to speed up the design process and foster creativity, the fashion industry has embraced digital tools and techniques more and more. This advancement of Digital fashion technology has been in many ways beneficial to a wide range of aspects in the scope of game design, and creating realistic clothing for video games has never been more accessible. In this article, I will be covering the behind-the-scenes workflow of garment creation and integration into Unreal Engine. With the huge advancements in digital garment creation technologies, it has become a bit overwhelming for new artists to choose the method of work to take on, so I aspire to find the most beginner-friendly efficient pipeline for digital fashion creation.
I hope that my project serves as a valuable resource for fashion designers and game artists like me interested in exploring the realm of digital fashion and its applications in various industries.
The process doesn’t require you to have extensive knowledge in the area of dressmaking and couture, it only requires you to have an eye for design, 3D skills, and the proper tools like: Marvelous Designer for pattern making and simulations, 3Ds MAX for prepping and polishing (or a similar software), Substance Painter for texturing, and Unreal Engine to bind everything together.
In order to construct the best workflow possible for my purpose, I went through extensive research of all the possible ways to go about transitioning from one software to another while preventing any sorts of technical issues. The many trials and errors led me to finalize and polish the digital fashion workflow I discovered and share it with you in detail.
Valuable technologies
In Marvelous Designer, two key features that are particularly valuable to my digital fashion workflow are Automatic UVs and Mesh Transformation.
First, Marvelous Designer offers an Automatic UV unwrapping feature, which simplifies the process of creating UV maps for the 3D clothing models. UV unwrapping is the process of flattening a 3D model's surface onto a 2D plane, allowing textures and materials to be applied accurately. Marvelous Designer's Automatic UVs generate optimized UV layouts automatically, reducing the need for manual UV manipulation. In my project, I needed Automatic UVs to ensure that I can apply textures, patterns, and materials accurately onto the garments, while saving time and effort by automating the tedious process of manually unwrapping each pattern piece. What Marvelous Designer initially does is create the UVs following the pattern outlines of the garments that I create, thus preparing the clothes for direct texturing.
Second, Marvelous Designer provides tools for mesh transformation, which allows me to optimize and refine the topology of the clothing models. This process involves converting the initial triangular mesh generated by the software into a more optimized and animation-friendly mesh with quad polygons for example. By creating a cleaner mesh topology, I can achieve better deformations during animation and improve the integration of the garments into game engines or other 3D software. It also has a “remesh” option that allows me to transform the overall topology of an outfit into a clean grid of squares that wraps around the shape of the garments.
Furthermore, when working with game engines such as Unreal Engine or Unity, optimizing the mesh topology can significantly improve performance and rendering quality. Quad-based topology is generally preferred in real-time rendering environments as it provides better support for subdivision surfaces, smoothing groups, and more efficient rendering.
Concept and references:
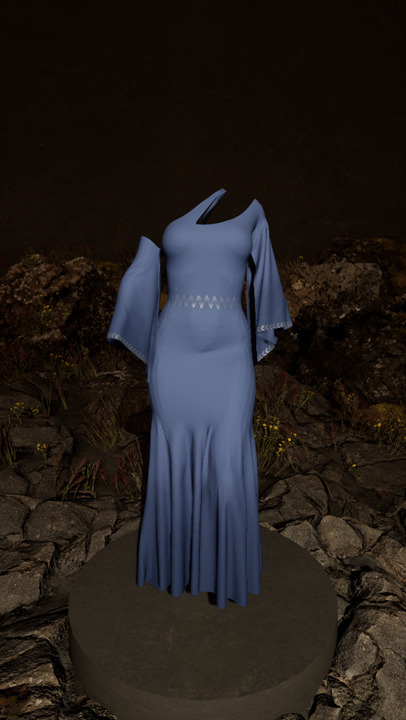
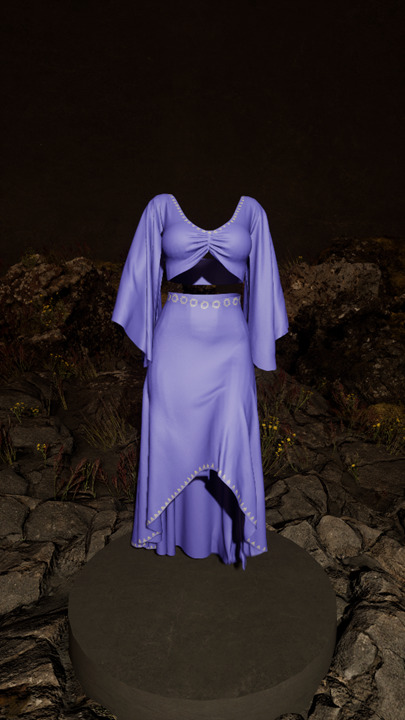
I believe this is a crucial step before officially starting the practical work. During this stage, I hop on Pinterest and browse through the fashion board where I have been saving my pins of favorite outfits and designer clothes. These images serve as a visual inspiration for the clothes that I will be creating.
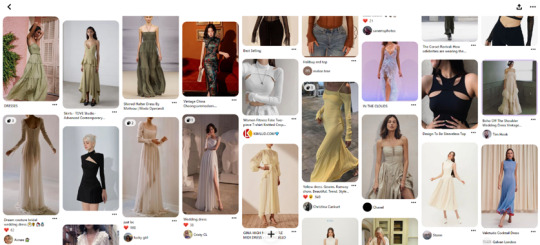
Figure 1- Pinterest Fashion Design Board
I later gather the collected pictures into groups that form references for potential assortments that I can recreate in 3D. These pictures are saved in PureRef, an application that allows me to organize the pictures to use them as references for my creations. I keep the PureRef window open all the time to visualize color combinations, fabric textures, and potential pattern pieces for my garments.
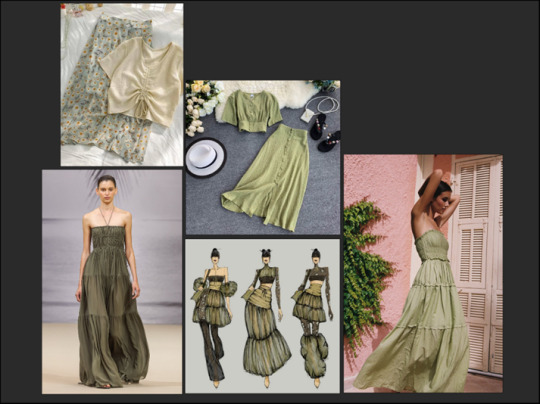
Figure 2 - PureRef file of one of the dresses
0 notes
Text
Assignment 5: Part 3
This is the last part of the 3D printing where I finalise the object I decided to create.
After I was done with the main Netsuke piece, I jumped into creating a base for it. I wanted it to fit the overall theme of a Japanese garden, so I made it into slabs of rock. It was my first time sculpting stylised rocks so I made sure to watch a few online videos for reference. The channel IceCrystal ART had a video which was quite helpful and straightforward (https://youtu.be/phgEOyqhDuo?si=9l7xw1p3PK3NAw6X).
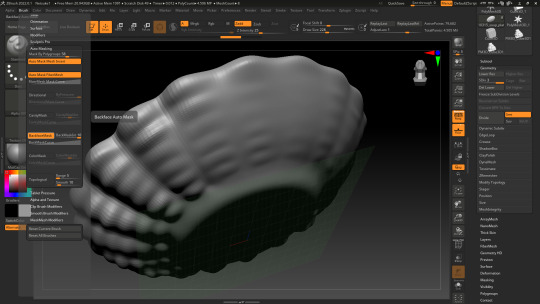
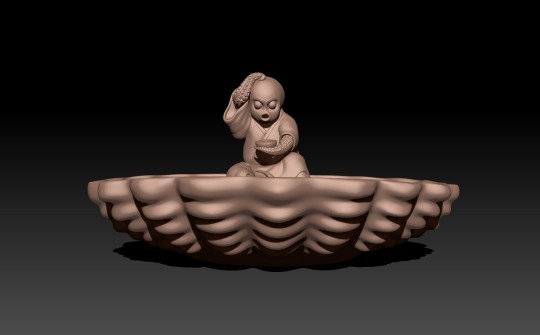
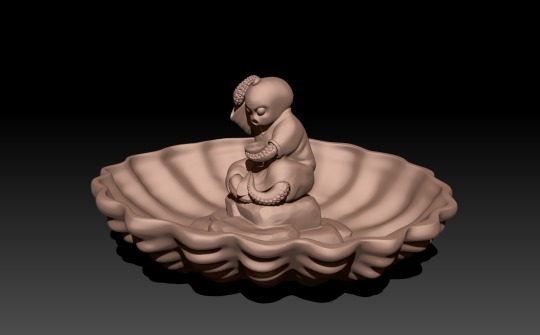
After that came the stage where I created the planter bowl. I quickly modelled it in 3dsMAX and imported it into ZBrush to add details. Then, to create wavy bumps on its sides, I used the "Standard" brush to carve into the bowl on both sides. I wanted to make sure that the brush only affects one side at a time, so I researched how to do it online. I found this video by Follygon on YouTube which introduced me to backface masking for brushes (https://youtu.be/G_pEfhDqtZY).
At first, the backface masking was very useful, but I later realised that using it had a potentially bad effect. Both sides of the surface no longer had a connection and were independent, this caused them to overlap in places where the surface had been pushed too far in or out. Unfortunately, this was not clearly visible inside of ZBrush and I only realised it had happened after exporting the object later on. I ended up fixing it afterwards by using the backface mask again and pushing the mesh in the opposite direction in places where it overlaps.

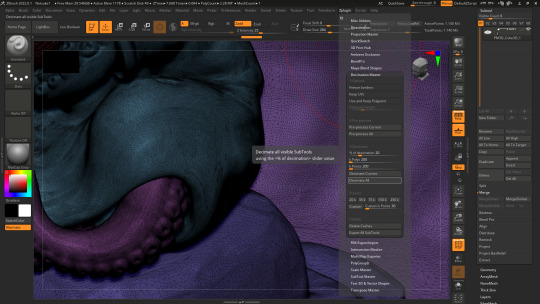
The final step was to get the sculpt ready to be exported. Meanwhile, the subtools were too high in polygon number so I had to reduce them somehow. For that, I remembered a tool that was discussed during class, which is ZBrush's "Decimation Master". It turned out to be relatively easy to use as I only had to do two steps: preprocess all the subtools first, then decimate second. What this allowed me to do is reduce the number of polygons while keeping the sculpted details intact by transforming the mesh into triangular faces. In the end, I exported the entire object as an STL file which is ready for printing.

Sources:
IceCrystal ART (2019). How to Create Stylized Rock for Games Speed Art / 3ds Max / ZBrush / Substance Painter. YouTube [online video] Available at: https://youtu.be/phgEOyqhDuo
Follygon (2019). How To Use Backface Masking In ZBrush. Youtube [online video] Available at: https://youtu.be/G_pEfhDqtZY
0 notes
Text
Assignment 5: Part 2
After I had already worked on the Leviathan axe, I decided to redo some work on the assignment. I realised that 3D-printed in miniature size, the details I had sculpted would not show very well on the axe. I also wanted to have a piece that could be useful for something instead of just being for display. Thus, I decided to start researching again for another concept. The idea of a shallow moss planter struck me as I was brainstorming, so I decided to go for it. I also wanted the planter to be well decorated with a main ornament inspired by Japanese cultural pieces. This is what led me to look for references to Netsuke pieces online, which are miniature sculptures that have been made by traditional Japanese craftsmen over the years.
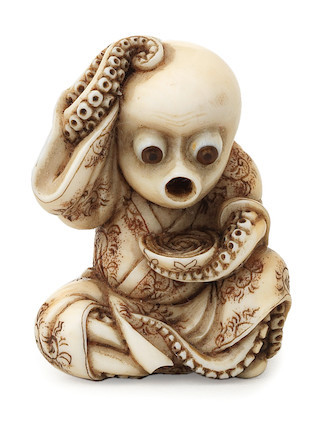
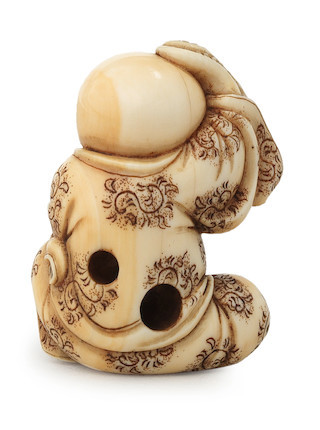
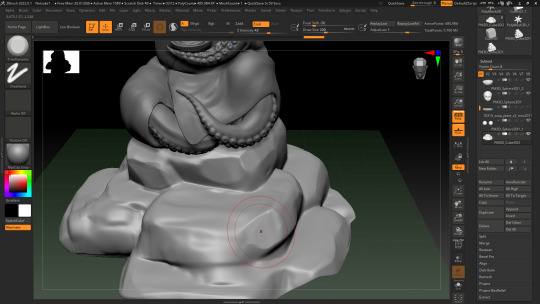
I ended up coming across this cute ivory octopus Netsuke that was made in Osaka, Japan back in the 19th century. So, I decided to replicate it in 3D by sculpting it inside of ZBrush.
The first step was to create the general shape of the octopus, so I started from a cube subtool and roughly created the base for the body. For this part, I mainly used the "Clay Buildup" brush and smoothed it out afterwards. As for the head of the octopus, I started out with a sphere which I then sculpted to resemble the reference.
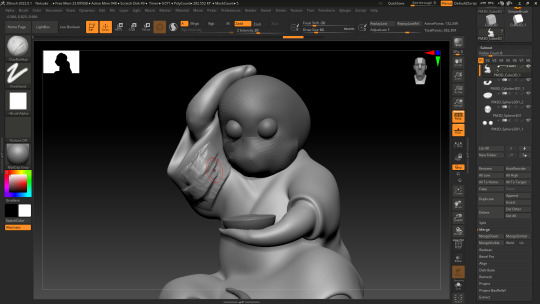
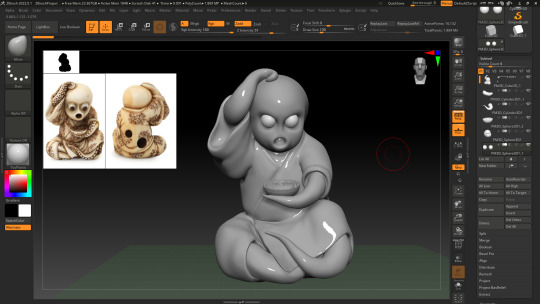
For the tentacles, I use the "Snake Hook" brush with "Sculptris Mode" turned on, to extrude the mesh out of the main body. I made sure to Zremesh every time afterwards to get an even topology.
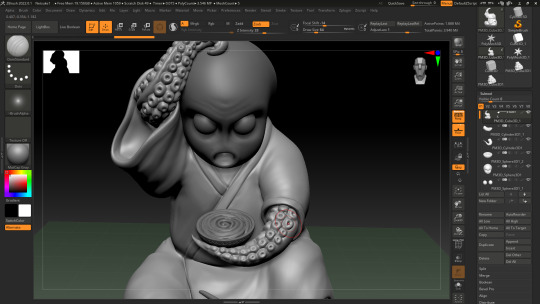
When I was satisfied with the overall shape of the Netsuke, I decided to jump into detailing it. I created the suction cups on the tentacles by creating small bumps on their surface using the "Standard" brush and refining them by using the "Dam Standard" brush to accentuate the corners and creases. I did the same for the kimono that the octopus is wearing, and I also added some wrinkles to give it a fabric allusion.
Sources:
www.bonhams.com. (n.d.). Bonhams : An amusing ivory netsuke of an octopus Style of Hidemasa, Osaka, mid 19th century. [online] Available at: https://www.bonhams.com/auction/23948/lot/158/an-amusing-ivory-netsuke-of-an-octopus-style-of-hidemasa-osaka-mid-19th-century/.
0 notes
Text
Assignment 5: Part 1
In this blog post, I am going to break down my process of creating the 3D asset for the "3D Printing" assignment. When the project brief was first released I was very excited for it as I had never tried building something for 3D printing before. In the beginning, I was thinking about creating a miniature diorama type of environment including a main monument for example. But as I had already modelled similar assets in the past, I wanted to give myself a different type of task that would be a bit more challenging. I had created a sword before which turned out kind of cartoonish and not as realistic-looking as I would've liked. For this reason, I really wanted to give myself the chance to experiment with sculpting techniques. This is when I remembered about a project idea which I had started before but ended up abandoning. It's the Leviathan Axe from the game God of War (2018).

Since the game had many versions of the axe throughout, I decided not to focus on recreating a specific one, and to focus on the process instead. I was heavily influenced by another artist's rendition which I found on Sketchfab. So, I began by inspecting the 3D model by Alex Chuchvaga, and trying to decipher the way the axe was created. I realised that the axe was created as a game asset, so the detailing was made through texturing and using a normal map and was baked on a low-poly model. In my case, I needed to have the details sculpted on the model itself instead, so I took a slightly different approach to the workflow.
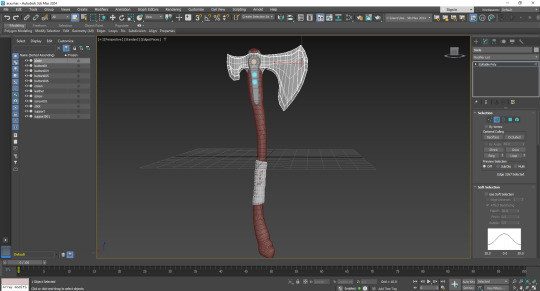
The first step was to create the base model inside of 3dsMAX. I began by blocking out the main shape and adding segment iterations to manipulate the volume. Before exporting it as an FBX file I had too keep in mind to add extra segment loops on the edges that I'd like to preserve. To test out if the model would retain its shape in ZBrush after increasing the subdivision level, I used the "Turbosmooth" modifier inside of 3dsMAX which increases the polygon count.
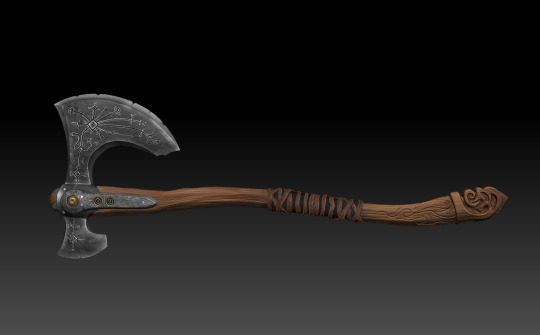
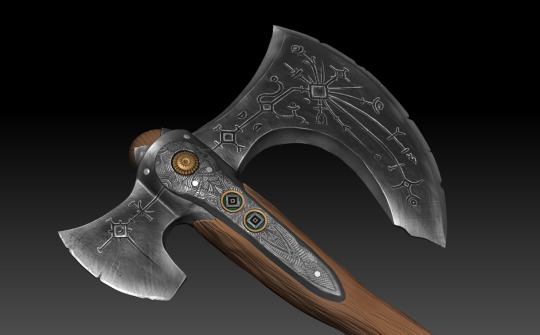
Once ready, I exported the FBX file and imported it into ZBrush. The first step was to "Zremesh" the model to begin sculpting. The main brushes I used are "Clay build up" to create the engraving on the wooden part of the axe, and "Trim Dynamic" for the sharp ends of the blade. I then used the "Dam Standard" brush to create the engraved shapes on the metal parts, as well as, chippings to simulate some more realism and make the blade's edge look slightly dull and worn out. The last step was to create more textural deformations to make sure both parts of the axe are recognized as distinct materials. For the haft, I used an alpha shape which turned out perfect to paint the wooden texture in 3D. As for the head, I searched online for special brushes for metal and rock. I ended up using...which I found on...
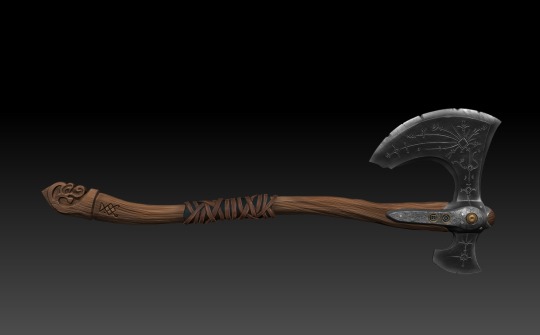
Since the axe was meant to be 3D printed, there was no use in texturing the model, therefore there was no need to UV unwrap the model. Nonetheless, I really wanted to see what the axe would look like as a polished game asset, so, I decided to hand-paint it quickly using the "Polypaint" feature inside of ZBrush.
I am proud of the results I ended up with overall, but more importantly, this assignment acted as a great opportunity for me to practice my sculpting skills without having to worry about extreme optimization or clean UV unwrapping.
Sources:
sketchfab.com. (2019). Leviathan Axe - 3D model by AlexChuchvaga. [online] Available at: https://sketchfab.com/3d-models/leviathan-axe-ef5dc2b5d99d43108e61029ec916b35e
0 notes
Text
Assignment 4: Part 2
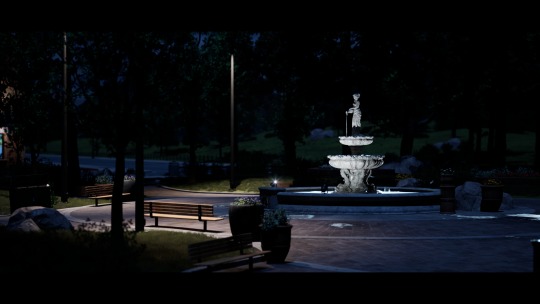
This is the second part of the "Lights and Shadows assignment". After I deleted all lighting elements that preexisted in the demo project, I proceeded to create a new sky sphere and volumetric clouds that I adjusted to fit the night mood.
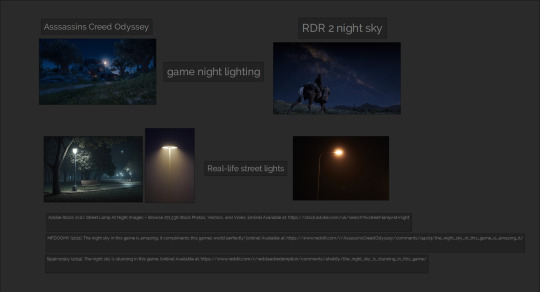

In the beginning, I was trying to follow real-life references of night lighting, but after my tutorial session with Wayne, it was brought to my attention that most night scenes in video games have a blue tone to them. In most cases, people seem to associate the blue color with night even if it does not always look realistic. So, I took the decision to have a directional light as my main light source that sets the tone of the scene and adjusted it slightly to make it look faint with a cool colour temperature. I was heavily inspired by night skies from games like Assassin's Creed Odyssey and Red Dead Redemption as I remember being fascinated by their night lighting before.
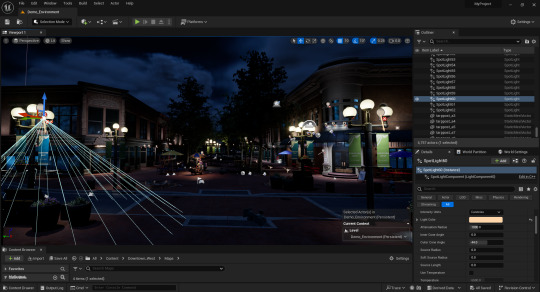
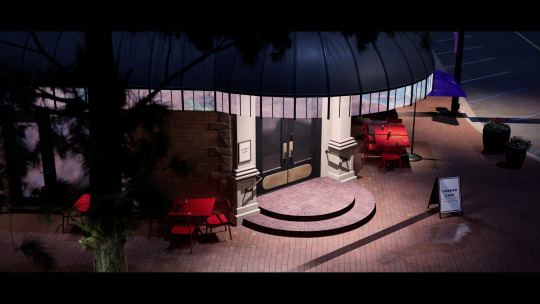
The next thing to do was to add all the other small lights that come together to light up the scene. For that, I mostly used point lights for the well-lit parts of the environment such as round lamp posts, food carts, etc… I used spotlights for areas where the light needs to be accentuated like the shop entrances and outdoor tables. While setting up the light properties, I kept in mind the look of real-life lighting conditions especially for street lamps by following the references I had gathered.
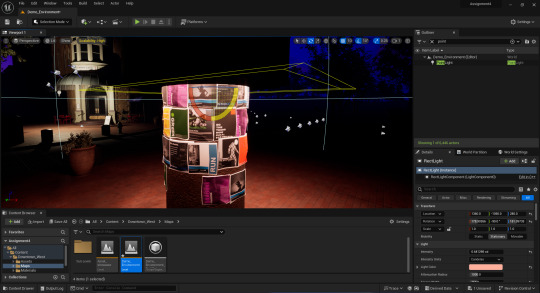
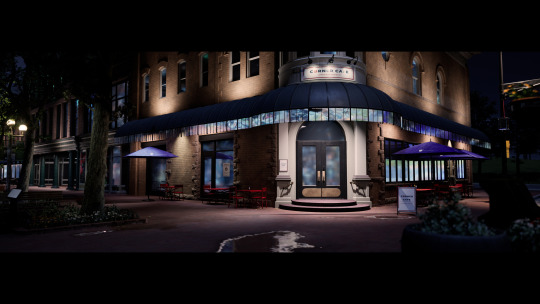
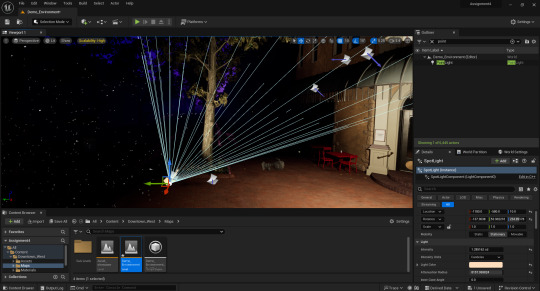
While working, I noticed that there were a lot of dark spots in the scene, which would have been fine for cinematic shots but undesirable for games. In most video games, most parts of the environment should be visible at all times, even if the overall scene is supposed to be dark so that the players can understand the space they are interacting with and be able to recognize familiar objects throughout gameplay. Therefore, I started by creating additional spotlights directed from my existing point lights towards the unlit areas, which made them more visible overall. I also used some rectangular lights in places where I wanted the light to lay flat on a surface or cover a wide area.
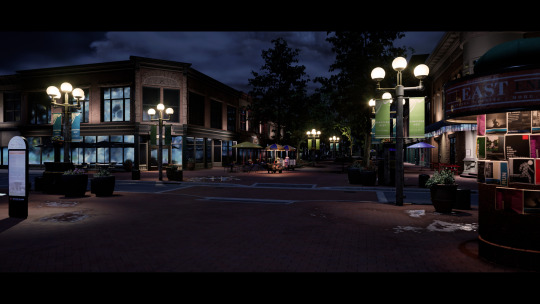
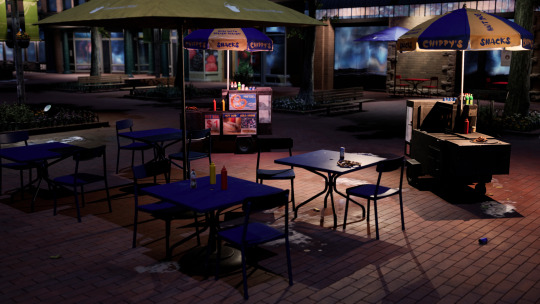
A few adjustments were then made by using a post-process volume to get the final look as shown in the renders (bloom/glare, lens flares, colour tones, exposure, etc…).
Finally, I adjusted the angles and focus values of some of the cameras that were placed in the scene by the creator of the modular pack demo, and went ahead for rendering.
I am so glad this project brief was presented to us as I had never worked on lighting an exterior night scene before. It was a bit tricky to figure things out at first, but I got the hang of it eventually. The assignment made me understand the importance of colour tones in game lighting setups. It also brought to my attention the existence of secondary lighting systems that help illuminate unlit areas that might hide important game assets.
0 notes
Text
Assignment 4: Part 1
This project is titled "Light and shadows". My first thought was to create different lighting scenarios of one particular angle of an interior scene. However, I soon felt like it is quite simple to achieve good lighting results in instances where only one small portion of an interior environment is being shown. It is also relatively easy to get a nice outcome with one main light source, but it can be more difficult to light an exterior scene containing many light sources. That's why I decided to work on lighting a night scene of an outdoor environment.

I hopped on the UE Marketplace looking for ready-made game environments. I ended up stumbling upon the "Downtown West Modular Pack" environment which had a built in demo scene I could use to practice and test my lighting skills.(https://www.unrealengine.com/marketplace/en-US/product/6bb93c7515e148a1a0a0ec263db67d5b)
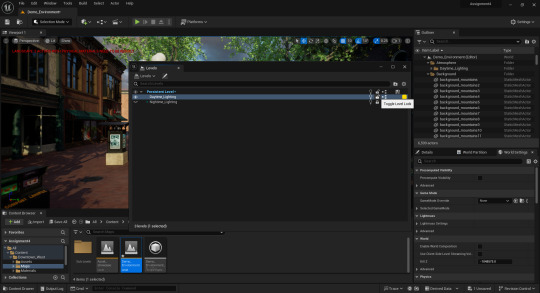
At first, I inspected the already existing lighting that comes with the project demo scene to understand how it was designed. As a first thought, I felt like the lighting setup that was done looked pretty basic if it were to be used in a game. I really wanted to challenge myself and see how far I could go in making the environment into a favourable game world through lighting only. For this reason, step one was to delete all lighting elements that came with the project for both day and night options. I struggled with doing that in the beginning as I was not very familiar with lighting inside of Unreal. I actually was not able to delete the existing lights as they were greyed out in the outliner. After some thorough research, I found out that it was because the elements were locked by the creator of the project. This is how I got introduced to the "Levels" panel in Unreal through the software's official website (https://docs.unrealengine.com/4.27/en-US/Basics/Levels/LevelsWindow/#:~:text=The%20Levels%20window%20shows%20all,will%20modify%20the%20current%20Level.). The "Levels" window allows for better manipulation of elements that are created in the project. For instance, I was able to toggle a lighting sublayer's visibility on and off or even delete it.
Sources:
Unreal Engine. (n.d.). Downtown West Modular Pack in Environments - UE Marketplace. [online] Available at: https://www.unrealengine.com/marketplace/en-US/product/6bb93c7515e148a1a0a0ec263db67d5b [Accessed 25 Oct. 2023].
docs.unrealengine.com. (n.d.). Managing Multiple Levels. [online] Available at: https://docs.unrealengine.com/4.27/en-US/Basics/Levels/LevelsWindow/#:~:text=The%20Levels%20window%20shows%20all [Accessed 25 Oct. 2023].
0 notes