
hextbook
Bibidi Bopidi YOU!
Helpful tips and tricks for costumers, cosplayers, and eccentrics alike. Also an archive of con photos taken throughout Florida :)
490 posts
Last active 60 minutes ago
Don't wanna be here? Send us removal request.
Last Seen Blogs

cool-person-yey
Doing cool Stuff and Making cool Things

geek-network-entertainment
Geek Network Entertainment

awesomeboss0808
welcome to stupidity central
grandaddy-of-all-liars
shhh...the walls have teeth
Text
forgot my night time garlic bread in the oven for the length of 2 mythbusters wpisodes and when i opened the oven door it was so thoroughly cremated that i was blinded not by smoke and ash but what surely must have been its Soul as well
95K notes
·
View notes


Photo

Sunlit dew in Finland (Photo: Tiina Törmänen) [OS] [1280x1280] - earthmoonsun
26K notes
·
View notes


Photo


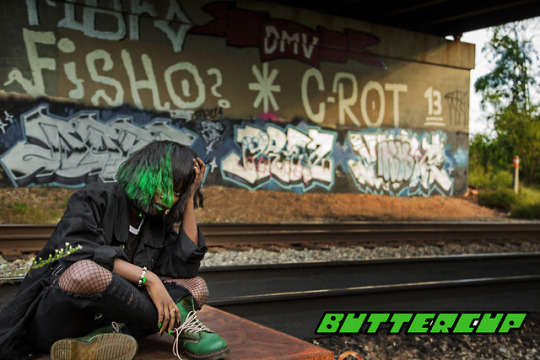
fantasy lucia cosplay inspired by santa lucia day, @ home december 2020
wings by @fancyfairywings, star halo by @/foolofbeauty on insta
87 notes
·
View notes
Link
This database holds a ton of useful materials for embroidery! many different types of stitches in various difficulties, all incredibly useful!


43K notes
·
View notes
Video
undefined
tumblr
(original video link here)
this is world cosplay summit team mexico for this year (and i believe this is their qualifying entry? correct me if i’m wrong.)
i gasped. this is so unbelievable. kudos to them. the video didn’t have any links to cosplay pages, so if someone knows the participants’ facebook/tumblr cosplay pages, linking me would be great :)
59K notes
·
View notes
Photo

#throwbackthursday with my fave photo from this set ❤️
Michiru by Rizzy
Haruka by Rach
Photo by thereallarkas
2K notes
·
View notes
Photo
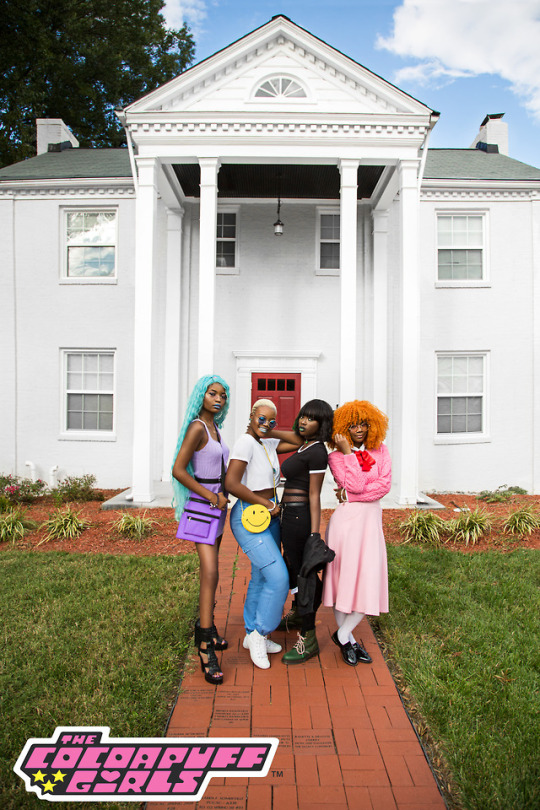
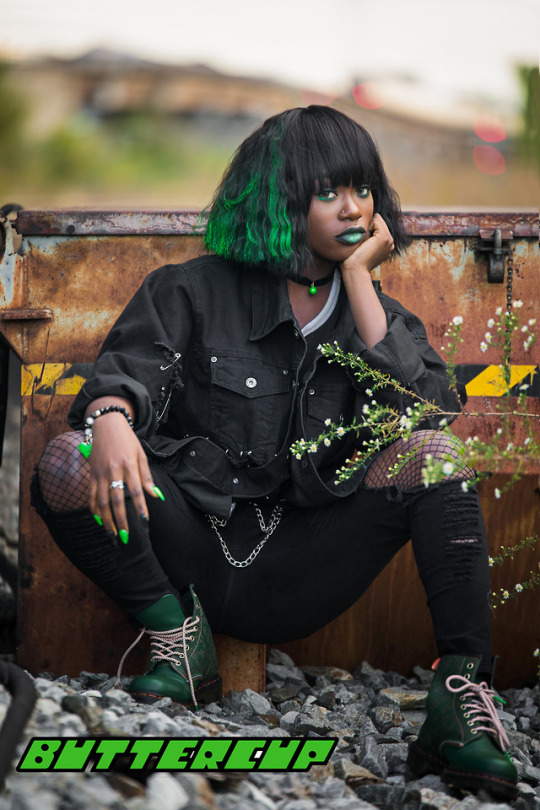


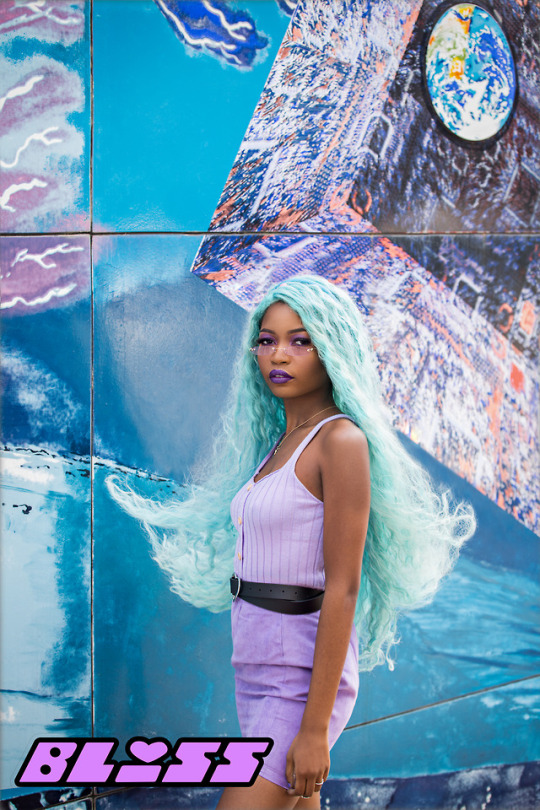

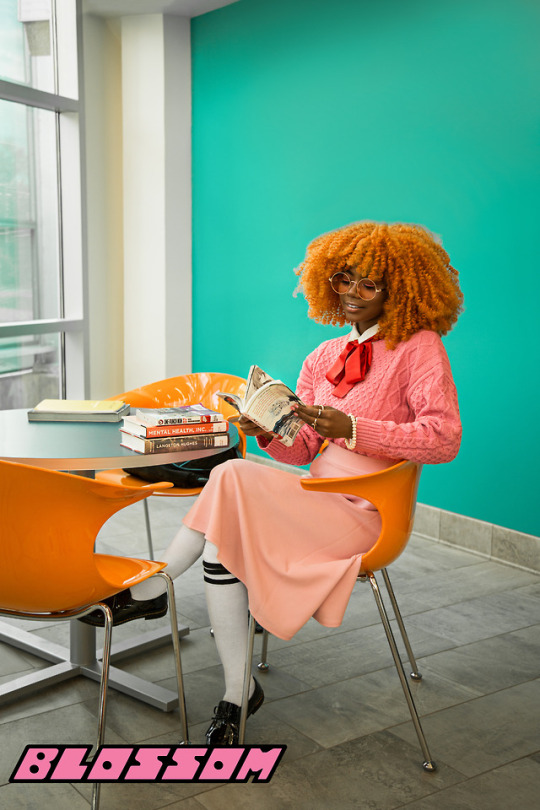

THE COCOAPUFF GIRLS
So about this project. For awhile now I’ve noticed almost every single time I see a darker skinned black woman “going viral”, she’s half naked, oiled up, and/or sexualized in some way shape or form. It’s very rarely ever “Look at this amazing dark skinned woman who accomplished this thing.” Or “Look at her smile, she’s gorgeous”. Please don’t misinterpret what I’m saying. There is nothing wrong with darker women and black women in general being free and expressive about their sexuality and provocative features. BUT that is NOT ALL they are. They are so much more than sexual beings, but for some reason, that seems to be almost the only thing that grabs viral appreciation. So here’s my attempt to have darker skinned black women go viral for just being cute, creative, stylish, bubbly, beautiful, and black. Aside from the videographer EVERYONE involved in this project IS A BLACK WOMAN. I hope you guys like it. I ask that if you enjoyed this and agree with my objective, share it with a few people please.
A special thank you to @aggienes, I couldn’t have done this without her.
INSTAGRAM PAGES OF THOSE INVOLVED
Photographer & Creative Director: @ohpenmike @ohpenmikephotos
Stylist: @ohpenmikephotos & @aggie_hair
Hair-Stylist: @aggie_nes @aggie_hair
Graphic Designer: @pepitapepper
MUA: @chidi.mma
Models: @kristiatolode @misskellykel @chiepodeu @yanjusofine_
121K notes
·
View notes
Photo
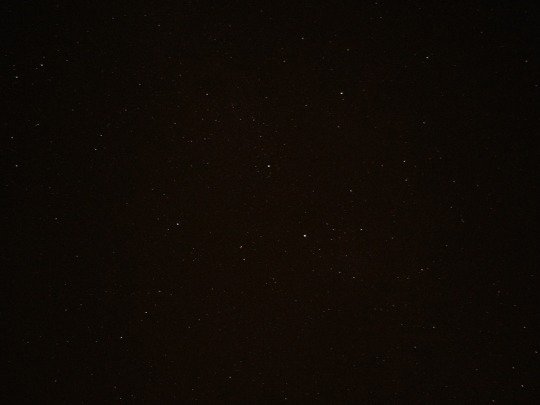
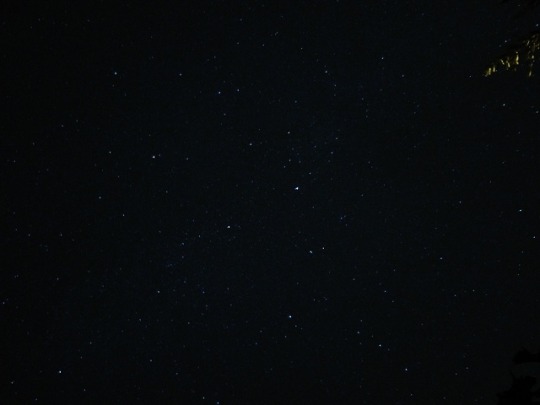
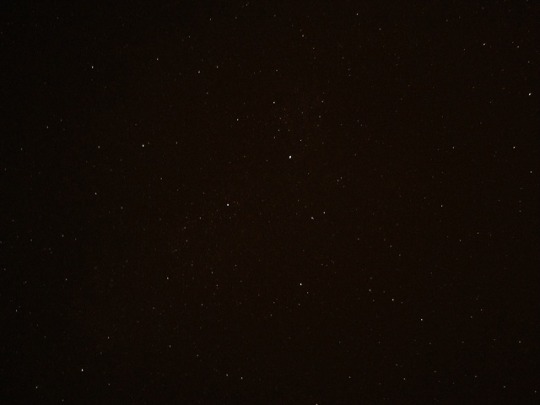
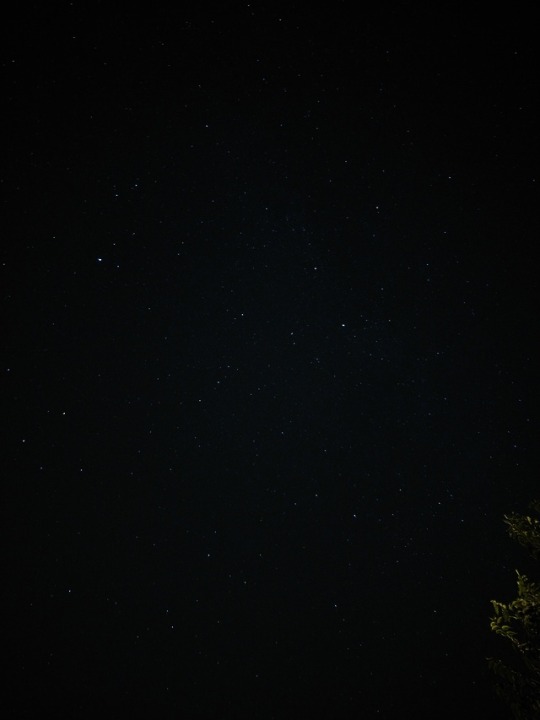
im very grateful for the lessons in photography i was taught in stop motion class because just now they made it possible to photograph the stars with my phone in spite of the camera usually not detecting the light of stars because theyre so dim,,,, enjoy these shiny motherfuckers
246K notes
·
View notes
Photo
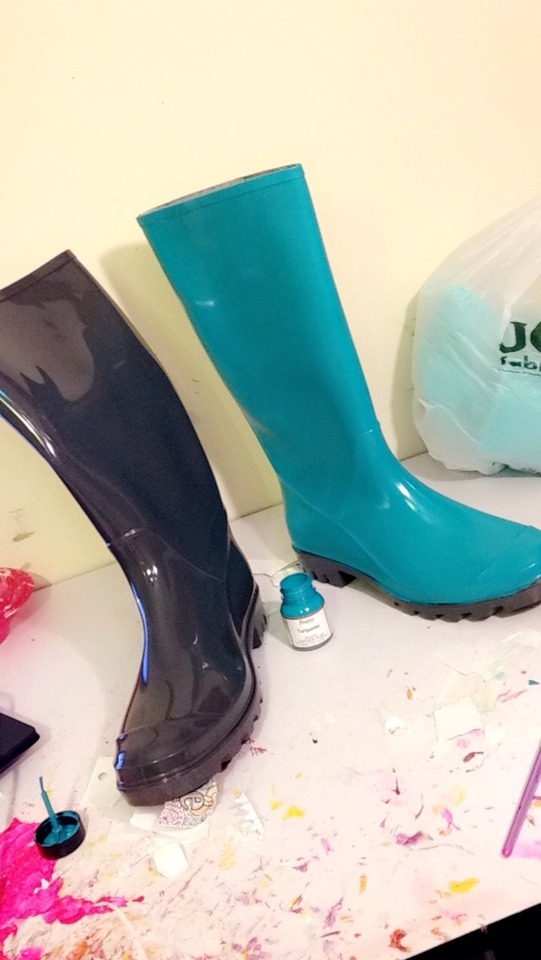

ATTENTION COSPLAYERS:
I would like to make the paint brand “Angelus” known. It is a special paint that is for leather, faux leather, rubber, and similar surfaces.
This is literally the best paint you can buy if you love a pair of shoes, but they aren’t in the right color for your character.
This stuff coats VERY well AND the coats of paint bend with your shoes. This means no cracking!!
In the photos above I took black rain boots and painted them with Angelus Turquoise. As you can see, they don’t look black any more! It’s so good!
I managed to paint two boots with a little one ounce bottle of the paint, and I still have a third of the bottle left over!
The paint dries very fast, so you can put layer on top of layer on top of layer without it streaking.
You can get the paint on Amazon and it comes in every color!
I just really wanted to make this known!! :D This stuff is amazing!
159K notes
·
View notes
Text
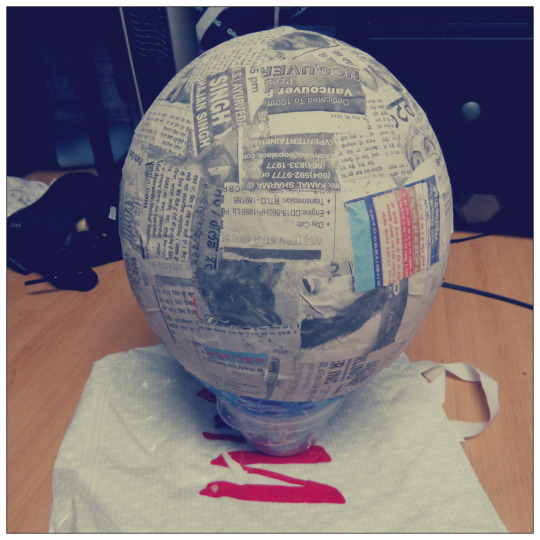
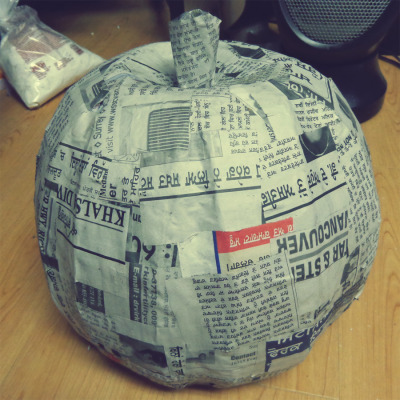
How to make a pumpkin head
Since I defs didn’t want to carve a real pumpkin to put on my head and get nasts pumpkin insides all over my hair I decided to paper mache one. Unfortunately there was no good tutorials anywhere so I will share my trial and error knowledge.
First I got some supplies: 1 Punch balloon (they’re rounder and larger they regular balloons), some paper mache stuff in a bag, cardboard, a glue gun, paint, sculpey clay, tape, some news paper and some water and flour mixed together.

I then put at least three - five paper mache layers of newspaper with flour water on the balloon. I also measured my head and left an opening at the bottom. (NOTE: Don’t put tape on the balloon and try to peel it off after you’re done paper macheing, RIP)
After that’s all dry I put glue gunned some cardboard onto it to give it some pumpkin like ridges.

Then I filled the gaps between the cardboard and the newspaper with the paper mache in a bag stuff. Wait for it to dry. (Note: Don’t pop balloon until the paper mache in a bag stuff is dry cause it holds a LOT of water and your paper mache project will sink, RIP) After that I popped the balloon and lightly dampened the top with a sponge and water until it was wet enough to slowly press down into more of a pumpkin shape.
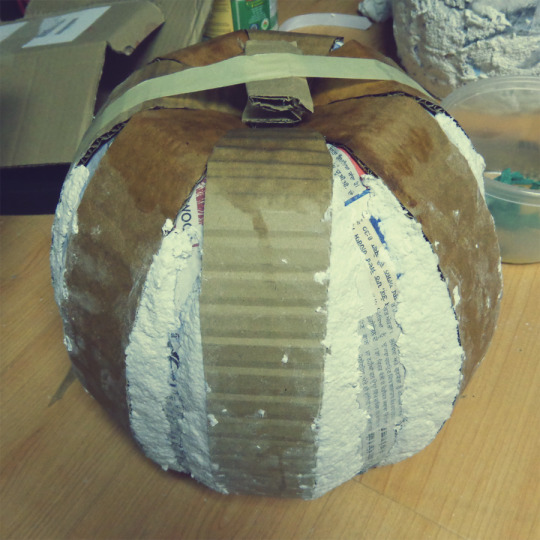
After it’s all dry I taped a stem I made out of card board on the top and put another layer or two of newspaper mache over top.
More drying wait time (you can use your oven on the lowest setting to make it dry faster) then I sanded it down and cut out a face with an exacto blade.
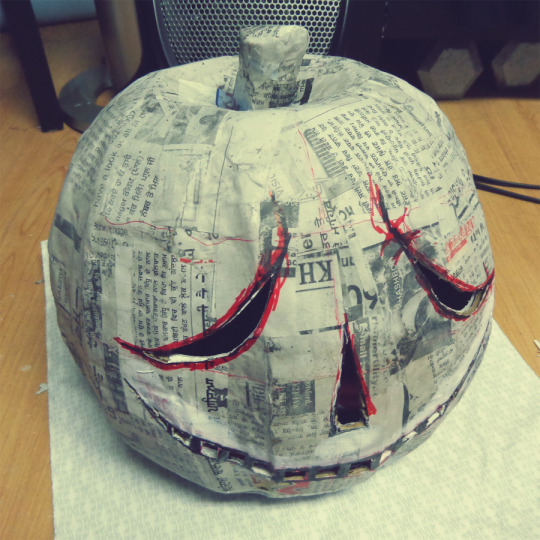
I added a little bit of backing behind the face on the inside with the paper mache in a bag to give it more of a 3D look which wasn’t that noticeable but oh well, it kidna worked… After all that stuffs done I painted it all white otherwise the newsprint would bleed through and make my colours not as bright, I also added some sculpey clay to the brow area to give it some more emotion in which I used an iron to dry it with cause it was too late to put it in the oven with paint all over it (Note: Put clay on before painting).
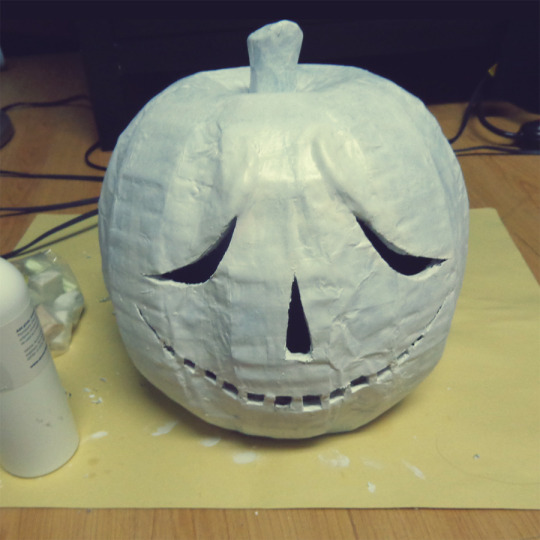
I sprayed it with a sealer before painting colours on it cause I find acrylics do weird things sometimes. After it was all dry I begin to paint.


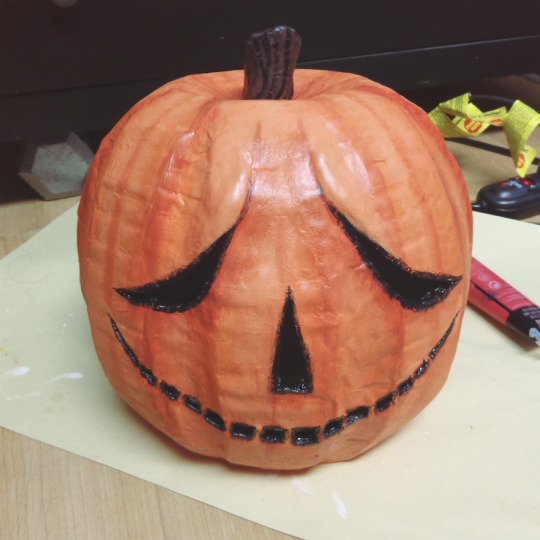

I also painted the inside a red and added a kinda head rest thing on the inside since when I pushed the top down it made an uncomfortable point at the top when putting it on your head. Then once it was all dry I sprayed it with some more sealer, added some cool stuff like stitches with some ribbon and blood which I used nail polish for a shiny effect and put in some lights which weren’t very effective when my head was in the pumpkin but that’s okay, it still looked cool.


And that’s that!

Hope this helps some people, Enjoy!
184K notes
·
View notes
Text
Otachi Craft Foam Spine/Tail How-to Post


So at dragon*con I debuted my Otachi gijinka cosplay! The fitting and patterning and rhinestoning on this costume was all stuff I knew how to do. I have never worked with craft foam before. So. Here is a post about a craft foam newbie’s strugglebus.
For once I decided to take a lot of pictures of my process of something, and I am here to share with you a… well, I wouldn’t be so presumptious as to call it a tutorial. Call it a documentation of my first time ever working with craft foam, all the struggles and tears, and all the things I learned along the way.
More Otachi pics can be found here~
This was a super intense process, and this post is mega exhaustive, so this is under a cut!
Keep reading
2K notes
·
View notes
Photo


“My King..
My life is your’s..”
South Park: Stick of Truth
Stan Marsh - @adamae
Kyle Broflovski - Mariko
Photo by Fosya
1K notes
·
View notes