
hazelandglazed
Let's Cook This Shit
Recipes for Millenials who want to cook their own shit but don't have time for those 12.000.001 steps like WTF
50 posts
Don't wanna be here? Send us removal request.
Last Seen Blogs


wwwtechxidvtw
無標題

kuroganedecimo
The Nihilistic Hierophant

wikkidwitchofhighland
Shortcuts for the Lazy Witch

loftfurniturehk4-blog
Untitled
Text

don't forget during the WGA strike that animation is not covered under the WGA deals and as a result animation has gotten the shortest possible end of the stick in under-staffing, under-paying, and generally turning the field into gig employment.
please sign the petition here for Disney to recognize animation production workers as a union and reblog this post!
58K notes
·
View notes
Photo
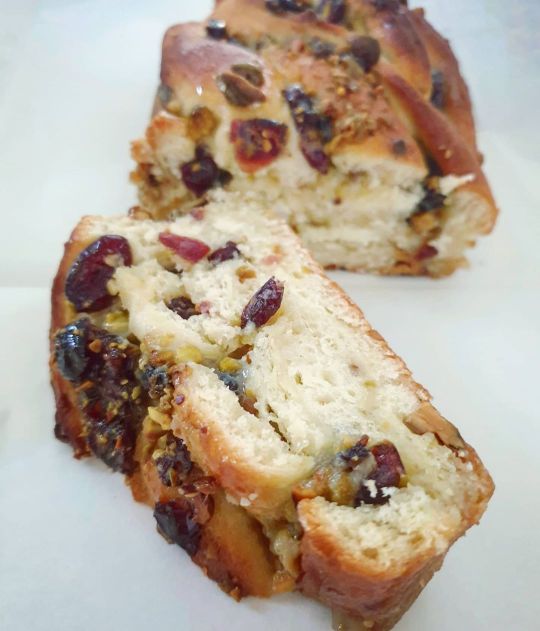
PISTACHIO & CO.
Pistachios are definitely one of my favorite ingredients when it comes to baking and pastry. Their singular taste goes well with many things, from chocolates to fruits, citrus, caramel…
And fro this Babka I made one of the combos I always love: pistachios, cranberries and white chocolate.
For the Babka you will need:
530g flour
3 medium eggs
90g sugar
120g milk
20g fresh yeast
150g soft butter
6g salt
+100g sugar and 100g water for the syrup
And for the filling:
150g white chocolate
120g cream
20g pistachio paste
60g peeled pistachios
100g cranberries
Start by mixing the flour, yeast and sugar. Then add the milk and eggs and start mixing at medium speed for 8 minutes. Add the butter and mix for another 8 minutes. Add the salt and mix for another 5 minutes.
Put your dough in a large oiled bowl, and cover with nylon. Ideally, let the dough rest overnight in the fridge, otherwise you can let it rest 2 hours in a warm room.
Make the pistachio ganache : put the white chocolate, cream and pistachio paste in a bowl and melt them in a Bain-marie. Let it cool down for a bit.
Meanwhile, roast the pistachios in a pan, then crush them. Keep aside.
Then flour your work table, roll 1/3 of your dough to make a rectangle (approx. 25 x 30 cm). Spread the ganache on the dough, 1df pistachio chunks and cranberries and roll. Cut the dough to make to strains and kneat it to make a torsade. Place in a cake mold and let it rest for 30 to 40 minutes before baking at 180 for 25 to 30 minutes.
Prepare the syrup by heating the sugar and water in a pan.
When your Babka is still hot, brush it generously with the syrup and let it rest before eating.
Enjoy!
#food #foodblogger #foodporn #foodie #foodil #gargeran #breakfast #israelifood #brunch #lifestyle #babka #brioche #goodmorning #patisserie #pastry #kosher #kosherfood #jewishfood #pistachio #chocolatelover #jewishfood #israeli_kitchen (at Florentin, Tel Aviv)
https://www.instagram.com/p/CD5rNN2HSmV/?igshid=1cbgzy8ss0aeq
5 notes
·
View notes
Video
wrapping jiaozi🥟 chinese dumplings
39K notes
·
View notes
Photo
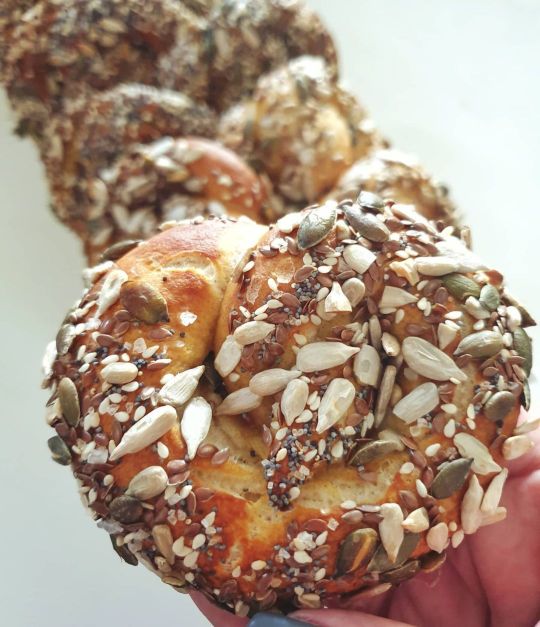
PRETZELS🥨🥨🥨
When I think about pretzels, I am immediately in the Christmas market in Strasbourg, with the smell of the Glühwein (the traditional hot wine with spices).
This year, there won’t be a Christmas market there, but at least we’ll have pretzels!
For 12 pretzels:
150g flour
350g whole wheat flour
15g salt
330g milk (or water) at room temperature
12g fresh yeast
5g sugar
30g soft butter
+
2.5 liters of water
80g baking soda
15g sea salt
Grains and seeds
In your mixer bowl, start by mixing the flours and salt.
In a separate bowl, stir the yeast, sugar and milk until the yeasts are dissolved. Pour on the flour and mix at medium speed for 8 minutes.
Then add the butter, and mix for 10 more minutes, until you get a soft dough.
Cover and let rise for 1.5hr at room temperature, until you get a fluffy, double sized dough.
Make 12 balls (each one will weight 70 to 75g) and roll each ball in a thin and long strand, then make dough knots (explained in the Highlights)
Let rise for 10 minutes, and in the meantime, boil the water with salt and baking soda. Cook the pretzels for a few minutes until the resurface, then dry them with paper and cover them with seeds (I used poppy seeds, sesame, pumpkin and sunflower seeds, and sea salt).
Bake at 200 for 13 to 15 minutes, until you get nicely golden, soft, smooth little pretzels!
I bet you won’t wait until they cool down 😉😁🥨
#food #foodblogger #foodporn #foodie #foodil #gargeran #baking #cooking #foodforfoodies #kosher #kosherfood #pastry #bread #pain #pretzels #pretzel #alsace #homemade #homebaking (at Tel Aviv, Israel)
https://www.instagram.com/p/CHkIjSnI_rn/?igshid=j8pupkm7fg6v
10 notes
·
View notes
Text
fucked up how cooking and baking from scratch is viewed as a luxury…..like baking a loaf of bread or whatever is seen as something that only people with money/time can do. I’m not sure why capitalism decided to sell us the idea that we can’t make our own damn food bc it’s a special expensive thing that’s exclusive to wealthy retirees but it’s stupid as hell and it makes me angry
411K notes
·
View notes
Photo
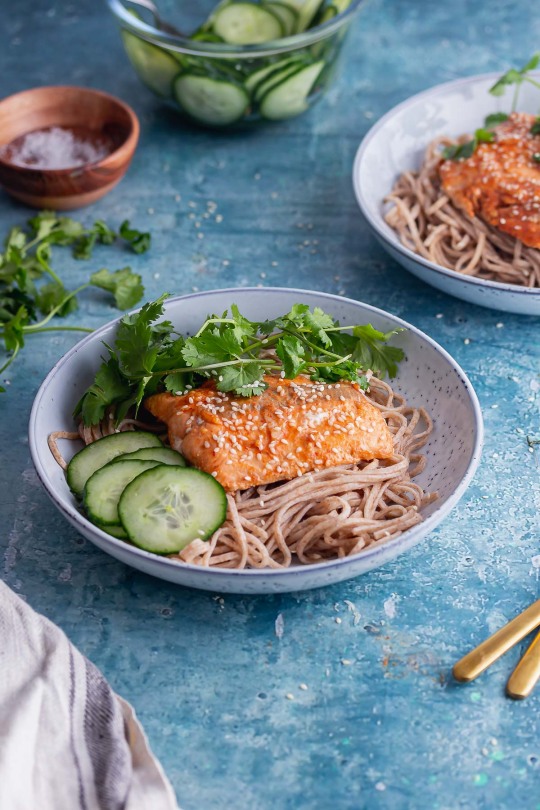
Oven baked honey soy salmon is served over noodles with a side of pickled cucumber for a healthy and easy dinner. This glazed salmon also works perfectly cold for lunch the next day!
41 notes
·
View notes
Text

Recipe soon to come 🍕
1 note
·
View note
Text
Remember those cookies?
I made a fun version that I really wanted to share with you, and that I’m probably going to turn into a series:
COCKTAIL COOKIES! (or Coocktails, as I’m already calling them)
I started with Mojito, duh, because Mojitos are delicious.
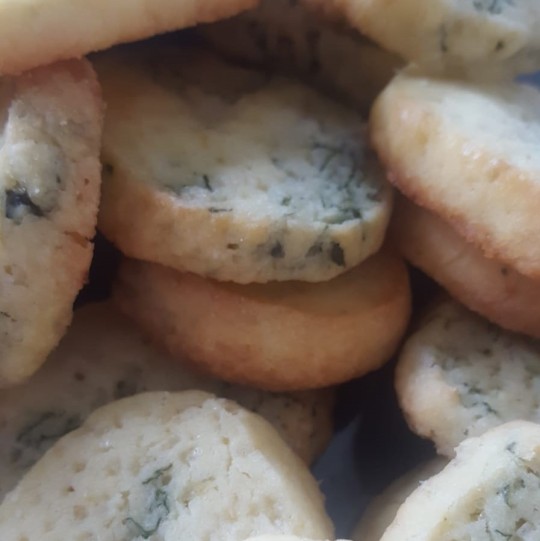
The recipe doesn’t change much, but still, a few adjustments were made.
New Ingredients:
Basic dough is identical
2 lime - zest and juice
1 lemon - zest and juice
A bunch of mint leaves
1 teaspoon of rum
40g of flour, divided in 2
Once your basic dough is ready, divide it 2/3, 1/3.
In the 2/3rd, add 20g of flour and the citrus.
In the 1/3rd, mix in your shredded bunch of mint leaves and the teaspoon of rum.
Mix each of them thoroughly to guarantee the distribution.
The dough will feel wetter than the usual one, but sprinkle in some flour until it feels right to the touch.
After that, you are back on track with the original recipe: form stripes of dough and create patterns with the citrus dough and the mint one, before rolling into a sheet of plastic and place it in the freezer overnight.
As a result, the taste of citrus and mint should be the strongest, the alcohol having evaporated during the baking.
Enjoy, and let me know which cocktail you’d like me to turn into a cookie!
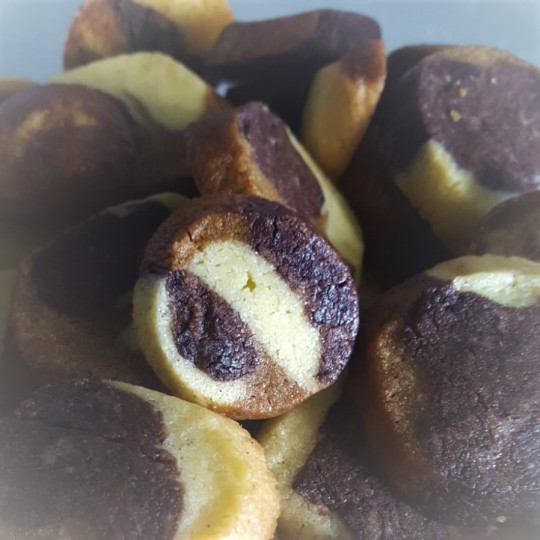
17. Why Choose When Your Cookies Can Be All The Flavors (well, at least three)
I saw a recipe for “zebra cookies” and immediately thought, “why couldn’t it be a tricolor thing”, because vanilla and cacao? Good. Cacao and coffee? Good too.
So why choose?

Hence, trifecta of tastes in those cookies!
Ready?
Let’s go!
Keep reading
19 notes
·
View notes
Text
19. Fried Noodles On The Fly
Because sometimes, the maximum of time you want to invest on your dinner does not exceed 20 minutes.
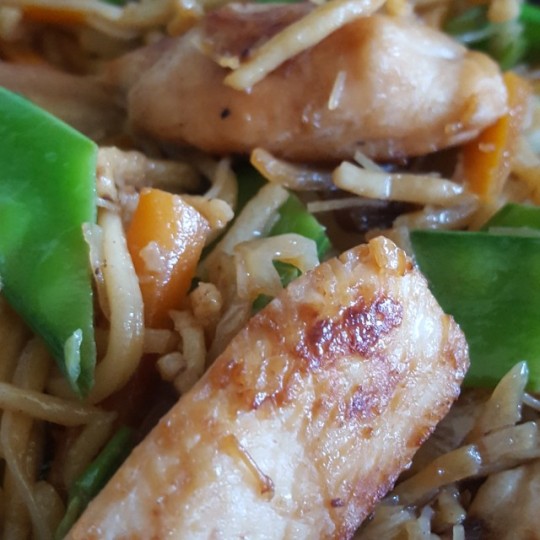
Okay, I’ll admit, the chicken was marinated beforehand, but you can prepare that in the morning before you leave, and it will be good to go when you come home in the evening ;)
Ingredients:
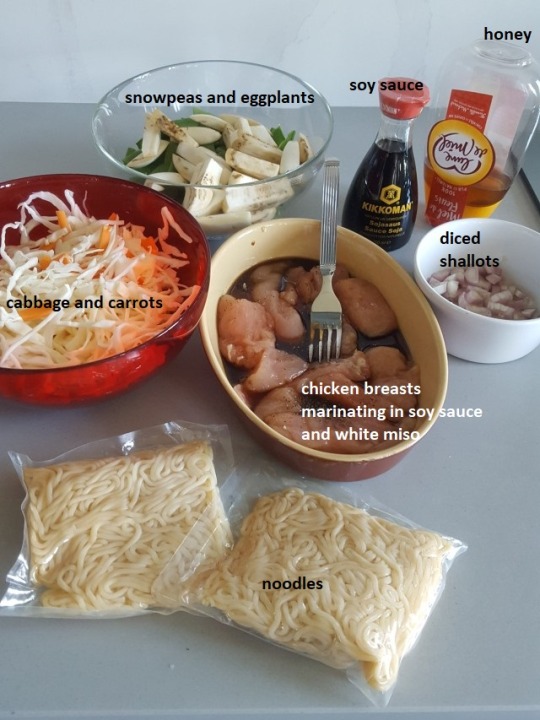
Instead of the shallots, you can use onion or garlic, or the three together, really, it’s really a matter of taste. I love garlic to the end of the world, but sometimes, you just want something gentler.
The eggplants need to be dried a little bit before being added to the mix: when you cut them in half, criss-cross them and sprinkle some salt. After a couple of minutes, pat them with kitchen towels and voilà, dried eggplants that won’t absorb all of the oil.
Also, not pictured, one lemon (for juice and zest) a couple of tablespoons of oil. I recommend using one tablespoon of sesame oil and one tablespoon of any vegetal oil.
Also not pictured, optional sesame seeds.
First, you need to cook the noodles. Follow the instructions on the box, drain them, pour a little bit of soy sauce and leave them aside.
Now take your (marinated or not) chicken and cut it into strips (1.5 to 2cm wide).
Next, in a pan, heat the oil(s) and add the shallots and sprinkle some salt. when they start turning translucent, add the pieces of chicken.
Mix it well together and when the chicken starts taking on a nice, caramelized color, take it out of the pan and set it aside.
In your pan, pour your lemon juice and some water with the honey and deglaze your pan--it means using a liquid to stop the heat in the pan and get all those greasy bits at the bottom because that will create a sauce.
Add in the cabbage and the carrots, and toss them well until they are coated in said sauce.
Add the snow peas and the eggplants. Toss them together until the snow peas start coloring too.
Add the noodles. Toss everything together. If it feels dry, you can add a little bit of oil (at this point in the cooking process, you can use sesame oil on its own).
Season with salt, pepper and a little bit of Shichimi Togarashi (I love its heat but that is up to you too!)
In a bowl, serve the noodles and add the pieces of chicken (sprinkle some sesame seeds for their crunch and to make it pretty. Just because it’s quick to make doesn’t mean you can’t treat your eyes too!)
If you’ve made too much, you can save it for the next day, but it doesn’t freeze well.
Enjoy!
#easy peasy recipeezy#fried noodles#you can replace the chicken with tofu if you want#not vegan but could be i guess#not gluten free (unless you use gluten free pasta)
3 notes
·
View notes
Text
18. Biarritz Cookies (Don’t Ask About That Name, IDK either)
Through all my childhood, there has been one type of cookies that I have loved above all else: the Biarritz, by Delacre (zero clue why they are called like a city in the South of France, but that’s their name).
And I found a recipe to do it at home! I changed it a little bit, as usual, so here we go ;)

Ingredients:
200g of hazelnut flour
90g of flour
115g of icing sugar
Zest of one lemon
100g of milk
150g of egg white (should be around 5 eggs, but yes, you need to weight it)
80g of melted butter
250g of dark chocolate
1 tablespoon of vegetable oil
100g of shredded coconut
Preheat your oven at 180°C.
Mix the flours and the sugar together. If you can sift it, it’s better.
Add the zest and the milk.
Beat the egg whites into a fluffy cloud. Slowly add them into your first batter.
Pastry Chef tip: to add the melted butter into the dough more easily, take some of the batter (just a little bit), and mix it with the butter before putting all of it in the main bowl.
Using a spoon or, if you’re feeling fancy, a piping bag, scoop the dough into small mounds onto a parchment paper on an oven tray (a silicon sheet would be better but parchment paper is easier to find ;))
Bake it for 10 to 12 minutes.
Leave the cookies to cool on a tray on the side.
In a saucepan, melt the chocolate with the oil (you can temperate the chocolate but don’t ask me how to, I’m firmly on Claire Saffitz’s side - check the Bon Appetit Test Kitchen videos if you don’t know who that is).
When it’s liquid and easy to manipulate, dip your cookies in it before dipping it in the coconut shreds, and leave it to cool on a tray in your fridge.
The cookies will be soft (in taste and texture), with the dark chocolate to give a slight punch.
I hope you’ll enjoy them as much as I did!!
5 notes
·
View notes
Text
17. Why Choose When Your Cookies Can Be All The Flavors (well, at least three)
I saw a recipe for “zebra cookies” and immediately thought, “why couldn’t it be a tricolor thing”, because vanilla and cacao? Good. Cacao and coffee? Good too.
So why choose?
Hence, trifecta of tastes in those cookies!
Ready?
Let’s go!
Ingredients:
300g of flour
10g of salt
250g of butter
110g of sugar
1 egg yolk (maybe two, in case the first one is teeny tiny)
Mix everything together. That’s it.
That’s your basis. You could stop there, and make sugar cookies, but if you do want to make colorful (and flavorful) cookies, you should add, to taste, depending on how you want to divide your dough, some spices.
Here’s what I did for those cookies:
- 40g of unsweetened cacao
- 10g of vanilla
- 4 drops of coffee extract
I had 750g of dough waiting to be flavored.
So I divided it like so: 350g with the vanilla, 250g with the cacao, 150g with the coffee. That division is really up to you, on which flavor you prefer etc.
Once you have your three dough, you can roll them together.
I made them especially small, because I wanted coin-sized cookies, but again, as you wish ;)
Play with it like you’d do with Play-Doh: roll them, twist them, form shapes and press them together.
What matters is that when you are done, you should have a roll of sorts. Wrap it in plastic and put it in the freezer overnight*.
The following morning, preheat your oven at 180°C.
Take your roll(s) out of the freezer and start cutting slices, which you will put on a parchment paper on a tray for the oven. Leave some room between them cookies, they will spread and grow.
When they come out of the oven, leave them to cool down on a plate and there you go.
*You can, before rolling them in plastic, roll them in sprinkles or in sugar for an additional wow effect--I didn’t bother this time, but maybe I will!
I also used this recipe for a pistachio/citrus combo, but the colors were not as different (since I used homemade pistachio paste). I’m considering different combinations, and maybe try my hand at a “Mondrian” effect with this recipe, I’ll let you know :) Unleash your inner artist, peeps!
#easy peasy recipeezy#cookies#trifecta of tastes#tricolor#vanilla#cacao#coffee#super easy#not gluten free#not vegan
19 notes
·
View notes
Text
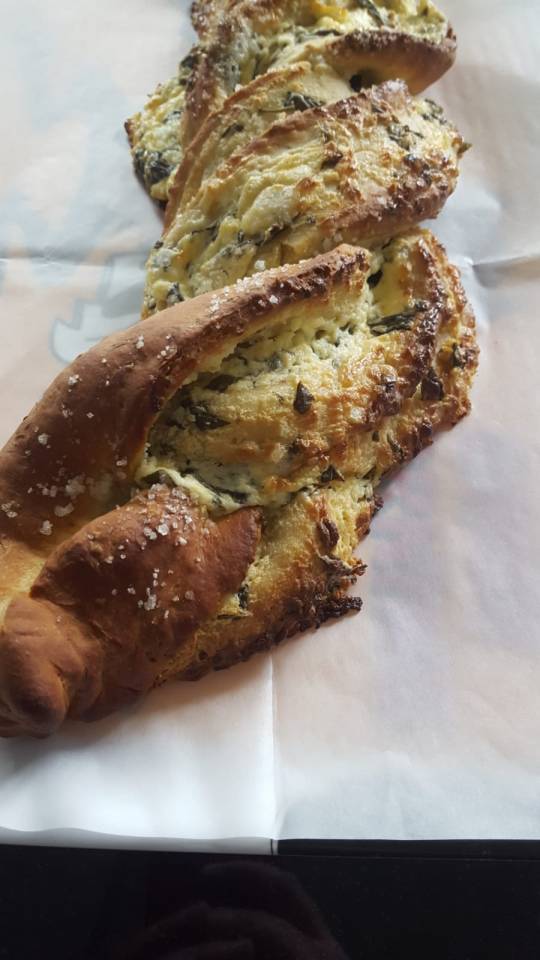
16. This Babka is Saaalty, Queen
Nah, just kidding, just to indicate that I made a savory Babka, the braided baked good that is becoming the new trend ;)
The recipe is not very complicated, you just need to take your time with each step ;)
Ingredients:
- For the dough
160 ml of milk
1 pack of baker’s yeast (11g)
5g of sugar
300g of flour
40g of oil (I chose olive oil but any vegetable oil will do)
2g of salt (plus some fleur de sel to put on top before baking)
1g of dry herbs (I used oregano, but pretty much any dry herb will do)
- For the filling
300g of mascarpone
The zest and juice of one lemon (can be more if you reaaaally want that acidic flavor but it was already very lemony)
A bunch of basil leaves (I had some that were going to be thrown out so I used the whole bunch, but really, up to you)
Salt and pepper to taste
To make the dough:
In a large bowl, mix the yeast, the sugar and the milk. Wait until the yeast is completely dissolved.
Slowly add in the oil and the flour. It should start forming a ball. Add the salt and dry herbs, and use that moment to lightly knead the dough.
Form a smooth ball, and put it in a lightly oiled bowl. Cover with plastic and put it in the fridge overnight.
While you wait, you can prepare the filling: mix together the ingredients until the mascarpone has softened. You can leave the bowl in the fridge overnight, too, until the time comes for

(I couldn’t resist)
The following day, the dough should have doubled in size. Gently take it out of the bowl onto a floured surface and give it a gentle kneading (pretend you’re a cat for a moment. There you go, that kind of kneading).
Now, preheat your oven at 180°C.
With a rolling pin, start rolling it down until you have a sort of rectangle, about 3mm thick.
Now take your filling, and spread it onto your rectangled dough, leaving about 1cm around free.
When you’re happy with your result, start rolling, on the longer side.
Really, take your time. It can be a bit tricky, but not as tricky as the next part (unless you’re used to braiding, in which case, never mind what I just said, and focus on rolling).
Once you have your long roll, put it down on top of the seam, and cut it in half.
You should now have two logs, open-side up.
Press the two logs together at one end, and start braiding. I recommend using both hands to move the logs on top of each other, in order to make sure you keep the open side up.
When you’re done braiding them, press the other end together.
Now you have two options:
- You can deposit your braided loaf onto a parchment paper, on an oven rack
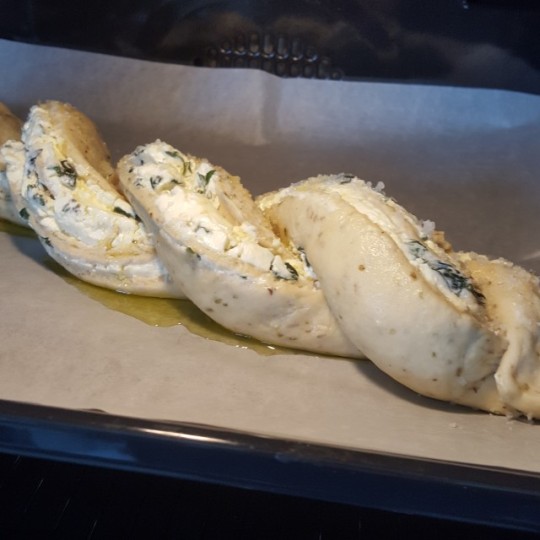
or
- You can put the braided loaf in a cake pan, pressing it where it needs to be to fit
Either way, once you have made your choice, brush some oil on top, along with some of the fleur de sel, and put it in the oven for 30 minutes.
And voilà!
It is delicious on its own, or as a side with a salad :)
10 notes
·
View notes
Photo
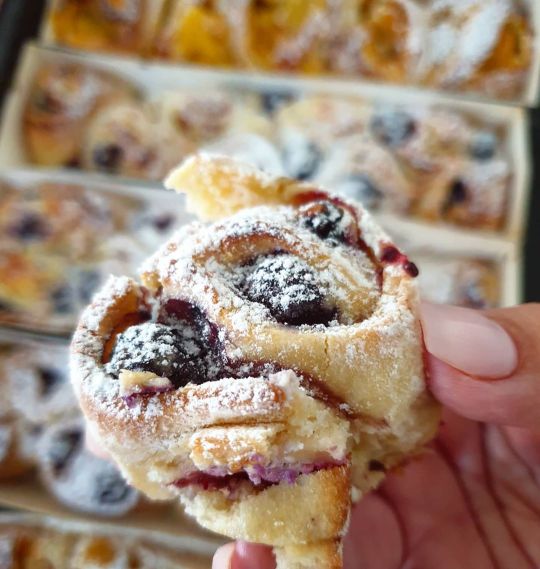
GOOD MORNING!
Homemade fruits and ricotta brioche, fluffy, not too sweet, quite light, perfect with your morning coffee 😊
Always use the fruits you want, I made 2 versions here
Berries and honey
Mango, pineapple and passion fruit
Frozen fruits are perfect for this recipe, so you can make it all year long!!!
#food #foodblogger #foodporn #foodie #foodil #gargeran #breakfast #israelifood #brioche #homemade #cooking #cook #foodforfoodies #baking #kosher #kosherfood #pastry #patisserie #fruits #ricotta #sweet #goodmorning #GoodVibes #coronacooking (at Florentin, Tel Aviv)
https://www.instagram.com/p/CAW64xanYKw/?igshid=1ktq122iatzwf
7 notes
·
View notes
Text
For my Fried chicken, here's how you prepare the pieces to be fried 😊
Step by step by step
And then plop in the hot oil!
2 notes
·
View notes
Text
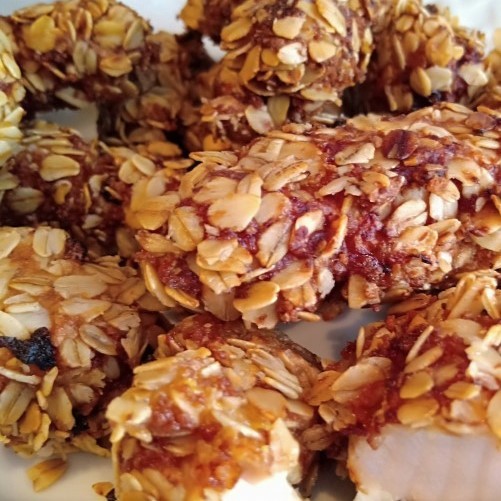
15. Who Needs KFC after all
During the Quarantine, there came a time when I was craving some fried chicken. All the good spots in Paris were closed, and I decided to take matters into my own hand.
And therefore, came up with my own recipe for fried chicken tenders with what I had at home, and I have to say, I’m very pleased with the result.
Ready?
Set?
Go!
Ingredients:
100g of chicken breast per person, cut into tenders
5g of grated ginger
1 tablespoon of white miso paste
2 tablespoons of soy sauce
1 teaspoon of sugar
2 tablespoons of flour
2 eggs, beaten
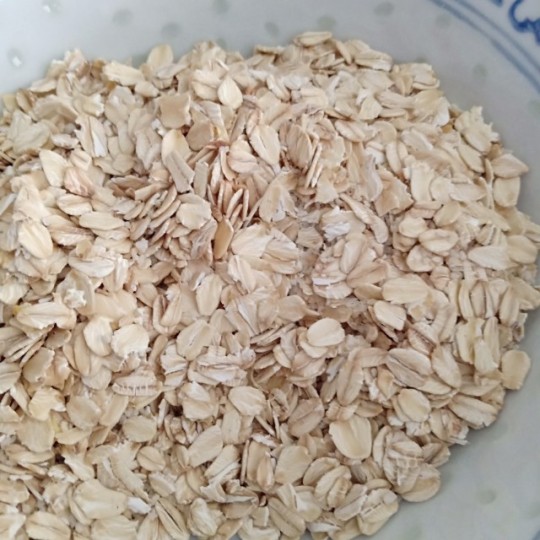
Oat flakes (it depends, keep it close, you may need to add some)
3 tablespoons of breadcrumbs
Vegetable oil for frying
So first of all, the secret of these fried chicken yummies is that I marinated the tenders for a couple of hours.
In a large bowl, mix together the miso and the soy sauce. When it’s smooth and blended together, add the ginger and the sugar. Then add the chicken tenders, mix it well, and leave it to rest for two hours.
Then, add the flour, and mix it well to make sure that all the pieces of chicken are well covered.
In a deep dish, crack the two eggs and beat them until there is no more streak.
In another deep dish, mix together the oat flakes and the breadcrumbs. You can add some salt and some Cayenne pepper for more heat.
In a deep pan, heat up some oil. (Of course, if you have a fryer, that’s even better, but I don’t have one, and I prefer to give instructions.)
It should be about 10 cm deep, enough for the piece of chicken to float around and be flipped without making big splashes.
Then you can start the chain of making (I will post a video after this linking to this post, you’ll see ^^) : take each piece of chicken, roll it around the eggs, then dip it into the oats/breadcrumbs bowl, then set it aside on a plate.
It’s better, to have several pieces ready to fry them by groups of 5.
To check if the oil is ready, drop a little piece of oat in it. If it starts bubbling around it, then it’s ready.
Check out how the cooking goes. Someone once told me that the oil keeps on bubbling until the meat is cooked, and the last thing you want is undercooked chicken!
Flip it around a couple of times, until the exterior seems to be golden.
Take the pieces out and leave it on a plate covered with kitchen paper towels.
Sprinkle some salt on top of it, and let it cool. It should darken slightly as it cools down, it’s normal.
You can serve it with a fresh salad, or grated carrots like I did, to freshen up a little.
And voilà! Not too complicated, right?
If you happen to make too much of it--yes it can happen--you can freeze the fried pieces of chicken. To reheat it, I recommend to put it in the oven at 160°C for 30 minutes, covered with a sheet of aluminium :)
Bon appétit!
6 notes
·
View notes