
gargaj
Gargaj
Stumbling and failures from the world of someone who clearly doesn't know what they're doing.
11 posts
Don't wanna be here? Send us removal request.
Last Seen Blogs

hohejudoditu
Untitled

thuthuatithelpdesk
Sans titre

thuthuatithelpdesk
Sans titre

infernaedeae
She's just like her mother ;;
Text
The tools, techniques and conclusions of diskmag archeology
Not exactly a text post, but here's a video recording from my talk from Evoke about how we turned age-old diskmags into something web-readable. Best enjoyed if you're into byte-level hackery, reverse-engineering, oldskool DOS culture, and self-indulgent projects no-one understands.
youtube
Sorry about the visual, I'm aware I look like someone left a kiwi in a bucket of drain cleaner for a week.
I also hope to get a post about my DOS demo up at some point, because it was a project I had a ton of fun with, and it was super-cathartic to work on.
19 notes
·
View notes
Text
ÜD20: 30 seconds and 64 kilobytes
There's something to be said about unwanted situations that jostle bits of your creative thinking that you wouldn't otherwise really care to use: this was pretty much the case a few weeks ago, when Slyspy/UF decided to announce a 30 second demo compo, and our little contribution caused me to try out a few things that I've faintly considered to be a good idea, but never really had the situation to try out.
youtube
Hit and run.
Below are a few bits and pieces of the process that contributed to the creation of the intro.
Mischievous intent
To be perfectly honest, the idea of making something that only lasts 30 seconds didn't sound too enticing: I always felt that demos were too short (except for bad ones which were usually too long), and that making something that's 30 seconds was sentencing the prod to be ephemeral by design.
The final motivational push was a combination of things: First, I realized that the 20th anniversary of Ümlaüt Design was the same week as the competition, and I would've felt very bad if we didn't make something to celebrate, and second, I figured it could be a good idea to do a second pass on the 64k toolchain that I built during the end of last year and made "in::flux" with - after all, 30 seconds sounds like it'd fit in 64k, right?
As it was a celebratory thing, I decided to talk a bit to Procyon/ÜD about it - he's been out the scene for a while and was looking for a way to get back in the groove again, and we threw a few ideas around for something that subverts the expectations within the scope of 30 seconds: If we'd pretend that the first bit of the intro is something retro and pixely, that'd give him the chance to work on some software rendering code (something which was more in his wheelhouse) and I'd get to do something more highend for the latter half of the intro, and we'd be able to work relatively independently since all he'd be doing is drawing into a pixel buffer, that I'd later put into a texture and render out into a quad.
Now we had a plan.
First things first: Infrastructural changes
Before we started working on anything, I was adamant to do three things:
First off, I wanted to move the whole project to Github for easy access; we've had a Bitbucket repo for a while, and there's of course stuff like Gitlab, but let's face it: the reason everyone uses Github is because their features and interface are simply better, and now that they offer private repos for free, there's no reason not to use that as a main collaborative platform.
Secondly, I wanted to finally be able to compile 64k "properly" again, without VS runtime requirements; I of course used to be able to do this ages ago, but there was a lot of code rot happening and I never really bothered to clean it all up since I was mostly making 64ks for non-64k compos anyway. The Handmade Network has a great article on how to approach this to "trick" the compiler/linker; I also decided to leverage VS2019's ability to run multiple compiler environments, and included the "final" intro build in the same solution, simply using VS2010.
One fun little aspect that I ended up spending way too much time on is creating Github Workflows for continuous integration: initially I just made a quick one that performs a compile test on each build, but for giggles I drove that far enough that it eventually not only installs VS2010 (using the Chocolatey package), but also downloads the latest DirectX SDK to grab the D3DX libraries from, compiles and compresses the intro and zips the output up as an artifact. This was working wonderfully until I realized that the VS2010 install was taking ~8-10 minutes for each commit, and we ran out of minutes on the free account in a weekend. (Oops.)
Another thing that I spent a day / night on - only to ultimately have to revert all of it - was my hope to get custom build tools integrates to the engine - this would mean any random raw data file included into the project would get converted into an object file that can be referenced as a symbol in the source code. I spent an inordinate amount of time trying to get this to work, and I got to a point where I was actually getting results, except VS wouldn't pick up changes in a file. Out of desperation I decided to check some other projects implementing the same thing, and when they seemed to reproduce the same exact problem, I asked the creators, and their answer was essentially "Yeah, we know, it's broken ¯\_(ツ)_/¯", so I decided to just shelve it and focus on making an actual intro.
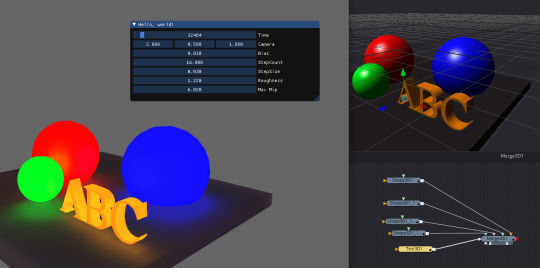
The final thing I really wanted to lean into is to finally integrate ImGui: For those who don't know (and really, who doesn't?), ImGui is a wonderful little GUI library that allows the quick-tweaking of values with very very simple single-line pieces of code that create complex convenient ad-hoc user interfaces - it is almost universally used in gamedev, and it has a ubiquitous presence in the scene among those who don't want to write a demotool.

The joy of ImGui: each of these controls (including the tabstrip!) is a single line of code
Adding ImGui is really a work of 5 minutes, and from then on, each camera or color tweak is as easy as pie - the only downside, of course, is that there's no "obvious" mechanism on saving values, and while I briefly considered writing a quine-like wrapper around ImGui that overwrites its own source file that contains the variables, I ended up just manually copying the values back to the source, because sometimes the fastest method is the best.
The move to DirectX 11
So this is the "duh" part of the post where everyone smugly welcomes me to the 21st century, but as I explained earlier, my reasoning for sticking with DirectX 9.0c so long was based on the idea that me as a hobbyist-yet-perfectionist, who ostensibly does this not only for "fun" but also to learn things, should first wring the absolute maximum out of an environment before moving on to something more expansive - eating the vegetables before the dessert, if you will.
This proved to be a good idea on many fronts: While my initial forays into 11 were often confusing (the mode selection is considerably fiddlier than in 9.0), there was a distinct moment where I understood that if I approach everything from the perspective of what I always wished 9.0 would have, a lot of those wishes are the exact changes 11 has.
Graphics debugging integrated into Visual Studio? Sign me up! (It worked for about 2 days until I started using UAVs and then it just crashed. Oh well - back to PIX...)
One of the things I needed to get used to but makes sense in hindsight is "views": rather than the OpenGL/DX9 way of creating a texture and sticking that into the shader, DX11 expects you to create "views" on top of a texture (which it essentially treats as a generic buffer), and instead provide those views to the shader. Initially this step felt gratuituous, but I eventually realized that the same step (creating a render-target view) allows you to turn the same texture into a rendertarget, or a compute-target, or even a depth buffer - and underneath all that, it's still just a buffer with numbers in it. The flexibility that I always wanted was suddenly there.
Once I got reasonably comfortable with the renderer, it was time to get some content in.
Exporting from Fusion
The first hurdle that set my mind off thinking was the question of how I'm gonna get content into the intro without writing any sort of tooling - there simply just wasn't enough time, and by my estimation it probably would've been single use tooling anyway, so I needed an adhoc solution.
Luckily, I had something in mind: a few years ago I started digging into Blackmagic Fusion when I noticed that the 9.0 version was available for free (and it no longer is, for whatever reason), and have gotten quite proficient at it at this point; Fusion itself is effectively a node-based video-compositing tool, but at some point they added basic 3D scene composing to it, and as it had a few useful procedural nodes, it felt perfect for the kindof "blocky" sci-fi geometry that I was hoping to achieve: as long as I was able to 1) reimplement basic versions of the 3D nodes it had and 2) somehow get the data out of it, I essentially had my quick-iteration 64k tool.
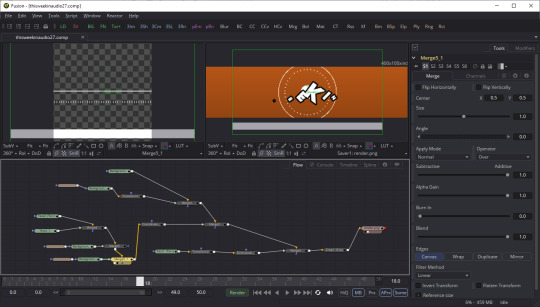
Fusion in action - I shall endeavour to make sure that my next demotool looks like this.
Getting the data out seemed more like a chore than a challenge; while the Fusion format (.comp) was text-based, it used an odd JSON-esque format that would've needed a parser - normally for something like this I'd juse use some sort of arcane regexp or PHP script, but this time because of the graph-based nature of the data, I decided I was better off doing it "semi-properly", and looked around on the market for programmable AST-parsers, preferably in C#. I eventually found Superpower, which seemed to be just the ticket, and I spent a few days deconstructing their example JSON parser, and modding it to be able to load Fusion Comp files.
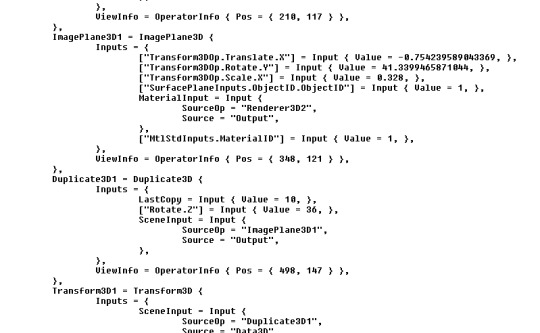
This is like JSON after a drinking binge.
It was far from being an obvious process, as one look at some of the stranger aspects of Fusion Comps will tell you: their format seems to be a mix between flat arrays, objects, objects with attributes, and key-value pairs. Ultimately, I decided that as long as the object data is relatively correctly represented, I'm okay with having to write some C# code around it for easy access, so that's what I did. One curious little challenge was that tokenizers tend to sneer a bit at non-strict syntax use, for example JSON's array syntax ([1,2,3]) which is strict, whereas in JavaScript, you're allowed to have a trailing comma ([1,2,3,]) and the "empty" element wouldn't be counted. Fusion's Comp format was also not strict in this sense, which was a bit of a headache to handle in the parser, but ultimately I decided to just bamboozle the parser that ,} and } were both valid terminators to an array, and it fell for it. (The code for the parser is available here.)
Once the data was in C#, I decided to just simply make it export C++ code that created my scene - now, fair warning, this is actually terrible practice: what you should be doing for optimal size is putting all your data in one simple binary blob, have a basic parser that loads in data and performs the actual scene generation, thus making sure that stuff like object allocations are only represented in code once, and that data compression doesn't mix with code compression. The simple reason I didn't do it this way was just laziness and convenience: I wasn't worried about space (we were going to be well within 64k), and I didn't feel like fiddling with yet another data format. Instead, I just exported straight C++ code. (Inque tools used to do this, by the way, so it's not an unworkable method, but still.)
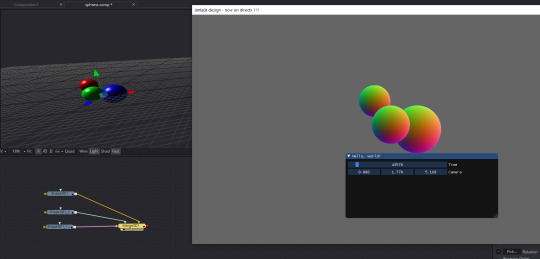
My first exporting test, just as a proof of concept; one thing I had to realize early on is that Fusion is RHS, not LHS.
Reimplementing the Fusion nodes wasn't particularly hard, and halfway into it I had an epiphany: since I was mostly using Fusion's Shape3D and Text3D nodes, why don't I just use the D3DXCreate* functions for everything? Then I'd have basic shapes (boxes, toruses, cylinders, texts) for free - the only somewhat hilarious downside was that I had to sneakily create a DX9 device to make it work (and avoid DX11 throwing a hissy about it when going fullscreen), but once that was done, snatching out the vertex data was trivial.
There were a few problems with my approach: First off, the UV mapping function in Fusion was a bit crap (understandibly), but I just used my own and decided to live with having different looking results. Secondly, the material system in Fusion was completely different; I eventually just relied on the basic material colour, and used the comment field on each node to indicate whether that particular object was emissive or diffuse. (Huge hack, but who cares? Again, adhoc solutions work fine.) A minor annoyance was that certain things in Fusion just didn't look the same after exporting: text was always slightly offset, and of course randomized geometry always looked different - I decided to just compensate for the former and ignore the latter, although I eventually found out that the source code for most of the 3D nodes is available in the plugin SDK, but by that time I comfortably settled into the routine of making stuff, and didn't want to bother, because the scene was shaping up nicely.
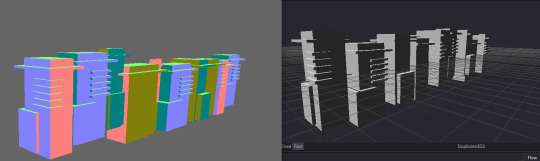
An early test of just some boxes exported from Fusion; the Offscreen Colonies influence is obvious.
Adding shinies
When thinking about where to get some visual inspiration, I happened to remember "Shapeshift" by Cocoon, and in particular one of the "opening" scenes, which takes place in a very similar setting that I was hoping to create:
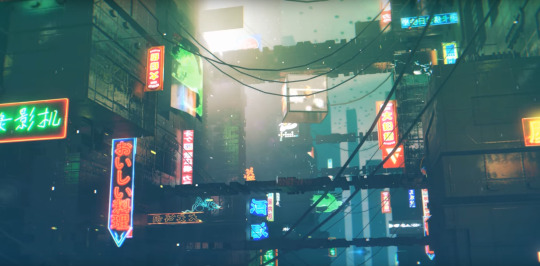
"Shapeshift" by Cocoon
Upon closer analysis, however, something kept boggling my mind. How do these reflections work?
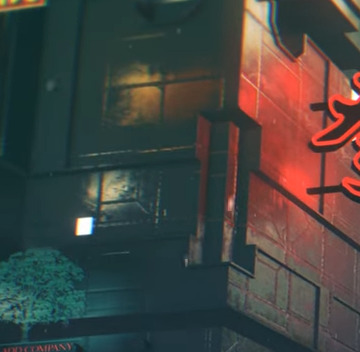
Note the two blobs in the middle; this screenshot was taken from the corner edge of the image, so there's nothing to the left of it.
They cannot be simple planar, since the surfaces are angled, but they can't be screen-space because they reflect things that are off-screen.
Luckily, I realized Guille was on Discord and quickly asked what the technique and he was glad to explain: voxel cone tracing.
The idea behind voxel cone tracing is relatively simple in theory: for "correct" reflections, you'd need to calculate the reflection of the entire scene into every pixel, which isn't viable: you'd either need to render the whole scene again from the perspective of each pixel, or do some sort of raytracing - of a polygon scene, nonetheless. But what if we would have the polygon scene also available as a voxel grid? That way, we could do some rough sampling into the voxel grid for each pixel, and have a reasonably good idea of what reflects - sure, it would lose a considerable amount of resolution (as our voxel grid is of course memory-limited), but for some rough moody reflection (and some added fake-global-illumination as a side effect), it'll do just fine.
Ostensibly, there's two steps to the process: first, we voxelize the scene, and second, we render the scene and calculate the reflections. Both of these steps are finicky in their own ways: the former needs our scene to be rendered into a 3D texture, the latter is more straightforward, but requires a lot of parameter-fiddling.
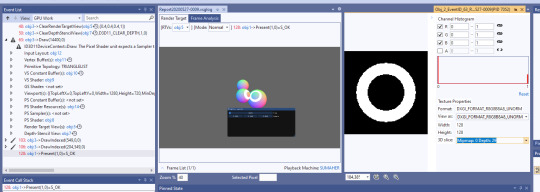
So how to voxelize a scene? Well, first off, we need a way to be able to render into a 3D texture; normally you'd do this in slices, but that is very slow (as you have to render the scene once for each slice). Luckily, DX11 introduced something Unordered Access Views (or UAVs for short): as their name says, if you have an UAV associated to your render target, the rendering can be "unordered", i.e. you get to pick WHERE you write into the texture. What this allows us is to render the scene "as-is" (i.e. with a relatively simple vertex/pixel shader), but at the end of the pixel shader, instead of returning a color, we write directly into the 3D texture, based on the world-space position of that point.
My first test of voxelizing a scene - I didn't want to bother with writing a voxel viewer, so I just used PIX.
The obvious solution for the vertex shader is to orthographically project the scene and designate the corners and clip planes of the ortho matrix to be corners of our voxel cube; this gets us there halfway. However, there's still an interesting problem: even though we're writing into a 3D texture, the pixels written are only ever the ones that provide coverage in that given viewport - meaning that if we're looking straight down the Z axis, the top and sides of a cube would only produce a few pixels (if any) as they are parallel to our view. This usually results in gaps or missing surfaces in our voxels.
The fun little solution for this is to simply "fake" the triangle facing forward for the pixel shader - after all, even if we completely distort the triangle, we can still pass the actual, accurate world space position of each written pixel, so whatever we pass as POSITION to the pixel shader isn't really relevant. So that's what we can do: We simply check the "dominant" axis of the triangle (i.e. where it's facing), and if it's not facing towards us (i.e. the Z-axis), we trick the pixel shader to think that it does by pretending that the view has been rotated. That way we get the perfect amount of pixels. Normally, this method sometimes results in a few gaps between triangle edges; this can be fixed with what people call "conservative rasterization", i.e. making sure that voxels don't get missed by being low-resolution, but I didn't bother with this.
My initial reflection tests
There was an issue, however, that I didn't have the time or energy to fix: There's considerable flickering at places. Guille noted that he actually works with two voxel cubes: one is rendered once, during loading, with all the static geometry, and one is rendered each frame with the animated geometry, and the two are then combined, for which I used a compute shader. The problem was, the dynamic voxel seemed to flicker even when the frame data wasn't changing; I eventually concluded this was due to what I can best describe is a GPU race condition: GPUs render massively parallel with units called "wavefronts" (AMD) or "warps" (NVIDIA), that schedule the actual rendering threads calculating the pixels. What happens in our case is since the resolution we're rendering the "fake" polygon in is larger than the actual voxel, some threads end up with the same world-space coordinate, and as such, voxels get written into multiple times by multiple threads, and the color really depends on whichever thread got there last. There's a solution to this in the form of atomic shader writes (the Interlocked* HLSL operations), but they only work on integer texture formats, and I wasn't feeling like rewriting the whole rendering path one day before delivery just to fix something that's only really prominently visible when you freezeframe - that said of course, it's nice to get such experience in relatively "harmless" projects.
Texture generation
Another thing I observed with Shapeshift is the use of normalmaps - they're a great way to break up geometry and add detail to flat surfaces, but at the same time I also didn't want to overdo it to the point where the "buildings" would look like they were in serious need of sandblasting.
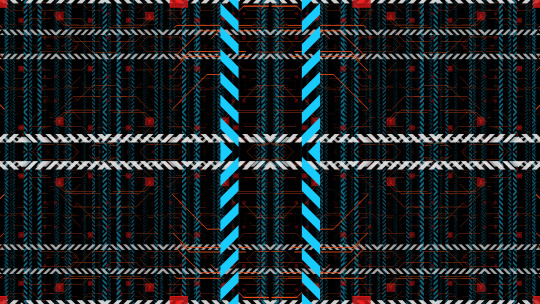
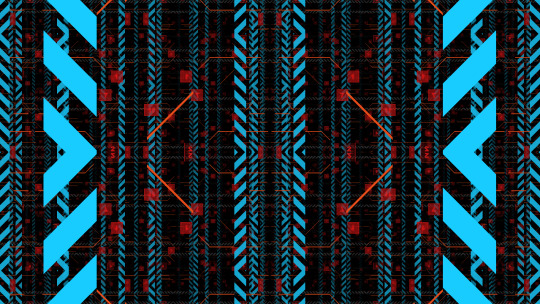
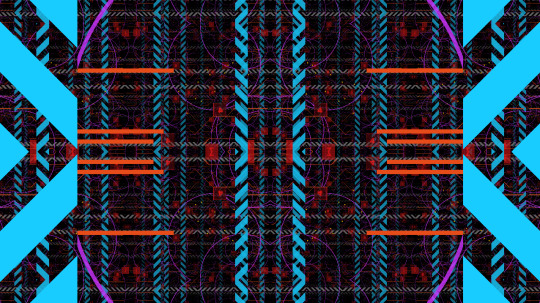
After doing some research on similar "sci-fi" normal maps, my impression was that they kinda looked like Voronoi diagrams with Manhattan-distance calculation, which was a valid option to do in 64k, but I felt it would've been overkill for the situation, so I decided to break it down more primitively:
The motif most noticable was the set of horizontal and vertical lines - I could easily generate those of course.
There were also lines consisting of either horizontal, vertical, or diagonal bits. I could essentially just do this by picking a random point, and just drawing a line strip with random directions and lengths.
I also decided to add a very very tiny noise layer, just so that the reflections become a bit rougher and more uneven, to hide the inaccuracies.
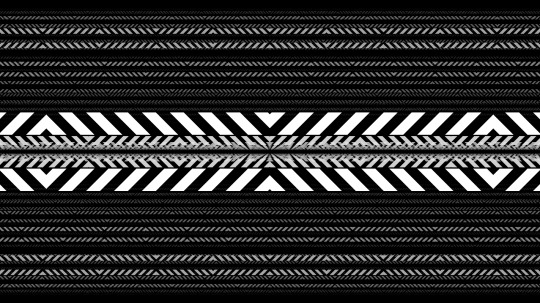
Et voilà, the result:
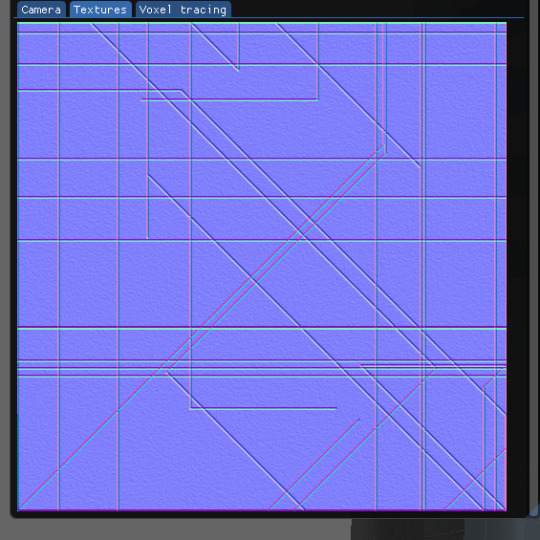
Brutalist normalmaps are my jam.
Another thing I noticed in Shapeshift is the use of the grungy / scratchy specular maps to occasionally break up the reflective surfaces; I gave this a shot with standard perlin, but I could never get the result I wanted, so I eventually just abandoned it.
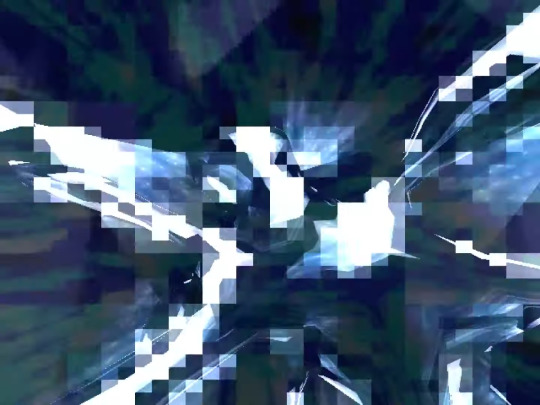
Cloudy bits
One thing that I felt would work when it comes to adding atmosphere is volumetric clouds; first off, it'd add a nice parallax depth and a bit of definition to the image, but most importantly, I already had the effect lying around for a rather peculiar reason: A few months ago, my good friend and art-nanny Mulm was sad to tell me that one of her Internet friends passed away, and that she was hoping to do a VR world as a tribute, preferably with large explorable fractals; I was on board to help out and fiddled around a bit in Unity to wrap one up. Eventually the conversation turned to clouds and I suggested I could probably make that too, and got to work, only to realize the moment I was finished and sending the shader that it was one minute past midnight and the day turned into her birthday, and that I inadvertently gave a shader to someone as a birthday gift... (It's a thing that admittedly wasn't on my bucket list, but it was one of those innocently positive little moments that still makes me smile.)
The effect itself is pretty straightforward and is mostly just a riff on the raymarching-into-a-polygon-scene technique seen in "PILEDRIVER", with one important distinction in the rendering path: Because of the aforementioned view-system, DirectX 11 allows you to treat the depth-stencil target as a texture from the get-go! No FOURCC hax, no separate depth pass, just create a shader view on it and you're done: perfectly valid depth values coming out from the sampler.
The actual raymarching algorithm for the clouds is very simple: just fixed step raymarching and sampling 3D Perlin noise. Where it became tricky is forming actual clouds out of it, and tweaking parameters: The technique I ended up using is simply ignoring samples under a certain threshold value, and then cranking up the intensity on the samples that were above it - this made the clouds more "chunky" and feel more like plumes of smoke rather than a continuous fog, which fit better with the visuals.

The nice thing about clouds done this way versus billboard particles is that 1. they interact more naturally with geometry (no clipping) and 2. they don't "rotate" with the viewpoint
Once that effect was in place, it felt like everything fell into place, and all it needed was some heavy duty ImGui-poking to turn a relatively decent looking scene into a well-directed decent looking scene.
A job well done
Making the intro was far from a smooth process - and I'll let Procyon explain those details in his own time - but I'm glad I was finally getting to stretch a bit into something more "modern-adjacent", and more importantly, this little excursion gave me a better understanding of how I should be writing my next "major" engine... Which I'll... start... any day now... eventually...
4 notes
·
View notes
Text
Getting stuff done - practical solutions for pulling off large projects
So this might be an unusual post for a site that I predominantly intended to be a collection of tech-articles, but over the recent years I've both been observing and noticing in conversations that while there's plenty of technical material online about how to learn to program, do graphics, engineer music, and so on, much of the writing about how to get projects done seem to veer over into either "life hacks" about how you should do stretches and open your window for fresh air, or escalate into the territory of motivational speeches and emotional, heart-to-heart peptalks; now, while I understand and appreciate their usefulness in certain scenarios, they seem to cultivate a misunderstanding that all you need to get a project done is a positive attitude and ab-crunches.
After having been in an industry for 10 years that has a relatively high throughput, and having had many relatively recent conversations with people who were in awe or disbelief about my ability to handle large projects, I was reinforced in my belief that most people are unaware how much of getting a large amount of work done is down to cold science, scheduling, professional planning, and the ability to retain control of a project even when unexpected events happen.
With that in mind I'd like to present a few random bits and bobs about what I learned about project management - not necessarily only in programming, but in any sort of creative activity - while hoping to keep the popular psychology element in them to the mininum.
A quick note before we dive right in: I'll be talking entirely about sparetime activity that you want to invest time in. While it can be useful to apply professional techniques to your sparetime activity, you should definitely not treat the two as they're one of the same. That's a good way to hate what you used to like. (Trust me.)
Who's producin'?
Before we start talking about actual work, it is important to introduce ourselves to an important term, namely production. Most people think "production" is the act of making something, and the "producer" is someone who makes things, while I would wager a large portion of the populace can't tell you what a "film producer" does aside from "making films"; on a day-to-day basis, that role seems to be an opaque cloud to most people, even if it's one of the most important.
The short version is that the producer's job is to make sure that the project is finished on time, and on budget. The slightly longer version is that the producer takes the amount of time available, the amount of resources available (budget, people, inventory, etc.), consults the respective heads of departments actually doing the work, and then comes up with the plan and schedule as to what happens when, when something finishes, who works on what, and what resources will it take; once production starts, they transition their role into making sure everything goes to plan and if something doesn't, what are the options to salvage things.
There is a reason why in most professional environments, there are entire departments for this: it is a tough job, often frustrating, sometimes disheartening, but at the same time a producer is always aware of the state of the project and can have a good idea of progress being done, and whether the whole thing will come together in the end. This will become extremely important later.
Weeks of coding can save you hours of thinking
Projects are usually broken up to three important segments: Pre-production, production, and post-production. These tend to vary from industry to industry as to what they mean, but pre-production generally consists of building a production plan out of the resources and time available. Pre-production is one of the most important parts of a project, because it will define how the rest of the project will be committed, and thus it's important that we first delve into the ins-and-outs of planning.
First thing first, decide if you have a deadline for your project. Deadlines are cruel, they're unforgiving, but that's why they work miracles on productivity; projects without deadlines don't put pressure on the authors and eventually they just get dropped down the chute of "maybe later". Pick a hard deadline, or pick a reason to have a hard deadline. (Sidenote: demoparties work wonders as deadlines.)
Secondly, once you picked a deadline, assess your project's needs: Assuming your project is in some way technically complex, what are the things that you don't have and need to create or acquire for this? If you're doing music, is there plugins or samples you need, or instruments to acquire, or musicians to talk to? If you're painting, do you have the paints and brushes, or is your tablet broken and need to get it fixed? If you're making a demo, do you have an engine, can it do what's needed? Think about every single thing you need.
Once that list is done, break down your project into elements, in detail - this is the most crucial part of production. If it's a song, roughly jot out the parts on paper and maybe the list of instruments you want in there. If it's a large 3D scene, write down the elements you want in it in detail. If it's a novel, jot out the chapter titles. If it's a demo, chart out the parts with rough ideas on how long each is and what's in it. If it's a game, map out all the mechanics, characters, levels, cutscenes, and so on. Break everything down to parts, and do it visibly so that if something is missing, you can spot it. Once that's done, take the parts and break them down further: What is needed for each part? Roughly how long is the duration of each part? What are the technical necessities of each part? What are the assets needed for each part? What is the process for creating each part?
There are many reasons why all of this is crucial. Firstly, this will serve as your gameplan for the rest of the production process. Secondly, and more importantly, the more you break a large project down to small parts, the less daunting it will seem: if you embark on a project that can take months to complete, you have to take it on one day at a time, and each day will need to end with some sort of progress. If you have a roadmap that tells you each day what that day needs to get ticked off at the end of it, you will no longer be fighting an endless battle; instead you'll focus on the task at hand, with a bigger roadmap to keep you in check.
This leads us into another important consideration, and one of the more murky ones: time estimates - for each of the broken down tasks, give a good guess as to how long it will take. Then multiply it by at least two, and that'll give you a good idea of the time you will need. See, the first thing you should learn about when producing is contingency: contingency is a multiplier for each task's estimate that adds extra headroom that accounts for anything the estimate doesn't account for. There are many things that can make a task take longer, and not all of them are relevant to the task: you might run into edge-cases that add extra complexity, but on a much more basic human level, you never know when you're going to break a leg, or your cat will get sick, or your apartment gets flooded - anything can happen, and it probably will, so make sure you account for that, and leave yourself plenty of headroom as contingency, and best case scenario you'll just have a more relaxed process.
Sometimes, however, even contingency isn't enough, and you'll find yourself running behind schedule. This is why this next step is important: Nail down your scope, and stick to it. There are many things you have listed in your above breakdown, but they all vary in importance, so make sure that next to the time needed, you also note down their importance. As the late great Randy Pausch said in his Time Management talk, it's important you distinguish between things that are important, and things that are urgent: there might be things that are urgent for a project, but ultimately not important, and it is up to your discretion to rank them upfront. [Update: I've recently found out that this is called the "Eisenhower Decision Matrix".] As for ranking, this is up to you; you can do it on a scale of 1 to 10, but I personally prefer what they call the MoSCoW method, where "MoSCoW" stands for "Must", "Should", "Could" and "Would"/"Won't", and they signify how important that specific thing is to the project: "Must"-s are the things that are the bare minimum to get a project off the ground, "Should"-s are important, but not necessary, "Could" are polish, and "Would" are just whatever there's time left for if you're ahead of schedule. Ranking by necessity is very important, because once you start running out of scheduled time, the only option you will have aside from having a project fail is to cut stuff. Ranking by importance also allows you to schedule accordingly, making sure that unimportant polish tasks are moved towards the end of the process instead of wasting time with them at the start.
One thing to note here is that it takes decades of experience to get all of this right, so much like your actual skills of making things, your production skills will get better with time - a good rule of thumb here is to just keep your eye on the ball: decide whether an item on the list fundamentally contributes to the production, or is it just something that you think it would be cool to do, or something you wanted to do anyway. It's tempting to get sidetracked by excessive detail like splurging on instrument recordings or adding engine features, but focus on the goal: If it doesn't contribute to your end goal, cut it.
I also want to remark that I actually did the same for this article: earlier I wrote down bullet points about what I want to mention and started arranging them into a flow.
Doin' the work
Once you've planned your stuff out, then it's just a matter of discipline of taking off the next item on your list, and working on it until it's done. This is of course both easier and harder than it sounds, but remember: you made this list with full knowledge and intention to follow through on it, so at this point this is your best bet to get to your goal. I usually reinforce my adherence to the plan by putting the physical (printed) schedule in a visible place in front of me somewhere in the room, to keep me focused on the goal; I also mark off items that I'm finished with, because I personally find the physical act of ticking off or crossing out an item very satisfying - it's the little things, really.

The production document for PILEDRIVER
There are a few things that can help with getting into a good workflow: One thing a lot of people underestimate are placeholders - when your final art isn't done, just stick something in there that only vaguely resembles what you want in there, and every day you work on it, not only will it remind you that it needs to be replaced, but on occasion it will reveal problems in the grand picture.
To bring a practical example, both with "Signal Lost" and especially with "PILEDRIVER" I went absolutely crazy with placeholders, essentially building both of those demos twice as what in the 3D industry they'd call "animatics": just rough boxy versions of the scenes with approximate camera/lighting, just to be able to get a feel for the pacing / length of the scenes, the camera speed, and so on. Making an animatic version of the scene and getting it in the engine usually took less than 15 minutes, but with the music done, I was able to immediately get a feel for whether I need to adjust my initial idea slightly, or perhaps I needed to find another camera angle, or break a section up to more parts.
youtube
The PILEDRIVER animatic
I actually went one step further earlier in the process; I knew I wanted the rap part in the middle, but the lyrics I wrote were fairly complex, and I knew Fantom would struggle with some of it (especially in pronounciation), I decided to take the lyrics and put them through my favourite speech synth, Daniel, and then chop it up so that it resembles the flow I thought sounded best for that particular part. This not only helped with the recording, but also reassured me that the idea would work.
youtube
Against all odds, I managed to coax Daniel out of retirement.
As you can see, my work methodology was often designed around one thing: quick feedback and iteration. I find myself having very clouded visions about art-related things most of the time, so for me it is very crucial to be able to try stuff as quick as I can and fail early, so especially with music, I do what the late Linds Redding coined as The Overnight Test: If something I make late at night doesn't sound great the next morning, I scrap it and start something new, maybe cannibalizing the good bits from the previous iteration. When on a timer, sometimes iteration means not getting stuck on something that would never work.
Note: I'm aware that Mr. Redding used his term in a more somber context later in his life, but I'm merely sticking to its original meaning here.
And speaking of overnight, let me stress one thing: always do nightly snapshots of what you're doing. If you're making a demo, build the whole demo every night and watch it, maybe run it on your work computer the next day during lunch. If you're making a song, render it out and put it on your portable player and listen to it on the bus the next day. Not only will you internalize the work and make a list of issues to fix over the course of the day, but it assures the integrity of the technical side of the project - I've watched way too many demogroups, as recent as last month, make an awesome prod that just doesn't compile or crashes before the deadline because they were too busy working on content and never tested the actual executable. If you do this every night, or maybe even every few nights (but always at least once a week), you're more likely to realize that your compile config hasn't been updated for a while and you really should do that before you're 5 hours before the deadline and you're drunk.
Sidenote: I'm aware that this is perhaps too specific of an advice to programmers, but probably worth mentioning, and I can imagine variations for other artforms as well, like importing/exporting problems with 3D.
Pushing on
So this is the bit in the text where we might be veering close to pretend version of popular psychology and talk about subjective things like motivation and dedication, so I'd like to make a disclaimer that I've never formally studied these things, and you should not take any of this as gospel or any level of scientific; these are just things I noticed about myself, and tried some simple methods to counter them, and they (mostly) worked fine.
One of the big things I've mentioned earlier is the daunting vision of the road ahead; with large projects, it's incredibly demoralizing to just sit at the start and be crushed by the amount of work that needs to be done, especially if you're doing something where it takes a large amount of work just to be able to have something basic; with music it perhaps only takes a ~10 second loop to feel like to be on the right track, with a full demo, the aforementioned placeholders do a great job, but with e.g. writing a larger engine, it can take weeks before you get to the point where you have anything on the screen simply because of all the modules you need to work on first. My mitigation for this was what I call the skeleton method: What's the least amount of work I need to do to get anything to get on screen? For that, what's the least amount of work I need to do to get something to just run? All of this ends up in the pre-production document as well, so when I start working, I can relatively quickly get to a stage where it's just a blank window, but it's built on an engine skeleton where replacing things is straightforward once I reach that point in the process. I myself noticed that my work morale improves once I'm able to send screenshots or chunks of the thing I'm working on to people, so I try to get there as fast as I can.
Another thing I noticed about my working style is that even with managable work chunks I have problems getting started simply because it takes a while to get into "the groove", so a little technique I've been using is that when I'm about to wrap up for the day, I make sure there's a glaring problem with what I just did, like an obvious bug or mix error that I could fix in a few minutes - and then I leave it like that until the next day. That way, the next day I'm able to jump in and start with something easy.
The final thing - which I kinda hesitate to mention because we're already way too deep into motivational speech territory to my taste - that I found extremely useful is regimen: making sure that there's a period of time either or daily or weekly that I get to work on the project. Perhaps the ultimate guru of regimen is the great Beeple, who has been releasing a piece of art every day for more than 10 years now, and has given expletive-laden talks on the subject of why regimen is important. Now, I think we can safely consider him an edge-case with 10 years of everydays, but at the same time, there's value in doing something in a regular manner, and there's also a consideration of the amount of work you need to do versus the amount of time you have.
One important aspect all of this is that while guilt can be a good force of motivation, you shouldn't beat yourself up if something doesn't work out. Failures are a part of life, and they're an even larger part of any artistic or techical process, and you should accept that sometimes best laid plans can go absolutely up in flames because of a variety of reasons - like, say, because there's a global pandemic going on, and that the existential pressure of it takes away your motivation to do things. All of that is okay. As Eisenhower once (supposedly) said, "Plans are worthless, but planning is invaluable."
In summary
I'm mentioning that failing is always part of the process, because I've been listing a lot of rules and constaints and limitations on what you should and shouldn't do, and I must again emphasize that all of this is meant as advice and observations with regards to spare-time activity, and that how much of this you use will depend on how bad do you want one thing over the other: Managing spare time can require a delicate balance especially if you have a healthy social life, and if you do, you have to decide how much to work on retaining that versus how much you work on your passion project, and in my eyes this ultimately all leads back to pre-production: if you know you can't spend time on something every day and the deadline is right around the corner, rein in your scope early so that you can deliver rather than giving up halfway, because no unfinished project is as impressive as a finished one.
27 notes
·
View notes
Text
A breakdown of the Revision 2020 Threeway Battle shader
Those of you who have been following this year's edition of Revision probably remember the unexpected twist in Sunday's timeline, where I was pitted in a coding "battle" against two of the best shader-coders in the world to fend for myself. Admittedly the buzz it caused caught me by surprise, but not as much as the feedback on the final shader I produced, so I hope to shed some light on how the shader works, in a way that's hopefully understandable to beginners and at least entertaining to experts, as well as providing some glimpses into my thought process along the way.
youtube
Recorded video of the event
But before we dive into the math and code, however, I think it's important to get some context by recounting the story of how we got here.
A brief history of demoscene live-coding
Visual coding has been massively opened up when graphics APIs began to introduce programmable fragment rendering, perhaps best known to most people as "pixel shaders"; this allowed programmers to run entire programmable functions on each pixel of a triangle, and none was more adamant to do that than a fellow named Iñigo Quilez (IQ), an understated genius who early on recognized the opportunity in covering the entire screen with a single polygon, and just doing the heavy lifting of creating geometry in the shader itself. His vision eventually spiraled into not only the modern 4k scene, but also the website ShaderToy, which almost every graphics programmer uses to test prototypes or just play around with algorithms. IQ, an old friend of mine since the mid-00s, eventually moved to the US, worked at Pixar and Oculus, and became something of a world-revered guru of computer graphics, but that (and life) has unfortunately caused him to shift away from the scene.
His vision of single-shader-single-quad-single-pass shader coding, in the meantime, created a very spectacular kind of live coding competition in the scene where two coders get only 25 minutes and the attention of an entire party hall, and they have to improvise their way out of the duel - this has been wildly successful at parties for the sheer showmanship and spectacle akin to rap battles, and none emerged from this little sport more remarkably than Flopine, a bubbly French girl who routinely shuffled up on stage wearing round spectacles and cat ears (actually they might be pony ears on second thought), and mopped the floor up with the competition. Her and a handful of other live-coders regularly stream on Twitch as practice, and have honed their live-coding craft for a few years at this point, garnering a considerable following.
youtube
Just a sample of insanity these people can do.
My contribution to this little sub-scene was coming up with a fancy name for it ("Shader Showdown"), as well as providing a little tool I called Bonzomatic (named after Bonzaj / Plastic, a mutual friend of IQ and myself, and the first person to create a live coding environment for demoparties) that I still maintain, but even though I feel a degree of involvement through the architectural side, I myself haven't been interested in participating: I know I can do okay under time pressure, but I don't really enjoy it, and while there's a certain overlap in what they do and what I do, I was always more interested in things like visual detail and representative geometry aided by editing and direction rather than looping abstract, fractal-like things. It just wasn't my thing.
Mistakes were made
But if I'm not attracted to this type of competition, how did I end up in the crossfire anyway? What I can't say is that it wasn't, to a considerable degree, my fault: as Revision 2020 was entirely online, most of the scene took it to themselves to sit in the demoscene Discord to get an experience closest to on-site socializing, given the somber circumstances of physical distancing. This also allowed a number of people who hasn't been around for a while to pop in to chat - like IQ, who, given his past, was mostly interested in the showdowns (during which Flopine crushed the competition) and the 4k compo.
As I haven't seen him around for a while, and as my mind is always looking for an angle, I somehow put two and two together, and asked him if he would consider taking part in a showdown at some point; he replied that he was up for it - this was around Saturday 10PM. I quickly pinged the rest of the showdown participants and organizers, as I spotted that Bullet was doing a DJ set the next day (which would've been in a relatively convenient timezone for IQ in California as well), and assumed that he didn't really have visuals for it - as there was already a "coding jam" over Ronny's set the day before, I figured there's a chance for squeezing an "extra round" of coding. Flopine was, of course, beyond excited by just the prospect of going against IQ, and by midnight we essentially got everything planned out (Bullet's consent notwithstanding, as he was completely out of the loop on this), and I was excited to watch...
...that is, until Havoc, the head honcho for the showdowns, off-handedly asked me about an at that point entirely hypothetical scenario: what would happen if IQ would, for some reason, challenge me instead of Flopine? Now, as said, I wasn't really into this, but being one to not let a good plan go to waste (especially if it was mine), I told Havoc I'd take one for the team and do it, although it probably wouldn't be very fun to watch. I then proceeded to quickly brief IQ in private and run him through the technicalities of the setup, the tool, the traditions and so on, and all is swell...
...that is, until IQ (this is at around 2AM) offhandedly mentions that "Havoc suggested we do a three-way with me, Flopine... and you." I quickly try to backpedal, but IQ seems to be into the idea, and worst of all, I've already essentially agreed to it, and to me, the only thing worse than being whipped in front of a few thousand people would be going back on your word. The only way out was through.
Weeks of coding can spare you hours of thinking
So now that I've got myself into this jar of pickles, I needed some ideas, and quick. (I didn't sleep much that night.) First off, I didn't want to do anything obviously 3D - both IQ and Flopine are masters of this, and I find it exhausting and frustrating, and it would've failed on every level possible. Fractals I'm awful at and while they do provide a decent amount of visual detail, they need a lot of practice and routine to get right. I also didn't want something very basic 2D, like a byte-beat, because those have a very limited degree of variation available, and the end result always looks a bit crude.
Luckily a few months ago an article I saw do rounds was a write-up by Sasha Martinsen on how to do "FUI"-s, or Fictional User Interfaces; overly complicated and abstract user interfaces that are prominent in sci-fi, with Gmunk being the Michael Jordan of the genre.
Image courtesy of Sasha Martinsen.
Sasha's idea is simple: make a few basic decent looking elements, and then just pile them on top of each other until it looks nice, maybe choose some careful colors, move them around a bit, place them around tastefully in 3D, et voilà, you're hacking the Gibson. It's something I attempted before, if somewhat unsuccessfully, in "Reboot", but I came back to it a few more times in my little private motion graphics experiments with much better results, and my prediction was that it would be doable in the given timeframe - or at least I hoped that my hazy 3AM brain was on the right track.
A bit of math
How to make this whole thing work? First, let's think about our rendering: We have a single rectangle and a single-pass shader that runs on it: this means no meshes, no geometry, no custom textures, no postprocessing, no particle systems and no fonts, which isn't a good place to start from. However, looking at some of Sasha's 3D GIFs, some of them look like they're variations of the same render put on planes one after the other - and as long as we can do one, we can do multiple of that.
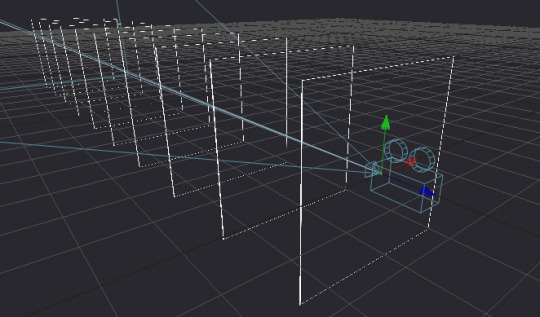
Rough sketch of what we want to do; the planes would obviously be infinite in size but this representation is good enough for now.
Can we render multiple planes via a single shader? Sure, but we want them to look nice, and that requires a bit of thinking: The most common technique to render a "2D" shader and get a "3D" look is raymarching, specifically with signed distance fields - starting on a ray, and continually testing distances until a hit is found. This is a good method for "solid-ish" looking objects and scenes, but the idea for us is to have many infinite planes that also have some sort of alpha channel, so we'd have a big problem with 1) inaccuracy, as we'd never find a hit, just something "reasonably close", and even that would take us a few dozen steps, which is costly even for a single plane and 2) the handling of an alpha map can be really annoying, since we'd only find out our alpha value after our initial march, after which if our alpha is transparent we'd need to march again.
But wait - it's just infinite planes and a ray, right? So why don't we just assume that our ray is always hitting the plane (which it is, since we're looking at it), and just calculate an intersection the analytical way?
Note: I would normally refer to this method as "raytracing", but after some consultation with people smarter than I am, we concluded that the terms are used somewhat ambiguously, so let's just stick to "analytical ray solving" or something equally pedantic.
We know the mathematical equation for a ray is position = origin + direction * t (where t is a scalar that represents the distance/progress from the ray origin), and we know that the formula for a plane is A * x + B * y + C * z + D = 0, where (A, B, C) is the normal vector of the plane, and D is the distance from the origin. First, since the intersection will be the point in space that satisfies both equations, we substitute the ray (the above o + d * t for each axis) into the plane:
A * (ox + dx * t) + B * (oy + dy * t) + C * (oz + dz * t) + D = 0
To find out where this point is in space, we need to solve this for t, but it's currently mighty complicated. Luckily, since we assume that our planes are parallel to the X-Y plane, we know our (A, B, C) normal is (0, 0, 1), so we can simplify it down to:
oz + dz * t + D = 0
Which we can easily solve to t:
t = (D - oz) / dz
That's right: analytically finding a ray hit of a plane is literally a single subtraction and a division! Our frame rate (on this part) should be safe, and we're always guaranteed a hit as long as we're not looking completely perpendicular to the planes; we should have everything to start setting up our code.
Full disclosure: Given my (and in a way IQ's) lack of "live coding" experience, we agreed that there would be no voting for the round, and it'd be for glory only, but also that I'd be allowed to use a small cheat sheet of math like the equations for 2D rotation or e.g. the above final equation since I don't do this often enough to remember these things by heart, and I only had a few hours notice before the whole thing.
Setting up the rendering
Time to start coding then. First, let's calculate our texture coordinates in the 0..1 domain using the screen coordinates and the known backbuffer resolution (which is provided to us in Bonzomatic):
vec2 uv = vec2(gl_FragCoord.x / v2Resolution.x, gl_FragCoord.y / v2Resolution.y);
Then, let's create a ray from that:
vec3 rayDir = vec3( uv * 2 - 1, -1.0 ); rayDir.x *= v2Resolution.x / v2Resolution.y; // adjust for aspect ratio vec3 rayOrigin = vec3( 0, 0, 0 );
This creates a 3D vector for our direction that is -1,-1,-1 in the top left corner and 1,1,-1 in the bottom right (i.e. we're looking so that Z is decreasing into the screen), then we adjust the X coordinate since our screen isn't square, but our coordinates currently are - no need to even bother with normalizing, it'll be fine. Our origin is currently just sitting in the center.
Then, let's define (loosely) our plane, which is parallel to the XY plane:
float planeDist = 1.0f; // distance between each plane float planeZ = -5.0f; // Z position of the first plane
And solve our equation to t, as math'd out above:
float t = (planeZ - rayOrigin.z) / rayDir.z;
Then, calculate WHERE the hit is by taking that t by inserting it back to the original ray equation using our current direction and origin:
vec3 hitPos = rayOrigin + t * rayDir;
And now we have our intersection; since we already know the Z value, we can texture our plane by using the X and Y components to get a color value:
vec4 color = fui( hitPos.xy ); // XY plane our_color = color;
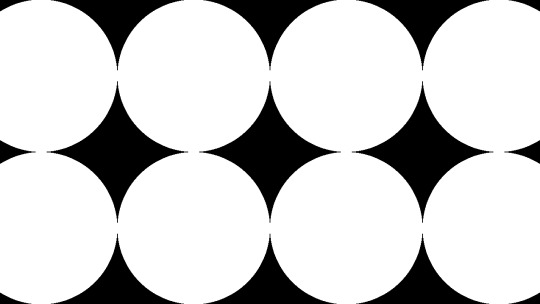
Of course we're gonna need the actual FUI function, which will be our procedural animated FUI texture, but let's just put something dummy there now, like a simple circle:
vec4 fui ( vec2 uv ) { return length(uv - 0.5) < 0.5 ? vec4(1) : vec(0); }
And here we go:

Very good, we have a single circle and if we animate the camera we can indeed tell that it is on a plane.
So first, let's tile it by using a modulo function; the modulo (or modulus) function simply wraps a number around another number (kinda like the remainder after a division, but for floating point numbers) and thus becomes extremely useful for tiling or repeating things:

We'll be using the modulo function rather extensively in this little exercise, so strap in. (Illustration via the Desmos calculator.)
vec4 layer = fui( mod( hitPos.xy, 1.0 ) );
This will wrap the texture coordinates of -inf..inf between 0..1:
We also need multiple planes, but how do we combine them? We could just blend them additively, but with the amount of content we have, we'd just burn them in to white and it'd look like a mess (and not the good kind of mess). We could instead just use normal "crossfade" / "lerp" blending based on the alpha value; the only trick here is to make sure we're rendering them from back to front since the front renders will blend over the back renders:
int steps = 10; float planeDist = 1.0f; for (int i=steps; i>=0; i--) { float planeZ = -1.0f * i * planeDist; float t = (planeZ - rayOrigin.z) / rayDir.z; if (t > 0.0f) // check if "t" is in front of us { vec3 hitPos = rayOrigin + t * rayDir; vec4 layer = fui( hitPos.xy, 2.0 ); // blend layers based on alpha output colour = mix( colour, layer, layer.a ); } }
And here we go:

We decreased the circles a bit in size to see the effect more.
Not bad! First thing we can do is just fade off the back layers, as if they were in a fog:
layer *= (steps - i) / float(steps);
We have a problem though: we should probably increase the sci-fi effect by moving the camera continually forward, but if we do, we're gonna run into a problem: Currently, since our planeZ is fixed to the 0.0 origin, they won't move with the camera. We could just add our camera Z to them, but then they would be fixed with the camera and wouldn't appear moving. What we instead want is to just render them AS IF they would be the closest 10 planes in front of the camera; the way we could do that is that if e.g. our planes' distance from each other is 5, then round the camera Z down to the nearest multiple of 5 (e.g. if the Z is at 13, we round down to 10), and start drawing from there; rounding up would be more accurate, but rounding down is easier, since we can just subtract the division remainder from Z like so:
float planeZ = (rayOrigin.z - mod(rayOrigin.z, planeDist)) - i * planeDist;
And now we have movement! Our basic rendering path is done.
Our little fictional UI
So now that we have the basic pipeline in place, let's see which elements can we adapt from Sasha's design pieces.
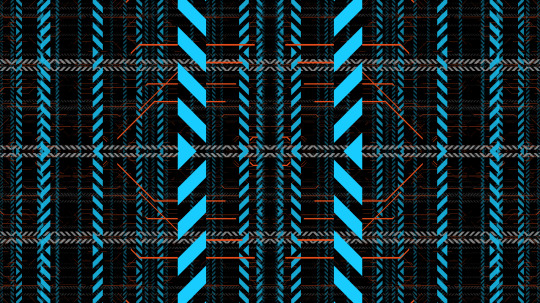
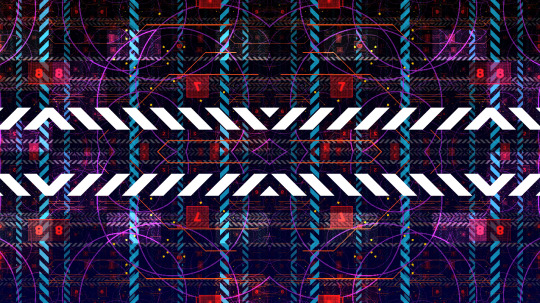
The first one I decided to go with wasn't strictly speaking in the set, but it was something that I saw used as design elements over the last two decades, and that's a thick hatch pattern element; I think it's often used because it has a nice industrial feel with it. Doing it in 2D is easy: We just add X and Y together, which will result in a diagonal gradient, and then we just turn that into an alternating pattern using, again, the modulo. All we need to do is limit it between two strips, and we have a perfectly functional "Police Line Do Not Cross" simulation.
return mod( uv.x + uv.y, 1 ) < 0.5 ? vec4(1) : vec4(0);

So let's stop here for a few moments; this isn't bad, but we're gonna need a few things. First, the repetition doesn't give us the nice symmetric look that Sasha recommends us to do, and secondly, we want them to look alive, to animate a bit.
Solving symmetry can be done just by modifying our repetition code a bit: instead of a straight up modulo with 1.0 that gives us a 0..1 range, let's use 2.0 to get a 0..2 range, then subtract 1.0 to get a -1..1 range, and then take the absolute value.
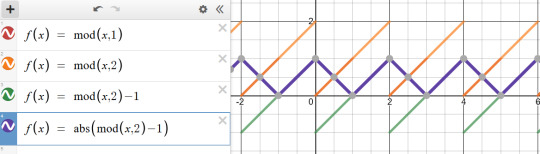
vec4 layer = fui( abs( mod( hitPos.xy, 2.0 ) - 1 ) );
This will give us a triangle-wave-like function, that goes from 0 to 1, then back to 0, then back to 1; in terms of texture coordinates, it will go back and forth between mirroring the texture in both directions, which, let's face it, looks Totally Sweet.
For animation, first I needed some sort of random value, but one that stayed deterministic based on a seed - in other words, I needed a function that took in a value, and returned a mangled version of it, but in a way that if I sent that value in twice, it would return the same mangled value twice. The most common way of doing it is taking the incoming "seed" value, and then driving it into some sort of function with a very large value that causes the function to alias, and then just returning the fraction portion of the number:
float rand(float x) { return fract(sin(x) * 430147.8193); }
Does it make any sense? No. Is it secure? No. Will it serve our purpose perfectly? Oh yes.
So how do we animate our layers? The obvious choice is animating both the hatch "gradient" value to make it crawl, and the start and end of our hatch pattern which causes the hatched strip to move up and down: simply take a random - seeded by our time value - of somewhere sensible (like between 0.2 and 0.8 so that it doesn't touch the edges) and add another random to it, seasoned to taste - we can even take a binary random to pick between horizontal and vertical strips:

The problems here are, of course, that currently they're moving 1) way too fast and 2) in unison. The fast motion obviously happens because the time value changes every frame, so it seeds our random differently every frame - this is easy to solve by just rounding our time value down to the nearest integer: this will result in some lovely jittery "digital" motion. The unison is also easy to solve: simply take the number of the layer, and add it to our time, thus shifting the time value for each layer; I also chose to multiply the layer ID with a random-ish number so that the layers actually animate independently, and the stutter doesn't happen in unison either:
vec4 fui( vec2 uv, float t ) { t = int(t); float start = rand(t) * 0.8 + 0.1; float end = start + 0.1; [...] } vec4 layer = fui( abs(mod(hitPos.xy, 2.0)-1), fGlobalTime + i * 4.7 );

Lovely!
Note: In hindsight using the Z coordinate of the plane would've given a more consistent result, but the way it animates, it doesn't really matter.
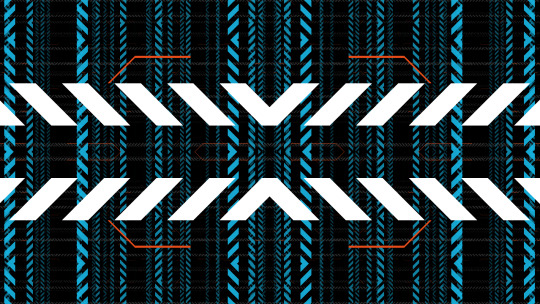
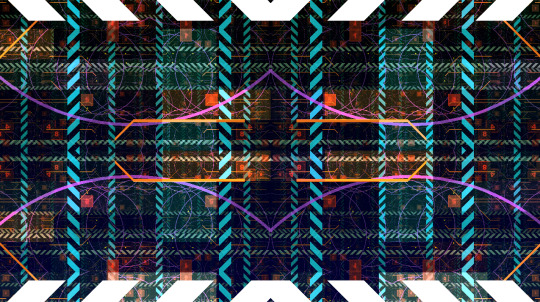
So let's think of more elements: the best looking one that seems to get the best mileage out in Sasha's blog is what I can best describe as the "slant" or "hockey stick" - a simple line, with a 45-degree turn in it. What I love about it is that the symmetry allows it to create little tunnels, gates, corridors, which will work great for our motion.
Creating it is easy: We just take a thin horizontal rectangle, and attach another rectangle to the end, but shift the coordinate of the second rectangle vertically, so that it gives us the 45-degree angle:
float p1 = 0.2; float p2 = 0.5; float p3 = 0.7; float y = 0.5; float thicc = 0.0025; if (p1 < uv.x && uv.x < p2 && y - thicc < uv.y && uv.y < y + thicc ) { return vec4(1); } if (p2 < uv.x && uv.x < p3 && y - thicc < uv.y - (uv.x - p2) && uv.y - (uv.x - p2) < y + thicc ) { return vec4(1); }
Note: In the final code, I had a rect() call which I originally intended to use as baking glow around my rectangle using a little routine I prototyped out earlier that morning, but I was ultimately too stressed to properly pull that off. Also, it's amazing how juvenile your variable names turn when people are watching.
Looks nice, but since this is such a thin sparse element, let's just... add more of it!
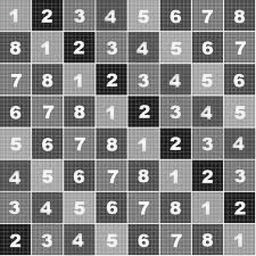
So what more can we add? Well, no sci-fi FUI is complete without random text and numbers, but we don't really have a font at hand. Or do we? For years, Bonzomatic has been "shipping" with this really gross checkerboard texture ostensibly for UV map testing:

What if we just desaturate and invert it?
We can then "slice" it up and render little sprites all over our texture: we already know how to draw a rectangle, so all we need is just 1) calculate which sprite we want to show 2) calculate the texture coordinate WITHIN that sprite and 3) sample the texture:
float sx = 0.3; float sy = 0.3; float size = 0.1; if (sx < uv.x && uv.x < sx + size && sy < uv.y &&uv.y < sy + size) { float spx = 2.0 / 8.0; // we have 8 tiles in the texture float spy = 3.0 / 8.0; vec2 spriteUV = (uv - vec2(sx,sy)) / size; vec4 sam = texture( texChecker, vec2(spx,spy) + spriteUV / 8.0 ); return dot( sam.rgb, vec3(0.33) ); }
Note: In the final code, I was only using the red component instead of desaturation because I forgot the texture doesn't always have red content - I stared at it for waaaay too long during the round trying to figure out why some sprites weren't working.
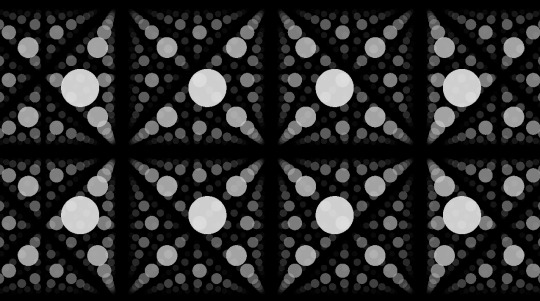
And again, let's just have more of it:
Getting there!
At this point the last thing I added was just circles and dots, because I was running out of ideas; but I also felt my visual content amount was getting to where I wanted them to be; it was also time to make it look a bit prettier.
Post-production / compositing
So we have our layers, they move, they might even have colors, but I'm still not happy with the visual result, since they are too single-colored, there's not enough tone in the picture.
The first thing I try nowadays when I'm on a black background is to just add either a single color, or a gradient:
vec4 colour = renderPlanes(uv); vec4 gradient = mix( vec4(0,0,0.2,1), vec4(0,0,0,1), uv.y); vec4 finalRender = mix( gradient, vec4(colour.xyz,1), colour.a);

This added a good chunk of depth considerably to the image, but I was still not happy with the too much separation between colors.
A very common method used in compositing in digital graphics is to just add bloom / glow; when used right, this helps us add us more luminance content to areas that would otherwise be solid color, and it helps the colors to blend a bit by providing some middle ground; unfortunately if we only have a single pass, the only way to get blur (and by extension, bloom) is repeatedly rendering the picture, and that'd tank our frame rate quickly.
Instead, I went back to one of the classics: the Variform "pixelize" overlay:
This is almost the same as a bloom effect, except instead of blurring the image, all you do is turn it into a lower resolution nearest point sampled version of itself, and blend that over the original image - since this doesn't need more than one sample per pixel (as we can reproduce pixelation by just messing with the texture coordinates), we can get away by rendering the scene only twice:
vec4 colour = renderPlanes(uv); colour += renderPlanes(uv - mod( uv, 0.1 ) ) * 0.4;
Much better tonal content!
So what else can we do? Well, most of the colors I chose are in the blue/orange/red range, and we don't get a lot of the green content; one of the things that I learned that it can look quite pretty if one takes a two-tone picture, and uses color-grading to push the midrange of a third tone - that way, the dominant colors will stay in the highlights, and the third tone will cover the mid-tones. (Naturally you have to be careful with this.)
"Boosting" a color in the mids is easy: lucky for us, if we consider the 0..1 range, exponential functions suit our purpose perfectly, because they start at 0, end at 1, but we can change how they get here:
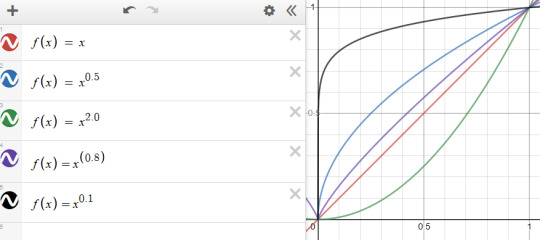
So let's just push the green channel a tiny bit:
finalRender.g = pow(finalRender.g, 0.7);
Now all we need is to roll our camera for maximum cyberspace effect and we're done!
Best laid plans of OBS
As you can see from the code I posted the above, I wrote the final shader in GLSL; those who know me know that I'm a lot more comfortable with DirectX / HLSL, and may wonder why I switched, but of course there's another story here:
Given the remote nature of the event, all of the shader coding competition was performed online as well: since transmitting video from the coder's computer to a mixer, and then to another mixer, and then to a streaming provider, and then to the end user would've probably turned the image to mush, Alkama and Nusan came up with the idea of skipping a step and rigging up a version of Bonzo that ran on the coder's computer, but instead of streaming video, it sent the shader down to another instance of Bonzo, running on Diffty's computer, who then captured that instance and streamed it to the main Revision streaming hub. This, of course, meant that in a three-way, Diffty had to run three separate instances of Bonzo - but it worked fine with GLSL earlier, so why worry?
What we didn't necessarily realize at the time, is that the DirectX 11 shader compiler takes no hostages, and as soon as the shader reached un-unrollable level of complexity, it thoroughly locked down Diffty's machine, to the point that even the video of the DJ set he was playing started to drop out. I, on the other hand, didn't notice any of this, since my single local instance was doing fine, so I spent the first 15 minutes casually nuking Diffty's PC to shreds remotely, until I noticed Diffty and Havoc pleading on Discord to switch to GLSL because I'm setting things on fire unknowingly.
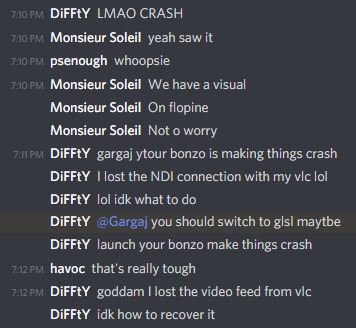
This is fine.
I was reluctant to do so, simply because of the muscle memory, but I was also aware that I should keep the show going if I can because if I bow out without a result, that would be a colossal embarrassment to everyone involved, and I only can take one of those once every week, and I was already above my quota - so, I quickly closed the DX11 version of Bonzo, loaded the shader up in a text editor, replaced "floatX" with "vecX" (fun drinking game: take a shot every time I messed it up during the live event), commented the whole thing out, loaded it into a GLSL bonzo, and quickly fixed all the other syntax differences (of which there were luckily not many, stuff like "mix" instead of "lerp", constructors, etc.), and within a few minutes I was back up and running.
This, weirdly, helped my morale a bit, because it was the kind of clutch move that for some reason appealed to me, and made me quite happy - although at that point I locked in so bad that not only did I pay absolutely not attention to the stream to see what the other two are doing, but that the drinks and snacks I prepared for the hour of battling went completely untouched.
In the end, when the hour clocked off, the shader itself turned out more or less how I wanted it, it worked really well with Bullet's techno-/psy-/hardtrance mix (not necessarily my jam, as everyone knows I'm more a broken beat guy, but pounding monotony can go well with coding focus), and I came away satisfied, although the perhaps saddest point of the adventure was yet to come: the lack of cathartic real-life ending that was taken from us due to the physical distance, when after all the excitement, all the cheers and hugs were merely lines of text on a screen - but you gotta deal with what you gotta deal with.
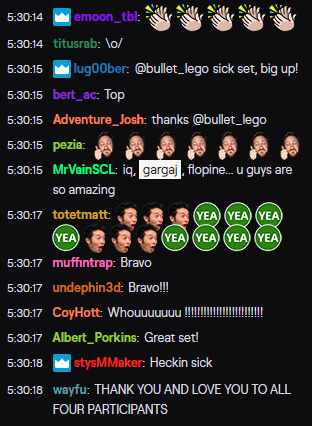
A small sampling of the Twitch reaction.
Conclusion
In the end, what was my takeaway from the experience?
First off, scoping is everything: Always aim to get an idea where you can maximize the outcome of the time invested with the highest amount of confidence of pulling it off. In this case, even though I was on short notice and in an environment I was unfamiliar with, I relied on something I knew, something I've done before, but no one else really has.
Secondly, broaden your influence: You never know when you can take something that seems initially unrelated, and bend it into something that you're doing with good results.
Thirdly, and perhaps most importantly, step out of your comfort zone every so often; you'll never know what you'll find.
(And don't agree to everything willy-nilly, you absolute moron.)
10 notes
·
View notes
Text
“PILEDRIVER” - Driving an aging demo engine to its limits
The first memory I can recall of working on what became ÜDS3 was sitting on the floor of San Francisco International Airport in 2008, right after NVSCENE, next to a power socket and trying to spend the remaining time until boarding with some coding, in hopes that one day it would be an engine.
My hope was lofty: an engine that would last for a long enough time in terms of feature-set and convenience that I would only need to do perhaps incremental upgrades, and an ability to do project-specific code, but keep most of the core system intact so that it can be moved from project to project without having to reinvent the wheel.
It is now almost a decade later. After having built more than a dozen demos on the same engine that I started sitting on the airport carpet, I have recently released "PILEDRIVER", a gigantic several month effort with easily the largest amount of tech and content in a demo I've ever done. With this finished, I have now made the decision to cease using this engine, as I feel it has served above and beyond its purpose.
youtube
The final demo.
I've been meaning to sunset ÜDS3 for a long time now, and while making the demo it became apparent to me that this would be the last demo I'd make with this engine - for reasons that I'll detail later in this post. That being said, I'm also now confident that the fundamental principles of the engine hold up really well, and looking back to both the several year development time of the tool/engine, and the 3-4 month development time of the demo itself, I thought it'd be fun to take stock of a few things: What updates I had to do for this particular demo, and how certain aspects of the engine held up or didn't hold up over time.
(Note: This particular post will less be about PILEDRIVER itself; I do plan on writing some more about how to pull off such a large project, from a scheduling / management / production perspective, but that'll be a whole different post.)
Deferred shadows
This was less of a new feature and more a refinement of an old one; I already had decent support for variance shadowmapping in previous demos, but the big problem with them was that I could never really properly integrate them into the node-based concept: With a forward rendering engine, the idea of having an input scene and an output texture was relatively straightforward; with a deferred engine, the G-buffer object was used several times even after the final colour-buffer was rendered, but the G-buffer itself didn't contain any shadow-map information, so the "wins" of having any amount of lightsources ended up being negated by having the shadows render for every lightsource.
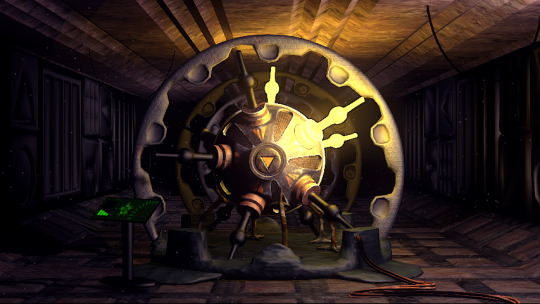
This particular scene has a light source attached to every spike of the thing (10 in total) that don't cast shadows, but also 2 lights around the scene that do.
The update for PILEDRIVER was relatively simple in this sense: with some careful index-management internally, I was able to selectively allow only specific lightsources to cast shadows. This allowed me to have a large amount of light sources again, but only waste time on rendering shadow maps for the ones I needed shadows for - sounds like an obvious thing, but with a node-based system some of these things were counter-intuitive, and I had to throw some caution in the wind. to get things working.
Particles
One of the few things that I felt in hindsight "Along For The Ride" could've used more of to add some depth is particles. Particles have many advantages: large particles can be used to create things like dust clouds and fog, to add a bit of complexity and movement to an otherwise static scene, while small particles can add tiny details like welding sparks, or more fine-grained dust floating in the air, a commonly used technique to add visual depth cues to a camera movement.
Another nice thing about particles is that while then common way of animating them is some sort of physics calculation, you don't really need that: most of the time it's perfectly acceptable for them to just move in a certain direction within a given volume, which means the entire deterministic movement can be done within the vertex shader: a fast, hot-pluggable scripting system allowing for rapid iteration. The only place I wanted something that resembled physics were a few bits that resembled welding sparks, but a projectile arc and some bouncing was always easy to fake, especially once I added support to billboard stretching based on the particle "velocity" (in reality a fake sampling of the previous position based on time) to achieve something that resembles a particle trail.
I've had particle support in the engine since Sosincs Vége, but it never felt like I've utilized it properly; all the particle effects I've done were very representative (explosions, etc.), rather than image detail. This time, naturally inspired by Zoom's use of particles in "When Silence Dims The Stars Above", I went for the more artistic use, adding large fluffy particles to provide depth and motion to a scene, and to aid the eventual colour-grading process by providing colour data where otherwise there wouldn't be any.
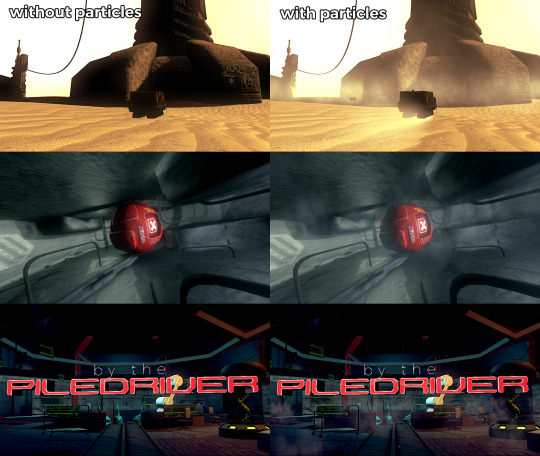
Particles allow you to add a good amount of definition to your visuals if used well.
Ultimately, I ended up with about a dozen shaders for particles, each with various movement types or blending types; I probably could've written a more general solution to encompass most of these, but in the end I think I was happy with how fast I was able to integrate chunks of particles into my scenes.
Raymarching
So I'm aware that there's this large movement of people using raymarching / sphere tracing / distance fields for both 4k intros, and live coding (and I'm aware that at least part of it is my fault), but I never really dug the process: I always felt I was more comfortable with using actual vertices and polygons and textures - even if it was a bit more tedious at the start, it felt like when it came to detail and craftsmanship, it paid off in the end. Where such situations have an upper hand are mathematically defined, "abstract" objects such as blobs or fractals; something that, to me, often had an air of running out of ideas - which meant they were perfect for imbuing some more irony in the demo.
The rendering technique itself is relatively simple and there are a ton of tutorials, so I'll be brief: Instead of working with vertices and projection, you treat the screen as a 2D surface, and the camera as a point looking at that 2D surface. You then shoot (cast) rays out of the camera through each point of the screen, and see what that ray hits. How you see what it hit can be found out a number of ways, and I won't go in-depth with it, but in this particular case my surfaces all worked with distance values, so eventually I would retain a colour and a depth value; all I needed is to be able to, theoretically, stitch raymarched geometry into a non-raymarched scene.
How to do this was relatively simple: paint a fullscreen quad over the scene, and write a shader that renders the fullscreen pixel shader with a depth value that corresponds to the depth values that were already in my depth buffer, rendered by the polygon geometry. A quick explanation of this (for OpenGL) can be found in cpdt's breakdown, but the general idea is that you usually work with a [0..1] range for depths, and as long as your "2D" shader outputs the same range, you should be able to have the raymarched object clip correctly with your polygons.
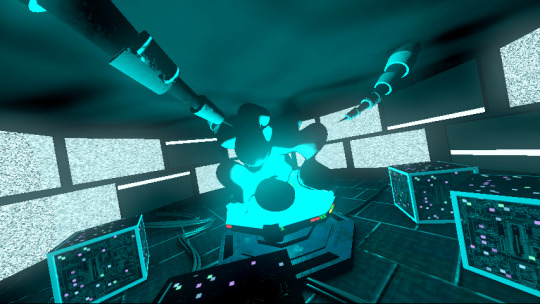
The horns from the ceiling correctly occlude the raymarched blobs.
The other step for being able to do this is of course using the correct matrix transformations to have the ray align with the camera settings that rendered the original scene; the way I achieved this was transforming my 2D screen quad texture coordinates back to world space using the combination of the inverses of the view and projection matrices: with clip space depth 0.0, this gave me the camera eye position; with clip space depth 1.0, it gave me a point on the virtual world space screen - subtracting these two vectors gave me the ray direction that I was able to use for marching. Once I found my final point of contact, all I did was transform it back with my view and project matrices to clip space to get a depth, and then use that (saturated) depth to pass it to my shader for depth testing.
Since all of this was done via the same shader path that was using the G-buffers, I was able to also acquire camera, light and shadow data in my raymarching shader, which made sure that my raymarched geometry was correctly lit. The only downside came for certain post-processing situations where e.g. my raymarched buffer wasn't producing motion vectors, but as long as I had clever camera work, it ultimately didn't cause a problem.
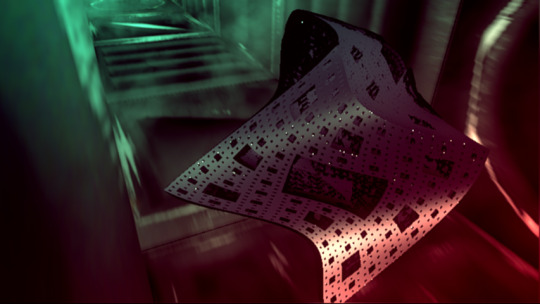
Note how this object has no motion blur on it - but since it's only visible for a split second, that's okay!
GPU instancing
Instancing was one of the things that I wanted to do for a long time, but kept postponing until the right time for it came along; it also felt like one of the final things that I never did with DirectX 9.0. This time it felt like it was time to tackle it, and the tail end of the demo was a perfect opportunity to showcase it.
The idea behind instancing is that sometimes you want to draw a single piece of geometry many times, but with minor changes, such as different positions, rotations, different shader parameters (colour, lighting, etc.), but without having to reconstitute your world matrix every time, and most importantly, without having thousands of draw-calls for thousands of objects. Instancing allows you to multiplex two vertex buffers: one that contains your model data that gets copied over the scene, and another that contains some sort of per-instance data, like positions. It then internally muxes the two, and renders each instance so that your vertex shader receives the same model every time but paired with each instance data. This way, you can transform the model with that instance data the way you want to, and each instance can be distinct.
Solving this turned out to be easier than I thought; there's a bit of a fiddle with certain things, buffers and such, but ultimately with a bit of management, I was able to integrate this into my particle-pipeline, where instead of a billboard-quad with a 2D image, I was able to plug a mesh-node into the instancer, and was able to write the same particle-animation code in my vertex shader that I was doing for particles, except this time it was for full, lit 3D meshes. My instance data was relatively minimalistic: as I was doing my animating in the shader, I only needed a bunch of distinct [0..1] random values, and I was able to do the rest in the shader with variables.
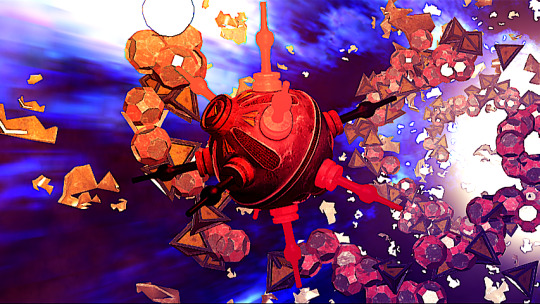
Everything in this scene except the main object and the background clouds are either particles or instanced geometry.
Motion blur
Given the high pace of the prod, I had an asterisk on my todo-list for the longest time to reintegrate the motion blur that I used in "Machine" back in 2012; not that this was necessarily a problem - in fact it was even easier, since now I had G-buffers and I could easily allocate a new texture for velocity vectors - but it only became apparent to me a week before deadline that this demo really, really craves motion blur, and by that time I was already at several hundred nodes and was wary of changing anything that was so much in the guts of the engine.

Motion blur adds a ton to these rapid scenes.
Ultimately, courage prevailed and I'm glad it did, because it really helped the demo convey the breakneck tempo I wanted it to represent, although it wasn't without problems: Because of the compositing tricks I were using (see above with raymarching), some of the geometry simply wasn't prepared for this: the text during the breakdown looked particularly gross with just the "standard" motion blur, so in that specific scene, the motion blur is done simply by re-rendering the text geometry multiple times.
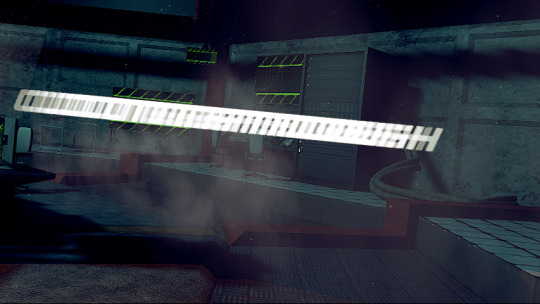
The text here is simply copied over; note how there's a slight brightness burn-in as the text becomes white before it should - this is intentional to give more of an abstract motion trail.
One of the funniest problems I encountered with the motion blur was a few days before the party, in the corridor scene, where I noticed a large seam in the blur at the edges of the screen. After inspecting the buffers, it became apparent that the problem stems from the camera movement: most of velocity-buffer-based motion blur relies on the idea that the objects that you're blurring are in front of the camera (i.e. the near plane) at all times. In my case, however, as the camera was moving backwards at a relatively high pace, a good chunk of the geometry that was visible in the current frame was still behind the near plane in the previous, and that crossover of the near plane resulted in completely bogus reprojection values.
At this point, I was getting concerned, as it was already Thursday night, and the deadline and compo were on Saturday, and when I went to IRC to ask around, everyone seemed to have drawn a blank in terms of a solution (later, a conversation with Reptile / AstroideA at the party resulted in the same conclusion: "Hey, so what happens to my velocity buffer if an object crosses the near plane?" "Well, then you're fucked."), so I needed a creative solution quick, and luckily a lightbulb went off, since I realized I was lucky in two aspects: First, my animation was fully deterministic, so I had access to both past and future frames - in fact, my velocity buffers were calculated from an epsilon value I defined and then subtracted from the current animation time to calculate the "previous frame" matrices. Secondly, my motion blur was symmetrical, meaning while my velocity vectors had an angle and length, I would sample the scene both ways, since real motion blur is symmetrical as well. This gave me an idea: If instead of sampling the "past animation frame", I sample the "future animation frame", my motion blur should be perfectly correct (since now the near plane crossing happens in the other direction, behind the camera) - after about a minute of adding some extra code to un-hardwire that epsilon value, it turned out that I was right and I was able to go to sleep more relaxed.

The velocity buffer sampling problem, illustrated.
(Fun little sidenote: I posted the demo on our work forum's "Personal Projects" thread, and as a joke I added a footnote about struggling with this; about a month later, at a completely unrelated work conference in London, our render coder Tim Mann pulled me aside saying "So about the velocity buffer problem you had...")
Final touches
Overall I was rather pleased with the performance of the demo; the only place I was perhaps a bit miffed about was the text scene where the framerate inexplicably drops, and it is quite obviously a CPU bottleneck, but I never bothered to profile it out mostly since my CPU is quite old and I assumed most people have an i7 at this point, but also because of the time constraints.
On the flipside, however, while the actual rendering performance was reasonably quick, the tool at this point was noticably struggling under the weight of the content: loading the demo took minutes, saving (and autosaving) would stall the whole tool for 3-4 agonizing seconds, and the UI itself ground to a halt when trying to visualize close to 800 nodes and the 300 spline tracks coming with it. It made me realize how stress-testing the UI before you start even working on a project is important, because interface lag like this affects your creative workflow: If you know adding and connecting a node takes 10 seconds, you're less likely to do it. That being said, it rarely ever crashed, especially once I replaced the MSXML parser with pugixml.
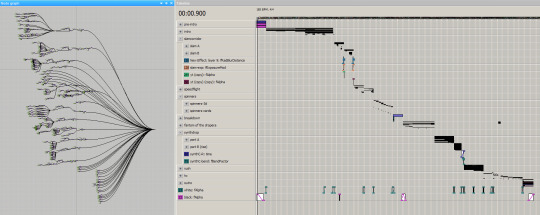
In case you wondered, yes, the backend of the demo is just as complicated as the final result.
Getting the demo down to 128MB wasn't a problem; with lossless textures it was clocking at around 300MB, but luckily most textures degraded rather gracefully; perhaps the only thing that stood out for me during the screening at the party (Pasy very gracefully allowed me to check the demo on Friday, a day before the compo) is some micro-stuttering when scenes were first shown, something that's also visible on my recording of the screening. I believe this was a result of some of the on-demand resource allocation the DirectX 9 drivers do, meaning that (as far as I've been explained) some of the buffers / textures / shaders you create won't be loaded to VRAM until an actual rendering call happens, even if you specify that accordingly. This was something the demo was prepared for, and there's a short period between the loading and the demo where the engine actually quickly renders a single frame of each second of the demo to trigger that kind of "hot-loading" or "caching". However, because of the unusually high frequency of scenes, I believe some of the scenes might have gotten accidentally skipped and never triggered. There's probably a better solution for this - as far as I know "Stargazer" mitigates this by rendering a single frame of each scene, but that solution is only workable if you have the concept of a scene. One possible method is going by the clips on the timeline, but that's a problem for another time, and I've been told this is no longer an issue in DirectX 11.
Conclusions and engine postmortem
I admit for a second I was trying to get emotional about sunsetting an old engine that served for seven years, but the more I thought about it, the more my thoughts veered towards all the things I forced myself to work around simply because they were intrinsic problems of the engine, and even moreso toward the idea that "the next one will be better". With that in mind, here's a selection of ideas and verdicts whether certain decisions bore fruit or not.
Writing a demotool
Verdict: Yes, definitely. I've said it many times that I'm a visual, but mostly just indecisive person, who needs to see what they're doing and needs to try out versions of ideas to be able to decide and A/B-test; this can apply to one specific colour I want to choose in a scene, or entire post-processing chains that I need to be able to turn on and off. I need an UI to work (and I think most people do), and I need a demotool. That said, my caveat of saying this is that I started working on this tool after many years of experience, and that I see a lot of people who make engines without any purpose or know-how, and then get disillusioned when they turn out janky and noone wants to use them. Don't build spaceships, just use what you really need. ImGui is a perfectly fine method of integrating a few tweakers into your renderer if you really must; some people use Rocket, other people use the Unity frontend over their own engine to expedite the synchronization - there are ways to expedite these things. Myself, I knew I needed a tool, but I also knew it'd take years, and that it would be for me and me only.
Using DirectX 9
Verdict: Yes, to a point. As someone who doesn't have any interest in making demos for other platforms, I always viewed DirectX as a perfect API for a programmer in terms of support: the documentation is great, the tools are fantastic, the API design makes sense and since most games rely on the DirectX HAL, the drivers are battle-hardened. (Mostly.) That all said, DirectX 9 at this point is 17 years old (so much so that it's a pain to get it working because they've deprecated the SDK and tools), and it's time to move on.
Plugin-based system
Verdict: I don't know. This one I'm not sure about. My idea of making the system modular certainly helped adding bespoke code to prods when it was necessary - but most of the time it wasn't, and the amount of maintenance plugins required (keeping the interfaces in sync between the plugins and the tool) or the effort to set a new one up eventually felt like they were outweighing the advantages. This is something I'm still undecided on, and I can't tell if it's something I'll do in the next version.
Float-based parameters
Verdict: Ultimately no. One of the first decisions I made when building the tool was that "everything are floats", to be able to efficiently animate them. This worked to a point, but in the end, it's possible to animate non-float (or even non-numeric) parameters too, and the advantages of being able to assign certain parameters a semantic meaning (e.g. "these 3 parameters represent a position") or just to be able to use a colour picker vastly outweighs the issue.
Using a node graph
Verdict: Hell yes. Turning my tool into a node-based editor was one of the best decision I've made: the amount of freedom this gave me in terms of creative production was fantastic, even though the actual UX could've used some more love (comment fields, grouping, and so on) There are technical challenges with it (resource management being the obvious one), but the advantages way outweigh the downsides.
Using MFC for a UI
Verdict: Ultimately yes. MFC as an UI toolkit was always my favourite - part of that might be just familiarity, or that I like the "flat" look, but I think I'll probably go with it for the next gen as well. That being said, there are obvious performance problems when it comes to using hundreds of nodes or timeline tracks, and I have two ideas to mitigate that: one is using Direct2D for some of the fancier UI windows (yay for hardware-accelerated antialiased lines), and the other is simply being more clever about how the UI is arranged.
Using a datafile / archive
Verdict: Mostly yes. Admittedly this is one of those "oldskool" aesthetic things that I enjoyed doing, having a single package file next to the executable that the tool can produce and the demo itself is just a "player" for that particular datafile, and I'm quite happy that the UDS file format has not changed for 15+ years now. However, not having an "intermediate" format was always problematic, and during "PILEDRIVER" the system began to struggle with the amount of data it had to save during an autosave (as it had to save the entire pakfile each time); so in the future I will separate the actual saving into "save" and "export" steps, and only the latter will produce such a pakfile.
ASSIMP
Verdict: Yes. This is a simple one: 3D formats are a pain in the ass, and if someone else can do it for you, let them.
Resource system
Verdict: Yes, but should've been done better. Internally the tool uses a common resource pool for all resources, textures, meshes, shaders, etc, and also the dynamic resources like rendertargets and other stateful things. While having pools is the way to go, I find myself thinking of multiple problems with the approach: The dynamic nature of resources should've relied heavier on reference counting instead of a dependency graph, to make sure that memory use is minimum but also that resources (specifically rendertargets, the bane of this toolset) are used appropriately.
So there's your quick scattershot retrospective on 10+ years of tool-coding. Overall, if there's one advice I can give to people (and I'll get back to this later in my post about production / scheduling), it's this: Learn how to scope. Finish a project, then take stock of what you used for it, what you could've used for it, what you would've needed for it, and build your next project according to that. Learn to iterate over your technology, don't instead spend a bunch of time on things no one will ever use.
Who knows, maybe you'll even finish a demo someday.
6 notes
·
View notes
Text
“Along For The Ride”, a reasonably complex demo
It's been a while since I've been anticipating people finally seeing one of my demos like I was anticipating people to see "Along For The Ride", not only because it ended up being a very personal project in terms of feel, but also because it was one of those situations where to me it felt like I was genuinely throwing it all the complexity I've ever did in a demo, and somehow keeping the whole thing from falling apart gloriously.
youtube
The final demo.
I'm quite happy with the end result, and I figured it'd be interesting to go through all the technology I threw at it to make it happen in a fairly in-depth manner, so here it goes.
(Note that I don't wanna go too much into the "artistic" side of things; I'd prefer if the demo would speak for itself on that front.)
The starting point
I've started work on what I currently consider my main workhorse for demomaking back in 2012, and have been doing incremental updates on it since. By design the system itself is relatively dumb and feature-bare: its main trick is the ability to load effects, evaluate animation splines, and then render everything - for a while this was more than enough.
Around the summer of 2014, Nagz, IR and myself started working on a demo that eventually became "Háromnegyed Tíz", by our newly formed moniker, "The Adjective". It was for this demo I started experimenting with something that I felt was necessary to be able to follow IR's very post-production heavy artstyle: I began looking into creating a node-based compositing system.
I was heavily influenced by the likes of Blackmagic Fusion: the workflow of being able to visually see where image data is coming and going felt very appealing to me, and since it was just graphs, it didn't feel very complicated to implement either. I had a basic system up and running in a week or two, and the ability to just quickly throw in effects when an idea came around eventually paid off tenfold when it came to the final stage of putting the demo together.

The initial node graph system for Háromnegyed Tíz.
The remainder of the toolset remained relatively consistent over the years: ASSIMP is still the core model loader of the engine, but I've tweaked a few things over time so that every incoming model that arrives gets automatically converted to its own ".assbin" (a name that never stops being funny) format, something that's usually considerably more compact and faster to load than formats like COLLADA or FBX. Features like skinned animation were supported starting with "Signal Lost", but were never spectacularly used - still, it was a good feeling to be able to work with an engine that had it in case we needed it.
Deferred rendering
During the making of "Sosincs Vége" in 2016, IR came up with a bunch of scenes that felt like they needed to have an arbitrary number of lightsources to be effecive; to this end I looked into whether I was able to add deferred rendering to the toolset. This turned out to be a bit fiddly (still is) but ultimately I was able to create a node type called the "G-buffer", which was really just a chunk of textures together, and use that as the basis for two separate nodes: one that renders the scenegraph into the buffer, and another that uses the buffer contents to light the final image.
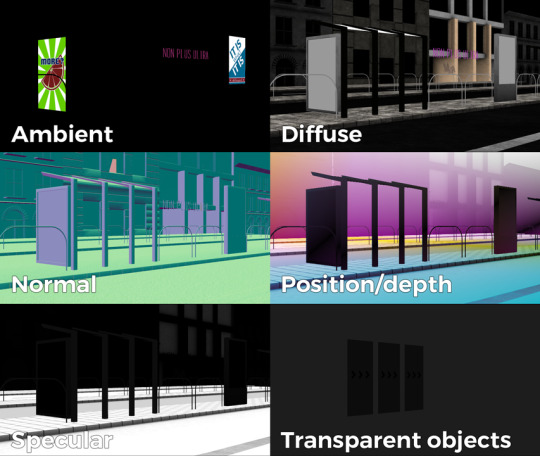
The contents of a G-buffer; there's also additional information in the alpha channels.
Normally, most deferred renderers go with the tile-based approach, where they divide the screen into 16x16 or 32x32 tiles and run the lights only on the tiles they need to run them on. I decided to go with a different approach, inspired by the spotlight rendering in Grand Theft Auto V: Because I was mostly using point- and spot-lights, I was able to control the "extent" of the lights and had a pretty good idea whether each pixel was lit or not based on its position relative to the light source. By this logic, e.g. for pointlights if I rendered a sphere into the light position, with the radius of what I considered to be the farthest extent of the light, the rendered sphere would cover all the pixels on screen covered by that light. This means if I ran a shader on each of those pixels, and used the contents of the G-buffer as input, I would be able to calculate independent lighting on each pixel for each light, since lights are additive anyway. The method needed some trickery (near plane clipping, sphere mesh resolution, camera being near the sphere edge or inside the sphere), but with some magic numbers and some careful technical artistry, none of this was a problem.
The downside of this method was that the 8-bit channel resolution of a normal render target was no longer enough, but this turned out to be a good thing: By using floating point render targets, I was able to adapt to a high-dynamic range, linear-space workflow that ultimately made the lighting much easier to control, with no noticable loss in speed. Notably, however, I skipped a few demos until I was able to add the shadow routines I had to the deferred pipeline - this was mostly just a question of data management inside the graph, and the current solution is still something I'm not very happy with, but for the time being I think it worked nicely; starting with "Elégtelen" I began using variance shadowmaps to get an extra softness to shadows when I need it, and I was able to repurpose that in the deferred renderer as well.
The art pipeline
After doing "The Void Stared Into Me Waiting To Be Paid Its Dues" I've began to re-examine my technical artist approach; it was pretty clear that while I knew how the theoreticals of a specular/glossiness-based rendering engine worked, I wasn't necessarily ready to be able to utilize the technology as an artist. Fortunately for me, times changed and I started working at a more advanced games studio where I was able to quietly pay closer attention to what the tenured, veteran artists were doing for work, what tools they use, how they approach things, and this introduced me to Substance Painter.
I've met Sebastien Deguy, the CEO of Allegorithmic, the company who make Painter, way back both at the FMX film festival and then in 2008 at NVScene, where we talked a bit about procedural textures, since they were working on a similar toolset at the time; at the time I obviously wasn't competent enough to deal with these kind of tools, but when earlier this year I watched a fairly thorough tutorial / walkthrough about Painter, I realized maybe my approach of trying to hand-paint textures was outdated: textures only ever fit correctly to a scene if you can make sure you can hide things like your UV seams, or your UV scaling fits the model - things that don't become apparent until you've saved the texture and it's on the mesh.
Painter, with its non-linear approach, goes ahead of all that and lets you texture meshes procedurally in triplanar space - that way, if you unwrapped your UVs correctly, your textures never really stretch or look off, especially because you can edit them in the tool already. Another upside is that you can tailor Painter to your own workflow - I was fairly quickly able to set up a preset to my engine that was able to produce diffuse, specular, normal and emissive maps with a click of a button (sometimes with AO baked in, if I wanted it!), and even though Painter uses an image-based lighting approach and doesn't allow you to adjust the material settings per-textureset (or I haven't yet found it where), the image in Painter was usually a fairly close representation to what I saw in-engine. Suddenly, texturing became fun again.

An early draft of the bus stop scene in Substance Painter.
Depth of field
DOF is one of those effects that is nowadays incredibly prevalent in modern rendering, and yet it's also something that's massively overused, simply because people who use it use it because it "looks cool" and not because they saw it in action or because they want to communicate something with it. Still, for a demo this style, I figured I should revamp my original approach.
The original DOF I wrote for Signal Lost worked decently well for most cases, but continued to produce artifacts in the near field; inspired by both the aforementioned GTAV writeup as well as Metal Gear Solid V, I decided to rewrite my DOF ground up, and split the rendering between the near and far planes of DOF; blur the far field with a smart mask that keeps the details behind the focal plane, blur the near plane "as is", and then simply alphablend both layers on top of the original image. This gave me a flexible enough effect that it even coaxed me to do a much-dreaded focal plane shift in the headphones scene, simply because it looked so nice I couldn't resist.
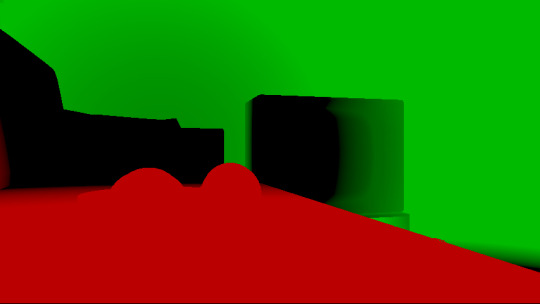
The near- and far-fields of the depth of field effect.
Screen-space reflections
Over the summer we did a fairly haphazard Adjective demo again called "Volna", and when IR delivered the visuals for it, it was very heavy on raytraced reflections he pulled out of (I think) 3ds max. Naturally, I had to put an axe to it very quickly, but I also started thinking if we can approximate "scene-wide" reflections in a fairly easy manner. BoyC discovered screen-space reflections a few years ago as a fairly cheap way to prettify scenes, and I figured with the engine being deferred (i.e. all data being at hand), it shouldn't be hard to add - and it wasn't, although for Volna, I considerably misconfigured the effect which resulted in massive framerate loss.
The idea behind SSR is that a lot of the time, reflections in demos or video games are reflecting something that's already on screen and quite visible, so instead of the usual methods (like rendering twice for planar reflections or using a cubemap), we could just take the normal at every pixel, and raymarch our way to the rendered image, and have a rough approximation as to what would reflect there.
The logic is, in essence to use the surface normal and camera position to calculate a reflection vector and then start a raymarch from that point and walk until you decide you've found something that may be reflecting on the object; this decision is mostly depth based, and can be often incorrect, but you can mitigate it by fading off the color depending on a number of factors like whether you are close to the edge of the image or whether the point is way too far from the reflecting surface. This is often still incorrect and glitchy, but since a lot of the time reflections are just "candy", a grainy enough normalmap will hide most of your mistakes quite well.

Screen-space reflections on and off - I opted for mostly just a subtle use, because I felt otherwise it would've been distracting.
One important thing that Smash pointed out to me while I was working on this and was having problems is that you should treat SSR not as a post-effect, but as lighting, and as such render it before the anti-aliasing pass; this will make sure that the reflections themselves get antialiased as well, and don't "pop off" the object.
Temporal antialiasing
Over the last 5 years I've been bearing the brunt of complaints that the aliasing in my demos is unbearable - I personally rarely ever minded the jaggy edges, since I got used to them, but I decided since it's a demo where every pixel counts, I'll look into solutions to mitigate this. In some previous work, I tried using FXAA, but it never quite gave me the results I wanted, so remembering a conversation I had with Abductee at one Revision, I decided to read up a bit on temporal antialiasing.
The most useful resource I found was Bart Wroński's post about their use of TAA/TSSAA (I'm still not sure what the difference is) in one of the Assassin's Creed games. At its most basic, the idea behind temporal antialiasing is that instead of scaling up your resolution to, say, twice or four times, you take those sub-pixels, and accumulate them over time: the way to do this would be shake the camera slightly each frame - not too much, less than a quarter-pixel is enough just to have the edges alias slightly differently each frame - and then average these frames together over time. This essentially gives you a supersampled image (since every frame is slightly different when it comes to the jagged edges) but with little to no rendering cost. I've opted to use 5 frames, with the jitter being in a quincunx pattern, with a random quarter-pixel shake added to each frame - this resulted in most edges being beautifully smoothed out, and I had to admit the reasonably little time investment was worth the hassle.
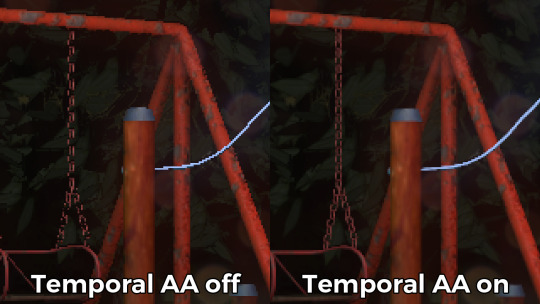
Anti-aliasing on and off.
The problem of course, is that this works fine for images that don't move all that much between frames (not a huge problem in our case since the demo was very stationary), but anything that moves significantly will leave a big motion trail behind it. The way to mitigate would be to do a reprojection and distort your sampling of the previous frame based on the motion vectors of the current one, but I had no capacity or need for this and decided to just not do it for now: the only scene that had any significant motion was the cat, and I simply turned off AA on that, although in hindsight I could've reverted back to FXAA in that particular scenario, I just simply forgot. [Update, January 2019: This has been bugging me so I fixed this in the latest version of the ZIP.]
There were a few other issues: for one, even motion vectors won't be able to notice e.g. an animated texture, and both the TV static and the rain outside the room were such cases. For the TV, the solution was simply to add an additional channel to the GBuffer which I decided to use as a "mask" where the TAA/TSSAA wouldn't be applied - this made the TV texture wiggle but since it was noisy anyway, it was impossible to notice. The rain was considerably harder to deal with and because of the prominent neon signs behind it, the wiggle was very noticable, so instead what I ended up doing is simply render the rain into a separate 2D matte texture but masked by the scene's depth buffer, do the temporal accumulation without it (i.e. have the antialiased scene without rain), and then composite the matte texture into the rendered image; this resulted in a slight aliasing around the edge of the windows, but since the rain was falling fast enough, again, it was easy to get away with it.

The node graph for hacking the rainfall to work with the AA code.
Transparency
Any render coder will tell you that transparency will continue to throw a wrench into any rendering pipeline, simply because it's something that has to respect depth for some things, but not for others, and the distinction where it should or shouldn't is completely arbitrary, especially when depth-effects like the above mentioned screen-space reflections or depth of field are involved.
I decided to, for the time being, sidestep the issue, and simply render the transparent objects as a last forward-rendering pass using a single light into a separate pass (like I did with the rain above) honoring the depth buffer, and then composite them into the frame. It wasn't a perfect solution, but most of the time transparent surfaces rarely pick up lighting anyway, so it worked for me.
Color-grading and image mastering
I was dreading this phase because this is where it started to cross over from programming to artistry; as a first step, I added a gamma ramp to the image to convert it from linear to sRGB. Over the years I've been experimenting with a lot of tonemap filters, but in this particular case a simple 2.2 ramp got me the result that felt had the most material to work with going into color grading.
I've been watching Zoom work with Conspiracy intros for a good 15 years now, and it wasn't really until I had to build the VR version of "Offscreen Colonies" when I realized what he really does to get his richer colors: most of his scenes are simply grayscale with a bit of lighting, and he blends a linear gradient over them to manually add colour to certain parts of the image. Out of curiousity I tried this method (partly out of desperation, I admit), and suddenly most of my scenes began coming vibrantly to life. Moving this method from a bitmap editor to in-engine was trivial and luckily enough my old friend Blackpawn has a collection of well known Photoshop/Krita/etc. blend mode algorithms that I was able to lift.
Once the image was coloured, I stayed in the bitmap editor and applied some basic colour curve / level adjustment to bring out some colours that I felt got lost when using the gradient; I then applied the same filters on a laid out RGB cube, and loaded that cube back into the engine as a colour look-up table for a final colour grade.
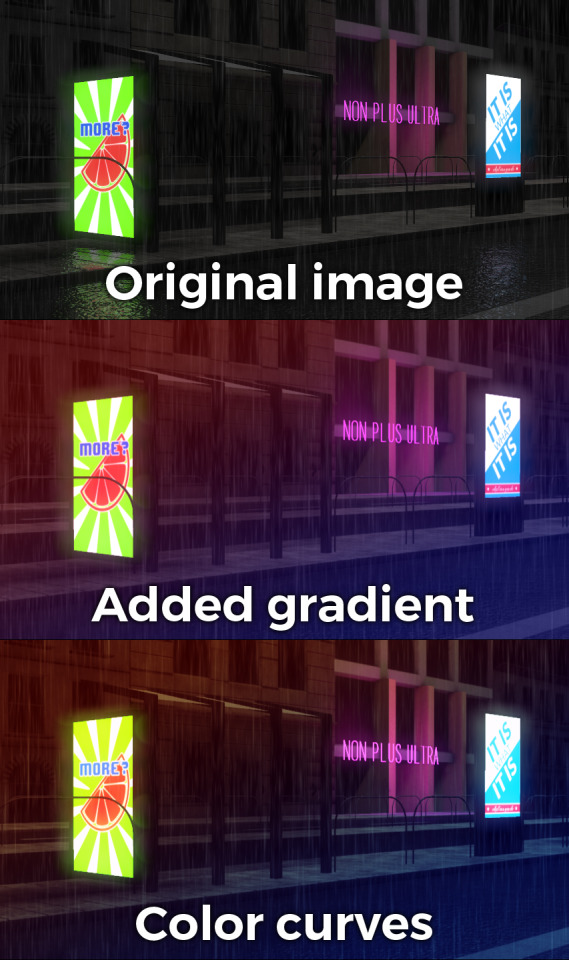
Color grading.
Optimizations
There were two points in the process where I started to notice problems with performance: After the first few scenes added, the demo ran relatively fine in 720p, but began to dramatically lose speed if I switched to 1080p. A quick look with GPU-Z and the tool's internal render target manager showed that the hefty use of GPU memory for render targets quickly exhausted 3GB of VRAM. I wasn't surprised by this: my initial design for render target management for the node graph was always meant to be temporary, as I was using the nodes as "value types" and allocating a target for each. To mitigate this I spent an afternoon designing what I could best describe as a dependency graph, to make sure that render targets that are not needed for a particular render are reused as the render goes on - this got my render target use down to about 6-7 targets in total for about a hundred nodes.

The final node graph for the demo: 355 nodes.
Later, as I was adding more scenes (and as such, more nodes), I realized the more nodes I kept adding, the more sluggish the demo (and the tool) got, regardless of performance - clearly, I had a CPU bottleneck somewhere. As it turned out after a bit of profiling, I added some code to save on CPU traversal time a few demos ago, but after a certain size this code itself became a problem, so I had to re-think a bit, and I ended up simply going for the "dirty node" technique where nodes that explicitly want to do something mark their succeeding nodes to render, and thus entire branches of nodes never get evaluated when they don't need to. This got me back up to the coveted 60 frames per second again.
A final optimization I genuinely wanted to do is crunch the demo down to what I felt to be a decent size, around 60-ish megabytes: The competition limit was raised to 128MB, but I felt my demo wasn't really worth that much size, and I felt I had a chance of going down to 60 without losing much of the quality - this was mostly achieved by just converting most diffuse/specular (and even some normal) textures down to fairly high quality JPG, which was still mostly smaller than PNG; aside from a few converter setting mishaps and a few cases where the conversion revealed some ugly artifacts, I was fairly happy with the final look, and I was under the 60MB limit I wanted to be.
Music
While this post mostly deals with graphics, I'd be remiss to ignore the audio which I also spent a considerable time on: because of the sparse nature of the track, I didn't need to put a lot of effort in to engineering the track, but I also needed to make sure the notes sounded natural enough - I myself don't actually play keyboards and my MIDI keyboard (a Commodore MK-10) is not pressure sensitive, so a lot of the phrases were recorded in parts, and I manually went through each note to humanize the velocities to how I played them. I didn't process the piano much; I lowered the highs a bit, and because the free instrument I was using, Spitfire Audio's Soft Piano, didn't have a lot of release, I also added a considerable amount of reverb to make it blend more into the background.
For ambient sounds, I used both Native Instruments' Absynth, as well as Sound Guru's Mangle, the latter of which I used to essentially take a chunk out of a piano note and just add infinite sustain to it. For the background rain sound, I recorded some sounds myself over the summer (usually at 2AM) using a Tascam DR-40 handheld recorder; on one occasion I stood under the plastic awning in front of our front door to record a more percussive sound of the rain knocking on something, which I then lowpass filtered to make it sound like it's rain on a window - this eventually became the background sound for the mid-section.
I've done almost no mixing and mastering on the song; aside from shaping the piano and synth tones a bit to make them sound the way I wanted, the raw sparse timbres to me felt very pleasing and I didn't feel the sounds were fighting each other in space, so I've done very little EQing; as for mastering, I've used a single, very conservatively configured instance of BuzMaxi just to catch and soft-limit any of the peaks coming from the piano dynamics and to raise the track volume to where all sounds were clearly audible.
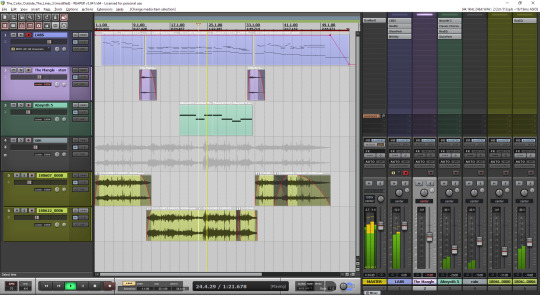
The final arrangement of the music in Reaper.
Minor tricks
Most of the demo was done fairly easily within the constraints of the engine, but there were a few fun things that I decided to hack around manually, mostly for effect.
The headlights in the opening scene are tiny 2D quads that I copied out of a photo and animated to give some motion to the scene.
The clouds in the final scene use a normal map and a hand-painted gradient; the whole scene interpolates between two lighting conditions, and two different color grading chains.
The rain layer - obviously - is just a multilayered 2D effect using a texture I created from a particle field in Fusion.
Stuff that didn't make it or went wrong
I've had a few things I had in mind and ended up having to bin along the way:
I still want to have a version of the temporal AA that properly deghosts animated objects; the robot vacuum cleaner moved slow enough to get away with it, but still.
The cat is obviously not furry; I have already rigged and animated the model by the time I realized that some fur cards would've helped greatly with the aliasing of the model, but by that time I didn't feel like redoing the whole thing all over again, and I was running out of time.
There's considerable amount of detail in the room scene that's not shown because of the lighting - I set the room up first, and then opted for a more dramatic lighting that ultimately hid a lot of the detail that I never bothered to arrange to more visible places.
In the first shot of the room scene, the back wall of the TV has a massive black spot on it that I have no idea where it's coming from, but I got away with it.
I spent an evening debugging why the demo was crashing on NVIDIA when I realized I was running out of the 2GB memory space; toggling the Large Address Aware flag always felt a bit like defeat, but it was easier than compiling a 64-bit version.
A really stupid problem materialized after the party, where both CPDT and Zoom reported that the demo didn't work on their ultrawide (21:9) monitors: this was simply due to the lack of pillarbox support because I genuinely didn't think that would ever be needed (at the time I started the engine I don't think I even had a 1080p monitor) - this was a quick fix and the currently distributed ZIP now features that fix.
Acknowledgements
While I've did the demo entirely myself, I've received some help from other places: The music was heavily inspired by the work of Exist Strategy, while the visuals were inspired by the work of Yaspes, IvoryBoy and the Europolis scenes in Dreamfall Chapters. While I did most of all graphics myself, one of the few things I got from online was a "lens dirt pack" from inScape Digital, and I think the dirt texture in the flowerpot I ended up just googling, because it was late and I didn't feel like going out for more photos. I'd also need to give credit to my audio director at work, Prof. Stephen Baysted, who pointed me at the piano plugin I ended up using for the music, and to Reid who provided me with ample amounts of cat-looking-out-of-window videos for animation reference.
Epilogue
Overall I'm quite happy with how everything worked out (final results and reaction notwithstanding), and I'm also quite happy that I managed to produce myself a toolset that "just works". (For the most part.)
One of the things that I've been talking to people about it is postmortem is how people were not expecting the mix of this particular style, which is generally represented in demos with 2D drawings or still images or photos slowly crossfading, instead using elaborate 3D and rendering. To me, it just felt like one of those interesting juxtapositions where the technology behind a demo can be super complex, but at the same time the demo isn't particularly showy or flashy; where the technology behind the demo does a ton of work but forcefully stays in the background to allow you to immerse in the demo itself. To me that felt very satisfactory both as someone trying to make a work of art that has something to say, but also as an engineer who tries to learn and do interesting things with all the technology around us.
What's next, I'm not sure yet.
3 notes
·
View notes
Text
The making of the realtime version of Tomthumb
I’ve held a longtime fascination with Tomthumb, ever since it was released in 2002 - not that the idea of generative art was anything new, but there was something novel about trying to apply generative principles to 3D, audio, video, all at the same time. It was created by Alex “Statix” Evans, at the time most known for his demos like 303 and Square, which are classics in their own right. He is currently known as the co-founder and technical lead of Media Molecule (the LittleBigPlanet guys), which is why he’s nowadays referred to in our circles as “the E3 stage guy”. I’ve had the chance to meet him and talk to him a bit at Breakpoint 2006, which was one of the last demoparties he attended before he got scooped up by the AAA gamedev biz, although I do hope that one day at some point he finds the time to drop by again.
youtube
The original Tomthumb
Tomthumb was originally created for what was called the “Canon Digital Creator Contest” and in all fairness I don’t think it was ever intended to be a demoscene-related production, so it was little surprise (and on some levels a disappointment) that a realtime version was never promised and it never appeared either. Statix did release the source, but a cursory look revealed that it was very much carved in stone: It was a hardwired videodumper that was hacked in a tracker-like editor, using considerable amount of CPU-heavy software postprocessing on hardware accelerated visuals. At the time, pixel shaders were still a fairly underutilized thing, and they were far from being as programmable as they are now, so noone really gave it a shot (as far as I know at least), and it soon got forgotten. Statix released another generative film called “Staying Pictures” (which he also only released in video form, despite my repeated bombardment in email), and eventually slowly left the scene for game development. Despite all this, however, his writeup on the internal tech was fascinating, and it stayed in the back of my mind for a long time.
It was a few years ago when I was mentally fiddling around with generative visuals again, when I realized that a realtime version never materialized. With the assumption that we have these brutal graphics cards nowadays with super-programmable capabilities, I decided to take a look at the source again, and after a cursory look, decided that it was plausible with a bit of work and gave porting a shot.
The following is a hazy recap of how it went down - note that unfortunately I didn’t version control my changes (it was a spur-of-a-moment thing) so there might be inaccuracies in the actual order of things, but as far as the gist of it goes, it is for the most part accurate.
Getting it to compile - and run
So where do we start? The code was written for Visual C++ 6.0; an extremely common version at the time, but seriously outdated since. While the compiler hasn’t changed much since, there’s been a few things that needed to be ironed out when it came to porting it to a current version: implicit variables (e.g. static x = 1;) got deprecated, for scopes changed, and re-declaration of a variable was now an error. None of this was a huge issue, I just had to manually go through the compiler errors. Another issue was that in STL, using std::vector’s begin() to get the pointer to the beginning of the vector no longer worked, but front() worked just fine so replacing it was no problem either. The whole thing finally compiled.
And then crashed: as the original README notes, some of the files that were required for the original (video, audio) were left out of the source archive for size reasons, and they were never amended. As I found out after releasing the port, Statix himself lost the files shortly afterwards, so it’s sadly very very likely that these are gone forever. From a code perspective, this wasn’t a hard fix either, just some basic pointer NULL-ing and NULL checks, and I was able to follow the instructions in the README to load the project and spend my next 15 minutes or so trying to figure out how the tracker worked.
The first problem
The GUI popped up, and I was able to look at some of the rendering, but at parts I couldn’t see anything. Checking PIX I was able to see the geometry, but for some reason it eventually wouldn’t get rendered. I spent a long time debugging and the core of the problem turned out to be the growing red vines: there’s a pruning routine (which I know because it says // prune) that takes the generated vines, tests them for their length, and if they’re longer than a certain length, they get removed. The problem (and I’m not 100% sure about this) was that the first vine point was always way under the floor, so its distance from the floor level would make it seem as if the vine was really long, and eventually all vines would get cut, which became a problem because there are shots where the camera is following a vine in the process of growing, so if it doesn't find one, it simply sits at (0,0,0). Omitting the test of the first point seemed to fix this problem and everything started working. I was also happy to notice that the audio code worked perfectly independently from everything and I had no reason to touch it.
Porting to DirectX 9.0
If I was planning to use shaders, I needed to upgrade the rendering from DirectX 8.0, which it was using at the time. This was mostly just a grind, looking through all the uses of DX8 data structures and interfaces, and then replacing them with their 9.0 equivalent - 9.0 is a superset of 8.0 so it required very little interaction, the biggest difference being (I think) sampler states. With some additional messing around, I was able to get the same rendering effect in the tool as I was in DX8.
Making it standalone
Tomthumb was never meant to leave the tool. It was entirely built inside that strange tracker-like interface Statix constructed (which in many ways pre-dated GNU Rocket), it had a video dumping mode, and that was it - there was no “player” for any of it. Unfortunately I was mostly interested in making a standalone version that is just a standard “demo”, that anyone can run by just clicking on it, which meant that I had to somehow rip apart the GUI bits from the actual rendering code, then create a new project and share the code of the “engine” with the standalone version.
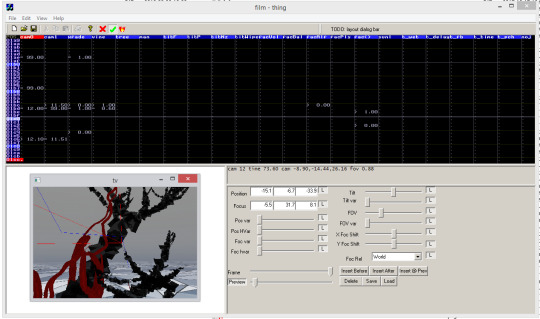
The Tomthumb editing GUI
This was tricky, but I luckily had enough experience with MFC to spot where the problems began and ended. I spent a bit of time figuring out which files were “engine” (which compiled by themselves), which files were GUI (which I could ignore), and which were a mix of both - the latter was obviously the problem. My solution to do this relatively harmlessly was to create a superclass to the classes that were ostensibly engine classes but also served as a GUI element. I would move all the data members and data-manipulation or rendering code into the superclass, then let the “original” class inherit the functionality (this allowed the GUI to still work as if nothing happened, but I'd be able to use the super in the standalone renderer. This way I had the same code running in both of my rendering backends, which was great for comparison.
The only slight inconvenience I ran into while doing this was the actual tracker’s data format - it simply used MFC’s proprietary Serialize(), which is fine by me, but unfortunately the way that’s written, that only works in MFC’s Document/View context, and I didn’t feel like reverse-engineering the format if there was a way to avoid it. The only way I was able to work that around is to extract the serialization and de-serialization code into a different function, “fake” the CArchive object it requires in the standalone player, and then feed it the file straight from the hard drive instead of jumping through the document-hoops. Other than this, the MFC-wrangling was mostly just boring, it wasn’t really a big issue.
At this point, I (think I) had a version that was able to run independently in a window, it’s just that it was extremely slow as soon as any type of post-processing was turned on. Still, I was becoming convinced that this was possible.
The clever bits
It was at this point that some actual coding was starting to become required. The post-processing in the original code was done via simple pixel operations in straight up pixel buffers that Statix retrieved from the rendertargets. I was happy to notice that even though code for the buffer-management itself was visibly last-minute-hacked, the genesis of it was well-thought out and was easy to work with; all I had to do is 1) make the rendertargets actual rendertarget surfaces and 2) replace the pixel operations with their shader equivalents.

The scene without and with post-processing
The former mostly took some refactoring and some management code that allowed copying between rendertargets (StretchRect is awesome), and for the latter, I simply created some basic 2D postprocessing framework that loaded in a pixel shader that took one texture as an input, and rendered it on screen again. Once that was done I mostly just re-implemented the shaders manually - thankfully nothing was really complex, particularly bound to specific pixel values, or using some sort of feedback filter, so it was fairly straightforward to take a look at the existing C code and then just turn that into HLSL. One specific shader (color correction) used a 2D lookup table, which I basically created an 1D texture for; the only other thing that didn’t fit into this bill was the occasional crossfades, but that I just reimplemented in fixed-function multi-texture blending.
Debugging
Once it was done, I was able to see the whole demo running realtime with for the most part full framerate: it still rendered everything in immediate mode so it wasn’t as fast as it could’ve been, and unfortunately due to what I assume to be different random generation (plus potentially my fixes) the randoms ended up looking quite different, but I was ready to accept these as a sacrifice. However, I ran into two problems.
First off, the framerate during the red part of the demo dropped to almost standstill even though there was no longer any direct-to-pixel access in the code anymore. This part took quite long to debug with a considerable amount of head-scratching: the culprit turned out to be the particle system which, as I noticed, wasn’t even visible for some reason. As I found out, the physics behind the particle system eventually pulled most particles into a state where one or more coordinates of a particle would propagate to NaN, eventually forcing the processor into performing denormal calculations. Once I found the cause, I simply added some additional code where any NaN coordinate would simply be clamped to 0.
Another bug was something I almost didn’t notice missing - the figure’s and the tree’s shadow on the ground. Tomthumb uses a pretty basic shadowmap routine that renders the silhouette of the figure’s and the tree’s 3D meshes into a texture in black (but only if there was a change in the tree’s length - a clever optimization), blurs it, and then uses it as a lightmap on the ground, in texture channel #2. The reason for the the shadow not showing up, as I found out, is that during the rendering of the floor colors, the texture channel 0 is set to NULL, which works in DX8, but in DX9 it disables all further texture channels, and the colors of the floor triangles never get modulated by the rendered shadowmap. I was at this point somewhat exhausted, and to fix this, I simply loaded in a white texture into channel 0 instead of setting it to NULL in the floor pass, and the shadow appeared immediately.
With that, I decided I reached the point where it was as good as it can get, and all that was left is to adjust the blur values to be somewhat resemblant to the original, and wrap up a setup box to test in a variety of resolutions - different aspect ratios made it look all squashed, but since the original was hardwired to 4:3, I decided that simply letting it run full screen instead of pillarboxing was a better idea. It was time (after getting Statix’ blessing, of course) to release it into the wild.
youtube
Video capture of my realtime port of Tomthumb - do watch the real thing though if you can. Note how the speech and video parts are missing compared to the original.
(Fun fact: We showed an early version of this at Function 2013, but noone recognized it.)
Overall, I wouldn’t say the project was a complicated one to patch up. Most of the code is well-structured (even if you can tell time and/or enthusiasm was running out), and is suitable enough for realtime production, once the hardware caught up to the processing demands Statix called for - in a way, when it comes to post-processing, Tomthumb was probably ahead of its time.
I don’t know how many people share my opinion that Tomthumb was a bold step and a landmark in the scene as far as generative art was concerned, even if the scene itself didn’t necessarily follow in its footsteps. I certainly had a bit of fun figuring out the innards of the code to get it working, and I’m quite happy that I was able to give a second wave of interest to it for people.
Epilogue
While posting, I somehow always felt it would be interesting to ask Statix himself about how he feels about the demo with the hindsight of more than 10 years, what his original intentions were, what his approach was, what he wanted to achieve. So I fired off a quick email, and I was delighted to find out that he was willing to do this favor for me.
So without further ado, the words of the creator himself:
Ok so here are some half recollectons from 10 years ago:
I remember writing tom thumb with grand plans for 'generative art' (which I pompously left in the introduction of the video), but in the end it was rather more demo like than I had anticipated. It was really the mashing together of a bunch of component projects, and actually the original pieces were simpler & better in many ways (and truer to 'generative techniques') than the final thing.
The elements were, IIRC: Rune Vendler (echo/fudge) and I were working at lionhead at the time and in our lunchbreaks we were messing around with writing tiny C programs that made music, that we'd pass back and forth each day. He tended to add drums, I tended to add synths, I think! It was really messy code, and the title of the project was 'rte23' or something like that - from just hitting the keyboard. Anyway, the melodies in it were generative in the sense that they started from certain note patterns, but each time the pattern was played it 'decayed' - with random inversions of order / pitch and other tweaks. Like an evolving loop. That was quite fun. When it came to make tom thumb, I just lifted that 'generative' music track and added some sequenced sound effects and things.
Another experiment that had gone well was that I recorded an hour of talk radio one day, at random, and it was an interview with Leslie Philips, who has a very recognisable, 'cut-glass' English accent from another era. I loaded the whole sample into soundforge and manually marked up and labelled the onset of every word of the entire hour. (took ages! The UI for that wasn’t very friendly). Then, I put it through a markov chain dissociated press type thing except piecing together audio instead of just text.
I also had some demo-like visual that was sort of heven-7 style typography of the generated words as they were spoken. It was quite cool as a sort of installation piece, and you just got hours and hours of randomized yet strangely intelligible chatting from his famous voice... I actually tried to clear the sample but I couldn't find the right person at the BBC to ask, and this was years ago... ANYWAY, that experiment made it into tom thumb too: I filmed my mum and sister (!) reading the story of tom thumb, and then used the same technique with the resulting video footage, to make a kind of randomized dissociated version of the tom thumb story.
Then, I had written another project (!) - a kind of quick sequencer that is somewhat like gnu rocket is these days - that I used to add a narrative layer, controlling time stretch, granulation and probabilities of the two speakers over a 'script'. ANYWAY, all of that was actually the most fun stuff to make in the demo! But it all got so mushed together and dominated by the more demo-y elements, that I think the end result wasn't as good as the pieces.
The main thing that made it non-realtime (apart from the fact that it didn’t need to be - I was just using the canon competition as an arbitrary deadline, but it didn’t require realtime-ness at all) was the video stuff, as well as the completely hacked software post. I don’t quite remember why, but I think back then I didn’t have any pixel shaders in my home code base, and I just wanted to shove some big wide blurs on there. So I did the quickest thing possible, and locked the surface, read it back and just did the dumbest possible blur. I didn’t really care about performance, all I wanted was to get a quick result! So, I apologise for the non-realtimeness, there is no real reason for it other than an arbitrary hack artefact of history...
I was really surprised that the overall project received such a positive response (thanks world!) and it amused me even more to see you resurrect it after all these years. I really appreciate it but you've probably put more love and care into it now than I ever did in the first place!
Hope that was interesting. Right, back to fixing bugs in this here game....
- Alex
2 notes
·
View notes
Text
“Kacce”: 4k procedural graphics without raymarching
In 2013, Revision was an odd situation for me: after doing a remix for a commercial artist, I found myself registered with the Hungarian equivalent BIEM, which in turn disqualified me from doing my usual annual executable music entry. I wasn't particularly let down, to be honest, because I felt I've done what I could in that category, and I've been feeling a bit of a writer's block in music anyway, so I decided to look for something else to do.
I kinda found procedural graphics to be a strange category, because it usually seemed to be something that was mostly centered around variations of raymarching; some people were able to make it look great, but most of the time it was just something abstract with well picked colors. I didn't really want to follow the grain, so I started looking for something that I was able to do and make it look nice enough, but at the same time have a "real world" aesthetic to it.
My initial tries were - naturally - disastrous: Even though I decided to go for the raymarching route (it's still the best code-imagequality ratio), I tried to look around my window and model something that I was able to use as a visual reference. I'm a sucker for architecture, so I looked around for some buildings that I thought would look plausible, and I also walked around Budapest to take a few photos of buildings, textures, stuff that I thought looked interesting.
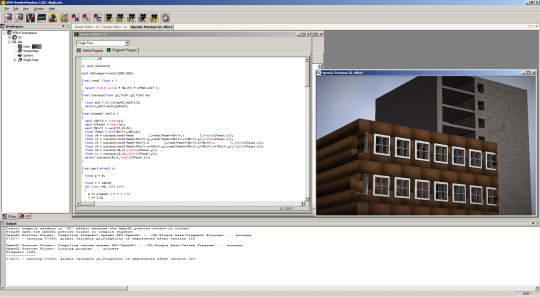
2013.03.04. - Yeah, this won't work.
I didn't get very far. It quickly became apparent that I don't have the necessary aesthetic sensibility to use the toolset that I built myself, even if I could develop it further as far as the actual code went. I needed to find another solution.
Non-photorealistic rendering
I was always a fan of revisiting things, and one of the ideas that popped into my head was something that I always wanted to do: brush-rendering. I theorized that if I can take some sort of stored vector art, and then paint either along the lines, or inside the polygons, I could spend most of the 4k size limit either refining the vector, or refinining the brush stroke look. It sounded plausible.
My plan was the following:
Take a vector-drawing, load it in some editing tool (preferably CorelDRAW)
Export some easy-to-parse format out of it, preferably with some sort of metadata
Export the polygons as points, colors, and brush parameters
Put random, but controlled brushtrokes
None of it seemed particularly hard: CorelDRAW played relatively nicely with SVG, it even allowed me to add metadata to the shapes, and parsing it was just a few lines of C++ code with a readymade XML parser attached to it.
Brush control
It quickly became apparent that the way the brushstrokes are painted is the crux of the technique: I realized that it's not only the color that counts, but also how many brushstrokes are painted, how long the strokes are, and how thick they are. All of these I was able to connect to the metadata inside the SVG.
Once that was done I started working on the actual painted algorithm. The question of course was how the brushstrokes are laid out: I went for the simplest method first - just take two random points inside the polygon, and connect them with the brushstroke. This, however, turned fairly chaotic fast, none of them really followed the lines.
I decided to change strategy: Instead of choosing the second point randomly, I checked which edge of the polygon was it closest to, and used that edge as a guide to where the brushstroke would go. This (with a bit of randomness), allowed me to keep the brushstrokes both within the polygon, as well as keep them looking like someone was actually trying to paint within the lines.
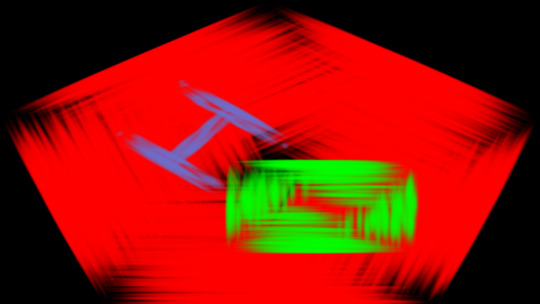
2013.03.09. - Proof of concept.
The dreaded content
Obviously, now I had to draw something. This is where the problems began as usual. I used to spend my teenage years helping the family DTP business, and that sometimes involved taking the photographs or exported bitmaps by the client, and vectorizing them - so I've become quite good at that. The problem in this case was finding an image that looked good.
Because of the fuzzy nature of the rendering, I initially tried going with the picture of a teddy bear:
2013.03.09. - Not bad, but still a bit dull.
At this point, being on Teh Internet and all, I started wondering if cat pictures would work. I had a ton of photos, but ultimately I settled on one Leia sent me of her cat Pølsin as inspiration:
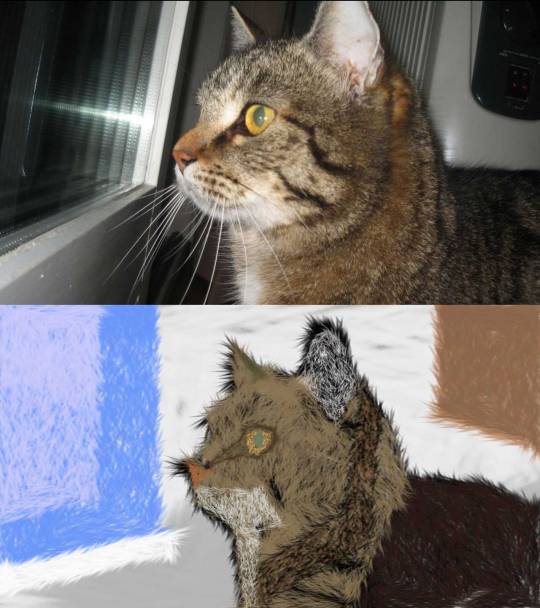
2013.03.10. - This illustrates the problem really well.
I gave up - I couldn't make it look good. In hindsight I now realize the issue: I was unable to see that I would've been unable to re-make the picture in its entirety anyway, and I should've just went for the basic shapes with a lot more contrasting / "imaginary" colors.
I found out a few days later that Zoom was coming to Revision - it's been a while since he did, and as a way to get him more involved with the party, I showed him what I was working on and asked if he wanted to get involved. Luckily he said yes. He started working from a stock photo of a white tiger with blue eyes (which was great for the contrast), and was able to quickly make a vectorized version that already looked passable. With him working parallel on the content, I had some setting up to do.
The toolchain
Knowing well that this will be one of those "content-vs-engine" releases, I wanted to make sure that we could iterate on everything as fast as we could. To this end I optimized down the actual in-engine parser of the datablob into ASM as small as I could, but I left the painter-code in C since we were still tweaking on that.
I then decided to create a flexible build-system for the whole thing: We wanted to iterate on the visuals rapidly to see if it looks good, but to also get a ballpark figure on the byte-size of the final product. At the same time, we wanted to make sure that with a flick of a switch we can create a "packaged" version, which included generating a set of executables for various resolutions, with higher compression ratios.
For building this, I went for PHP simply because I enjoy working with PHP and I've gotten so used to the string-manipulation in it that it felt the most natural, and this being a build-system (i.e. a lot of strings) it sounded like a good idea.
I wrapped up a build.bat for quick iteration and a build_all.bat for the "packaged" version, and quickly showed Zoom the ropes - apart from the tediousness of file management we seemed to settle in a quick feedback loop quite fast, and was able to work towards a final product conveniently.
The final product
We finished well before the deadline, and ultimately ended up 3rd in the competition.
Hindsight
A lot of people noted that for such a soft-looking picture, some of the edges were quite sharp. A few days after the party I realized I could've remedied that by simply taking more than one edge around the random point and interpolating in the stroke direction based on the distances - this would've made points that are close to both edges a mix between the two, rounding the edges down.
Ultimately, however, I'm glad that we went for an "alternative" route; people noted that it was nice to see something that wasn't built out of implicit surfaces.
0 notes
Text
Making the Machine - part 2
(read the first part here)
Concept and content
When I finished the music, I already had some visual ideas I wanted to try (the clawbot and the walking laser), but for the most part I wasn't sure where I wanted to go with it, or even how I would want to present a lot of it; the demo wasn't really conceptual enough at that point to inspire more content out of thin air. However, as I worked through the engine and especially on the aforementioned the scenes, I started to slowly get a feel for what I was trying to say with the demo, and where I could pull ideas from.
Without going into excruciating detail about what I think the demo is about, while working on the claw-robot I started to think about how weird it is that it's a functioning robot that is stuck in the middle of a hall with nothing in its reach even though it's obvious from the way it was built that it has a purpose, it's just that the environment it's placed in by some unseen creator (me) is unsuitable for it. I began to think about more demos that have pointless robots just for visual purpose (most demos do that) right around the time I started having serious doubts about my own motivation, and in my mind the two thoughts started to blend a bit, which in turn became fuel for the remainder of the demo.
Effects
I wanted a few hand-coded effects in there just to avoid being called a full-on "boring flyby"; I've never been a particularly good effect coder, but I usually got around that by taking something existing and trivial and putting some sort of spin on it.
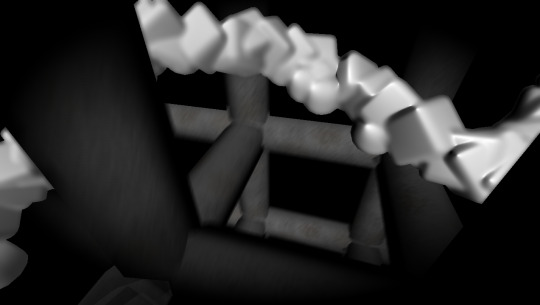
2012.03.14. - Initial tests for the blobs.
The first effect I thought about was something Pantaloon did in Only One Wish, a fake-metablob effect, that he did by taking standard geometry and blurring the normals that made it look like a continuous surface. My take on it was mostly a trick in direction: I decided to pull the geometry through a path (which I did by animating a dummy object) so that it gave the audience the impression of a large stream and a variety objects, neither of which are plausible with your standard iso-surface routines. Lucky for me, since it was actual existing geometry that I was faking with, I was simply able to render it into the shadow buffer too, which meant my blobs also cast shadows. One thing I remembered from Chaos' seminar about .debris is how they used Euler-rotation in their demo instead of quaternions to make the shapes look more "tumbly", which I did here as well because they're right, they do look more unpredictable.
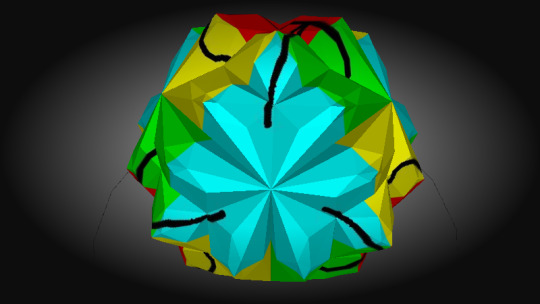
2012.03.17. - First extrusion text.
My second effect took a bit longer, because I wasn't sure how to implement it in a way that it runs fast enough: I wanted to play around with extrusions and bevelling, applying it on some sort of geometry and animating it. What the effect does is take an object built out of quads, and then applies a series of bevels and extrusions on the faces, and then breaks it down to a renderable triangulated form. Once this was done I was able to play around with 2-3 parameters of the effect that allowed me to keep the scene interesting even for a longer time.
Direction
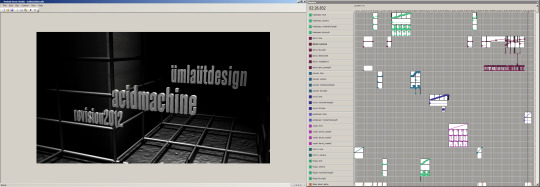
2012.03.31. - The final edit; a lot of work here.
Once I had most of my content done, I started "shooting", lining up cameras, lighting, etc. My main motivation at this point was that I really didn't want the demo to be boring even if the content looked dated. To this end, I tried to exploit the music as much as I could, sometimes cutting back and forth between scenes, adding overlays, even at some points going back to the music and adding some extra effects that I felt could assist the visuals if used properly.
I tried using the camera work to "personify" a lot of the subjects in the demo: the claw-robot initially gets shaky, far away shots, with a lot of scratching, backspins, but during the breakdown it gets a really slow closeup shot.
What went wrong
The demo ultimately ended up in 10th place out of 18, which I still find a bit disappointing to this day, especially considering the rest of the compo, but that is by no means to say that I consider the demo any levels of perfect or even great. There are a couple of glaring flaws that I learned along the way, and they've become painfully obvious after releasing.
The big thing was that obviously I'm not even close to being a graphics artist, but most of all I don't have an eye for detail. Many people have pointed out that the demo is full with continuous uninteresting surfaces, and it's lowpoly like there's no tomorrow. I have nothing to excuse myself on this apart from that I'm always a good 10 years behind on what looks good and what doesn't and I simply didn't think that adding extra things would 1) be necessary and 2) wouldn't slow the demo down to a grinding halt. Nowadays I'm trying to think more consciously about this, trying to spot "empty" places easier.
One light is never enough. Any photographer / DOP will tell you one light is never enough, especially for larger scenes. Now I know too.
In 2015, post-processing (and especially colorgrading) is important. It makes a world of difference, and it unifies your look. Part of the reason why Machine had none (apart from my aversion to glow) was because I had no time to develop a post-processing pipeline just yet, so every shader was on all the time. This made for a tedious process when it came to setting up e.g. motion blur, and probably would've been even more tedious for finer effects like colorgrading.
Avoid large black spots. Put something in the background at all times, just don't make it too significant. It allows the viewer to track the camera movement relative to it, giving them a better sense of space.
If you do demos alone, you're gonna spread thin. Aim low unless you're absolutely sure and prepared.
Conclusion
It's difficult for me to tell if I like this demo or not - ultimately I think being overly ambituous ended up feeling like running in a brick wall just to see if I can break through even though I knew I won't be able. That being said, I feel I certainly put enough effort into it, and the very least, I ended up with a demotool I was able to iterate on for upcoming, better demos.
0 notes
Text
The Clusterfuck of Javascript Date Parsing
The code
var date = new Date('2013-02-27T17:00:00'); document.write(date);
The ISO standard
According to Markus Kühn's ISO 6801 summary:
Without any further additions, a date and time as written above is assumed to be in some local time zone. In order to indicate that a time is measured in Universal Time (UTC), you can append a capital letter Z [...]
In other words, omitting the "Z" ending or an explicit time zone implies local time zone.
The ECMAScript 5.1 standard
According to the ECMAScript 5.1 standard specification:
ECMAScript defines a string interchange format for date-times based upon a simplification of the ISO 8601 Extended Format. [...] The value of an absent time zone offset is “Z”.
Here, omitting the "Z" ending implies the same as adding "Z", i.e. UTC.
The output
Note: here we're assuming the code runs in Central European Time (+1:00)
Firefox 31.0
Wed Feb 27 2013 17:00:00 GMT+0100 (Central Europe Daylight Time) The string is treated as local time - this is following the ISO 6801 standard.
Chrome 36.0
Wed Feb 27 2013 18:00:00 GMT+0100 (Central Europe Standard Time) The string is treated as UTC - this is following the ECMAScript 5.1 standard.
So where does this leave the developer? Somewhere in a dark room with mild weeping sounds. Or you use Moment.js - a library that has to be 10k compressed to finally solve date calculation / parsing / formatting across the board.
1 note
·
View note
Text
Making the Machine - part 1
[Originally published at Displayhack]
Preamble
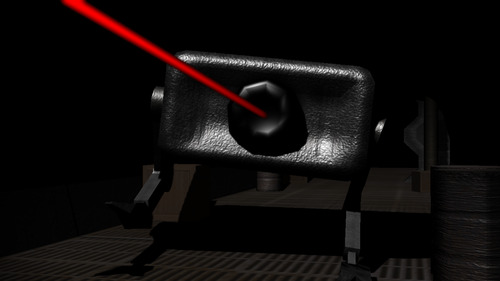
Ödönke bánt.
In hopes that most people enjoy makingof's as much as I do, the following series of articles would be an attempt to describe the creation process of my Revision demo called "Machine" by Ümlaüt Design, both from a technical and artistic standpoint, and perhaps shed some light on a few easily avoidable mistakes I've made along the way.
A disclaimer: I'm not aiming this to be a tutorial or a white paper; if you're a competent demomaker, you will probably not find anything novel in these texts. This is more aimed at people wanting to get into demomaking, but are perhaps intimidated by the chore, or maybe made a few simple demos, but are unsure how to direct them better or approach the production process easier. Note that I'm not a very good visual effect coder, so don't expect a lot of linear algebra. I'll also try to keep a lot of the actual maths / technical stuff to the minimum, or at least digestible to a non-technical / artist audience.
Preparations
I first had the idea to do a demo for Revision around February. Reasons were simple: I haven't done a demo for several years at that point (meaning actually worked on one instead of just supplying music), and I felt I needed to do something to get back into the loop, and to stay sane. Another motivation was that I found out about ASSIMP, a fantastic little loader-library for 3D formats; I would often discard ideas for a demotool simply because I felt the management of a 3D content pipeline was a right pain: I tried stuff like Flexporter or writing my own plugin, but it just never worked out quite right, and I also realized that to be really effective (and perhaps somewhere down the line, artist-friendly), I would need to use standard formats like COLLADA. So often I shelved ideas because of this, but then ASSIMP came along and I was in a sense reinvigorated, knowing that there's a whole open source project who'll gladly deal with these kind of problems.
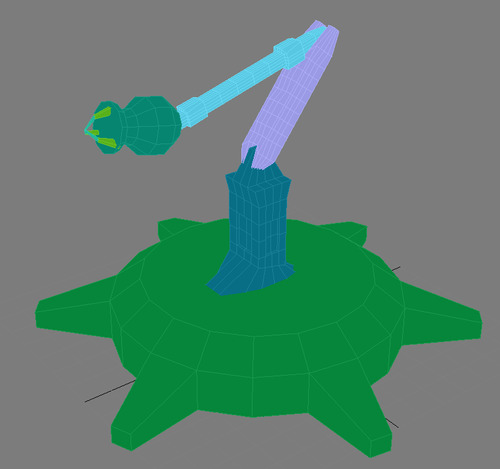
An early concept model of the first robot.
My plan was simple: I had a track from around 2007 influenced heavily by Drew Cope's Drum Machine animation, and I realized I never got around to making anything with it, so finishing the track already put me in a good position. I also had some really rudimentary basecode from around that time for the next generation of ÜD tools we wanted to make - this certainly spared me some time to mess around with datafiles and parsers and loaders. Of course this was by no means finished, but it was a good start. So I started planning:
I had roughly two months. First, I really don't like party coding. (Why code in Germany when I can code at home any time I want? It's a waste of a good time.) Second, my current portable computer is a netbook; a fantastic little machine for everything other than Shader Model 3.0 demos. These all meant that I had to finish at least a day before the party.
Already had the soundtrack (or at least something that needed a day of work at most to finish), and it wasn't particularly long either.
Some basecode, mostly just boilerplate STL-like stuff.
One person project - you'd think after 12 years in the scene I would know some willing graphics artists, but the problem here is that they were either uninterested or unavailable at the time, and my concept wasn't fully fledged either, as I was anticipating to make some of the stuff up as I went along. (Plus there's something to be said about masochism, megalomania and lack of human skills, but that's a different story - let's not dwell on that.)

Demomaking. Serious business.
I also planned what I'll be needing:
I'll need a tool. You can argue about handcoding, but no. For the stuff I planned, razor-sharp editing and continuous flow, you'll need a tool. And no, GNU Rocket won't cut it - it just wasn't precise enough or convenient enough for what I wanted. I'm a firm believer in that if you spend a week on writing a tool that saves you a week somewhere down the line, do it.
I'll need a 3D engine that can somehow load an animated 3D mesh and display it. I've written a few of these so I wasn't concerned, although I really wanted it to be non-hacky this time, i.e. unified lighting, material system, and hopefully looking the same in the tool as in the modeller.
I'll need a couple of effects. Nothing special - I'm not good at them, so I'll just keep them basic but hopefully interesting.
A LOT of content. I was originally planning about 3-4 scenes, but listening to the music, I had to realize I needed at least double that.
I made a rough timeline for the project: about two weeks for the tool, two weeks for the engine + loader + effects, two weeks for content, and I allocated the last two weeks to edit the demo together. This last point might sound like an overkill, but I really wanted the demo to look polished and feel well thought-out, and I was also aware that making a demo, being a non-linear process, sometimes involves you going back to previous steps and fixing content or code in the phase when you're supposed to edit (in film, I suppose this is what you'd call "re-shooting"), so in a sense I left myself some headroom to fail.
The tool
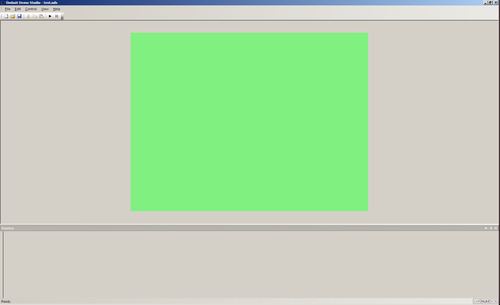
2012.02.11 - We all start somewhere.
I decided early on what I wanted my tool NOT to be: I didn't want to write a content tool. I had no room (and in this case, no time) to make a full-fledged 3D editor, even to just place cameras or tweak materials. I decided that I'm better off to do those in the content package and then just make sure it looks as close (within reason) as possible. All I really wanted is to manage resources (to an extent), composite, but most of all, edit. That was it.
I also decided that since I don't have much time, I needed to tone down on functionality: the basic idea of a tool is to make certain things easier, case in point editing and scratching back and forth in the demo. That's all I wanted to have. The underlying system was capable of managing resources, loading them, reloading them, etc., but since my internal format was XML, I decided that as long as it doesn't get too tedious, everything else I could just do by hand. Now, it's up to each and every demomaker to decide what's tedious and what's not - for me, copy-pasting XML tags to insert a new envelope was a perfectly acceptable trade, even if I had to do it several times; compared to adding GUI to a "New Effect" window with foolproofing and all, it was really just a minor nuisance. Of course, I'll finish the GUI properly at some point, sure, but then and there I had two months, of which I allocated two weeks for the tool. From scratch. I had to create a triage.
As far as the tool's interface goes, I went back to what I've been using a lot: music editors, specifically DAW's. DAW's have a particular way of arranging envelopes, clips, loops, and they allow a really precise level of editing, but the thing that struck me the most about them is how much ease they have developed over the years. I used to be a tracker person, and my switch to DAWs was somewhat bumpy, but now I don't regret it - adaptive grids, triplet beats, beat snapping, envelopes, these are all things that one can use for a demotool and gain a lot of strength with them. With that in mind, I set out to essentially build a DAW by my own rules. The underlying system was simple:
I can load an arbitrary number of plugins.
These plugins can produce an arbitrary number of resource loaders and effects. These are object factories that can instance any number of effects or resources.
I have a common resource pool where I manage the outputs of the loaders: Textures, meshes, videos, shaders. If there's a loader for it, it goes here. Resource loaders can also use this pool if they depend on other resources (e.g. 3D scenes can reach for textures already loaded)
Each effect can specify a set of resources (by type) to use. None of them HAVE to be there - it's a plugin's responsibility to fall back gracefully.
Each effect can specify a set of parameters to be wired out to envelopes or left as a static value.
The demo then loads plugins, instantiates the loaders and effects, loads the resources, feeds them to the effects, loads the envelopes, and runs.
That's it. That's all I needed at the moment.
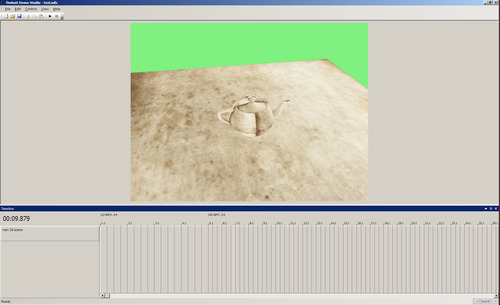
2012.02.16 - GUI shaping up slowly. Note the time signature change.
Early on one of the things I thought about is having arithmetic envelopes, i.e. I would be able to have two splines create an envelope by adding, multiplying, and so on (e.g. a pulsating beat that gets progressively stronger), but I ditched the idea (AFTER I wrote the code for it) because it was a hassle to manage, and I had a better idea: if it's all just envelopes creating floating point values, why not subclass them? So right now I have one subclass for static values, one for a standard spline-based envelope, and then if I need specific GUI functionality later, I can just implement a new type. This all might sound like an overkill (I haven't actually implemented new ones yet), and certainly arguing about GUI design can be pretty pointless, but I thought about how I would imagine an envelope to e.g. switch between cameras conveniently: with an ordinary spline-based system, you can set your splines to flat and just move your points up and down until it crosses to another integer value, but it sounds like a nightmare from a convenience point-of-view (and due to the time constraint, this is what I ended up using, so I can confirm it too). A better idea, of course, would be displaying the GUI itself as a list of ranges (i.e. "between 2:00 and 3:00, the value is constantly 7"), and not just a spline - like the pattern editor for the GlitchVST. While you could argue that this way you're actually spending time on removing functionality, my perspective is that for certain parameters (colors are a good example too), a specific GUI feels much better, and with a subclassed GUI, that's fairly easy to do without having to break something else. Once again, this might sound like a tangent, but the idea is this: As long as it spits out a floating point number, anything goes, and a bit of forward thinking pays off later.
One thing I kinda forgot about initially and then just sorta chose the simplest solution to take care of it was the actual rendering range, i.e. if there are all these possible envelope types, how does the demo know if it's time to render an effect or if it's time to leave it alone. This I decided to leave up to the discretion of the actual envelope class: each class had a bool function that returned whether according to that envelope, something should be happening or not, and when all envelopes said "true", I rendered the effect. Constant values always returned true, and splines returned true if the play cursor was over one of their clips (= the white boxes visible on the screenshot below). This provided fairly convenient control over when effects were active or inactive, and again, with a different envelope type, I would've been able to define a whole new behaviour if I wanted to.
Another thing before I forget: For splines, I didn't limit myself to a 0.0-1.0 range. When I did my first 4k synth, I realized a lot of the fun stuff comes from the out of range values, and if you want to extend your animation with 20 more frames, you don't have to re-sync your entire demo. (This, by the way, is a hindsight. I did make this mistake.) Of course the question is, how to fit an infinite range to a GUI like this? Well, I went for the simple and stupid solution - default range is 0.0-1.0, a rightclick menu of "Set Range" can change that to anything. This is purely a GUI thing and the demo doesn't even have to care about this. As far as GUI goes, I went with MFC for a number of reasons: I'm really familiar with it, having worked with it for a number of years, I find it not only reliable, but also very convenient, however the REAL real real reason was docking panes. I fell in love with the Visual Studio-style docking panes on first sight and I wanted them in my tool for ages, not only because they're really easy to rearrange, but I also wanted to have a level of multi-monitor support where I can see the demo on one monitor and edit the envelopes in the other - just like in a convenient DAW. (That hissing sound you just heard was the Ableton camp. Heh heh.) So for that I needed my docking panes to be able to leave the main window and maximize on the other screen.
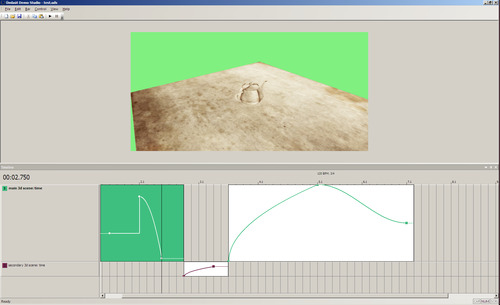
2012.02.19 - The basic spline editor.
Another reason I enjoyed MFC was the library perks of the Document/View model - anything that keeps me from having to manage stuff like "Do you want to save the changes?" and the clipboard and keyboard shortcuts and loading bars and the whole New Document business is a bliss. To peek ahead a few weeks, somewhere down the line I occasionally found myself working with multiple UDS project files to cut down loading time and then just eventually manually merging them, all thanks to the fact that I was able to do a "New Document" trick fairly fast. (And yes, some of this sounds like an epiphany of a 3 year old finally figuring out how a toilet works, but hey. As said, it's been years.)
The first iterations of the tool were obviously puritanical, but I wanted the idea to be clear from the word go - the View has a rendering window in the middle, rendering in the exact same resolution the demo is running in (optimally - resolutions can vary but there's always an intended one, in this case 720p), and everything else is in panes, toolbars, menus, keyboard shortcuts, etc. One positive thing about MFC (and WINAPI in general, I guess) is that it encourages redundancy in GUI: if you have a menu item, you can immediately add it to the toolbar, assign an accelerator, and so on. It's free, and it makes the GUI adapt the user instead of the other way around.
Now, this isn't strictly code-related, but it's worth mentioning that I noticed an interesting trick a few days into the development: I worked better, when I left basic stuff unfinished at the end of the day. My reasoning for this was that if I've done a 100% job that day, the next day I'd sit down in front of Visual Studio, and spend time wondering how to jump into the next task; I would start to procrastinate. However, when leaving really run-of-the-mill stuff unfinished, I would often spend the next day thinking about how I will solve a particular solution, and by the time I got home, I just jumped into the project and fixed the problem, and essentially carried on working without losing momentum. This worked best when the problem at hand was as simple as it gets: reproducible crash bugs, broken colors, textures being upside down, stuff you're able to debug and fix in your sleep. But because they're so easy, you don't feel as if there's a mountain to climb for the next task; by the time you fixed it, you're "warmed up" and ready for the next big chunk. I highly recommend it if you feel that you're able to lose motivation in democoding.
After I reached a satisfying stage with the basic envelope GUI, I switched to the next step: the underlying engine.
The engine
I had a pretty good idea from the get-go of what I wanted my engine to achieve, both as far as timing and compositing goes and as far as rendering goes: For each "effect":
Load some sort of standard mesh format
Use incoming splines to animate camera, light and meshes
Render in multiple passes, perform compositing
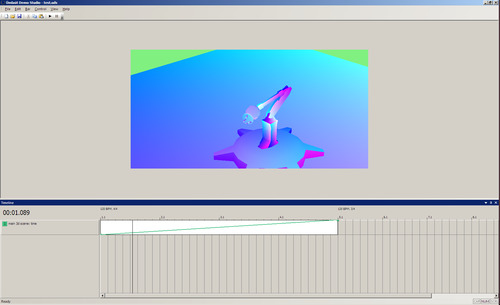
2012.02.21 - FK in action, rendering normals.
Step one used to be a huge pain; my first demos used to use 3DS files, but they're a bit outdated by now, and they've always been a bit of a nuisance to handle. Later I made my own file format using Flexporter, a step above 3DS files but still a fairly dodgy solution: you're using middleware to create even more middleware - things just go wrong. Finally, I attempted to write my own exporter, and that just ended up being torturous, because of the intricacies of the tools' inner workings. At around 2007, as a result of this, I spectacularly gave up trying to create a content-pipeline, and with it, making demos.
Revelation came in the form of a set of Pouët posts talking about a library called ASSIMP, a 3D mesh loader library that takes dozens of known 3D formats and loads them into a unified data structure. Not only that, but it's also able to do a bunch of really cool transformations on it, and it comes with a set of fun little tools to test your meshes as well. I took a look at the API, and I was sold immediately. I did some tests, and it worked so well that I decided to start integrating it into the engine with newfound enthusiasm.
Of course, it wasn't all fun and games - the 3DS loader in ASSIMP is still kinda broken, but the COLLADA importer works. The COLLADA exporter for MAX, however, is rather lacking. The solution in this case was OpenCOLLADA, a unified exporter for MAX and Maya, which is slightly improved. A weird thing I noticed is that I had to flip my cameras around to get them to face the right way - this might be a bug in my code, but unfortunately ASSIMP's reference viewer doesn't use cameras, so I have no way to check. In any case, with the loader slowly creeping in the engine, and step 2 already mentioned above (splines and envelopes - I'm jumping a bit in chronology here), I was ready to tackle step 3.
Over the years I've done some intermediate rendering stuff, but I never really built a comprehensive engine where everything was combined with everything, and this time I really wanted to do something that "just works". My wishlist was simple:
Forward kinematics animation. This is easy on paper, comes from step 1, but of course the whole row-major/column-major/nodegraph/LHS/RHS matrix quagmire can take up a bit of time to sort out.
"Correct" lighting, i.e. lighting done in the tool, and not the usual "it looks kinda okay if I change this to 0.5" debacle.
Normal maps. I'm a huge sucker for bump maps, and I'm sure I'll die happy if they're the last thing I see.
Motion blur. Ever since the Realtime Generation invitation I've been infatuated with realtime motion blur, because I realized what a nice subtle film-like quality it adds to everything.
Shadowing. Again, not a big thing, but it does make a considerable difference.

2012.02.24. - Shadow maps up and running.
This all doesn't sound like a big thing, but I wasn't sure how to manage all of this, as far as rendering order, render targets, etc go. The first "a-ha!" moment came when I started looking into D3DXEffect. Granted, after about 7-8 years of it being released, perhaps it was bloody time, but I guess I was always wary of particularly high level stuff. This time, it came like a breath of fresh air - all the tedious pass management is in there and more. The only problem was render targets.
Luckily, I came across a little note in the SDK about annotations. Annotations are essentially meta-data that allows the coder to assign variables and values to passes, and then read them back once the pass is running. This gave me the freedom I needed; I built my little system like so:
During initialization, the effect plugin builds the required render targets and depth buffers, and stores them in a dictionary, designated by some sort of identifier e.g. "shadowmap" or "velocitybuffer". (Later I built a facility where the effects would be able to request render targets from the engine core, and the core would either allocate a new one or hand out one of the older ones, depending on the parameters. This cut down on the video memory usage considerably.)
The .fx file is built in a way that all the passes designate which buffer they want to render to. The actual rendering code then loops through the passes, sets up the render target, and pushes out all the draw calls. Also, since I designed .fx files to be handled as resources, I was able to switch between them easily during editing, changing one rendering chain to another.
Because I wanted to do some compositing / VFX / etc., I extended this by adding another flag to specify whether the current pass is a "scene"-pass or a "post-processing"-pass. In the latter case, instead of pushing out the scene's 3D geometry, the engine would simply render a 2D quad, and I'd be able to use the results of the previous passes as input.
Down the line, I also realized that if I wanted to integrate "hard-code" effects into the chain, I could just insert a pass where I render the geometry, and specify an annotation that e.g. I want to render the color pass into a certain buffer, but I want to use the depth values of the previous render. That way, my "effect" would be correctly occluded by the geometry around it.
To this end, I even introduced flags to specify that during certain passes, while the setup of the matrices would remain the same, the effect would "skip" rendering the 3D scene-graph and instead would render the custom effect code. Additionally, I subclassed my renderer, and made sure that all the "custom" code would remain in a separate class - this wasn't necessary, but it made sure that my actual engine code remained lean and effective, and more importantly, reusable. An example "technique" for one of the custom passes would end up looking something like this:
technique StandardRender { pass passShadow<string renderTarget="shadow";> { AlphaBlendEnable = false; vertexShader = compile vs_2_0 vsDepthToColor(); pixelShader = compile ps_2_0 psDepthToColor(); } pass passBlobObjectsShadow<bool blobs=true; string clear=""; string renderTarget="shadow";> { vertexShader = compile vs_2_0 vsDepthToColor(); pixelShader = compile ps_2_0 psDepthToColor(); } pass passVelocity<string renderTarget="velocitybuffer";> { vertexShader = compile vs_2_0 vsVelocity(); pixelShader = compile ps_2_0 psVelocity(); } pass passBlobObjectsVelocity<bool blobs=true; string clear=""; string renderTarget="velocitybuffer";> { vertexShader = compile vs_2_0 vsVelocity(); pixelShader = compile ps_2_0 psVelocity(); } pass passRender<string renderTarget="colorbuffer";> { vertexShader = compile vs_3_0 vsRender(); pixelShader = compile ps_3_0 psRender(); } pass passBlobObjects<bool blobs=true; string clear="color"; string renderTarget="blobbuffer"; string depthTarget="colorbuffer";> { vertexShader = compile vs_3_0 vsRenderBlobObjects(); pixelShader = compile ps_3_0 psRenderBlobObjects(); } pass passBlur<bool postProcess=true; string renderTarget="blurbuffer";> { vertexShader = compile vs_3_0 vsPostProcess(); pixelShader = compile ps_3_0 psBlur( 2.0, samBlobmap ); } pass passBlur2<bool postProcess=true; string renderTarget="blur2buffer";> { vertexShader = compile vs_3_0 vsPostProcess(); pixelShader = compile ps_3_0 psBlur( 4.0, samBlurmap ); } pass passBlur3<bool postProcess=true; string renderTarget="blurbuffer";> { vertexShader = compile vs_3_0 vsPostProcess(); pixelShader = compile ps_3_0 psBlur( 8.0, samBlur2map ); } pass passComposite<bool postProcess=true; string renderTarget="backbuffer";> { vertexShader = compile vs_2_0 vsPostProcess(); pixelShader = compile ps_2_0 psComposite(); } }
Nice and clean, and more importantly: doesn't require touching the source.
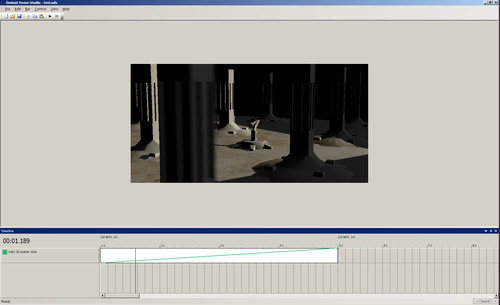
2012.02.26. - Motion blur and lighting.
As far as the actual shading/effects go, I chose simple methods: I restricted myself to a single spotlight source (which worked well with the concept I had in mind), so I was able to do rudimentary PCF shadow mapping, which is jaggy as hell, but for some reason it worked really well with the gritty textures I was making. For normal maps, I used simple hand-painted stuff, and ran them through NVIDIA's Texture Tools. For the motion blur, I used basic velocity buffering, which I achieved by doubling all my matrices: before I render anything, I pre-transform all my node matrices according to my animation values. (Since the cameras and lights are all just nodes in the scene-graph, these also transform with it for free and come with all sorts of fun perks - but more on this later.) Then I do another transformation calculation, but with my epsilon value subtracted from my animation timer. This will give me two matrices for each draw call, one being slightly behind in time compared to the other. Then for the velocity pass, I simply calculate their screen-space position and calculate their difference vector, which I store into an D3DFMT_G32R32F buffer, and then use that later as a directional blur input. This method is obviously not perfect, but my assumption was that motion blur is only visible when there's fast motion, so while it doesn't necessarily look good on a screenshot, in motion it does give that subtle film-like feel to the demo which I was looking for.
So I had my basic engine and tool-chain ready. It was time to sit down and come up with what I considered the hard part: content.
[to be continued, in theaters near you]
0 notes