
fmp1liamberry
FMP1LIAMBERRY
He/They - I like bug
94 posts
Don't wanna be here? Send us removal request.
Last Seen Blogs

lotusgraphics
Lotus Graphics

kurumeki
goblin groove
kolsangel
flora simps
multi-fandom-official-account
Multi.Fandom

katropolis
Katropolis
Text
Finished Bug
I have finally completed it and honestly, it looks better than I thought it would. The result is unbelievable. I am so impressed with how it turned out. This is something I will be mentioning as a project if I ever get the chance to make models professionally someday.

Kystie did a great job photographing it and it really brings it all together how the lighting is. It makes the model highlight its best features. I just can't believe I made this. Everyone I have showed this to is impressed. I feel like this is a passion I didn't know I had.
0 notes
Text
Poster Update
I added more of a texture to it and wrote out the actor names per Josh's advice. Looks good adds a lot to he image and I think it was great that I asked Josh to see his opinion. If I didn't I think it would have been too boring.


This is my finale poster it took a lot of time and effort but I am positive it is done!
0 notes
Text
What Do Labs Look Like?
Labs are often linked with the colour white or the colours blue and green especially if it is a biology lab. They have test tubes chemicals and all kinds of things. Here is a few examples of what a lab looks like.
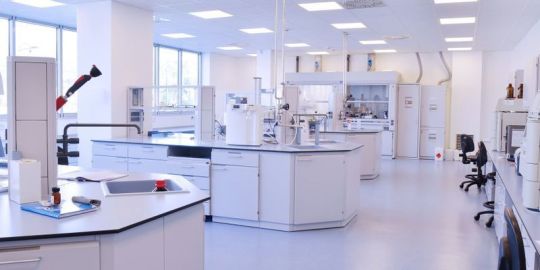
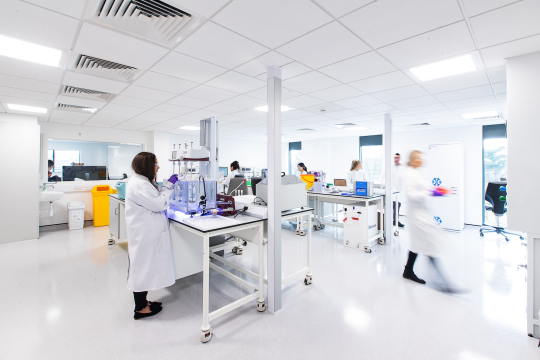
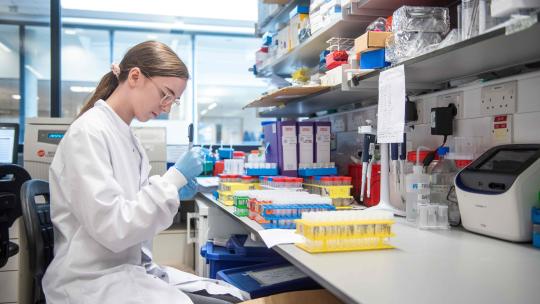
I plan to find time to draw a lab for my beast so I know where it came from. I think it would be really neat thing to add more to the story.
0 notes
Text

I'm adding interesting doodles to my page because it looks kinda empty and boring so I am adding colours and all sorts of little drawings to make it more interesting!!

On another note these colours are very tasty and I probably would eat them.
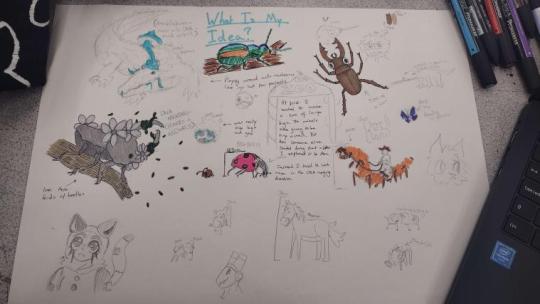
I am adding little messages and colours to this one too, the main reason is so that I can add them to my portfolio without too much worry of if it is filled or coloured enough.
0 notes
Photo
These are very cool bugs and I love them they are the cutest babies ever.
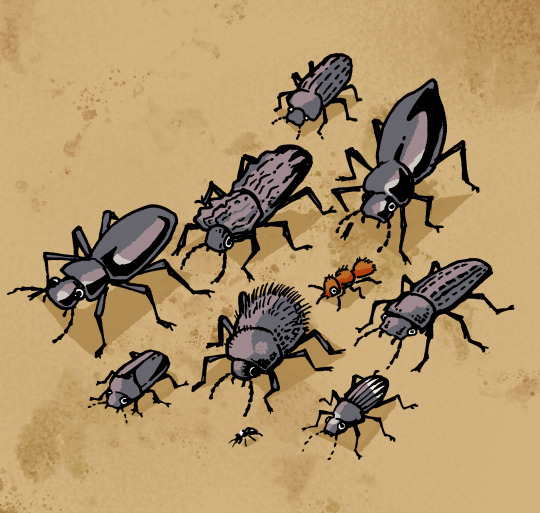
I love seeing Tenebrionidae on trail. They always look like they know where they’re trying to go.
3K notes
·
View notes
Text
Finished Poster


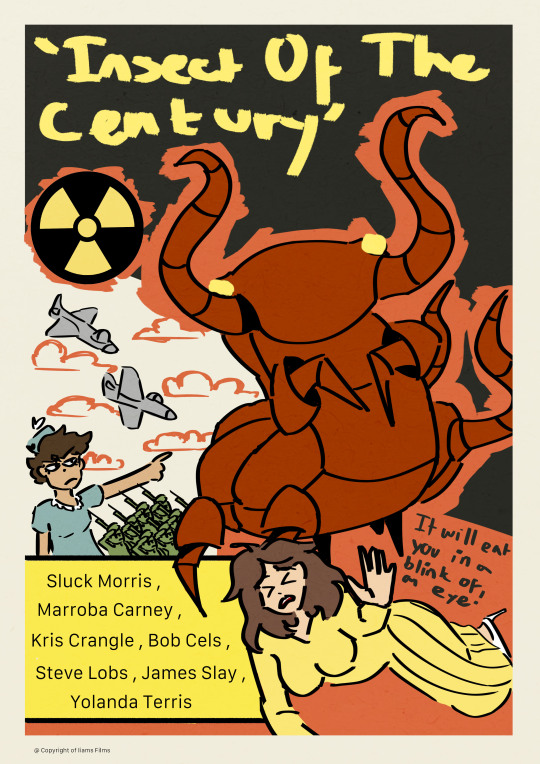
it took a lot of trail and error but I have finally finished the poster. You can see I changed the type of dress so it would fit the time period. It was not as common for women to wear jeans at this time. I also added a queen controlling an army as well as moving the actor names around. I struggled a lot to match the look I want but I can't seem to get it so this is close enough.
0 notes
Text
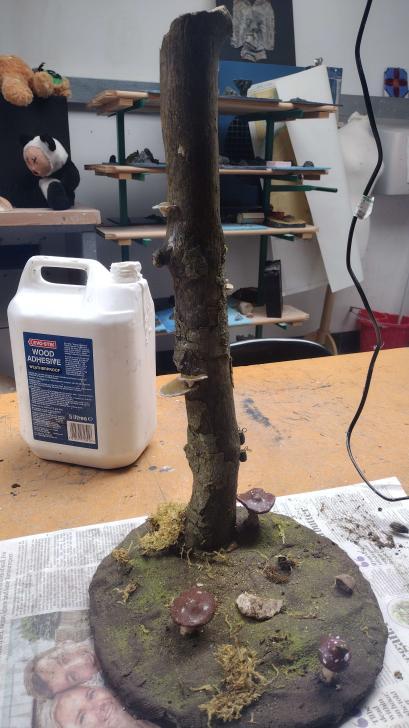
The End Of The Model

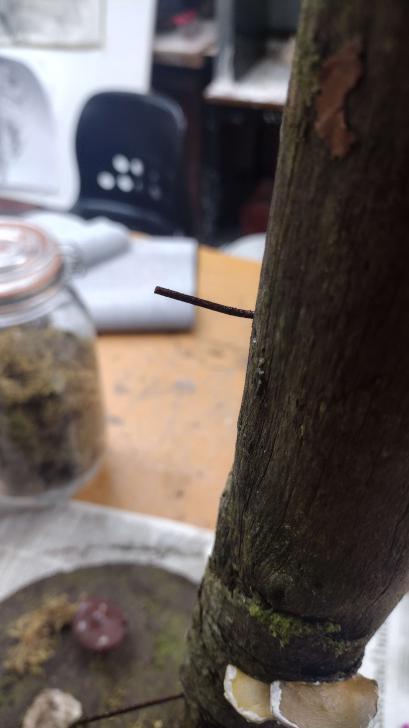

I asked the man in the workshop to make a hole in my tree and the bug in a certain way. I felt bad having to ask for help but I did not at all know what I was doing. He did as I asked in the right positioning and put the rods in the perfect size. It was a little painful watching him drill into something that I had spent weeks on but it turned out ok. I painted the wire to blend in a little better into the environment and I think it looks pretty great. I wish I could have found a better way to do this but I had to. I stuck them in with PVA and at the moment it is staying up pretty well.

I wish I glued it better but I am happy with the results none the less I think it looks pretty great for my first big model.
0 notes
Text
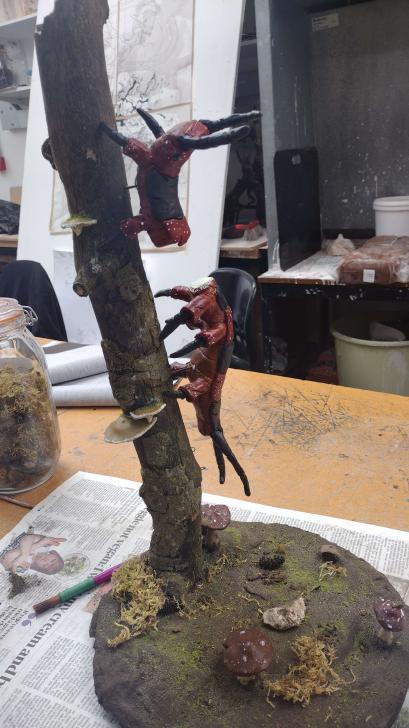
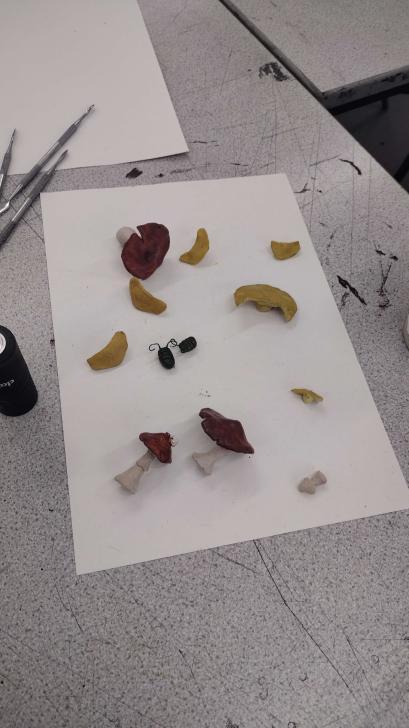
Putting It All Together

I put PVA glue on the base of the model after glue gunning the mushrooms I finished making to the brown painted base.


I sprinkled dirt on top and got rid of the excess leaving this dirt look on the base which is what I wanted.


I glued some of the mushrooms to the side of the log and added little grass bits and tiny pinecones moss all sorts to add the cool details I wanted.
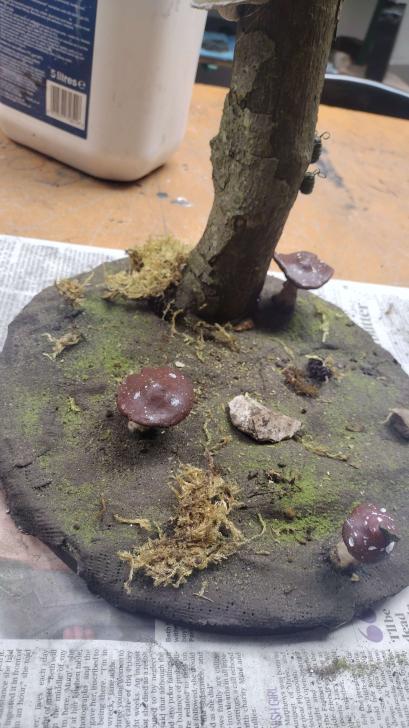
It was really great to put this together and it took so long before I could finally just do it but I am so glad with the results. It was really hard to find placement for certain parts but I found my way around it and finished painting all the mushrooms. I wish it didn't take so long
0 notes
Text
Finished Painting Progress

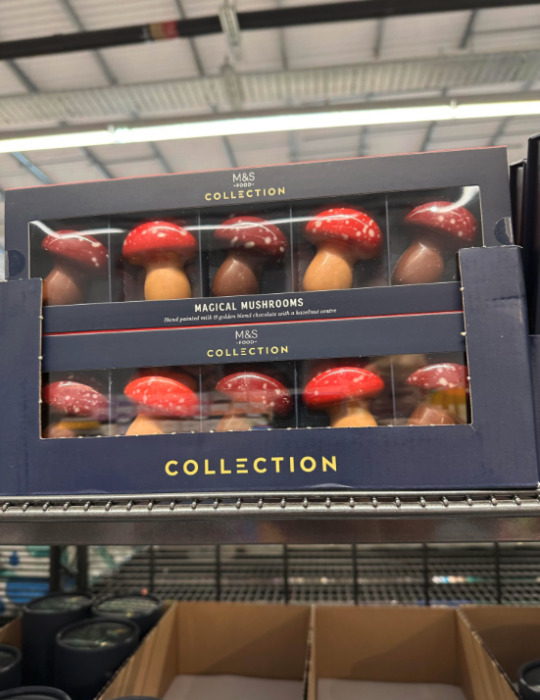

I painted these today and used a flicking technique to get the mushroom spots and I think it looks pretty good, there was some mess ups with the splatter going a bit crazy but I think it looks really good otherwise. reminds me of these M&S chocolate mushrooms I got for Christmas.


I added white spots to my centipede, to match the little details on the mushroom. I am so proud of it but I wish I could have made the banana look more like a banana it just looks kind of weird inside of it.
0 notes
Text
Painting The Grubs And Mushrooms.
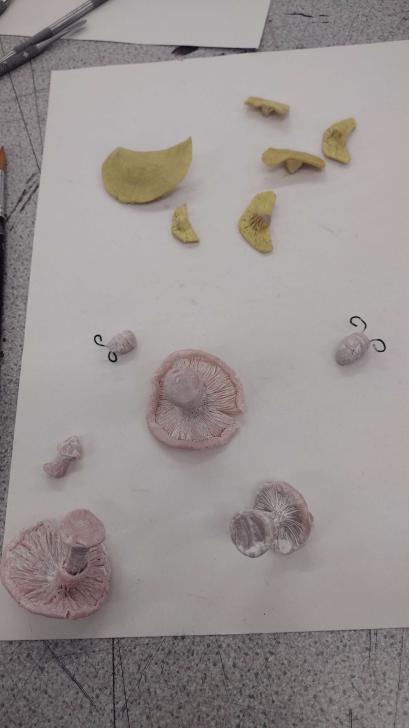
I started with a white wash over everything apart from the tree mushrooms which I used a yellow wash over. I waited for it to try make it easier of the yellowy colours to go on top.


I painted the grubs green as I always wanted to do. I also put another layer of yellow on the tree mushrooms and put the murhsroomy colour on the normal shrooms.
This is what I finished that day, I painted everything and painted the red cap of the mushroom. The next day I got back into it and started painting on it more.
0 notes
Text
The Tree Shrooms
With the tree shrooms I struggled a lot to make them look good at first. I made a base out of foil and put sculpey on It and It looked really ad so I tried a different style of creation without using tin foil.

Instead I did this and I made quiet a few!
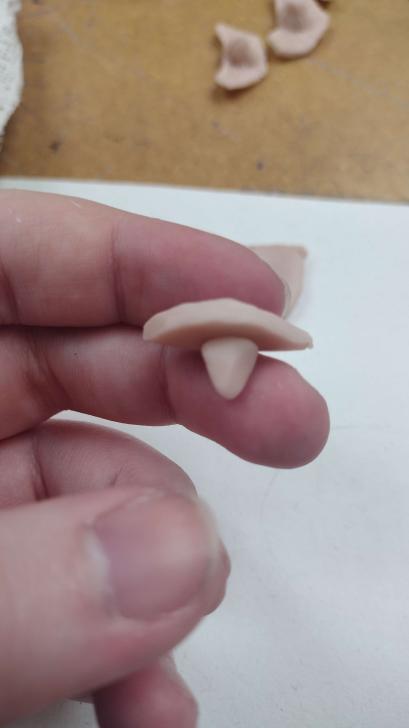
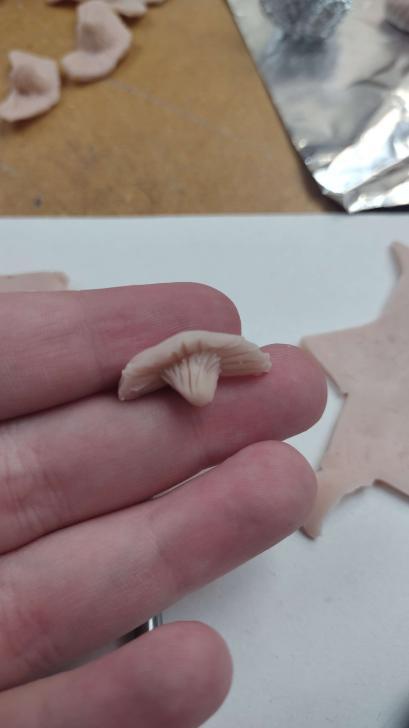
I added little mushroom gills too. You can see in the background how many I made. Making them is pretty simple.
Kystie showed me how to do this before I replicated it so many times.
0 notes
Text
Tree Grub
For my FMP I need little grubs to go on a log. This is how I did it.


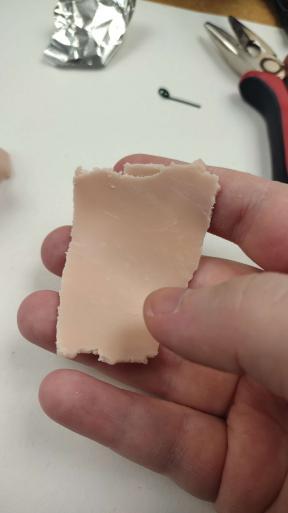
For the first grub I made a little tinfoil ball and wrapped it in sculpey, making a little ball.
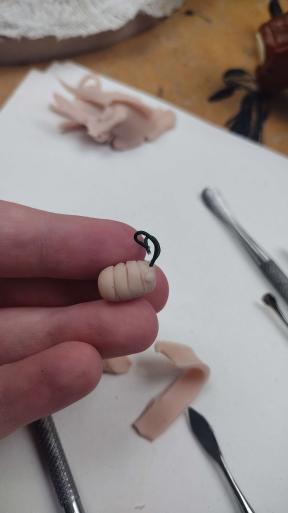

I added a few details and curled up some wire to stick in through the sculpey and tinfoil. This method is not the best and you can see here I came up with a better one.
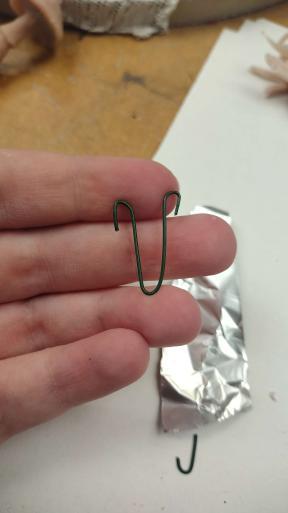

Instead I made a little U shape out of some wire and I curled the edges with pliers then covered it in tinfoil before finally adding the sculpey.
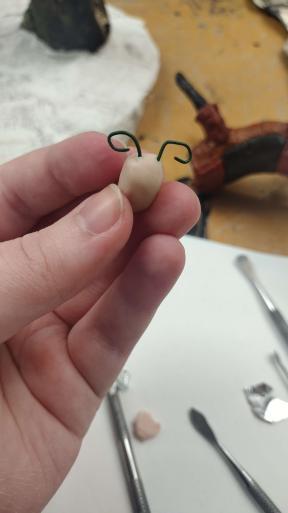

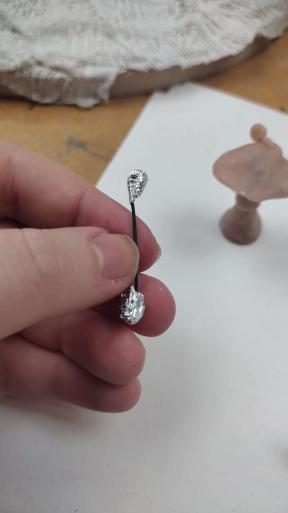
You can see here I made a little smooth bean then added these indents around the body. I think it is looking pretty good so far.


I indented it a little more and added a small mouth before i finally finished! I am so glad with the little guy and I am so excited about the results!


They are finished and I will be using both for my project.
0 notes
Text
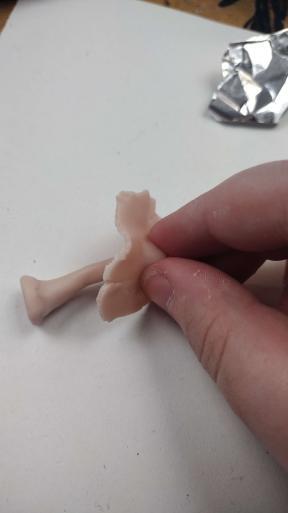
Mushroom Modelling!
I start off by getting some wire and bending it into a little circle, then I cut off the other end and make a bigger circle. I used pliers to do this.


Then I add tinfoil to both ends and cover that in sculpey. This will be the stem of the mushroom.


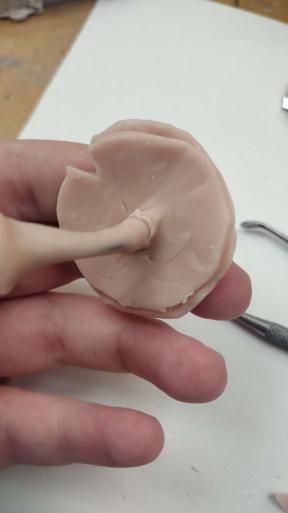
I molded the stem into a curved shape then cut a circle out of some sculpey and pinched it on the top as shown here. This is so that the mushroom cap sticks to the stem.

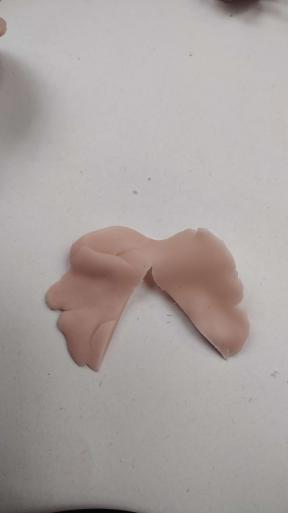
After shaping the cap and adding additional sculpey to the middle I cut another circle of sculpey and sliced it so that it would wrap around the stem at the bottom of the cap. I did this to create a thick layer to add the gills onto.

Then I added gills by using the arrow head tool and sliced a bit of sculpey into a ribbon to wrap around the top of the stem to look like mushroom frills.
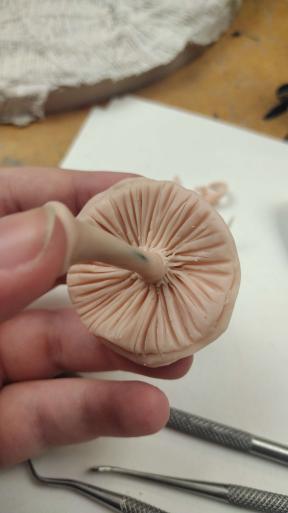


I messed up while messing with the shape of the frills, I was too heavy handed and tore up part of the model. It was a little annoying but I redid it and it looks much better now.
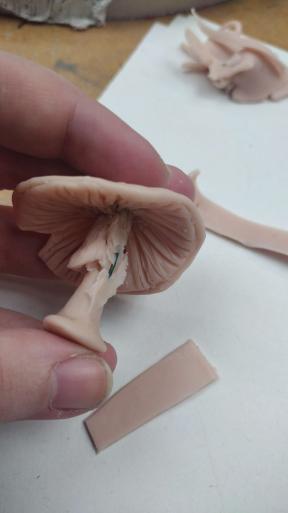

As you can see in the previous photo I started pinchingout the flaps, what I am doing is I am folding it over to look more like a mushroom. I think it is a nice little detail that stylises my modelling.

This is the end result! I am very proud of it and I think it looks like a cute little shade for a little bug.

This isn't the first mushroom model I have made and it's definitely not my last one. This is just one of the ones I made for the FMP, I had a friend Make one too, Olivia made a very cool mushroom while I was making other mushrooms and it helped so much considering I didn't have much time left and the project was needed to be finished.
At the beginning of the course Kystie taught us how to make a sculpey mushroom and I had a lot of fun and I learned a lot from the process. I am even using the original mushroom I made for my model. I am really excited about my FMP and it is very very hard to try get it done but I am keeping my head down and getting my work done asap. I am even not socialising so much so that I can get it done much faster.
0 notes
Text
The Model Base
My model looks great yes but what will it look greater with? A base of course, a look into the little habitat that the Bananapede lives in.


I finished with the mudrock and am finally ready to put some paint down so that white does not peek through the dirt. I am really excited and I can't wait to add more details to the base.


Here it is all painted up and drying! I am very eager to add the dirt but I have to finish the little mushrooms and glue gun them to the painted mudrock before I can add dirt!
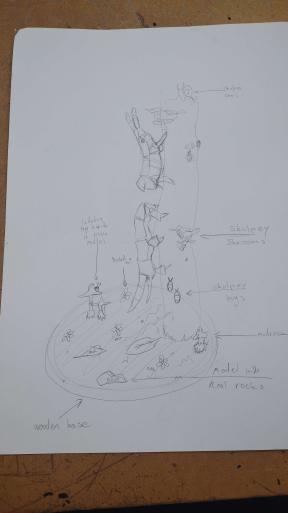
here is my idea and I can't wait to do it! I don't know if i will be able to do everything but I am hoping I can.
0 notes
Text
Poster Progress

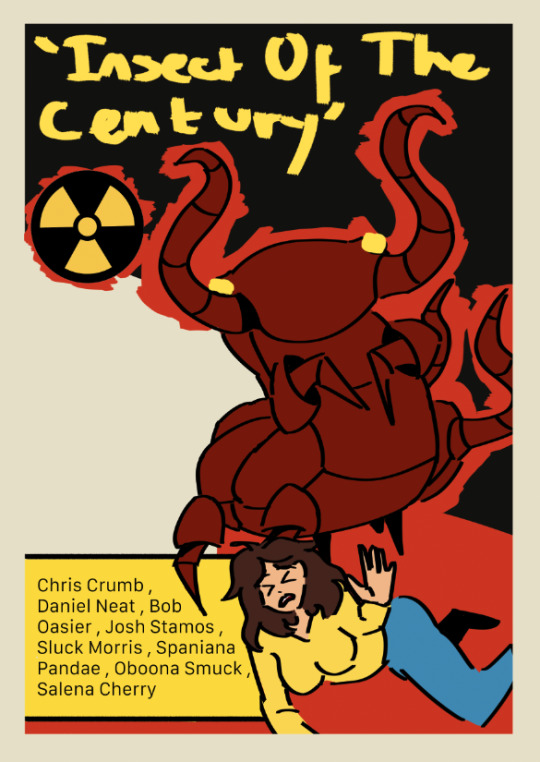
I changed the expression of the woman to look more in peril and added some colour to the mouth. I have decided to go for a personal style when it comes to the poster. Sure the colouring is on theme with the original poster design, but the characters I am drawing are more in my way of drawing characters. I also added a radiation symbol because bananas have trace amounts of radiation. I also added some actor names to make the movie look more legit.
0 notes
Text
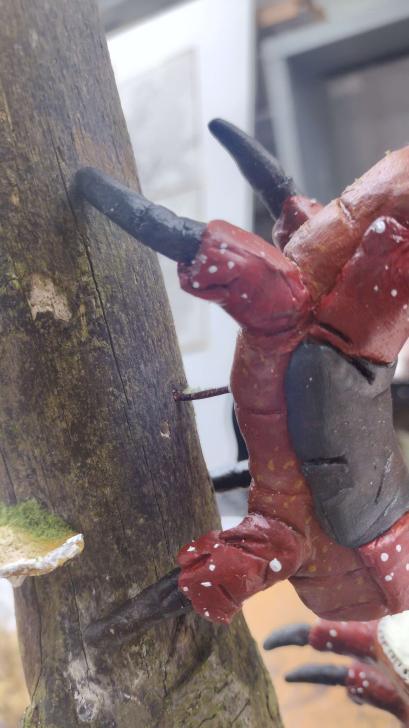
Almost Complete Centipede Model Close Up
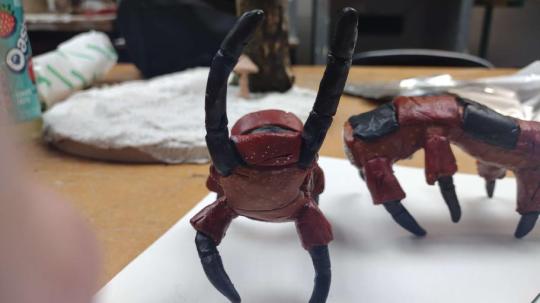


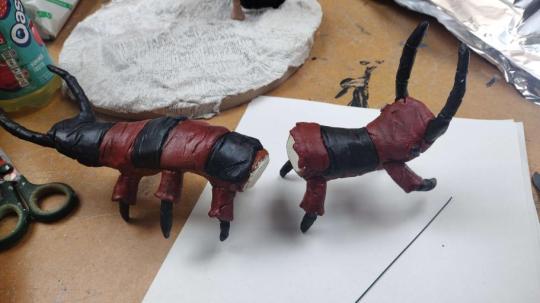

The centipede model is one of the most detailed creature models I have ever made. Back before I started this course I didn't even dream of using high quality sculpting products like Sculpy. I came into this course knowing a little photoshop and more drawing related skills, but now I have made a really sweet little centipede. Kystie helped along the way and was the one to teach us how to sculpt like this. I am so pleased and I can't wait to finish the painting of this model and base, I can't wait for the FMP.
0 notes
Text
MUSHROOMS
This relates all my projects together, the fungus of the future. I keep somehow having to make or discuss or look at mushrooms when it comes to my projects. This one not as much tho, I'm simply looking at these as something I need to add then want to add. Without mushrooms how would you know it's in a forest? Anyway, I have looked at a couple different mushroom types, I fell in love with one or two that look pretty neat. I love the more complicated ones but I also love the simpler ones. Examples of types I like:
But in the end I decided on the following types:


These are kind of the type of mushrooms I am adding to my model. They are cool unique and I find them very interesting. And I wanted to have a more simpler look considering all the work I have already put into the project.
0 notes