
Last Seen Blogs

chesssmoke27
No.1 CV Writing Companies in Dubai

t-eggz
Art of t-eggz

jiangui
don't tell me who I am.

inaflashimagine
Just A Tiny Bookstore

ereece
REECESS
Text
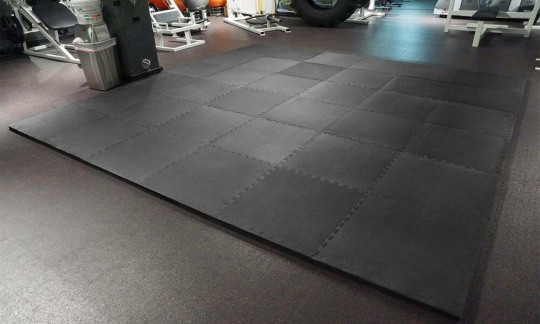
How To Clean Rubber Gym Floor [9 Different Methods]
A routine part of a healthy lifestyle is hitting the gym regularly to keep your body active and not be sluggish and tired. We need to trust the slow and steady process to transform our body in a good shape.
Even though they are used for developing your health regimen, in the end, they are sweaty smelly gyms in need of regular cleaning and maintenance. The carelessness of hygiene will convert the gyms into germ-spreading hubs.
Gym owners are usually responsible for checking up on the gym’s conditions and carrying out the requisites. They may hire janitors/cleaners to do so or may do it themselves. The usual chores include cleaning the urinals and showers, wiping down sweats and dirt from gym equipment, washing/wiping the gym floors, etc.
The aim of using rubber flooring for gyms is its durability, its non-susceptibility to fire and mildew, damage-resistant to physical pressures. Thus we must be mindful of the purpose.
Different Methods of Cleaning
No matter who recommends you, even if your best friend swears by it, do not, at any cost, do the ‘Lick Test’! When you have a hundred other options to achieve spick and span rubber gym floors, why do the abominable?.
The method of cleaning should take into account factors like the material of the flooring, the time when it was last cleaned, dark blotches or spots, and the current climate change, which also affects the contraction and expansion of the floor material.
Most of the methods are mentioned below-
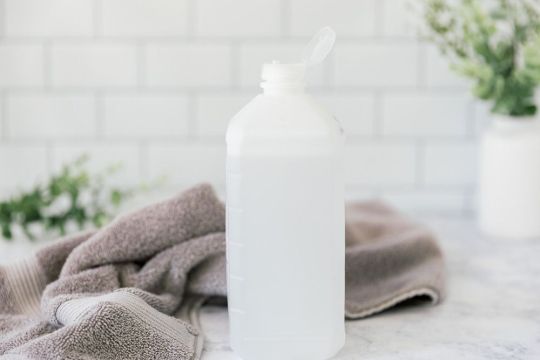
Using Store-bought Rubber Gym Floor Cleaner
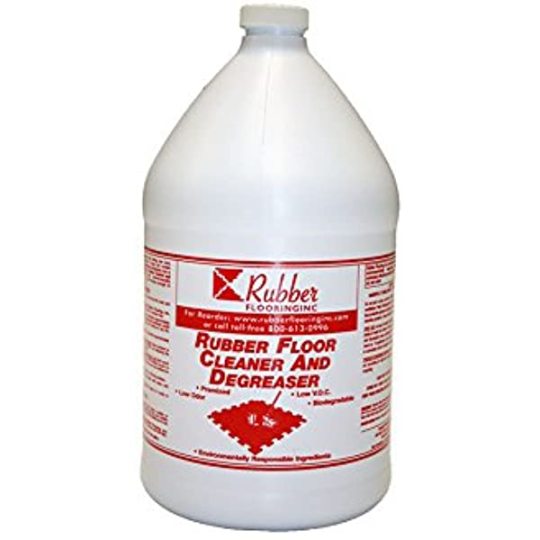
It is a basic on the aisle of cleaning products. Affordable and easy-to-use. Good reviews and promising results.
It is pH neutral, which means no acidic or basic reactions occur when applied to the rubber floor.
Mix with water and it’s ready to use. Use a rag cloth for dipping and sweeping the rubber gym floor.
The traditional Sweeping
A traditional broom is used, and regular strokes are cast on the rubber gym floor to remove dust, dirt, crumbs, or any other solid scum. Deep cleaning or removal of stains cannot be done by this method.
This method is the best for daily cleaning and even twice a day during shifts.
Vacuuming
A vacuum cleaner is used to eliminate all kinds of filth, soot, grime, or crud. It uses high-pressure induction and pulls in the waste through its pipe/nozzle. Also, not suitable for stain-removal or water-based cleaning.
Again, a method suitable for daily cleaning and maintenance.
Mopping
A mop (microfibre/nylon based) is dipped in the cleaning solution and moved with to and fro motion on the rubber gym floor, pressing hard downwards. The movement should be carried out in fixed lanes so the dirt won't get spilled much.
The cleaning solution may just be a mixture of regular liquid soap and water or a special cleaning agent for thorough cleaning.
Change the dirty water regularly (recommended after 2 rounds) so that the clean floors don't get contaminated again.
Using mild detergents
The list of mild detergents consists of liquid soap, solid bars of soap, powders, gels, etc. These are mixed with warm water or just water and other cleaning products combined for scrubbing/scouring/brushing.
Using an Automatic Scrubber
Physical exertion is majorly cut down with Automatic Scrubber. The automatic feature scrubs the gym rubber floor with sharp precision and does not leave any corner or crevice, leaving a floor as good as new.
Using a Scraper
Scraper is mainly for removing ‘things’ stuck to the rubber gym floor and is too stubborn to come off with just water, detergent, cleaning solution, or any fancy machine.
A scraper has a flat rectangular/squarish head with a sharp edge and a short handle. It removes chewing gums, chocolates, candies, or any other sticky-melty material.
It does require a lot of bending and crouching but helps in removing the slime and sludge.
Using a Buffing Machine
It comes under the category of heavy-duty cleaning. A bit on the expensive side, but with its soft pads and speed, it’s the best option for those who opt for daily basis cleaning and can afford it with ease at the same time.
Using a Sealer/Shiner
This is not primarily a cleaning product; instead, it’s like an after-shave, used at the end of cleaning. This coats the rubber gym floor with a brand new shine and seals the surface from coming in contact with any dirt, solid or liquid, thus avoiding deep settling of smudges.
However, this wears off over a while, faster if the use is regular or the inflow of gym members is much more, and so reapplying every few months is necessary for a fresh look.
Important Tips
- Do not use hard scrubbers like steel which leave marks on the rubber gym floor.
- Be careful while pouring water on the rubber gym floor because excess amounts may seep through to the bottom, becoming the source of mold growth.
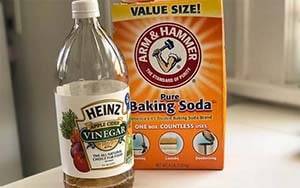
- Do not use highly acidic chemicals like phenyl, vinegar, or ammonia.
- Use a soft cloth (microfiber/cotton) while mopping or scrubbing the rubber gym floor, which is compatible with the rubber material and does not work against it.
- Proper drying is mandatory to preserve the quality of the rubber.
- Warm water usage goes a long way.
- Any spills must be immediately cleaned to avoid excess hard work.
- The new rubber gym floor smell is usually not liked by most gym-goers, which we can easily get rid of by regular cleaning (implying daily).
Conclusion
Cleaning can often be the most uninteresting of jobs needed to be done unless, of course, you are a cleanliness freak. The process is slightly longer and may even make you gag more often, but it is imperative to be done.
The above-mentioned methods will surely help you in your quest of attaining a non-smelly, non-sweaty clean gym. The methods have been tested numerous times, and changes have been made through experience and only then included in the list. So the chances of them not working is close to none.
Fit and clean. That’s the way to go!
Read the full article
0 notes
Text
How to get Dry Slime Out of your Carpet? [4 Easy Methods]
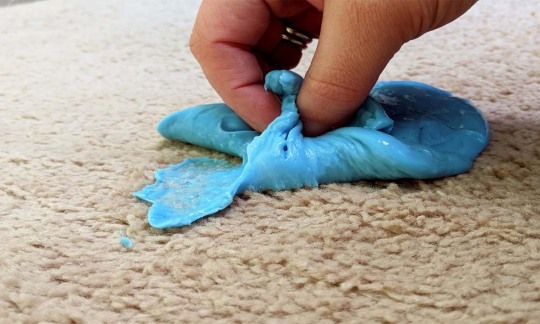
This article is for all the parents whose kids love playing with slime! We are here to help you through your scrubbing journey. Sure, slimes are fun to play with, but not when you’re the one who has to clean them.
Slime, if kept exposed to air for a long time, becomes hard and solidifies on the surface. If it’s stuck on a surface that has too many layers, good luck scrubbing it off! Let us help you get rid of the slime and get back your precious carpet.
Tools You Need
There are some easily available tools to help you get rid of the hard sticky substance stuck on your carpet. The tools required are:
- Bucket
- Scrub
- Damp towel
- Heat source
Effective Ways to Get Rid of Dry Slime
Getting rid of slime is definitely less about the tools to use and more about the fluids, and shockingly, the amount of scrubbing you are willing to do.
Using Vinegar
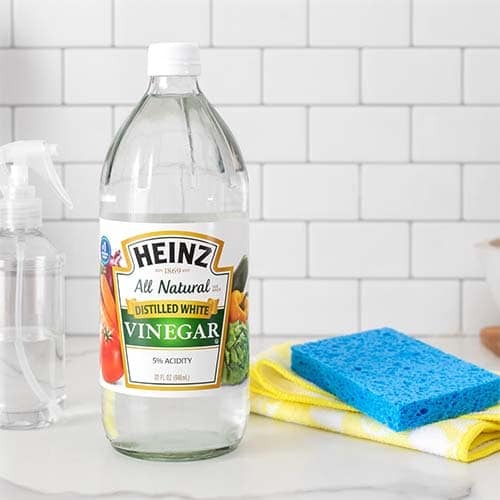
Vinegar, no doubt, is one of the best cleaning agents out there. Especially, white vinegar. The acidity in vinegar breaks down the slime and melts it. This melted flowy slime can then be washed off with a damp towel. Below are the steps to use vinegar the right way.
- Place a damp towel over the damaged area.
- Plugin your heating iron and press down on the stain over the damp cloth. The heat will help melt the slime and make your job ten times easier.
- Slowly remove the damp towel while taking off most of the slime along with it.
- Pour vinegar (white) all over the area.
- Squeeze a few drops of soap or shampoo.
- Scrub really hard. It might take a few minutes, sadly.
- Leave it for 5-8 minutes.
- Repeat the process until you see noticeable progress.
- Place the damp cloth and provide heat to the stain again.
- You might have to pick up slime pieces with your nails.
- Make sure, after all the scrubbing, the carpet is dried properly.
- Vacuum clean the damaged part.
Using Hot Water
The heat coming from water does the same job as that of the iron in the previous technique. You don’t have to boil the water, simply warm it enough to be used as hot shower water. This method could be the easiest one you will find on the internet and the most hassle-free one too. Below are the steps to follow.
- Remove all the excess slime with a tissue.
- You might have to pluck with a dry towel.
- Take half a bucket of water and warm it.
- Take a damp cloth and dip it completely in the warm water and squeeze out the excess water.
- Place it on the stain and press downwards. The increase in temperature and pressure will melt the hard slime.
- After applying pressure for a minute or two, wipe in a circular pattern and pluck off the sticky slime simultaneously.
- You will have to repeat this step again and again.
- In the end, scrub the stain and let the carpet dry.
- Vacuum clean all the residue that’s hiding between the fibers of the carpet.
Important Tips
Carpets make your room look pretty, but not if they have slime stains over it. Also, in the process of getting rid of the stains, you shouldn’t ruin your carpet fibers, Should you? Hence, below are some points that you must keep in mind before you get going with scrubbing.
- Do not use water that’s too hot for the carpet.
- Using extremely hot water can fade away the color of your carpet.
- Do not use strong cleaning detergents on your carpet.
- Strong detergents degrade the quality of the carpet leaving you with an easily noticeable dark spot.
- Always squeeze away excess water first and then place it on the carpet.
- If the carpet absorbs a lot of water, then there might be chances of fungal and bacterial growth underneath the carpet. It might also affect the hardwood floor beneath it.
- Always wear gloves if you’re using any kind of chemical-based fluids.
- Always read the instructions given on the product container before you use it on your carpet. Do your research!
Alternatives to Vinegar
If you are looking for an alternative to use vinegar, we have got your back! But make sure that if you do not practice the following steps properly, you might ruin your carpet. So read the steps carefully.
Rubbing Alcohol
Rubbing alcohol could be the next best thing after vinegar. It is a stronger version of vinegar but milder than most cleaning agents. First, try using rubbing alcohol on a tiny hidden spot on the carpet to see if the carpet reacts to rubbing alcohol in a negative way or not.
- Remove excess slime from the carpet.
- Wet the area with warm water.
- Pour a few drops of rubbing alcohol over the stains.
- Spread it evenly.
- Rest it for 8-10 minutes.
- Damp off the residue with a towel.
- Scrub if there is still some slime stuck to the fibers of the carpet.
- Vacuum the residue off.
WD-40
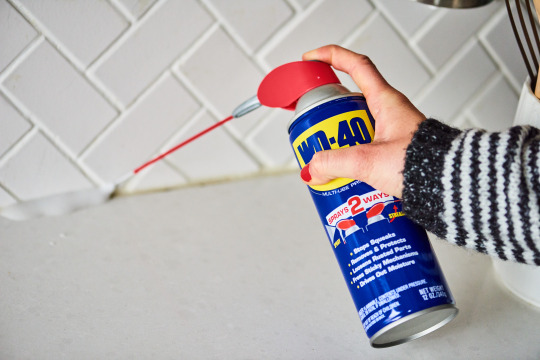
This can be directly applied to the stain. Here too, pour a few drops on a hidden part of the carpet to check whether it damages it or not. WD-40 is a strong washing detergent so please be careful while handling it. Use the same steps mentioned above for rubbing alcohol and you will be good to go!
Conclusion
Removing dried slime off the carpet is a strength-demanding job. It's more about how hard you scrub without damaging the carpet. It’s also about what product you use while scrubbing and the techniques you apply to get rid of that substance.
We hope that this article has helped you gain insights into slime removal. You can opt for any method mentioned above as all of them are very effective, but remember to select the right one according to your need. Remember, hot water and high pressure melt away the slime! Happy cleaning!
Read the full article
0 notes
Text
How To Clean Unsealed Wood Floors?

Wooden floors are durable and make the home decor very classic and presentable. On the contrary, when it comes to cleaning the unsealed floors, it is not only tough but requires specific cleaning products too.
The wood soaks up the moisture that is smeared on the floor. To avoid this, cleaning products should be used in appropriate quantities. In this article, we have summarised a few tips and steps that you can follow to learn how to clean unsealed wood floors.
Materials required to clean unsealed wood floors are a mop, bucket, water, vinegar, cloth or rag, and broom.
Steps to Clean the Floor
- The common mistake that people make while cleaning the wood floor is that they start by cleaning it with water. Instead, you should start with a broom. Sweep the floor completely and get rid of all the solid dust particles that are visible. If we skip this step then the big dust particles dissolve in the water making it dirty which will further make the floor dirtier.
- After you have swept the floor, please ensure that you check whether or not the wood grains of the broom picked up the dust particles from all the nooks and corners of the room.
- Now to mop the floor, fill the bucket with water. Add a small amount of vinegar around ¼ cup per gallon of water.
- This mixture of water and vinegar will act as a perfect floor cleaner. Use a mop or a cloth to wipe the floor. Dip the cloth that you would be using in the cleaner and make sure that it is thoroughly rung out to prevent dampening the wood unnecessarily. Dampening of wood ruins it in the long run so this is the most important step.
- However, if you are doing it for the first time, it is likely that the floor might get too wet the first few times you clean the floor. You will get the hang of it after you have done it a few times. In such a case, follow the mop with a dry cloth to make sure that the extra water is absorbed before the moisture seeps in and ruins the wood floor.
- After following these steps, let the floor dry completely. You can switch on the fans to speed up the drying part.
- Please ensure that no one steps on or walks on the wet floor unnecessarily before the floor dries out completely as it will make the floor more dirty.
Protecting Your Floor
There are ways to protect the flooring too, especially if you have hired someone to clean the house. To make sure that the wood of the floor is protected, waxes can be applied to the surface. It is difficult to remove these waxes once applied.
Please do not apply any sort of wax if the wood will be sealed. As it is time-consuming to remove.
If there is any probability of the floor getting sealed or refurbished in the near future, then it is not a good idea to use commercial products for cleaning the floor as doing that might leave a remnant.
Alternative Ways of Cleaning the Floor
For wiping the floor, substances such as mineral spirits can be utilized as well. But make sure that after wiping the floor with mineral spirit, you clean it again with a dry cloth to get rid of any residue.
A very smart way is to invest in decorative rugs and runners and cover the floor with them to avoid the dirt from building up in the long run. It will act as picturesque home decor as well as protect the floor at the same time.
Protecting unsealed hardwood floors
Unsealed hardwood floors look presentable but its bad side is that it does not have a protective layer and it’s likely to get affected with the change in the weather condition in the surroundings. Before you go ahead and seal them, it is important to make sure that they are cleaned completely as floors that do not have a protective layer can trap dirt particles easily and get dirty in no time. Cleaning the untreated floors thoroughly is very essential.
Follow the steps given above and clean it using a dry cloth first and foremost and get rid of the dust and dirt. We discuss how to clean an old unfinished wood floor in the next few paragraphs.
Protecting an old unfinished hardwood flooring
In today’s times, modern houses are well-furnished and their hardwood floors are properly sealed and finished but that is not the case with houses that were built in older times. They need to be carefully cleaned regularly to maintain their look and for them to last longer. A very paramount thing to take care of with such floors is to keep them away from any contact with water or moisture.
It is not a good idea to mop the unsealed floor with water or cleaners that are liquid-based. Please determine whether your hardwood floor is sealed or not so you can clean it accordingly. Ensure that any water-based cleaner or water is used if you are not sure whether or not the wooden floor is sealed.
Moisture and liquids can have bad effects on unsealed floors in the long run. If it is exposed to water or liquid-based products regularly, the wood gets ruined over time. Whenever water is spilled or you end up using extra water while cleaning it, always wipe the excess water with a dry cloth.
Conclusion
Maintaining unsealed wooden floors is crucial. Therefore, we listed the methods that can be used to clean the floor. You need to pay attention to those floors that are finished but might have damaged seals, dents, gaps, and cavities. Water can damage these floors too as it can penetrate through the openings.
We hope this article helped you with how to clean unsealed wood floors, so make sure to strictly follow the instructions and the safety measures to avoid any kind of problems or harm to your comfort. Happy Cleaning!
Read the full article
0 notes
Text
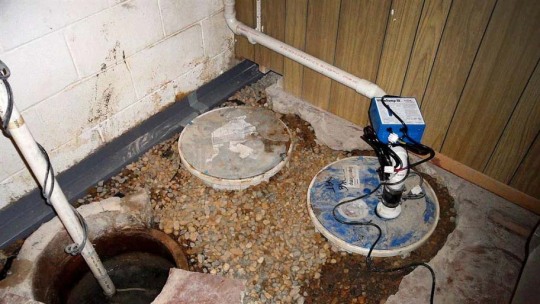
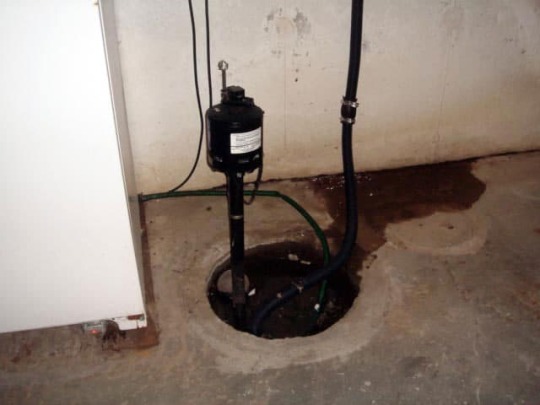
Sump Pump Stopped Working - What To Do Now?
A machine is a machine so it can stop working anytime sooner or later. No matter how much you take care of it, no doubt someday or once in life it will stop working for sure.
So it is important to learn about that machine for tackling the upcoming problems. Just like other machines, the Sump Pump can stop working too and it is common.
Because it's a water tool and if the pump is not working for a long time it will stop working. Also, other things like blockage, rust, and leakage, etc. can also cause trouble.
Some other things also cause issues to work sump pump properly, so in this article, we are gonna talk about them.
If your sump pump stopped working too then you need to check this guide. Maybe you will be able to solve the problem by yourself.
© angieslist.com
Why Sump Pump Fails To Work Properly?
When a working sump pump stops working or turns on, then there are chances that you have a flooded basement. Maybe your sump pump is not that powerful to tackle with too much water.
So to tackling this kind of situation experts suggest installing a high-quality cast-iron submersible sump pump and also a secondary sump pump with battery backup.
Submersible sump pumps are long-lasting and come with self-cooling technology, and they are powerful to handle too much water. So installing a good sump pump with backup in the first place minimizes the chances of failure.
Still, if your sump pump is not working check below:-
1. Major Basement Flooding
If your basement was flooded recently and your sump pump failed to handle that water, then you need professional help.
Remove that standing water as soon as possible as standing water causes so many issues to pump related and also health-related too.
That standing water can permanently damage your foundation and also promote allergens.
So call a professional for help in this situation.
2. Stuck Float Switch
Sump pump depends on the float switch to turn on or off. As whenever water rises to the adjusted level floated switch activates the pump and when the water level goes down the pump turns off.
So if your float switch is stuck then your sump pump will not work properly. When the sump pump works it creates vibrations so the floating switch can get pressed in the side of the sump pit or another stackable place.
Check if it happened in your case then your pump will not work. So if your float switch is stuck, make it unstuck and your pump will start working again.
If this is not your case then maybe your float switch is filled with water as some float switches are hollow. And by the time they get filled with water. So with the weight of water, it fails to rise as it should, so empty the float switch and it will start working again.
Still, if this is not happening in your case check if the float switch is held down by any physical debris. Try to make it smooth as much as possible.
It will make things easy and your pump will start working for sure.
3. Frozen Discharge Pipe
This problem normally comes in cold weather, as by chance any water is left inside the discharge pipe, It will freeze and stop the way out.
Sump pump uses suction to remove the water through pipes from the sump pit when it reaches a certain level. The discharge pipe throws the water away from the house and keeps your basement flood-free.
It is important, discharge pipe must be long enough to release the water a few feet away from your house, so the water can't find the way back to your house immediately.
But in cold weather, the present water inside the discharge will freeze, and the pump will face physical blockage.
To stop the blockage you need to melt the ice first for that you can use the hairdryer or any other heat kind of thing.
Once you are done with that take the help of the professional to stop that from happening again.
4. Power Issue With Pump
It can be happening with you that the sump pump is not getting proper power. So before performing the above-listed steps try this first.
It really happens most of the time that your pump is not plugged in properly so it will not work. If the pump is plugged in properly then check for the fuse box and also check the cracks in the cable.
Sometimes we use the outlet for other works and forgot to plug the pump again. Maybe it happens in your case too.
If your outlets are not GFCI maybe the fuse on your circuit board is blown. Check for that if it is then replace it and also start using GFCI outlets.
Maybe during the rainstorm, there was no power from the backend, which means the power outage causes the pump to stop. To install a backup battery system to not face the same issue in the future.
Conclusion
In the last, we can say if your sump pump is too old then you need to replace it as soon as possible.
Check the papers and see how many years the owners said it will work. If that time is passed or near then replace the sump pump with a new one.
We hope this guide helped you to solve the problem, if not then please get help from the professional and solve the issue as soon as possible.
Read the full article
0 notes
Text
How Long Does Polyurethane Take to Dry?
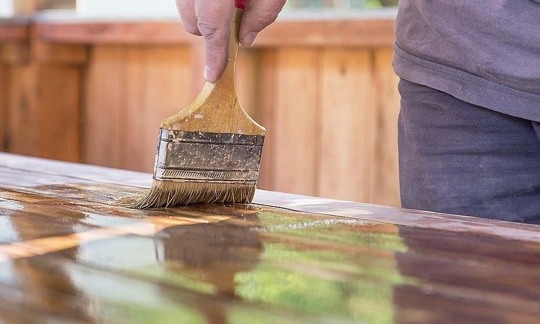
Polyurethane is used for decorative and functional purposes and can levitate the look of your house instantly, but not doing so with care can ruin your costly hardwood floors.
In this article, you will get to know the types of Polyurethane available in the market and how long the complete process lasts. Make sure to read till the end to know what factors affect the time taken for this process. You will also learn about How Long Does Polyurethane Take to Dry.
Timeline of the Application Process of Polyurethane
Before you even open the can of Polyurethane, make sure you clear all the furniture over your working space. Make sure to properly sand dust the surface and broom away from the shavings. Keep the wooden surface as clean as possible.
Before we start with the timeline, you need to know the difference between drying time and curing time. The former is the amount of time you will need to wait before applying a second coat. In this process, waiting is as much of an importance as applying a coat. The latter is the time required for Polyurethane to completely dry up. This is exactly when you can walk on it and move in your furniture without worrying about damaging the fresh coating.
The drying time for water-based Polyurethane is eight hours whereas, for oil-based coating, it is twenty-four hours. You must test the water-based Polyurethane coated surface to check whether it is dried up or not approximately twenty-four hours after applying the second coat. The same, if you use an oil-based Polyurethane, would be forty-eight hours.
For the water-based coating, you can freely place all your furniture after a week. For the oil-based coating, you will have to wait only for three to four days. The curing time for the former is 20 days and for the latter, it is 30 days.
To be on the safer side to not ruin the flooring, you can attach furniture leg pads. This will avoid scratch marks and keep your floors shiny.
Factors that Affect the Drying Time of Polyurethane
The application of Polyurethane changes at extreme weather or climatic conditions. It depends on the type of wood flooring, the thickness of the coating, and humidity. Read along to know how you can deal with such factors and end up with protected wood flooring.
- Temperature: The most important factor to keep in mind before you plan out your polishing is to simply check the weather. The best temperature at which Polyurethane dries up faster is around 70 degrees Fahrenheit. Extreme cold conditions will cause a white substance to grow over the coating. On the other hand, extremely hot conditions might cause a chemical reaction between the wood and the coating.
If the floors are too cold to work on, try applying heat to them. Make sure not to overdo it, as too much heat can totally ruin the hardwood floors.
- Humidity: The ideal percentage of moisture is 50 to 70%. If you experience extremely humid conditions, then opt for the oil-based Polyurethane. Water-based is sensitive to the moisture content in the air.
It is advisable not to start coating while it is pouring outside. This may cause mold or fungal growth which will eventually give your wood a rotten greenish appearance.
- The thickness of layer: The thickness of each coat of Polyurethane also causes a difference in the drying time. The logic is simple. The thicker the layer, the longer it will dry up, irrespective of its oil-based or water-based. You are bound to have thick layers of coating if you apply it with a brush. The best way to apply a thin and uniform coating is to use a paint roller.
Types of Polyurethane Available in the Market
Do you remember that Polyurethane can be used for decorative as well as functional purposes? Here’s why? Concerning its decorative usage, Polyurethane comes in various textures, or scientifically speaking, it comes in different viscosity.
- Satin sheen: A satin finish won’t give you a shiny finish as it almost has a matte finish over hardwood floors. It is the fastest drying Polyurethane type you can use.
- Semi-gloss sheen: This plays the middle ground between a matte finish and a glossy one. It is durable but dries up slower than the satin finish.
- High-gloss: If you're on a budget but want your guests to think that you spent a lot on your hardwood floors, this is what you should go for. Besides everything, this type of Polyurethane can be used to coat indoor as well as outdoor hardwood floorings. It is highly durable but takes the longest to dry.
The overall completion time also highly depends on the type of Polyurethane you have chosen. You will confront two different concentrations of Polyurethane, i.e., oil-based and water-based. Both have their own advantages and disadvantages and both are used for specific purposes only.
Differences Between Oil-based and Water-based Polyurethane
The oil-based ones are preferred by homeowners having dark-shaded hardwood floors. It gives the flooring a peculiar shine or glow that compliments the wood. Oil-based Polyurethane is a lot cheaper than water-based.
Water-based Polyurethane is an eco-friendly option but on the other hand, you will have to buy more and more because it doesn’t last that long.
Oil-based Polyurethane
Water-based Polyurethane
A hassle-free way to coat wood.
You need to be careful to avoid the absorption of liquid into the wood.
It takes about three to five days to dry to completely have furniture over it.
Minimum two days to dry up completely to have furniture placed over it.
It lasts longer and is more effective.
Doesn’t last that long.
Has a peculiar odor.
Does not have a strong odor.
To give your hardwood floors a rich, luxurious effect, you must go with oil-based Polyurethane. If you wish to bring out the natural look of your wood, water-based Polyurethane is the one for you. The former definitely takes more time to dry up. If we talk about longevity, you must opt for the oil-based version.
Read the full article
0 notes
Text
How to Clean Travertine Floors - 5 Simple Steps
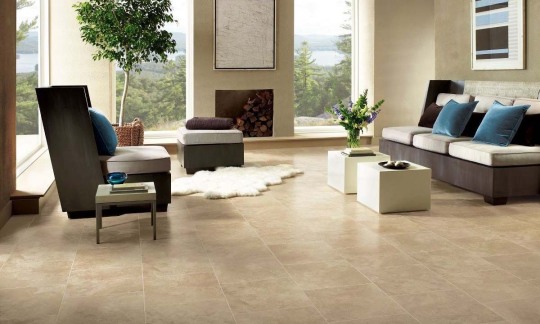
If you are planning to go for a complete makeover of the house by switching to travertine flooring, you are in for an experience of a pure aesthetic look of your home. You have probably installed Travertine flooring in your home or are contemplating doing so. So, it becomes imperative to say that Travertine comes with lots of holes and hollow spaces and tends to accumulate dirt in its gaps quickly.
Now the question that is probably clouding your mind is how to clean travertine floors. Well, there are specific techniques and proper cleaning rules to be adopted and adhered to get back the shiny, clean look of your dear travertines. Read along to clear away the mists of confusion from your mind and gear up to start with the cleaning process. Let’s begin!
What is Travertine?
Like other forms of stone flooring (say, marble or limestone), Travertine is a type of stone used for flooring purposes in residential properties. Its uneven, rough surface replete with hollows and pits enhances its beauty.
Travertine can create wonders and make your home take up a charming and posh appearance. Its main constituent is calcium carbonate and is formed from limestone remnants and as a by-product of solidification of the hot springs.
The best part about the Travertine is that it often resembles marble flooring and gives an overall splendid look to your living space. Oh, did we say that Travertine also comes in a plethora of rich colors such as emerald, ivory, walnut, silver, golden, and brown? Spruce up your home with this beautiful and vibrant stone flooring.
Since Travertine is susceptible to getting dirty, you need to take slight pains to ensure that these stay highly polished and well-maintained so that not even a little shade of dust gets the scope of accumulating on it.
Follow the cleaning instructions that have been tailor-made only for the Travertine floors and get the feeling of staying in a place filled with royalty just as you feel special while seeing the picture of the Roman Colosseum. Yes, it too has Travertine as its flooring!
Travertine Cleaning Gear
Make sure you have got these cleaning items handy before commencing with the task of deep-cleaning the travertine floors.
- A good quality broom having super-soft bristles
- A soft mop with not-so-rough fabric
- A cleaner solution having its pH as ‘neutral,’ that is, neither acidic nor alkaline
- A bucket
- A mini scrub to keep away the dirt materials from settling in the hollows of the tiles
- A soft washing piece or towel
- Sufficient amount of warm water
- Baking soda
- A stone cleaner from a good brand
Travertine Cleaning Instructions/Steps
Step 1
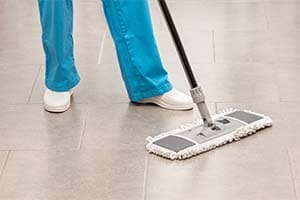
Kick-start your travertine floor cleaning by beginning with sweeping away the dust and dirt accumulated on the floor tiles. For this purpose, you may use a vacuum cleaner or broom. However, the best option will be to use a dust mop as its soft bristles smoothly remove the dust, strands of hair, and dirt from the floor.
If you wish to use a room, make sure you have a dustpan to collect the dust quickly and dispose of it later. Else, the dirt may get scattered, and you have to start from point zero all over again.
Step 2
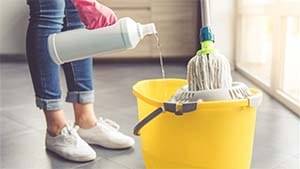
After removing the dust from the floor, prepare the solution you will use for mopping purposes. It is recommended that you use warm water as it has more extraordinary cleaning powers of eradicating even the stickiest dirt from the floor.
Pour a sufficient amount of warm water into a bucket and mix a few drops of your preferred cleaner solution in it. If you prefer a stone cleaner, you can add that to the bucket of warm water.
A neutral pH cleaner is also an excellent option to go for as it ensures deep cleaning of the Travertine floor. Go by the usage instructions mentioned in the product label and add the required amount in the water to form the perfect solution.
Step 3
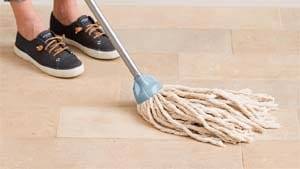
Now that the solution is prepared, start mopping the floor. Be careful to wring out the mop so that the extra water comes out of it. For this, you may want to use a spin mop. It doesn’t inflict too much pressure on your hands while retaining the required amount of water for washing at the same time.
Another excellent option to choose is to use a spray mop. It looks like a dust mop but has a built-in spray nozzle with it. The amount of solution you wish to sprinkle depends upon you as you will be in charge of releasing the trigger for the nozzle.
Here is a very important cautionary fact regarding travertine floor washing. Never make the mistake of making the floor excessively watery. The more saturated the tiles get, the greater the chances of these getting discolored or faded. The excess water will seep down through the grout lines and hollows and may stimulate mold growth, thus enhancing the chances of putting your tiles at a far greater risk.
Step 4
It’s time to start with the vital task of mopping the floor. The most effective mopping plan will be to start from the most remote part of the room and then reach the entrance or exit area. Make sure not to saturate the area with water. Keep wringing the bristles of the mop every time you dip it into the bucket of warm solution.
Pay attention to the drops of water that keep on dripping from the mop streaks. If you see water drops falling on the ground incessantly, take action immediately to prevent it.
The problem gets worse if you have a large room to cover. To avoid over-saturation of water on the tiles, divide the room into two halves and use one bucket for each half of the room. In this way, the solution in the bucket is getting replenished, and the tiles are getting washed more effectively.
Step 5
After giving the travertine floor one mopping coat using the warm water, go for another round of washing, but this time using cold water. Yeah, it is a bit of a back-breaking task, but the results are beautiful!
Start with mopping the entire room with cold water and look for any extra drop of water that falls on the floor. Wring the mop properly and change the water at the very instance when you see it getting blackish or dirty.
Step 6

This step of drying the floor is crucial. If you don’t carry out this step correctly, all your efforts in washing the travertine floor will be futile.
You can use any towel for drying purposes. In this way, you will be assured that no imprints of the wet mop streaks are left behind. Even if there were any presence of accumulated water on the floors, it would get swept away while you will be cleaning the tiles with a dry, tidy towel.
How To Seal Travertine Floors?
Sealing the travertine floor tiles is a significant task to jazz up the brightness of the color of the tiles. With the passage of time and the mounting effect of liquid spills and water splashes, the tiles undergo discoloration and take up yellowish stains. To save the tiles from getting degraded, sealing the floor at regular intervals is essential.
- For sealing, you have two options at your disposal. You may choose the penetrating material that permeates deep into the floor and block the openings. In this way, no moisture can enter into the tiles, thus eradicating the chances of mold growth at its very root.
The other option involves coating the surface of the floor tiles so that any liquid spill doesn’t affect the beauty of the travertine floor. After you have applied the sealer at the below surface level once, make sure that the coating of the barrier surface is applied periodically for long-term maintenance of the travertine floor.
- The travertine tiles have a pale and faded appearance. If you wish to give a rich, shiny, and vibrant look to your room, applying sealer frequently is a good idea. Else, if you wish to keep things simple and beautiful, apply the sealer once or twice a year.
How to Protect and Maintain Travertine Floors?
Cleaning the travertine floors periodically is an obligatory step. But that doesn’t mean that you will stop caring for it on other days, right? Here we have compiled some of the most fantastic tips that you need to know for the proper maintenance of the Travertine Floor.
- Since the travertine floors tend to pick up dirt and dust, they start looking dull and whitish. You can use a broom, mop, or vacuum cleaner with a soft attachment. Take out time so that you can go sweeping at least twice a week.
- Use a mild cleaner and a properly wet mop to get rid of stains and dust from the floor. Mopping weekly will be good enough to maintain the luster of the Travertine floors.
- Cover the areas of the floors that are centers of great activity with a carpet or doormat. In this way, the beautiful floors will be saved from getting stained by juices or other liquids.
Conclusion
Now that you know how to clean travertine floors, ensure that the tiles keep emitting ethereal beauty by proper maintenance. Wash the floor with a neutral solution and keep resealing it as per your needs. Your beautiful travertine floor deserves all of your pamperings. So, take out a little time for your lovely floors and enjoy having an aesthetic standard in your house. Happy Cleaning!
Read the full article
0 notes
Text
How to Get Sharpie Out of Carpet? [5 Effective Ways]
Sharpies, for kids, are a creative way to show off their talent in drawing but it, most definitely, is a disaster if they start drawing on walls, furniture, and carpets.
Parents have no choice but to get down on their knees and clean those stains off of their carpet. How do you get rid of those stains? What chemicals do you use to get the stain off your carpet? How do you avoid the stain from spreading further over the carpet? You will find answers to all of these questions in this article.
Top 5 Most Effective Ways to Get Rid of Sharpie Stains on Carpets
You can never predict and prevent sharpie stains on your carpet but what you can certainly do is know the quickest and easiest ways to get them off the carpet.
The main ingredient to removing sharpie stains is alcohol. Whatever chemical you use, it must have a certain amount of alcohol to separate the stain from the fibres of the carpet. So without further beating around the bush, let’s discuss the steps to get sharpie stains out of the carpet.
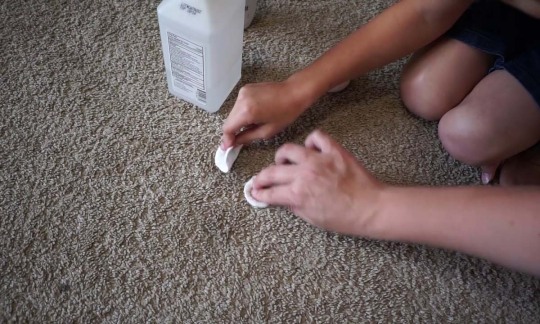
Rubbing alcohol and hair spray
You will need some cotton pads or tissue. A q-tip will be fine as well. You obviously need rubbing alcohol and a can of hair spray. Follow these steps to get out tough sharpie stains.
- Take the bottle of rubbing alcohol and pour four to five drops of the liquid over the cotton pad. Never touch the cotton pad to the mouth of the container as doing so will contaminate the alcohol.
- Gently blot over the affected area. Do not press the cotton pad against the carpet as this would make the stain penetrate further deeper into the carpet. Make sure you go in circles but never out of the affected area. This will spread the stain even further.
- After noticing a slight change in the color of the stain, use the hair spray. Ensure the hair spray is oil-free as you don’t want to have oil stains on your carpet. Shake the can and direct it right above the affected area. Do two sprays.
- Use a new set of cotton pads to dab over the stain.
- If the carpet gets too fuzzy in that region, use a toothbrush instead of cotton pads. Go in circular directions.
- You will have to repeat the process a couple of times to get rid of the stain completely.
- After you are all done, use a towel soaked in clean water and blot the wet area dry.
Nail polish remover
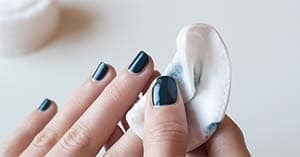
If you don’t have a bottle of acetone lying around, you can reach out for a nail paint remover. The key components that work over the stain are acetone and alcohol. You will need a soft cloth or cotton pads. Follow these steps to get out tough sharpie stains.
- Pour a few drops of nail polish remover over the cotton pads. Do not pour the liquid directly onto the carpet. Doing so will not only waste your nail paint remover but will also seep through the carpet and damage it from down under.
- Take the wet cotton pad and dab over the stain. Do not press the cotton pad against the carpet, as this would make the stain penetrate further deeper into the carpet. Do not go outwards as the color will affect the area near the stain. Go in circles.
- You will have to repeat this process at least three to four times to completely get rid of the stain.
- After the stain disappears, take a dry cloth and separate out the fibres of the carpet from one another. This will help dry the wet area faster.
Hand sanitizer
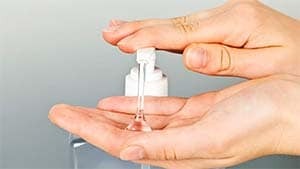
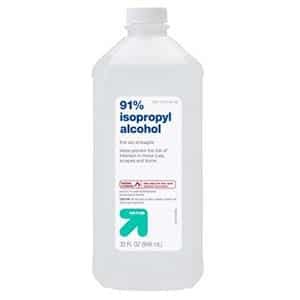
Hand sanitizer contains sixty and sometimes even ninety percent of alcohols such as ethanol and isopropanol. But these types of alcohol are not very effective on sharpie stains. So, use them over weak and light stains only or as a last resort to get rid of the residue. Follow these steps to get out tough sharpie stains.
- Take a towel and squeeze eight to ten drops of hand sanitizer over it.
- Spread it evenly over the affected area and start blotting.
- Go in circles and try to separate the fibres of the carpet to get a deeper reach into the stain.
- You will have to repeat this process at least three to four times to completely get rid of the stain.
- Use a slightly soaked cloth to clean off the stickiness or any kind of residue lying over the stain.
- After the stain goes off, use a hairdryer or any type of hot air blower to dry the wet region.
Vinegar and baking soda
Using vinegar and baking soda is the most common method to remove almost every kind of stain. This combination works like magic over sharpie stains. All you need is a paper towel and a vacuum cleaner. Follow these steps to get out tough sharpie stains.
- Pour some vinegar into a spray bottle. A spray bottle is preferred as it helps the sprayed liquid get deeper into the carpet.
- Once your spray bottle is ready, sprinkle some baking soda over the stain.
- Spray vinegar right over the baking soda. Make sure both these components mix well. Let the mixture rest over the stain for an hour and a half.
- If there is any loose baking soda powder lying around the stain, clean it up using the vacuum cleaner.
- To make sure the mixture doesn’t damage the carpet fibres, use a damp cloth and gently dab over the region. Repeat this step until you don’t notice any trace of the mixture.
Hydrogen peroxide and cold water
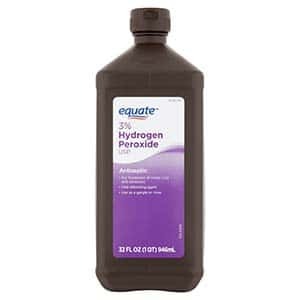
Hydrogen peroxide is a bleaching agent. It will definitely affect the color of your carpet. So, opt for this method of use only if you have a white-colored carpet. If you use hydrogen peroxide on a colored carpet, you might notice a white patch or discoloration over the stained area. Follow these steps to get out tough sharpie stains from the white carpet.
- Spread hydrogen peroxide over the stain. Make sure you don’t pour it in one place but spread it evenly throughout the affected area.
- Use a toothbrush and cover the fibres of the carpet with the liquid. Do not press the toothbrush against the carpet as this would make the stain penetrate further deeper into the carpet. Do not go outwards as the color of the stain will affect the area near the stain. Go in circles.
- Let it rest for about an hour.
- Next, gently pour cold water over the stain.
- Use a dry cloth and blot over the wet area.
We hope this article has saved you the time and effort to get rid of those stubborn sharpie stains. As a precaution, we advise you to handle the above-mentioned chemicals with care. Make sure you don’t have the chemicals open and your pets around them. Cover the affected area with a paper towel to make sure nobody comes in contact with it. Happy cleaning!
FAQs: Frequently Asked Questions
Q. How does vinegar remove stains?
All the credit goes to its acidity. Vinegar’s acidity enables it to interact with tough substances. Doing so, disintegrates or separates those stubborn stains from the fibres of the carpet.
Q. How does baking soda remove stains?
Baking soda, unlike vinegar, is a strong and abrasive base. It consists of similar fatty acids that you will find in soaps and detergents. These fatty acids react with oily substances found in stains and loosen their grip over the affected area.
Q. Can rubbing alcohol ruin your carpet?
Rubbing alcohol is, in fact, the most popular cleaning agent used by cleaning professionals. It does not damage your carpet but if you carelessly pour a lot of it at once, it might affect the carpet temporarily. Rubbing alcohol is highly volatile in nature. This means that it evaporated if left open. So, the answer is no, rubbing alcohol does not ruin your carpet.
Read the full article
0 notes
Text
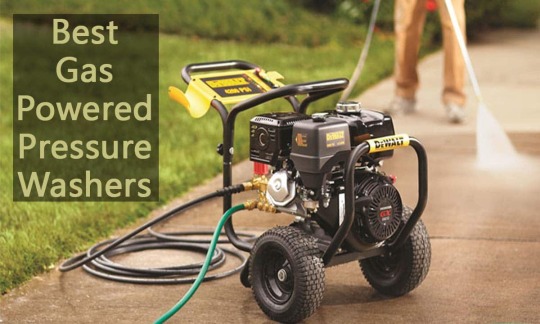
Best Gas Powered Pressure Washers Reviewed
Cleaning a car or the floor of your home takes a lot of time. You will need to deal with water, shop, or other cleaning materials for the job. In addition to that, you have to put manpower so you can clean up the mess. However, the thing is that not all of us love to clean our car other things for different reasons.
Hence we often think of getting one of the Best Gas Powered Pressure Washers which can make our job pretty easy. Even if you are some professional who offers cleaning services, then a gas-powered pressure washer will be a very useful tool for you.
As it does not only saves your time. But along with that, you will be able to save your energy and get done with the job as soon as possible. This way you will be able to serve more customers or get done with more cleaning jobs.
Even the best part is that gas-powered pressure washers are not an expensive piece of a cleaning tool. As a result, you can easily afford them. As well as it will be a one-time investment and you will be able to get done with most of the cleaning jobs.
However, the thing is that whenever it comes to buying the best gas-powered pressure washers. There are quite a lot of options that are available in the market and in case if you are a first-time buyer, then it will be quite a complicated job for you.
But you do not need to worry. As I have handpicked some of the Best Gas Powered Pressure Washers. So you can easily pick the best one pretty easily. But first, let's talk about Who needs a pressure washer.
So let’s just head into the topic without wasting much of the time:
6 Best Gas Powered Pressure Washers
- Best Overall: SIMPSON Cleaning PS3228 PowerShot
- Best Runnerup: WEN PW31 3100 PSI 2.5 GPM
- Best Home/Commercial: Champion 3200-PSI 2.4-GPM
- Best Performing: Generac SpeedWash 7122 3200 PSI 2.7 GPM 196cc
- Best Compact Designed: PowerBoss Gas Pressure Washer 3100 PSI
- Good Quality: Duromax XP2700PWS 2.3 GPM 5 HP
Who needs a Gas Powered Pressure Washer?
Anyone can purchase a gas-powered pressure washer as long as the job is to clean cars, garage doors, or anything else.
The thing about gas-powered pressure washers is that it cuts down the hard work of cleaning something with water and a shop. Instead, the machine does the job for you.
Also, no matter if you are a professional or non-professional you must go for a gas-powered pressure washer if you want to clean your car, garage door or offer your services professionally. They are pretty helpful.
Cleaning small darts from your home or other areas is a pretty daunting task and if you choose to hire a cleaning company. Then it will cost you a lot too. Instead, you can make a one-time investment and get yourself one of the Best Gas Powered Pressure Washers.
So it will be a cost-effective solution for you. Along with that, you will be able to clean your place whenever you wish to. Instead of waiting for the cleaning company to visit your place.
Anyway, now let’s just have a look at the Best Gas Powered Pressure Washers:
Best Gas-Powered Pressure Washers Reviewed
1. SIMPSON Cleaning PS3228 PowerShot
(Best Overall)
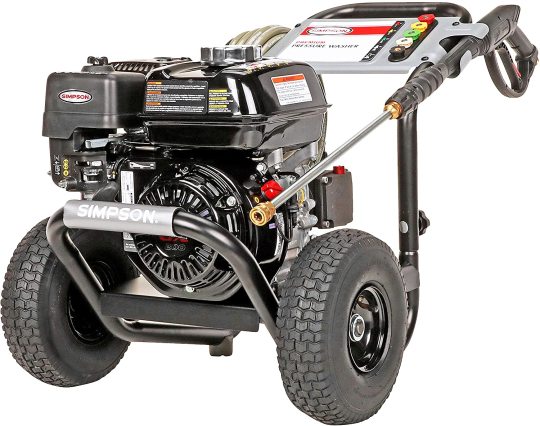
At first, I have the SIMPSON Cleaning PS3228 PowerShot Gas Pressure Washer. This is one of the best gas-powered pressure washers that you can find in the market.
Talking about the SIMPSON Cleaning PS3228 PowerShot, it comes with 2.5 GPM which will be sufficient for normal and professional users. A pressure washer is a perfect option for deep outdoor cleaning as well as it can be used at the job site.
The manufacturers made the pressure washer in a way that it can meet the needs of the professional users. Also, the interesting part is that it comes with a commercial HONDA GX200 engine along with that it also features a reliable AAA industrial triplex pump.
Using this powerful engine, you will easily be able to clean driveways, fences, concrete, and everything else. It also has 5 quick connect nozzle tips. These tips are 0°, 15°, 25°, 40°, and soap.
To offer you durability the pressure washer sports a welded steel construction frame and comes with 10 inches of premium pneumatic wheels. So you can easily move the washer from one place to another.
No matter if you are moving it from your front yard to backward or taking it to the job site. You will get to experience an easy process. Also, the size of the overall unit is quite compact too.
Furthermore, you will no longer need to deal with hose kinks. Thanks to the abrasion and kink-resistant pro-quality hose. As a result, you will easily be able to get done with your cleaning jobs.
Overall, the SIMPSON Cleaning PS3228 PowerShot Gas Pressure Washer is the best one out there for many reasons. It does not only serve the normal users but the best option for professionals. Also, the unit is made for long-lasting usage and comes with an affordable price tag. What is more? You get 3 years of warranty out of the box.
2. WEN PW31 3100 PSI 2.5 GPM Gas Pressure Washer
(Best Runnerup)
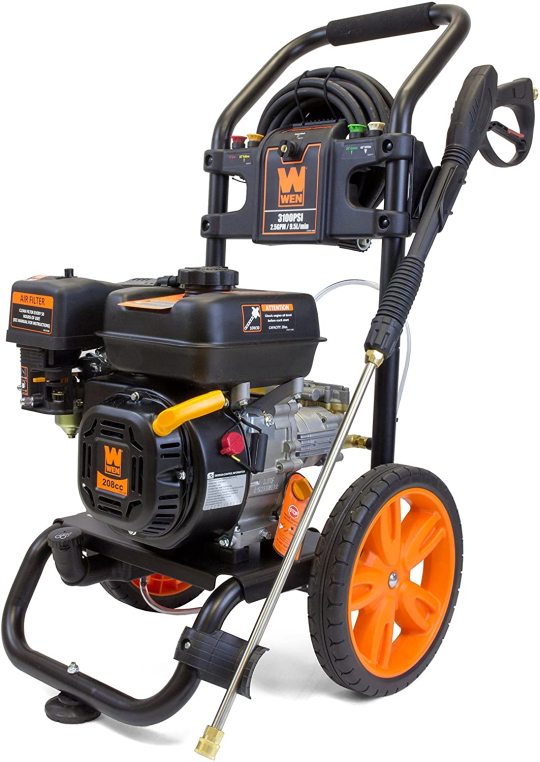
I have the WEN PW31 3100 PSI 2.5 GPM Gas Pressure Washer. This one is also one of the best gas p[owered pressure washers that you can try out. This one is available in two variants which are the 2800 PSI and 3100 PSI. Also, both of the models have a bit of difference in the specification.
However, talking about the WEN PW31 3100 PSI 2.5 GPM Gas Pressure Washer, well it comes with a powerful 208 cc 4-stroke OHV engine that pumps 2.5 gallons of water per minute.
As a result, you will be easily able to clean your driveway within an hour or clean the garage door as soon as possible. Moreover, along with the engine, you also get to see five quick-connect nozzles which are the 0°, 15°, 25°, 40°, and soap.
In addition to that, there is the Axial camp pump that you also get to see with the WEN PW31 3100 PSI 2.5 GPM Gas Pressure Washer. The Axial camp pump is pretty helpful in offering a reliable spray and also plays an important role in increasing the lifespan of the unit. This means that the unit is going to last for the longest period of time without giving you any issues.
Also, to make it quite easy for you to move around the gas-powered pressure washer. It comes with a pair of 12-inch wheels. As a result, you will be able to move around the unit effortlessly and take it to the job site without putting in any effort.
There is also a 30-foot reinforced hose, an onboard soap tank, a quick-connect spray gun is included with the unit. Furthermore, the best part of the unit is that it offers you a cord-free operation experience. So you can get done with the job as soon as possible without tangling with wires.
With this machine, you will not just get to enjoy an easy cleaning process. But it will also make the whole job fun. Plus, with the unit, you will get an onboard Nozzle Storage too. Overall, the machine comes with an affordable price tag and has lots of amazing features which will help you to get done with home-based and professional cleaning jobs with ease.
3. Champion 3200-PSI 2.4-GPM
(Best Home/Commercial)
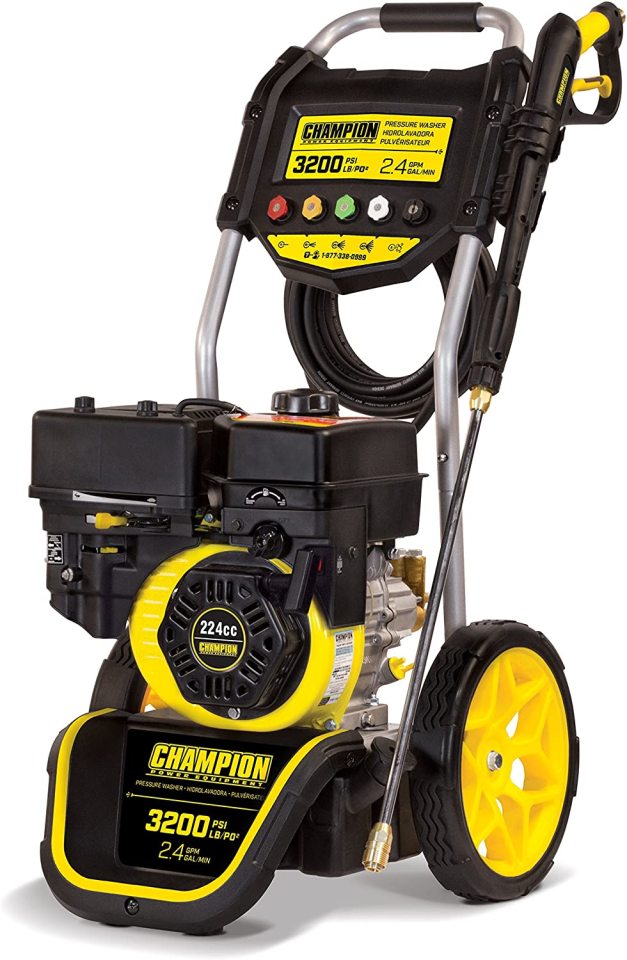
For the next pick, I have the Champion 3200-PSI pressure washer. This one is a bit pricey compared to the WEN PW31 3100. But it comes with lots of great features, and it is one of the best gas-powered pressure washers that you can find on this list.
Now talking about the features, this pressure washer comes with 3200 PSI along with that it has a flow rate of 2.4 GPM. As a result, you will be able to get done with your cleaning job as soon as possible. Moreover, it comes with a Champion’s 224cc single-cylinder OHV engine for better performance.
The unit is also extremely versatile, and it comes with a trigger gun, wand. Plus it has five different nozzles which include 0˚, 15˚, 25˚,40˚, soap. With these different types of nozzles, you will be able to get the maximum cleaning performance for all kinds of jobs.
As well as there are the 25-foot high-pressure hose and a 4-foot detergent hose and two ½-gallon onboard detergent tanks. This combination is enough for handling most of the jobs out there.
If we talk about the quality, the Champion 3200-PSI pressure washer will not disappoint you at all. It is made for long-lasting usages so you can use the machine for years without worrying much.
Champion 3200-PSI pressure washer is a cost-effective solution for all your jobs. However, this one is mainly focused on regular users. But you can use it for your professional work too. The unit is designed in a way that lets you do more with little effort. Plus, it is a perfect solution for all your outdoor cleaning jobs.
The best part is that this machine works absolutely amazing for all kinds of jobs. No matter if you want to clean siding, stairs, patios, fencing, decks, RVs, boats, driveways, paint preparation, farm equipment, and vehicles. This will offer you the best performance possible.
It also comes with 12-inch never-flat tires which will help you to move the pressure washer from one place to another pretty easily. In addition to that, you get 2 years of warranty. Overall, you must consider this pressure washer if you want a tool for your home-based jobs.
4. Generac SpeedWash 7122 3200 PSI 2.7 GPM 196cc
(Best Performing)
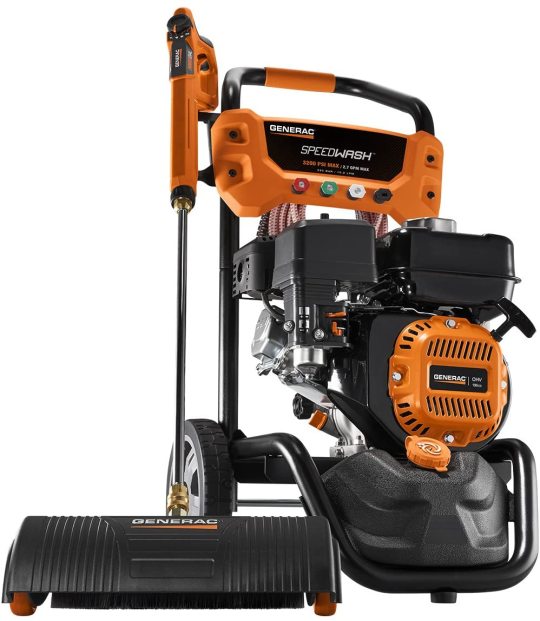
Generac SpeedWash 7122 3200 PSI is one of the best gas-powered pressure washers that you can purchase. This one is available in two different variants which are the 2900 PSI and 3200 PSI.
Both of the variants are pretty similar apart from the PSI. Also, this one is a bit expensive pressure washer that you will find on this list.
Anyway, talking about the machine, well with the help of this unit you will be able to get done with your cleaning jobs 50% faster than any other pressure washers in the market.
Also, it comes with the power dial ergonomic spray gun which allows you to adjust the pressure easily. So you can get the right pressure for a specific kind of job. It has different pressure levels for four different tasks which include car, wood, concrete, and soap, and switching between these modes is quite easy.
It also comes with a few attachments which include a turbo nozzle. With the turbo nozzle, you will be able to remove dirt and grime pretty easily and 30% faster. Also, there is the soap blaster that sprays soap 3x farther. Also, for faster cleaning, you will find the power broom. This family of functions is designed in a way to offer you a better cleaning experience with less time.
Along with that it also comes with a Generac 196cc OHV engine. As a result, you will be able to get maximum cleaning performance out of the Generac SpeedWash 7122 3200 PSI pressure washer. The unit also includes a 30 feet high-pressure flex hose which is kink resistant and non-marring. Plus, you will get 4 quick-change nozzle tips. These nozzle tips include 0 Degree, 25 Degree, 40 Degree, and soap.
Overall, the Generac SpeedWash 7122 3200 PSI pressure washer offers you a complete washing system that comes with the best in the business cleaning power. You can this gas-powered pressure washer for your home-based needs as well as for professional usages. The machine is made for both of the works and it performs like a charm.
However, considering the price point it’s a bit pricey. But as long as it comes to the performance and ease of use. You will not have complaints about it.
5. PowerBoss Gas Pressure Washer 3100 PSI, 2.7 GPM Powered
(Best Compact Designed)
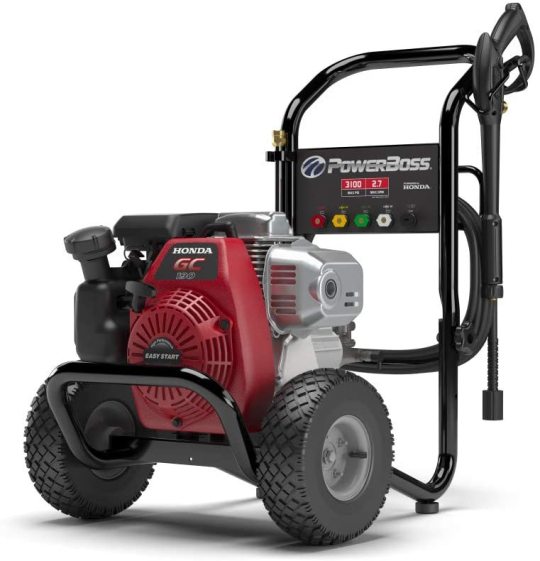
For the next pick, I have the PowerBoss Gas Pressure Washer 3100 PSI pressure washer. This one is available in three different variants which are the 2800 psi 2.3 GPM, 3100 psi 2.8 GPM, and 3300 psi 2.7 GPM. All of these variants are pretty similar to each other apart from a few features.
Talking about the PowerBoss Gas Pressure Washer 3100 PSI pressure washer, well it is one of the best ones that you can find on this list.
It comes with a Durable HONDA GC190, 187cc engine, which makes the unit a perfect option for medium-level cleaning jobs. Even you can adjust the pressure from 300 PSI up to 3300 PSI and anywhere in between.
Along with that you also get to see a maintenance-free axial cam pump and it comes with an easy start technology. As a result, you will not find any hard time getting started with the machine.
Also, the machine allows you to connect 4 quick connect tips pretty easily. It comes with nozzles tips of 0°, 15°, 40°, and soap. Also, there is the steel spray wand which you can use for different kinds of cleaning jobs.
It also comes with 25 feet of flexible hose which is built for high pressure. With the hose, you will be able to reach higher and get done with the cleaning process pretty easily. You can also upgrade the whole cleaning process by simply adding soap to the 1-gallon detergent tank.
Overall, with the help of this machine, you will be easily able to clean house, driveways, back decks mess. Also, one of the most interesting features is that it comes with very large wheels which makes it easy for us to move the pressure washers from one place to another. Also, the unit weighs around 100 pounds.
What is more? You will get 24 months of warranty along with the pressure washer. Also, the unit is extremely easy to use. One pull of the rope and you are all done.
6. Duromax XP2700PWS 2.3 GPM 5 HP
(Good Quality)

In the end, we have the Duromax XP2700PWS 2.3 GPM 5 HP Gas Engine Pressure Washer. This one is also one of the best gas-powered pressure washers that you can find on this list. Also, the best part is that it comes to some of the most amazing features.
Talking about the pressure washers, well it comes with a powerful DuroMax 5 HP Engine with Low Oil Shutdown.
Also, you will get to see quick change connectors which will help you to install the hose within seconds. Plus, you get 5 quick connect nozzles along with eh pressure washer. These nozzles are the 0 Degree, 25 Degree, 40 Degree, and soap applicator.
With the help of this machine, you will easily be able to blast away dirt and grime. As well as Duromax XP2700PWS is capable of delivering you 2,700 PSI of cleaning power at 2.3 Gallons per Minute and it will be enough for most of the cleaning jobs.
Along with that, it comes with a built-in detergent reservoir which will help the machine to maintain a steady flow and help you to clean the mess pretty easily. Overall, it is a perfect solution for cleaning driveways, gutters, sidewalks, stucco, roofing, and more.
It also offers you convenient onboard storage for spray guns, high-pressure hose, and nozzles. Also, there is the rear hose connection which is pretty helpful for easy connections and maximum convenience. The pressure washer also comes with a durable welded frame that helps in protecting the engine and pump. Also, it makes the unit easy to lift.
Moreover, the hose of the machine is 20 feet long so you will be able to reach such areas which are hard to reach usually. Also, the pressure washer is extremely durable. Thanks to the steel welded frame the machine will run for years and offer you great performance.
Overall, the Duromax XP2700PWS 2.3 GPM 5 HP Gas Engine Pressure Washer satisfies the home and professional users. Plus, it comes with an affordable price tag which makes it a great deal without any doubts.
How To Pick Best Gas Powered Pressure Washers?
So those were some of the Best Gas Powered Pressure Washers that you can find in the market. But now the question is which one to pick among them? Well to make it easy for you, let me give you a buying guide. So here we go:
Hot Water vs. Cold Water
First of all, you need to decide you want to use hot water or cold water. Cold pressures are one of the most common things that we get to see. Even they are less complicated compared to the hot water pressure washers.
Plus, the good part of cold water pressure is that they are quite portable and they rely more on the pressure. However, if you want to get the best in the business cleaning experience, then you must go for hot water pressure as they use hot water to clean and the whole process is quite faster, and it uses less soap.
However, going with a hot water pressure washer would not be the right thing if you are looking for home-usage. As they are only good for industrial and farm use. Hence as a normal user, the cold water pressure washer is the perfect option for you.
Warranty
The warranty thing may not be important to you. But let me tell you it is as important as any other term. Different manufacturers have different terms on their warranty. Some manufacturers offer a warranty on the overall unit and some of them only offer a warranty for a specific part like frame, engine, or something else. Hence you need to know what kind of warranty the manufacturer is offering.
Power
You need to look after the power too. However, this thing is quite tricky. There is pressure water which has two power stats which are the Pounds Per Square Inch or PSI and Gallons Per Minute or GPM and it is quite hard for us to determine which is better. Even some of the pressure washers have a third stat called CU or cleaning units and the better CU a water pressure has, the better the machine is. However, in case if you do not find the CU number. Simply multiply PSI by the GPM, and you will get it.
Portability
The last thing you must consider is portability. In fact, it is one of the most critical factors. Of course, you would like to move the pressure washer from one place to another and in case if you have a bulky machine, it will only make things worse for you.
Instead, you should go for a pressure washer that is easy to move around and store. Although, all the pressure washers come with wheels which makes it easy for us to move the machine from one place to another. But if they are heavy, then wheels even would not help you out.
Read the full article
0 notes
Text
How to Clean Your Tile Floors with Steam Mop
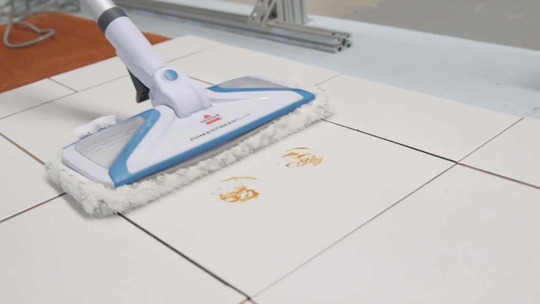
A steam mop definitely sounds like a better idea than the conventional bucket and mop system. It saves plenty of time and covers each and every corner of the floor. And as you may have heard the adverts say, steam cleaning has the ability to terminate dust mites, germs, and bacteria too. So making the switch shouldn’t be a tough choice, right?
The confusion arises when you have a tile floor. It leaves people asking; do steam mops damage tile floors? Well, the simple answer to this question is yes. Steam cleaning is an aggressive way of deep cleaning the floor, after all. It involves the intense pressure of steam which might damage your tile floor.
We will discuss the answer to this question in more detail and give you a fair idea of whether a steam mop is a suitable option for you or not. Keep reading to know more about it!
How Does Steam Mops Damage A Tile Floor
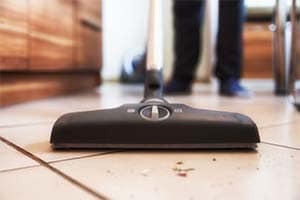
Overdoing It
Steam cleaning is seen not just as a deep cleaning system but also as a way to sanitize the floor because of its ability to kill germs and bacteria. This makes people think the more they use it, the better for the floor's hygiene. But that isn't necessarily the case. It might do more damage than good for your tile floor. The point is never to underestimate the intensity of steam cleaning.
The amounts of heat and moisture that are released by a steam mop aren’t suitable for a tile floor if you expose it more often than you should. Keep a day in the week when you use a steam mop for cleaning the tile floor and use a conventional mop and bucket the other days or just vacuum it. Reserve the steam mop for days when you feel the tile floor needs a thorough cleaning.
Chemical Cleaners
As you may already know, tile floors can lose their sheen and finish if exposed to chemicals they can’t handle. There are special cleaners that are meant and approved by manufacturers for tiles. Use only those tile floor cleaners with your steam mop so that they don’t weaken the tiles. Although, the heat of the steam is more than enough to remove dirt, grime, germs, and bacteria from the floor. Just water is good.
Leaving Water Unattended

Water is the common enemy of many types of floorings. In the case of tiles, water seeps through the grout if you leave it unattended. This may weaken the tiles. Steam mopping can do this too. Drying the floor thoroughly is the only prevention. Other accidents like water spills should also be dealt with the same promptness.
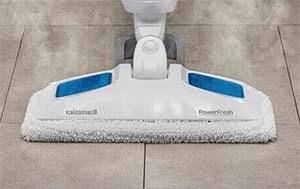
How To Safely Use A Steam Mop For Tile Floor
Tip 1: Prep The Tile Floor
It sounds ridiculous to clean the floor before you are going to steam clean it anyway, but this is a crucial step in ensuring both the steam mop and tile floor stay intact. Either use a vacuum cleaner or mop to do a preliminary cleaning of the floor to remove any excess dirt or other unwanted things like hair, etc. This can make the steam mop dirty, something we must avoid to increase its durability.
Tip 2: Change The Mop When It’s Dirty
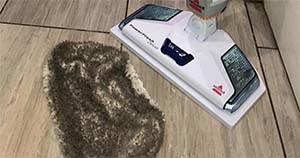
Most steam mops come with changeable mop heads, and if not, you can buy them separately. Whenever you see your mop head become grimier and dirtier, change it immediately. Your beautiful tile floor will look very insightful with steaming dirt all over it! It even saves you time as each time you get to steam cleaning; you have a clean steam mop ready to be used.
Tip 3: Use Steam Mop Only On Sealed Tile Floor
Tile floors are fitted using grout, which is prone to damage with the intensity of the steam coming from a steam mop. Make sure you use steam mops only on tile floors that are sealed using a protective sealant. Check whether the mop you are using or are planning to buy will do any harm, in particular if the floor isn't unsealed only then use it.
Final Words
A steam mop is a wonder machine because it isn't as time-consuming as a mop and bucket system and comes with many added benefits like disinfection. It does have the potential to cause harm to your tile floor, but that can be prevented. All in all, if you consider all the guidelines and cleaning methods shared in this article, you are sure to have a smooth cleaning experience with steam mops!
Read the full article
0 notes
Text
How to Install Linoleum Flooring?
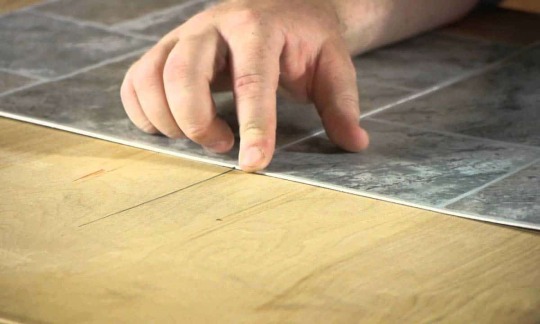
The installation process of Linoleum flooring highly depends on the quality of the prepared subfloor and conditions in which they are laid on the floor. The subfloors have to be properly cleaned, brushed, and made smooth. They must be permanently dried as well.
In this article, we are going to tell you about the correct and professional way to install linoleum flooring. We are also going to talk about the factors you need to consider before installing them.
Steps Involving Installation of Linoleum Flooring
Follow these steps to give your floors a professional look. It might be difficult for just one person to do this job, so call up your family members or friends. Here are eight simple steps to get a linoleum flooring-
- Measure the floor area which you wish to cover with linoleum. Pay close attention to corners or curved edges. Unroll the linoleum sheet and, mark with a pencil, the noted measurements of the floor. Use a linoleum cutter or a Mozart knife to cut out the dimensions.
- Lay the cutout piece on a flat surface for fifteen to twenty minutes. This will help the piece to flatten itself and will make it easy for you to install later.
- Meanwhile, divide your floor into sections, the first one being the largest in area, and apply a good quality adhesive over the first region.
- Use a sharp-edged spatula or a slide plate to evenly distribute the glue. Make sure the layer of glue is as thin as possible by making sure that the floor is completely covered as well as visible through the adhesive layer.
- Select the bigger part of the floor and start laying the linoleum sheet down.
- For the best outcome, after you are done laying the sheet, use a floor roller to get rid of the air bubbles between the floor and the sheet. Make sure you start from one corner and, in the same direction, roll towards the opposite corner. This will not only remove air bubbles but also make the linoleum sheet stick faster to the floor.
- For the next section of the floor, apply the adhesive in a similar manner. Hold the linoleum sheet at 45 degrees to the floor and start gently pressing down portion by portion. Make sure the second layer touches the first one. To be on the safer side, you can let the second layer overlap, a little, over the first layer.
- Continue this process until you cover the entire floor.
Laying the First Layer of Linoleum Flooring
Selecting the right quality of the adhesive is very crucial. Moreover, spot-checking of any chemical is important because it ensures that neither the floor nor the sheet is going to be damaged or discolored. Spot checking means you pour a few drops of adhesive on that part of the floor which is usually out of sight. After doing so, wait for half an hour to see whether there is any reaction occurring. If there is no discoloration or damages, you can use the same for the flooring.
Before applying the glue, check whether the cutout piece of linoleum sheet fits into every corner and threshold of doors. Mark with a pencil on the floor, a boundary that is at least 2cm away from the wall. This is precisely where you will stop spreading the adhesive so that it does not get on the walls and adjacent doors.
Laying the Second Layer of Linoleum Flooring
Cut out the second piece of linoleum according to the measurements of the second section. Place the sheet on a flat surface for fifteen to twenty minutes. Meanwhile, apply the adhesive all over the selected area.
Take the sheet and place it down, overlapping the first layer. The overlap should at least be 2cm. After successfully laying down the second piece, pull the overlapped region such that it perfectly sits beside the first sheet. Use a hammer roller or any type of paint roller to get rid of air bubbles.
Key Points to Know Before You Start the Process
Here are some important points to remember that will help you get better and faster results.
- The subfloor has to be prepared perfectly. It must be sanded down to give a smooth texture. Make sure to brush away all the sawdust and wipe it with a dry towel. Keep the surface as dry as possible.
- Temperature plays a crucial role too. A temperature of or above 18 degrees Celsius is preferable. Make sure the temperature is at least around 18 degrees Celsius, 48 hours before the flooring happens. The temperature of the room should not exceed 27 degrees Celsius while the process of flooring is going on.
- Make sure you spot test any fluid, especially the adhesive, on a small part on the floor. This will save your floor as well as your brand new linoleum from getting damaged. It will also give you an idea of how effective the glue is.
- It is advisable to buy a whole batch or roll of flooring at once. You might think that buying the same material from different shops won’t make a difference but, sadly, it does. Different companies can have different shades of flooring which might look the same but when glued together, look terrible. So, make sure to stick with one shop while going linoleum shopping.
- While you install each layer, remember to clean away any excess adhesive. Do not let the adhesive stay for long. Clean it as soon as you notice one. Use a dry cloth to do so.
- After the installation is complete, no washing or wiping the surface for at least forty-eight hours. Do not place any kind of furniture over the flooring for at least two to three days.
- Make sure the room you're working in has proper ventilation. The odor of the glue can give a suffocating sensation.
- Make sure you handle the adhesive after wearing thick gloves. Keep them on while you cut the linoleum sheet.
Usually, linoleum flooring is done by professionals who have a vast knowledge of wood material, linoleum flooring, and adhesives. But using this technique will simply do the trick for you. Before buying adhesives, ask the storekeeper for suggestions or recommendations.
We hope that this article has been helpful to you and you bring out the best outcome after following these instructions.
Read the full article
0 notes
Text
Top 6 Best Pedestal Sump Pumps
Are you absolutely annoyed with the problem of waterlogging and dampened floors and walls? Then you definitely need to take a look at the basement because your basement might have been flooded with water. In case this happens, you need to install a pedestal sump pump as quickly as possible.
What is a pedestal Pump and Why is it needed?
Around the globe, numerous people stay close to or immersed in the water table level, and they easily find their basement water clogged or dampened. This is the exact reason why pedestal pumps come in use so that any expensive water damage can be avoided, and you can save a lot of time and money as well.
In general, there are two types of sump pumps, namely- the pedestal and the submersible sump pumps. Out of the two, pedestal pumps are the ones that come in two different components- the all-in-one motor, and a hose that is installed in it.
These are more durable than the submersible pumps and are relatively lesser-priced at the same time. This kind of sump pump can only be used in case there is a narrow-mouthed pit. Also, you will be able to gain better access to it, and therefore handling it becomes a lot easier.
Best Pedestal Sump Pumps Reviewed
Now without wasting much time let's check out the best pedestal sump pumps and we will review some of the best pedestal pumps and we will try our best to tell you about these pumps in a detailed manner by telling about their features, pros, and cons and final verdict.
1. Superior Pump 92551 ½ HP
(Cast Iron Pedestal Pump)
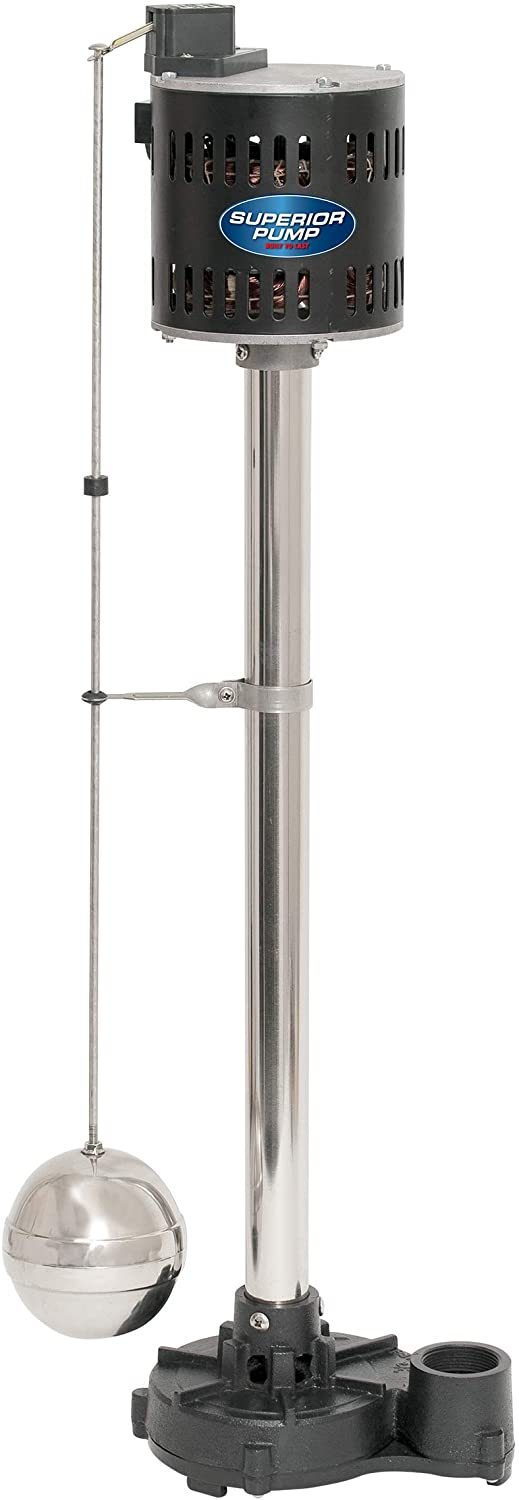
If having a non-corrosive pump is your priority, then you should definitely take a look at the Superior Pump 92551 model because it has been crafted out of stainless steel and its base has been perfected out of cast iron.
Even the impeller, float ball, and driveshaft have been made out of steel, and it has the tenacity to handle liquids till180 degrees Fahrenheit. It also comprises a metal switch arm so that the product becomes more long-lasting and hardy.
In case you have wide-necked sump basins which are 12 inches in diameter or even more, then this is the most appropriate pump.
It gives a super capacity pumping which is the reason why it can give 1- ½ discharge.
Verdict
2. Superior Pump 92333 ⅓ HP
(Thermoplastic Pedestal Sump Pump)
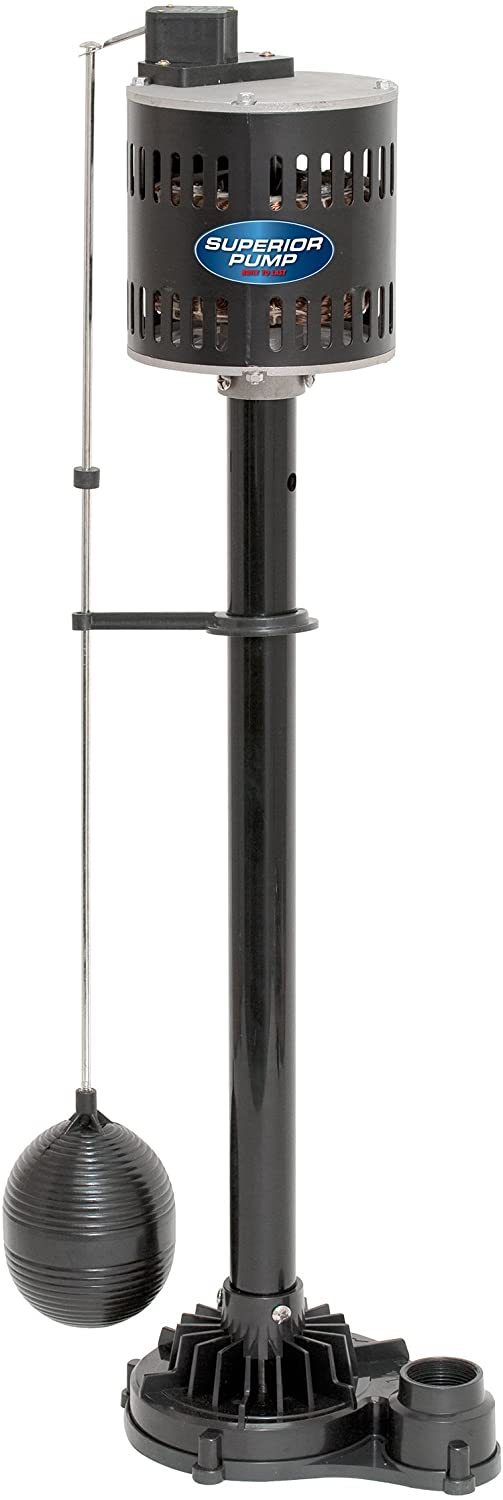
Created totally out of cast iron, this is an anti-corrosive product that helps in making the body absolutely durable.
It is a superior quality pedestal pump, which has been designed to move to 3000 gallons per hour, which is accompanied by a maximum head of 20 ft.
The unique factor of this product is that it has a thermoplastic construction which means that it is capable of sustaining high-temperature changes- therefore is one of the best pumps for homes located in extreme temperatures- hot or cold.
Even the impeller, as well as the shaft, has been designed to be absolutely anti-corrosive so that once you install this product, you do not have to look back at all.
It has a discharge rate of 1-¼ inch NPT and every trivial component of the product has been tried and tested- as well as marked ok by the factory experts.
Verdict
3. ECO-FLO Products EPC50
(Sump Pump with Vertical Float Switch)
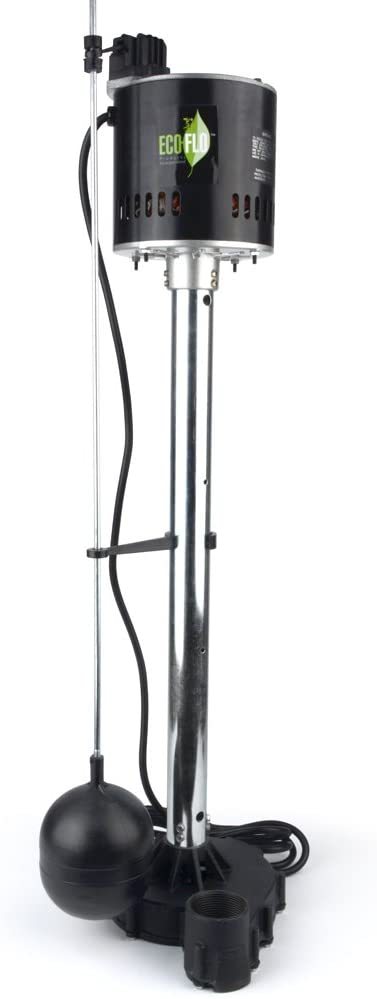
It is one of the best-designed sump pumps by professionals which comprises an automatic adjustable switch for easy handling of the device.
It has the capacity to clear clogging of solids that have the dimension of ⅜ inch and also has the potential to go for 1-½ inch FNPT discharge.
The float switch is top-mounted which makes sure of the fact that you can get easy access to the device and do not have to step into the water.
Along with the product, there is a very easy user guide given with detailed clarifications so that you do not have to worry in case you encounter any problems in installing the device or have further trouble.
You can even get to have the troubleshooting options there and also the warranty information.
Verdict
4. Flotec FPPM3600D-01/09 ⅓ HP
(Quality Pedestal Sump Pump)
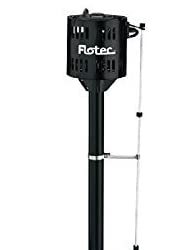
This is one of the best pumps that have been brilliantly designed by the experts- so that it has the ability to replace any 1/3HP pump that might have pre-existed in your house.
It is a very well known product for its durability and that is because it has been built out of thermoplastic material.
Therefore even in high intensity heat and cold, the device would not get damaged in any way.
The impressive factor about it is that installing this product is even easier and that is the reason why you will be able to follow the user guide and handle it without any assistance.
It works efficiently in any sump basin that is 12 inches in diameter or even more, and has the power to work for 1- ¼ inch discharge. It consumes a power of 100 volts and is a product with good former reviews.
Verdict
5. Zoeller 84- 0001 Old Faithful 84 Pedestal Pump
(Automated Sump Pump)
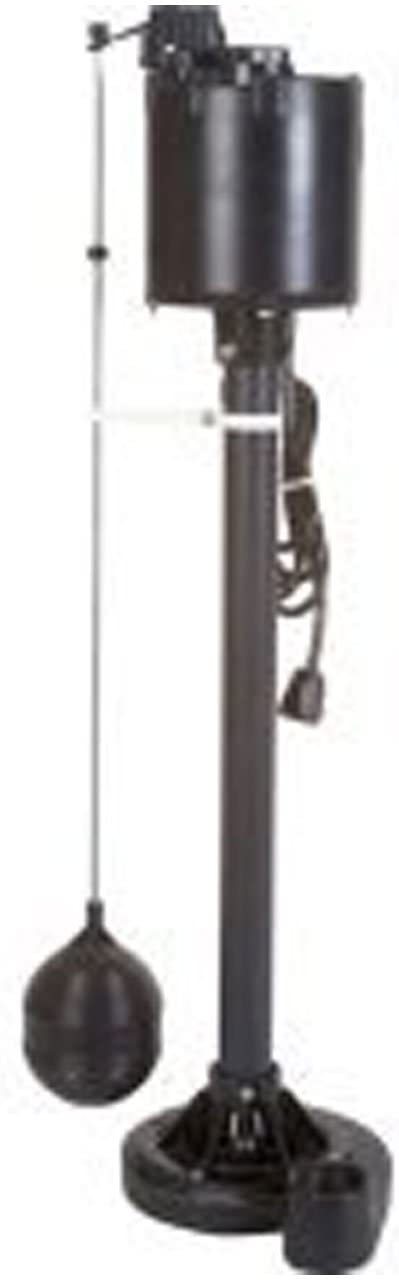
This device has been created out of high quality metal, and is split phase in nature. It is created out of thermal protected metal so that even in case of overloading, you will have no problems whatsoever.
Since this device has automated lubrication problems, then you will not have to think about the greasing process time and again.
It has the tenacity to go for 1-½ inch FPT discharge so that it has an adjustable 12-inch cycle as well. It has been set at the factory at 9 inches and the automation can be done easily.
You can use it on sump pumps which are maximum 16 inches in diameter and minimum 4 inches in diameter so it is indeed highly versatile.
It can help in passing small and large solids through it. It is also chemical resistant by nature which makes sure of the fact that it can give a smooth performance without any corrosion.
Verdict
6. Star 3CEH ⅓ HP Thermoplastic Column Pedestal Sump Pump with Vertical Float Switch
(Budget-Friendly Pedestal Sump Pump)
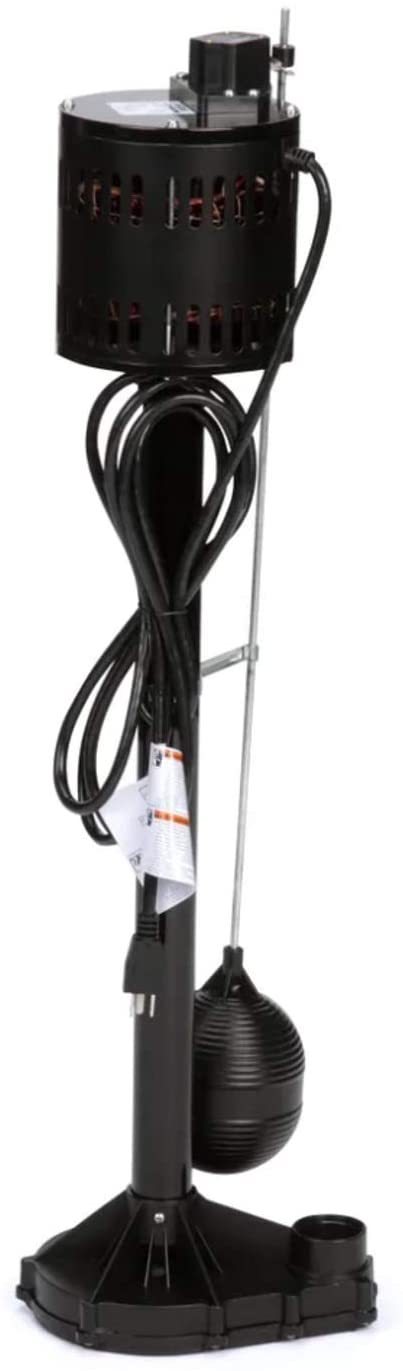
This is a ⅓ inch pump that has been used for removing all sorts of clogging and comprises a multifaceted impeller as well.
It is accompanied by a very durable and hardy motor.
The motor is of high class and goes for 115V and 60 cycles. It has a capacity of going through 1725 rotations per minute.
It can fit easily into large pits of 12 inches in diameter and has the capability to pump 3000 Gallons per hour as well.
The switch is easily adjustable and it has a 1-¼ inch discharge pipe as well.
It also features a durable shaft that securely fits the impeller and a top suction strainer that filters out debris.
Verdict
Buyer’s Guide for Pedestal Pumps
When you look for pedestal pumps in the market, then you will get to find a number of options to choose from which might send you in a quandary.
But now all you have to do is to make sure of the fact that you check certain factors so that you can choose none but the best of the lot.
Design of the Pump
The first thing that you have to look forward to while buying a pump is to determine the kind of design that you want to have.
When you are thinking of having any pedestal pump, then make sure that you are choosing the manual one or the automatic one as per your needs and how you want it to be handled.
Just for your information, the manual ones are noisier than the automatic ones.
Switch quality of the pump
There are two different kinds of switches- the manual and the automatic. The switch that you will choose will definitely depend on the kind of operation that you need.
There are semi-automatic switches as well, and you just have to make your choice between electronic, diaphragm and float switch to handle your pump.
While the diaphragm switch uses the water pressure detection method to start and stop the pumping process, the electronic ones have special sensors.
Last but not least., the float switch is just adjacent to the pump and it works by detecting the level of water.
Horsepower of the device
The metric horsepower of the device will definitely play a major role in your choice of pedestal pumps. The ideal ones that you get to have in general is the ⅓ HP ones but you can even get higher and lower ones depending on the kind of flooding that occurs in the basement of your home.
Voltage
It is advisable that for the residential areas you buy a device with up to 110V to 115V. But if it is meant for commercial areas, then you can go for 220V.
Rate of flow for the device
The flow rate is the frequency of your pump to get rid of the water from the basement of your house. This is basically measured by the term ‘Gallons per minute’.
The higher will be the flow, the bigger will be the pump size so make sure that you choose wisely. Now you can find compact pumps which can remove water quickly so you should definitely settle for one of those.
Length of the cord
Always choose a long cord that at least can go up to the nearest socket that you have so that you do not have to use another extension. The longer the cord, the better you can move around in places.
Head Pressure
Last but not the least, this is the final factor that you have to look forward to. Choose the pumps that have 10-16 feet lifting capacity so that the waterlogging can be eliminated within no time and there can be no dampening at all.
Final Words
We know that choosing the best pedestal sump pump can never be an easy task, especially when you have so many options to choose from. Therefore, it is for the best that you check out the aforementioned factors while buying the sump pumps from the online or offline market.
Read the full article
0 notes
Text
How to Clean Pergo Floors? [A Detailed Guide]
There are three types of Pergo floors and all of them have to be dealt with differently when it comes to the cleaning process. The three types are laminated, hardwood, and rigid floors.
In this article, we will tell you about the perfect way to clean your Pergo floors. We have also discussed the preventive measures to be taken to minimize damages on the surface of your flooring. You will also come to know what methods are used to get rid of different types of stains and products you can buy online to help you with your cleaning.
How to Prevent or Lessen Damages on Your Pergo Flooring
As mentioned below, we have three types of Pergo floors. Read along to know what preventive measures you need to undertake.
- Do not drag your furniture around. Use furniture leg pads to avoid scratches during any activity.
- Dust is the main enemy of Pergo floors. Make sure you have doormats in every threshold or transition zone of your house. Shake and scuff off the dirt under your shoes before you step in.
- Whatever kind of cleaning you do, first get rid of dust and debris. Then use a soft, dry towel to wipe over the flooring. Never use a hard bristled brush or a mop over the surface. This may cause scratch marks.
- Never let water or any fluid rest on the surface of the flooring for long. Clean the spill immediately. The same goes with wet mopping. Only dry wipe the floor.
- Do not use a steam mop as the steam condenses and enters the flooring, simply damaging the material and eventually, the look of your flooring.
- For laminate Pergo floors: The mats or rugs that you use must be of good quality so that the dirt and dust don’t seep through them. Do not slide but lift furniture and other heavy objects.
- For hardwood Pergo floors: Avoid wearing shoes with worn-out souls and footwear with pointy heels. These definitely damage the hardwood flooring. Spills, if any, immediately remove with hardwood floor cleaners. If you have pets, better have their nails cut before you see scratch marks all over the surface.
- For rigid vinyl flooring: Make sure you have rugs at every transition zone, from outside to the inside. You must use floor protectors to avoid any scratches. Never slide or drape heavy items over the flooring. Only lift and keep.
How to Clean Laminate Pergo Floors
Before we start with the chemicals and the mop, you must make sure that the floor to be cleaned must not have any hindrance as such. This means, move away all the furniture to the side and try to cover maximum space in one stroke. Now that we have all the furniture out of the way, let's start with the cleaning.
- Use a dry and soft cloth to get rid of the dust particles on the surface. Even if you don’t seem to notice any dust, at least go over the floor with a soft cloth, once.
- For daily cleaning, you can use a vacuum cleaner with a hard floor attachment. For intense, once in a while cleaning, use a damp cotton cloth or a cloth mop.
- Make yourself a Pergo floor cleaner at home by mixing one cup of vinegar with one gallon of warm water. Another solution you can opt for is a mixture of one-third cup of ammonia and one gallon of warm water.
- Wet mopping is a big no but one can do so, only occasionally, if the flooring provided by Pergo is spill-proof or wet proof.
How to Clean Hardwood Pergo Floors
Before going in for the cleaning, dust the surface. You can use a soft dry cloth or a vacuum cleaner that does not have any hard bristles under it that will cause any scratches. Pour a hard surface cleaner on a soft cloth and rub gently in one direction. Do not go in circles but start from one corner of the room to the opposite one. We have recommended some best-selling hard surface cleaners at the end of the article. Do not forget to check them out!
How to Clean Rigid Vinyl Pergo Floors
For a daily clean, vacuum, or dry wipe your floor to get rid of the dust particles. If you only clean your floors once or twice a month then opt for a damp cloth mop but make sure the cloth is not soaking wet. Here are some ways to clean your rigid vinyl floors.
- Never let any sharp object or any item that rusts quickly stay longer on the surface. The rust from the furniture will permanently stain the flooring, causing you to replace the entire plank.
- Make yourself a Pergo floor cleaner at home by mixing one cup of vinegar with one gallon of warm water. Another solution you can opt for is a mixture of one-third cup of ammonia and one gallon of warm water.
- Do not use heavy-duty cleaning agents or waxy textured soaps for any kind of cleaning. The lesser the liquid contact, the better and long-lasting your floor will be.
How to Deal with Different Types of Stains on Your Pergo Floors
Stains are not something you want your guests to see, the very first thing when they enter your house. Stains are not something that sits loosely like dust particles. They interact with the surface of the flooring and some even get absorbed, causing the affected region to inflame. To deal with food spills, use the above-recommended solutions of ammonia and water to clean them off.
If it is a gooey or a sticky substance, try to take out the hardened part with a tablespoon. Be careful to not scratch the surface. Use a standard cleanser to get rid of the residue. If you have kids around, you probably have crayon markings all over the floor. Use acetone or diluted rubbing alcohol to get rid of them. Sometimes, even rubbing crayon marks with a dry towel helps.
Why You Shouldn’t Use a Steam Mop
A steam mop is basically forcing the flooring to come in contact with moisture. Moisture is definitely not a good option for Pergo floorings. After coming out of the steam mop, the steam condenses and is slowly absorbed by the flooring. Wood and water are rivals and wood is always the one losing the battle. As soon as the water gets into the wood, it starts bloating and swelling the wood. This causes the finishing of the wood to crack and finally, voila, you have a cracked plank!
Anybody can own Pergo floors but maintaining it is the real deal. They are very sensitive to scratches and avoiding them is a big headache. So, here are some Pergo floor cleaning products to help you with the cleaning process. Remember to wear gloves while dealing with chemicals. Make sure the room is well ventilated and your pets are not anywhere near to the cleaning products. Happy cleaning!
Read the full article
0 notes
Text
Top 5 Best Electric Pressure Washers Reviewed
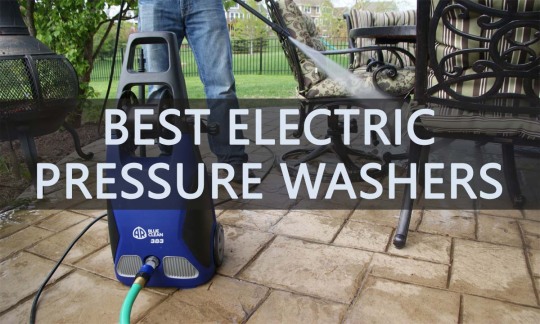
An Electric Pressure Washer is a type of pressure/power washer which uses a high-pressure mechanical sprayer for completing a cleaning job. Those who are wishing for the removal of dust, mud, dirt over the surfaces smoothly can go with Electric Power Washer.
These power washer measures in two ratings as pounds per square inch (psi). On the other hand, the flow rate of water is measured in gallons per minute (GPM). An electric pressure washer ranges from 1700 to 1800 psi.
If you are seeking the best pressure washer for several purposes, we suggest you the best electric pressure washer. These washers work as an excellent tool for cleaning purposes. A power washer can quickly clean many different types of outdoor surfaces. These washers are 10 to 15 times more potent than a garden hose.
Also, electric pressure washers are utilized for finishing light or medium-duty projects. But do not think that an industrial electric pressure washer is unable to be used in more massive duty projects. The most important thing that everyone needs to remember is that an electric power washer must be plugged directly into the valve.
In this article, we have explained various types of electric pressure washer machines that fit customer needs. Scroll down this web page to find one of the best electric pressure washers as per your requirement and pick the best one of them.
The electric washer is available on a low budget. Hence, an electric pressure washer may become ideal for those who have a smaller budget. Moreover, those who do not wish for regular cleaning can select these pressure washers.
The Electric Heated Power Washer
An electrically heated power washer is a perfect cleaning tool in commercial areas. Most people prefer an electrically heated power washer for commercial purposes. As we all know that hot water can easily clean surfaces or objects better than cold water. That's why the heated machine is utilized here.
The hot electric pressure washer is mainly responsible for cleaning breaks dirt, grease, and grime fastly. However, you have to make sure about the machine capability. Never use hot water in machines that are not designed accordingly. If you do so then hot water can damage the seals and O-rings inner the pump. So, using hot water on such machines will be a bad idea for you.
Things to Consider Before Buying an Electric Pressure Washer
How Does An Electric Pressure Washer Work?
An electric pressure washer is an ideal choice for those who wish to complete small jobs like car cleaning, bike cleaning or washing, and others.
The washer has the potential to remove dirt from the surfaces or objects without damaging them. There is an electrical power motor that generates power to a water pump.
After that, the pump accelerates the water coming from a garden hose. Once the machine is switched on, water pressurizes through the pump driven by the electric motor.
There are tons of people who use a pressure washer for different matters.
Features of Electric Pressure Washer:-
This machine offers fabulous features as discussed below here:
How to Pick an Electric Pressure Washer?
First, the selection of the best electric pressure washer depends on your intention. Whether a person required a massive amount of pressure or not to perform the intended work.
An electric pressure washer is easy to operate light-weighted. Hence, it is easily portable anywhere for cleaning purposes.
Most people or homeowners give priority to electric washers because of their low maintenance cost. By picking up an electric machine, a person does not need to buy gas or oil.
The Top-Rated Electric Power Washer
Many electric machines help everyone. We have found some of them. Go immediately as per our assumption.
Electric Pressure Washer
Water Consumption
Product Weight
Sun Joe SPX3000
1.76 GPM
31 lbs
AR Blue Clean AR383
1.5 GPM
27 lbs
Karcher K5
1.4 GPM
32 lbs
Sun Joe SPX3001 2030
1.76 GPM
32 lbs
Greenworks 1500 PSI
1.2 GPM
15.72 lbs
Electric Pressure Washer - Uses and Benefits
Uses
Benefits
Top Electric Pressure Washers Reviews
1. Sun Joe SPX3000
(Best Electrical Pressure Washer)

The Sun Joe SPX3000 pressure washer is one of the most popular models which are quite easy to use. The primary advantage of designing such an electric pressure washer is cleaning a lot of things. The model includes cleaning cars, driveways, patios, and home furniture.
Are you exploring the high-grade electric pressure washer? Then this post will help you to select one of the best electric pressure washers. Sun Joe SPX3000 Power Washer is the most powerful electric pressure washer. It is an absolute need for a person for their residential cleaning.
The first reason for selecting Sun Joe SPX3000 is the good performance of its pump. The Pump of 14.5 AMP produces 2030 PSI power for cleaning your house effortlessly.
Sun Joe washer can easily handle medium cleaning jobs as well as some heavy-duty cleaning tasks. People who have a desire to clean their sideways, driveways, cars, trucks, patios, outdoor furniture and more can go with this ultimate cleaning power.
The electric pressure washing machine comes with five quick-connect spray tips of 00, 150, 250,400 degrees. With the help of these spray tips, you can do your home cleaning task in the lowest possible time.
Features of Sun Joe SPX3000
2. AR Blue Clean AR383
(Budget-Friendly Electric Pressure Washer)
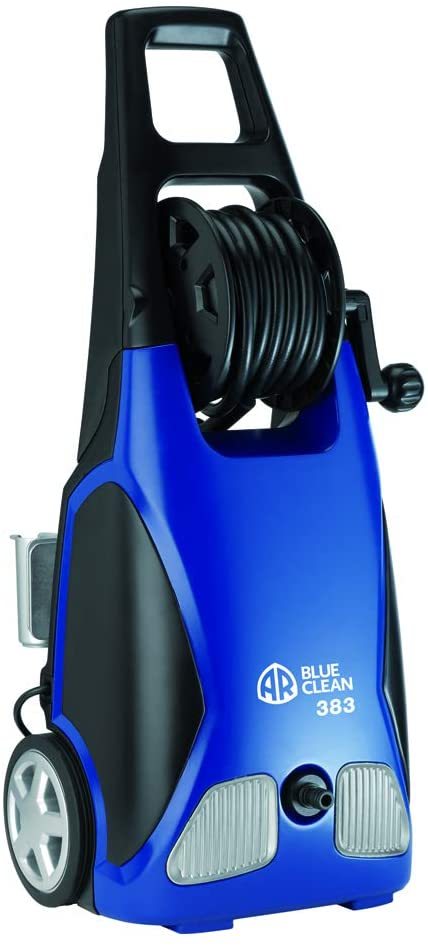
The AR Blue Clean AR383 is a good pressure washer for the toughest cleaning. It is another masterpiece of the best electric pressure washers. This electric pressure is extremely user-friendly. So, any non-technical user can easily maintain it. You can operate this machine without the need for any guidance.
The washer is durable and reliable for its cleaning jobs. The model has outdoor cleaning power. The Machine is capable of quick cleaning jobs. The model is designed in such a way that a middle-class family can easily afford it.
The device is manufactured in 1.5 HP including 13 AMP motor. Those who want to buy a high-performance quality based pressure washer under a medium budget. They can opt for the AR Blue Clean AR390SS. This is one of the best potential pressure washers which are available at reasonable prices. It is very convenient to use in residential areas.
With the use of AR Blue Clean AR383, you can clean the toughest surfaces in minimal time. If you are worrying about garden cleaning, lawns, and any outdoor equipment, AR383 fulfill all your desires. This power washer is not recommended for commercial use.
The machine has a broad range of attachments to handle almost all major tasks at home. The electric pressure washer is very useful to clean dirt in fast mode.
This AR Blue Clean AR383 electric pressure is extremely dominant for picking stubborn stain which is nearly impossible when done manually; this model is very lightweight, so easy to operate.
Also, the model is prepared with a modern state which gives prompt results. The electric pressure is designed with a large water storage capacity.
A person only needs to adjust the pressure washer in the best suitable place to serve long cleaning purpose. If you take AR Blue Clean electric pressure washer in your hand, then you will not be suffered due to a tedious job anymore.
This modern electric pressure helps in cleaning jobs without any hurdle. The machining equipment required very less space to operate a cleaning job, it also allows a high-pressure spray gun that helps in cleaning the hardened stain.
AR Blue Clean pressure washer is quite light-weighted. That's why anybody can easily carry it or handle it easily. You can easily move this model from one place to another for cleaning purposes.
Features of AR Blue Clean AR383
3. Karcher K5
(Premium Electric Power Pressure Washer)
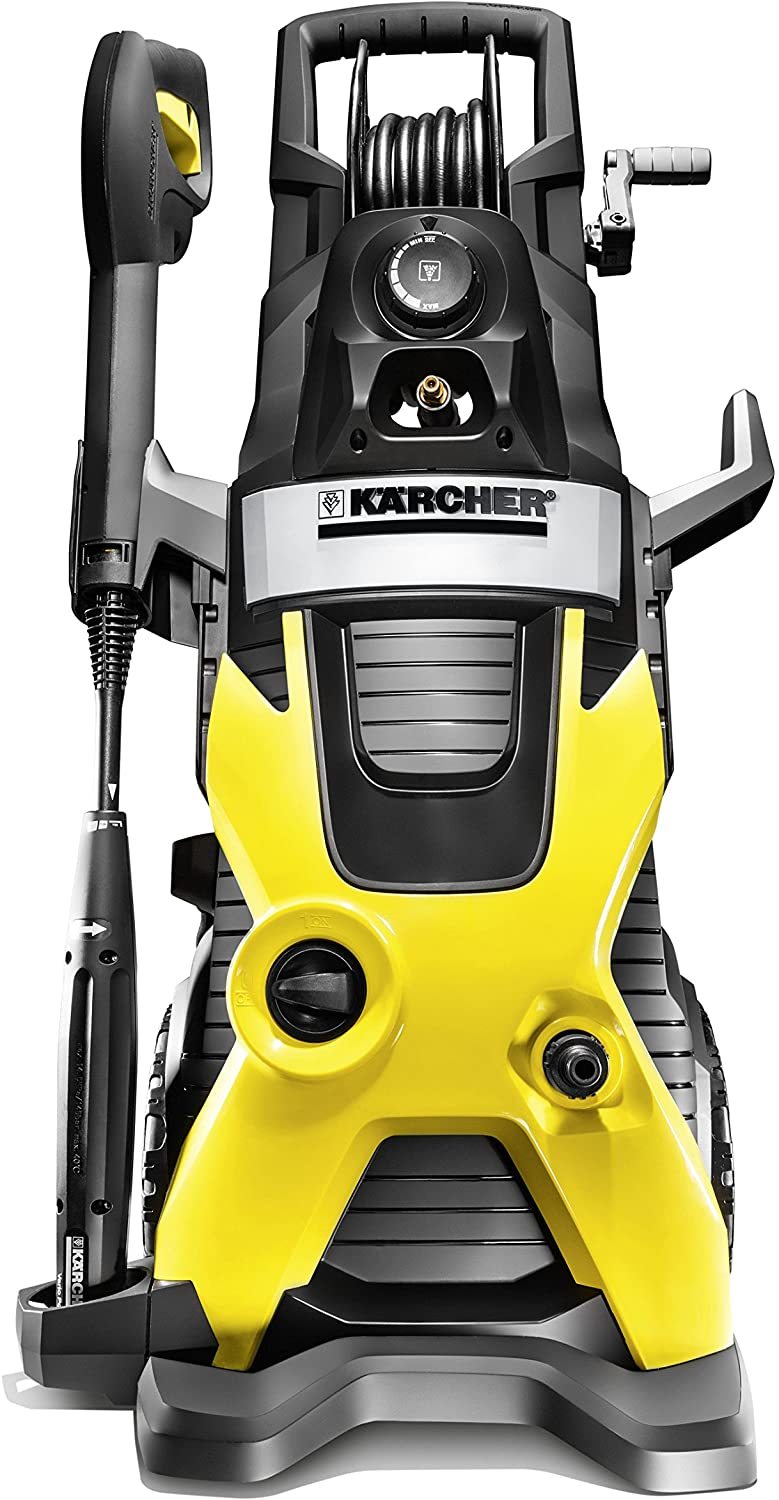
K5 Premium electric pressure washer is a top-ranked washer these days for cleaning home furniture. The machine can work non-stop for a longer time. Karcher K5 is practically noiseless. This pressure washer has several unique safety features.
Karcher K5 Premium Electric Power pressure is ideal for a moderate dust cleaning job. The K5 Premium is a high-pressure cleaner because it has a powerful water-cooled motor. The hose reel is designed in such a way that provides ease of use. So, K5 Karcher Premium is ideal for moderate dirt cleaning purposes. For example Stone Walls, Big Vehicles, and Bicycles, etc.
Karcher K5 is among the most convenient electric pressure washer for your home. This Karcher K5 can quickly and effortlessly clean moderate dirt. This electric pressure also involves Vario Power Spray Lance for gentle surface cleaning. It is very convenient for pressure adjustment. It also includes a powerful pencil jet for cleaning stubborn dirt.
Electric pressure washer delivers powerful pressure for completing tough cleaning jobs. This is the top-rated model of the year 2019 among all. K5 5.540 pressure washer is the highest power electric machine. For low-pressure cleaning, VPS manages regulated pressure.
The majority of people use a Karcher pressure washer for home cleaning purposes. This is suitable for all types of cleaning objectives. Those who are looking for a quick and best-class electric pressure washer can go with Karcher K5 5.540. The device is five times much better than the conventional electric pressure washer.
The machine gives the best quality of cleaning results at home as well as commercial place. The device is prepared by using the latest technology which increases effective pressure up to 50 percent. The user will be comfortable by using such a nice dirt blaster spray wand.
Features of Karcher K5
4. Sun Joe SPX3001 2030
(Electric Pressure Washer with Hose Reel)
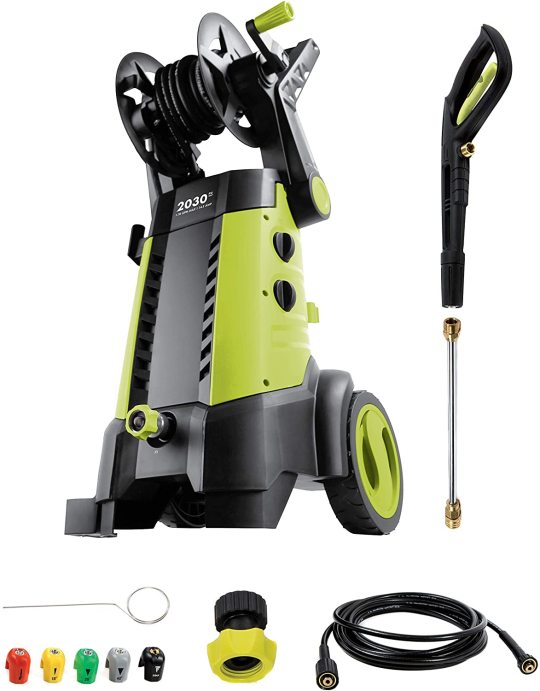
The Sun Joe SPX3001 2030 electric pressure washer helps to tackle your entire toughest cleaning job. The device is best suitable for those who wish for outdoor and auto cleaning. These projects can be finished with ease. The machine contains a lot of water which is enough to tackle tough jobs. This model is quite enough for cleaning tough stains in your residence.
The machine produces up to 2030 PSI of water pressure. This Sun Joe electric pressure washer is perfect for blasting away dirt. Such an electric pressure washer comes with a powerful 14.5 AMP/ 1800 Watt motor. The motor can produce high water pressure for removing dirt. Sun Joe SPX3001 has featured with the TSS facility.
By using TSS modern technology, you can shut off the motor automatically. So, when you are not working with this machine, the machine can automatically stop. Hence, a large amount of valuable energy saved which makes longer life of your motor as well as the pump.
Total stop system (TSS) could stop the motor if you didn't engage the trigger. This also increases the prolonged pump life. However, the device sometimes fails to meet the requirements of the customers.
Sun Joe is a quality pressure washer. The model is best suitable for residential areas. The electric pressure washer Sun Joe SPX3001 has a detergent tank of 40.6 ft. It has an onboard hose reel.
The device is ready for being moved to any of your desired places. People can clean their cars, motorcycle, driveways, patios, and many others. In short, Sun Joe fulfills all your requirements in your residence.
If you are eager to get the answer to why the rating is not so good then look at the features, pros, and cons below here:
Features of Sun Joe SPX3001 2030
5. Greenworks 1500 PSI
(Portable Electric Pressure Washer)
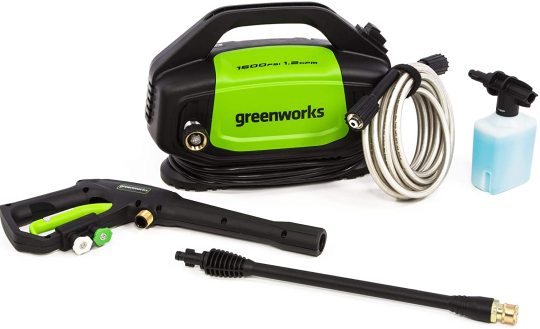
The Greenworks 1500 PSI is sufficient to handle more cleaning projects. This Greenworks model works in an upright and down direction because it has designed vertically. This electric pressure washer is a more affordable option for a middle-class family.
For the greater homeowners, the device is more enough to use a couple of times a year. This is the top performer electric pressure washer.
The powerful machine Greenworks 1501 PSI is enough to wash the mud of a car. This may be the best option for those who are planning for the best service electric pressure washer at affordable ranges. This model is ideal for cars, patios, and smaller surface areas. People can work with this pressure washer without disturbing their neighbors.
The device is sufficiently easy to use. Even it has high enough power to look over occasional light cleaning projects.
The design of the model is compact for easy storage when you do not use it. The Greenworks model is available in varying capabilities.
One of the most convenient aspects of this model is that the Greenworks pressure washer can be utilized both in upright and flat positions for surface cleaning projects. There occur varieties of cleaning applications.
Features of Greenwork GPW1501
Final Words
The above discussed best electric pressure washers are good in performance. Once you buy any of these, get relief for a long year.
You can select one of them according to your requirement. You can experience both the pros and cons of the above-discussed electric pressure washers. These electrics are good for small jobs and residential areas.
Which one should you buy?
Many people become indeed to know which type is better for them to complete a specific task. Electric Pressure Washer makes your light, medium and heavy-duty cleaning projects very simple. They are often available at a low cost. Many people think that electric machines are cheap in quality. But this is wrong for all types of electric pressure washers.
An electric pressure washer is easily disposable. There is no need to buy oil. Overall, an electric pressure washer is ideal for all types of cleaning jobs. Here, you can also enjoy a lightweight pressure washer. Hence, you can finish your cleaning task without worrying about gasoline.
The electric pressure washer has the power to exclude dirt, grim, and lose paint from the vehicles, buildings, and concrete surfaces. So, if you wish to buy a new electric pressure washer for home use, this article will help you. Find the best power washer as per your desire. Read this article completely to select the best one.
Read the full article
0 notes
Text
How to Get Silly Putty Out of Carpet? [4 Working Ways]
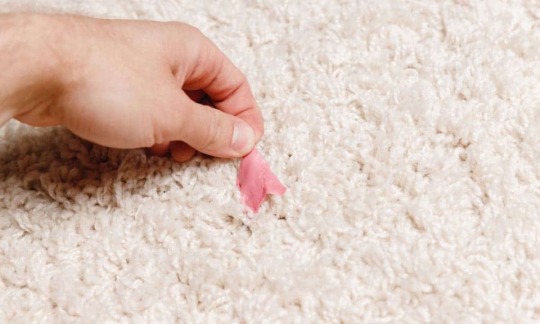
Children love playing with silly putty but you are the one who's going to have to clean all the spilled silly putty eventually. We hear you crying out for help and hence, we have come up with this article.
We are going to show you some effective ways, you can get rid of silly putty and say ���Hello’ to clean carpets. In this article, we’ll be going through chemical and natural ways to get off the stains. We will also be recommending some stain removers, in the end, that you can shop online. So, let's get started!
Chemicals Used to Get Silly Putty Out of Carpet
Under this section, we will go through the chemical ways of dealing with silly putty. These range from nail polish removers to heavy-duty carpet stain removers. It is advisable to know, in advance, the material and quality of the carpet. Before buying any kind of chemicals for stain removal, ask the storekeeper for advice and accordingly, select the best stain remover for your carpet.
Using carpet detergent
- Pour two tablespoons of detergent into a cup (240ml) of warm water. Make sure that the detergent is free of bleach.
- Soak the corner of a towel in the diluted non-bleached solution.
- Blot the stained area. Before doing so, make sure you remove the hardened pieces of silly putty if any. This will let the detergent seep through faster.
- Let the detergent stay on the carpet for fifteen to twenty minutes.
- Use a damp cloth to scrub off the silly putty. Make sure you don’t press down on the stain as doing so will make it even harder to get them out. Try pinching it out of the carpet or scrub in circular motions.
- Repeat the steps until the stain disappears.
- After the stain is off the carpet, dry the affected area using a hairdryer.
Using nail polish remover (acetone)
You can either buy acetone from a drugstore or use a nail polish remover.
- If the silly putty has hardened, take a knife or a paper cutter and scrape off the hard pieces. Be careful not to damage the carpet. To soften the pieces, you can pour some warm water over them.
- Wet a cotton ball with acetone.
- Blot all over the stain in an inward direction so as to not spread it further ahead.
- Repeat the process until the stain disappears.
- Make sure to vacuum the affected area to get rid of small silly putty particles.
- Dry the area by keeping it uncovered for a few minutes.
Rubbing alcohol

Rubbing alcohol also called Isopropyl rubbing alcohol is pretty famous for its stain removing ability. It can get rid of animal poop stains, slime stains and, you guessed it, silly putty stains. So here are the steps you need to follow in order to entirely get rid of hard silly putty.
- If you have been putting off the task of getting rid of this stain, it is probably as hard as the floor underneath your carpet. So, take a tablespoon and start scraping off the hardened pieces.
- Rubbing alcohol has the ability to seep through the carpet surface and damage the base. Hence, it is advisable to pour a few drops of it on a small portion of a towel and simply dab the affected area. Do not touch the towel to the mouth of the alcohol bottle. Doing so will contaminate the alcohol in the bottle.
- Blot the stain and pinch off the loose particles off the carpet.
- Take the tablespoon and scrape out the sticky stuff.
- Repeat the process and blot in circular directions.
- After the stain is off, take a dry cloth and go through the stain once again.
Using a stain remover
There are stain removers that are specifically manufactured to get rid of sticky stuff. While going shopping in your local supermarket or online, search for a stain remover that focuses on ‘gooey’ or sticky substances. Not all stain removers are carpet friendly so, make sure to go through the list we have provided at the end of this article. Ask the storekeeper to help you with a carpet-friendly stain remover as well. Here are ways to use a stain remover:
- Pour a few drops of stain remover over a dry towel.
- Gently rub the cloth over the stain. Make sure to entirely cover the stain and rub it inwards to avoid its spreading.
- Let the stain remover sit for twenty minutes.
- Take a cup of warm water and add some mild detergent.
- Dip the cloth into the mixture and rub it all over the stain.
- Repeat the process until the stain disappears.
- After all the rubbing is done, take a dry cloth and pick out all the tiny particles lying around the stain. Vacuum over the stain.
A Much Natural Way to Get Rid of Silly Putty
For all anyone who is too lazy to go buy a stain remover from the supermarket or go through the instructions and steps to follow in order to use a stain remover, this one is for you! It is shocking to say that ice can help you get rid of silly putty stains. Although you might need the help of soapy detergents at the end, this method is worth a shot. Follow the below-mentioned steps to get rid of silly putty stains.
- Take a plastic zip lock bag wide enough to cover the whole stain.
- Put four to five ice cubes in the bag and zip up the bag.
- Place the plastic bag directly over the stain and let it be there for two to three hours.
- When you notice the ice starting to melt, refill the bag.
- After four hours, remove the bag. You will notice that the silly put has hardened and risen up.
- Take a tablespoon and start scraping off the hardened pieces. Make sure not to damage the carpet.
- If there is still some silly putty left, use warm soapy water to get rid of it.
- After the stains are no longer visible, dry the area with a damp cloth and vacuum it.
Some Best-Selling Carpet Stain Removers
You will find these carpet stain removers in your nearest supermarket or online. The list is as given below.
- FOLEX Instant Carpet Spot Remover
- Miss Mouth’s Messy Eater Non-Toxic Carpet Stain Remover
- Shout Laundry Stain Remover
- Puracy Natural Laundry Stain Remover
- Dreft Stain Remover
Points to Keep in Mind
It is always better to deal with the stain as soon as it occurs. Delaying the scrubbing process will eventually make it hard on you. While working with chemicals, remember to wear gloves. Make sure the room is properly ventilated while you use rubbing alcohol.
The stain is not going to get off the carpet so easily if left neglected for days. So, be prepared mentally as well as physically to get your hands dirty. We hope this article has helped you come up with an effective way of dealing with silly putty. Happy cleaning!
Read the full article
0 notes
Text
Top 5 Best Water Powered Sump Pumps
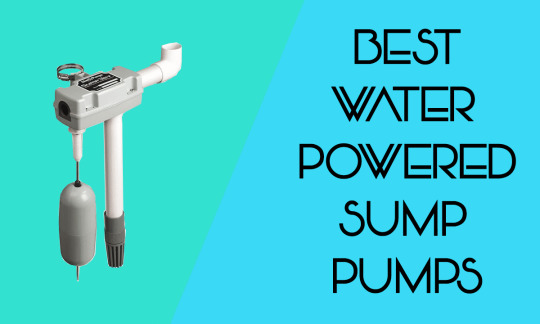
There is no doubt that a water-powered sump pump is a great equipment that protects your basement from encroaching water. Usually, we at our homes have an electricity-powered sump pump and the worst part about it is that when the power goes off, it stops removing water from your home. As a result, you end up being in a trouble.
However, when you choose to install a water-powered sump pump, you do not have to worry about anything. Instead, it will remove water from your home even when there is no electricity.
A sump pump is pretty helpful in such areas where the flood is common or usually faces heavy rainfalls. Also, the best part about these sump pumps is that there are no moving parts in it and it is hardly about 3 or 4 inches in size and there are no batteries or electricity required to operate it.
Plus, it can remove more than 1,324 gallons of water per hour when operational which helps you to remove water from your home as quickly as possible when water starts filling your basement.
However, when it comes to buying one of the Best Water Powered Sump Pump, things are not as easy as it seems.
First of all, there are quite a lot of options available in the market and choosing the best one from them is a daunting task. However, you do not need to worry as we have handpicked some of the best Water Powered Sump Pumps for you. So you can pick the right one on your first attempt.
But before we go ahead and talk about some of the best water-powered sump pumps. Let's talk about why you need water powered sump pump.
5 Best Water Powered Sump Pumps
- Best Overall: Liberty Pumps SJ10
- Best Water Backup: Basepump RB 750-EZ
- Best Premium: Basepump HB1000-PRO
- Best Jet-Powered: Liberty Sump Pump Jet Powered
- Best Budget: Zoeller 503-0005
How a Water Powered Sump Pump Work?
Usually, water-powered sump powers are configured to turn on automatically only when the primary sump pump fails.
A water-powered sump pump implements the venture effect as a result when the main water line is under pressure and waters flowing speed gets increased and when it gets increased it creates a pressure reduction and the pressure reduction sucks water from the sump crock.
After that, the sump water gets fixed with the flowing city water and exists from your basement via a discharge line. As a result, you do not face many disasters because of flowing water.
Best Water Powered Sump Pumps Reviewed
1. Liberty Pumps SJ10
(Best Overall)
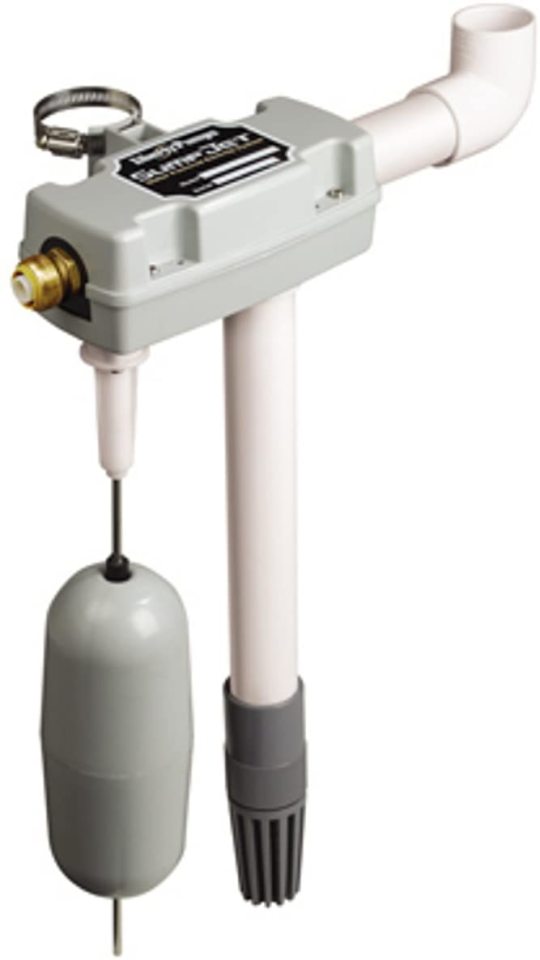
First of all, We have the Liberty Pumps SJ10 1-1/2-Inch Discharge SumpJet Water Powered Back-Up Pump. This one comes with a compact yet high-efficiency design which helps the pump to remove 2 gallons of sump water pretty easily.
Also, the pump requires no electricity, as a result, you will be able to protect your basement from water when there is a power outage.
The pump also gets powered by your municipal water supply and it operates on a fully automatic system. It also comes with a complete assembled unit. As a result, you will not have to hit your head through the installation process.
The overall performance of the Liberty Pumps SJ10 is also pretty amazing. However, you should know the fact that the pumping performance depends on the water source pressure and pumping head. Also, yes, this one requires an uninterrupted water source to operate.
This water-powered power pump accepts 20 PSI up to 100 PSI inlet supply pressure. Plus, it offers you a high output flow rate. This one works off municipal water supply too and it is UPC approved. Moreover, it comes with an adjustable stainless hose clamp which offers you an easy mounting.
There is also a built-in screen with a removable valve. Plus it has a built-in check valve at the water inlet.
2. Basepump RB 750-EZ
(Best Water Backup)
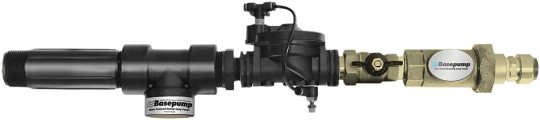
The Basepump RB 750-EZ Water Powered Backup Sump Pump is one of the best water-powered sump pumps that you will find on our list.
The best part of this water-powered sump pump is that it comes with a unique design. Plus, it is extremely easy to install. Even you can do it yourself so you do not need to call a plumber for the job.
It also comes with a built-in brass dual check valve which works as back-flow prevention equipment. Along with that, you get a battery-powered high water alarm. You have to mount the pump on the ceiling and make sure it is clean and dry until needed.
The design of the sump pump does not only make it easy for you to install it. But it also meets the local plumbing codes for back-flow prevention.
Along with that, it comes with many of the installation parts. Plus, it offers you greater efficiency and higher pumping rates. Also, the pump sump connects directly to your home water supply using push-fit pipe fittings.
Moreover, one of the most common reasons why people pick this one is durable construction. The sump pump is made of stainless steel and all the plumbing parts are corrosion resistant and the housing is made of sturdy PVC and polypropylene materials.
This ensures that the sump pump is getting a longer life and you won't have to face any problem within the next few years.
3. Basepump HB1000-PRO
(Best Premium)
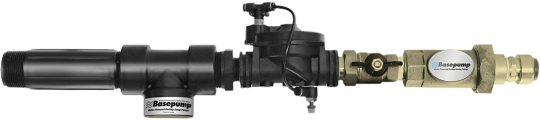
For the next pick, we have the Basepump HB1000-PRO Premium High Volume Water. It also one of the best water-powered sump pumps that you can find in the market. However, it is not a really cheap one. But on the other hand, it falls under the premium zone and offers you quite a lot of features.
Talking about the sump pump, well this one comes with a battery-powered high water alarm which will be helpful if the water limit exceeds. However, the sump pump does not require any battery or electricity.
In addition to that, you get a hydraulic float system which makes it possible for the sump pump to empty the sump to the bottom each time it runs. Also, this one falls under the pro series which allows the sump pump to pump more water than ever.
So if you are someone who is looking for a high-capacity sump pump then check out this one. Along with that it also offers you back-flow prevention and comes with a simple installation process.
Furthermore, the sump pump is low cost to operate and has an extremely durable build, as a result, the sump pump will run for years without any issues. However, to install the sump pump, you will need to call a plumber.
4. Liberty Sump Pump Jet Powered
(Best Jet-Powered)
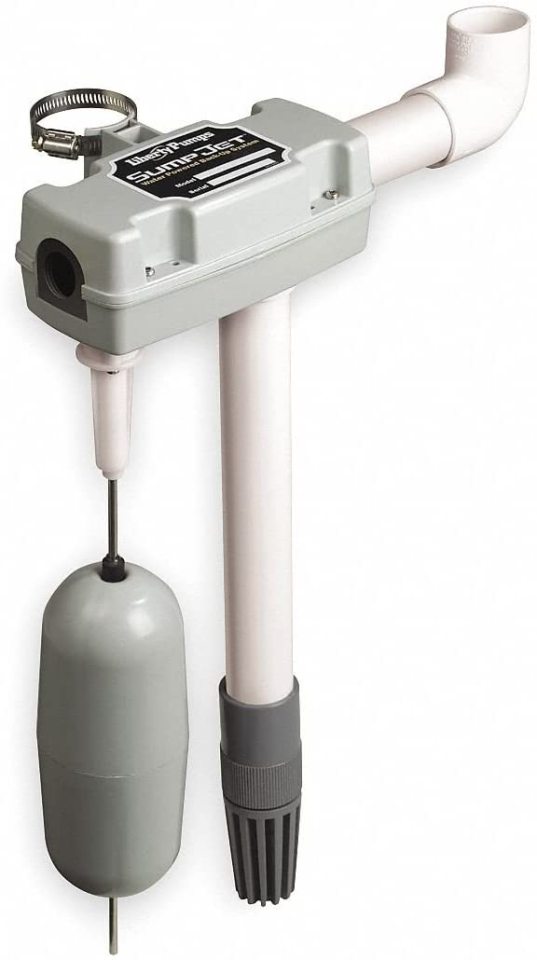
Next, on the list, We have the Liberty Sump Pump. This one is also one of the best water-powered sump pumps that you can try out.
This one requires no electricity or batteries to run. Moreover, it runs through the water pressure from the water supply. However, it will require a consistent water supply to work.
This sump pump's maximum water flow rate is about 1,188 gallons per hour or you can say 19.8 gallons per minute.
Along with that, you get 3 years warranty. The sump pump accepts an inlet power supply pressure between 20 PSI and 100 PSI and capable of removing 2 gallons of sump water per gallon received.
However, you should know the fact that this one does not come with smart features like most of the premium ones does. But if you look at the price it is quite justified.
But the good part is that the installation part for this sump pump is extremely easy and you can do it by yourself only. Also, considering the price point, the water-powered sump pump is quite durable and will offer you a worry-free experience for a quite long time.
5. Zoeller 503-0005
(Best Budget-Friendly)
In the end, we have the Zoeller 503-0005 Homeguard Max Water Powered Emergency Backup Pump System. This one is also one of the high capacity yet best water-powered sump pumps available out there.
Zoeller 503-0005 Homeguard Max is a high capacity and high-efficiency water-powered backup system, that requires no electricity or battery to run.
Moreover, the good part of the sump pump is that it can remove around 2 gallons of water for every one gallon used and, everything is fully automated.
Also, to make your life even easier it comes as a fully assembled unit. As a result, you will be able to install the sump pump easily and without the help of any plumber. Also, its small footprint allows for installation in even the smallest sump pits.
What is more? It offers you superior performance and discharge capacity. Along with that, it uses less water to operate. Moreover, the overall cost to run this sum pump is extremely low. The sump pump does not require any water unless your primary system fails or there is a power outage.
It can also be used with any existing brand of sump pump and offers efficient water usage. Also, it has built-in push-to-connect supply fitting and it performs at 80 PSI. Moreover, you will get one year of warranty along with this sump pump.
Best Water Powered Sump Pumps Buyers Guide
So those were some of the best water-powered sump pumps. However, the main question comes here is how to pick the right sump pump for your needs? There already too many options which can make any of us go confused.
Well do not worry, let me pen down some of the most common points that you should keep in mind while purchasing a water-powered sump pump. So here we go:
Water Powered Sump Pump Or Battery Powered Sump Pump?
This is one of the most common questions that we all have in mind. However, the answer to this question would be the water-powered sump pump.
As it requires no power to get activated. Plus, it turns on automatically when there is a huge water process and makes sure that your basement is dry.
Town water or well?
Which type of water supply are you using? It is a municipality one or you are getting water from some well. If the answer is well, you do not need water powered sump pump. As it requires a continuous water supply hence the municipality water supply is required.
Measure your water pressure
The second thing you need to do is measure your water pressure. All the sump pump requires a minimum amount of water pressure. Hence it is would be a nice idea to check the water pressure before you end up getting a sump pump.
Gallons per hour
The third thing that you need to consider is the Gallons per hour and it is one of the important things that you consider in the first place.
Ask yourself how much water the pump will need to remove in an hour. The answer to the question should be the amount of water your basement gets.
Efficiency
Another important thing that you should consider is efficiency. Most of the sump pumps usually use municipal water to remove one or two gallons of sump water and since most of us are paying a water bill for the town water. Hence you need to look after the efficiency thing. So you will end up finding yourself with a huge water bill.
Installation
Most of the sump pumps claim that they come with an easy to install process. Well on one side most of the sump pumps come with pre-assembled units and some of them also has an easy-to-install process.
But on the other hand, there are lots of water-powered sump pumps are there which are not really easy to install and if you are someone who has no previous plumbing experience then it will get hard for you to install them.
However, you have the option to call up a plumber and get done with the job. But that would take some more bucks. So if you are not fine with that make sure to get a sump pump that is easy to install and does not have a complicated installation process.
Drainage
Lastly, you will also need to look after the drainage. Like where all your water will go? For this you can simply connect the sump pump to your existing discharge pump and all the water will exit from there. Even by doing so the installation process will be a lot easier.
On the other hand, you can also connect the water-powered sump pump to a designated discharge pipe just for this pump. However, that will cost you a lot of bucks since it is a pretty big job. However, most of the users prefer designated discharge like why someone would want to connect the backup system to a potentially faulty discharge pipe?
Why do you need water powered sump pump?
When your home is drowning in water, then the water-powered sump pump is the only equipment that works against the encroaching water.
Since during floods or in other natural disasters electricity is something that gets cut down. So you have to have other equipment that helps you to remove the water and this is where the water-powered sump pump comes to the rescue.
Although, most of us already have an electric-powered sump pump for the job. However, in extreme weather conditions, they tend to fail and that is the reason why you should think of installing a water-powered sump pump and save your home from drowning.
Since water-powered sump pumps do not require electricity. Hence you can use it in all types of situations. Plus it offers you a bit of relief from a high electricity bill.
And the best part is that they do not cost you a lot of bucks. So overall, they are bang in the budget. However, you should know that never use a water-powered sump pump as your primary water supply as they are not meant for the job. Instead, they should only be used in emergencies.
Final Words
So that was all for the best water-powered sump pumps. Also, based on the above-mentioned considerations, We have already mentioned the best water-powered pump sumps. Simply check them and go with the one that simply satisfies all your needs.
Read the full article
0 notes
Text
How to Remove Silicone Caulk? [4 Easy Methods]
Silicone caulk is used to avoid bugs and pests from crawling into your house through gaps and holes in the walls, and you use the caulk to stick a piece of wood to cover the gaps and maintain the smoothness and decent view over that area. It is majorly used for fixing plumbing leakage areas, especially in the bathroom as they are waterproof. However, it doesn’t work directly on wood and metal, the material has to be an adhesive system.
Silicone caulk can be used to stick many materials including plastic, glass, metal, and more. It could make your walls or furniture look ugly if it wasn’t applied with due care. In this article, we are going to show you how to get rid of the caulk so that you can make it look prettier or more decent.
Methods to Remove Silicone Caulk
There are chemical and non-chemical ways to get rid of caulk. We will be sharing both methods so that you could find the suitable one for you.
Using silicone digestants:
These are ready-made chemicals that you can buy online or from your local supermarket. Silicone digestants work perfectly on ceramic floors, masonry, glass, plastic, and metal surfaces. Since these are chemically very much concentrated, you must not use them over unfinished or finished wood. Do not use this product on any type of nylon surface.
Steps to use silicone digestants are mentioned below:
- Apply the product on the silicone caulk.
- Let it rest for twenty minutes.
- Apply another layer of the digestant.
- Let it rest for another ten minutes.
- Try pressing into the caulk with a putty knife to check whether it has turned soft or not.
- If yes, then take a bristle brush (or you can use the putty knife as well but be careful) and scrape away the caulk.
- If it is still hard, wait for a minute or two and then start scraping.
- Once it's all out, brush away the residue.
Using no chemicals:
If you choose not to use chemicals, then you have to be ready to put in some man or woman power into getting the caulk off. The tools that you will require for this task are a razor, bristle brush, and a putty knife. Remember that your goal is to lose contact between the surface and the layer of caulk. You need to let as much air as possible between them to make your job a little easier.
Steps to manually get rid of silicone caulk are mentioned below:
- Clear all the clutter next to the area you are working on. Put away all objects that may hinder your scrapping action.
- Cut the layer of caulk with a razor. If you feel that the razor is too weak then use a putty knife.
- Fit a thin tool between the cut so that you get a good grip of the gap.
- Slice slowly and be careful not to touch the wall or any surface to avoid scratch marks.
- Do not cut all the way through the layer. Just cut a part that you can comfortably get a hold of.
- Hold the cut part and pull the caulk off the wall or surface in a way that it all comes off together.
- Pull or scrape away any residue you notice.
- Use diluted rubbing alcohol (do not if the surface is wooden)to wipe off any residue stuck to the surface.
Silicone caulk on a glass surface:
You need to be very careful while scraping over the glass. The surface is slippery and prone to scratch marks. You will need a hot air blowing device, razor or a putty knife, a semi-rough towel or a sponge, and rubbing alcohol.
Steps to scrape caulk off of glass surface are mentioned below:
- Take the hot air blowing device (you can also use a hairdryer but make sure the heat is enough to soften the caulk) and place it straight above the caulk strip for at least four minutes.
- Turn the device off and with the razor, start scraping. Make sure to hold the razor at a shallow angle from the glass surface to avoid any scratch marks.
- You might want to repeat these steps a few times until there are only small pieces of residue left.
- Remove leftover caulk with rubbing alcohol. Dab a little rubbing alcohol over a corner of the towel or sponge and rub.
Silicone caulk on a wooden surface:
Similar to the glass surface, you must be careful not to produce scratch marks. Also, refrain from rubbing aggressively with a liquid as wood has the tendency to absorb fluids.
In order to get rid of silicone caulk from wooden surfaces, you will need a hot air blowing device (you can use a hairdryer but make sure the heat is enough to soften the caulk), a plastic scraper (you can use a razor or a putty knife but be very careful to not damage the surface), a can of silicone caulk remover and a wooden cleanser.
Steps to scrape caulk off of wooden surface are mentioned below:
- Firstly, heat up the caulk with the hot air blowing device for at least five minutes.
- When the caulk starts becoming soft, cut a line through the layer and push the piece out so you can get a hold of one edge of the caulk strip.
- If pulling feels a bit difficult, then try scraping and pulling the strip simultaneously. The goal is to minimize contact between the surface and the layer of caulk. So, do not cut away pieces just to start all over again. Pull the strip in the direction of the caulk to get the maximum amount.
- Scrape with a plastic scraper or pour some silicone caulk remover over a towel to get rid of the residue.
- To secure the wood surface, apply a coat of wood cleaner.
Easy Ways to Get Rid of Silicone Caulk
In the below-mentioned ways, there is the usage of strong chemicals. We advise you to read the instructions on the back of the products. While buying these products, ask for personalized feedback regarding the chemicals.
Before using any kind of chemical, wear a pair of gloves and a mask. Make sure there is proper ventilation in your working area so that you don’t feel suffocated and inhale excess chemicals.
Here are some of the easiest ways to clean silicone caulk:
- Using WD-40: This is a very powerful chemical that is capable of ruining your surface. Make sure to spray it on the caulk and not let it get anywhere else. Let it rest for thirty minutes and spray another layer. Using a razor or a putty knife, scrape in the direction of the caulk. There shouldn’t be any residue on the surface but if there is, then scrape it off with a brush or a dry towel.
- Using acetone: Do not use this method on wooden surfaces. You will need a putty knife to, firstly, scrape off the thick layer of caulk. You do not have to remove it entirely, just take off the outermost layer. Apply acetone (you can also use nail-polish remover) over the caulk and let it rest for fifteen minutes. Scrape again in the direction of the caulk. You will need a dry cloth to get rid of the residue.
- Using vinegar or alcohol: White vinegar is safe enough to be used on wood but it is not the same for any type of alcohol. Perform the same procedure that we mentioned for using acetone. Isopropyl alcohol is the preferred alcohol used for scraping silicone caulk. Make sure you read the instructions before getting started.
If the silicone caulk has a blackish tint to it, it is probably due to mold formation. After you remove the caulk, if the black tint is still there, dip a towel in a mixture of warm water and bleach or ammonia-free detergent and wipe off the mold.
We hope this article has helped you show the right way to remove silicone caulk. Happy cleaning!
Read the full article
0 notes
Text
Top 5 Best Pressure Washer For Cars
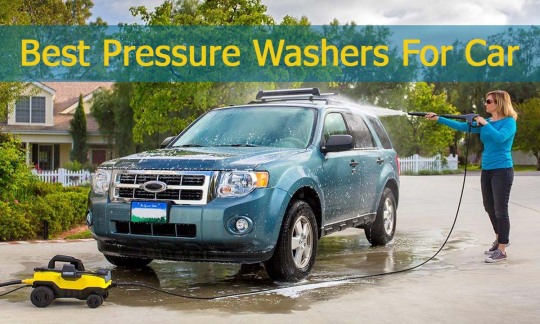
A car pressure washer is a fantastic device that assists in shedding dirt from around all facades simultaneously with mold, dirt, dust, debris, and any other sort of undesired matter. I wish to share you all with my personal involvement on how to pick an ideal car presser washer to fit the individual needs. Tremendous pressure is of great support while stepping ahead to remove the stiff trash.
Although the best pressure washer for cars is principally employed for cleansing cars and pathways, consecutively, these car presser washers are also utilized for washing household essentials such as desks, patios, and much more. I've contributed some days to compile my experience and here I am with my knowledge about the car pressure washer which I am going to use to assist you to save time & money.
Once you adopt the best car pressure washer, you will come to understand that it is not just a device, it is the basic need without that a car owner cannot live. The presser washer for cars offers a wide range of benefits. Primarily, they are light weighted nearly half that of the gas model's weight, and their smaller size makes it easy for the users to carry and handle.
These car presser washers are very easy to start up within a fraction of seconds, we can say just with a single press of a button. While using this car washer, you will never have to face any starting issues or gas troubles, and no need to fret concerning the damage of the pump when you are buying an ideal car pressure washer.
The best presser washer for cars can be employed for indoor uses, as it doesn't release any exhaust.
Car washing and cleaning is an art & can be wearisome if you lack proper resources, tools, and devices to perform your car washing practices efficiently. It undoubtedly takes more time and effort if you are utilizing a traditional washing process, i.e., a garden hose. By using the best pressure washer for cars drives the approach to the next stage as contrasted to a conventional method.
If you wish to feel the pleasure that pressure washer for cars offers but not having any idea about where to buy them what to keep in mind to have a great deal, you are suggested to have a look at the reviews of some of the most popular car presser washers before making your deal.
Top 5 Presser Washers For Cars
1. Sun Joe SPX3000
(Best Electric Pressure Washer)
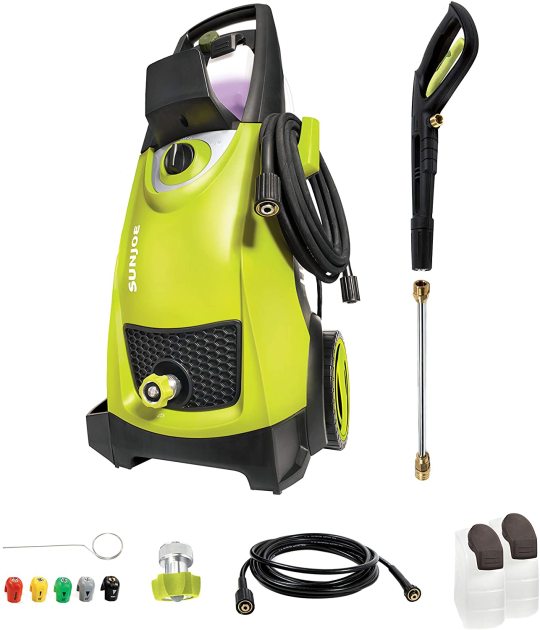
We discovered Sun Joe SPX3000 as one of the highly reputed pressure washers for cars in the United States. This vast reputation is due to the immense features & specifications it offers at a surprisingly low cost.
The Sun Joe SPX3000 exceeded all the user expectations and the washing operations that users had subordinated to it. "Ultimate Dirt Fighter" is the tagline that the company has given to this presser washer.
Sun Joe SPX3001 is among the best pressure washers for cars; it has five smart-connect shower tips that undertake all sorts of washing & cleaning chores.
All these five shower tips are rated as soap, 40 degrees, 25 degrees, 15 degrees, and 0-degree.
Along with this, it possesses a powerful 14.5 amps or 1800W motor that generates around 2030 PSI or 1.76 GPM for an ideal washing power.
Another characteristic is the onboard spindle that retains the twenty feet elevated pressure hose of the device in place for smart & secure clean-up and storehouse.
Along with this, the presser washer for cars also has TTS that electronically closes the pump as soon as you leave the system idle even for a moment. This assists in increasing preserving energy and life of the pump. Ultimately, the device is CSA certified and will be availed to the users with two years confined warranty.
Features of Sun Joe SPX3000
2. Karcher K5 Premium
(High-end Electric Pressure Washer)

If you are planning to buy the best pressure washer for cars the Karcher brand will undoubtedly hit your mind.
It is plausibly among the most prominent car presser washer brands that have advertised their products to be the perfect deals that money can make.
They were supposed to be high-priced, but as of now, the costs of this pressure washer have turned out to be easily affordable.
The Karcher presser washers are the go-to in the UK as compared to the popularity of Sun Joe in the US.
Karcher K5 Premium is one of the best pressure washers for cars at which every car owner can rely on, for the overall cleanliness and washing of their vehicle.
Its exclusive features and functionalities are at the top of its reach and exceed the race of competition by satisfying user expectations exclusively.
This is the best pressure washer for cars, and it is masterminded to confront the meticulous jobs of regular household usage (unquestionably including your vehicle).
The principal characteristic that makes it stand aside from its competitors is the water cooling system, i.e., water-cooled induction motor. This increases the life span of the presser washer by around five times that of other options available in the market.
Karcher has offered an N-Cor motor which is permanent and completely free of maintenance. This motor is non-eroding as professed by the producer.
To maintain the motor, they have a dazzling water-cooled pump system. It begins with an in-built detergent container so you can leave the stress of utilizing soap.
Another two central characteristics are the dirt-blaster shower wand & the Vario power shower wand. What the Vario-wand assists in accomplishing, is providing you the gratification of managing pressure from low to high efficiently from the rod. This pressure management is significant for washing the car.
Features of Karcher K5 Premium
3. AR Blue Clean AR383
(Professional Pressure Washer)

The AR383 is the perfect washing device that one can possess in a professedly small box.
This machine comes accompanied by a comprehensive kit that combines a flexible jet nozzle, a high-pressure pipe, foam faucet, and the most crucial gun.
Furthermore, this machine also comes with TSS that can supplement additional pressure to the car washer.
This presser washer is manufactured of plastic, copper, and aluminum, it can put out the pressure of 1900 PSI that is sufficient to draw out 1.5 gallons/m.
With readily available guidelines, it is just classic for immaculate cleaning operations.
This is an under-budget alternative to Karcher with a lower brand value. Because of its plastic body and small size, it is easy to carry and handle; it is among the central advantages over other alternatives.
The best point about AR383 is that it appears with a detachable soap/ foam container as well as an electronic security plug with a power shut-off button at the pump top.
AR Blue Clean AR383 is robust and comfortable to utilize even with the pipe stiffness. Therefore, by picking this presser washer, you will be glad to notice the polished car exterior.
Features of AR Blue Clean AR383
The AR Blue Clean is not a much-recognized brand, but they are offering a wide range of electric pressure washers for cars at a very cost-effective price with lots of hi-tech features.
4. Greenworks 1500
(Budget-Friendly Pressure Washer)

Being frank with you, I am here to make you aware that the Greenworks GPW1500 is remarkably compact for a cost (under $100) at which this can be owned.
If your pocket is tight and you cannot afford to buy an expensive, branded presser washer for cars, this is a great option; you can go for.
It is exclusively prepared for car washing; it is very small and light-weighted, users can carry it from one place to the other by rolling it over its wheels at the base.
Don’t predict anything about it after looking at its size. The story behind its operational capability is exclusively different from what it seems.
It has tremendous potential for washing spots and undoubtedly, car cleaning.
Conceivably this is among the most affordable pressure washers for cars in terms of cost and functional stability; it is not at all behind any of the other presser washers while we talk about its features and functionalities.
It is available with a 40 & 25 degree smart-connect tip for more excellent endurance to shift while you are washing your car. Its usage is not also limited to washing the car, we can also use it to wash and clean our other household items and even we can use it to wash our room walls and floor.
Features of Greenworks 1500
5. Karcher K3 Follow
(Pressure Washer with Rolling Wheels)
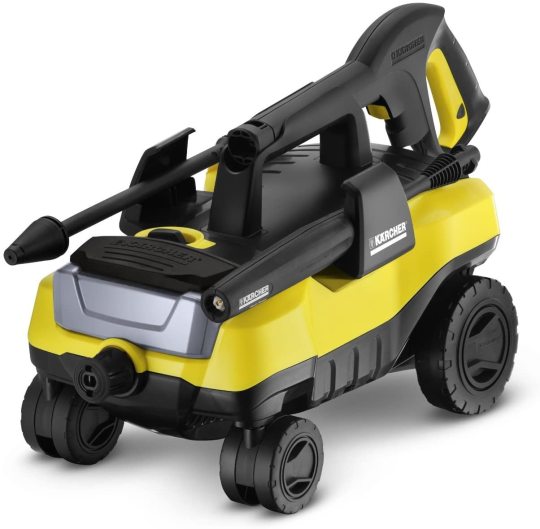
Karcher provides each necessary item from household or car presser washers to large machines used to clean roads, streets, and municipality.
They have devoted all their efforts to become a family brand for exterior cleaning and washing tools around the globe
Today we are here to review the impartial Karcher K3 Follow Me as it is among the best presser washer for cars and light household cleaning chores.
We have personally used the device and extremely satisfied with its performance and productivity.
In short, we can say it is the full worth of the amount we have paid for it, it has always surpassed our expectations with its superior presser washing capabilities.
Features of Karcher K3 Follow
Guide to Purchase Presser Washer for Cars
Try not to put pressure on your cerebrum. Give them a chance to do different things as we are going to control you precisely what to search for while purchasing a pressure washer. We realize individuals thinking for quite a long time to know: "what sort of pressure washer do we have to wash our car?"
This won't be as simple as choosing a hosepipe to water your blooms. You are going to need to think about some specialized focuses on this. Let us start.
There are classes of pressure washer that fills your need in a particular region. These classes can be portrayed in three areas. Regardless of whether you are searching for the best gas pressure washer or an electric pressure washer for your vehicle or porch, you can pursue these suggestions.
Light Duty Pressure Washer
You comprehend from the class; it isn't for day by day substantial undertakings. These are best for individuals who don't utilize them all the time, or for "mortgage holders." It does not indicate that these car washers are of lower tone.
Individuals who need to clean independently from anyone else; can pick this kind of pressure washer. DO-it-without anyone's help kind of thing. This class can play out a lot of family units cleaning efficiently at a modest expense. That is the reason this can be an excellent choice for your vehicle cleaning.
Either gas or an electric engine provides power to these. Their engine or generally assembled quality isn't care for the pioneers. Along these lines, they are best for occasional use. This type of pressure washers is perfect for cleaning your vehicle They can likewise perform cleaning of a sliding, stable, deck, and so on.
Medium Duty Pressure Washer
This class is a stage up to that of the pressure washer we discussed above, i.e., light-duty. You can likewise consider it an extension among "shoddy" and "extravagance" pressure washers. These presser washers are for the use of semi-masters. In case you look intelligently, you can locate some incredible electric pressure washers for vehicles in this gathering. Indeed, these items are preferred with assembled quality over the light-duty washers.
Be that as it may, it depends exclusively on the makers. Some may fabricate a pressure washer with an extraordinary siphon yet with a lower grade motor. It won't hurt the presentation in a lot; this is the best presser washer for cars for this range.
However, motorized pressure washers for cars are likewise a fantastic deal. Contingent upon your need (pressure, kind of work, the recurrence of work), you can choose from a broad scope of items. Regularly, they fall between the USD 300 to USD 400 value go.
Heavy Duty Pressure Washer
These are the best influence washers you can occupy in return for the investment you made. Proficient pressure wash organizations utilize these sorts of pressure washers. Be that as it may, in any case, you can use this too for your vehicle wash. You would already be able to comprehend; a rock-solid pressure washer is made with first-class parts in each perspective, from the siphon to spout.
Because of the incredible nature of segments, they are relied upon to keep running for a more drawn-out timeframe with remarkable consistency. The vast majority of the substantial pressure washers are the most dominant pressure washers. It has enough power for cleaning any stains on any surface. Usually, they run above USD 500.
How to Pick the Best Pressure Washer for Cars?
Presently, as you have learned various classes of pressure washers, we should endeavor to pick one for vehicle washing. The fundamental thing that strikes a chord is the electric versus gas pressure washer. We would state the primary target choosing the power of a pressure washer. Honestly, they differ in strength & size.
Vehicle pressure washers are controlled by either gas or power. Be that as it may, it is insightful to choose as indicated by your vehicle, yard, or space you are getting down to business. You definitely know, it doesn't require immense pressure for washing a car.
Along these lines, the pressure washers with light-duty power are set apart as vehicle pressure washers. Because of the pressure, they have, which is going from 1000 to 2100 PSI they can wash your vehicle efficiently. Likewise, for various undertakings like yard, vessel, and deck these light-duty car washers can be amazingly useful.
These pressure washers can be gas-controlled or electrically operated. Gas-fueled pressure washers require more upkeep than electric washers, which implies a delayed lifetime of electric pressure washers.
On the off chance that you think about movability, electrically operated pressure washers are a champ here. They are amazingly lightweight. You additionally need to analyze the smog that is produced by a gas washer. They are additionally overwhelming, hard to move around your yard. Be that as it may, a little motor gas pressure washer can provide more power than an expansive electric pressure washer. They are incredible for any surface washings.
Then again, lightweight electric power washers can be extraordinary for washing your vehicles every once in a while, yet not for day-by-day hard cleaning employment. Regardless of which pressure washer you select, dependably recollect the pressure. A delicate surface like your vehicle can without much of a stretch be harmed by high pressure.
Final Words
From choosing the best car pressure washers to the professional methodology of car washing and cleaning, you have been committed. So, why we are behind in devoting a little time to suitably managing this part of pearl? Never stay back in keeping your electric car pressure washer cleaned and maintain its power cable disentangled.
We are here to make you memorize one most important concern again; your car body or your car paint care can be susceptible to high pressure. Keep in mind to clean your car with an appropriate pressure washer. Before proceeding ahead ensure to manage security for you and your vehicle and be strict about keeping the washer pressure under 2000 PSI.
Well, we have privately used these pressure washers for cars. All of these are best at the price range they are available.
A car pressure washer is a robust device for automobile merchants and service centers. Spending valuable assets into a convincing model that comes with an outstanding guarantee, high-tech features, adjustable settings, and superior features is a profitable investment. You will ordinarily have a car pressure washer for years, and it's worth spending somewhat extra for the thing that will care for your car is slightly more extraordinary.
Karcher & Sun Joe is the two most favored and best presser washers for cars, but they may not suit the budget of most of the buyers. Other than these two, we have listed some of the fantastic presser washers to which everyone can afford and enjoy.
Read the full article
0 notes