eva-michael-white
Eva Michael-White
Final Major Project: exploration into historical dress and manipulation of design
69 posts
Don't wanna be here? Send us removal request.
Last Seen Blogs

vneconomics
VNEconomics

endocrinologistalocal
Endocrinologista Local

garden-uprooted
MOVED TO @HEARTSIIK

supersxn
i'm coming out

spectrumpenguin
Spectrum Penguin
Text
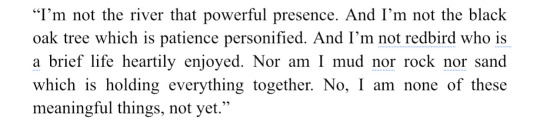
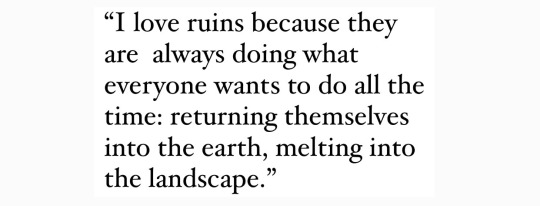
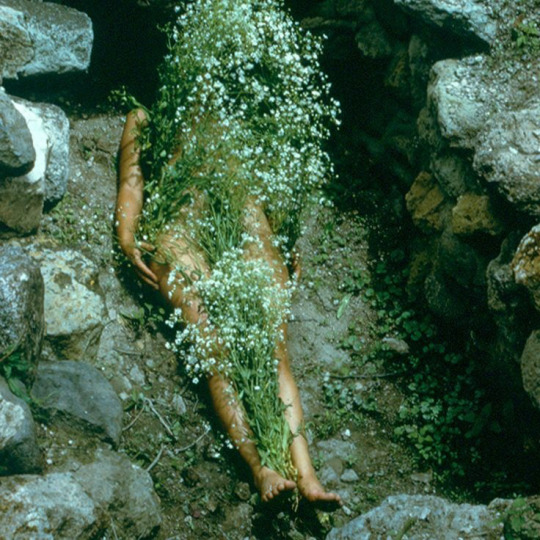
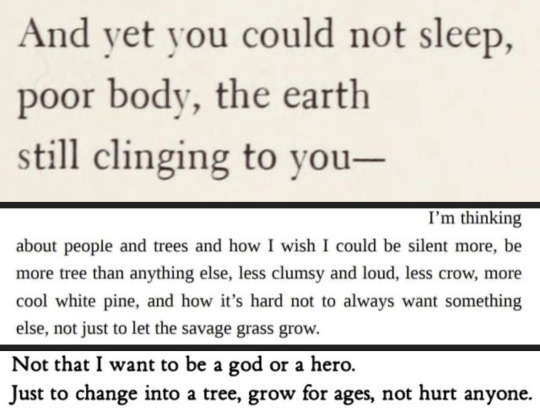
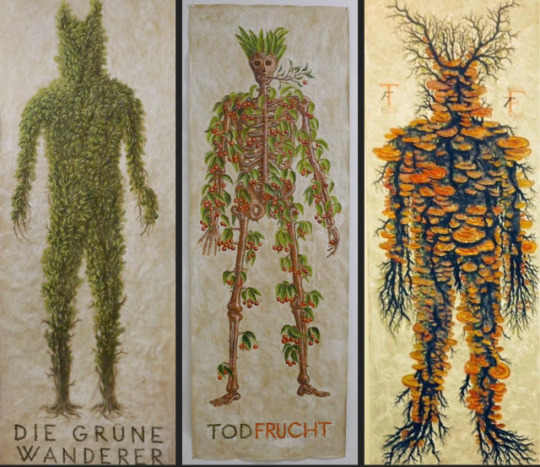
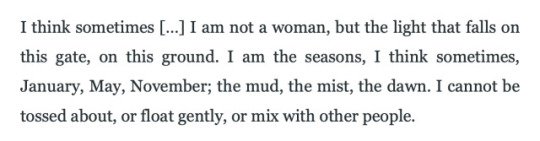
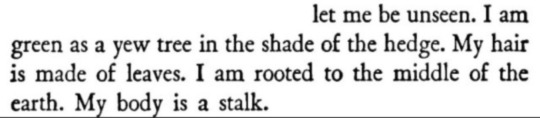
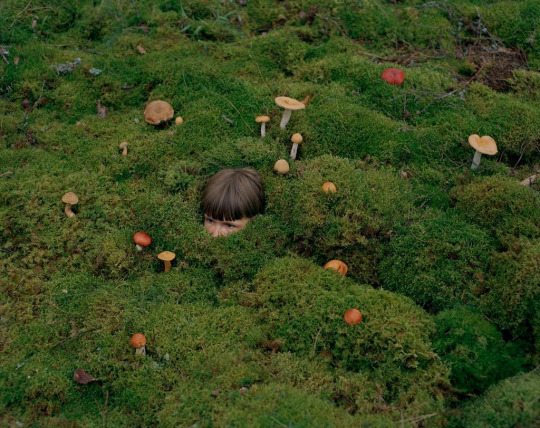

the human experience as returning to nature
mary oliver “i am not ther river” // roger deakins “wildwood” // richard misrach “untitled” // ana mendieta // ada limón “mowingä” // jean paul sartre “nausea” // kahn & selesnick // “the waves” virginia woolf // “the waves” virginia woolf // mary oliver //riita ikonen // catherynne m. valente “deathless” // @mossy-suggestions
4K notes
·
View notes
Text
EVALUATION:
To begin with, my research was very varied, i tried to explore as many techniques and processes that i could. I focused on traditional handcrafts and textile processes, exploring the technique and their role in history and society. I really enjoyed learning new skills, and i’ve since thought of lots of ways i can use them outside of this project in my own life. I also did more print experimentation, i got some vintage relief plates in amsterdam that i really enjoyed playing around with-especially the peice in which i incorporated cross stitch. Two artists that particularly really inspired me are Yinka Shonibare and Tilleke Shwartz- both these artists take traditional and historical things and distort them and use them in unconventional ways. Shonibare’s victorian dresses remade with african wax fabric are so incredibly striking they really inspired me, the bold colours and prints used in a style that typically did not use print or pattern very often is such a wild contrast it really stuck with me throughout the project. Shwartz’s embroidery is also sonething that i thought about quite alot throughout, embroidery and cross stitch are so often these pretty floral designs even now that Shwartz’s very different approach really stands out as unique.
My project evolved from this idea of historical techniques and processes into historical dress, heavily inspired by my visits to the Victoria & Albert museum and various museums in Amsterdam. I chose to work from a historical period amd try and make it historically accurate in construction because i really wanted to better my construction skills and forcing myself to make fitted garments with so many details and different aspects to them really showed yet sttengthened all of my weak points. My construction skills have gotten so much better, i understand alot more about not only how clothing works but also history. I think this project has also really made me step up my attention to detail, my hand sewing has gotten so much better and all those times when i’ve gone back to redo something that wasnt quite right has really payed off.
I think i’ve really fulfilled my statement of intent: i really enjoyed learning all new skills for the workshops, i got lots of primary research, i did far more planning and sketching and mathst than i’d ever done previously. Two areas where i didnt fullfill my plan as much was to use more printmaking (although this was because of the pandemic) and using unusual materials. I think if i were to do it again i would have experimented more woth this, using plastic or metal perhaps.
I have achieved what i set out to do, creating structurally accurate historical garments whilst exploring print and pattern as well as fabric manipulation and handcrafts, learning new techniques, learming new methods, refining my skills and learning more about construction and how garments work. I do think i could have planned my time better, although i for the most part did stick to my time plan the extra day here or there to finish up a garment meant i didnt have enough time to make the final bodice which i am quite dissapointed about as it meant i didnt have a complete set. If i had more time or didnt have a pandemic i would have changed my designs quite alot, i was thinking of designing and printing all of my fabrics for the outerwear but since i was printing at home with limited materials and space that meant it wasnt possible. I also wouldve liked to make my other designs, based off animals, plants, and the sea. This would have taken too much time, so also wasnt really an option. I also would have photographed my final outcomes alot better if i could have, it was really hard to do it all by myself hauling lamps around and positionong my phons on an ironing board. Its a bit dissapointing because you cant see all the detail and quality of finish in the photos, once i’m able i’m going to organise a proper photoshoot with some friends.
I am really glad i chose to do this, because these construction skills and understanding will be very useful next year at university where i will be studying costume. Also my exploration into historical dress has really inspired me, and i feel i have a much better understanding of different eras of dress and fashions i didnt understand previously. The working at home has also helped me to think about how i work when im not at college, although not being on campus didnt affect me a great deal because i had all my fabric and materials, i have my own sewing machine, i have my own space to work in, it did make my think about how i manage my time personally and how i approach my own projects. Working at home does definitely have its drawbacks, especially in lockdown, since my laptop, room light, and sewing machine light all broke around the same time and i havent been able to get them fixed which has been slightly inconvenient to say the least.
To conclude, i’m really happy with what i’ve achieved and i’m proud of myself and the work i’ve produced being stuck in my house woth broken lights and limited space. The quality of work i’ve produced has been the best i’ve ever done, my attention to detail and patience with finishing is the best its ever been, and i’ve learnt so much on this project i’m incredibly glad to have done it.
All work is my own or properly sourced.
3 notes
·
View notes
Text
BIBIOGRAPHY
http://blog.americanduchess.com/2013/01/v354-antique-and-vintage-proportion-you.html?m=1
https://www.historymuseum.ca/confederationdress/media/pdf/The-Delineator-Vol.51-no5-May-1898.pdf
https://historicalsewing.com/demystifying-victorian-bodice-construction
https://www.pinterest.co.uk/mondo_gonzo/costume-ideas/
https://archive.org/details/keystonejacketdr00heck
https://en.m.wikipedia.org/wiki/Textile_manufacture_during_the_British_Industrial_Revolution
https://www.tandfonline.com/doi/full/10.1080/13555502.2014.991747
https://babel.hathitrust.org/cgi/pt?id=mdp.39015087427533&view=1up&seq=36
https://books.google.co.uk/books?id=3h9lCwAAQBAJ&pg=SA1-PA27&lpg=SA1-PA27&dq=where+is+victoriaN+high+bust&source=bl&ots=9KacTkUlxy&sig=ACfU3U3SBMgxPyXP7yYfJr_6nQW9zZN8Jw&hl=en&sa=X&ved=2ahUKEwj3rMCOh_zoAhXOX8AKHdJpCoIQ6AEwCnoECAYQAQ#v=onepage&q=where%20is%20victoriaN%20high%20bust&f=false
https://books.google.co.uk/books?id=bitACwAAQBAJ&pg=PA250&lpg=PA250&dq=1890%27s+waist+hip+bust+measurements&source=bl&ots=9pZnDQC0Xw&sig=ACfU3U3H9z0GoAORHt_-j6izVzNi0kiQDg&hl=en&sa=X&ved=2ahUKEwj5qpr6__voAhUPesAKHerkC4IQ6AEwE3oECAMQAQ#v=onepage&q=1890's%20waist%20hip%20bust%20measurements&f=false
Books:
Threads, contemporary embroidery for art- Charlotte Vannier
Portraits in lace- Charles Freger
Patterns of fashion-Janet Arnold
The Delineator-various (magazine)
Museums:
The Victoria & Albert Musem
Stedelijk museum
Rijksmuseum
The van gogh museum
Moco museum
The dutch costume museum
Foam photography museum
Huis Marsaille museum
0 notes


Text
Book one: https://docs.google.com/document/d/1-4bDb-Pk_lRA4OcFR31ULQFRJ3Nj3eHB0Dnt2mhaPYY/edit
Book two: https://docs.google.com/document/d/1HvyyKqw2I4Cm6N1fTG7Ww45TedZSLIsXKooU8bn7lxU/edit
Notebook: https://docs.google.com/document/d/116mkhcEL1d20l9Tr_KWUIwVg9KJzF2y1poVS6mYpElA/edit
0 notes
Text
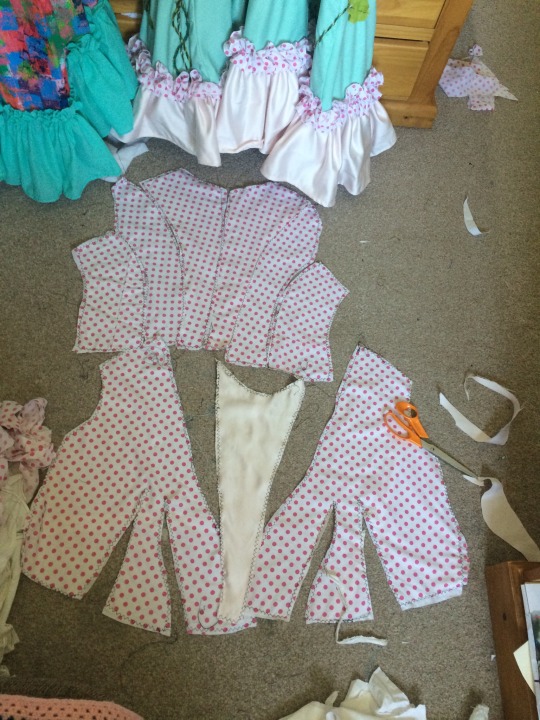

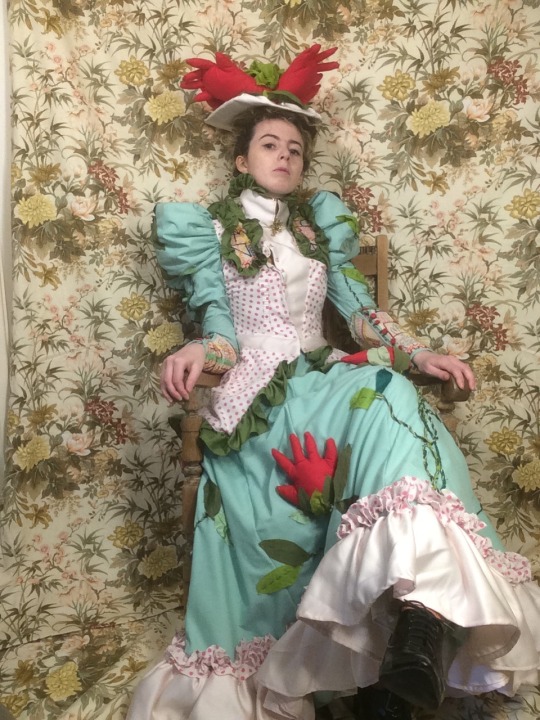
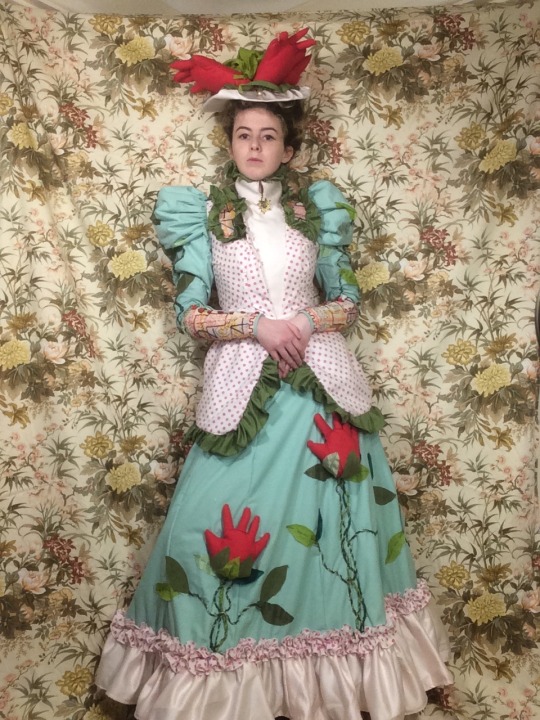
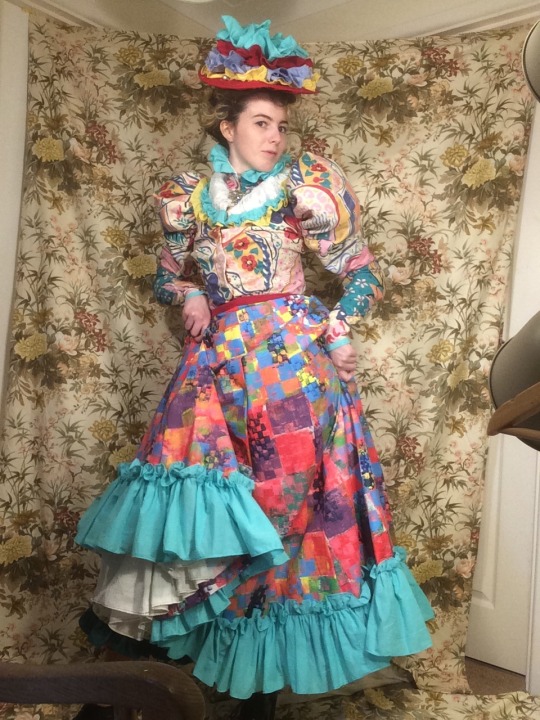
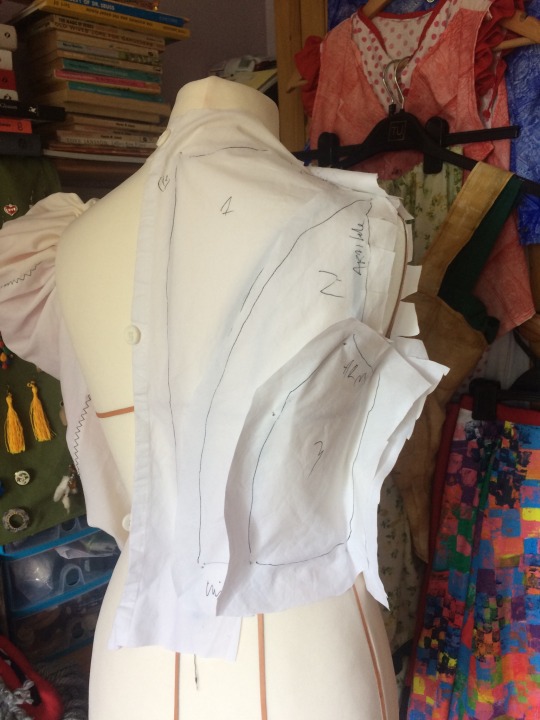
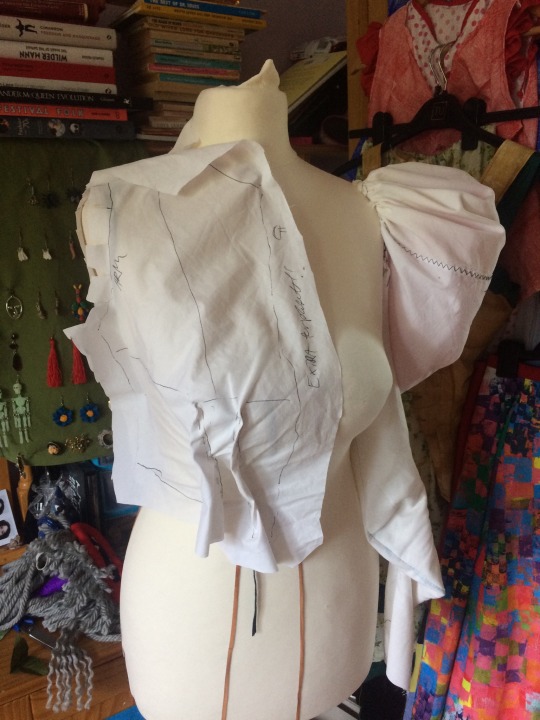
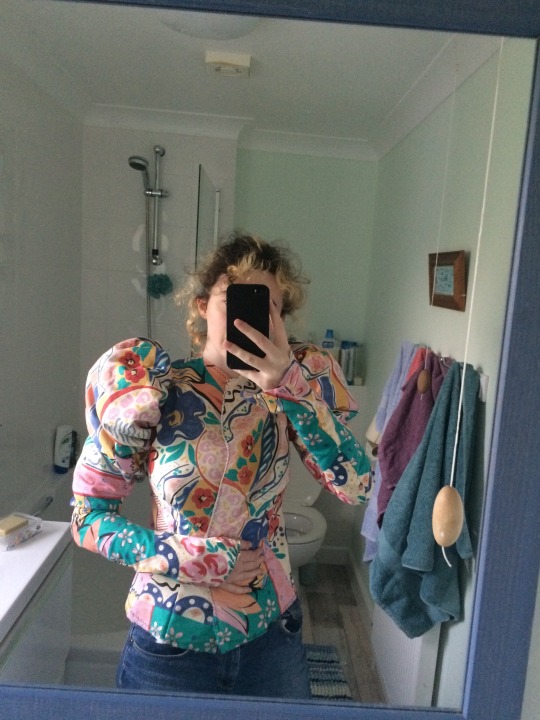
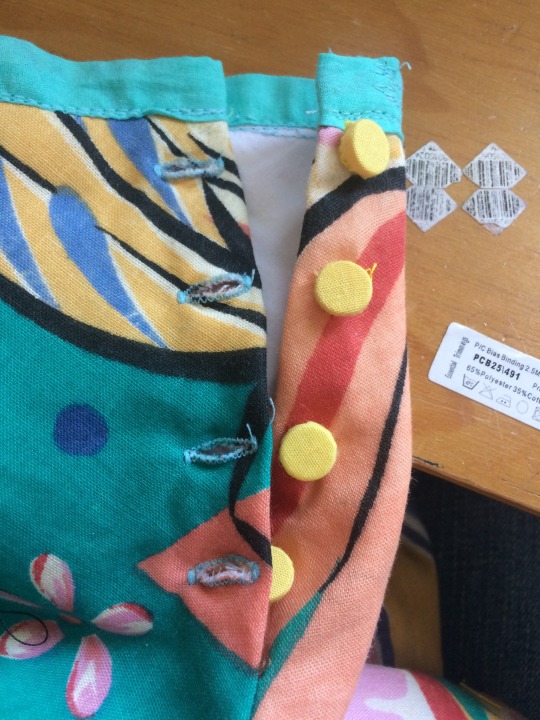
For this bodice i used pretty much the same basic pattern as the first one, with a few alterations; there will be a triangular panel in the centre front and the closure on one side of this, the same style as the historical bodice i studied. This was a pretty easy alteration to make, cutting a peice off the pattern from the shoulder-neck point to the bottom of the CF and allowing plenty of extra room when cutting as to allow for a fold to disguise the closure.
Basic construction wasnt too bad, the back seams are oddly slightly curved toward the small of the back which i’m not sure how this happened but it doesnt seem to affect the fit at all so i’m not going to alter it.
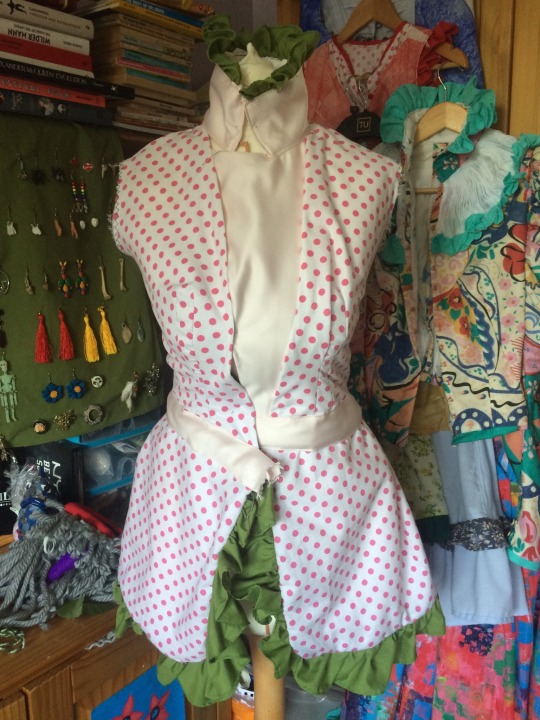
I had a few slight fit issues after adding the waistband and side hip panels, which took a bit of altering. I’m very glad i got to study the historical bodice to understand how this type of closure abd collar works because it ws very tricky to get it right and there is still a bit of a gap where there shouldnt. It took alot of undoing and altering, but i am pleased with the fit in the end and am glad i took the time to redo it.
Next the sleeves: i made a terrible mistake when cutting my skirt fabric to not leave enough spare for the sleeves. I did manage to peice together just enough to make them, but it was close. Need to take this into consideration more, knowing what i need to use a fabric for. Once peiced, i cut and flatlined my parts, using peiced bits of old white scrap. I am quite glad to be using these old bits up even if it takes a little longer. I made this sleeve without the forearm part, so as to leave room for my embroidered cuffs.


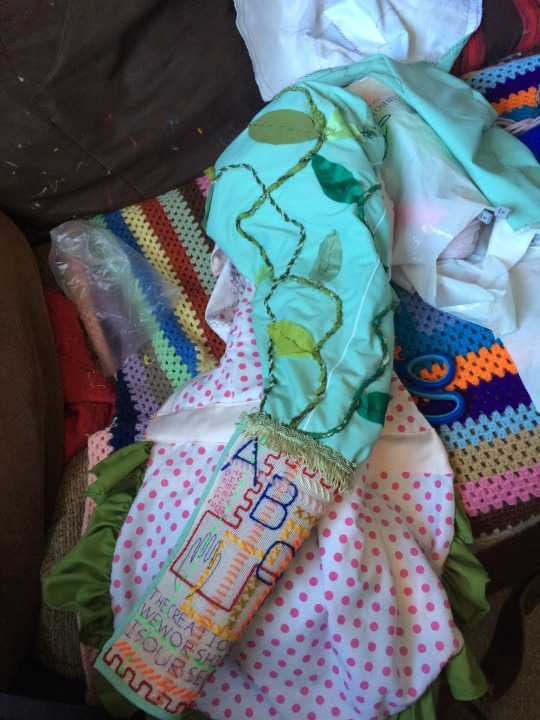
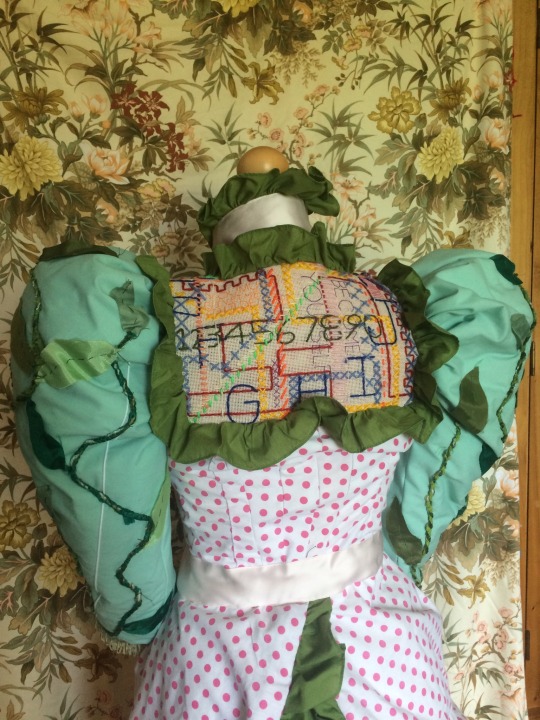
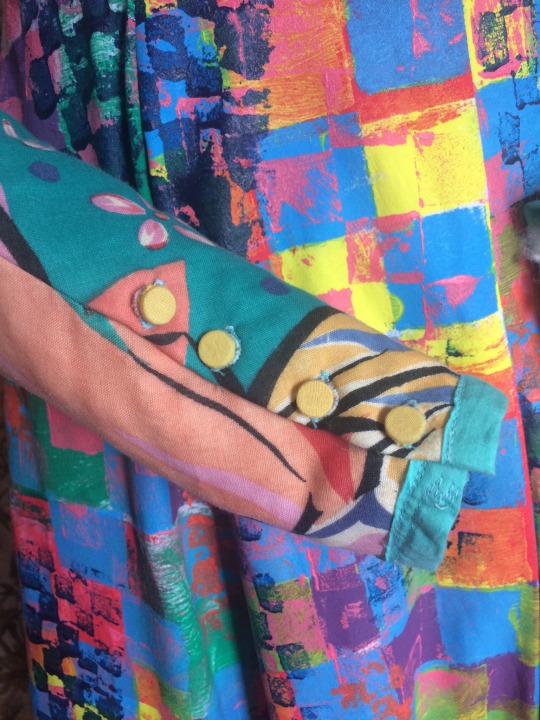
I flatlined the cuff using bias binding to neatly cover the edges. It was a bit difficult to attach to the sleeves, working in the round, but acheivable. I then sit in the sleeves, interfacing them beforehand. I then decirated the fabric with the cords and fabric leaves i used for the matching skirt. On my plan i also had hands, but i felt they would be much too heavy, and the leaves are decoration enough. I also added some green fringe i found in a free box down the road, which i think adds a lovely textural elemant and also gives it a very victorian feel, grounding it more in its inspiration as well as having all these fantastical elements.
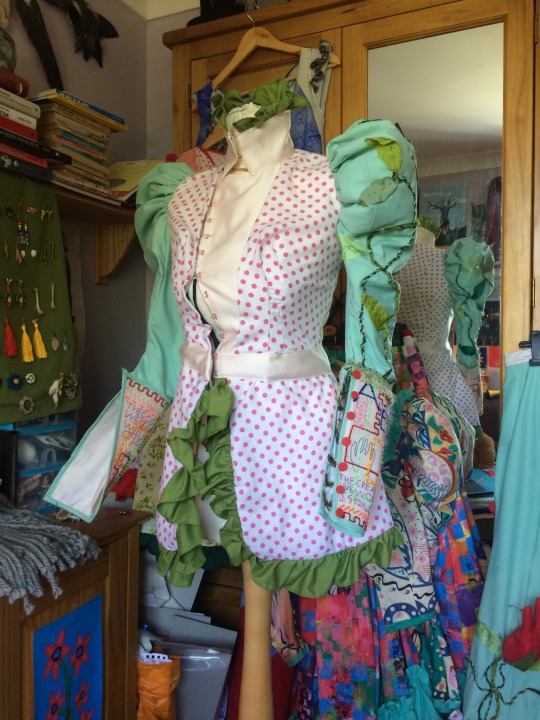
To close the cuff i added buttons i covered in the same fabric as the hands and used the cords as loops. This makes a very tight closure and although this makes for limited movement of the arm although it looks really good.
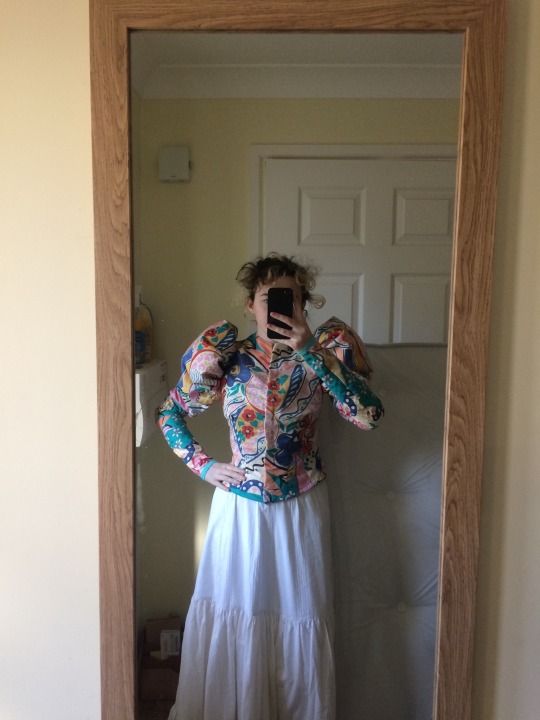
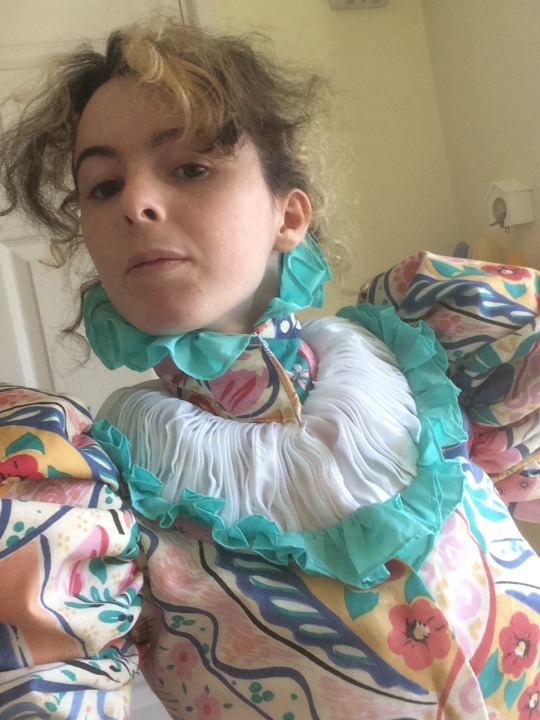
I’m really pleased with the cross stitch collar, the frill really enhances the colour and pattern. Overall i’m really happy with this bodice, one if the things i think work best is the micture of textures. The cords and leaves, stuffed elements, fringe, cross stitch, and frills work together to create a wonderfully tactile peice that i’m really proud of.
0 notes
Text

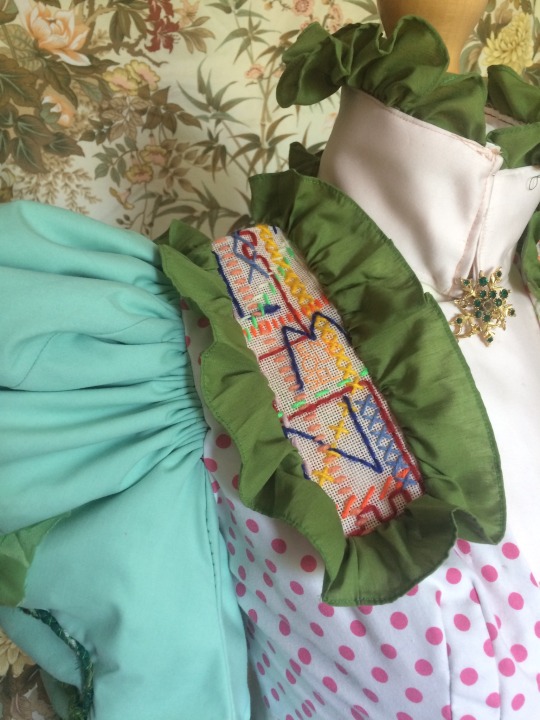
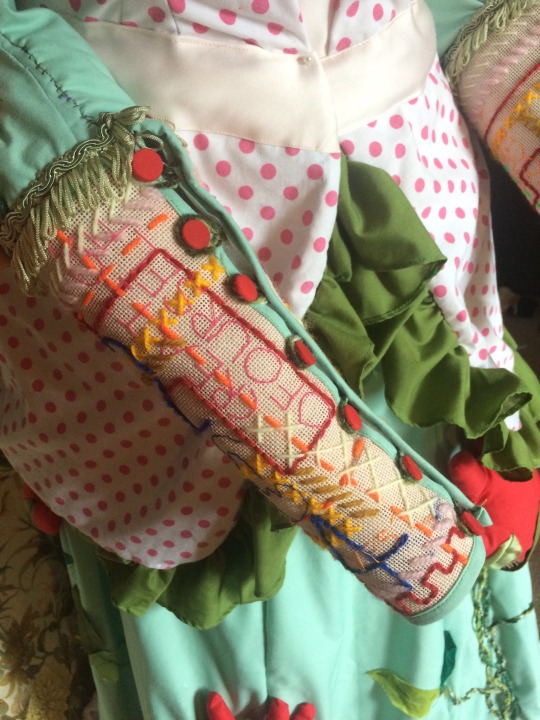
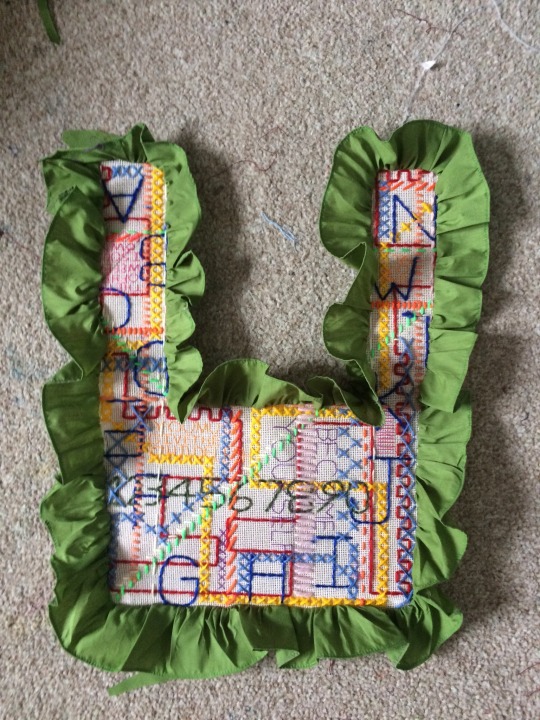
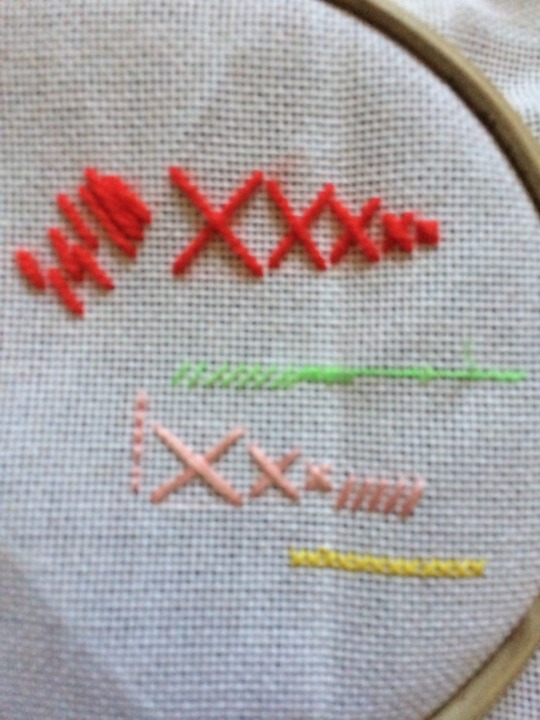
My cross stitch cuffs and shoulder decoration. I’m really pleased with how they turned out, adding the text aspect really brings it together and solidifies the distortion of traditional cross stitch samples as this is a very popular aspect of them. The mixture of colour, textures, thread weight, pattern and text creates this wonderful disorientating effect and makes you look closer at all the mixture of details. I’m really pleased with these and am anticipating making them part of a garment.
0 notes
Text
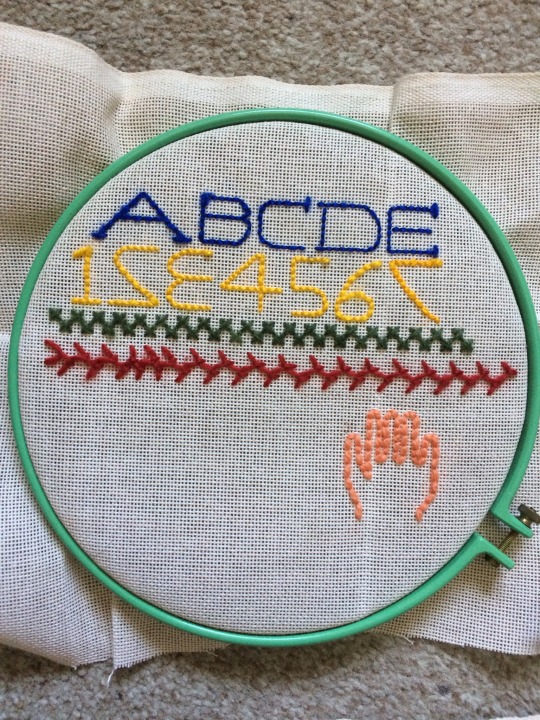
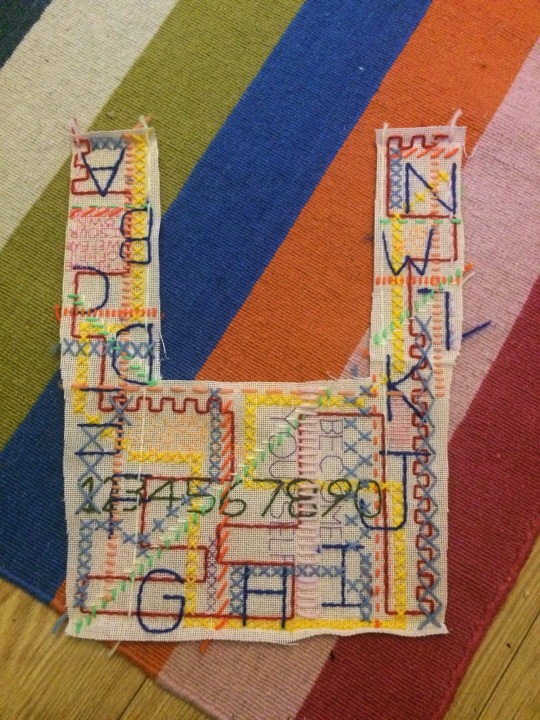
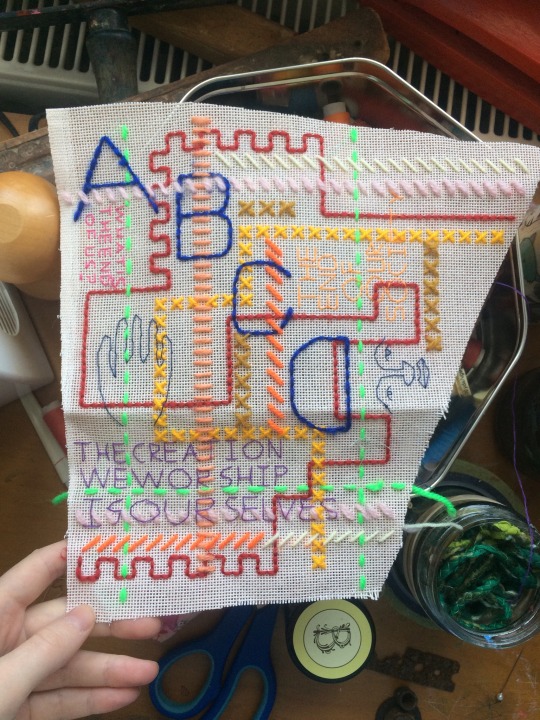
Cross stitch samples in preperation for the cuffs and collar of my next bodice. Inspired by traditional cross stitch and embroidery designs and techniques, and using a variety of thread weights in this fabric. I’m happy with my practice samples and am confident with my skill level, although i’m not going to use the embroidery hoop as this just dents the fabric and its stiff enough to hold still abd be taught in itself. My idea for my embroidery on the cuffs and collar is more similar to the design i did on my prints, overlapping colours and weights of all types of patterns. I also want to incorporate text, as this is often a part of traditional childrens cross stitch samples.
0 notes
Text
To begin the first bodice, i made a mock up of how the sleeves would work. I made a few, and managed to refine it into a suitable size and shape using some tulle to stuff it in a way. The design of bodice for this one is pretty much the same base as the corset covers, except i added two more back seams to be more like the bodice i studied. It was alot easier to sew these when it was three instead of one, probay because i could make the curve much less severe.
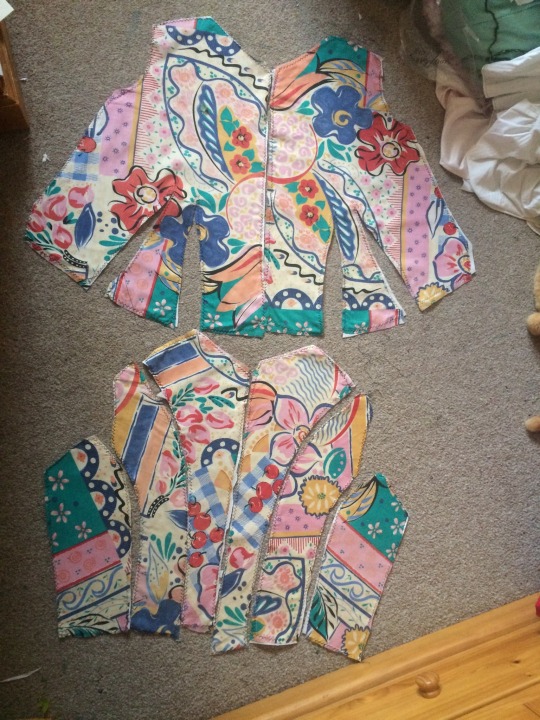
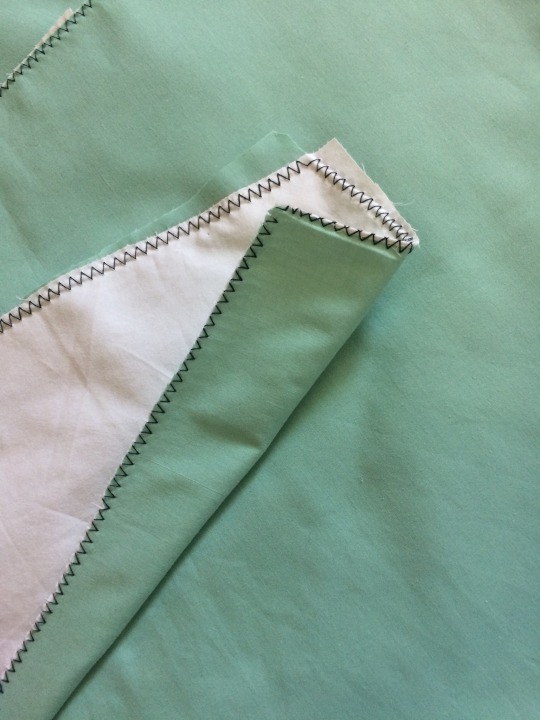
Next i flatlined all the peices of the fashion fabric i cut, doing so by zig zag stitching the eges together. The historical way of doing this would be to whipstitch the edges by hand. A better modern way would be to use an overlocker, as this would trim all excess fabric as well as binding them together. For the lining of all the bodices i will be using scrap fabrics peiced together since i’ve run out of whole bedsheets and large scrap. This will mean more time to peice the lining but i am glad it means i get to use up the very large bag of white scrap i have.
I left the collar out of the general construction so as to fold the decoration into it and finish it neat. Once constructed, i made very few alterations before adding the sleeves. I also added some interfacing to the shoukder if the sleeve before gathering it inti shape, this reall enhanced the shape and was a good addition. A historical equivalent would be tarlatan or horsehair. Next step was to add front and wrist closures- the very small plackett on the wrists was difficult to find buttons for, and very fiddly to cover but i’m very pleased with how it turned out, it looks very neat and is very functional.
I had a bit of an issue with the front closure; i added all the right amount of hooks and eyes, but some of them keep unhooking. I did have this same issue when i tried on the historical bodice, some of them kept unhooking even though it was very tight so i dont think fit is the issue. Ive been trying to find out more about this online but so far nothing; i think this is just what happens when hooks and eyes are used for a front closure. They were only generally used as fancy daywear and evening wear, not very functional for general daywear. I can fix this issue by adding a brooch at the neck and a small safety pin on the chest, but given this issue is about 130 years old i dont think i’m going to properly fix it.
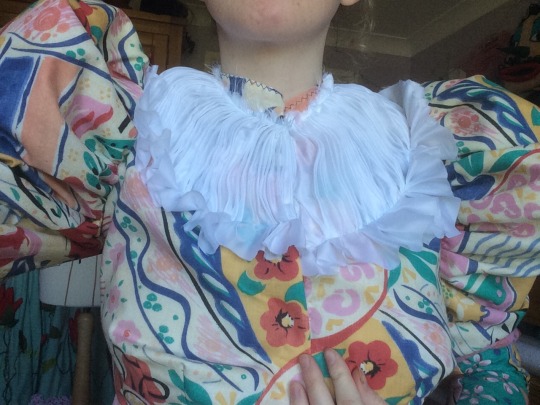
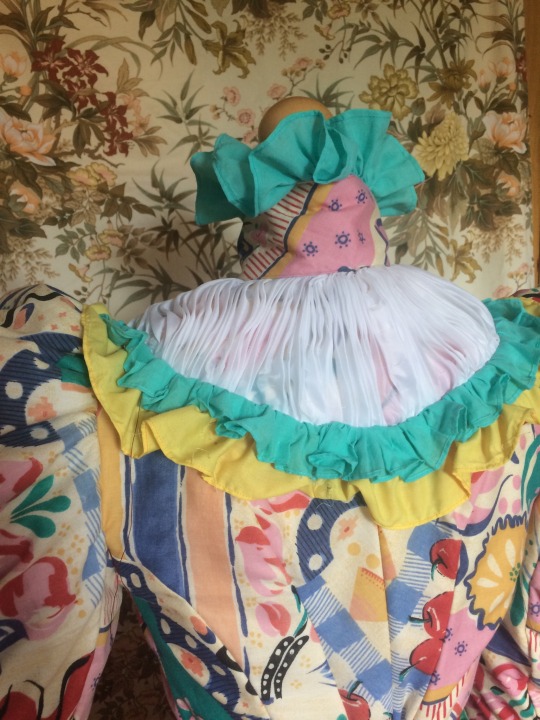
For the decoration, i’ve strayed slightly from my design. Instead of smocking i chose to do uniform gathers to add more variety of texture, and the nature of the gathers meant i could adjust it to the shape if the shoulders so it fit perfectly. i initially didnt add the yellow frill because i felt it overwhelmed it, but i ended up adding it last minute and it actually worked much better. It was a little hard to get the collar to fit right, it took alot of adjusting, but this will be really helpful when making the next bodices. I also used interfacing to make it stiffer, which was really effective in getting that stuff high collar look. Overall i am really pleased with how this looks, it goes really well with the skirt too, it definitely fullfills my concept in looking victorian but distorting it with crazy patterns and colours. It definitely needs a hat, which i will make if i have time.
0 notes
Text
Sustainability and recycling in victorian times
Before the industrialisation of textile production at the beggining of the 1800’s each peice of cloth would be hand woven, printed, painted, and individually treated. Quality of fabric was incredibly fine, something we have lost through the industrial revolution and find impossible to replicacate today. Although quality of textile itself goes down, attitudes to it remain the same; cloth is so valuable that rags were collected and payed for by rag and bone men who sold them to paper mills to recycle into paper. Nothing went to waste, clothing itself would be cut in the best way to save fabric; all clothing was made either by home sewers or tailors, so would be fitted to the exact individual, wasting no fabric on pre set sizes or mass produced fashions. These garments could be altered to changing fashions, altered to weight changes, recycled, handed down; our modern experience is vastly different. Clothes are factory and sweatshop made, made to last as long as the trend does, there is no quality or longevity in these clothes. It would be impossible to hand down these items, some deteriorate after a few months of regular wear. Its also incredibly bad for the environment, a simple cotton t shirt takes 2,700 litres of water to produce. Our £3 impulse purchases are killing the planet, treating our clothing as temporary throwaway items has polluted our planet. Every second, one truck load of textile is either burnt or sent to landfill; the fashion industry contributes to 20% of global waste. Compare this now to the victorian rag recycling- nothing went to waste. Victorian values are obviously not great, but their attitude to textiles and clothing is something we could learn and benefit from. Treating our clothes as valuable, fitted, long lasting items to be cared for is what will help end fast fashion.
0 notes
Text
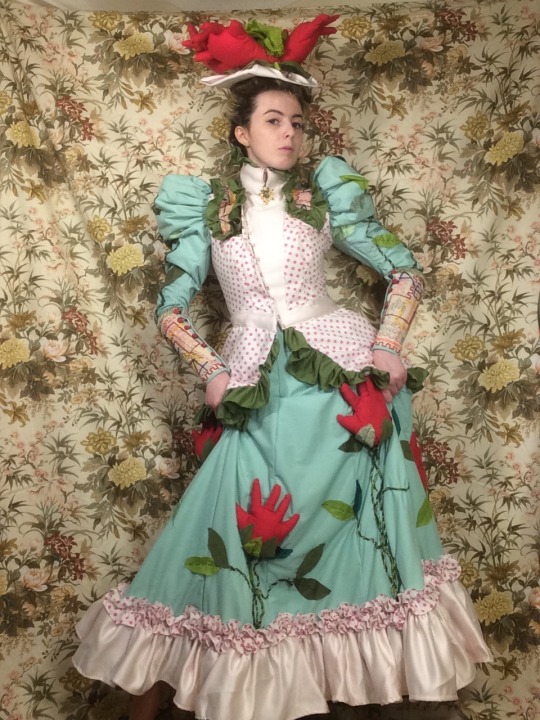
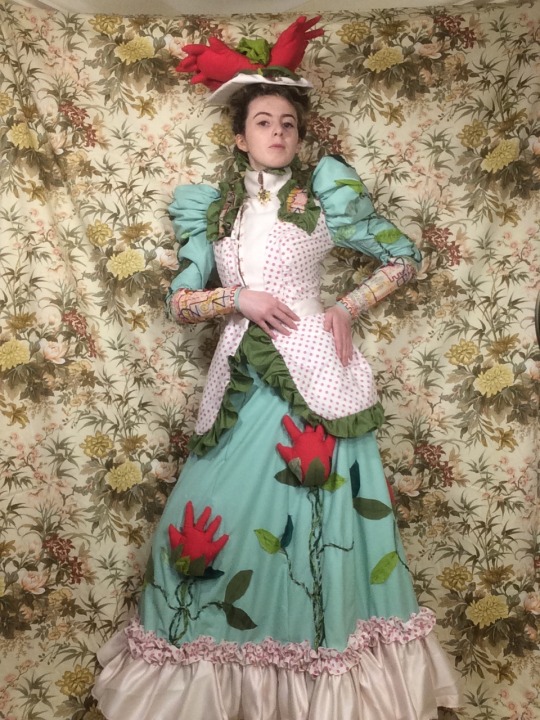
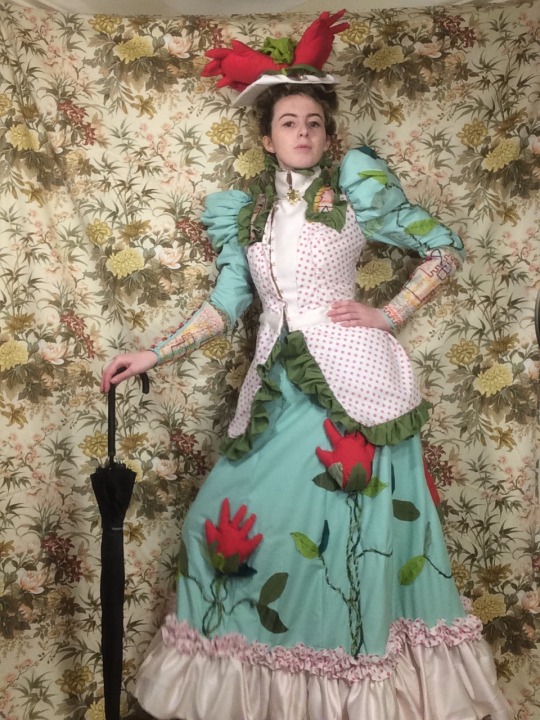
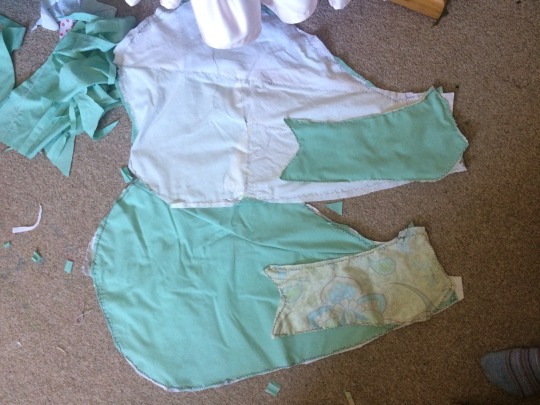
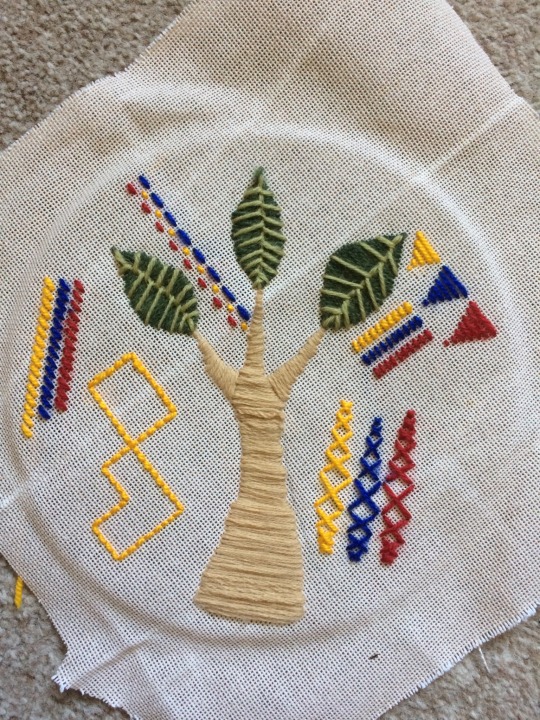
For the last skirt, the green fabric i have is rather thin so i decided to flat line ot using the peices from the mock up i made. Flatlining for this period is not very historically accurate, it would usually be done as a seperate peice more like a petticoat. But the fabric is so thin and the stuffed peices and decoration will weigh it down so that flatlining is appropriate. Once pressed and joined together, i added the waistband and folded the edges of the back so as to create a plackett when finished as i forgot to do this on the other skirts and had to add it in after. I then created a frill out of the pale fabric, although i had to redo it as the fabric is very tricky to work with and the hem was too small as so made it lift up in an odd way. Once this was done i added the polka dot frill, gsthered in the centre and hemmed both sides to add a new texture to the skirt.
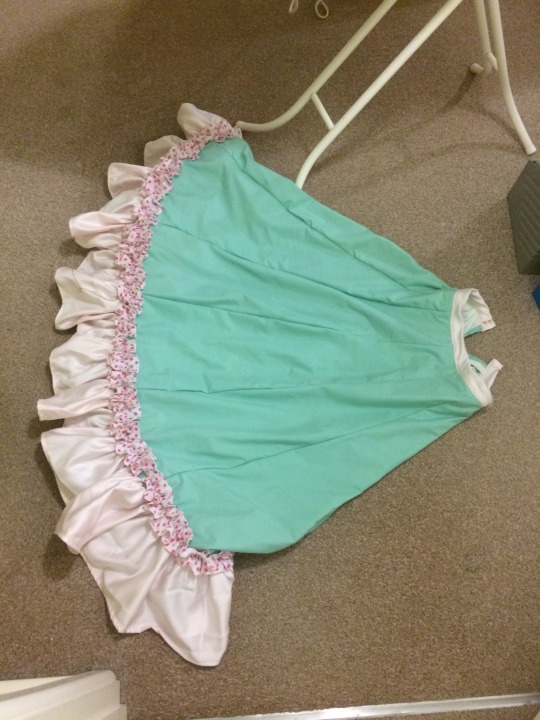
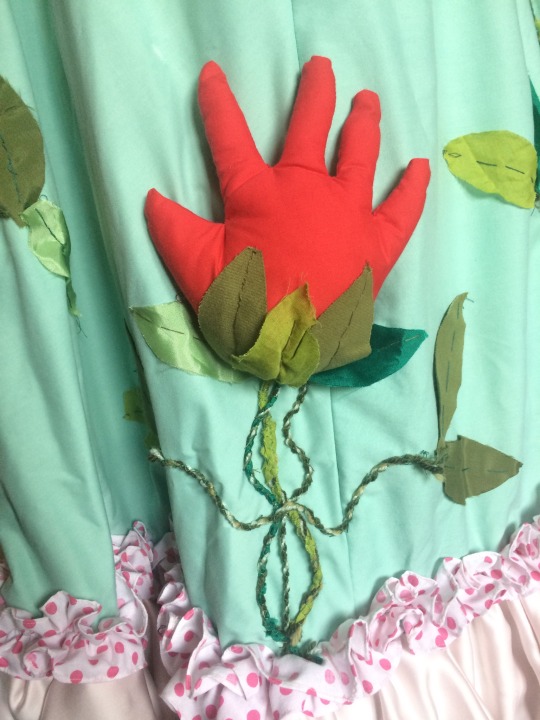
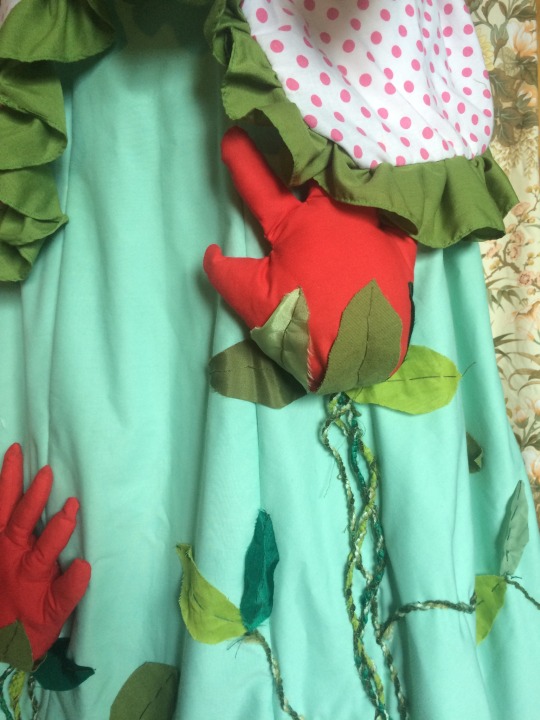
With the frills done i began my decoration: i first added the hands, so as to get the placement just right, before sewing on the cords i made using old wool and scraps of fabric. I then stitched on the leaves i cut from various different fabrics to cover up the raw edge of the hands and cords, as well as a few on the stems. On the back where there is no hands i added a few stems and leaves to fill it out.
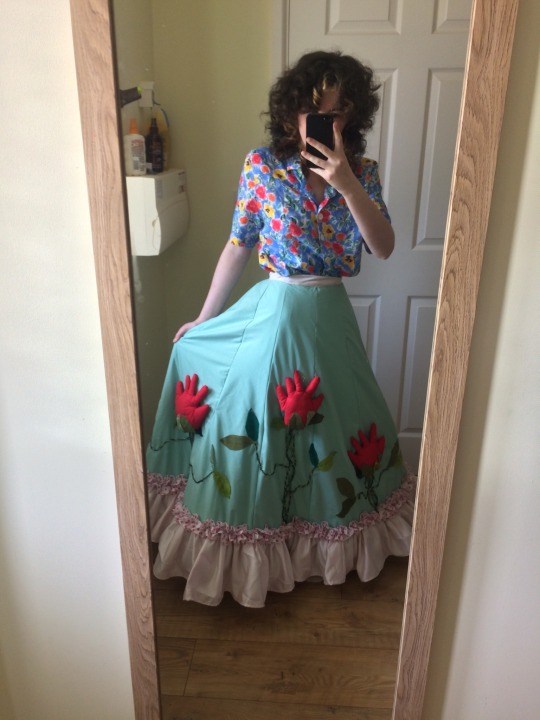
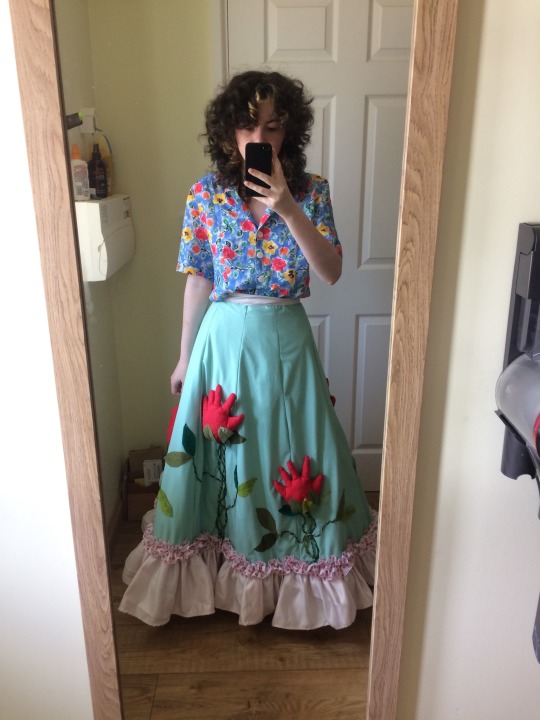
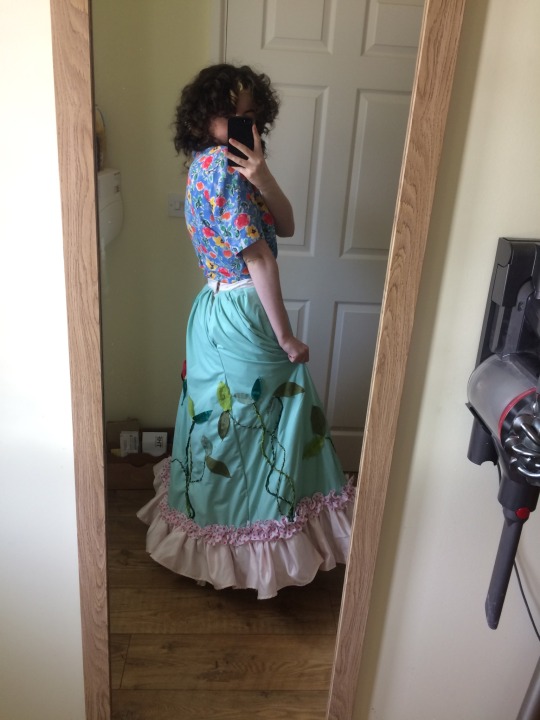
I’m really pleased with how it looks and i feel it accurately represents my design, i really like how the hands look, i’m glad i decided to se these instead of just fruit. The soft sculpture element of the hands create a new dimension to the skirt, it looks realy odd and i’m pleased it does as it is fulfilling my concept. The leaves and cords add a wonderful texture, especially with overlaying and intertwining them both. I’m pleased with this skirt not just as a garment but as a textile peice of art.
0 notes
Text
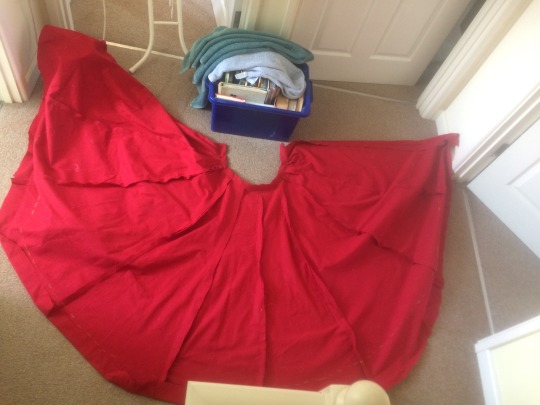
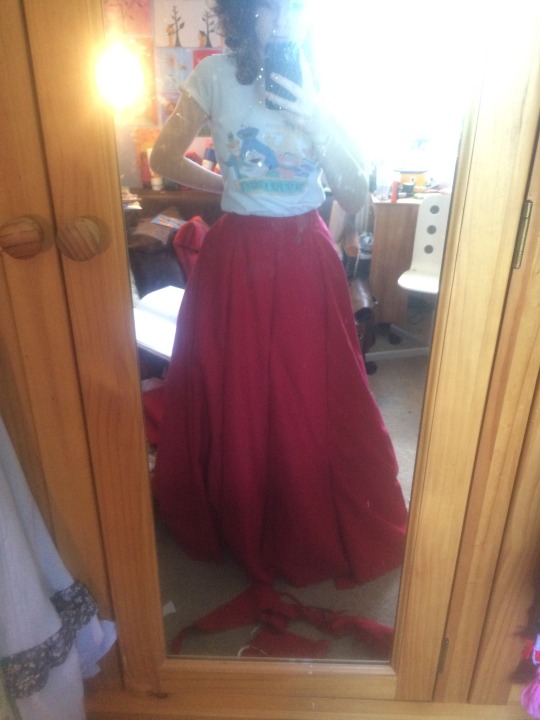
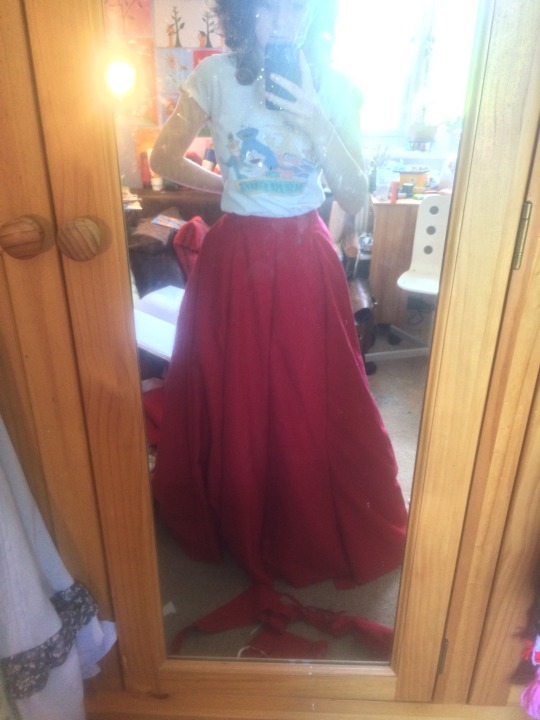
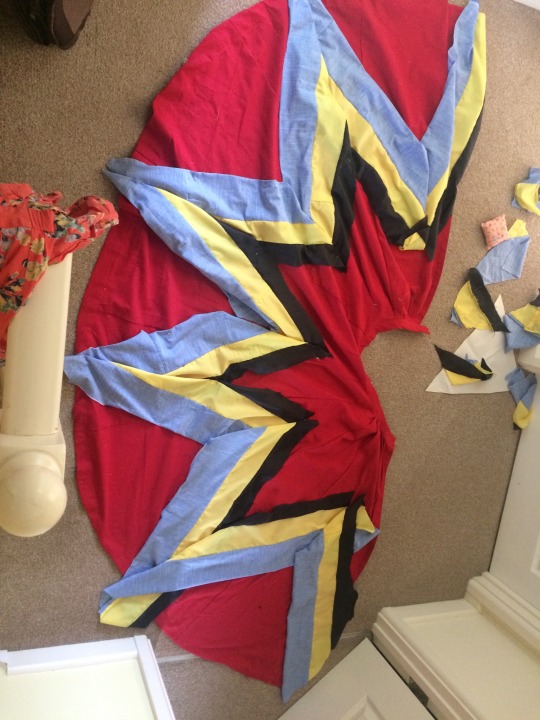
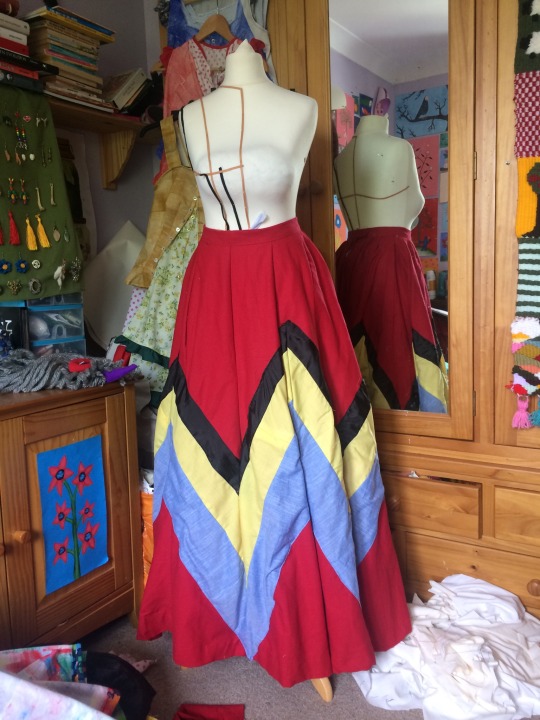
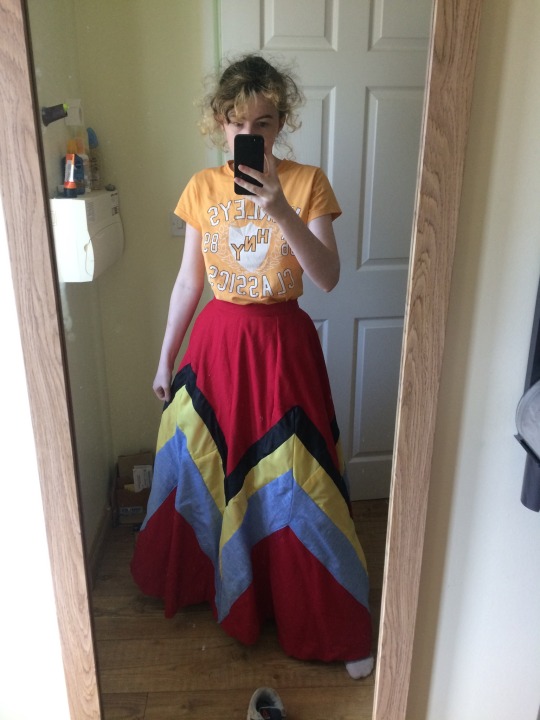
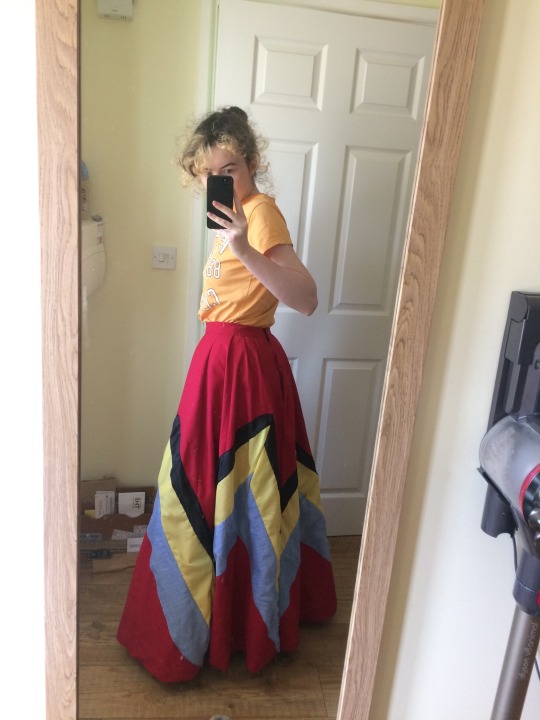
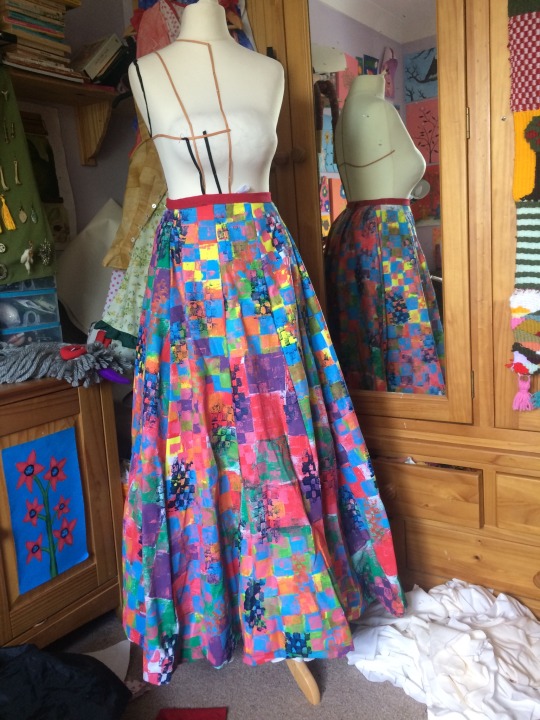
For the red skirt, it was pretty straight forward with just cutting the peices and peicing them together. I did run into an issue however, it was far too drapey and had too much excess fabric. I took a couple of inches out of each seam which seemed to do the job fine, although i probably couldve still taken more out.
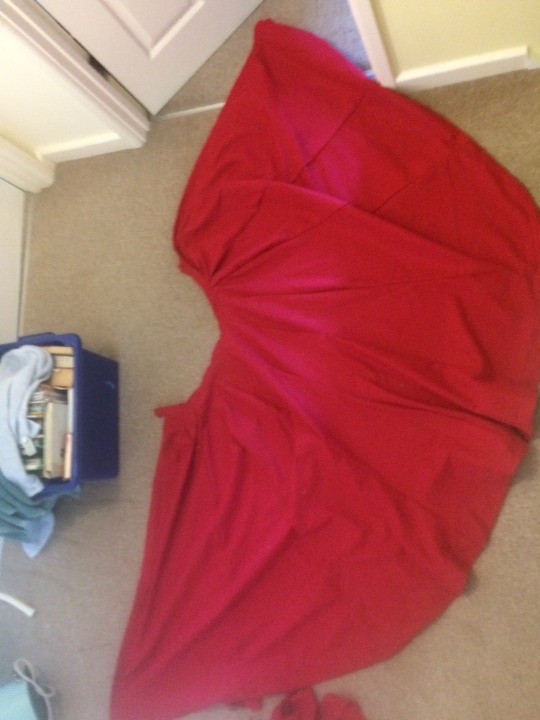
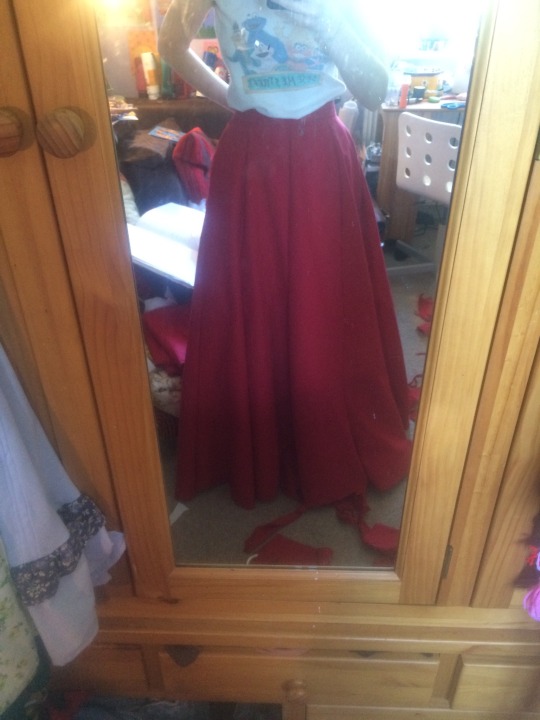
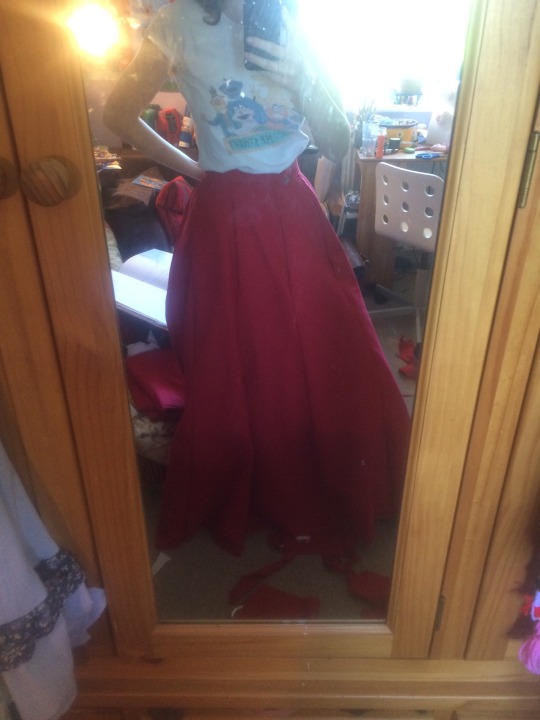
Next was the applique; i chose to do this before sewing up the back so that i could work on it flat which would be much easier. I made a long ribbon of each of the fabrics for the stripes before attaching them together. This way i could treat it as one large trim, but in himd sight i think it would have been better to do it individually even though this would have taken alot more time i think it would have saved some of the problems i had. Even though i meticulously measured and marked where the peice needed to go, it still went a bit wrong, i have some places that had excess fabric and drooped or pulled a bit. I think it also may have shifted a bit whilst i was sewing. If i had time i would do it again but i dont think its possible right now. Overall i am pleased with how it looks, i feel it represents my design well, but i feel it would be best photographed from a distance.
0 notes
Text
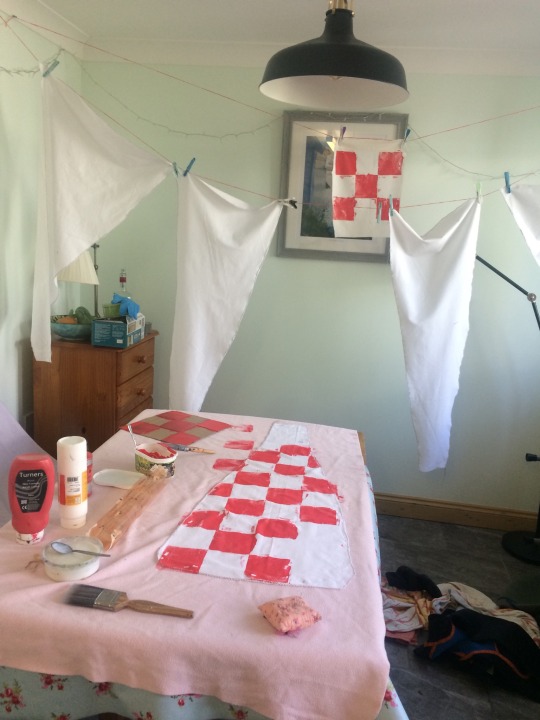
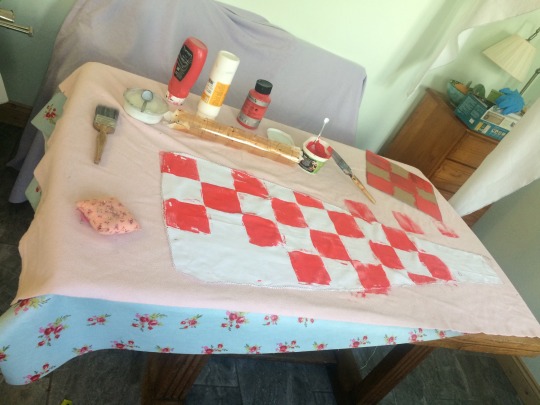
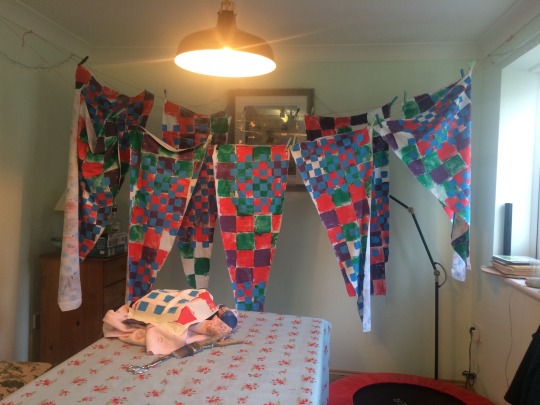
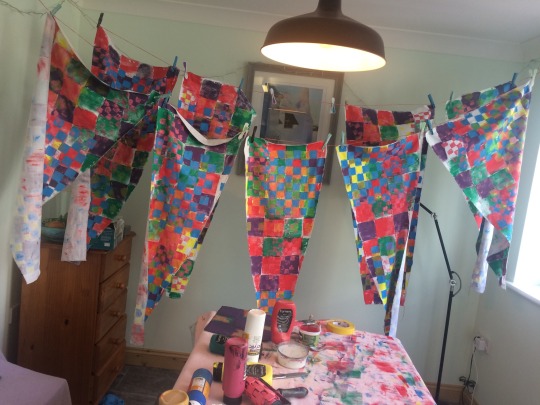
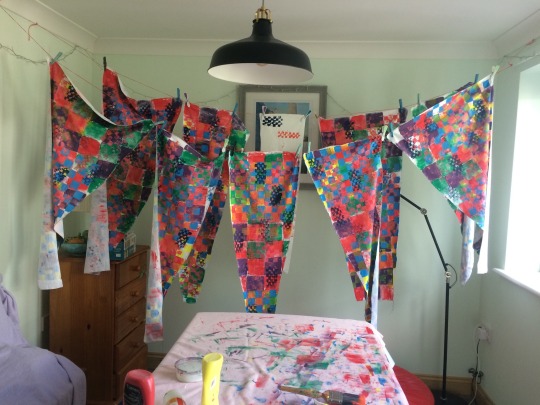
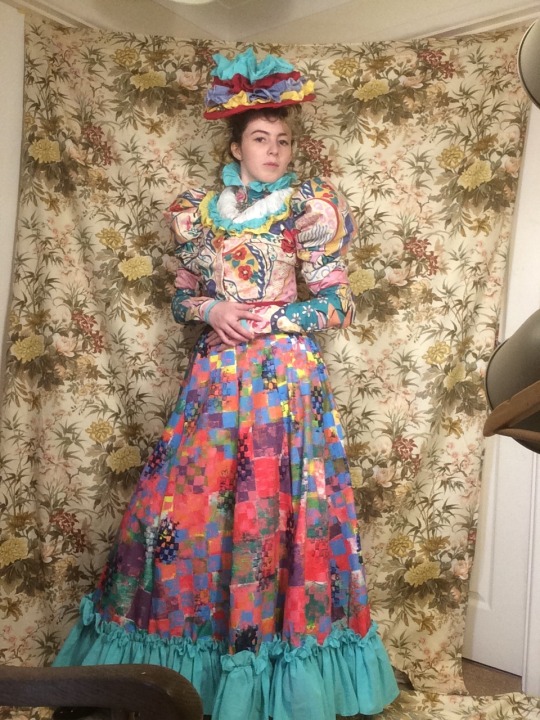
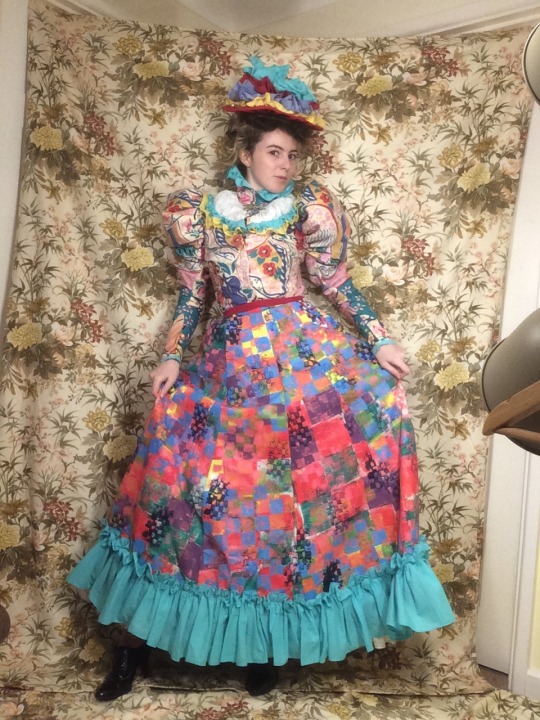
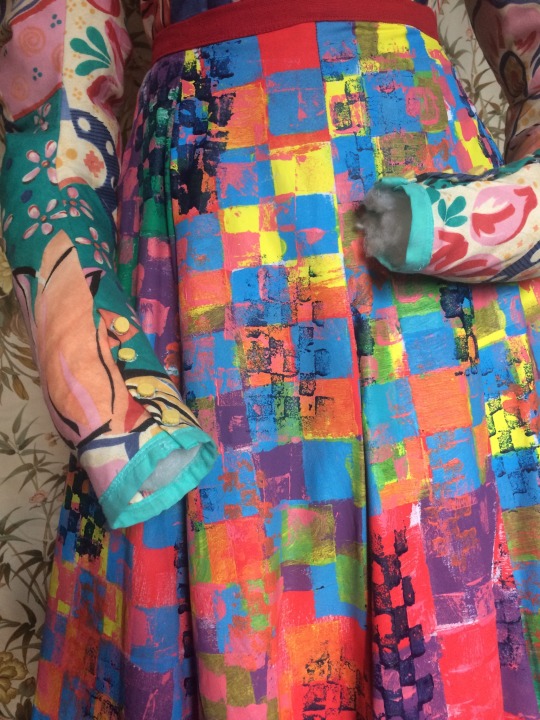
For the printed skirt, i first cut the peices and edged them before printing because i didnt want to waste ink printing the whole sheet pf fabric and also this way the checkers all face the right way and there are none of them angled different, and i can ensure that they all have a good coverage of pattern on. I used my tools that i had devised earlier, along woth the inks i had mixed. It took about two days in total to print it, but im really happy with the outcome it looks so good and definitely fullfills its purpose in distorting traditional patterns. I played around wth the tools to overlay and distort each use, like using the stencil to only create one line of squares or ofsetting the second lauer to overlay.
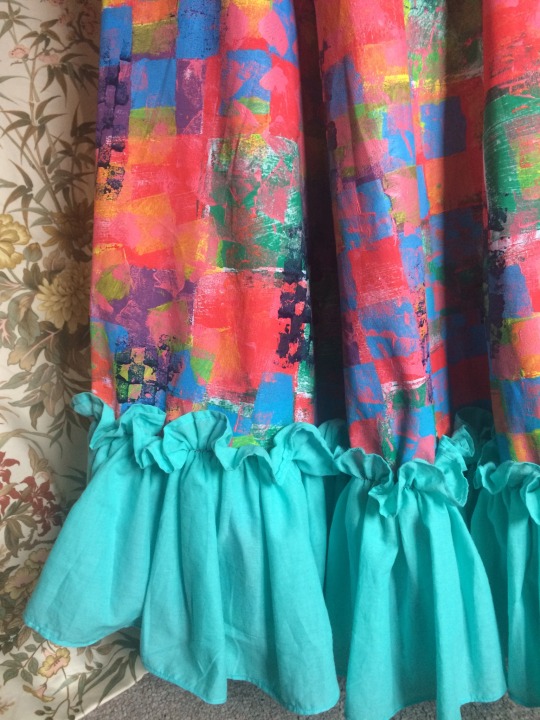
One problem i do have with the skirt is that because there is so many layers of ink, it becomes quite stiff and sticky, so it was quite hsrd to push pins through and the machine had a bit of a time sewing through some parts. Aside from this though, it was fairly easy to construct. I added a waistband in the red curtain fabric as i wanted ot to be nice and sturdy so a thick cotton was appropriate. I then added the frill before closing it together at the back, as i wanted to work on it flat instead of the in the round as i found this easier. For the frill i used just the turqouise fabric instead of as well as the red, because the red was a bit too thick and heavy and i felt as though it would weigh it down quite alot and also be really tricky to gather. But Im really pleased with how the one ruffle looks, i kept the top edge showing as this was a common way for ruffles to be done in this era, although it did mean i had to hem both sides of the fabric which was a bit of a pain as it was just over 50 feet long when flat.
One trouble i did have is figuring out how it was supposed to close, the only insteuctions i could find on this said to do it in “the usual manner”. One thing i have learnt from this project is that the victorians were typically not very good at writing down instructions for things that were thought to be common knowledge. I could find no patterns or instruction for padding either. But working from pictures and some very unclear diagrams, i managed to decipher that it would usually be closed with either hooks and eyes or buttons, sometimes having the split down the back seam left open and be covered by its own pleats/ruffles. I decided to go with hooks and eyes as it would hide better, and the pleats cover the opening really well. I will use this technique for the rest of the skirts too.
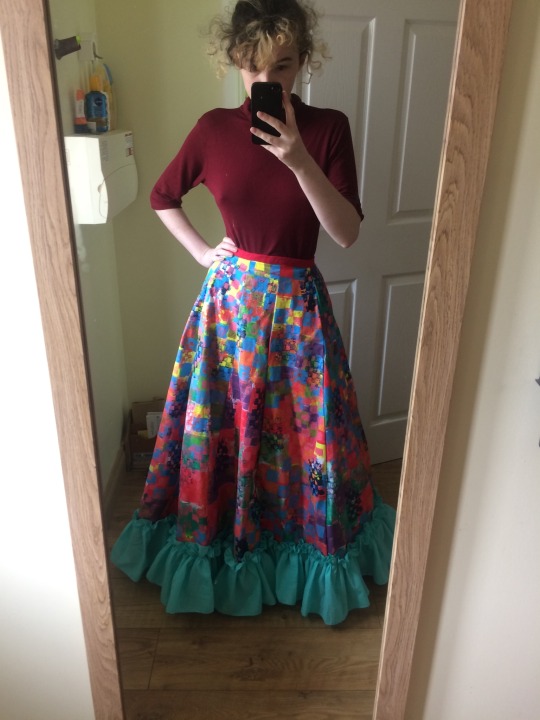
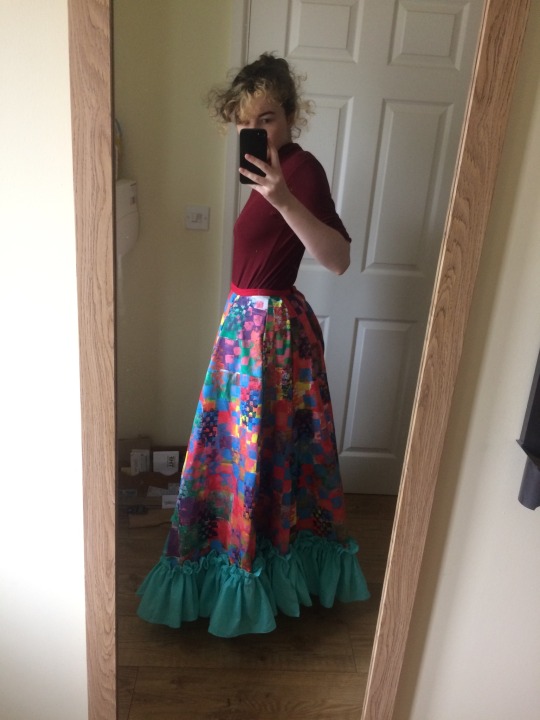
I am extremely pleased with the end result, it holds just the right shape and the turquoise frill complementsthe colours in the print perfectly. I love how loud and obnoxious it is, all the colours are so bright and the print is so manic it would be difficult NOT to look at. I feel it really fullfills my concept and i’m very pleased with it.
0 notes
Text
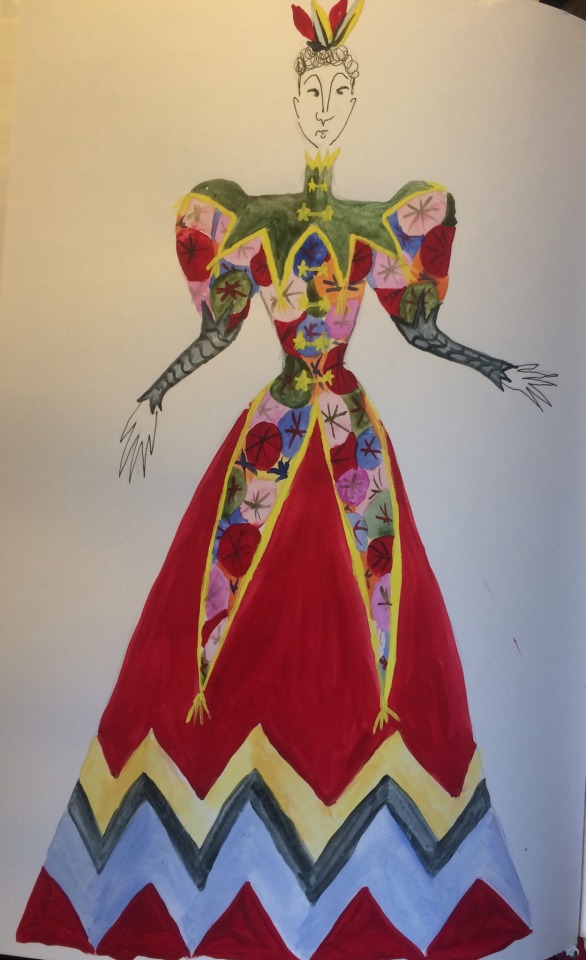

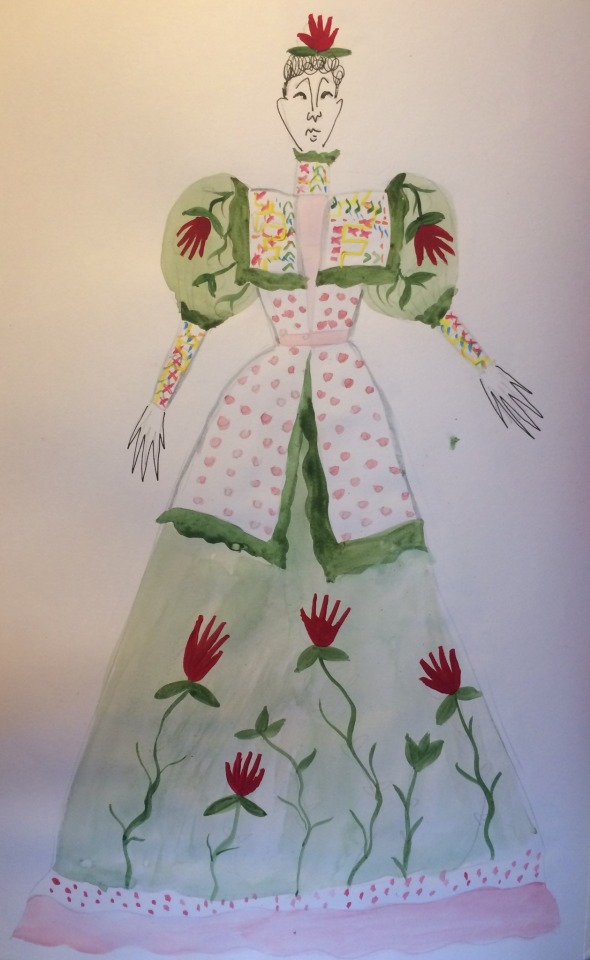
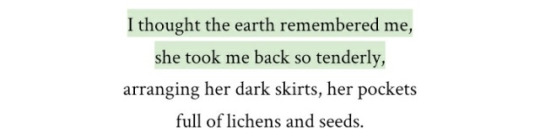
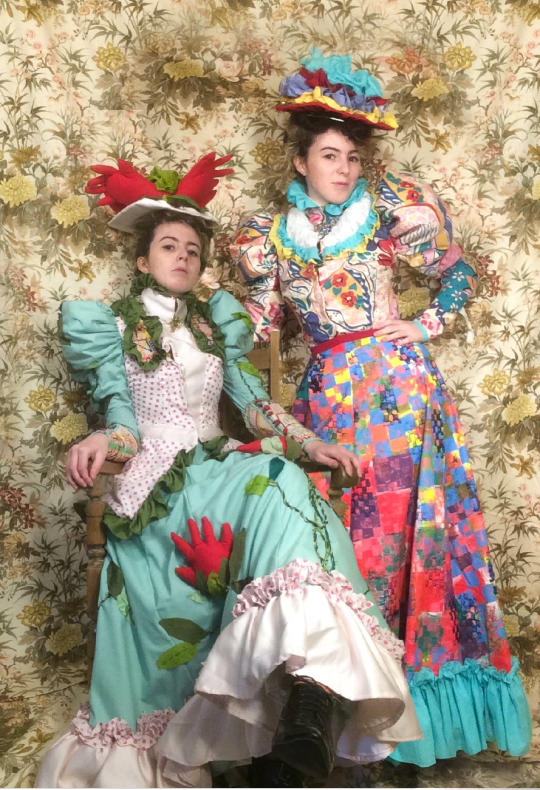
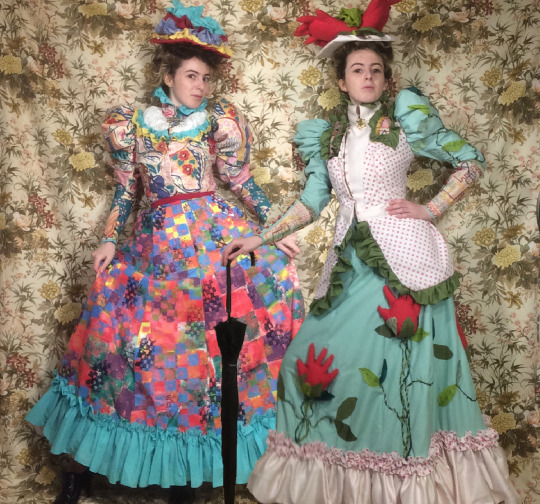
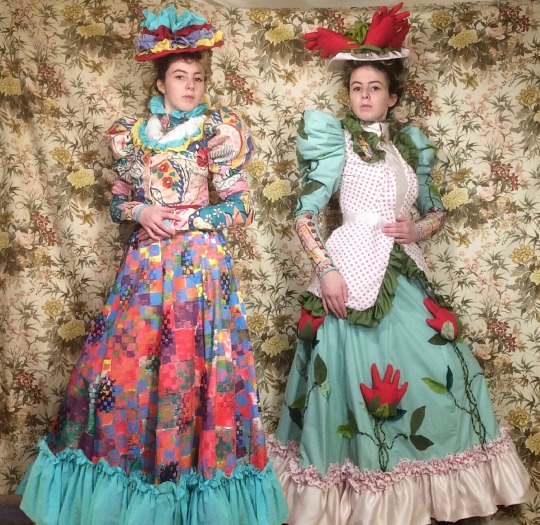
My final designs-these are more detailed versions of the ones i previously posted, with one or two elements changed. The fruit of the dress on the right are now going to be stuffed hands, as i felt fruit was a bit too normal and i liked the absurdity and subtle horror that came with the disembodied hands. I’ve altered the bottom flounce slightly on the centre skirt, but aside from this it remains much the same. The zigzag applique on the dress on the left has been slightly altered, adding yellow and having all the applique as stripes instead of having some on the bottom too. I have alsp added hats to the design, which i will make only if i have time.
To clarify my concept, i am manipulating victorian design through colour and pattern whilst incorporating both traditional and modern techniques such as embroidery/cross stitch/lace and soft sculpture/fabric manipulation. I will also be keeping the construction and layers of the outfit as historically accurate as is practical because i want to learn more and better my construction skills especially before going to university.
So far i feel i have fulfilled my concept, i have learnt a great deal both about history and fashion as well as different ways of constructing garments; i also feel my skills have developed much more and the more time i take with each method and the more mistakes i make i am learning, and i am grateful for this.
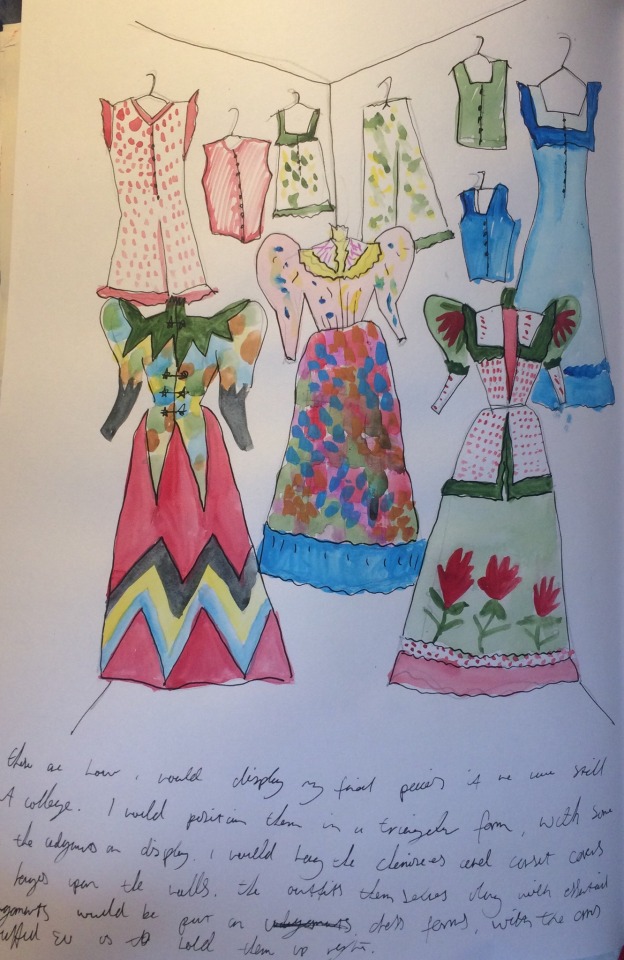
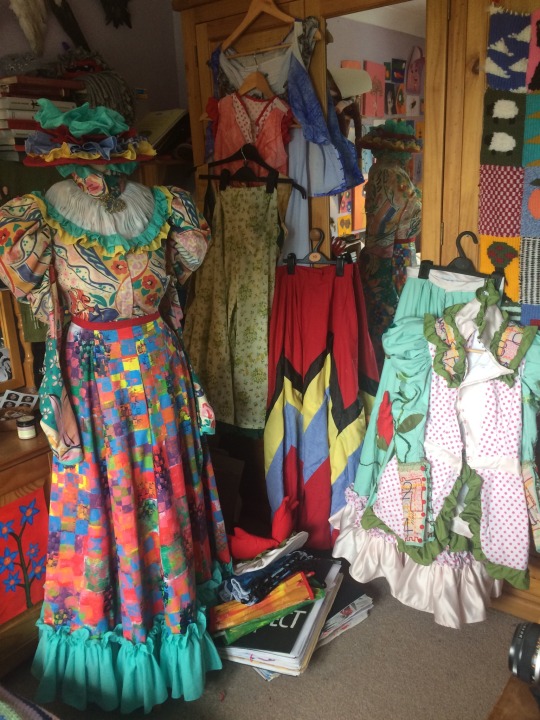
This is my plan as for how i would display them at the show, dressed on mannequins with the sleeves stuffed so that the arm hangs correct, stood with one just behind the others in a triangle like formation in a corner. I also would have the chemises and corset covers hanging on hangers behind them, as these arent necessary for the mannequin to wear and it would show some of the hard work that would otherwise be hidden. I would also liked to have done a photoshoot/display at a property such as lanhydrock or trelissick as they have victorian architecture and elements to the gardens. The orangery in trelissick or the great pillars in front of the house, or the stairways in lanhydrock or the by the great rhododendron bushes in the grounds.
So far i am pretty much on track for my time plan since easter, at this point i have completed the skirt and have a little over two weeks for my bodices, i was hoping for three but i feel it is still doable to complete them in time. I will focus on completing them to the best standard i can imstead of rushing to be complete because i want them to be the best i can.
0 notes
Text
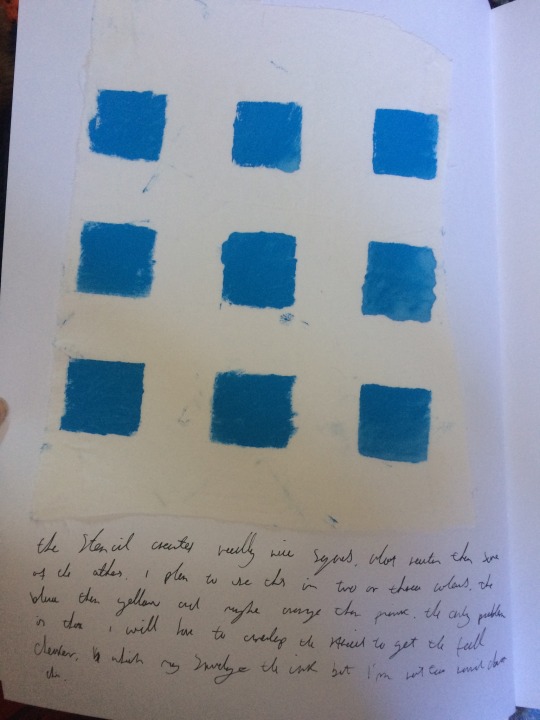
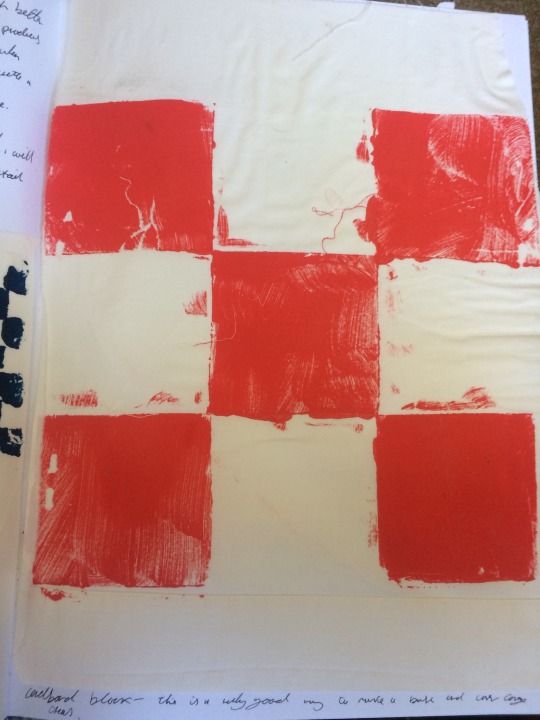

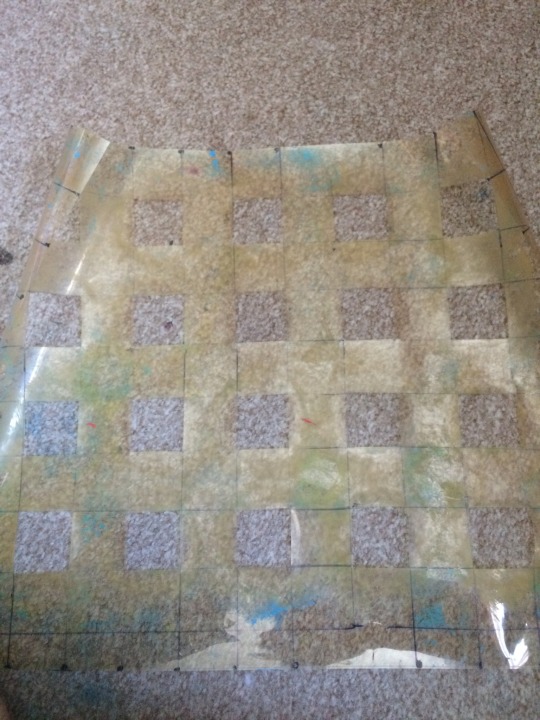
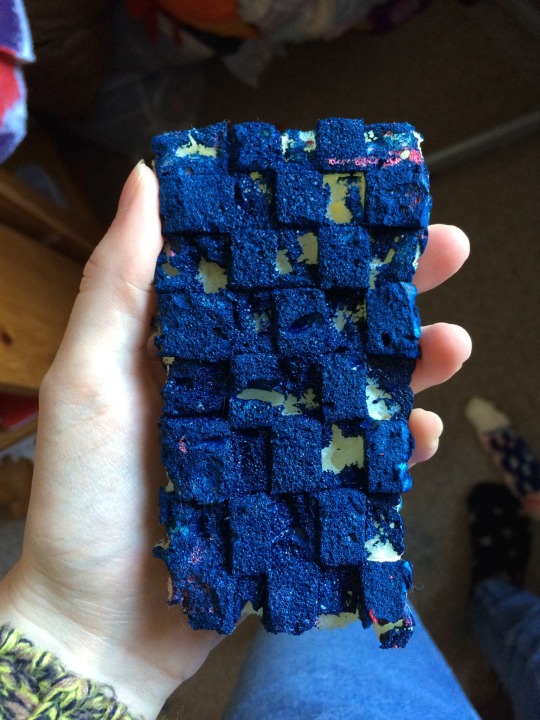
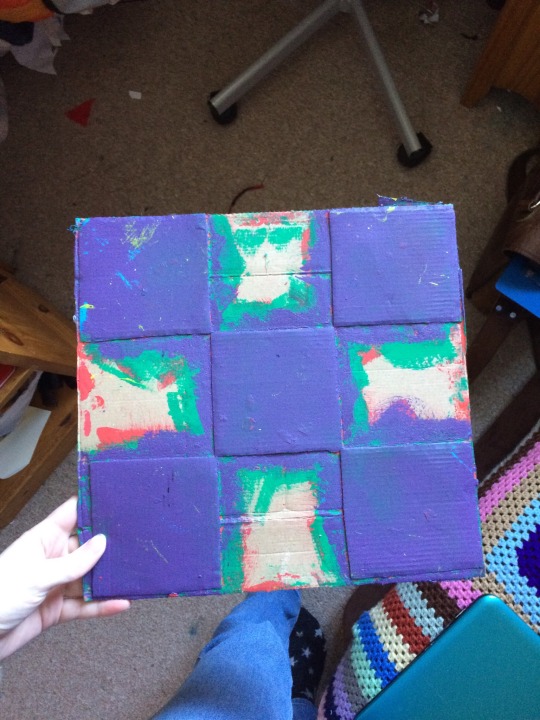
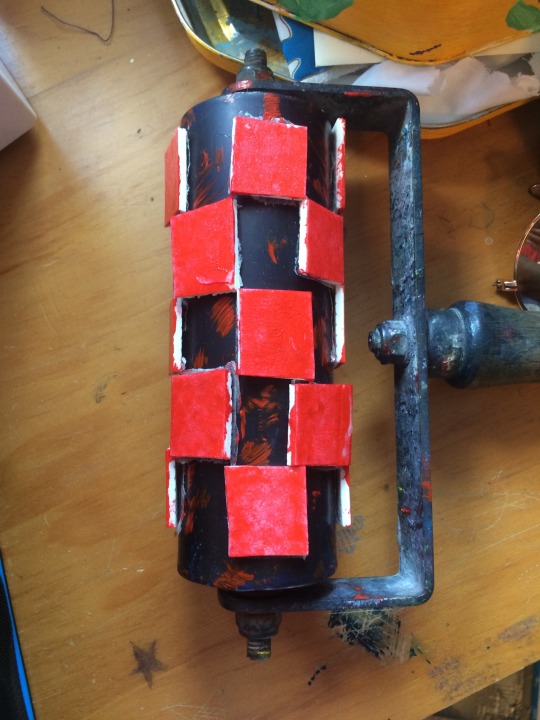
Fabric printing samples- i used my tools i have constructed on fabric, using printing ink i made by mixing acrylic and print medium. I only did one colour for each even thoughbibwill be using multiple colours for each tool but this is just to test if the tool itself works. They all work just as well as they do on paper, slightly better in some cases like the cardboard. I have made sure the are all different sizes because i want a myriad of different colours and sizes and angles of pattern. I intend to play around with how i use the tools, not just using them as direct checker prints but overlaying and amgling different and creating singular prints with some instead of a complete pattern.
0 notes
Text
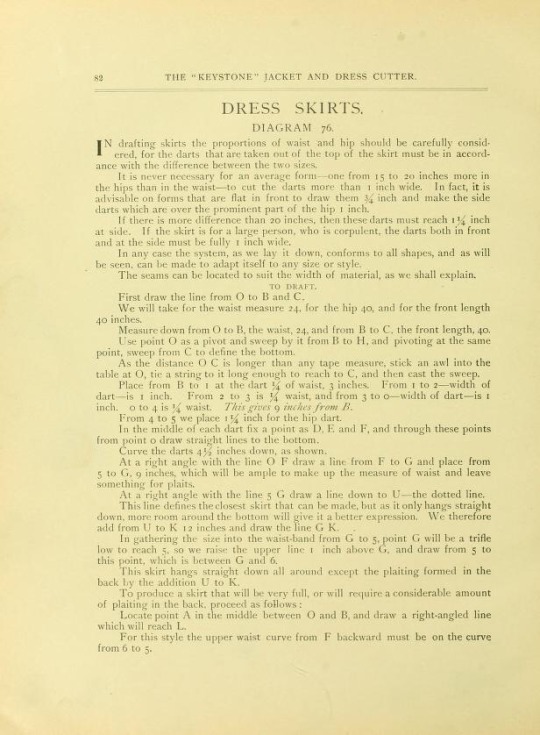
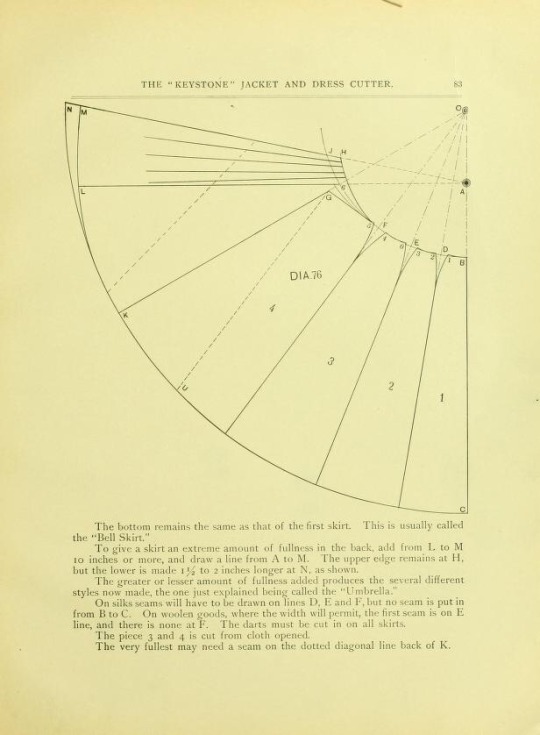
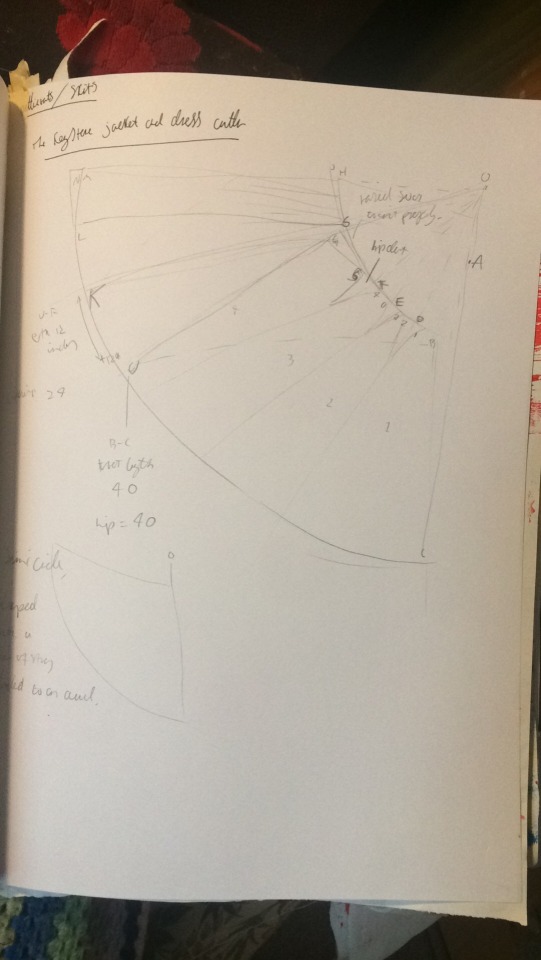
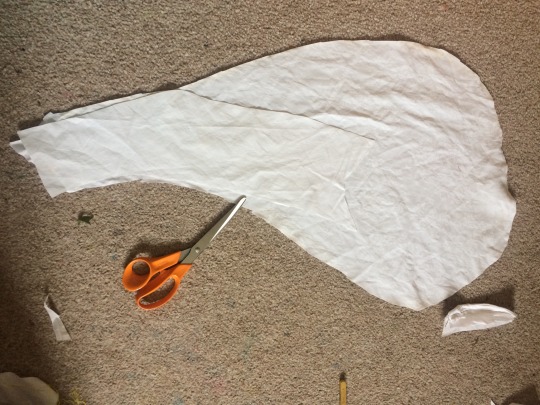
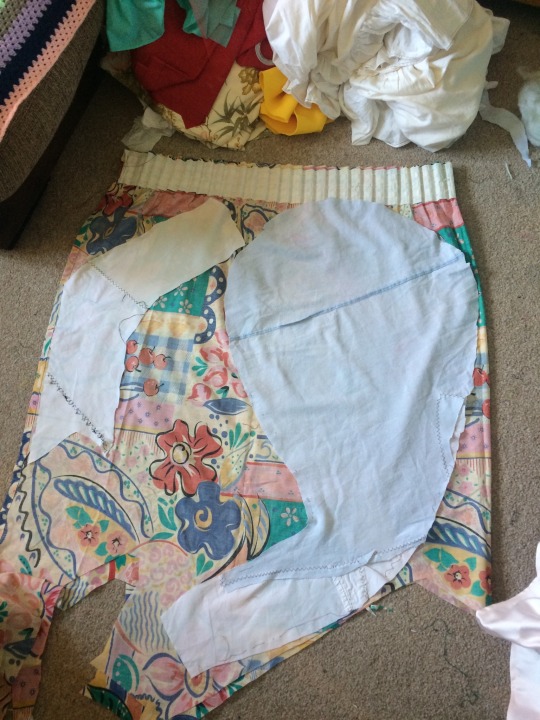
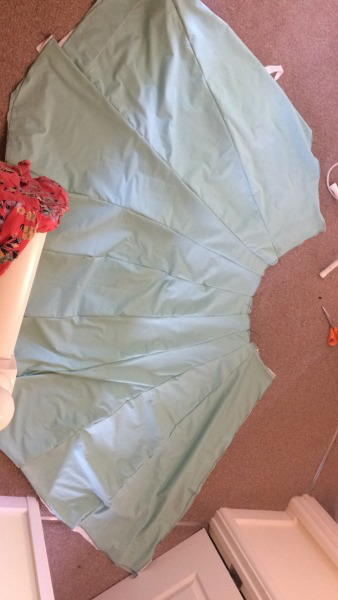
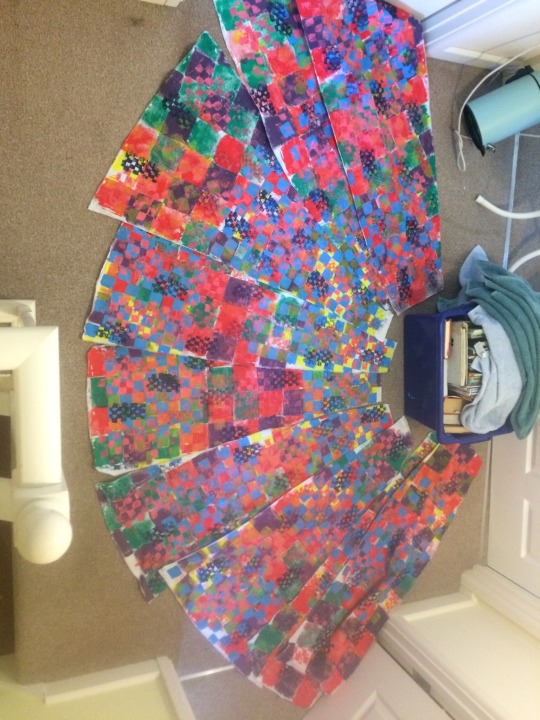
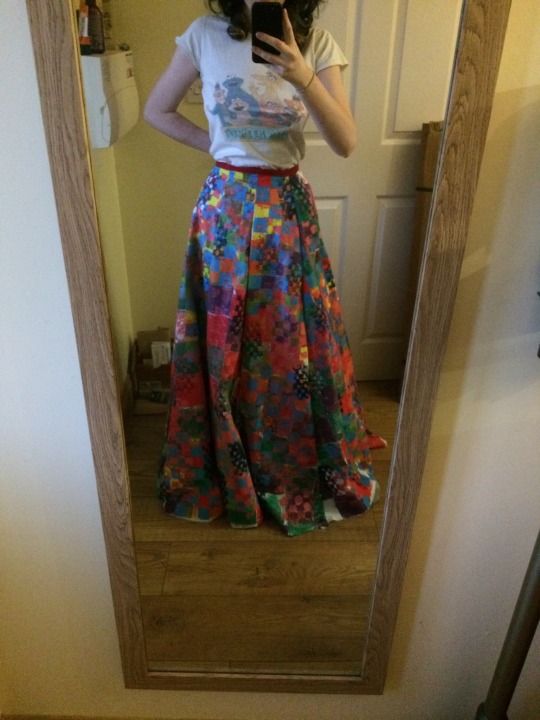
To make the skirts, i am using these drafting instructions from the Keystone guide to jacket and dress cutting from 1895. This isnt a pattern but instead a guide for how to create them yourself. It took me alot of reading and drawing to understand, and even then i didnt fully understand it so just worked with what i could figure out and what i already know of how to make skirts. I began by working out the measurements, adding width in the waist for darts and gathering at the back. I did make a mistake here by not halving the total, so it was twice what it shouldve been.
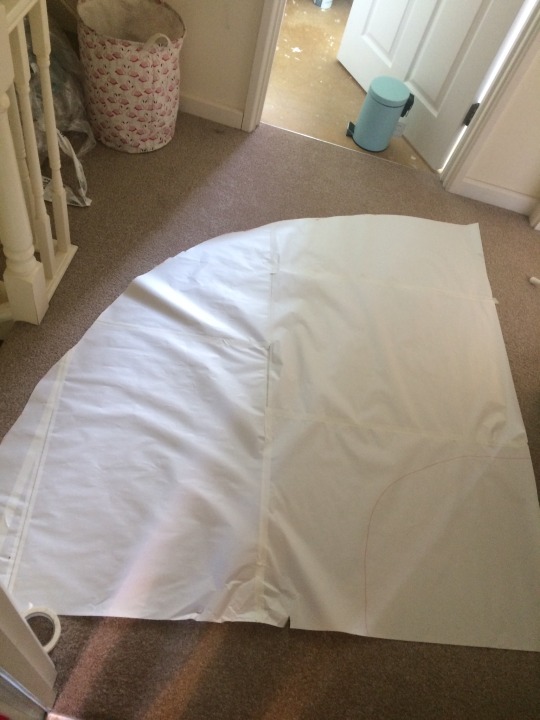


I taped some peices of needprint together to mark out the pattern, 10 seperate peices total. I could technically do it as one semicircle with darts but i dont have fabric big enough. I noticed my waist measurement mistake when sewing thrm together, do altered it by taking in a couple of inches for each peice which seemed to work out well and give the right measurements and shape.
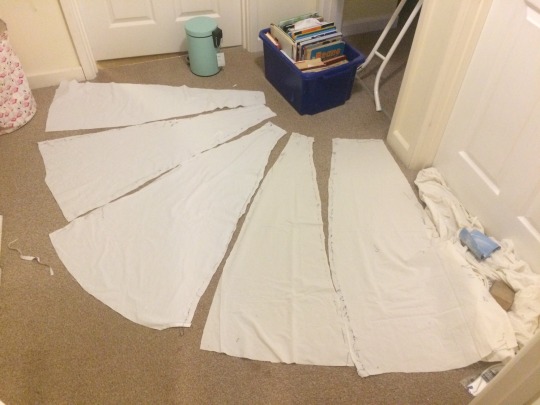
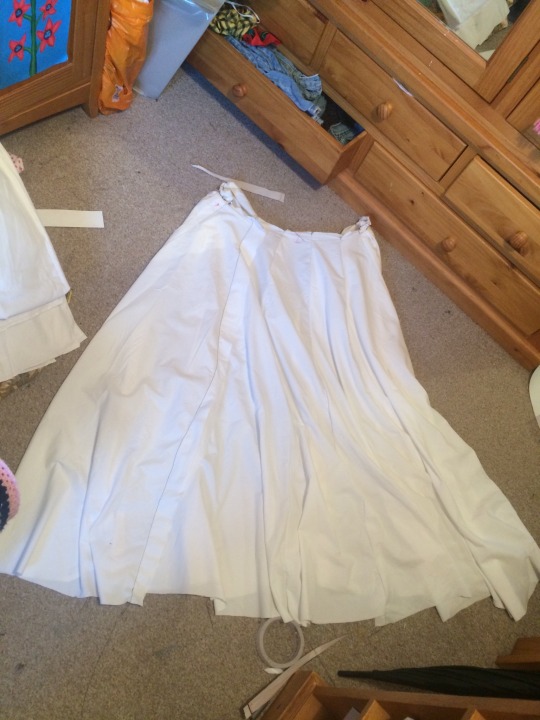
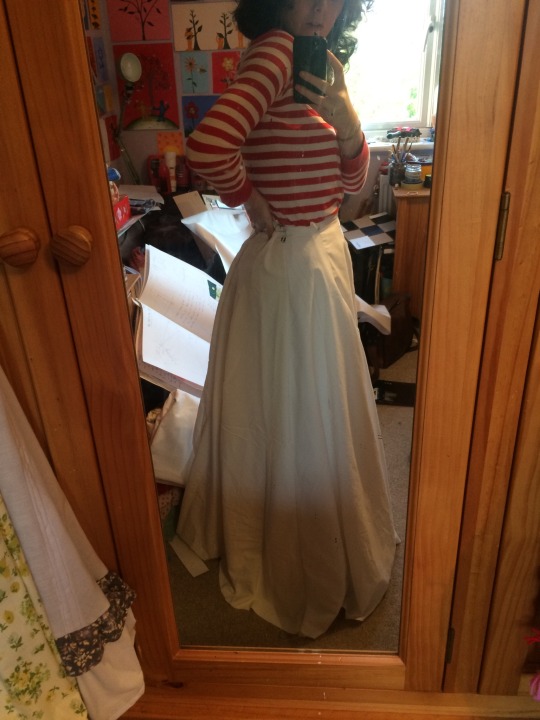
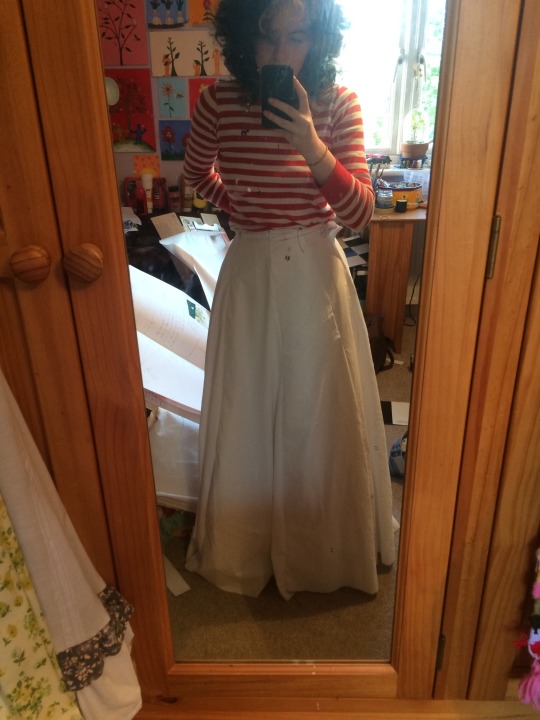
Once sewn together i added a few pleats at the back as it shows in the instructions; i’m really happy with how it looks over the petticoats and hip padding. I havent added a waistband to this mock up because i just wanted to test the shape. It has a really good 1890’s style shape so i’m happy to use this moving forward.
0 notes