
chrixeleon
Chris Chung
Some art and some games.
104 posts
Don't wanna be here? Send us removal request.
Last Seen Blogs

onlinetarotcardreadingcours-blog
Online Tarot Card Reading Course
grape-flavored-rukuuuuuu
I'm actually ur doctor

laurenlemonsmith-blog
Untitled

boom-chaac-alaka
A little Chaac and Awe
Photo

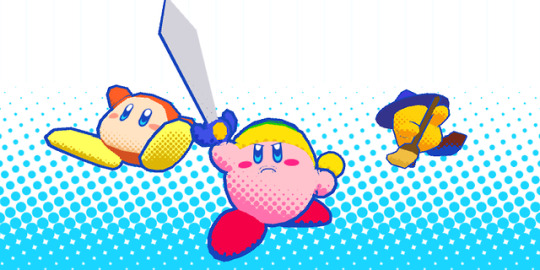
Updated this shader (and added some friends) to match the style in this Star Allies trailer:
youtube
#kirby#kirby star allies#shader#ShaderForge#unity#Unity3D#3d#toon#gamedev#game development#video games#games#nintendo
72 notes
·
View notes
Text
Building a 2D-Inspired Toon Shader

It’s been a really long time since I’ve posted here! Since this tweet took off I figured I’d put together a post about how I created this effect.
First, a disclaimer: I made this using Unity (2017.3.0) and the Shader Forge plugin, so this post will be tailored to those. I don’t have much experience with other engines, and I definitely can’t write shader code from scratch, but I’ll try to explain the steps so they can be implemented in your tool(s) of choice. It also assumes you have basic knowledge of 3D model UVs and texturing. Lastly, I’m not an expert in this area, so let me know if you notice any mistakes and I’ll correct them. Thanks!
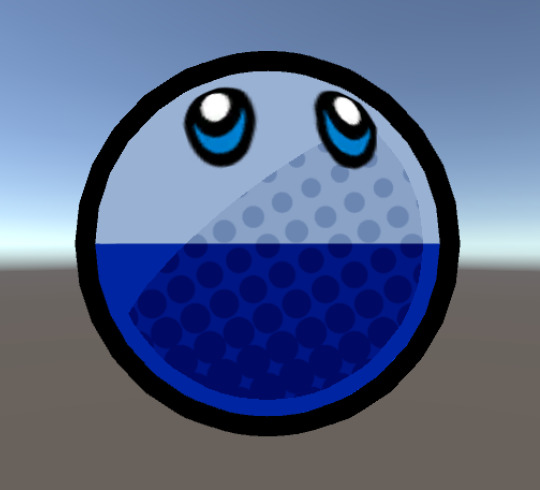
Overview
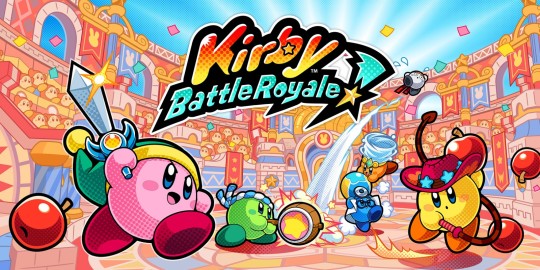
The inspiration for this shader came from the box art/promo art for the newest Kirby game, Kirby Battle Royale. I personally love flat, toon-style visuals and wondered how this promo art would look in 3D. I was also curious to see if I could make a custom shader that looked as good as a 2D illustration. (Maybe not this one, but it’s still neat!)
High-Level Steps
Before I dive into the details, here are the steps that make up the final product:
Create color textures (primary, shadow, dot) and dot mask
Set up screen space UVs for dots (with distance scaling, optional rotation)
Make Fresnel mask for a rim light effect
Use scene lighting to create primary and shadow areas
(Optional) Add an overlay decal texture (e.g. for eyes), add an outline
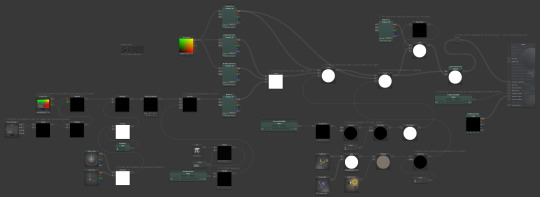
And here’s the final shader graph (larger version):
Step 1: Create textures
This isn’t really a shader step, but it’s an important step in creating the final result. I first tried just using 3 color values, which worked great for Kirby, but soon realized it would be nice to specify different colors using textures and the mesh’s UVs (instead of having a material for each differently-colored face of the mesh). For example, here’s King Dedede with a bunch of colors:

Each color texture is pretty standard, except with flat colors instead of baked shading or details. Here’s what King Dedede’s textures look like for his primary color, shadow color, and dot color:
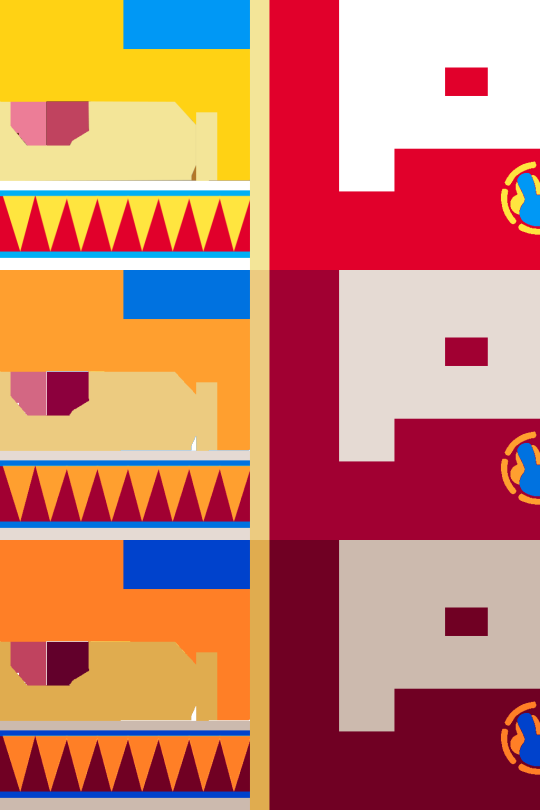
For the included Unity demo package and previews of each step below, these are the simple textures that are used:

The last texture needed is the dot texture. I created this one in Adobe Illustrator based on the pattern in the Kirby Battle Royale promo art, then rotated and cropped it so it would tile:

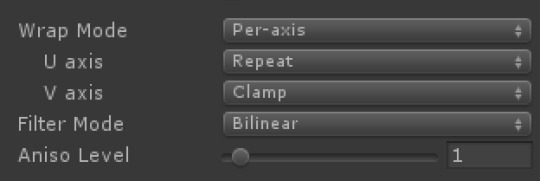
An important note about this texture: In order for it to look correct with this shader, the import settings have to be changed so that the U axis repeats and the V axis clamps (see below). You also have to set the X tiling to ‘8′ in the material settings (see “Putting it All Together” below). You could duplicate this “slice” 7 more times to make a square texture, but I figured tiling it was a little better for performance.
Next, we’ll combine these textures with some math.
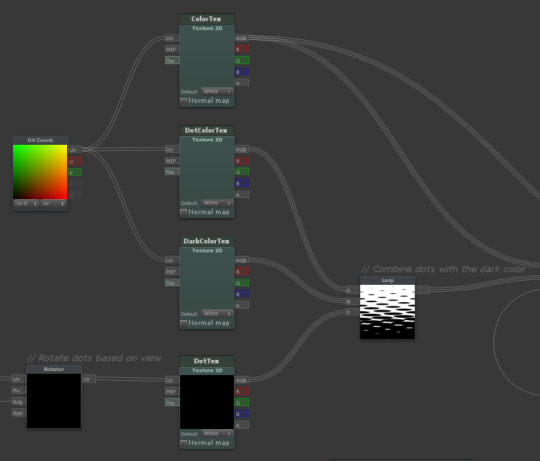
Step 2: Screen space dots
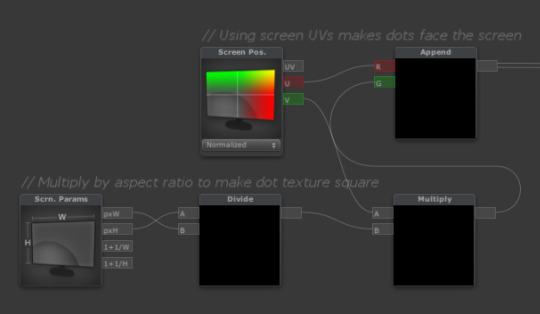
The first bit of the shader looks complicated, but it’s actually not too bad because it has some extra steps to make it look nicer. The core of it is the top-left node (Screen Pos.) and the last one (DotTex). This just tells the shader to use the screen position as UVs for the dots texture so they’ll always face the screen.


The next part is a little math to make the screen UVs a 1:1 square ratio so that the dot texture doesn’t stretch with different screen resolutions. The U (width) coordinate remains the same while the V (height) is multiplied by the aspect ratio.
After that, the screen UVs are scaled based on the distance between the camera and the object and a user-specified size value. Without this, the dots are the same size regardless of how close or far away the object is, which doesn’t look great.

Finally, there is another user property for rotating the dots (using Shader Forge‘s built-in Rotator node). The nodes at the bottom are just for converting the 0-360 slider from degrees to radians because my brain works in degrees.

With the dot texture sorted out, we can start combining them and the color textures using the Lerp node. Lerp blends two inputs using a third grayscale input to determine which color to output; it’ll output A if it’s black (0), B if it’s white (1), or a blend if it’s in between. For the dots, it’ll output the dark/shadow color texture in the areas that are white in the dot texture and the dot color texture in the areas that are black.

Step 3: Fresnel mask
The next step uses a Fresnel operation to create a sort of rim light. This step also includes a user property for specifying how thick the Fresnel effect should be. By itself, the Fresnel output is a smooth grayscale gradient, where the edges are white and the middle is black. For this shader, I used the Posterize node to restrict the Fresnel output to two steps (just black and white), then used the One Minus node to invert it. (Looking back though, the One Minus isn’t necessary if you swap the A and B inputs in the Lerp. Oops!) This step is then used to Lerp between the primary color texture and the output from the last step.


Step 4: Scene lighting
The final step is to create the lighting effect for the primary and shadow colors. This step is fairly simple, in that it just outputs a value from 0 to 1 (from the Dot Product node) depending on the directions of the directional light and the mesh’s normals. These values are also Posterized to 2 steps so that we can Lerp between the primary color and the previous steps. Note: This doesn’t take lighting information like color or intensity into consideration.


Optional Steps
And with that, the majority of the effect is complete! There are two optional steps that I added: the ability to overlay a sort of decal texture and the option for a simple outline. For the overlay, there’s a user toggle that either passes through the steps above or Lerps in another texture. The overlay Lerp uses the overlay texture’s alpha to add it as a decal over everything else. This is useful for things like the character’s eyes that you’d want to render on top.

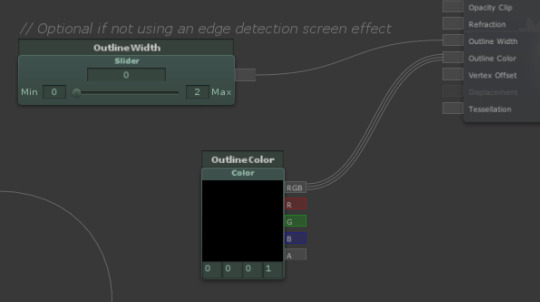
As for the outline, Shader Forge has built-in functionality for them, so you just have to specify options or values for the Outline Width and Outline Color inputs. Simple! For the Kirby, King Dedede, and Meta Knight (below) GIFs, I used two edge detection screen effects of different widths to create the outlines since geometry-based ones like these tend to be finicky with certain models.
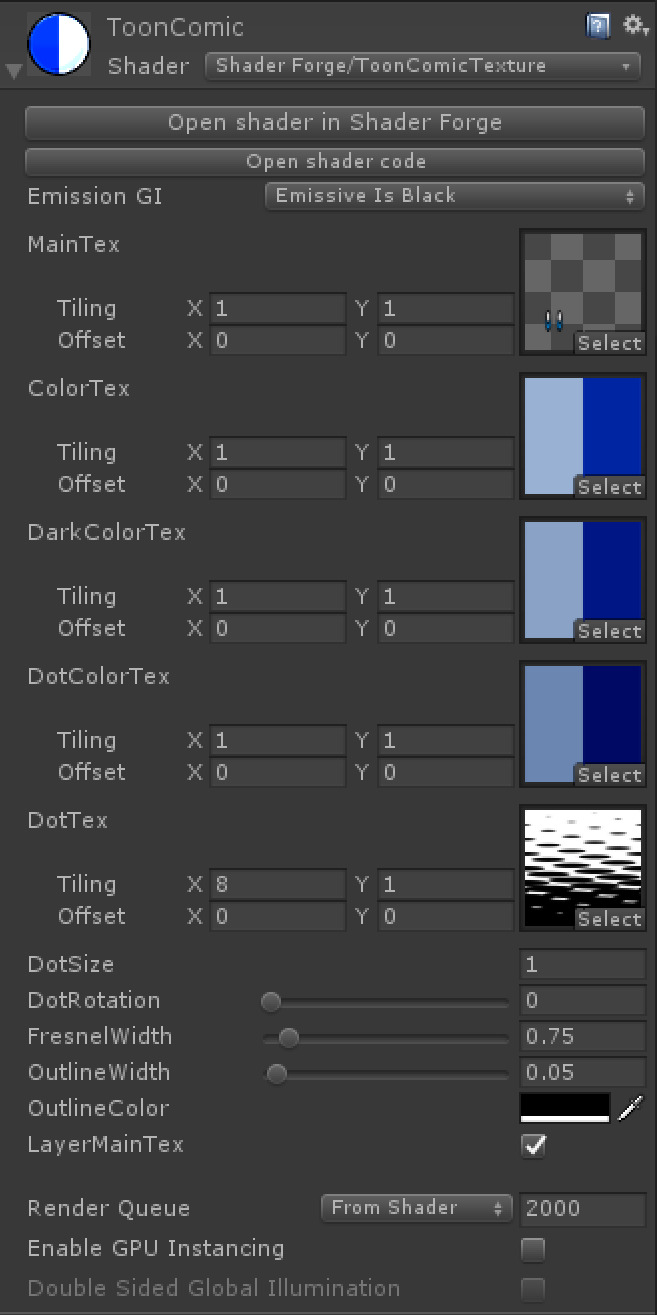
Putting it All Together
Once you have the final shader, you can create a new material using it and apply it to a mesh in the scene. Be sure to hook up the primary, shadow, and dot color textures, as well as the dot mask texture and overlay texture (if you’re using one). As mentioned previously, you’ll have to set the dot texture X tiling to 8 if you’re using the dot texture above. Then, you can customize how the material looks with the dot size, rotation, etc. options at the bottom.

Possible Improvements
While the current result looks pretty good, I’m sure there are plenty of improvements to be made. Here are a couple I can think of:
Highlights/Glossiness: This could be used to imitate the effect seen on the apples in the promo art.
Better outlines: Probably with a different screen effect?
Anti-Aliasing: The posterizing is pretty harsh, so a screen effect to smooth the edges could look nice.
Directional dot texture based on lighting: The promo art seems to angle dots based on lighting, so it might be nice to include that, too.
Performance optimizations: I don’t know what needs to be done here, but I expect there are optimizations!
Downloads
If you want to try this out for yourself in Unity, here are the shader script by itself and a package that includes a demo scene. If you have Shader Forge, you can open up the shader and play around with the nodes, too.
Shader script
Unity package
Thanks for reading! No credit is needed to use this in your projects (unless you want to!), but I’d love to see how it works out for you. :)
#unity#unity3d#shader#shaderforge#kirby#kirby battle royale#king dedede#meta knight#tutorial#art#gamedev#games#game development#video games#2D#toon
61 notes
·
View notes
Text
New Update! v1.0.3
Hey everyone!
The latest update for Catlateral Damage is now available! This one includes a bunch of cool new stuff for you to play around with.
First off, I’ve added several new objects to knock over based on other great indie games like Guacamelee!, Octodad: Dadliest Catch, The Binding of Isaac: Rebirth, and Goat Simulator. (You can check out all the cameos in this album.) In addition to these cameos, I’ve also added a new bonus level: the Box Purradise! This level is made up of tons of cardboard boxes and has lots of cat food and toys to swat at. There may be upgrades and power-ups hidden within the different box structures, too.

That’s not all! There are also a couple new features in this update. In Objective Mode, the scoring structure has changed from an infinite stream of levels to just 4 (plus any bonus levels you encounter). Bonus levels now give more points at the end and don’t stop your progression if you don’t complete their objectives. So keep an eye out for those special keys to get some bonus points! You also get bonus points for time left over when you complete an objective. Your highest score after completing all levels is then recorded so you can compete with others.

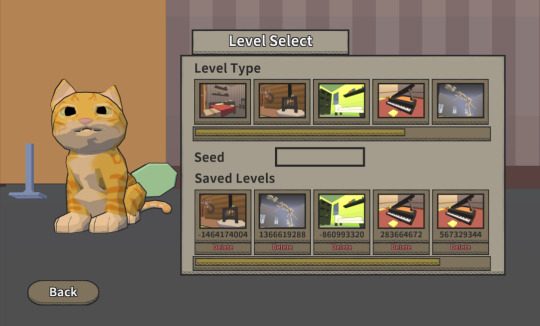
In Litterbox Mode, you can now select the level type you want to play, rather than just playing the same sequence of levels from Objective Mode without a timer or objectives. (For this reason, Litterbox scores are no longer sent to the Steam leaderboards.) You can also load previously saved levels this way. If you find a level layout you like in either Objective Mode or Litterbox Mode, you can pawse the game and select “Save Level” to be able to play in it again in Litterbox Mode.
On top of all this, the game now has full Japanese localization thanks to Kakehashi Games! You can switch between English and Japanese in the Options menu under the “Other” tab. Of course, this update also includes a bunch of tweaks and bug fixes to improve the overall experience.
And with that, here are the full release notes:
+ Added 23 cameo objects for knocking over
+ Added the ability to save levels from the pawse menu and load them in Litterbox Mode
+ Added full Japanese language localization
+ Added a keyboard shortcut to switch between fullscreen and windowed modes (Alt + Enter)
+ Added a brand new bonus level: Box Purradise
+ Added photos of Sockington and Penny
* Reworked the Objective Mode scoring structure to restrict it to 4 levels
* Changed how scores are recorded on leaderboards: Litterbox scores are no longer recorded and Objective scores have been reset due to the change in scoring structure
* Changed how bonus levels work: they now give more points at the end and you do not have to complete their objectives to progress
* Tweaked some procedural data for object and furniture placement
* Tweaked player movement a bit to make it more precise and make jumps more forgiving
* Improved the UI for selecting screen resolution and quality on the options screen
* Fixed bugs with crouching, rooms with missing doors, miscellaneous colliders, and more
Enjoy!
-Chris
11 notes
·
View notes
Photo


so!! this is what I’ve been up to!! I was asked by google to make something that I thought would be interesting on an android device. Kintsukuroi was the result!
you can get the game and its code here - there’s a video there too and a pretty extensive write up that’s continued here on my site if you wanna know a bit about development!
it’s been an amazing experience, even for what is quite a small game. thanks to Clark Powell for working on the music with me! I’ve never worked to a standard like this before - this is the realest game I’ve made and it feels real nice. I hope you like it!!! check out the other experiments up on the site too!
4K notes
·
View notes
Photo


Hey everyone!
I’ve been working on some new content over the past couple of months and will be pushing it all live on September 1st! First off, there will be some special objects that will be showing up, including Compy from Go Home Dinosaurs and a crystal skull from High Strangeness! I’ll be posting more of them throughout the month of August leading up to the update, so stay tuned!
Along with new objects, there will also be a few new features:
New Objective Mode scoring
Ability to save levels (seeds) and replay them in Litterbox Mode
Japanese localization
More bug fixes (crouch bug, blocked room issues)
Minor tweaks/additions (shortcut to toggle fullscreen/windowed, better UI on options for changing resolution)
I hope you enjoy it when it comes out in a few weeks!
-Chris
10 notes
·
View notes
Photo


Catlateral Damage is a first-person destructive cat simulator where you play as a cat on a rampage, knocking as much of your owner’s stuff onto the ground as possible! It’s available right meow on Steam (Windows, Mac, & Linux)!
Watch the infomercial here!
Website: www.catlateraldamage.com
Steam: http://store.steampowered.com/app/329860/
364 notes
·
View notes
Photo

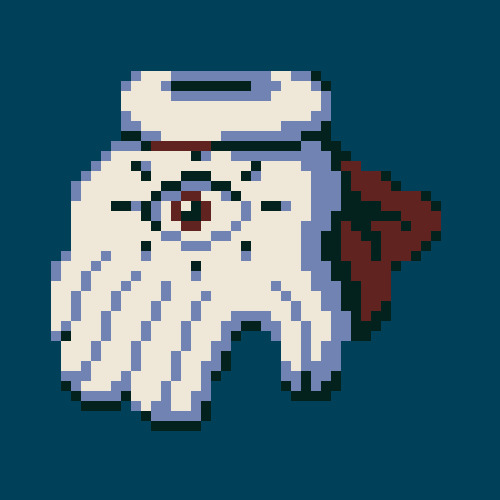
Playing catch-up. The first two aren't that good, but the third is interesting.
0 notes

Photo


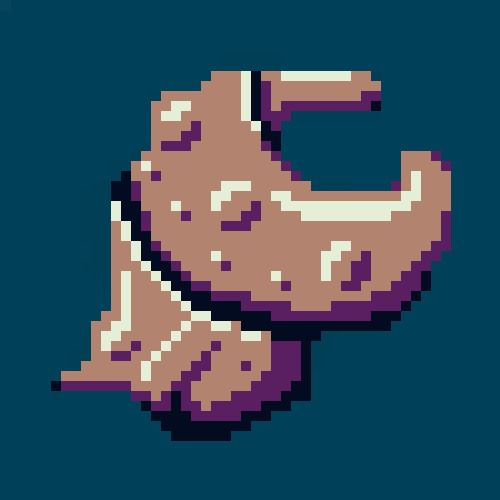
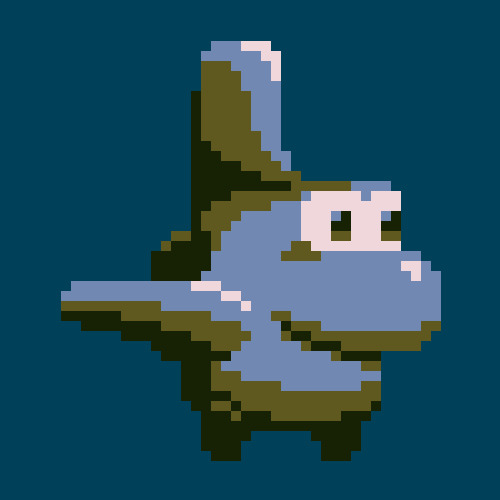
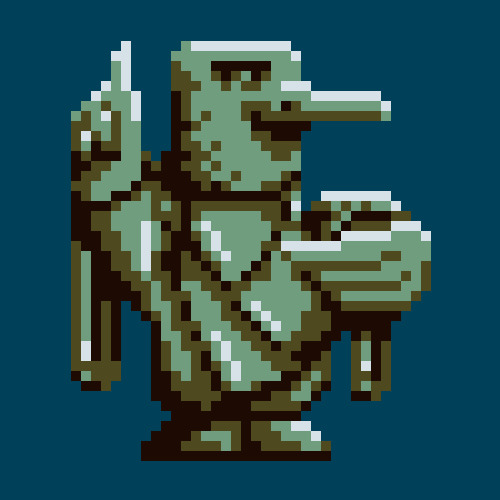
Forgot to do my pixel art yesterday, so here's yesterday's and today's!
0 notes


Photo


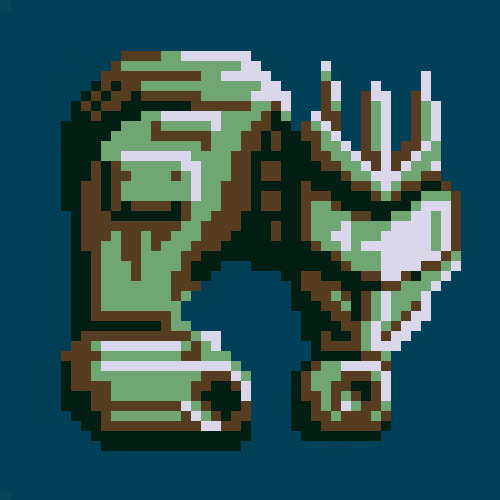
Oops, forgot to upload these. The first one is pretty meh, but I like how the second one turned out!
0 notes
Photo
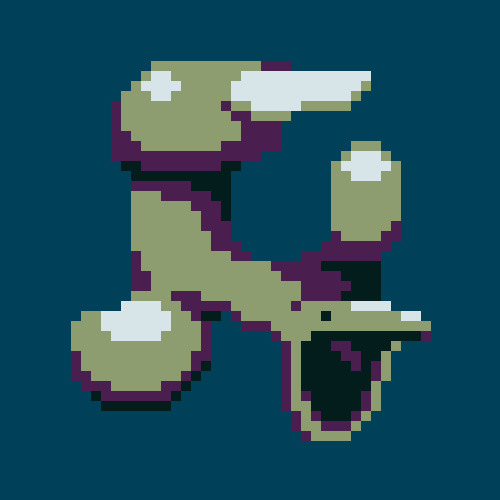
It took a few tries, but here's a cobra and mongoose for today's Daily Silhouette!
0 notes