chenyangziv
ChenYangZiv
For MA Games Art & Design Study
88 posts
Don't wanna be here? Send us removal request.
Last Seen Blogs
puckentine-love
Yoυ reαlly ɢeт мe
puckentine-love
Yoυ reαlly ɢeт мe
yoko787878
McDanno is Love
21stcenturyneanderthal
21st Century Neanderthal

darbyfitzpatrick
Darby
Text
Tips
Please Use Tabs above for locating
#FMP - Final Major Project Development Documentation
#Forefront & #New-ness - Forefronts
0 notes
Text
Evaluation
I could say the project went successfully and made possible by what I had been planned clearly from project management to decision-making.
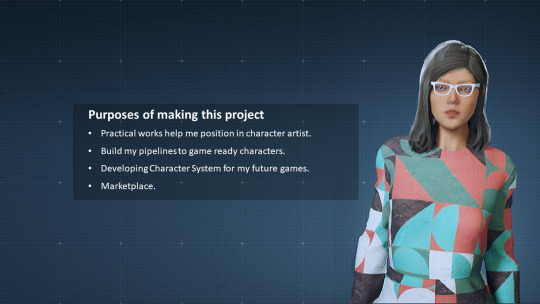
There is multiple purposes for me doing this project. First, I need a set of practical works that can help me to position in character artist, so through the project, I had practised organic sculpting from character anatomy, learn to use software such as Marvelous Designer to create character clothing assets, as well as had developed my pipeline to game character.
Secondly, I’m interested in those AAA RPG games features a character creation system, like Dark souls and GTA. This project is a great chance for me to exploring how the character system to be built and I can latterly develop it into my own games.
Finally, the project I’m making I want to show its potentials, to sell it in the Assets Marketplace with its valuable blueprint and could earn some money from it for living. I believe not only the system is welcome to those indie developers, Character artist can use it as a model viewer to present their character as part of the portfolio.
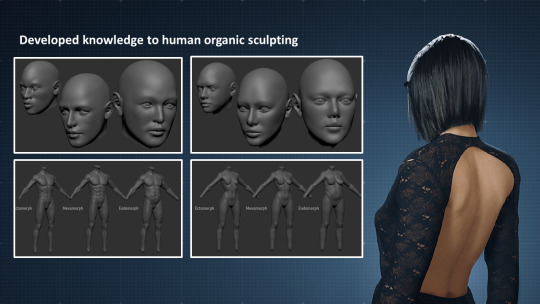
With these purposes in mind, in the process of production, I set the goals that I want to reach in each section. Through the first month of practical work on character production, I’m earned strong knowledge of organic sculpting. on portrait sculpting, I have improved understanding of the anatomy of human’s head, although there still has space to improve such as more-likeness sculpting, especially the part of eye socket where I found tricky to sculpt. The following month I had developed my pipelines to game-ready character, as well as the pipelines to character clothing. However, on the developing of game-hair pipelines I have to meet a lot of problems, the biggest problem is on the baking process and look-dev. This all requires my time and I do not have it as the deadline coming soon. Therefore, for the time being, I decided to use the free hair assets instead and save time for delivering more system functions as I proposed before. I will back to the game-hair development after hand-in the project and able to update my hair creation back to the program.
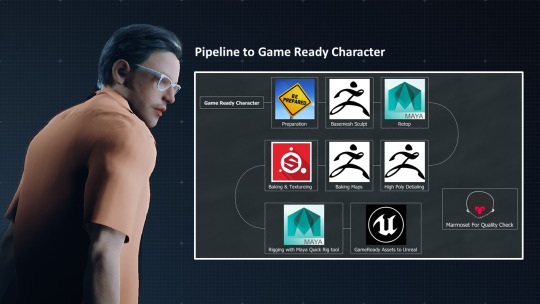
Developed pipeline to the game-ready character.

Developed pipeline to the game-ready clothing.
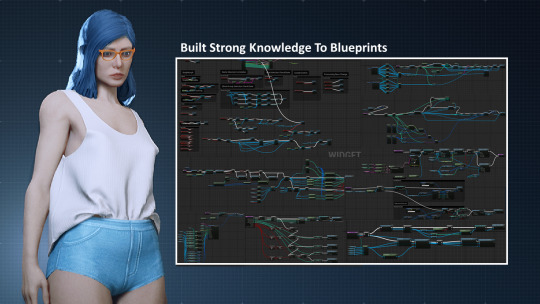
Through the development of the character system, I had improved my knowledge to blueprints, especially on the user interface. I would never know how hard the logic structure is behind those user interfaces when I use it in daily life. During the development, I do face lots of logic problems, but I got lucky and able to fix them in time. Doing blueprint is like playing problem-solving games and I quite like it, the feeling is beautiful when you able to be realizing your ideas by the blueprint. What I can improve in this section is the visual design of the interface as well as the layout, the current design is more like a debug like interface as it simple to be built, so for this point, I would to learn a bit of UI design and back with new bits of knowledge to enhance the visual. Last, the harvest of character system building experience can be referenced for my future games.
Finally, as I said the project going to be purchasable assets to the marketplace, with this reason, it always keeps me in mind to push the qualities of my work to the next level and benefits me with pressures to present my project with a better look in visual.
0 notes
Text
Third-party Materials List
Artefact
Hair Assets
EPIC GAMES. (2018) Paragon Characters Free Assets [Online]Available at: https://www.unrealengine.com/marketplace/en-US/assets?lang=&q=Paragon [Accessed 01 August. 2019]
Font
English Logo Font
ADOBE. (2019) Acumin Variable Concept. [Online]Available at: https://fonts.adobe.com/fonts/acumin [Accessed 06 August. 2019]
Chinese Logo Font
MICROSOFT (2019) Microsoft YaHei UI. [Online]Available at: https://docs.microsoft.com/en-us/typography/font-list/microsoft-yahei [Accessed 06 August. 2019]
Procedural Patterns for Clothing Texture
Open Source code
MANOYLOV AC. (2019) Semi Circle Patchwork [Online] Available at: https://www.openprocessing.org/sketch/510598 [Accessed 31 July. 2019]
YAGMOURIAN.G.(2019) AgilOne [Online] Available at: https://www.openprocessing.org/sketch/81829[Accessed 31 July. 2019]
DIOTALLEVI.A (2019) Geometric Patchwork [Online] Available at: https://www.openprocessing.org/sketch/678744 [Accessed 31 July. 2019]
Post-process Glitch Effect
FABRICE PIGUET(2016) Sci-Fi and Glitch Post-Process [Online] Available at: https://www.unrealengine.com/marketplace/en-US/slug/sci-fi-and-glitch-post-process [Accessed 04 August. 2019]
Promotional Video
Music
SAM HUI(2003) Xin Si Si (Disco Remix) [Online] Available at: https://www.shazam.com/gb/track/46397757/xin-si-si-disco-remix [Accessed 08 August. 2019]
Sound Effect
GAME SOUND FX. (2019) Mouse Click - Sound Effect (HD) [Online] Available at: https://youtu.be/h6_8SlZZwvQ [Accessed 08 August. 2019]
0 notes
Text
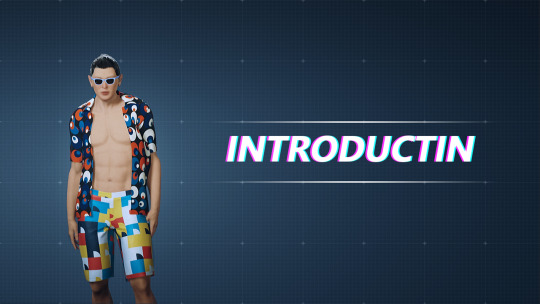
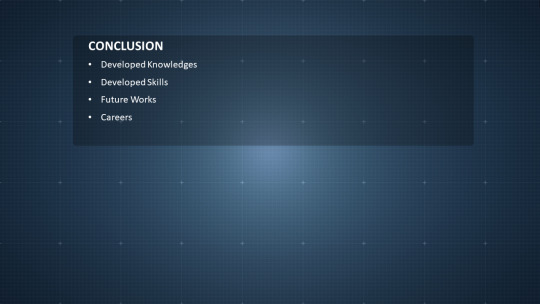
Presentation Slides
Here is the design of the slides for my presentation.
This is you can see how I use the space to layout mine note, for each slide I position a random character at the side functioning showcase of my work. Even I think is a brilliant idea.


0 notes
Text
Devlog#014 Promotional Video
vimeo
For my promotional video, I have used After Effects co-operate with Adobe Premiere to do the job
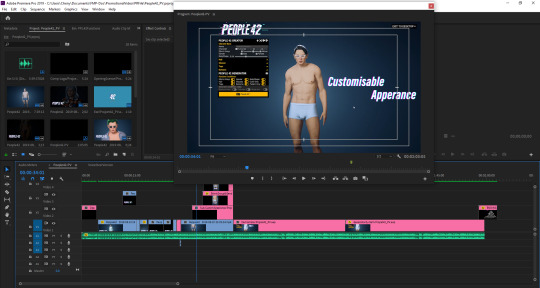
I want my video with style of 90′s so I had chosen the song written by Sam Hui - Xin Si Si, and I also used a mouse click sound effect for a point of purpose.
Reference:
SAM HUI(2003) Xin Si Si (Disco Remix) [Online] Available at: https://www.shazam.com/gb/track/46397757/xin-si-si-disco-remix[Accessed 08 August. 2019]
GAME SOUND FX. (2019) Mouse Click - Sound Effect (HD) [Online] Available at: https://youtu.be/h6_8SlZZwvQ [Accessed 08 August. 2019]
0 notes
Text
Devlog#013 Polishing & Branding
These days I worked on project polishing and branding, to push my project to the next level.
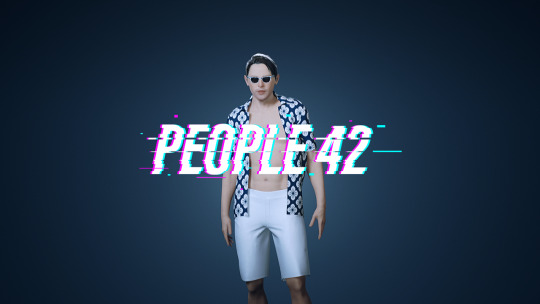
Branding
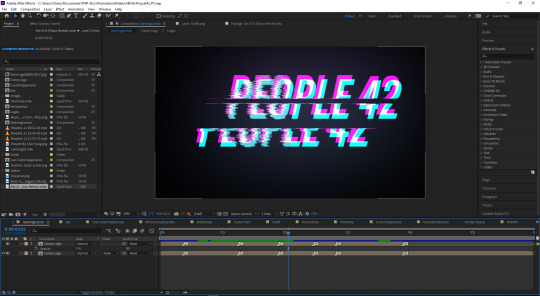
With the idea in mind of new project name “People42”, I want it to be designed with the glitch effect. And here is my design of the project logo in both English and Chinese.
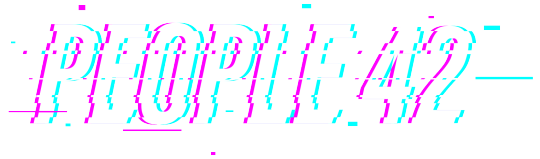
English Logo
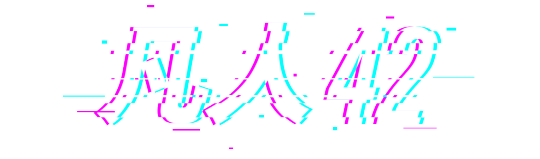
Chinese Logo
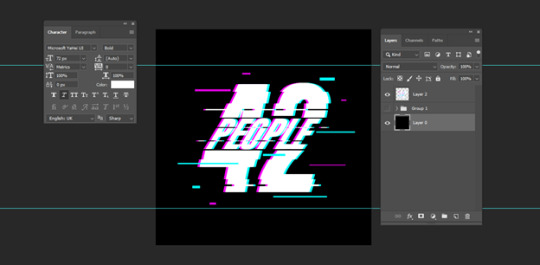
I have followed the tutorials to make this glitch effect.
youtube
The font I have chosen Adobe font “Acumin variable concept” and font “Microsoft YaHei UI” for Chinese Character as they have Samir form design.
Images below are some promotional look test.
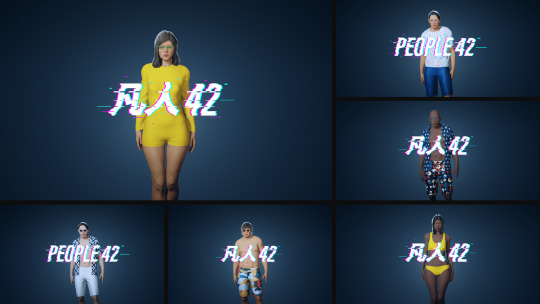
As the final project will be published as an .exe file, so I also designed the icon for the .exe programs.
Result:

Polishing
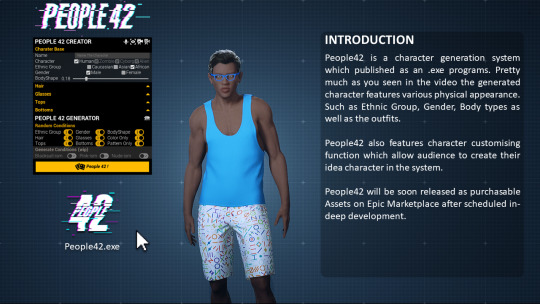
New functions have been added to the menu.
Character Turntable
Cursor Track
Auto Play Camera (Randomly play a preset camera sequence)
Auto Generation (Auto generate a random character per second.)
Auto Play Demo (Demo mode, auto play camera + auto generation)
Reference:
PSt(2017) How To Create Awesome text Glitch Effects - Photoshop Tutorials [Online] Available at: https://www.youtube.com/watch?v=Rr9Avn-rRWc [Accessed 07 August. 2019 ]
0 notes
Text
Devlog#012 Hair Dev. plan & Generation System Dev.
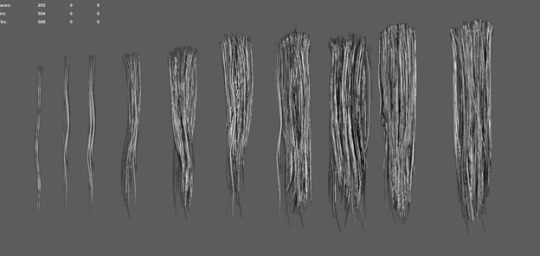
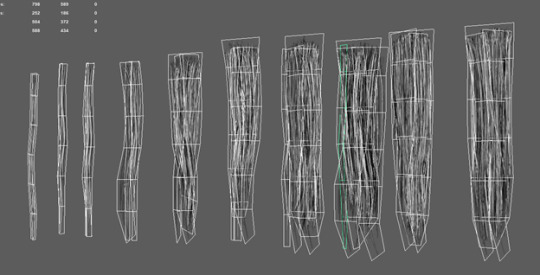
Before introducing my development on the generation system, I would like to talk about my plans and changes to hair dev. Recent days I was spending time on figuring out the game hair creation pipelines. Trough summarising previous cgma students who have shared techniques tips for game character hair creation on 80lv and try to follow and exploring the workflow by myself. However, I still find it is tricky to do when processing and I’m bit stacked in some of the steps with couple unknown problems, such as baking progress.
Here is the practical work I did which follows the article shared on 80.lv
CGMA Student Project: Hair for Games
Techniques for Game Character Hair Creation
Tips & Tricks on Hair for Games
https://www.youtube.com/watch?v=_BSlDfF-Iys
By following the above article, I learn how to use xGen to create hair, and how to use the script tools like “Simple Pipe” to turn the curve into meshes.
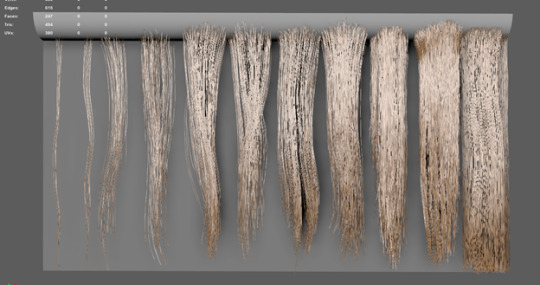
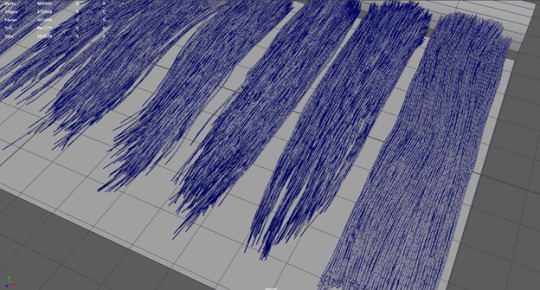
And using XNormals for baking out normal and high map textures.
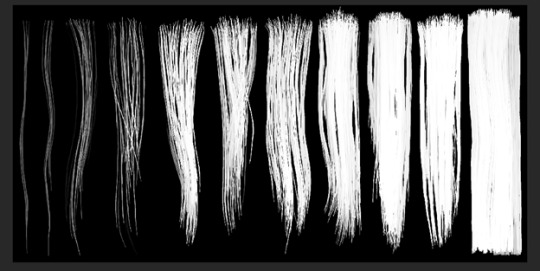
As well as I have tried to make the hair clumps as the article introduced.
However, I found to do a good hair requires time and focus, and I don’t really have those conditions as I would like to present and realising more functions for my project rather than spending time just on hair. So, I changed the plan, doing hairs I need at least one more month on it, Instead of wasting time I would like to use Epic Free assets (Just for better presentation) and focusing on deliver more functions that I want to show my character system and generation system. And I will be back to the game hair development after hand-in project.

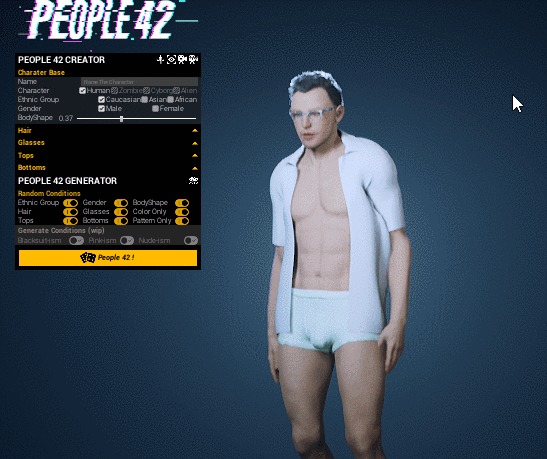
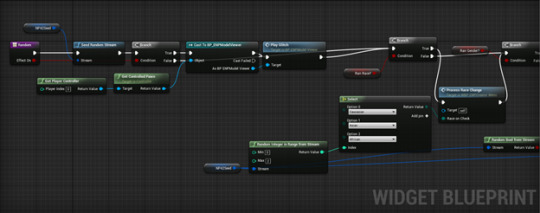
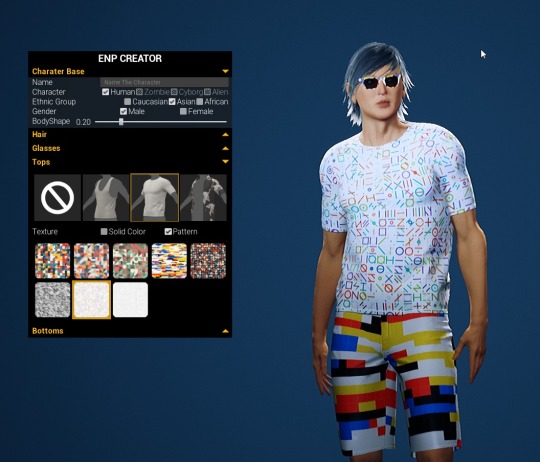
Generation System.
For the generations system I want it to be fun, with simple hit on the button and randomly generate a character in random appearance. Not only that the system should generating characters base on the conditions, generate character base on custom selected conditions that would be cool to show.
To generate the character randomly doesn’t have any specific meaning, it just random. But speak to the “generation” or “random” I just have an idea of a new name of the project, People 42!
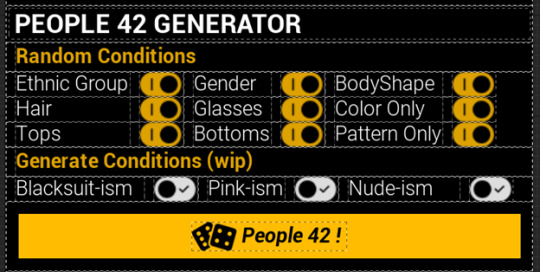
The generation system I created has conditions switches that will affect the result of generation. The switch turned “On” will randomly generate selected options, “Off” won’t generate any from a specific option.
Reference:
EPIC GAMES. (2018) Paragon Characters Free Assets [Online]Available at: https://www.unrealengine.com/marketplace/en-US/assets?lang=&q=Paragon [Accessed 01 August. 2019]
0 notes
Text
Devlog#011 Customisation System Dev.
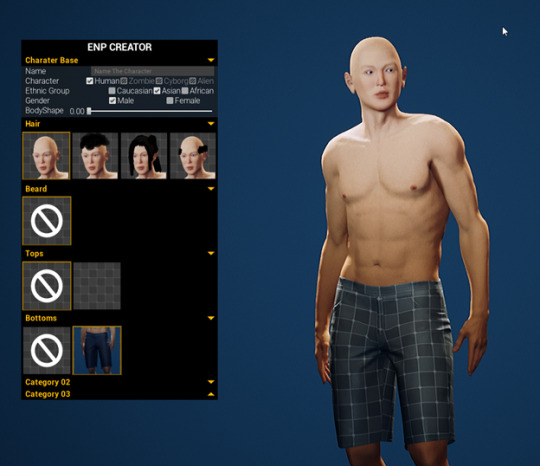
This week I have worked on Customisation System Dev. Especially on the menu UI, to make it works.
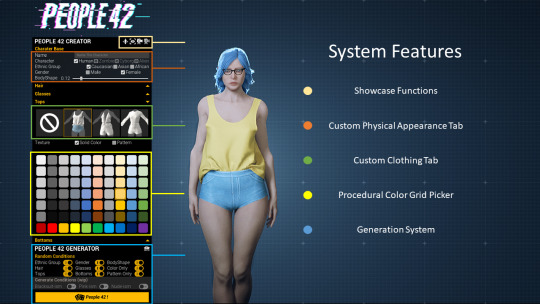
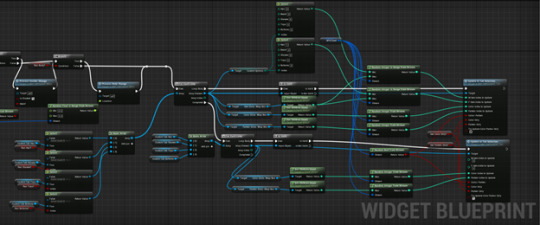
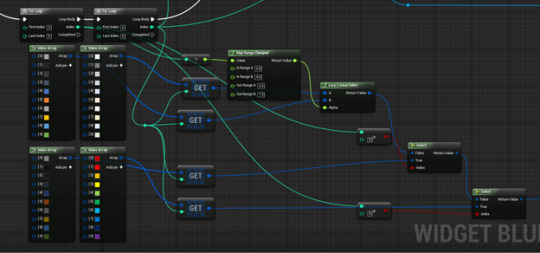
The customisation serves to deliver selections of different type of clothing including hairs. From that it can be seen they are sharing same of structures, so I would like to blueprint the UI widget that can be reusable for each type of custom clothing.
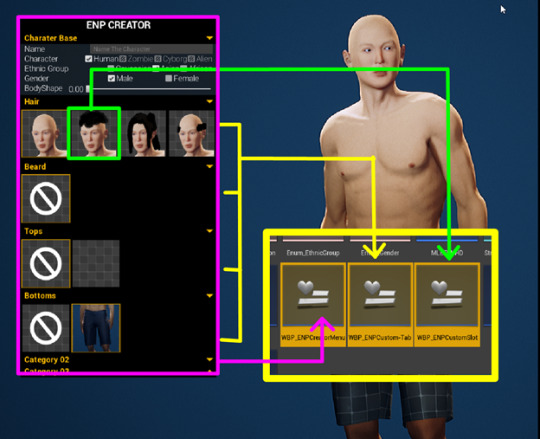
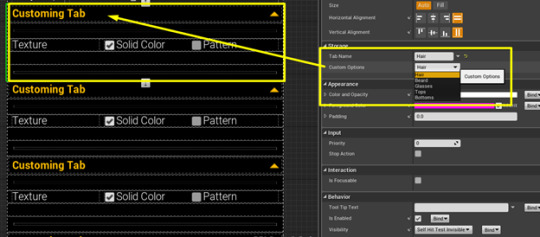
All the customing tab are shared same widget blueprint, when using it I can simply change the “Custom Option” Value to the desired target and it will automatically functional for selected custom options.
The customing tab needs the slots to store the assets, this also required the widget blueprint functional and reusable. For realising these features I use a loop node to generate those slots automatically.
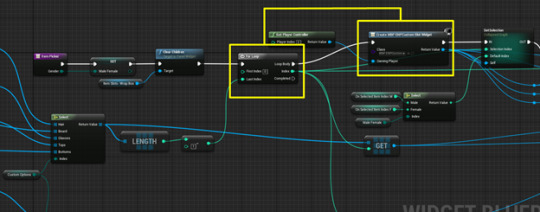
With this idea and structures in the head, I’m able to build the customising tab follows the same logic.
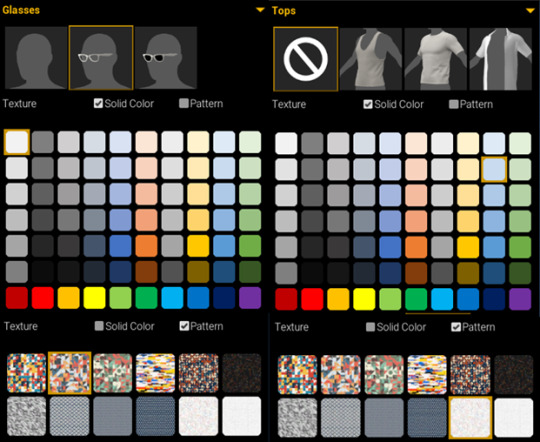
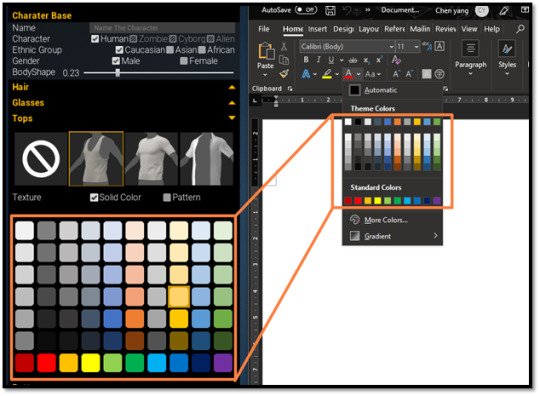
The Color Grid Picker is also generated via blueprints with preset color witch reference from Word font color palette.
Another cool feature is that the slot is highlighted when it is on selected.

This is because each slot has its own id. When the slot is on selected the menu is going to read the slot id and update to interactions.
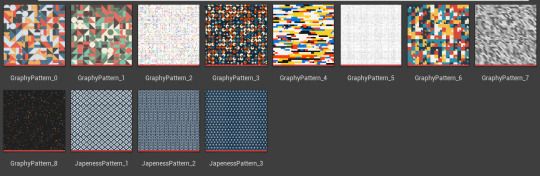
Providing only colors for customizing options is not enough, I want to make it more interesting, so I had idea add couple preset textures or patterns for more customising choice.
To make the patterns will cost me times, and I don’t have much time for that. Patterns that found on google is not reliable and I don’t like them. But I have an idea to use the generated pattern. I knew a bit of processing and I know openprocessing.org is a good place to hunt the patterns.
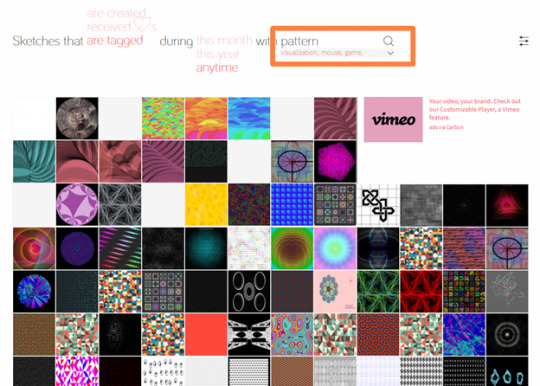
Once find the idea pattern, you can actually go to its open source code to tweak the values and modify the scripts.

And then the screengrabs the generated pattern and save as the texture for the project.
This is pretty much what I have been developing these days.
Reference:
MANOYLOV AC. (2019) Semi Circle Patchwork [Online] Available at: https://www.openprocessing.org/sketch/510598 [Accessed 31 July. 2019]
YAGMOURIAN.G.(2019) AgilOne [Online] Available at: https://www.openprocessing.org/sketch/81829[Accessed 31 July. 2019]
DIOTALLEVI.A (2019) Geometric Patchwork [Online] Available at: https://www.openprocessing.org/sketch/678744 [Accessed 31 July. 2019]
0 notes
Text
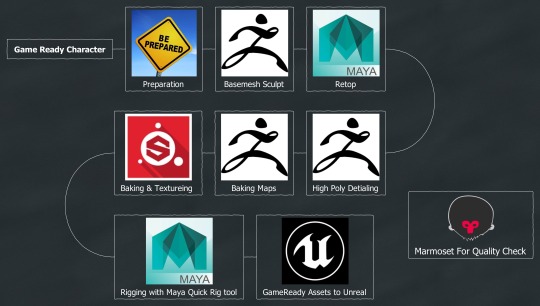
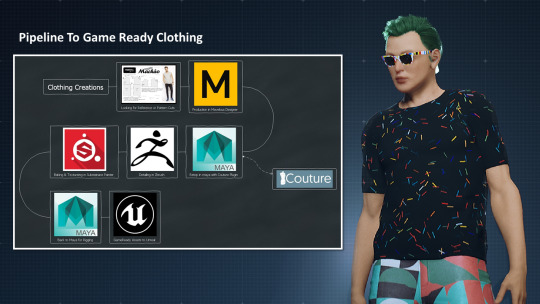
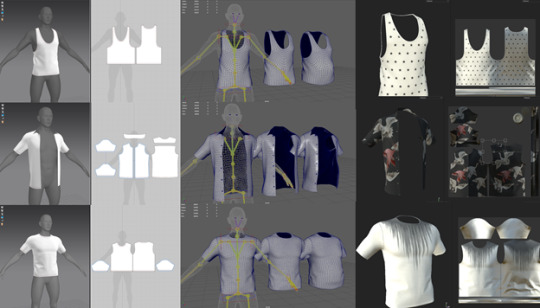
Devlog#010 Clothing Creations
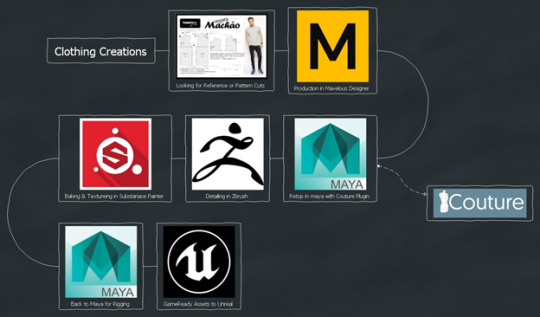
With last week developed the pipeline, these days I have been focusing on clothing creation for my characters.
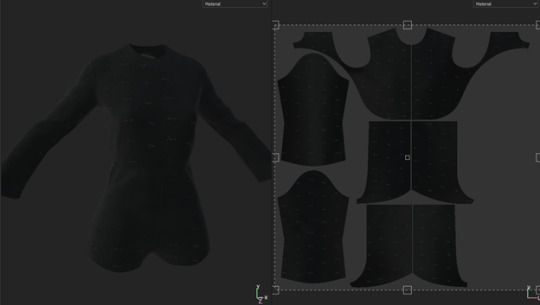
So, as the working flow chat above, my first step is to get the reference. I found a cool blog site called MModelistA made by Rio de Janeiro, where she is posting her researches and analyse about those pattern cuts, and it is helpful for people like me who don’t have any fashion background.
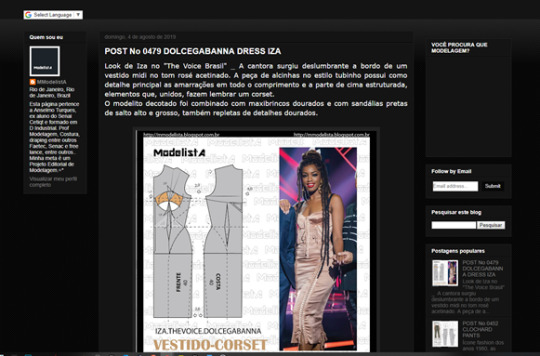
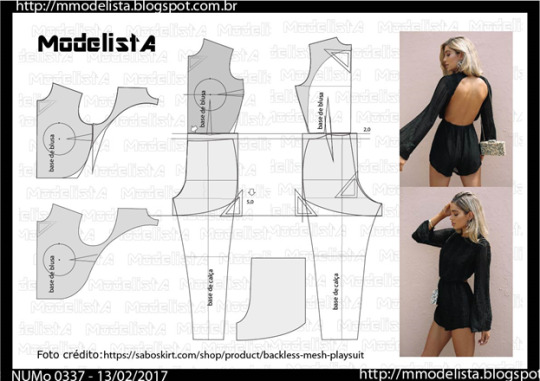
So, thanks for her work I able to figure out how the patterns of clothing look when they were flattened.
Here I took one of clothing for example:
With the reference pattern cuts I simply went to Marvelous Designer for tracing out the pattern and sewing them up.

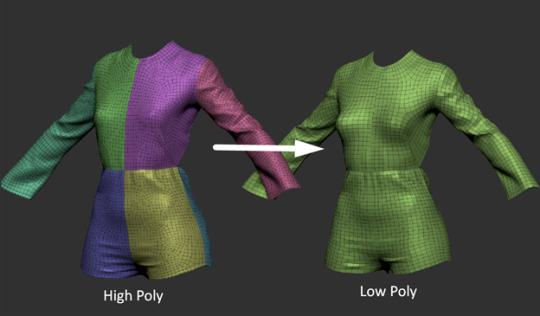
Once done the clothing base bring it to Maya and work with Couture for Maya Plugin to remeshes the model, as doing this can reduce tons of budget.

Next, bring remeshed model to ZBrush for detailing work, prepare the high poly for the baking.
Texturing in Substance with smart fabric materials and it’s all set.
The final step before sending to the engine, is to skin the clothing meshes to the character skeleton, and because my character got different body type, so for my assets I have to do them in each of form and blended them to the main mesh.
And for the rest of clothing assets just I follow the same flow to produce the assets, it is efficient and works perfectly.
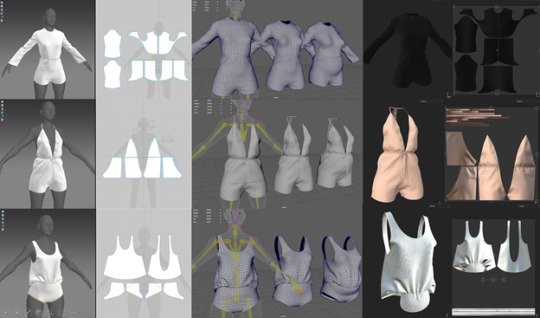
Also about the clothing materials, I created Smart Instance Materials that could easily replace the texture file for creating materials for new clothing assets, doing this saved me a lot of time and avoid repetitive works.

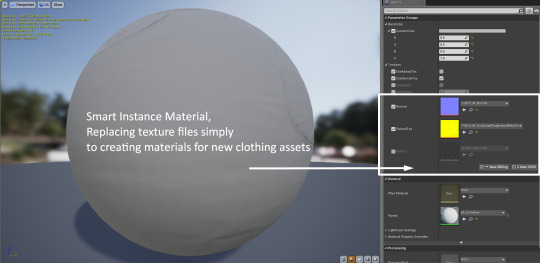
Reflections:
Through the production of this section, I have developed the clothing creation pipeline that worked for me. For time-saving I haven’t deep through the cloth material development and just leave it now as it looks fine. I would be back to the cloth material after the project, and able to deliver more realistic cloth material look.
Reference:
Janeiro,R (2019) Modelista, [Online] Available from: http://mmodelista.blogspot.com/ [Accessed 24 July 2019]
0 notes
Text
New-ness# Next-Gen Simulation of Human Character Movement
youtube
As the character artist, it is cool to notice how technology would shaping future gaming experience. Especially this one, first-ever using real-time simulation to character muscle-accurate movement which would enhance or push digital human to the next level. Muscle stimulation is used to be baked into animation and used as animation assets for a game character. And for the reducing budget consideration, the animations are played in a loop with the same positions and timing. This is where the reality is broken, instead of using muscle simulation the character movement in a real-time base on the algorithms, it would not only reduce the animation budget as well as presenting more realistic character movement. I’m looking forward to this tech in future development.
Reference:
80.lv(2019) Next-Gen Simulation of Human Character Movement [Online] Available at:https://80.lv/articles/next-gen-simulation-of-biped-character-movement-002sgr/?fbclid=IwAR1sMY2e_IkHrigSyZ6aikbhR_O-b815c9gcvR6QxpZRE46FdgdnnHP8C9M [Accessed 25 July. 2019]
PBA(2019) Scalable Muscle-actuated Human Simulation and Control(SIGGRAPH 2019) [Online] Available at: https://www.youtube.com/watch?time_continue=1&v=a3jfyJ9JVeM [Accessed 25 July. 2019]
0 notes
Text
New-ness# Unreal Engine Now Supports Maxon’s Cinema 4D
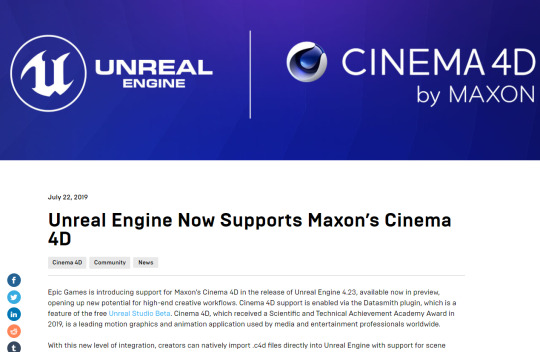
This is actually amazing, as I can pick up my cinema 4d skills and adapted into my pipelines. What makes me so glad to hear this news is that Cinema4d has its strong procedural animation functions, and it can be totally translated and redesigned as part of gameplay mechanics, I’m looking forward to what going to happen for the future update to unreal engine.
0 notes
Text
Devlog#009 Clothing Creation Pipeline Dev.
This week I have been developing on clothing creation workflow to my FMP or future project. Take underwear for example as it easiest clothing to do, I have developed my own game clothing pipelines.
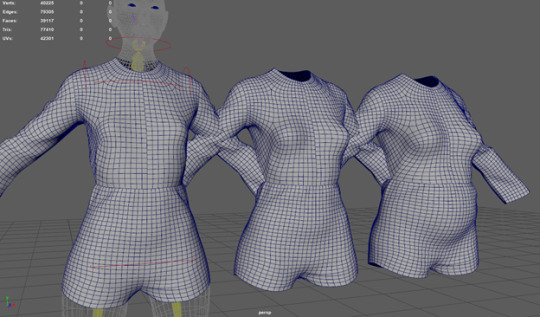
Take a first look at the outcome.
Male Clothing with body morph target.

Female Clothing with body morph target.
The blend shape of clothing works perfectly with body shape.
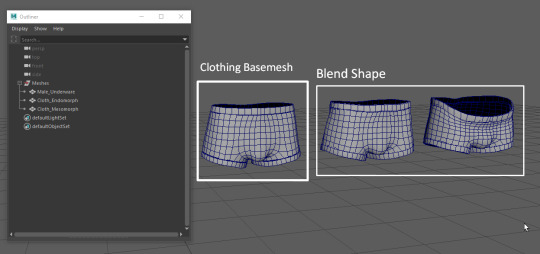
Due to the character has a multip body shape, when processing the clothing creation I have to create clothing mesh three-time follows different body shape. Once you have done the clothing base mesh, you duplicated it and reform it in different body shape as the blend shape. However, the tricky thing is when reform the clothing mesh, I was struggling by how to make the form of the clothing perfectly with different body shape, as when I changed the shape of the body, the clothing modelled for base body won't fit any more. Although I can send the file to Zbrush and use the move tool to match the form is idea way but it takes time, and its a ton of work if I do it manually.
lately, I found an article shared by Minions Art that solved my problem, She suggests using Shrinkwrap modifier to make clothes/armor work with Belendshapes.
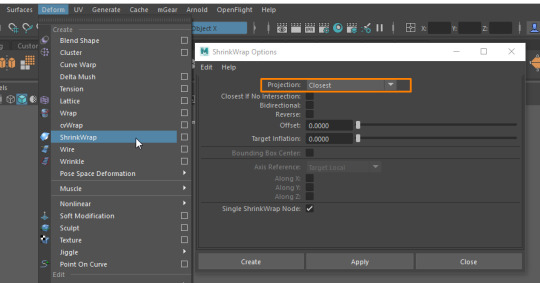
Select the clothing mesh and the body mesh and then create a ShrinkWrap with Closest Result in option.
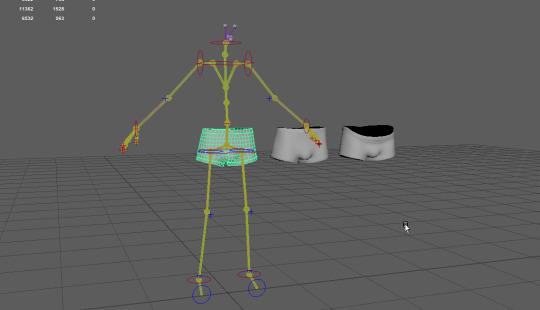
Next drop clothing meshes into rig file for skin bind.
The weight of clothing isn't matching to the body mesh after skin bind, to fix the weight we can transfer the weights from body to clothing.

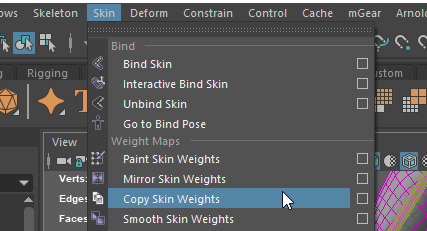
Now the clothing weight fixed and ready for output.
Reference:
MINIONS ART(2018) Creating a Simple Character Customiser using Blendshapes(Shape Keys). [Online] Available from https://www.patreon.com/posts/creating-simple-22650450 [Accessed 16 July 2019 ]
0 notes
Text
Devlog#008 Character System Dev.
This week I had started building up character system. I have done few functions so far to the system, character ethic group switches, Gender switches, and Body Shape slider. As well as some interactive details such as character turntable and head-cursor tracking movement.

And here are some gifs demonstration:
#Cursor Tracking
#Turntable
#Ethnic Group Switch
#Gender Switch
# Bodytype Slider <--Ectomorph - Mesomprh - Endomorph -->
Reflection:
0 notes
Text
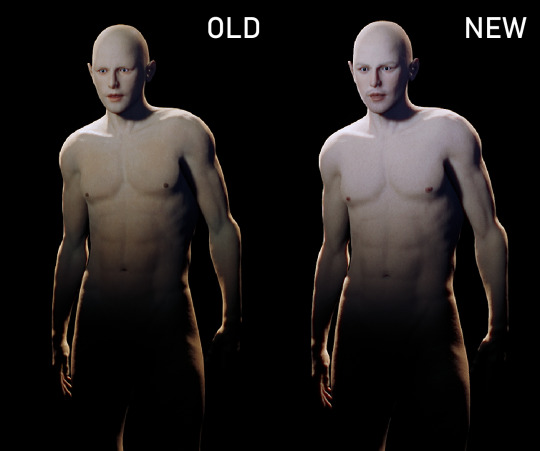
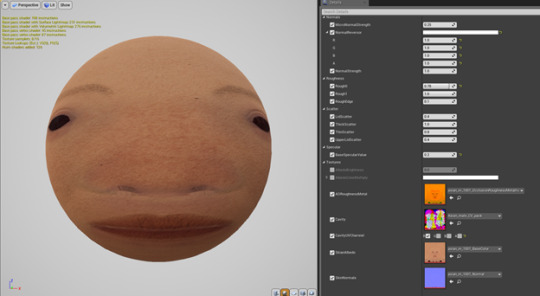
Devlog#007 Skin Material In Unreal Engine
This week I had reworking on the skin material. The material was showing ok in Marmoset, but when I bring it to Unreal Engine, I’m not satisfied with its result. I feel the skin material is losing details, flat, death and unrealistic. By reflection, I think I need to take more observation on the skin detail. to look at skin colour variations, tones, and vascularity. So, I went back to substance painter and reworked it.
Below is comparison of the skin material between the old one and the new one.
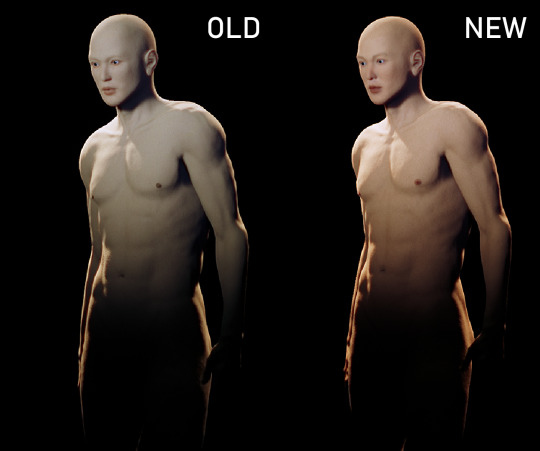

and take caucasian_male’s texture for comparison.
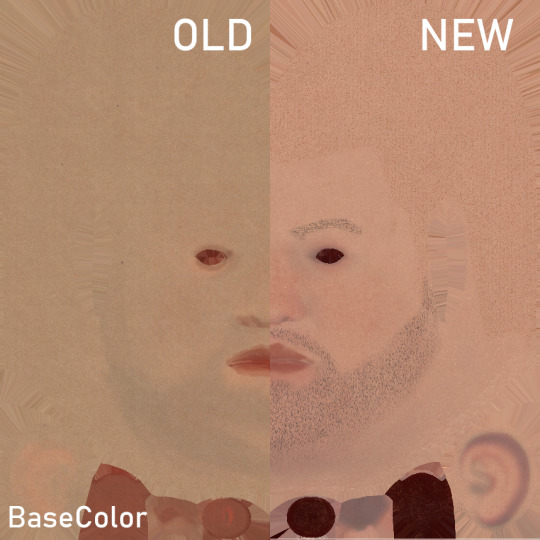
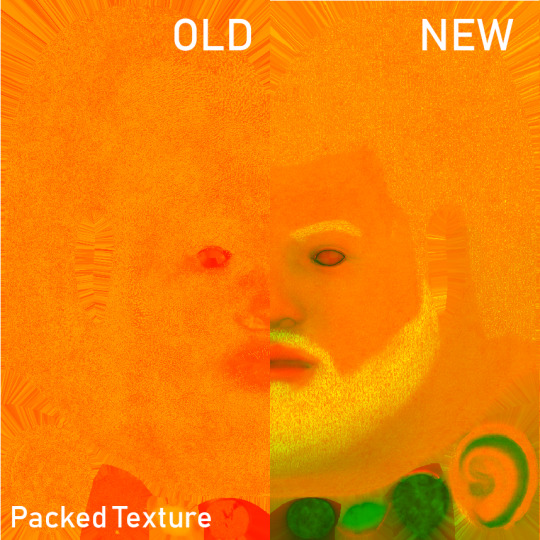
And this improvement are all thanks to the recent article on Substance 3D about skin paint for human, I learn how to reference the skin details and the part I should pay attention to.
Also, I have developed the skin material instantiable which I can easily control the value on each channel and replace new textures for others bodyparts.

Reflection:
Skin Texture
From weeks of skin development, I found out the observations in important, it is worth taking some time looking at the reference, standing front of the mirror and observe the face skin, for example, looking where are the veins and fat, colour variations and skin shine.
Pipeline
Early preview the skin material in Unreal Engine is also necessary, although Marmoset can give a quick result but the skin shader in differ than UE4, and considering the project in publishing on UE4 so it is better use the Unreal Engine to check the overall qualities.
Reference:
PAULHAC(2019) SUBSTANCE SOURCE AND MAGDALENA DADELA: SKIN MICRO DETAILS. [Online] Available from: https://www.substance3d.com/blog/substance-source-and-magdalena-dadela-skin-micro-details [ Accessed July 7th 2019]
0 notes
Text
Forefront Research# Kenshi
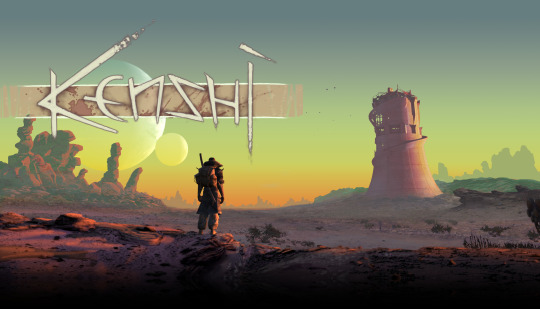
Hade couple days playing game Kenshi, an RPG Developed and Published by Lo-Fi Games. The game focused on providing sandbox gameplay features the give the player freedom to do want in its world instead of focusing on a linear story. What interests me is its character system, especially on how the conditions of environment influenced the generation of in-game citizen and their distribution on map.
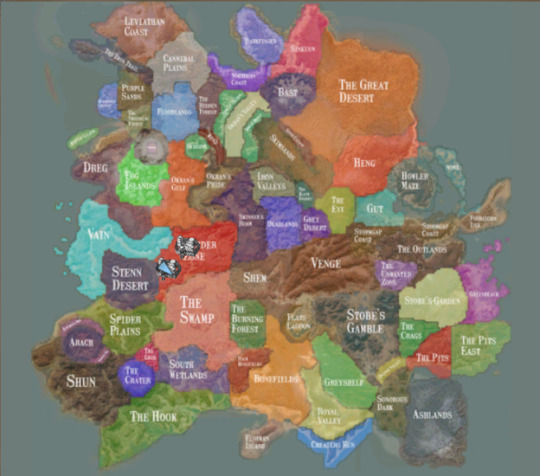
In the world of Kenshi has various of geology and environment where features different geological conditions and influenced the lives and creatures. This is also what makes the world of Kenshi has a difference in races of lives. There are Human, Shek, Hive and Skeleton. Each race of lives has differed subrace, and each of subrace because of the territorial dispute formed into a different organization.
I believe that with those pre-conditions, rules and limitations all set made generation result more reliable. The generation system knows where locations of the map is a suitable condition to generates a specific race of citizen or tribe. And this is a cool concept to generate in-game citizen intelligently. And this is what impressed me.
Reference:
LO-FI GAMES(2018) Kenshi [Digital Download] PC, Lo-Fi Games.
0 notes
Text
Devlog# 006 Character Rigging in Maya
This week I have been working on the character rigging. I was planning to do the rig by myself, but because I had spent a week on the art test. Therefore, I'm one week behind my schedule, and for timesaving, I changed the plan and using Maya quick rig tools for my character rigs. And yes it made me done the rigs for characters in just one week of time.
I use Referencing in my rigging pipeline, by means which refers to having one file reference another file. By doing this the work can be done in parallel, as well as if any problems I have made in a file and after I corrected it and all files will be up to date with it.
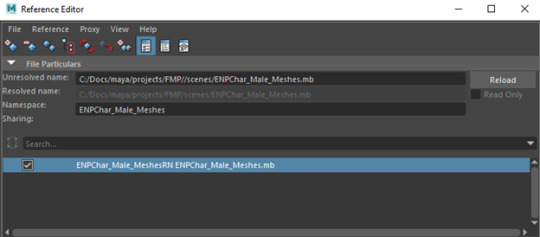
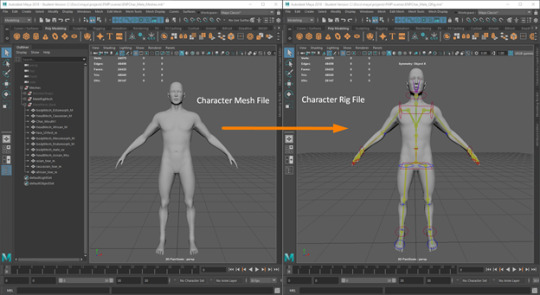
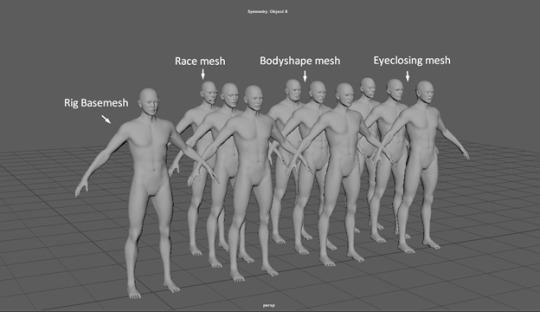
So, before the rigging, I have prepared a character mesh file which including rig base mesh and its blend shapes. And create a new file as rig file with mesh file referenced inside.
Maya quick rig tool saved me tons of time. By following its quick rig step by step guide, I can finish a rig roughly in seconds. The gif below shows how it works.
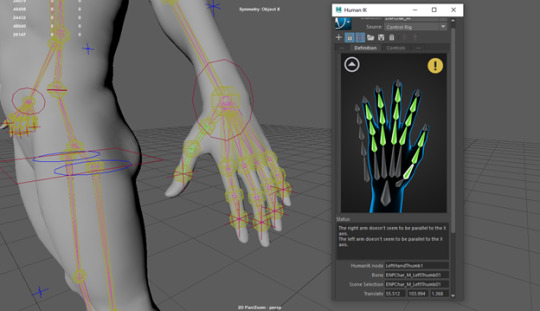
And of course, just by doing this is not satisfied as my character requires extra bones such as fingers and head additions, and those bones or joints I need to add them in manually. And the cool thing is the tool has a function to assign the new bones that you add to the character, once you have done the additional bones and simply hit the button the rigs will get updates and create the controls for those bones. For example, the finger joints at below.
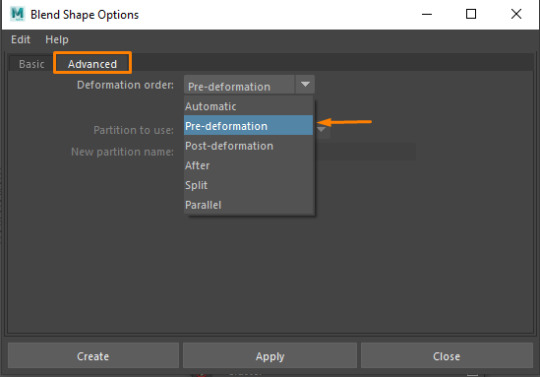
Once done the base rigging my next step is to deal with the blend shape. The Maya blend shape is literally allowed you to add blend shape after binding skin, just go to the blend shape option and go “Advanced” shelf, in “Deformation order” selected “Pre-deformation”. And the newly added blend shapes are working with bound skin information.
Reflections:
Using Maya quick tools does save me tons of time. And by playing around the rigs I found its rigging method is totally different then I used before in my own project, the rig seems driven by IK and FK controls at the same time, which means I can control the character rig with IK and FK even without the switcher, see the gif below.
(Maya quick rig IK/FK controls)
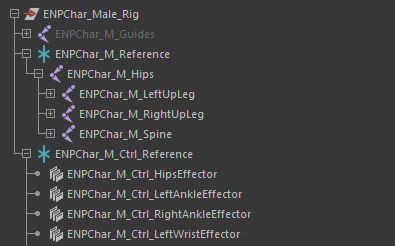
This evokes my interest and made me curious to see what been created in the outliner after the auto-rig. There is only one grouping contains all rig structure in three parts, as the image shows below, there are Guides (which are those yellow bones on screen as visual guides ), the joint hierarchy (the full skeleton structure, which you can select for bind skin), and the ctrl reference.
By comparing this to what I used to do for my character rig is totally different.
(Maya Quick Rig Grouping)
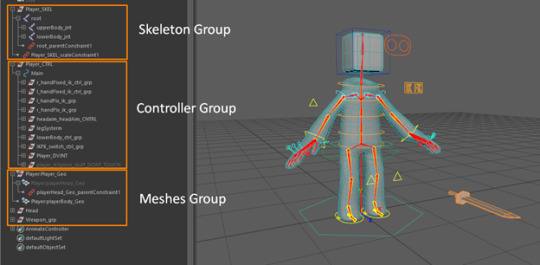
(My Rig Grouping)
This makes me think my method to the character rigging isn't moved on or not update, although I’m not specialising in character rigging, this method for character artist does bring tons of convenient.
Reference:
O’HAILEY, T.(2013) Rig it Right! Maya Animation Rigging Concepts. Focal Press
MY OH MAYA(2017) Maya 2017: Quick Rig [Online] Available from: https://www.youtube.com/watch?v=o1L3Unmm588&t=353s [Accessed June 26th 2019]
VISHU TR(2018) Maya Problem Applying Blend shapes After Binding.[Online] Available from: https://www.youtube.com/watch?v=43C06-bf8Gk [Accessed June 29th 2019]
0 notes
Text
Forefront Research# Character Creation System In Dragon’s Dark Arisen
The character creation system in Dragon’s Dogma: Dark Arisen is unique in my game library that I have played. What so impressive is the character’s physical appearance matters the gameplay, such as body size or height and the weight.
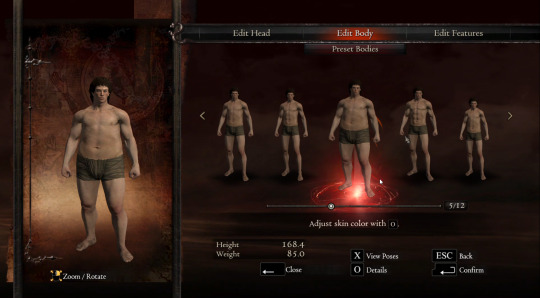
Character Height affects movement speed, weapon reach, accessibility to small places, and the likelihood of being hit by enemies. Increased character height will increase Character Weight. (Fandom,2016)
#Taller Characters
Can wade out into deeper water further without their lantern going out.
Have longer weapon reach.
Have a larger hitbox.
Generally have better knockdown and stagger resistance, and resistance to high winds - though this is an indirect effect of increased Character Weight.
Maximum height is over 210 for males and over 200 for females.
# Smaller Characters
Minimum heights are around 140 for males and under 140 for females.
To be able to enter the Goblin Holes in the Shadow Fort, a character's Height should be 150cm or less.
Can get under and between boss legs, giving a useful evasive advantage.
On the other hand Character Weight also affects its stats.
# Heavier characters
Able to activate pressure plates faster.
Hitbox is likely to be bigger; smaller classes have a correspondingly smaller hitbox.
Able to grapple and immobilize targets better.
Harpies can't fly off with a heavier class clinging to its legs, or fly more slowly
Able to move with less effort through Windworn Valley
The Leg-Strength skill (reduce encumbrance level by one) is more effective for heavy characters because for them the difference in mass between encumbrance levels is greater.
# Lighter characters
Likely to have a smaller hitbox.
Movement when hanging onto a harpy is quicker
The Sinew skill is a proportionately larger percentage increase to lighter characters because of their lower default carrying capacity.
(Fandom,2016)
With the above consideration in mind, it limited players’ ideation on their character in a friendly and reasonable way. I really like this mechanic through physical appearance to its gameplay.
Reference:
CAPCOM(2016) Dragon's Dogma: Dark Arisen [Digital Download] PC, Capcom Inc.
FANDOM(2016) Character Height. Dragon’s Dogma wiki on FANDOM [Online] Available from https://dragonsdogma.fandom.com/wiki/Character_Height [Accessed 01 July 2019]
FANDOM(2016) Character Weight. Dragon’s Dogma wiki on FANDOM [Online] Available from https://dragonsdogma.fandom.com/wiki/Character_Weight [Accessed 01 July 2019]
0 notes